
Dallisgrass – The “Address It As Soon As You See It” Weed

VIEWER DISCRETION ADVISED:
This email may not be suitable for all lawn and landscape lovers.
WARNING: This week’s post does not contain any pretty lawn and landscape pictures. Only ugly pictures of dallisgrass infestations. If you only click on our emails for inspiring pictures, please do not continue. We promise to return to normal content next week.
Often the content of our weekly emails is the result of what we are seeing in lawns and landscapes. This time of year, while doing lawn evaluations for soon to be Hall | Stewart clients, it is common to encounter lawns with dallisgrass issues.
Let’s spend a few minutes learning about this invasive weed and learn why it is so important to “address it as soon as you see it.”
Dallisgrass is a perennial grassy weed that was introduced to the US from Uruguay and Argentina in the 1800’s by A.T. Dallis as a fast-growing forage plant. Unfortunately, dallisgrass liked the environment a little too well and soon was growing out of control.
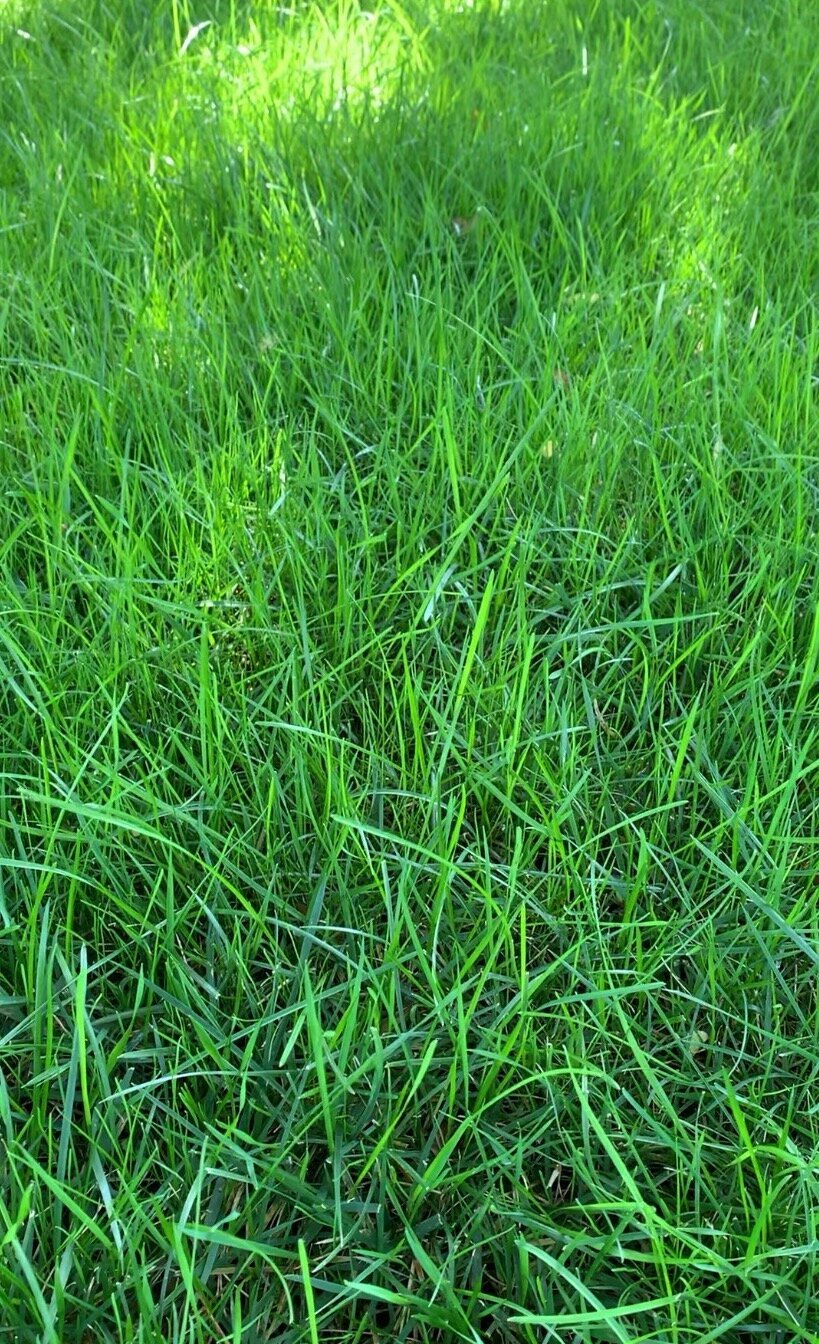
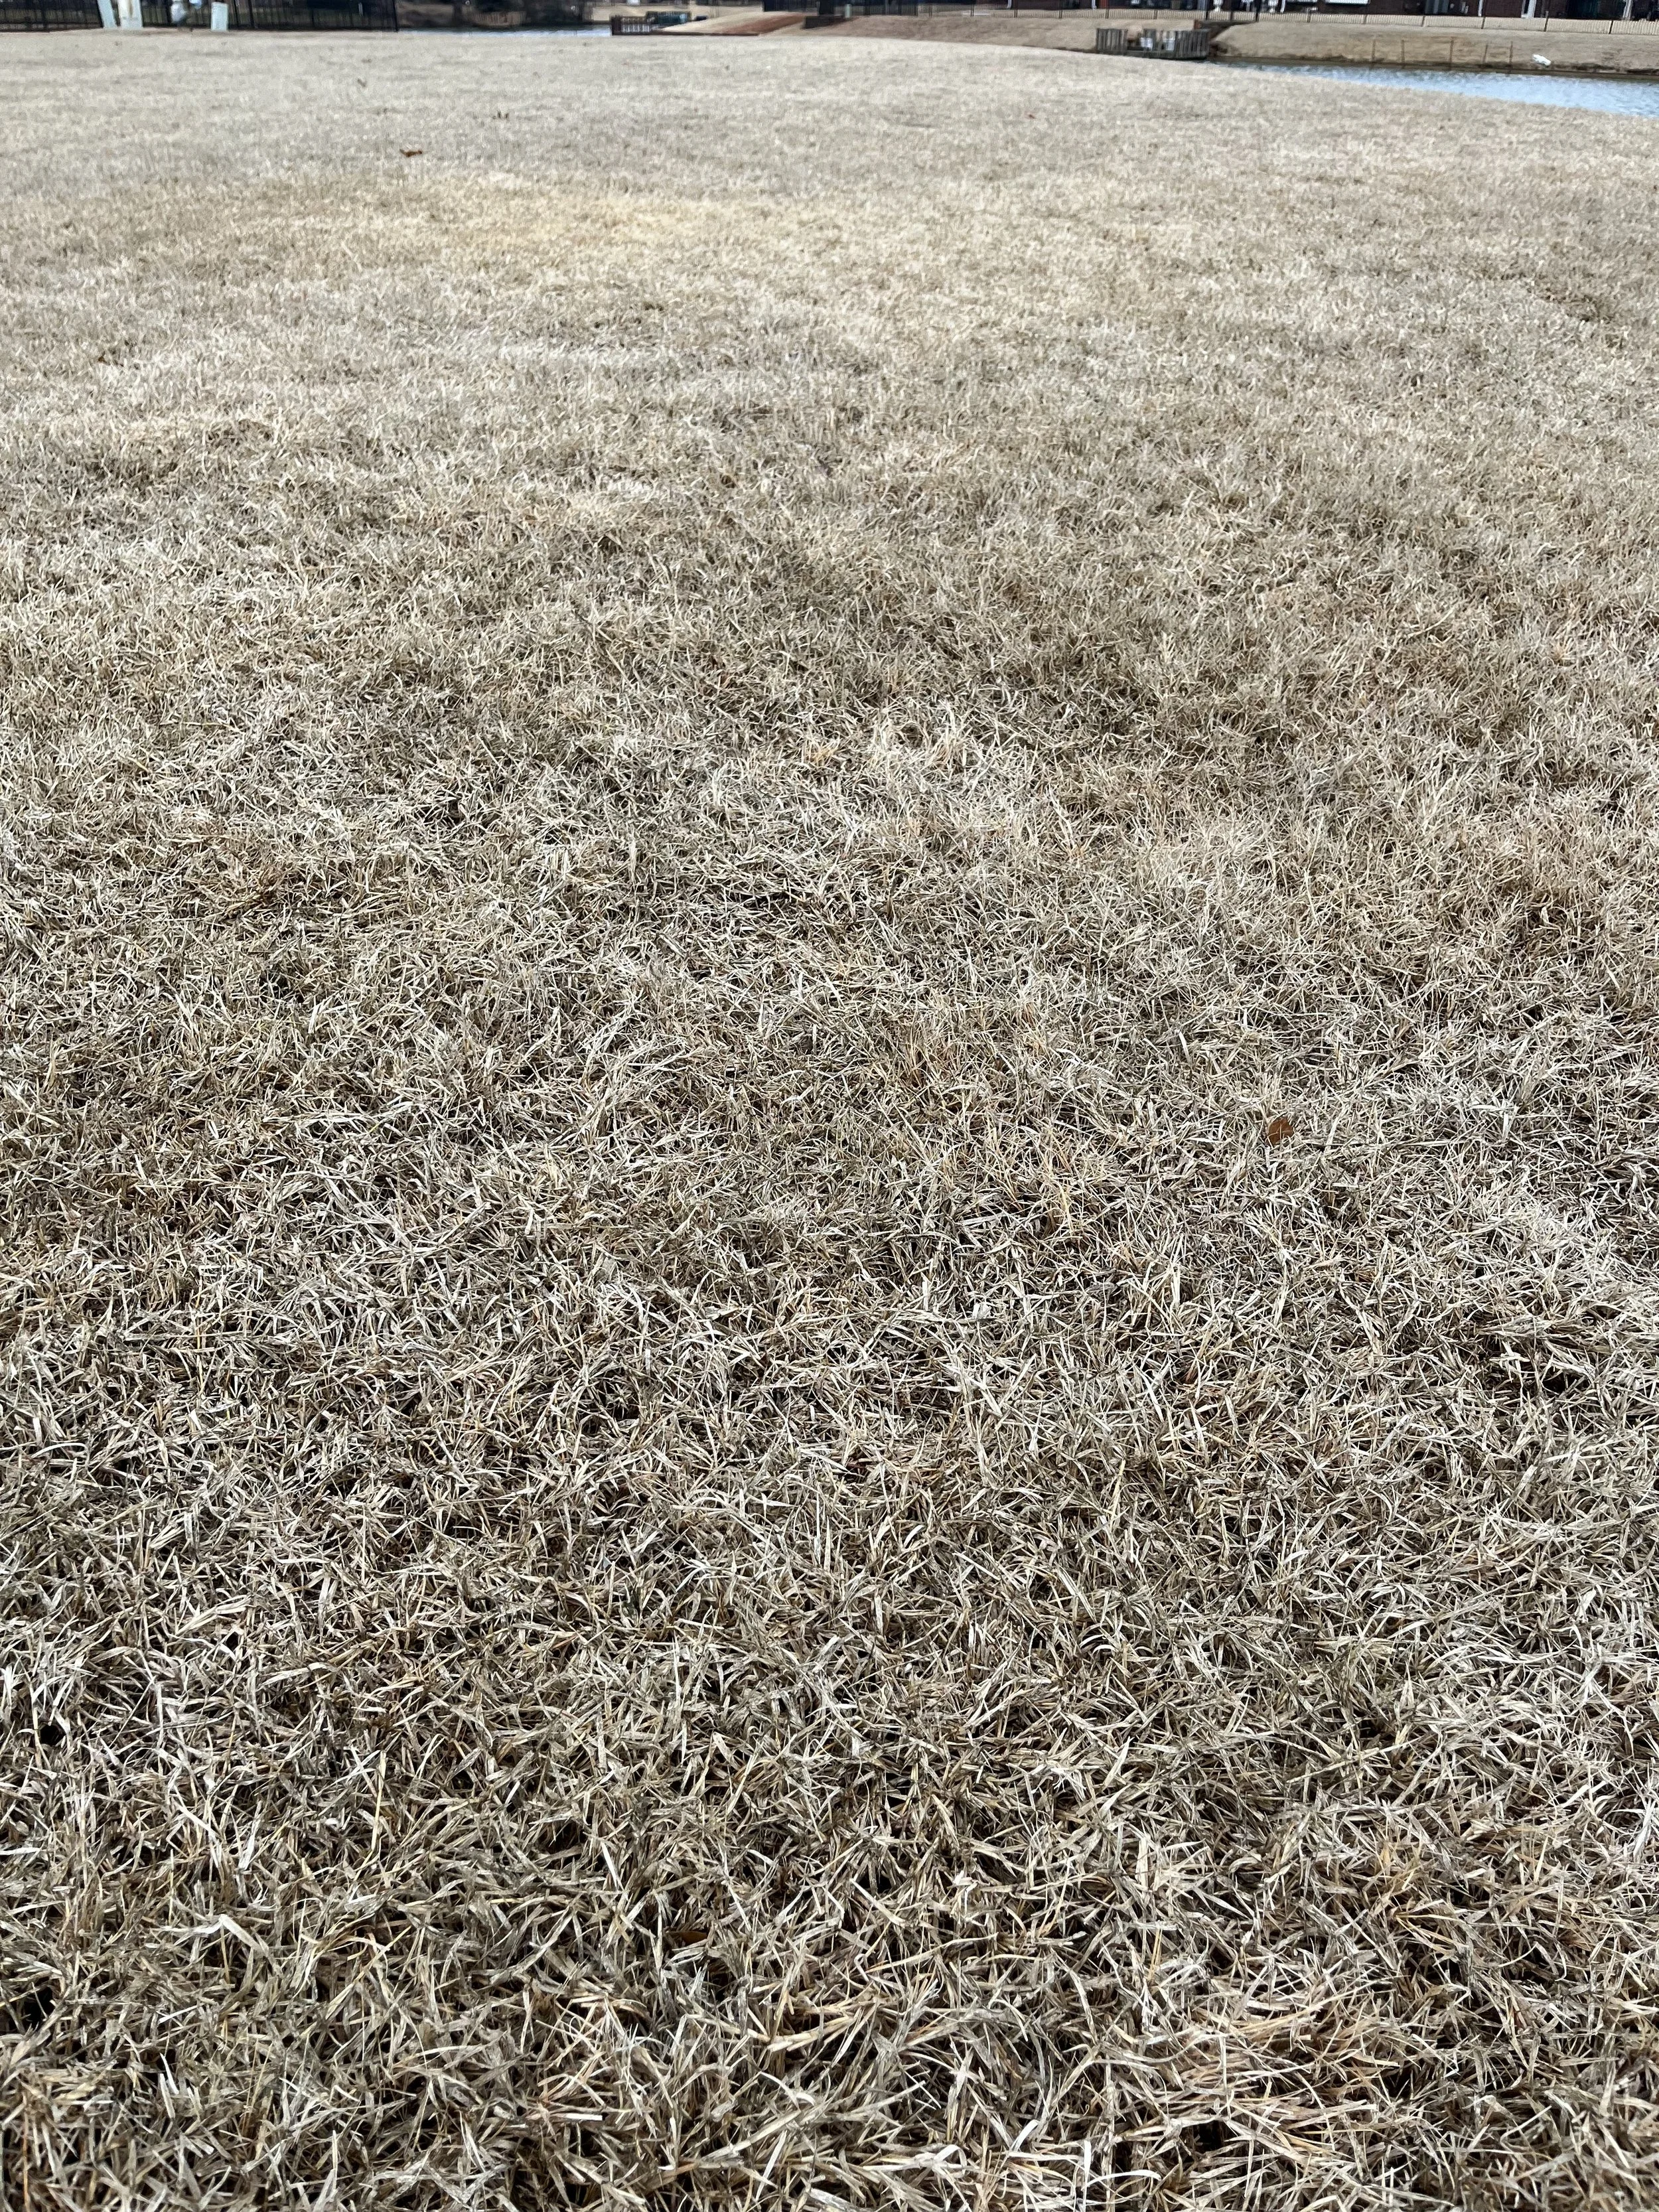
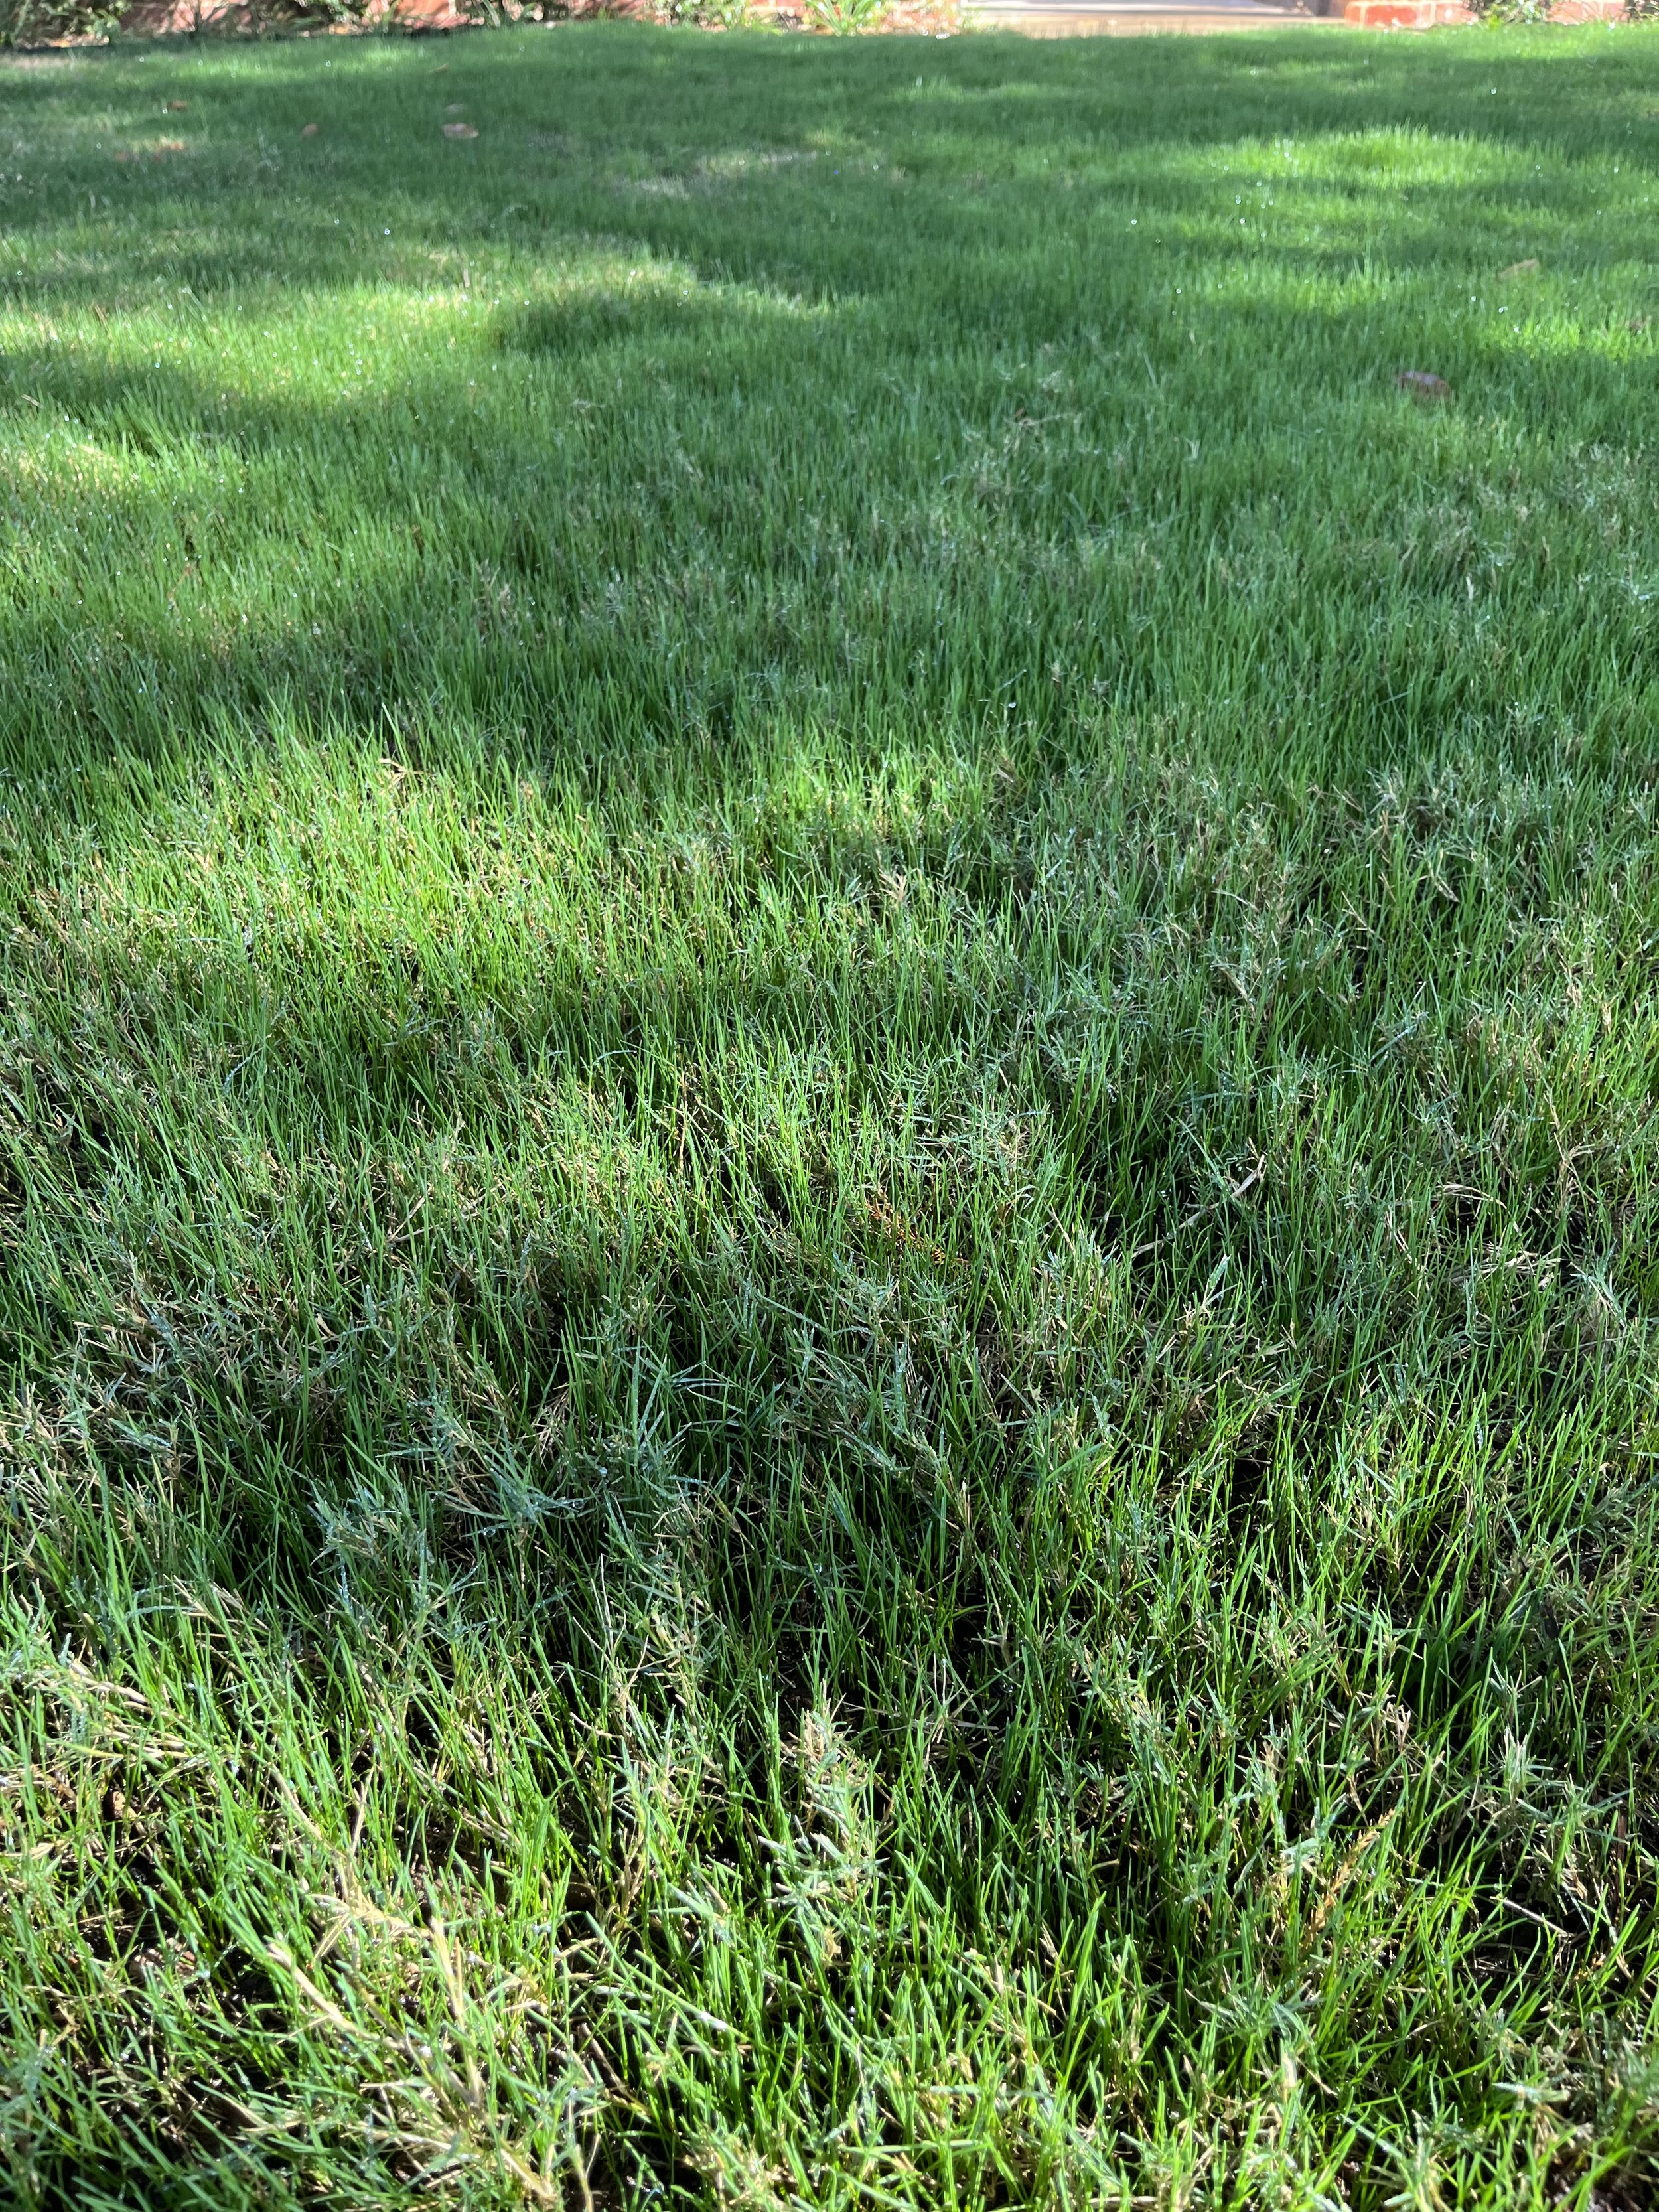
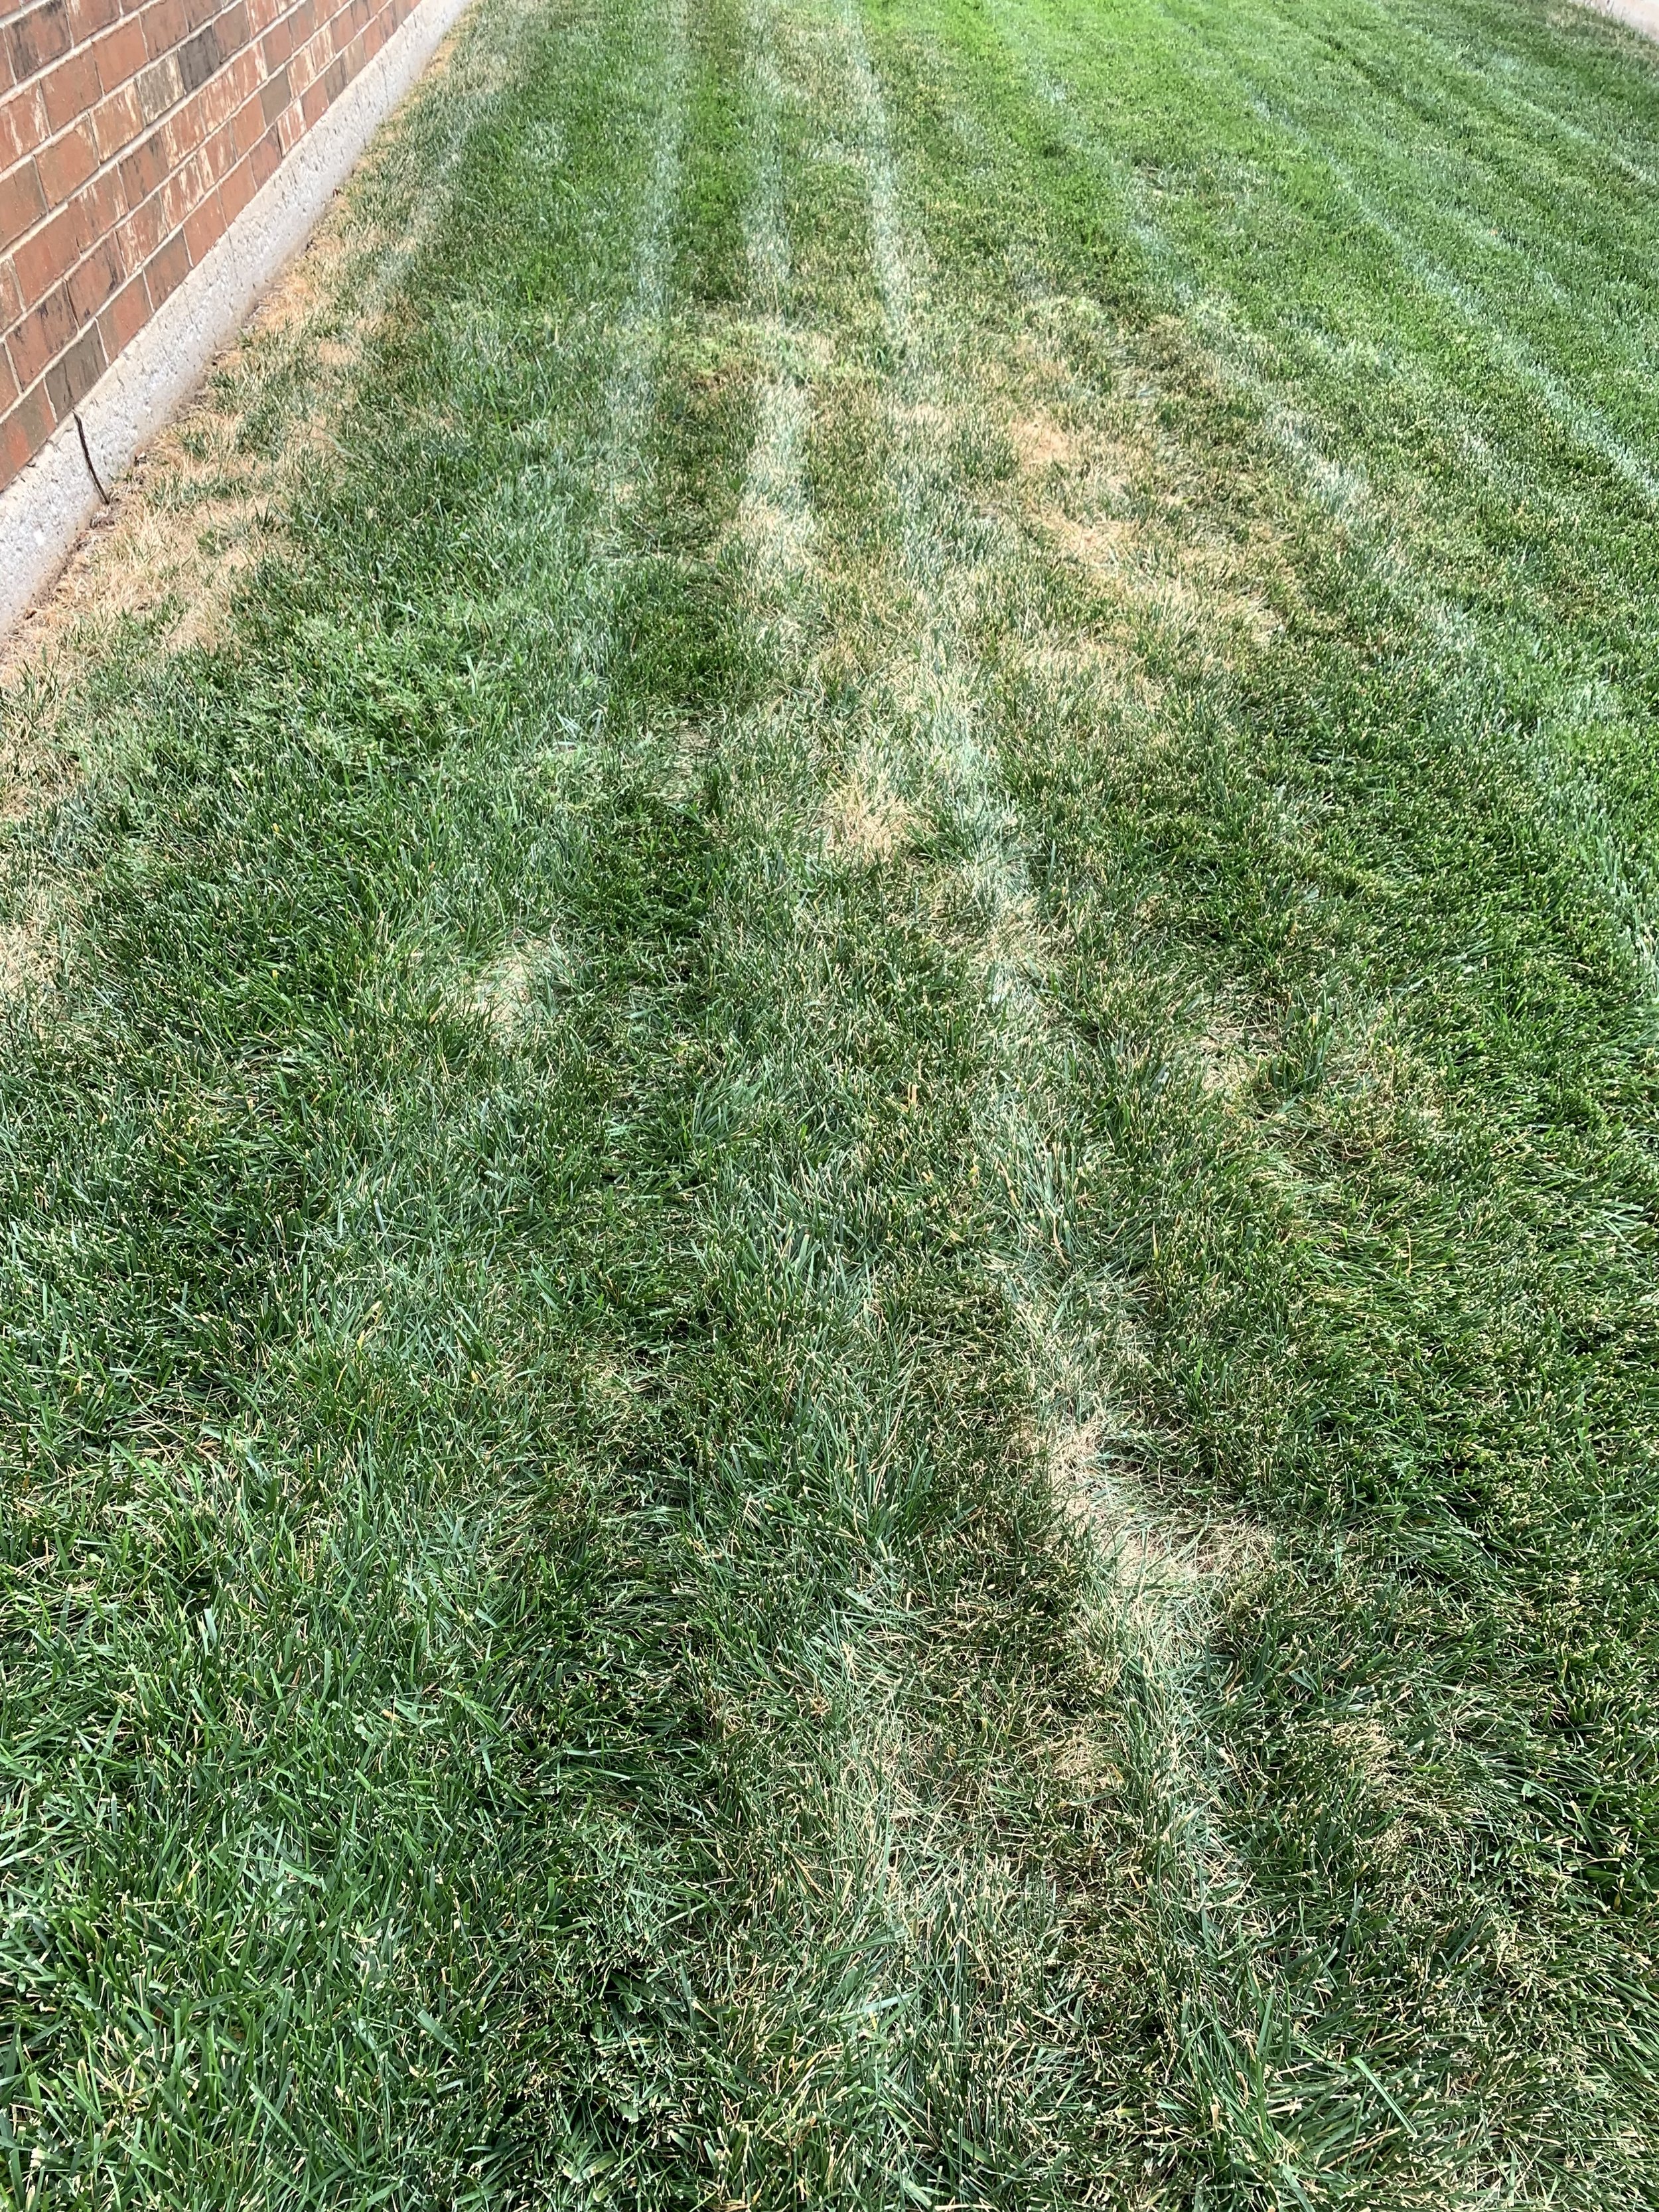
Dallisgrass is a grassy perennial weed that is very noticeable this time of year in dormant bermuda lawns.
How fun would it be to bring to market a plant that is beneficial for generations to come and have it named after you! Poor A.T., he thought he was helping, but instead of a plant people love named after him, he has a weed with his name that is the catalyst for a lot of foul language.
Dallisgrass is often confused with crabgrass. Crabgrass is an annual, meaning it dies every winter and can be completely prevented with a pre-emergent. While dallisgrass is a perennial, a pre-emergent will prevent the spread of new clumps but repeated post-emergent grassy weed control is required to eradicate existing clumps.
What is Dallisgrass?
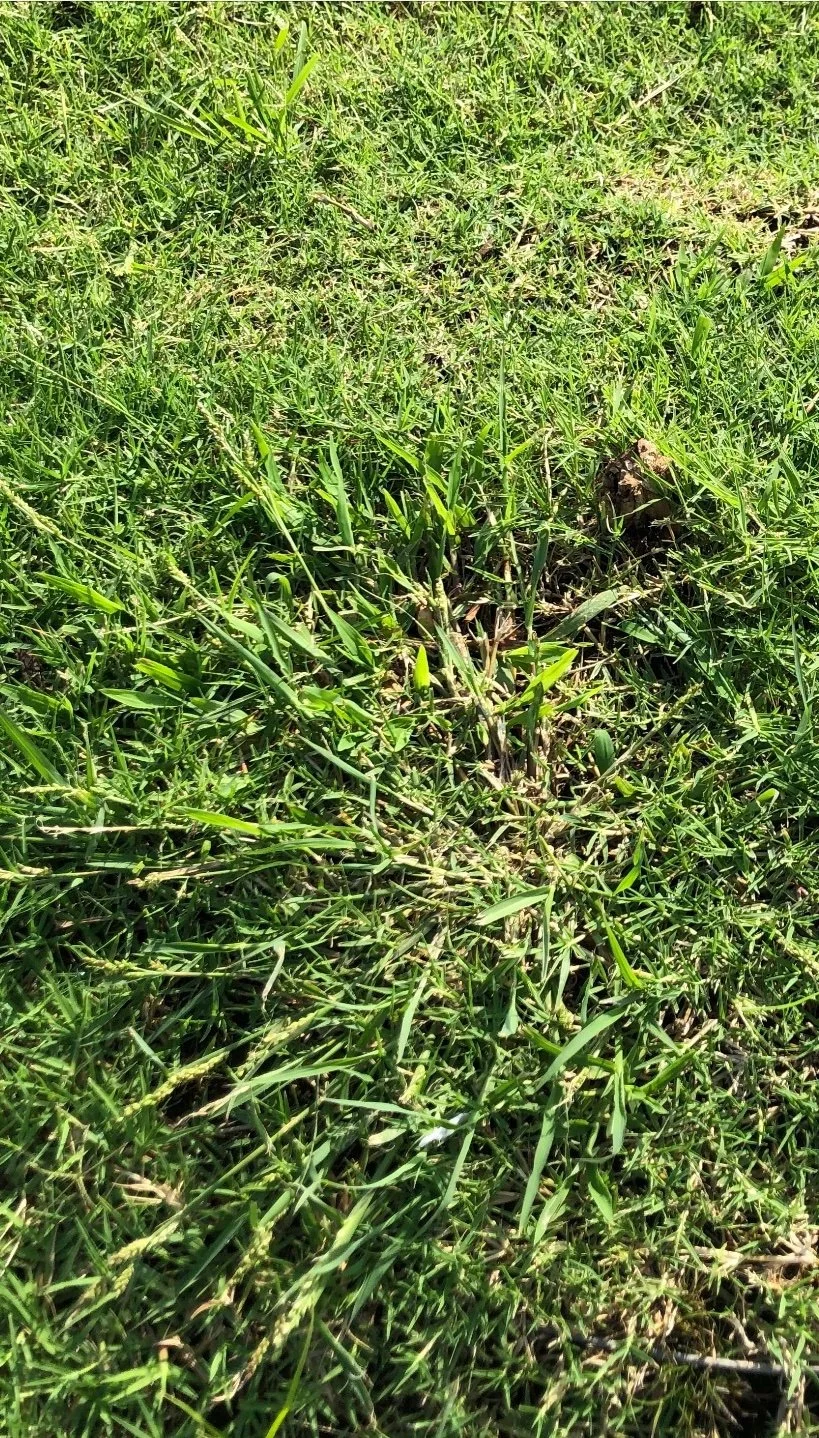
Dallisgrass is a coarse textured perennial that grows in an ever-enlarging circular clump and is often confused with crabgrass.
A perennial is a plant that comes back year after year. Dallisgrass goes dormant during the winter, but the rhizomes do not die. In the spring, new growth appears from the roots.
Dallisgrass has short underground rhizomes that gradually grow outward. It has wide ¼ to ½” leaf blades that grow 4-12” long when not mowed.
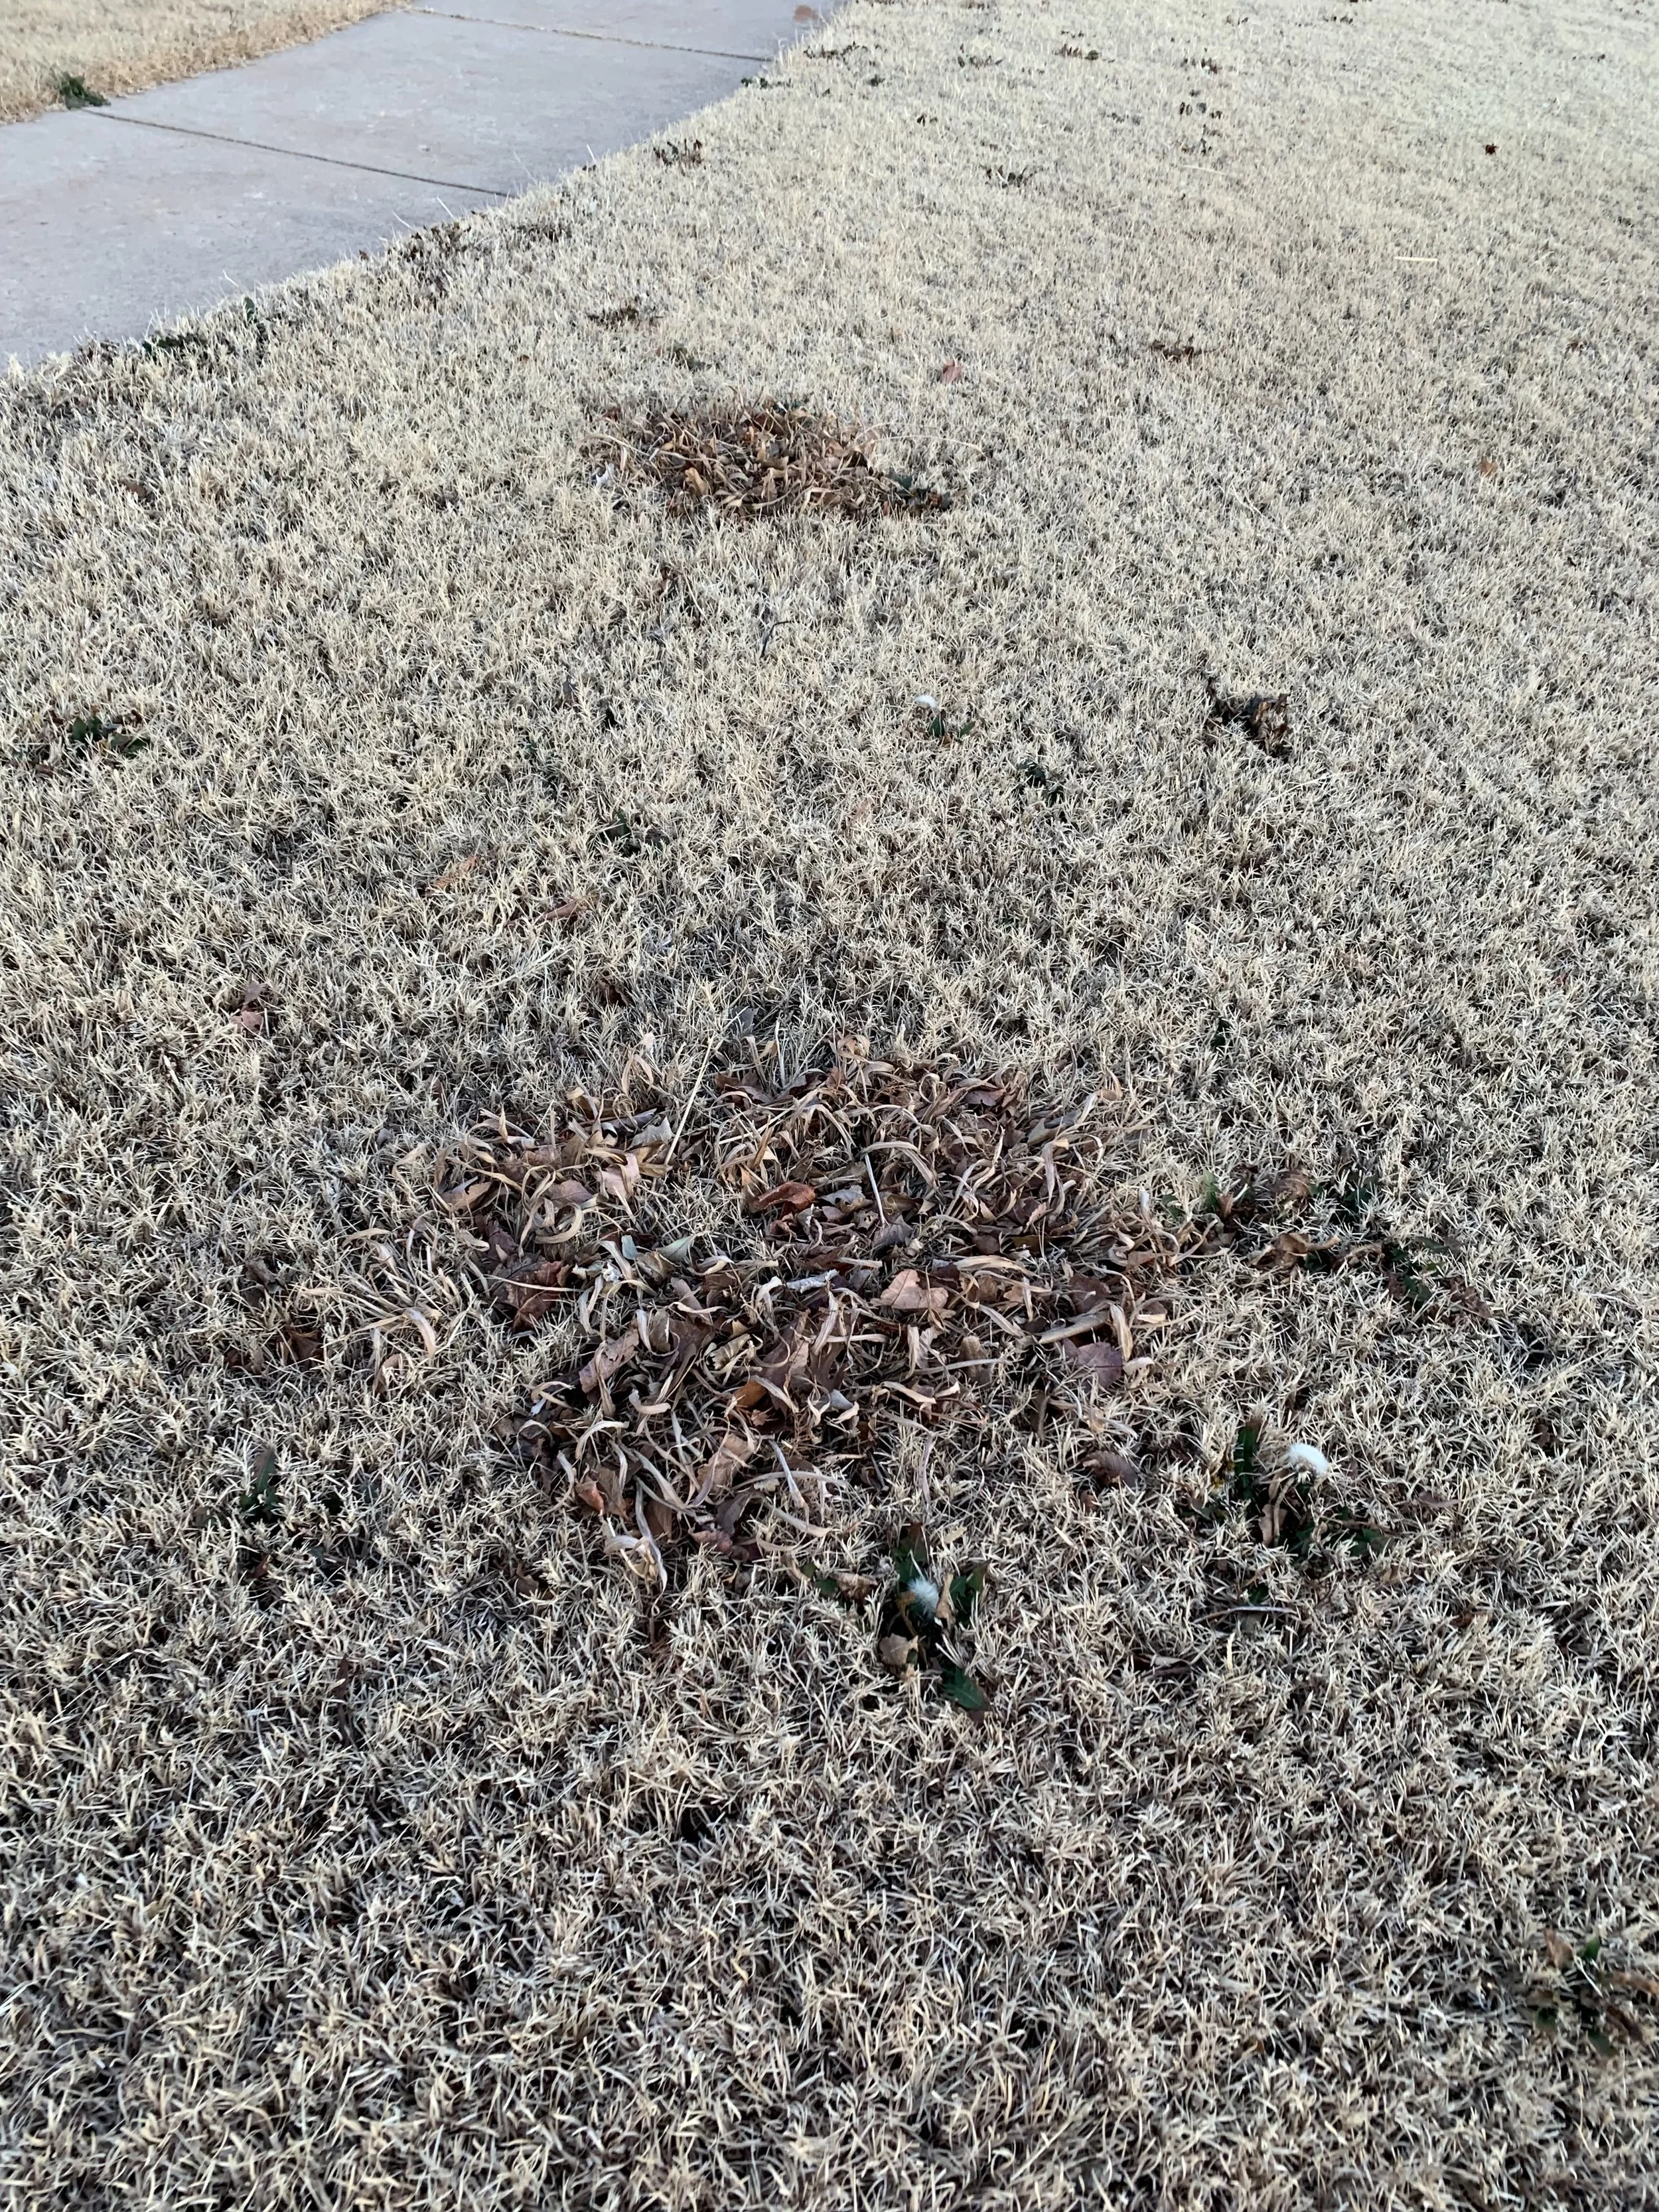
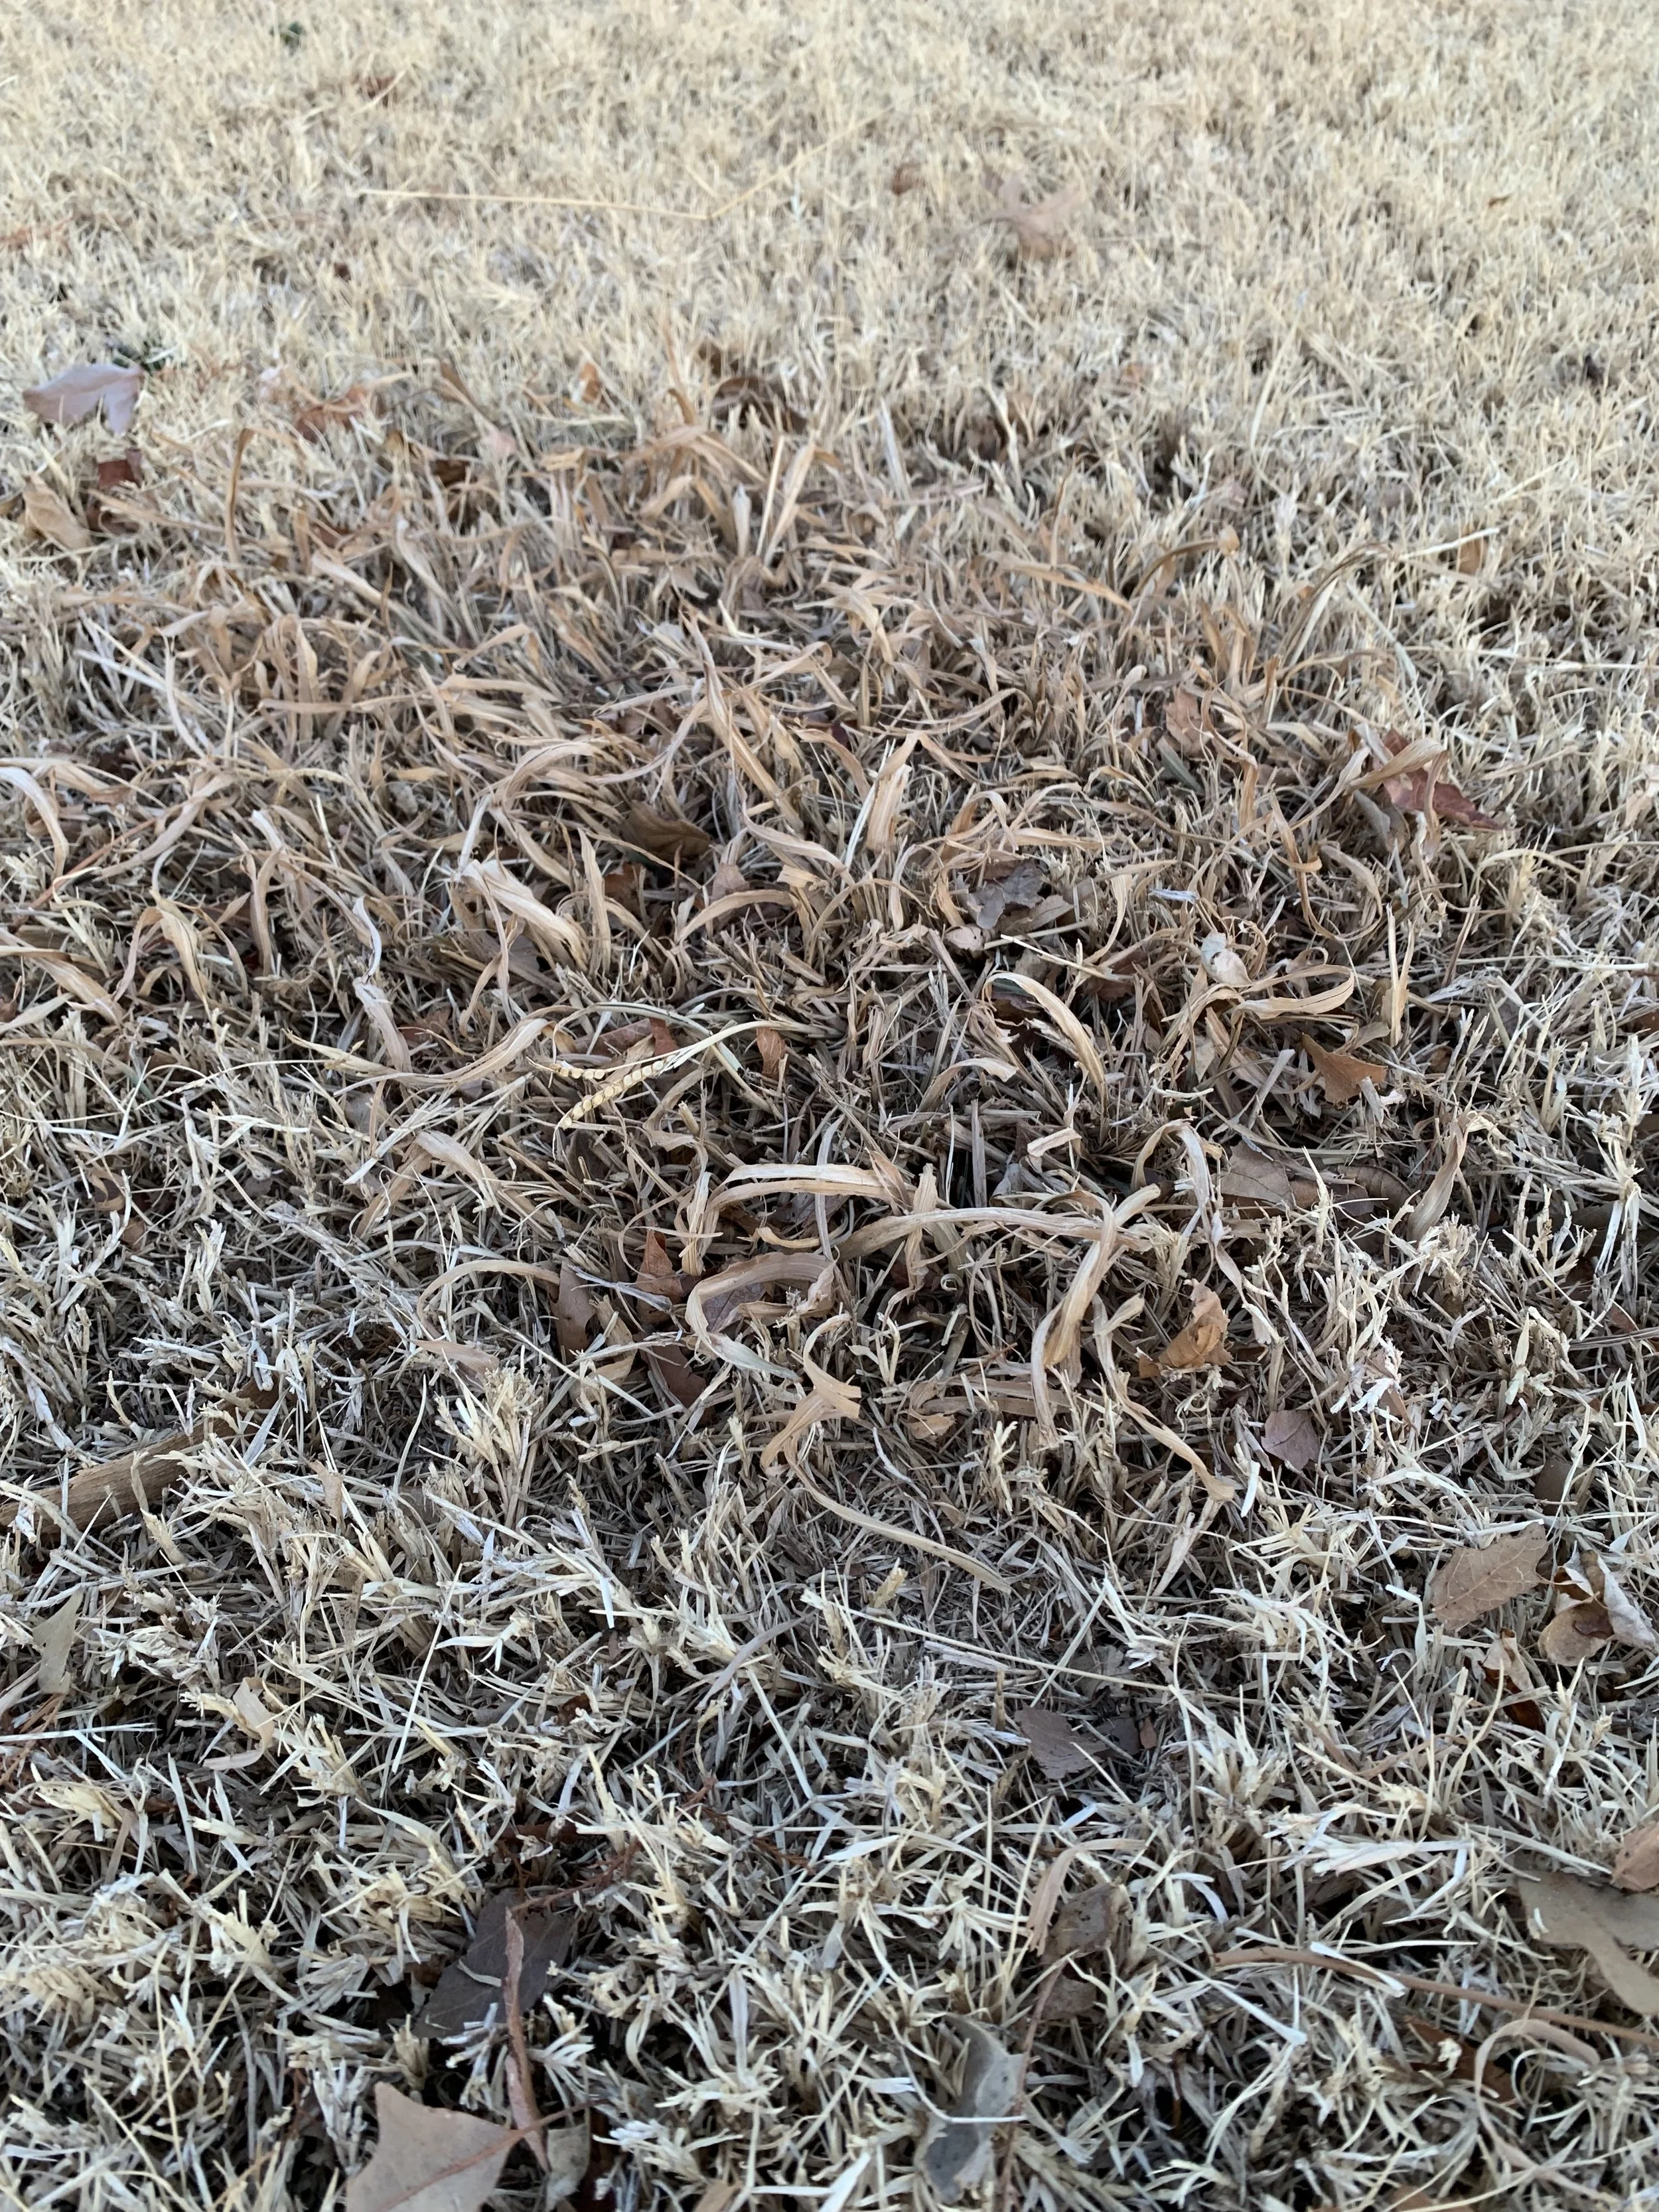
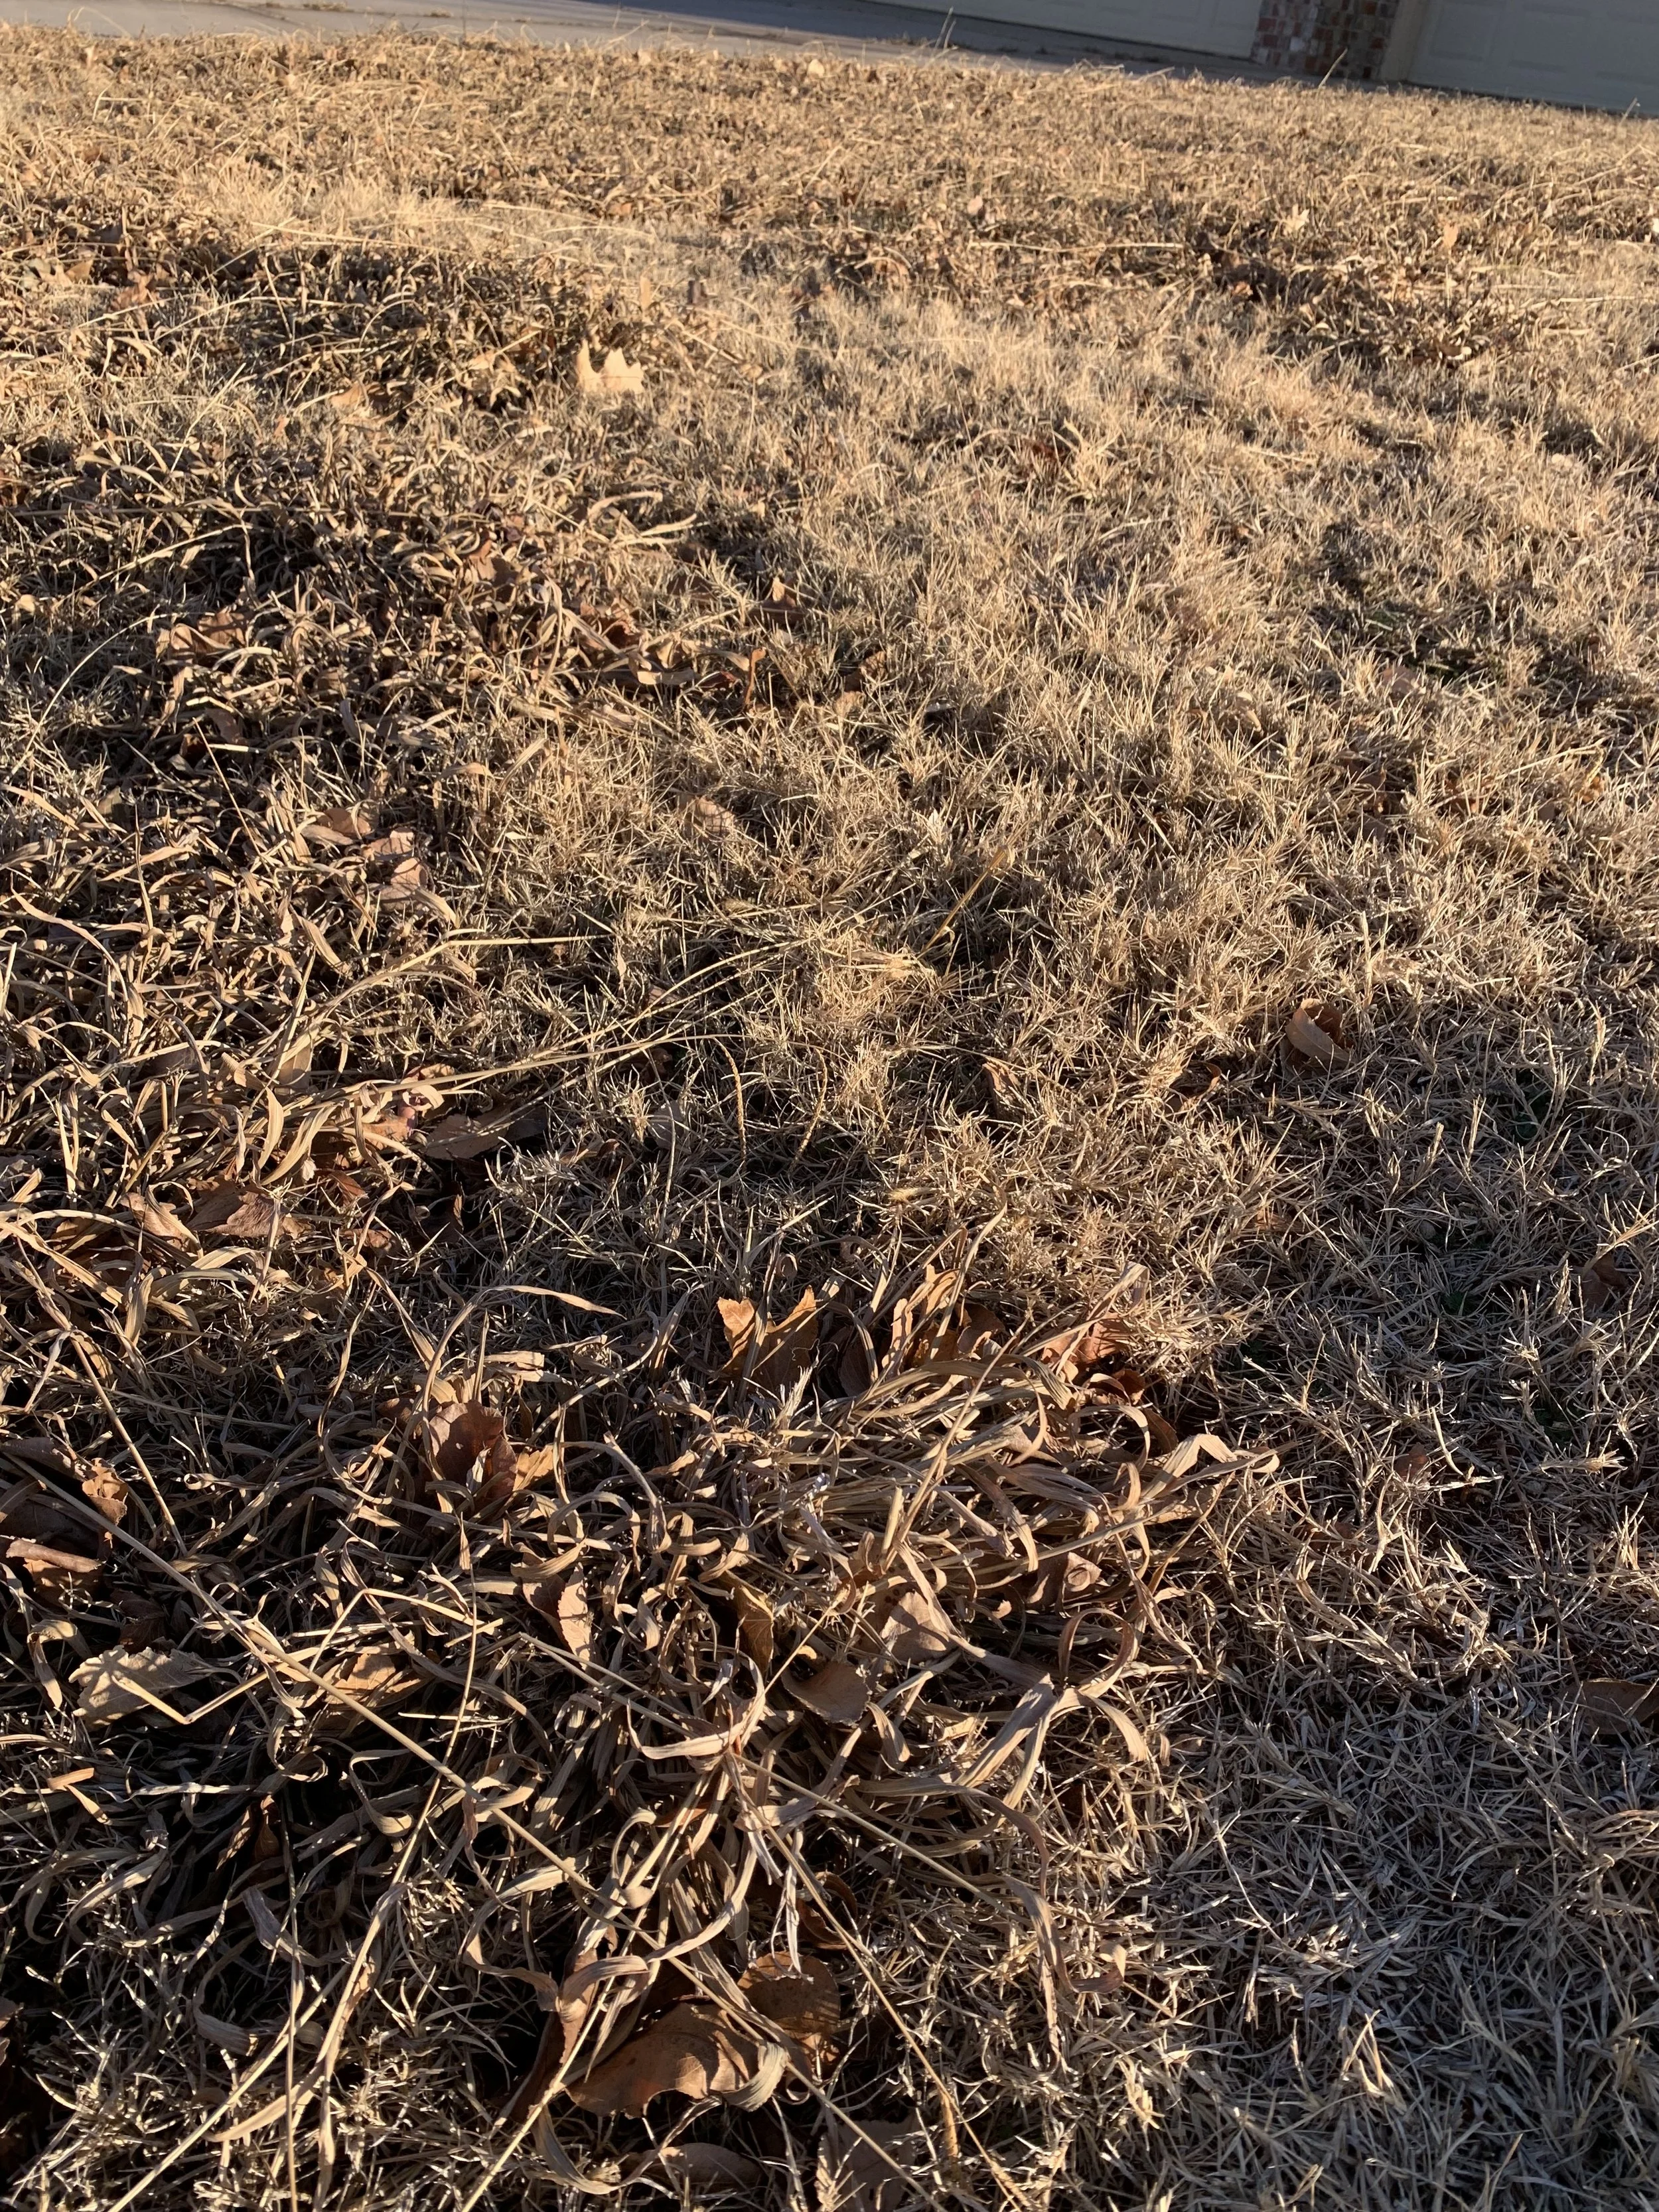
Mature clumps typically have dying centers while the outer edge continues to grow smothering turfgrass as it spreads.
Individual plants increase in size while new clumps start from weed seeds.
Dallisgrass flourishes in all soils, sandy to clay, but is partial to compacted, wet soils.
Dallisgrass is a very common problem for lawns throughout the south from coast to coast.
How To Control Dallisgrass
1. Healthy Turf - As with all weeds, maintaining a healthy, dense turf is the first step. Good mowing, watering, fertilizing and aeration practices result in a thick turf leaving less area for dallisgrass seeds to come in contract with and germinate. Thin turf and bare soil areas are an invitation to all weeds, especially dallisgrass.
2. Pre-Emergent Applications – Although dallisgrass is a perennial, it does produce an abundance of seeds that are spread by wind, animals and lawn equipment. Pre-emergent applications will not control existing dallisgrass, but it will prevent it from allowing more clumps to develop in your lawn. Seeds germinate in 60-65 degree soil temperatures, a few weeks after crabgrass germinates.
The second spring pre-emergent application between mid-March to early May is critical in stopping the spread of dallisgrass.

Dallisgrass goes dormant in the winter but the rhizomes stay alive and often keep some green color near the soil surface.
Dallisgrass grows outward smothering turfgrass as it spreads. Over time the center of the weed dies out while the rhizomes continue to spread.
3. Selective Post-Emergent Applications – Grassy weed control products labeled for crabgrass will work on dallisgrass, but repeat applications are required every 2-3 weeks until the rhizomes are completely dead. MSMA was the go-to product for years, but it is no longer available for home lawn use. One product labelled for homeowner use is Weed-B-Gone Crabgrass Killer. Always follow label instructions. Know your type of turf, and make sure the product is labeled for your turf type. Licensed lawn care professionals have restricted use herbicides available to use that provide better control of dallisgrass.
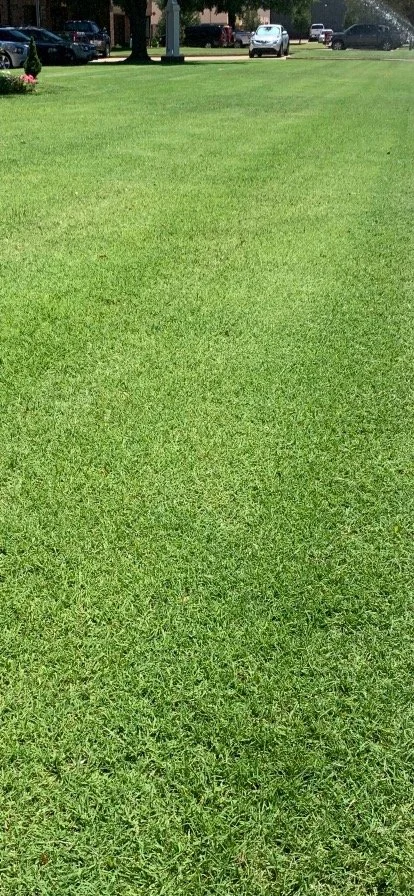
This lawn was overtaken with dallisgrass when we started working on it last spring. The owner agreed to allowing us to use glyphosate early in the growing season to aggressively control dallisgrass resulting large bare areas. Over the summer, most of the areas recovered. But another year of good turf management practices and this lawn is needed to return the lawn to looking great. Control of dallisgrass and recovery is often a two year process.
4, Non-Selective Post-Emergent Application – The best control of large areas of dallisgrass infestations where there is little to no desirable turfgrass remaining is to treat with glyphosate. Glyphosate is a non-selective herbicide, meaning it kills everything it comes in contact with. Repeated applications are still required. If spot treating clumps of dallisgrass in your lawn, take care not to allow the spray to reach desirable turf. Once the weed is completely killed, rhizomes included, resodding may be required.
5. Digging It Out – The most environmentally friendly, but the most time consuming and physically demanding, is to dig out the invasive weeds. A good step in preventing a dallisgrass outbreak is to dig out small clumps, rhizomes and all, as soon as you see them in your lawn.
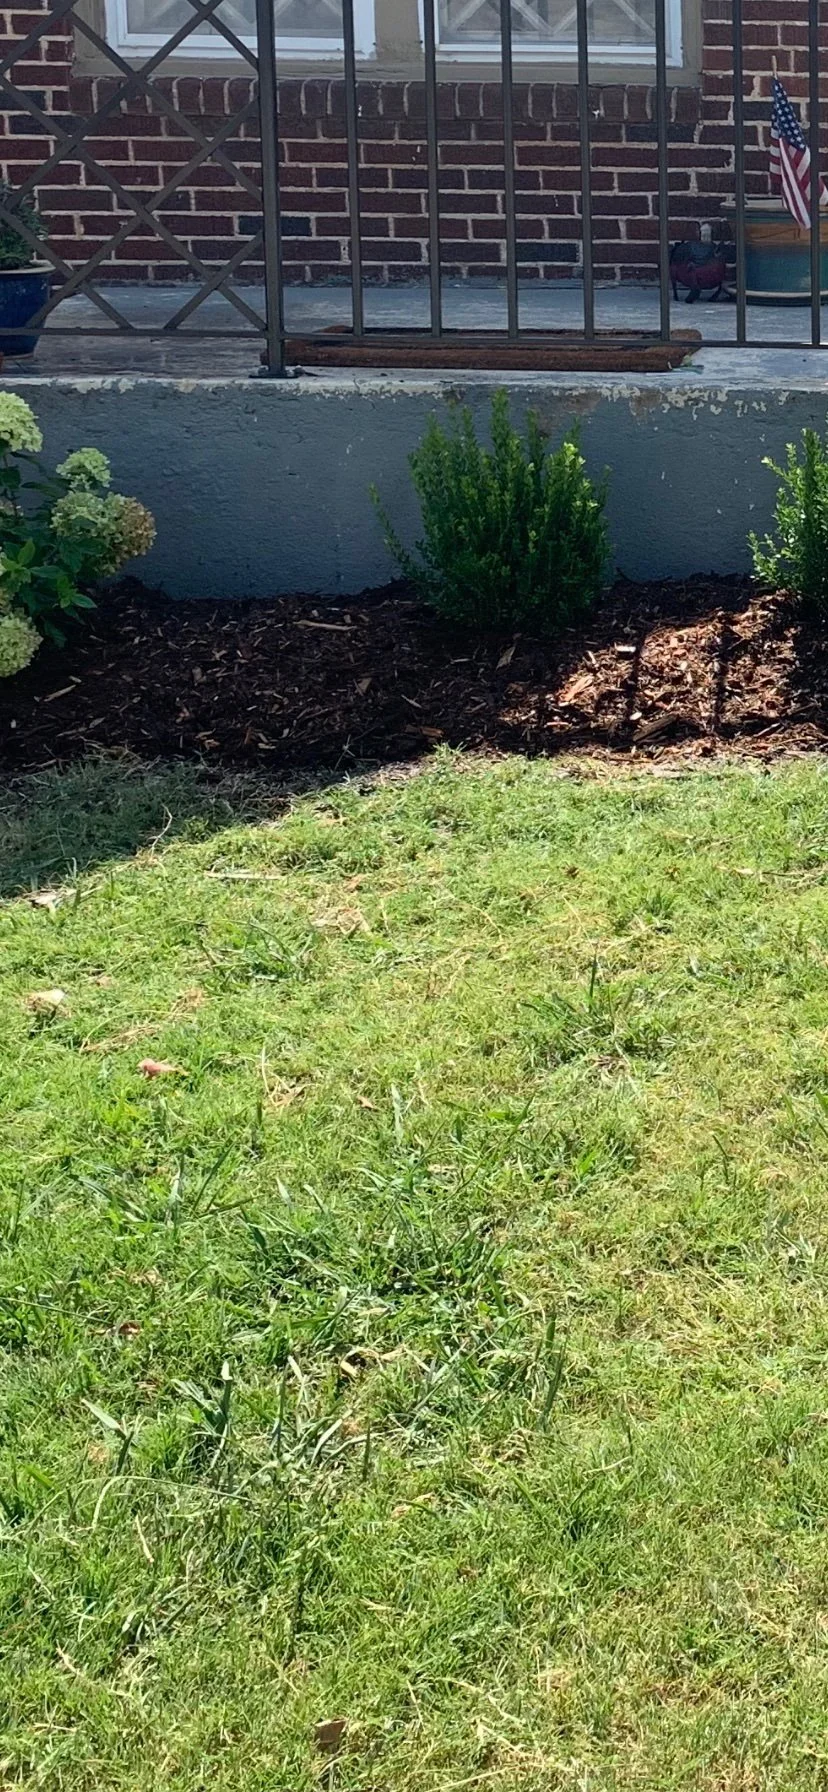
Large areas of dallisgrass where little to now desirable turfgrass remains are best completely killed out with a non-selective herbicide and then resodded.

Non-selective herbicides were used in June to control dallisgrass in this lawn. After the dallisgrass was completely controlled, the areas were sodded with Bermuda.
Dallisgrass grows faster than turfgrass spoiling a well maintained lawn and landscape.
Because dallisgrass is a perennial, persistence is required. Total eradication of a large area may take more than one season. Multiple treatments over a two-year period can be expected.
It is one of the more difficult to control weeds homeowners will face and the longer it has been established the harder it is to gain control.
Address dallisgrass as soon as you see it. The longer you wait the more invasive it will become.
If you have dallisgrass problems, or if you need help in identifying dallisgrass, please give us a call or respond to this email.
Lorne Hall
Hall | Stewart Lawn + Landscape
(405)367-3873
The goal is to have a clean and healthy lawn this summer. It is critical you address dallisgrass as soon as you see it.
Japanese Maples – Year Round Interest

With over 140 hours of the past 7 days below freezing with very little snow cover, our lawns and landscapes look as if they have been left uncovered in the deep freeze and are now suffering from a bad case of freezer burn.
After a long cold week of long johns, heavy coats and gloves, I doubt you are looking for a list of lawn and landscape tasks to accomplish over the next few days.
So, go ahead, pour yourself another cup of coffee, grab a blanket, and head to your comfy chair closest to the fireplace and spend a few minutes dreaming about beautiful landscapes.
Specifically, let’s dream of Japanese Maples – The Aristocrat of the Landscape
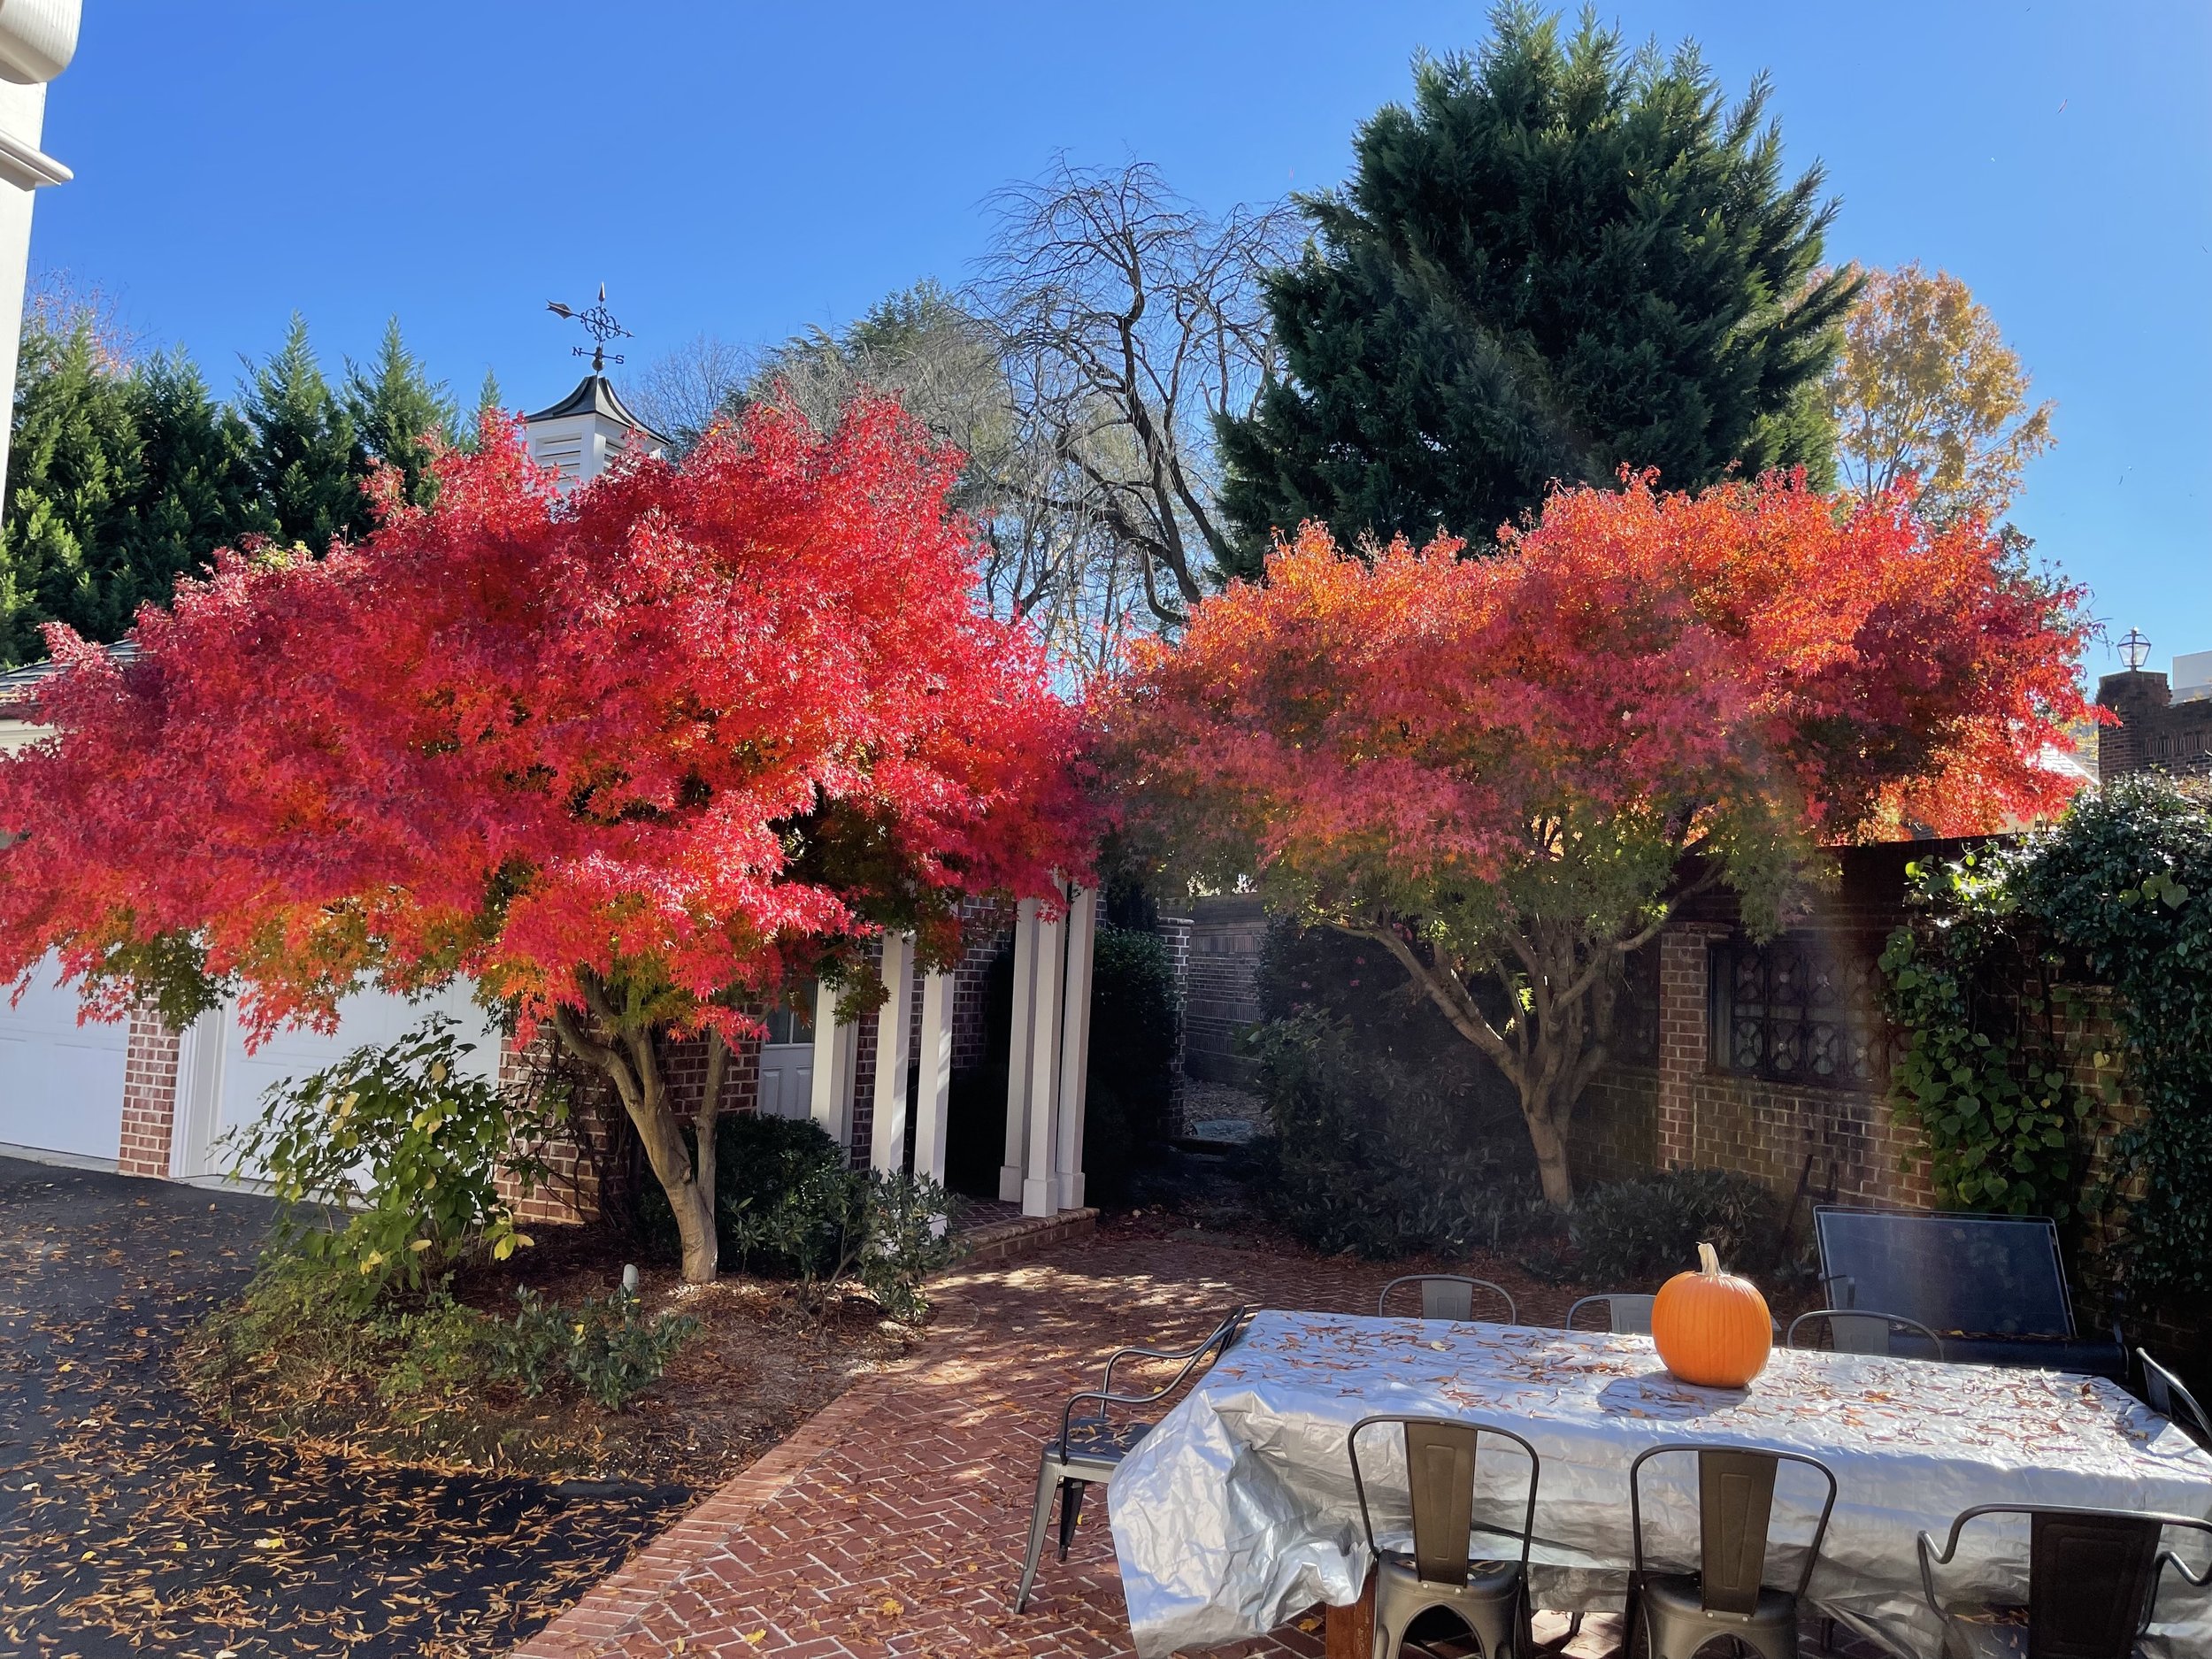

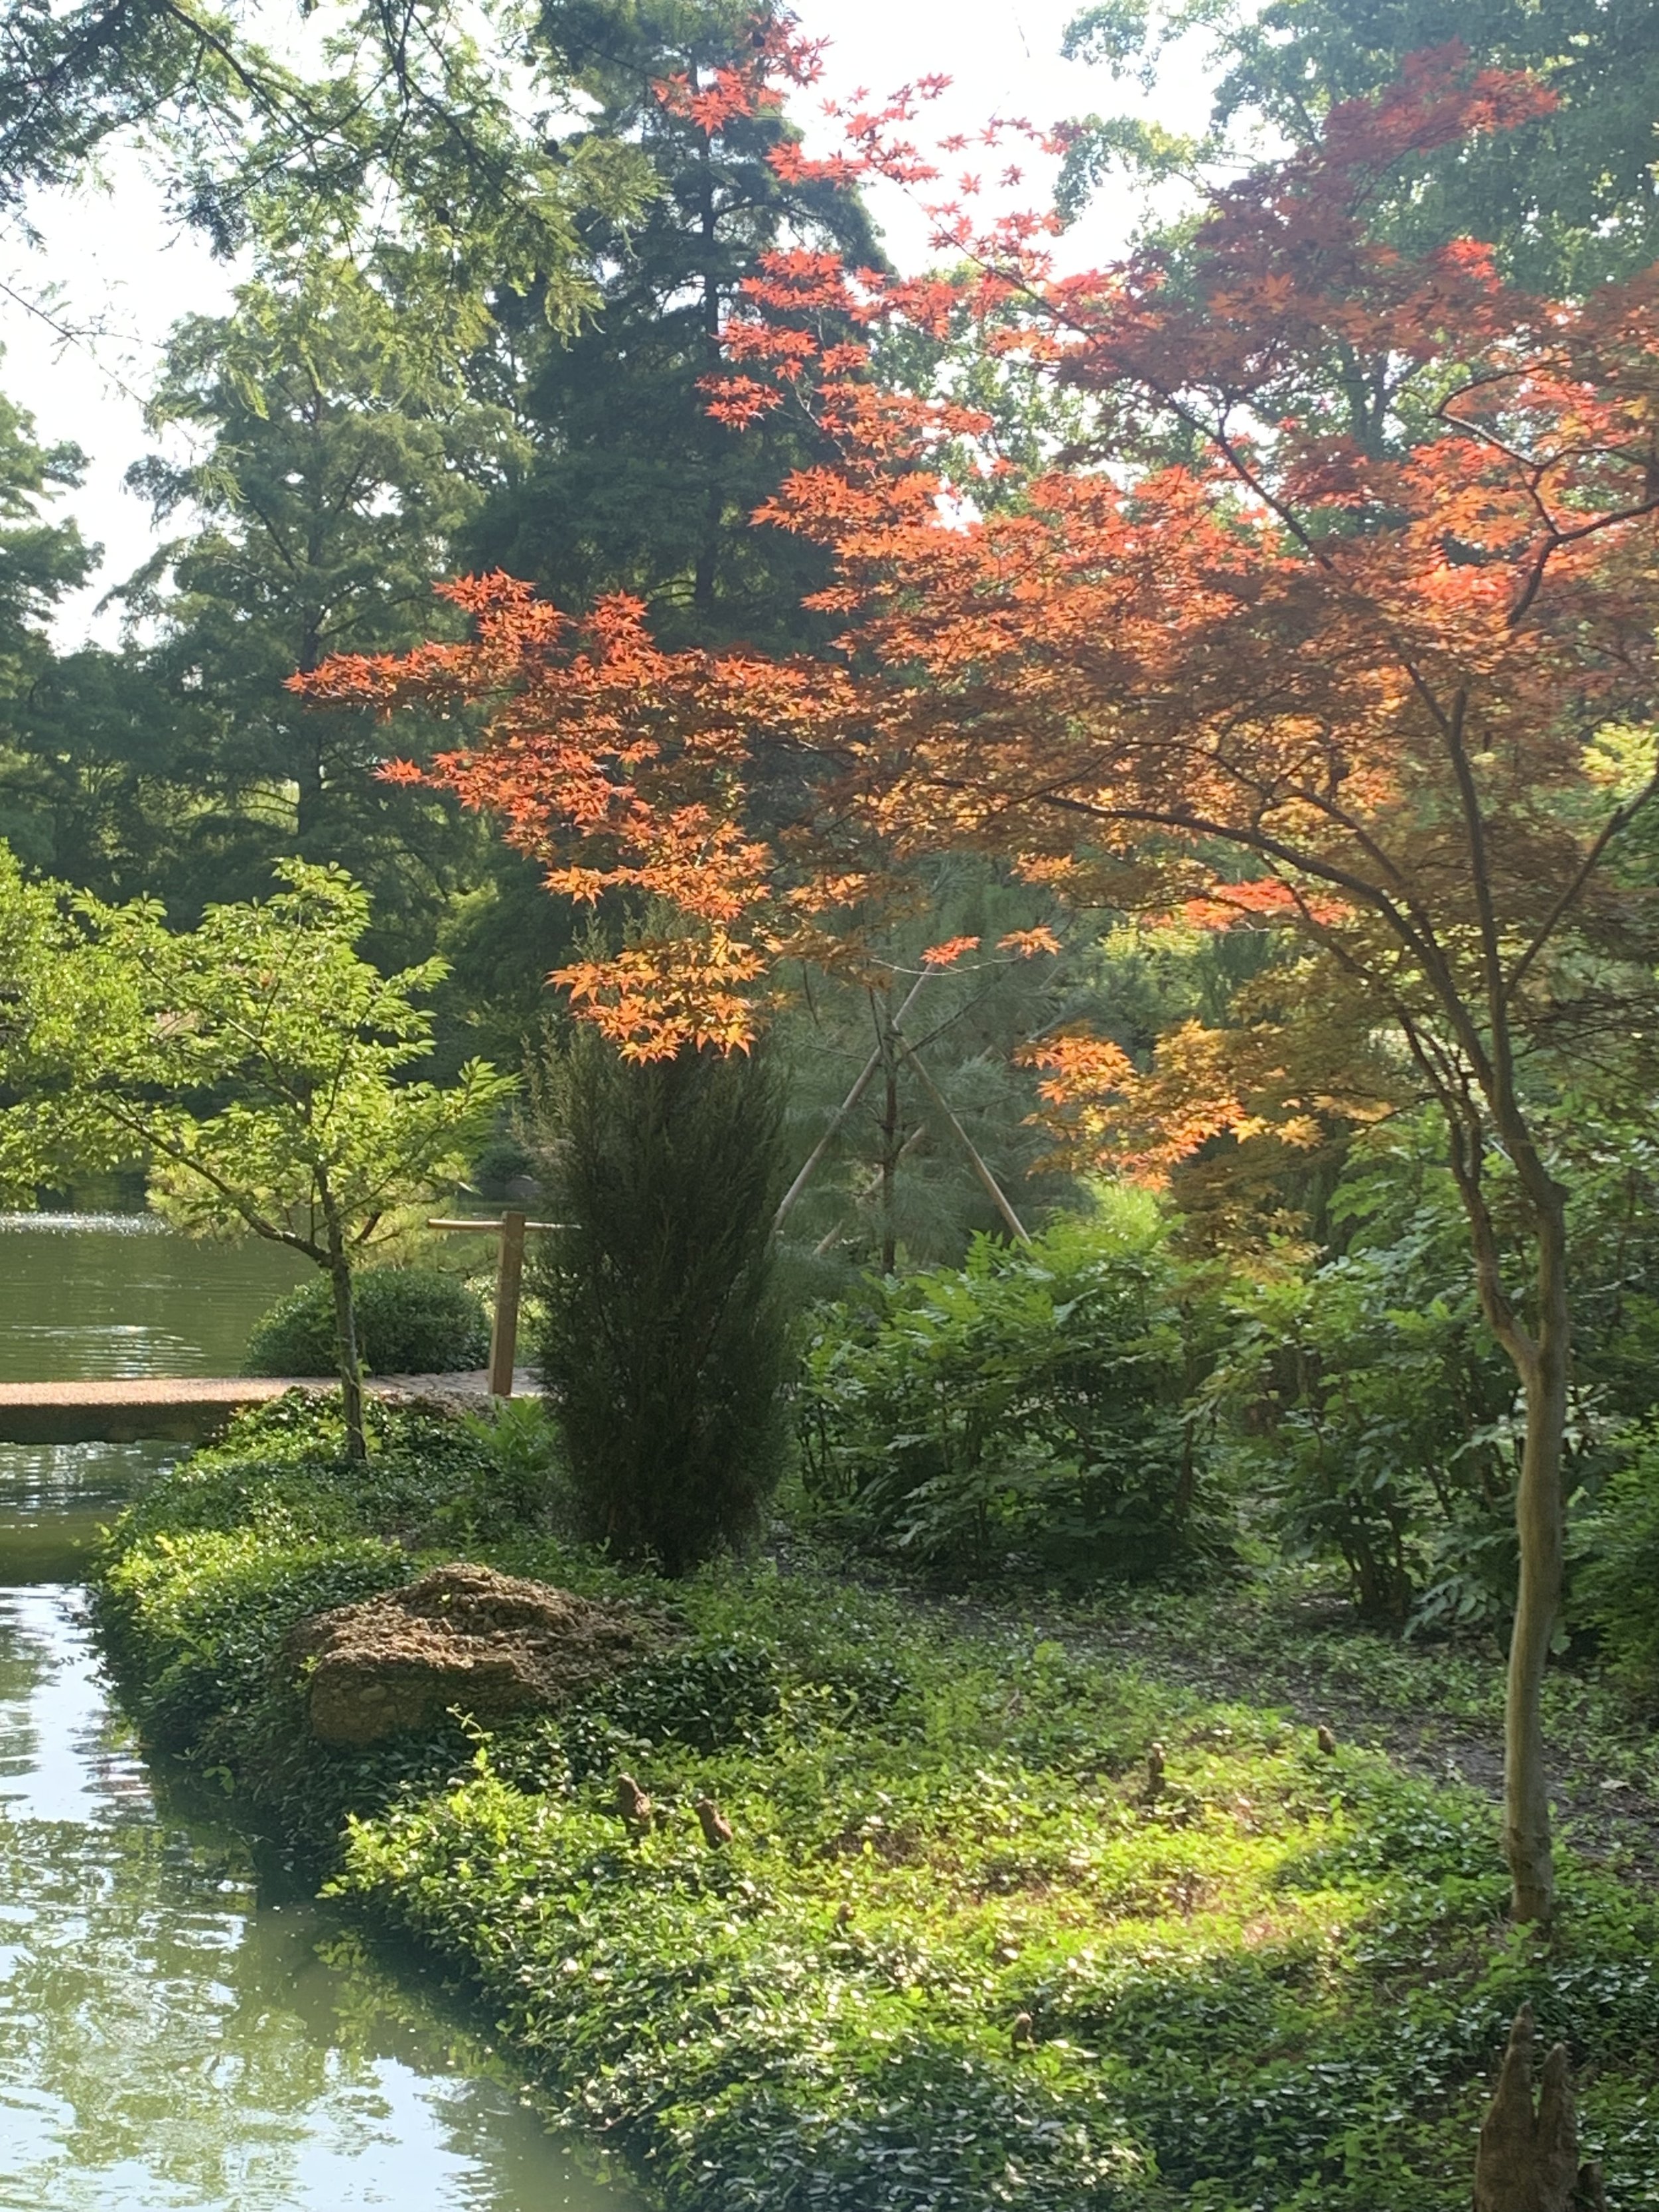
Japanese Maples are sure to add bright colors to your fall landscape.
Michael Dirr, author of the Dirr’s Hardy Trees and Shrubs textbook, writes:
“True aristocrats are rare among people and trees, but Japanese Maple is in the first order.
It is difficult to imagine a garden that could not benefit from one of the many forms of Acer palmatum.
The normal habit is round to broad-rounded, with the branches assuming a layered,
almost stratified architecture similar to Flowering Dogwood.
Leaves are light green to dark green, to reddish purple.
Fall color is sensational with rich yellow and reds through the fall.
The winter silhouette is attractive, providing interest during the off season.
Landscape uses for the species and its many cultivars are limited only by
the imagination of the gardener.”
Japanese Maples have added spectacular color to the fall landscape this year. Garnet is a graceful small variety with lacy leaves and a weeping growth habit.
A few things everyone needs to know about Japanese Maples:
Site
Japanese Maples grow well from zone 5-8, making them a good choice for Oklahoma City’s zone 7. They perform best when planted in dappled sun to shade and out of direct afternoon sun. Shade does have its limits…they need some sun for the best fall foliage color. During the summer heat, it is common for them to experience some leaf scorch, especially if they receive direct sun. They prefer well-drained soil and consistent moisture. During the heat of the year, you can expect them to need extra deep watering the first couple of seasons. But once they are established, they are essentially carefree.
Monrovia, a leader in the development and growing of landscape plants, refers to “Japanese Maples a statement plant…one of the most compelling plants you can add to your landscape.”
With over 1,000 varieties and cultivars of the Japanese Maples, there has to be one perfect for your landscape.

Tamukeyama Japanese Maple has deep red-purple leaves through the summer and bright red fall foliage. With cascading branches it grows in a mounding shape 10’ fall and 10’ wide.

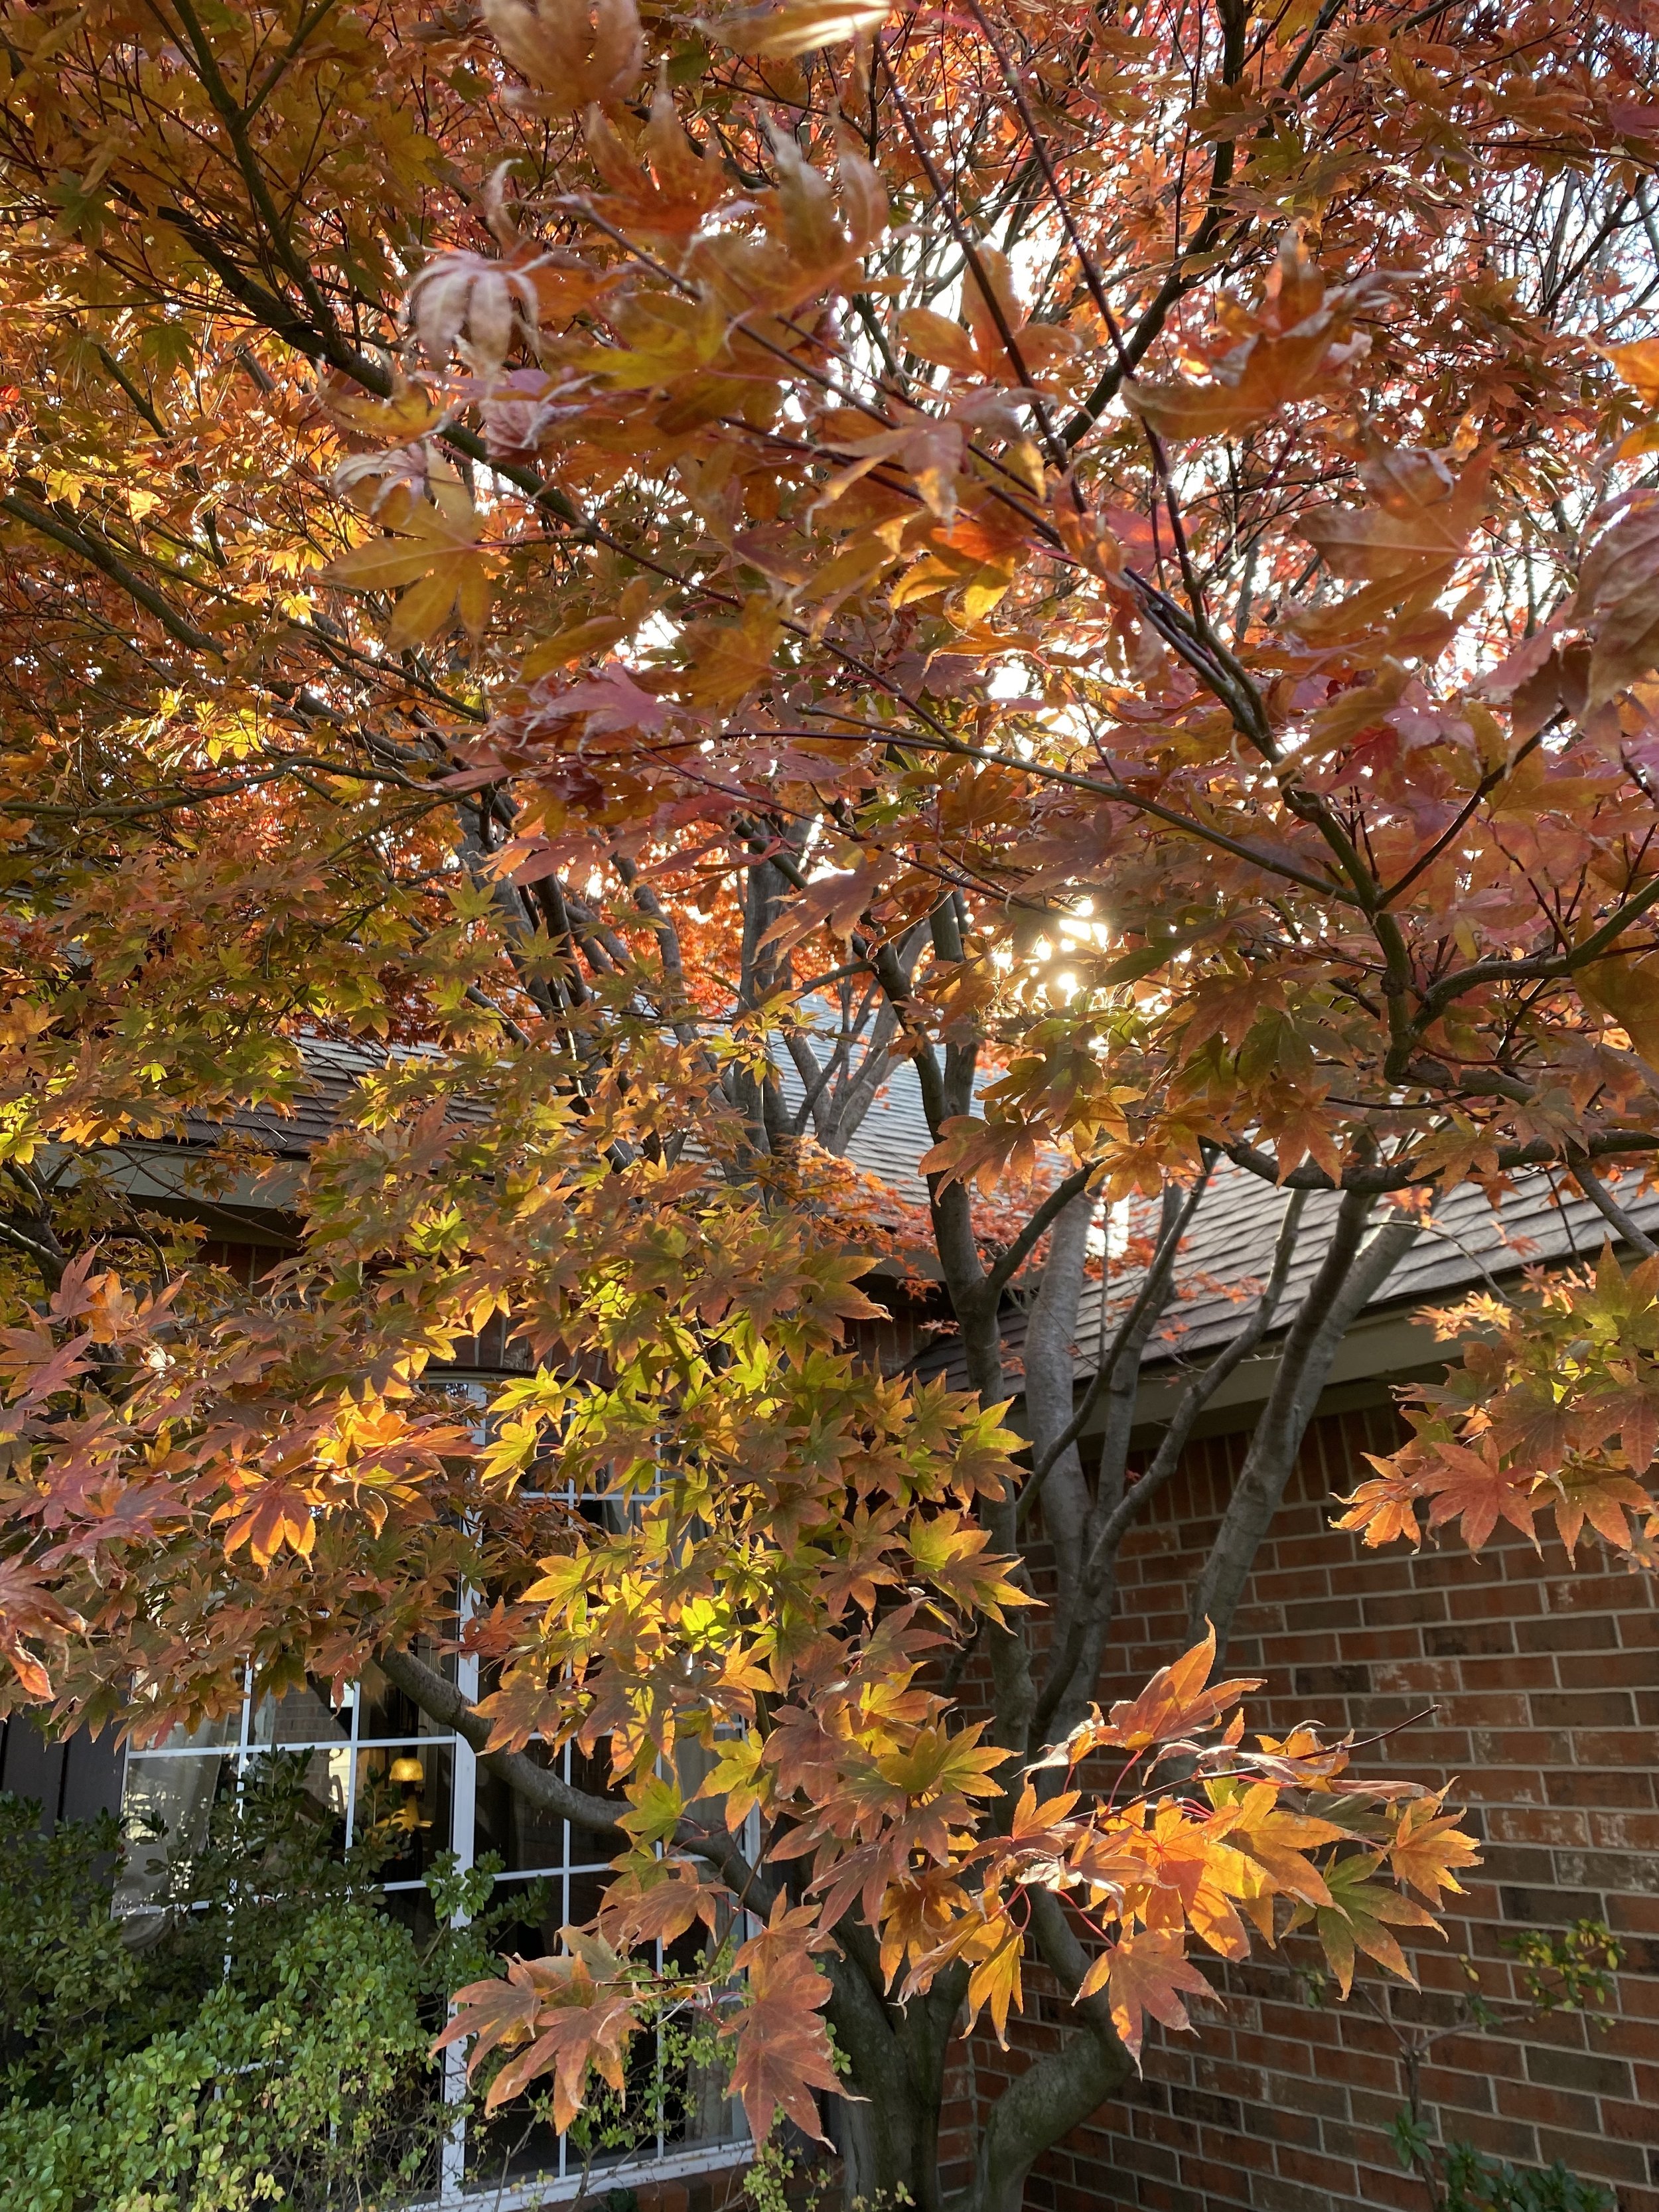
Coral Bark Japanese Maples have pale green leaves in the summer, Golden yellow fall color, and bright red-coral branches in the winter.
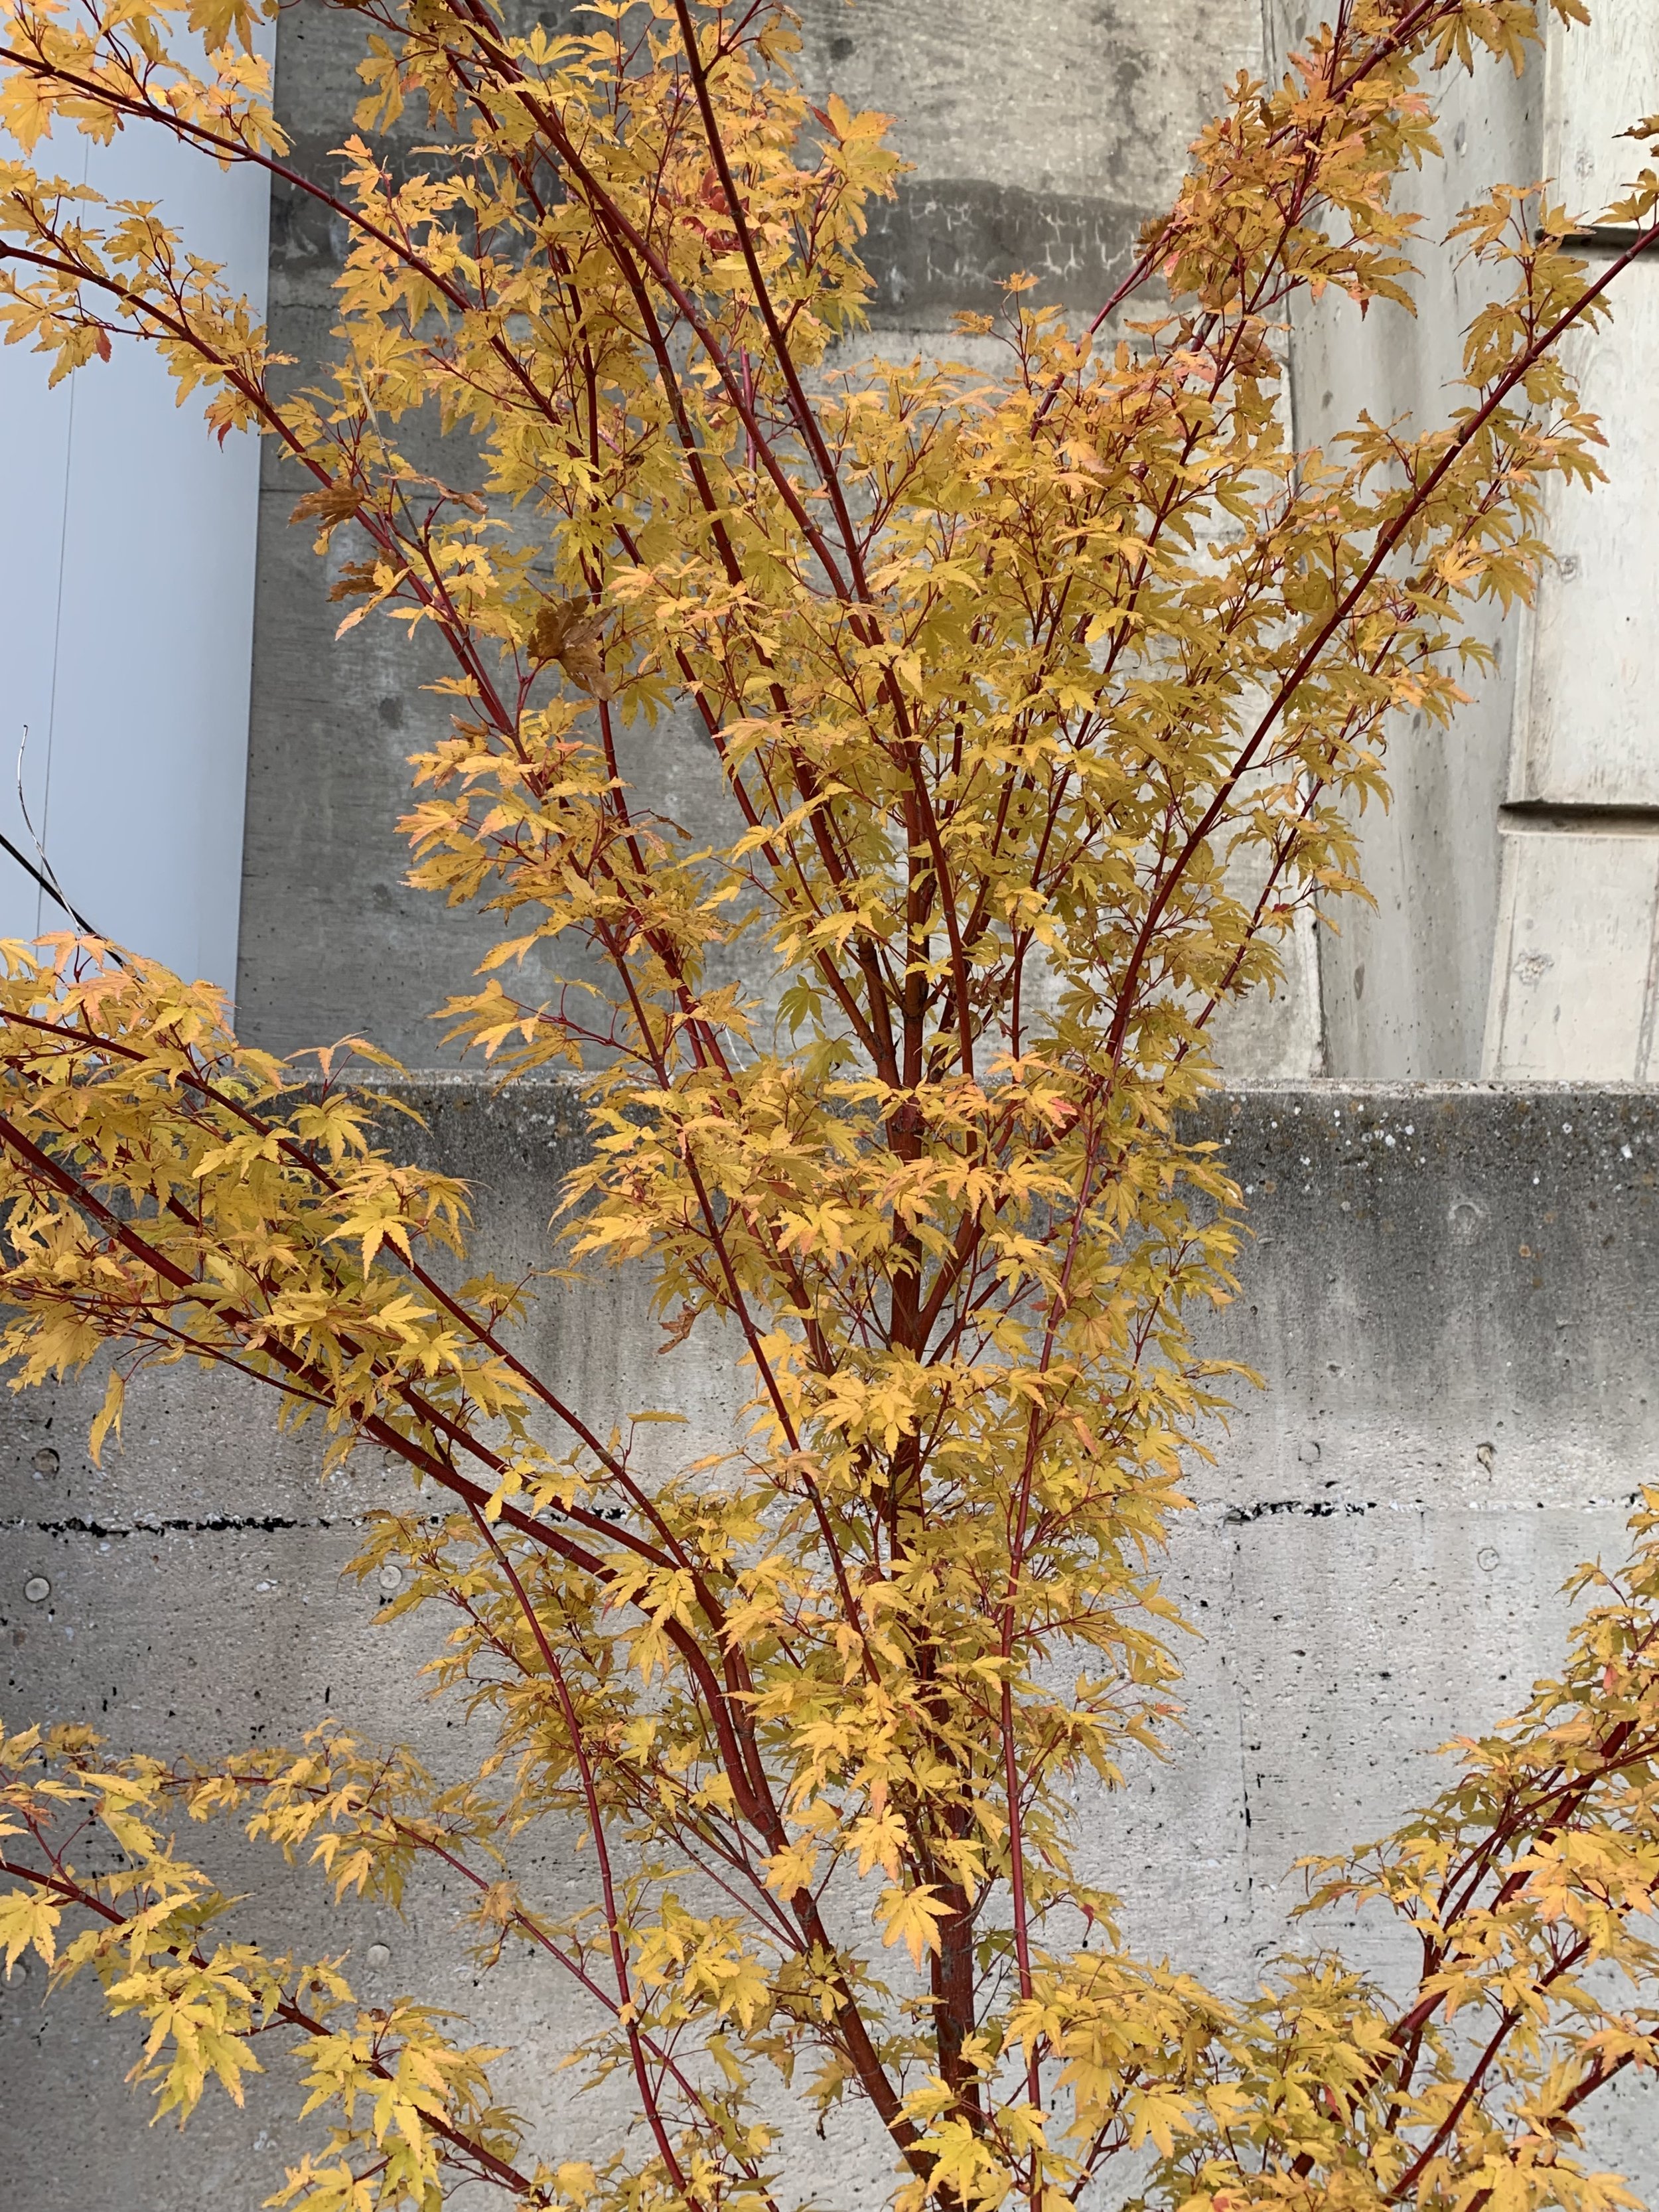
Coral Bark Japanese Maple

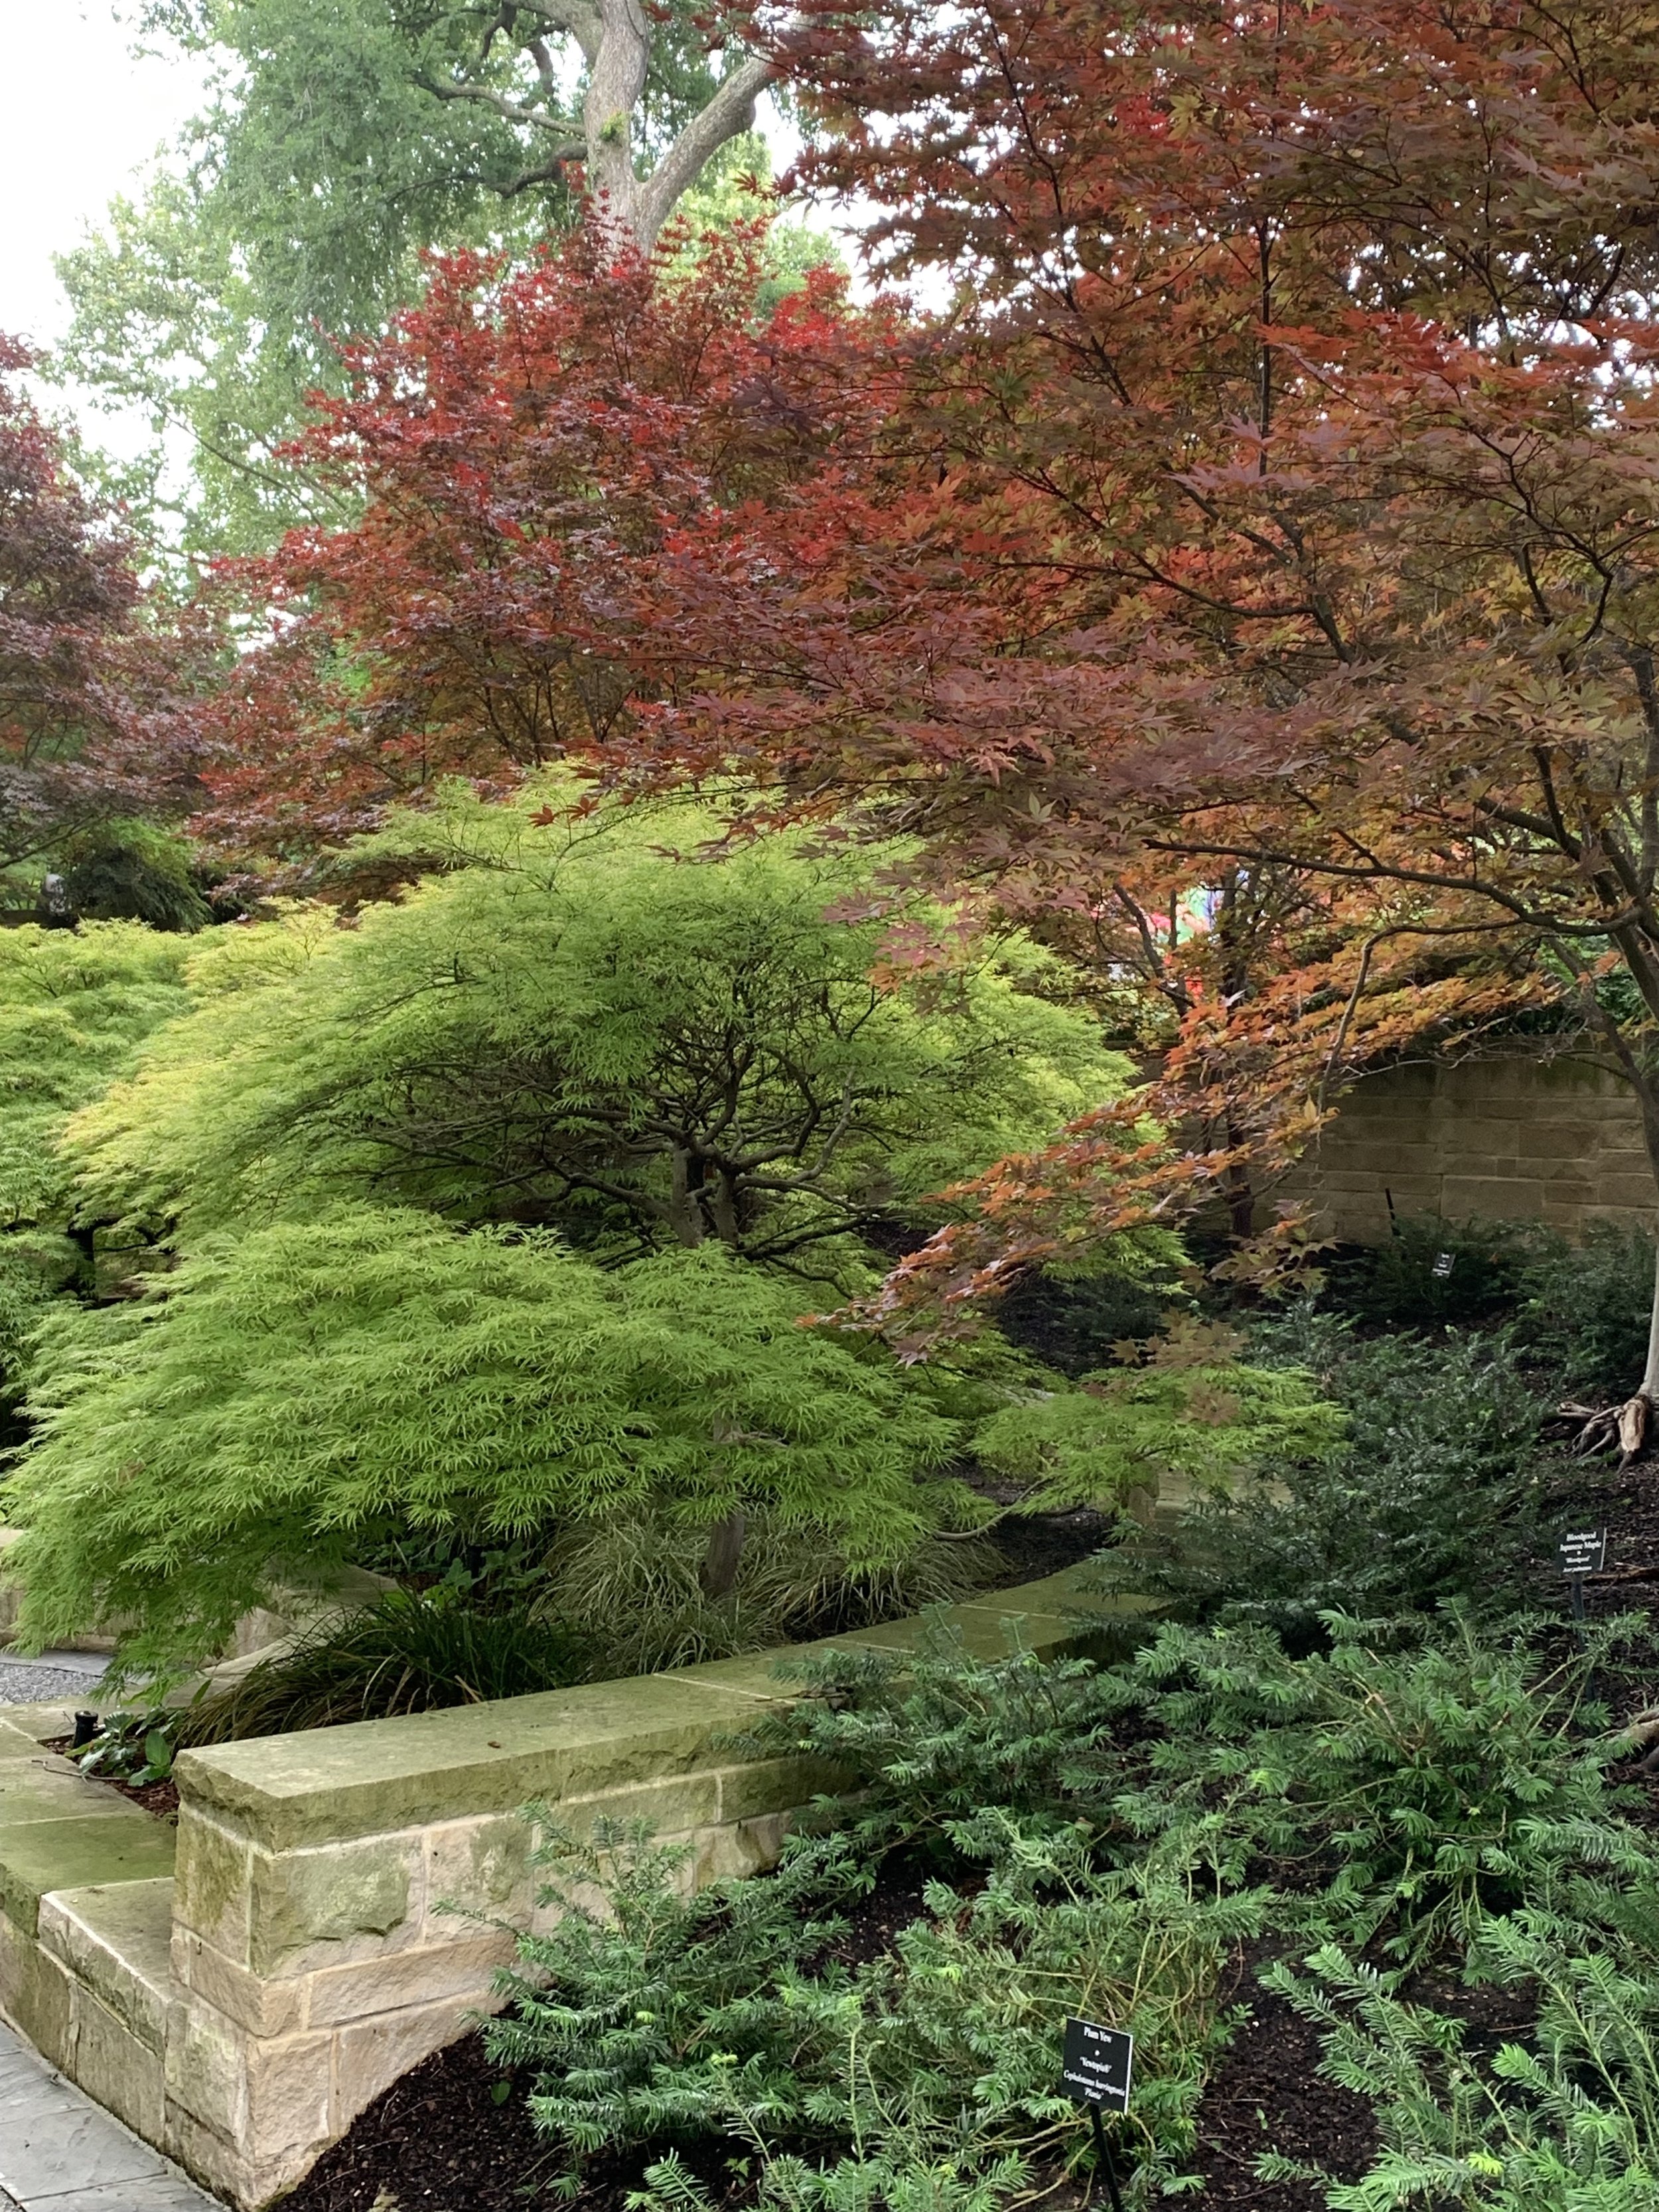
Japanese Maples are a staple landscape plant that will add interest to a landscape year round.

A mature Japanese Maple, such as this Bloodgood, will grow in full sun locations where the soil is shaded.
Size & Form
Japanese Maples range from a few feet tall to 25’. Considered a deciduous small tree or shrub, there are rounded, dwarf, weeping, upright, cascading, single trunk, multi-trunk…. varieties.
How can you use a Japanese Maple in your landscape?
You can create a solitary specimen as a spotlight in the landscape.
You can plant them in a group as a grove.
Or, you can use them in large containers.
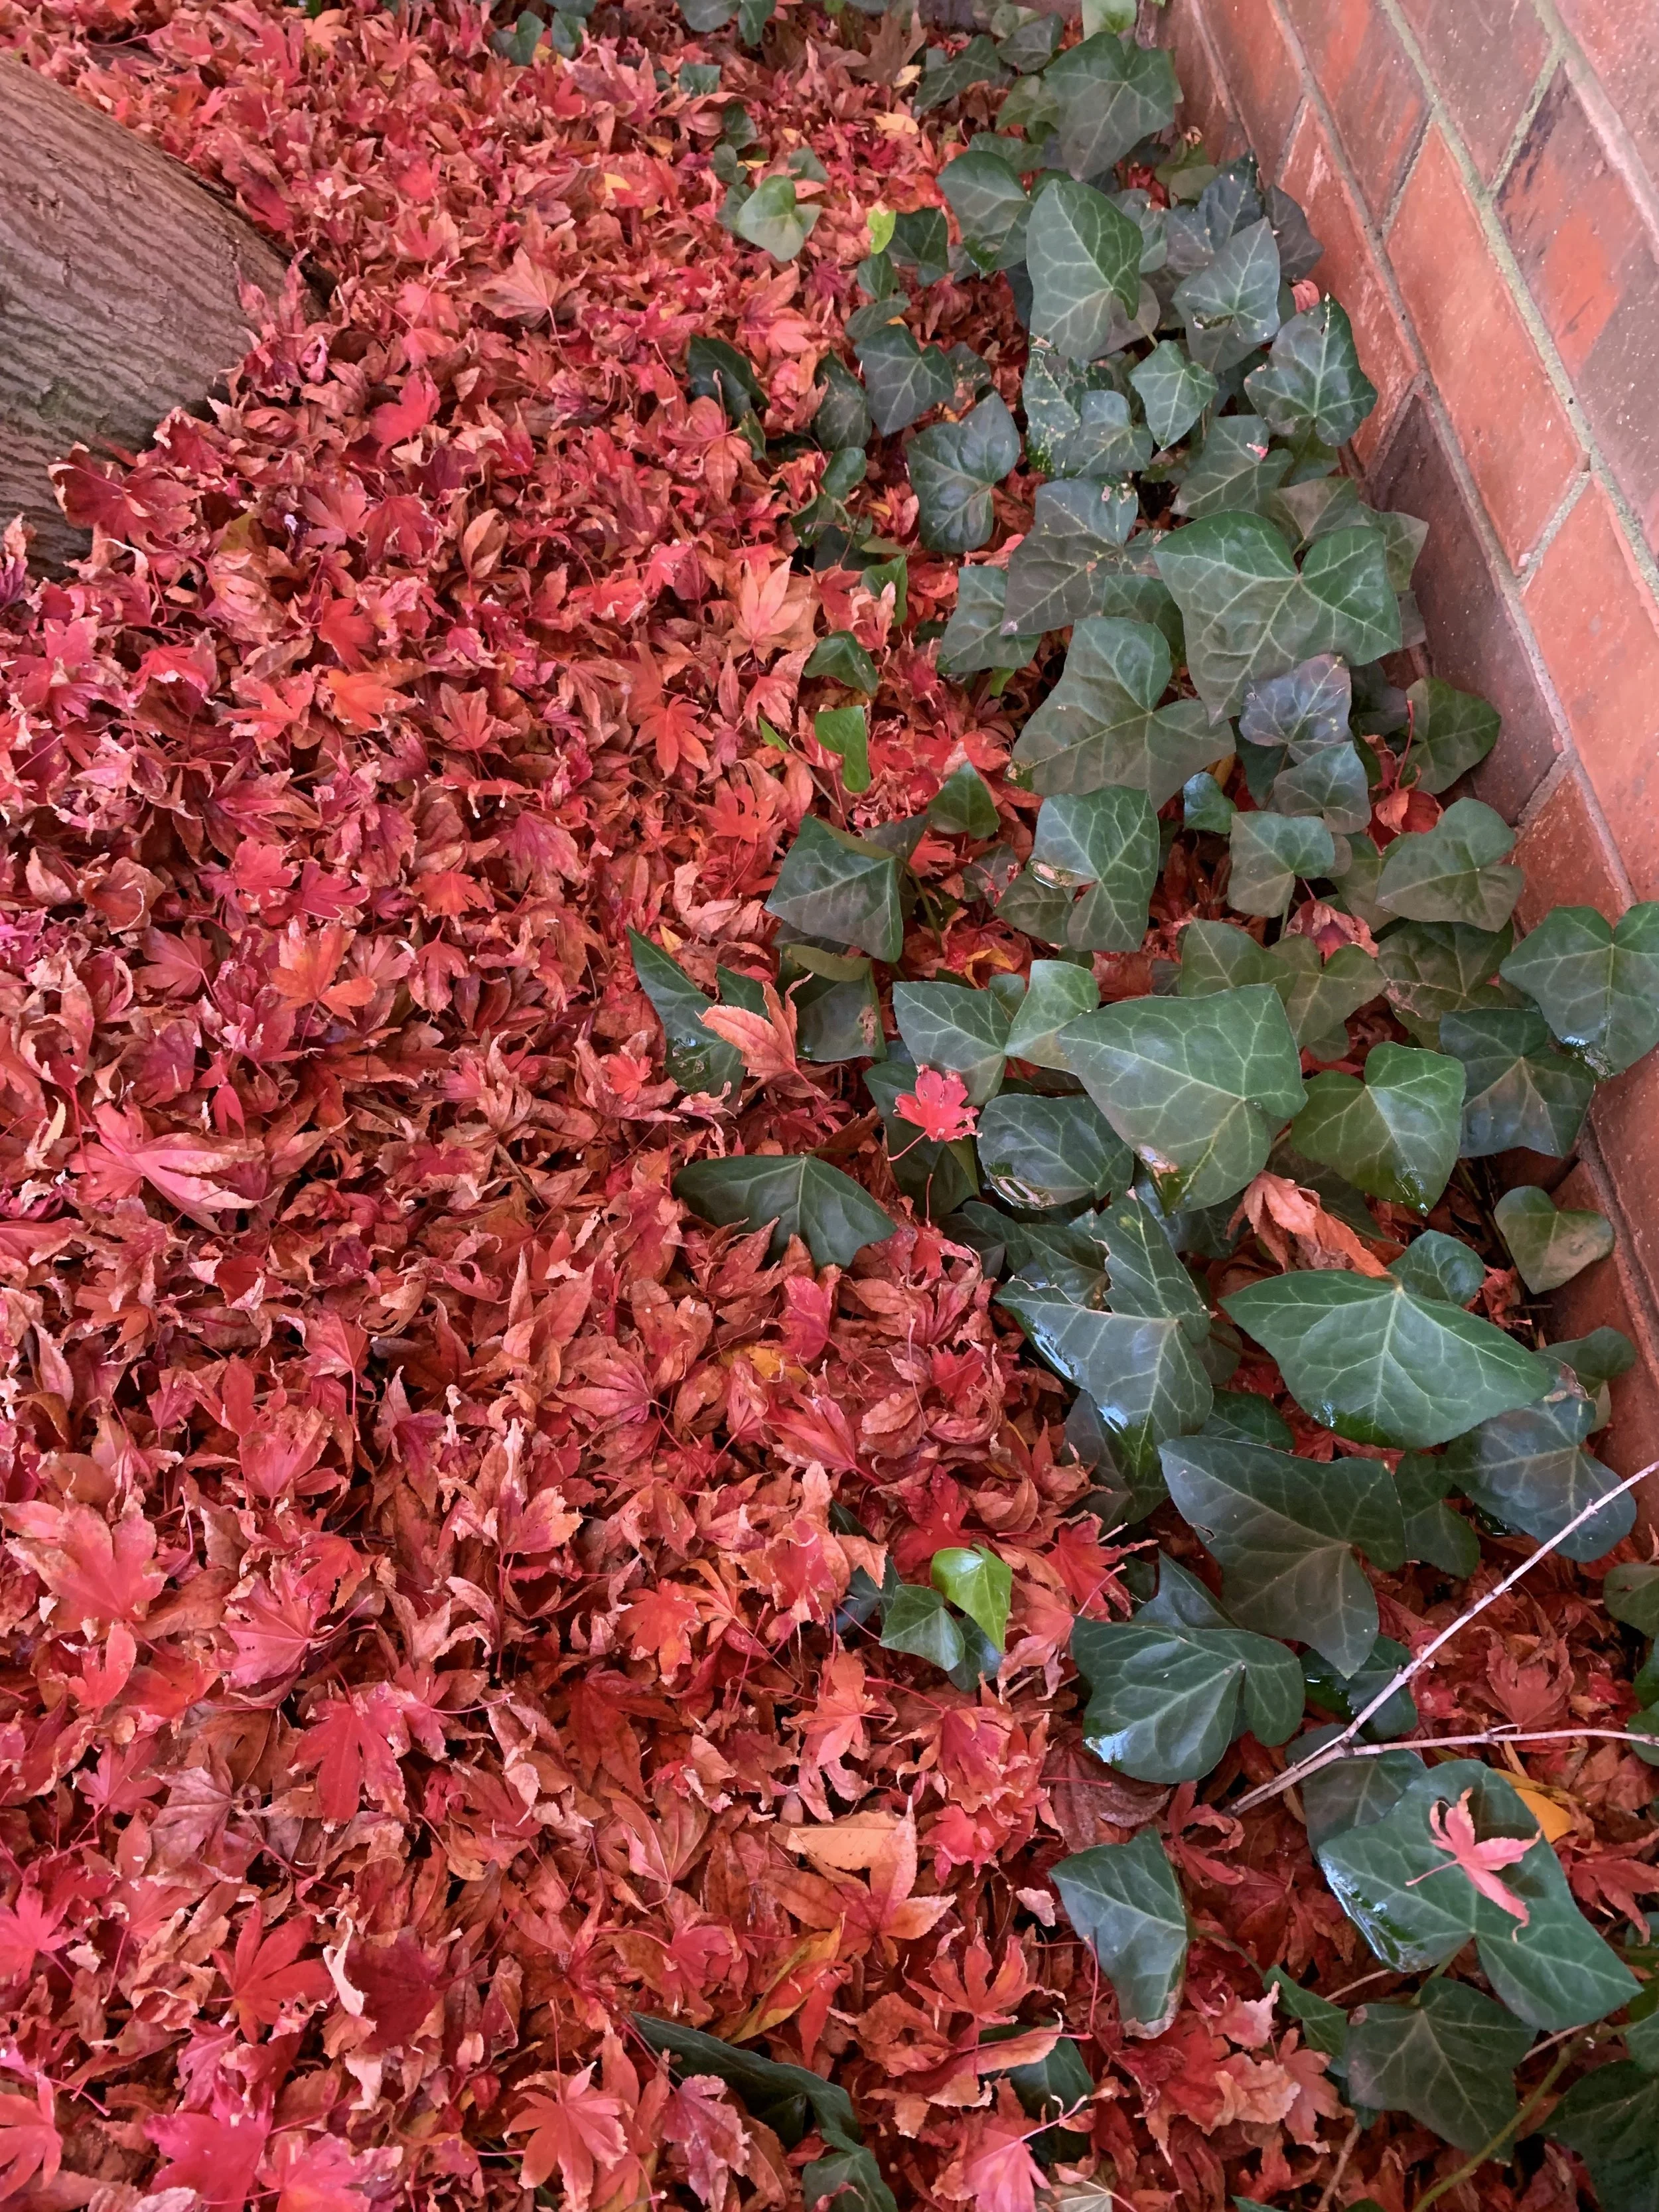
Leaves from a Bloodgood Japanese Maple cover the ground with a red carpet as they drop from the tree.
Leaf Shape
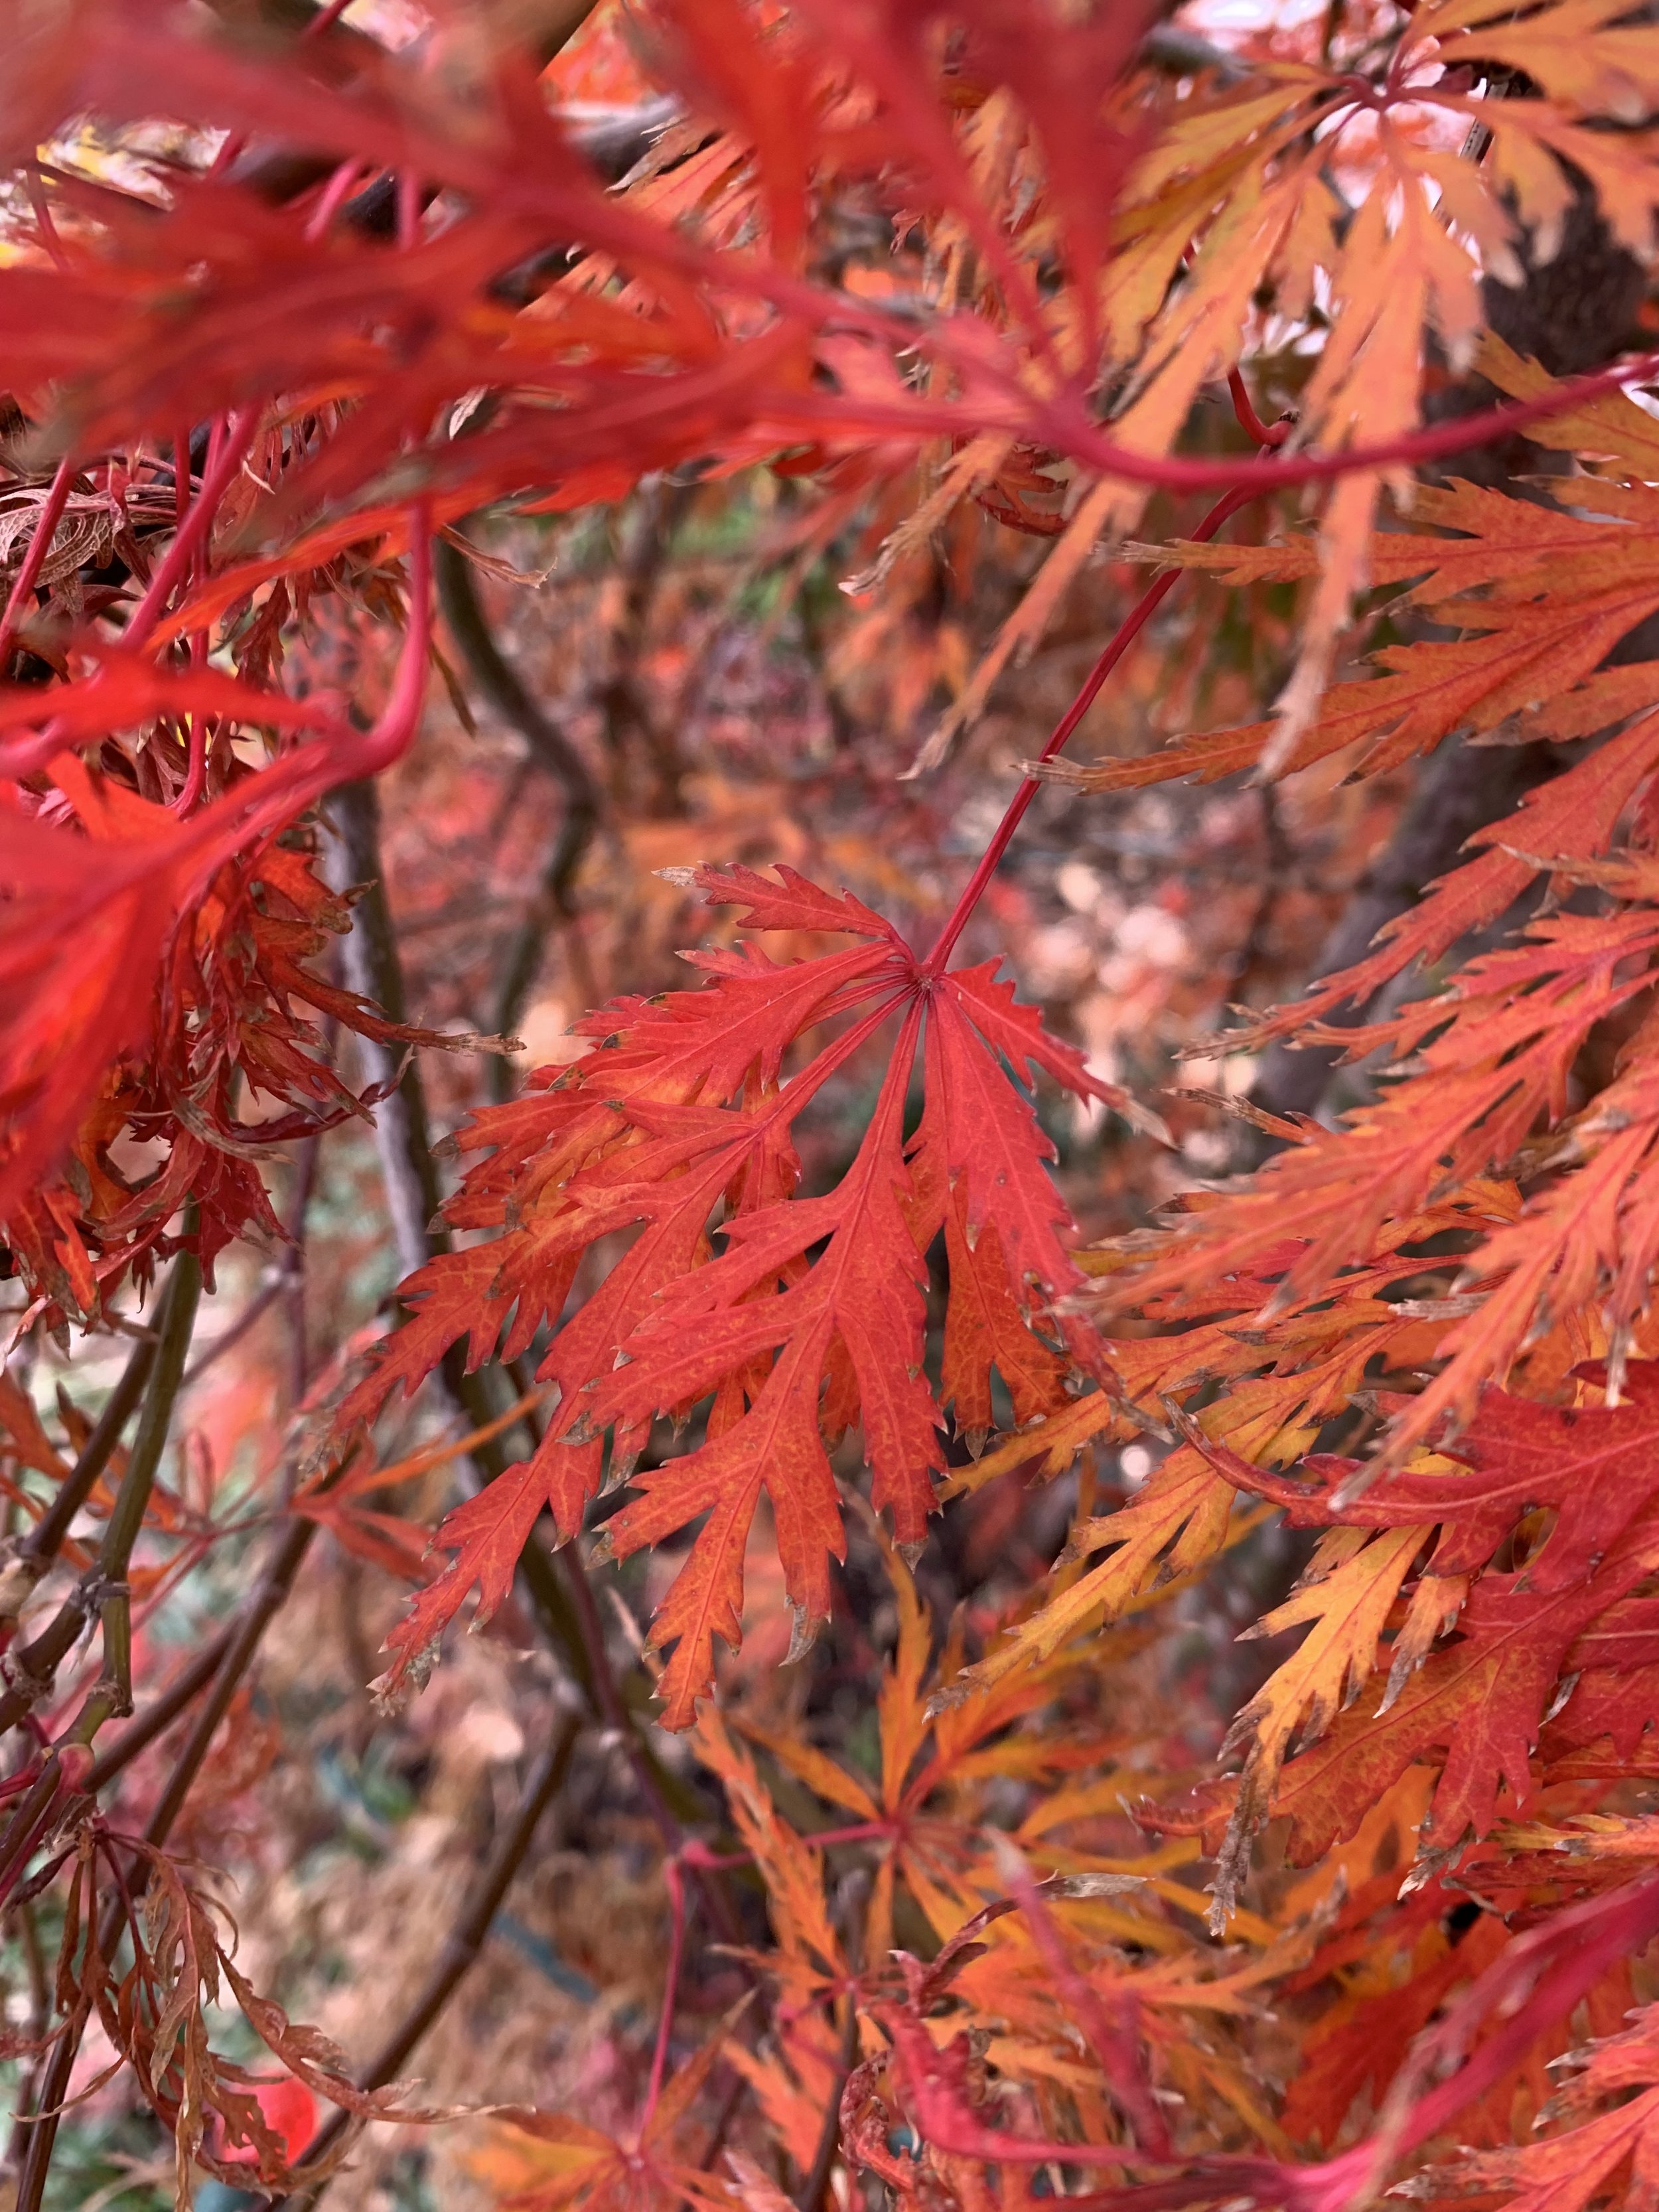
Japanese Maple foliage is divided into two types: traditional maple type, 2-5” wide palm-shaped with 5-7 lobes, or delicate and lacy.

Japanese Maples varieties will have either traditional maple shaped leaves or delicate and lacy leaves like this weeping variety.

Green and red Japanese Maples planted in a group to create a grove.

Bloodgood Japanese Maples make a bold statement in April when their leaves emerge a brilliant red.
Leaf Color
Japanese Maples are among the most wide-range, colorful trees. The foliage ranges from red, green, orange, deep red-purple and bright red-pink depending on the time of year. Some leaf out brilliant reds in the spring, change to green in the summer, and finish the year in bright reds, yellows and oranges. Other varieties start red in the spring, keep a red cast all summer keeping the red color through fall.
Monrovia’s website is a great place to explore Japanese Maples.

Fun Fact – Fried maple leaves are a very popular snack in Japan. The city of Minoh is famous for their fired maple leaves. The leaves are dipped and fried in tempura batter.
How To Plant A Japanese Maple
Dig a hole twice as wide as the tree container and a few inches deeper.
Backfill the bottom of the hole with a mixture of the soil from the site and a compost material (Back to Nature or Landscape Grower’s Mix are a couple of favorites). Tamp firmly the soil in the bottom of the hole.
Place the tree in the hole with the top of the root ball approximately 2” higher than the surrounding grade.
Back fill halfway with your soil and compost mixture.
Lightly tamp down the soil and water well.
Finish filling around the tree.
Mulch with a 2” layer of a Grade A Cedar Mulch and water well.
Japanese Maples are a great staple plant for every landscape. If you don’t have one, you should consider adding a Japanese Maple to your landscape this year.
Oh, you have one? Don’t you think you should add another?
Lorne Hall
Hall | Stewart Lawn + Landscape
(405)367-3873
Winter & Your Landscape

It’s January and the local weather forecasters are warning us about winter weather approaching in the days to come.
What does winter weather mean for your lawn and landscape?

For young trees and trees with thin bark, wrapping the trunk in the winter will protect the tree from damage due to freezing and thawing temperatures.
If you have perennials or winter annuals such as pansies or kale, winter moisture is critical to their performance going into the spring.
Fescue lawns will retain more color in the winter and rebound quicker in the spring if they are not allowed to become bone dry during the winter.
Newly sodded lawns, due to a shallow root system, can experience freeze damage if the roots are dry during a winter cold spell.
Finally, all newer landscapes, those installed in the last two years require a little more watering attention over the winter.
The goal is to make sure the top few inches of soil is moist well ahead of freezing temperatures. Roots are still active and providing moisture for the plant. Once the soil freezes, the roots no longer have the ability to replace moisture lost to transpiration.
Our rule of thumb is to keep your irrigation operational through the winter, monitor the weather, and be ready to water once every 7-14 days if we have not received a good rainfall.
Biggest Winter Issue – Lack of moisture
Lack of adequate soil moisture is often a major cause of winter damage. All lawns, shrubs, trees, perennials, and annuals need moisture during the winter. This is particularly true about evergreens. Remember, your lawn and landscape are dormant, not dead, and moisture is still important.
Most winter plant injury occurs when we receive a harsh cold spell while plant root systems are dry.
Winter watering is particularly critical for evergreen shrubs and trees. Windy days zap the moisture stored in their leaves making them sensitive to winter injury when we receive a harsh cold snap when they are dry.
Windy and cold winter temperatures dry needle and evergreen plants foliage. It is important they have moist soil for the days leading up to extreme winter weather.
Shallow-rooted plants, such as azalea and Japanese maple, are also prone to winter injury when they do not receive regular moisture during dormancy.
Newly planted landscapes need additional water in the winter for the first two years until the roots are established in the native soil.
Current Watering Recommendation:
We received ¼” of rain this week. If we do not receive at least a ½” of rain early this week, give your lawn and landscape a good deep soaking before the next cold front arrives.
First Step in Avoiding Winter Damage – Select plants that are winter hardy in our area.
Plant cold hardiness is based on the USDA Hardiness Zones. Central Oklahoma is Zone 7A. Plants with a 7A rating can withstand temperatures of 0 to 5 degrees. Northern Oklahoma is Zone 6B, -5 to 0 degrees. And southern Oklahoma is Zone 7B which can survive temperatures of 5 to 10 degrees.
If you live in central Oklahoma and are tempted to experiment with a plant that grows best in Zone 7B, plant it in a protected area that is shielded from dry winter winds.
Also, when selecting plants, look for plants that perform well in our tighter, clay soils. A 7A plant that grows best in loose soil may live for years when we have mild winters only to fail when we have a winter of extreme temperatures.

When making plant selections, don’t overlook ones that add winter interest such as Nandina with their bright red berries.

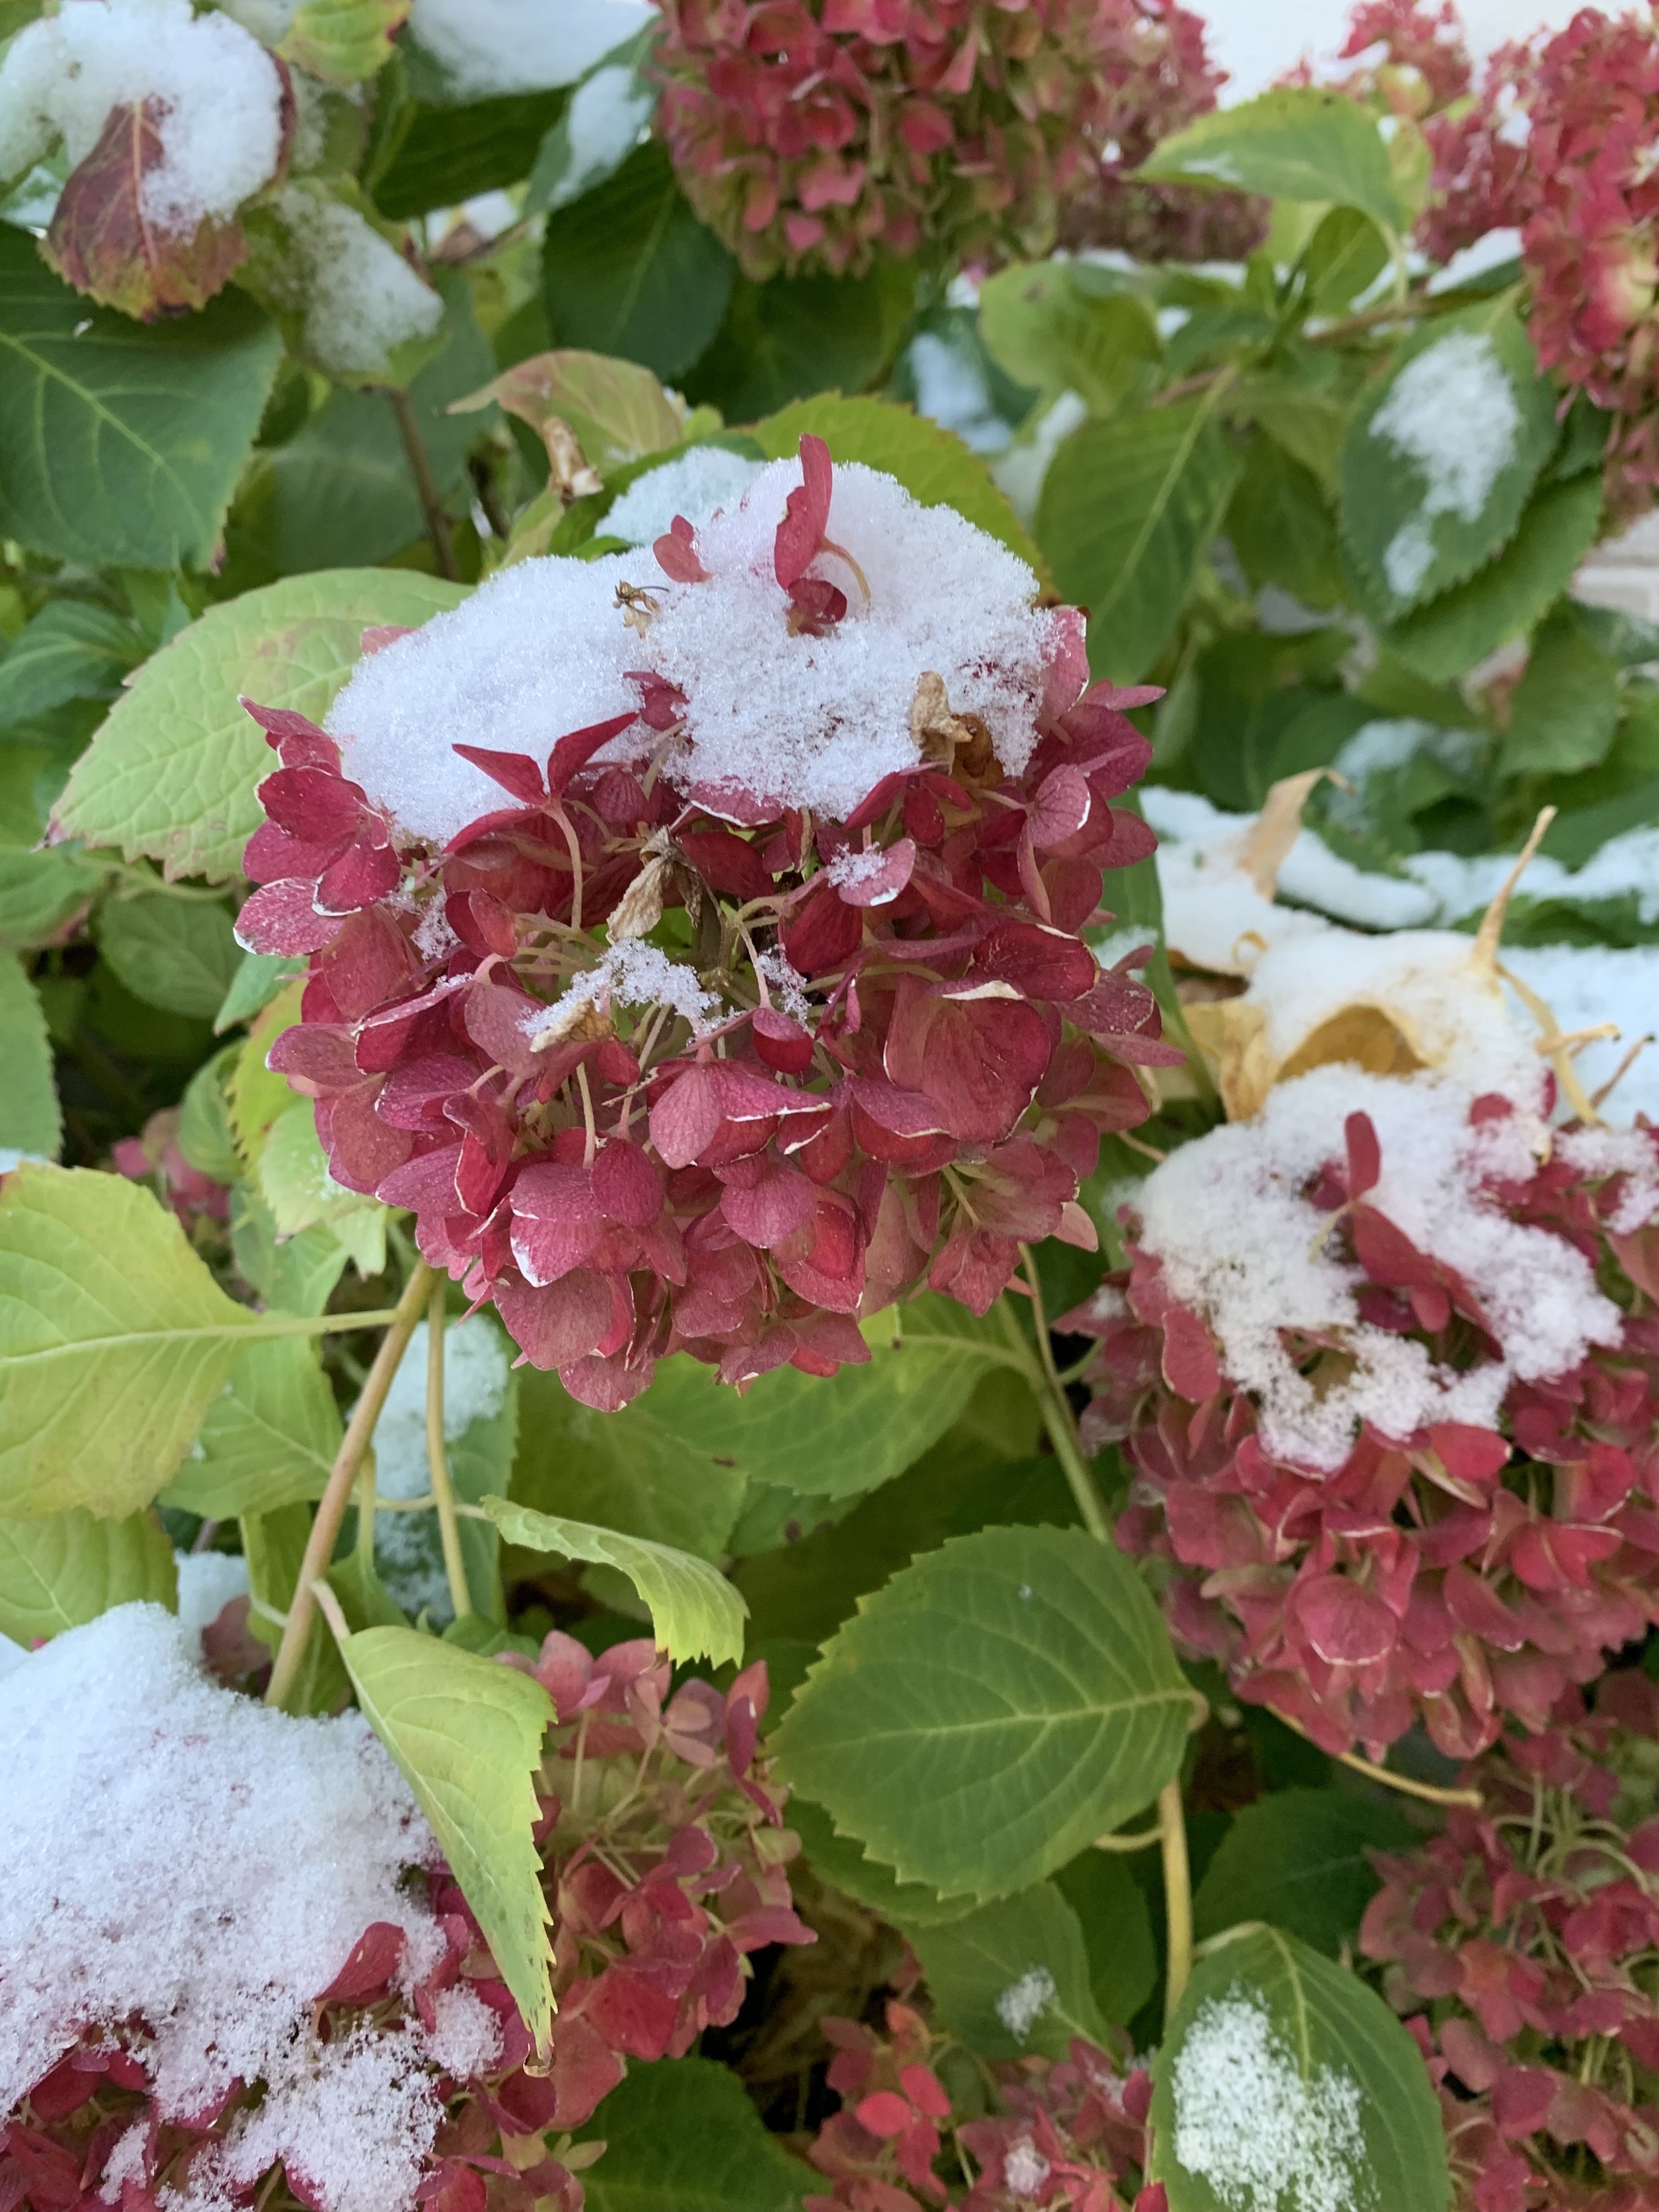
The best weather for your plants during extreme temperatures is a snowfall of 2 or more inches.
Snowfall is moisture!
If we get a ½” rainfall, there is a lot of runoff. But, when the snow melts, it slowly soaks in. Every single drop benefits the roots of your turf, flowers, shrubs, and trees. On average, a 4” snow equals nearly a 1/2” rainfall.
The Old Farmer’s Almanac calls snow a “poor man’s fertilizer.”
Snow is full of nitrogen. As snow falls it collects nitrogen that is naturally in the air and distributes it evenly over your lawn and landscape.
Best Weather Condition for Extreme Cold – Snow.
Fresh snow is like a warm blanket when temperatures dip into the teens or lower!
Snowfall is nature’s way of insulating your valuable landscape from cold temperatures. A fresh snow cover of more than 2” is very beneficial to the landscape by trapping soil warmth below the snow.
Without snow, soil temperatures fluctuate more, dipping deeper during cold spells. It is common for soil temperatures to be as much as 10 degrees warmer when there is a snow cover.
Your landscape is thankful for a blanket of snow to trap the warm soil temperatures around its roots and keep the cold windy temperatures at bay.


A Key to Preventing Winter Damage – Healthy Plants.
Rarely does a healthy plant die due to winter injury. Plants in poor health are the first to die during cold periods.
Keep your plants healthy during the growing season and they will be better suited for the winter cold. Inspect often for insects and disease. Make sure they are receiving the correct nutrients in the correct amounts. Practice good watering techniques throughout the growing season.
The healthier your plants, the better they will do in the extreme temperatures of winter.
One More Great Winter Practice – Mulch.
A fresh 2-3” layer of mulch will provide insulation for your plant roots, retain moisture, and moderate soil temperatures.
As always, let us know if you have any questions or if we can help you have your best lawn and landscape.
And…stay warm…. after all, it is January.
Lorne Hall
Hall | Stewart Lawn + Landscape
(405)367-3873

Merry Christmas!

Christmas…the season of hope!
What are you hoping for this Christmas? The top item on your wish list? Time with family and friends? Joy? Health?
Hope is a feeling of expectation and desire for a certain thing to happen.
Everyone is hoping for something.
But, what happens when the thing you are hoping for does not happen?
The feeling of hope is replaced with a feeling of disappointment. When the feeling of disappointment lingers it is easy to find ourselves feeling hopeless. Hopelessness is the feeling of despair about something.
I don’t like the feelings of disappointment. I really don’t like the feeling of hopelessness. We have all been there. Especially when we have placed our hope in finances, relationships, health, and careers…...
But this is Christmas… the celebration of real hope!
A hope that does not disappoint!
A hope that erases hopelessness!
Christmas, the celebration of the birth of Christ.
Christmas, the celebration of the birth of hope and love for all mankind.
May your entire holiday season be filled with the true hope and love of Christ!
Merry Christmas from your friends at Hall | Stewart Lawn + Landscape

Small Trees in the Landscape
A few times we have posted an article titled Great Landscapes Have Three Levels. In the article, we mention the use of small trees as one of the ways to create three levels.
Wintertime, with fewer lawn and landscape maintenance activities dominating your time, is the perfect time to evaluate your landscape. Let’s spend a few minutes learning about the importance of small trees in the landscape.
Reasons For Using Small Trees
Small trees often are the punctuation points of your landscape. They are the anchor plants that give the landscape balance.
Small trees are the stars of the landscape with the rest of the landscape playing a supporting role.
Often, they are the first to be placed in the design and commonly the first to be planted.
Small trees add height, color, and texture to the landscape.
They complement the landscape.
They direct the eye to key features or views.
Small trees can frame a house or an entry.
They can be used to create privacy or screen an undesirable view.
Small trees give the landscape balance.
Small trees are defined as those that have a mature height of 12-30’.
Small trees are typically multi-stemmed but can be a single trunk plant as well.
The list of small trees is long.
Here are a few to consider:
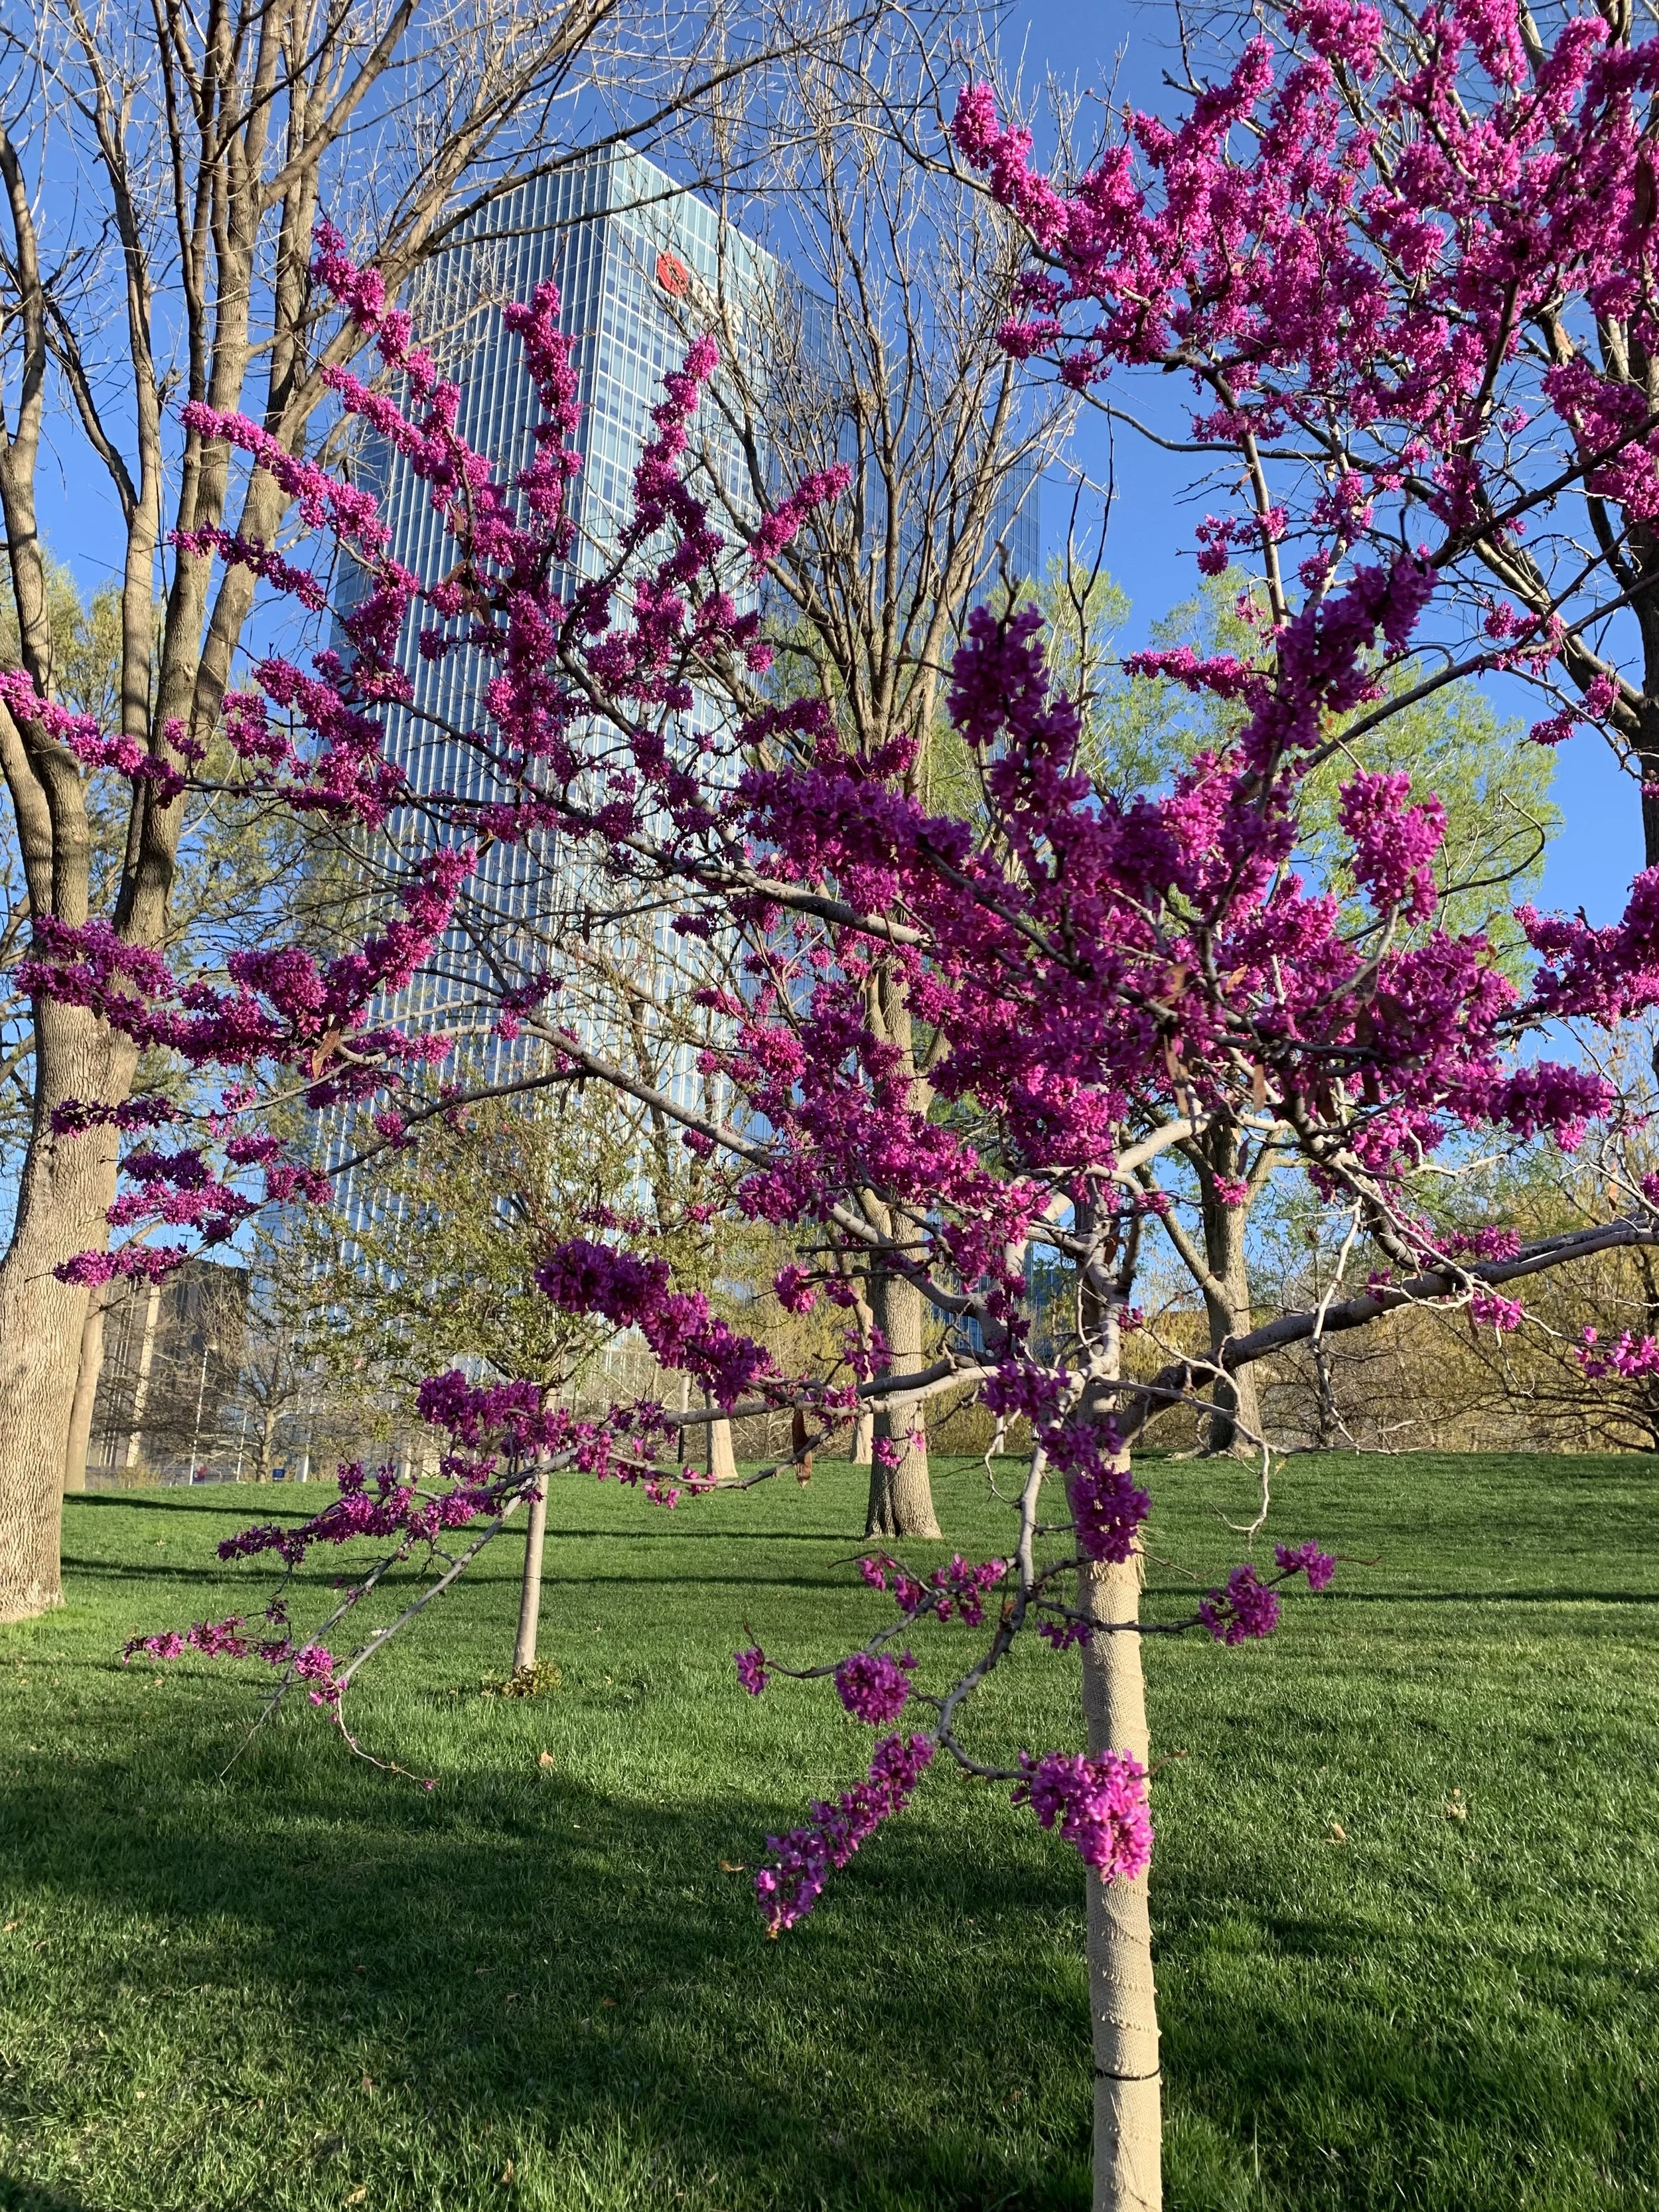
Redbud
Redbud – There are many varieties, but the Oklahoma Redbud stands out as a great landscape specimen with vibrant pink-purple flowers on bare branches in the early spring and glossy heart-shaped leaves during the growing season. 15-20’ tall and wide.
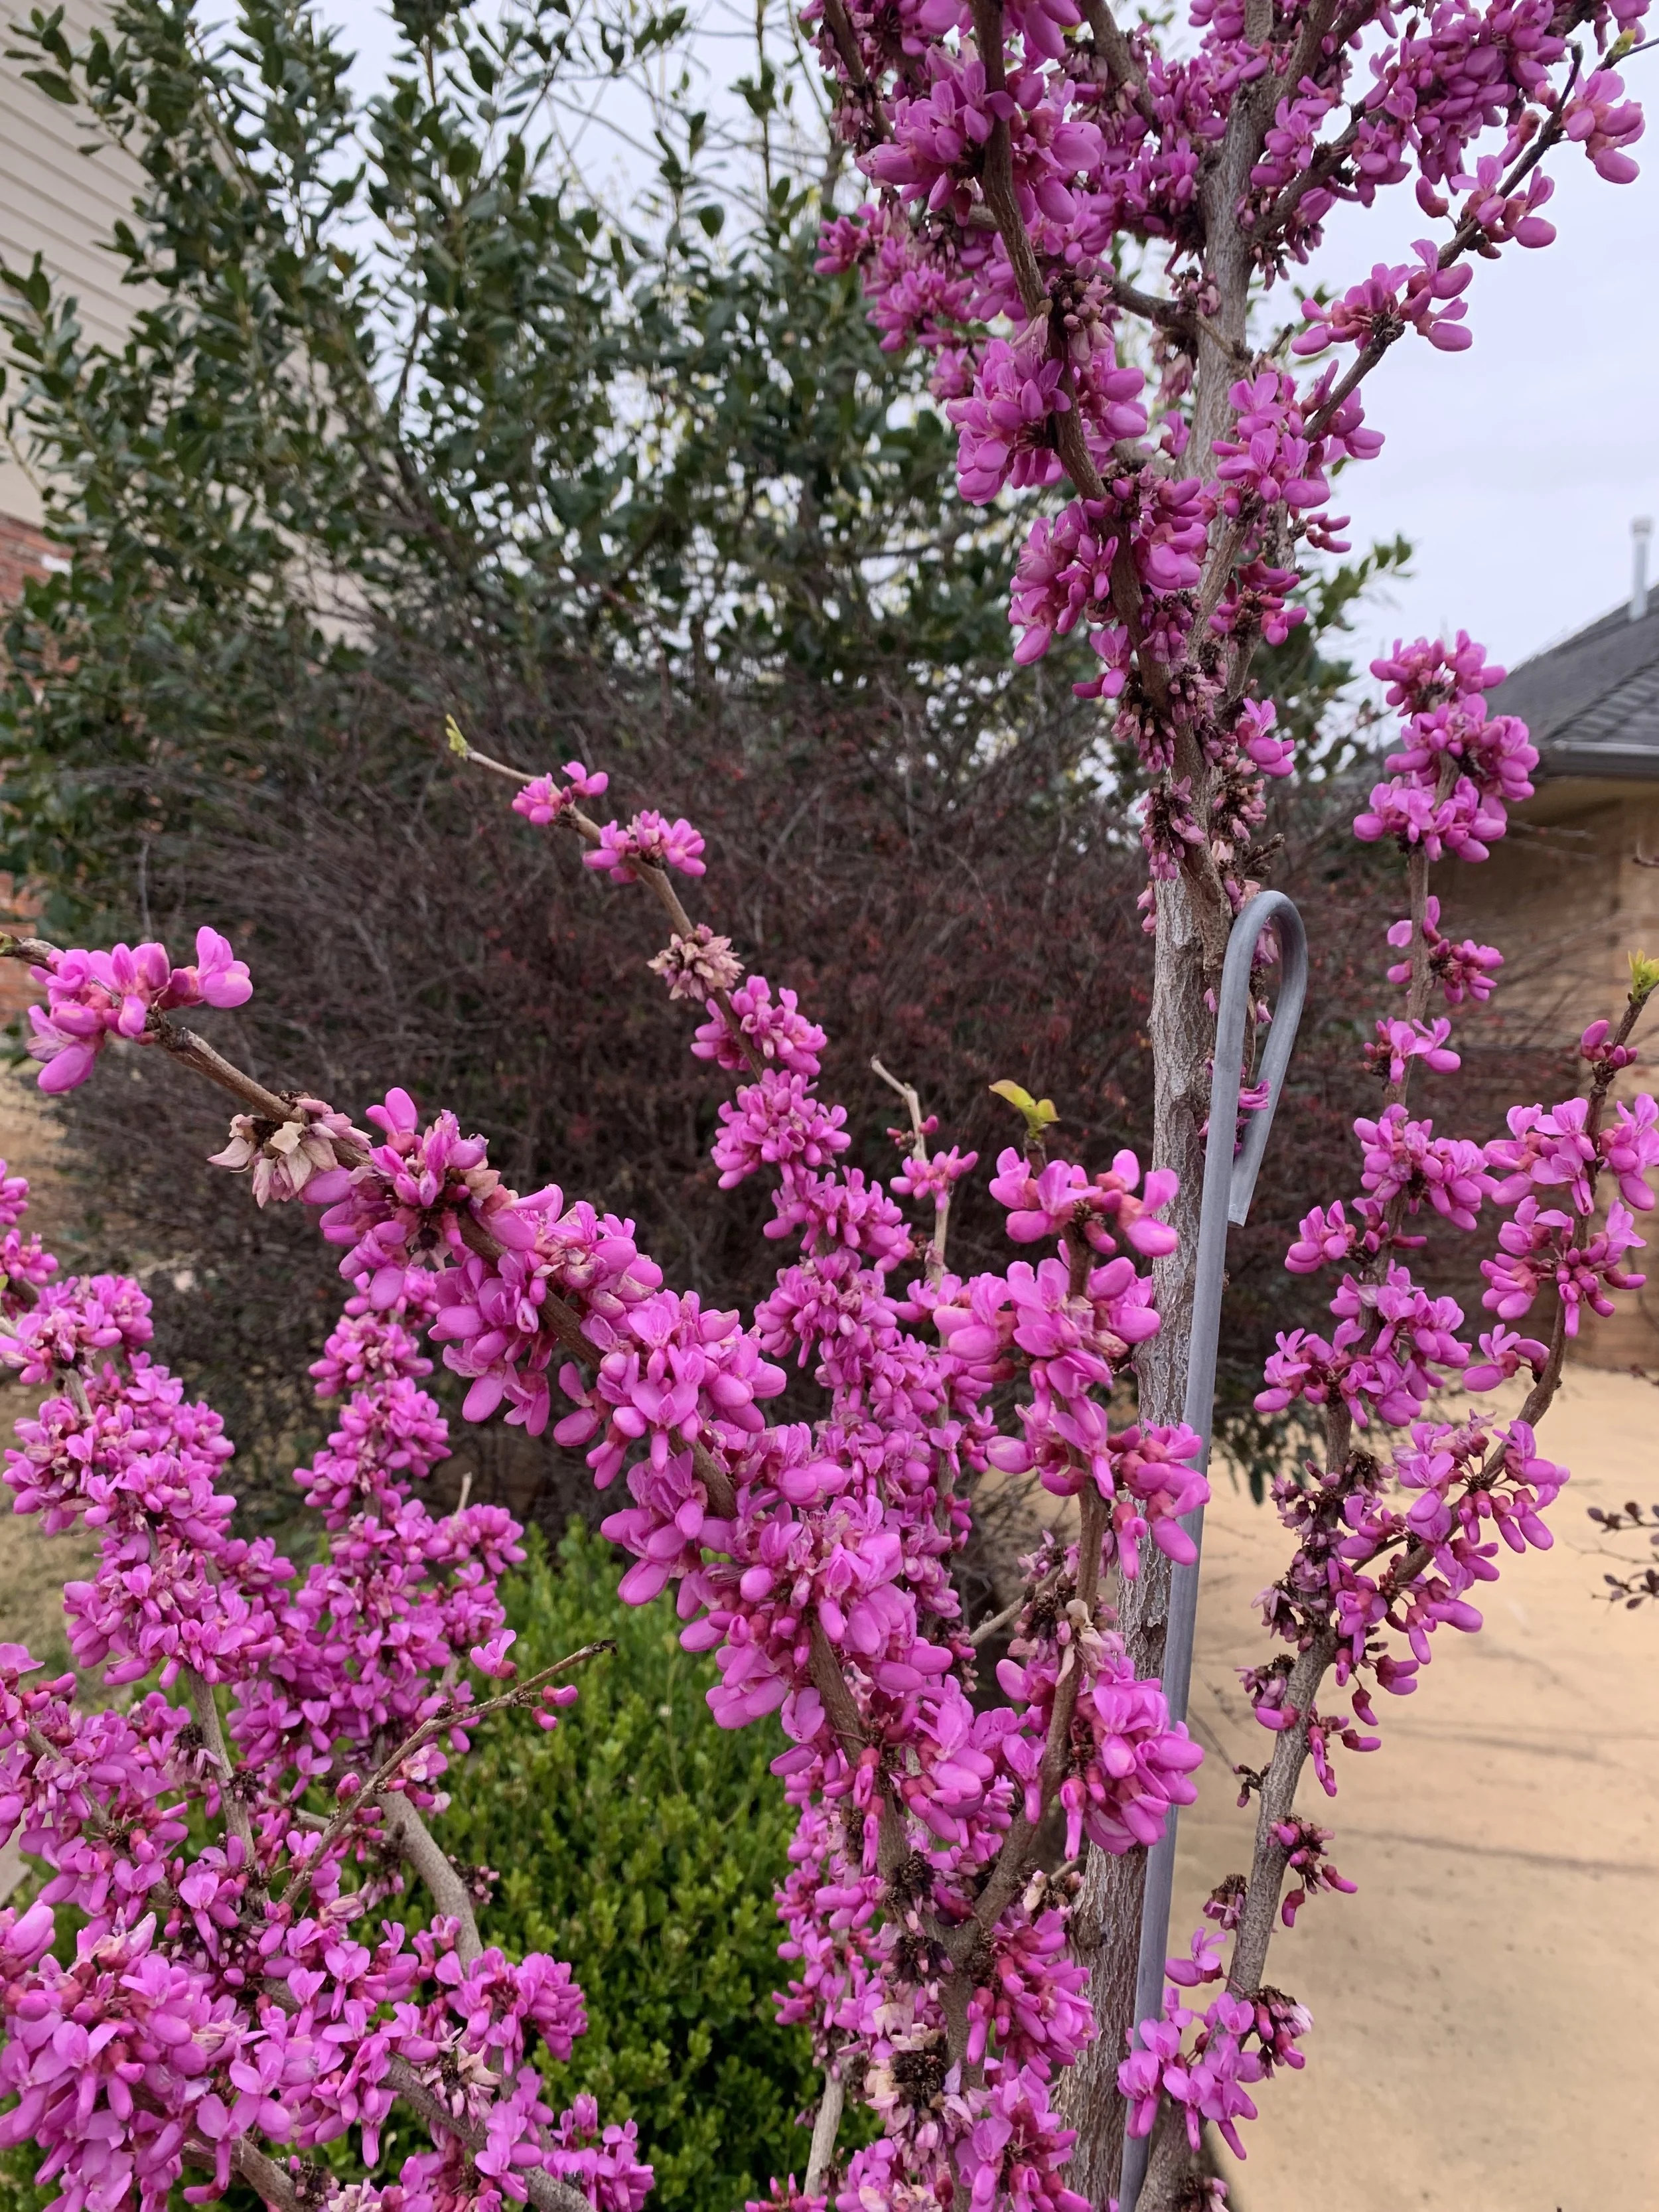
Redbud
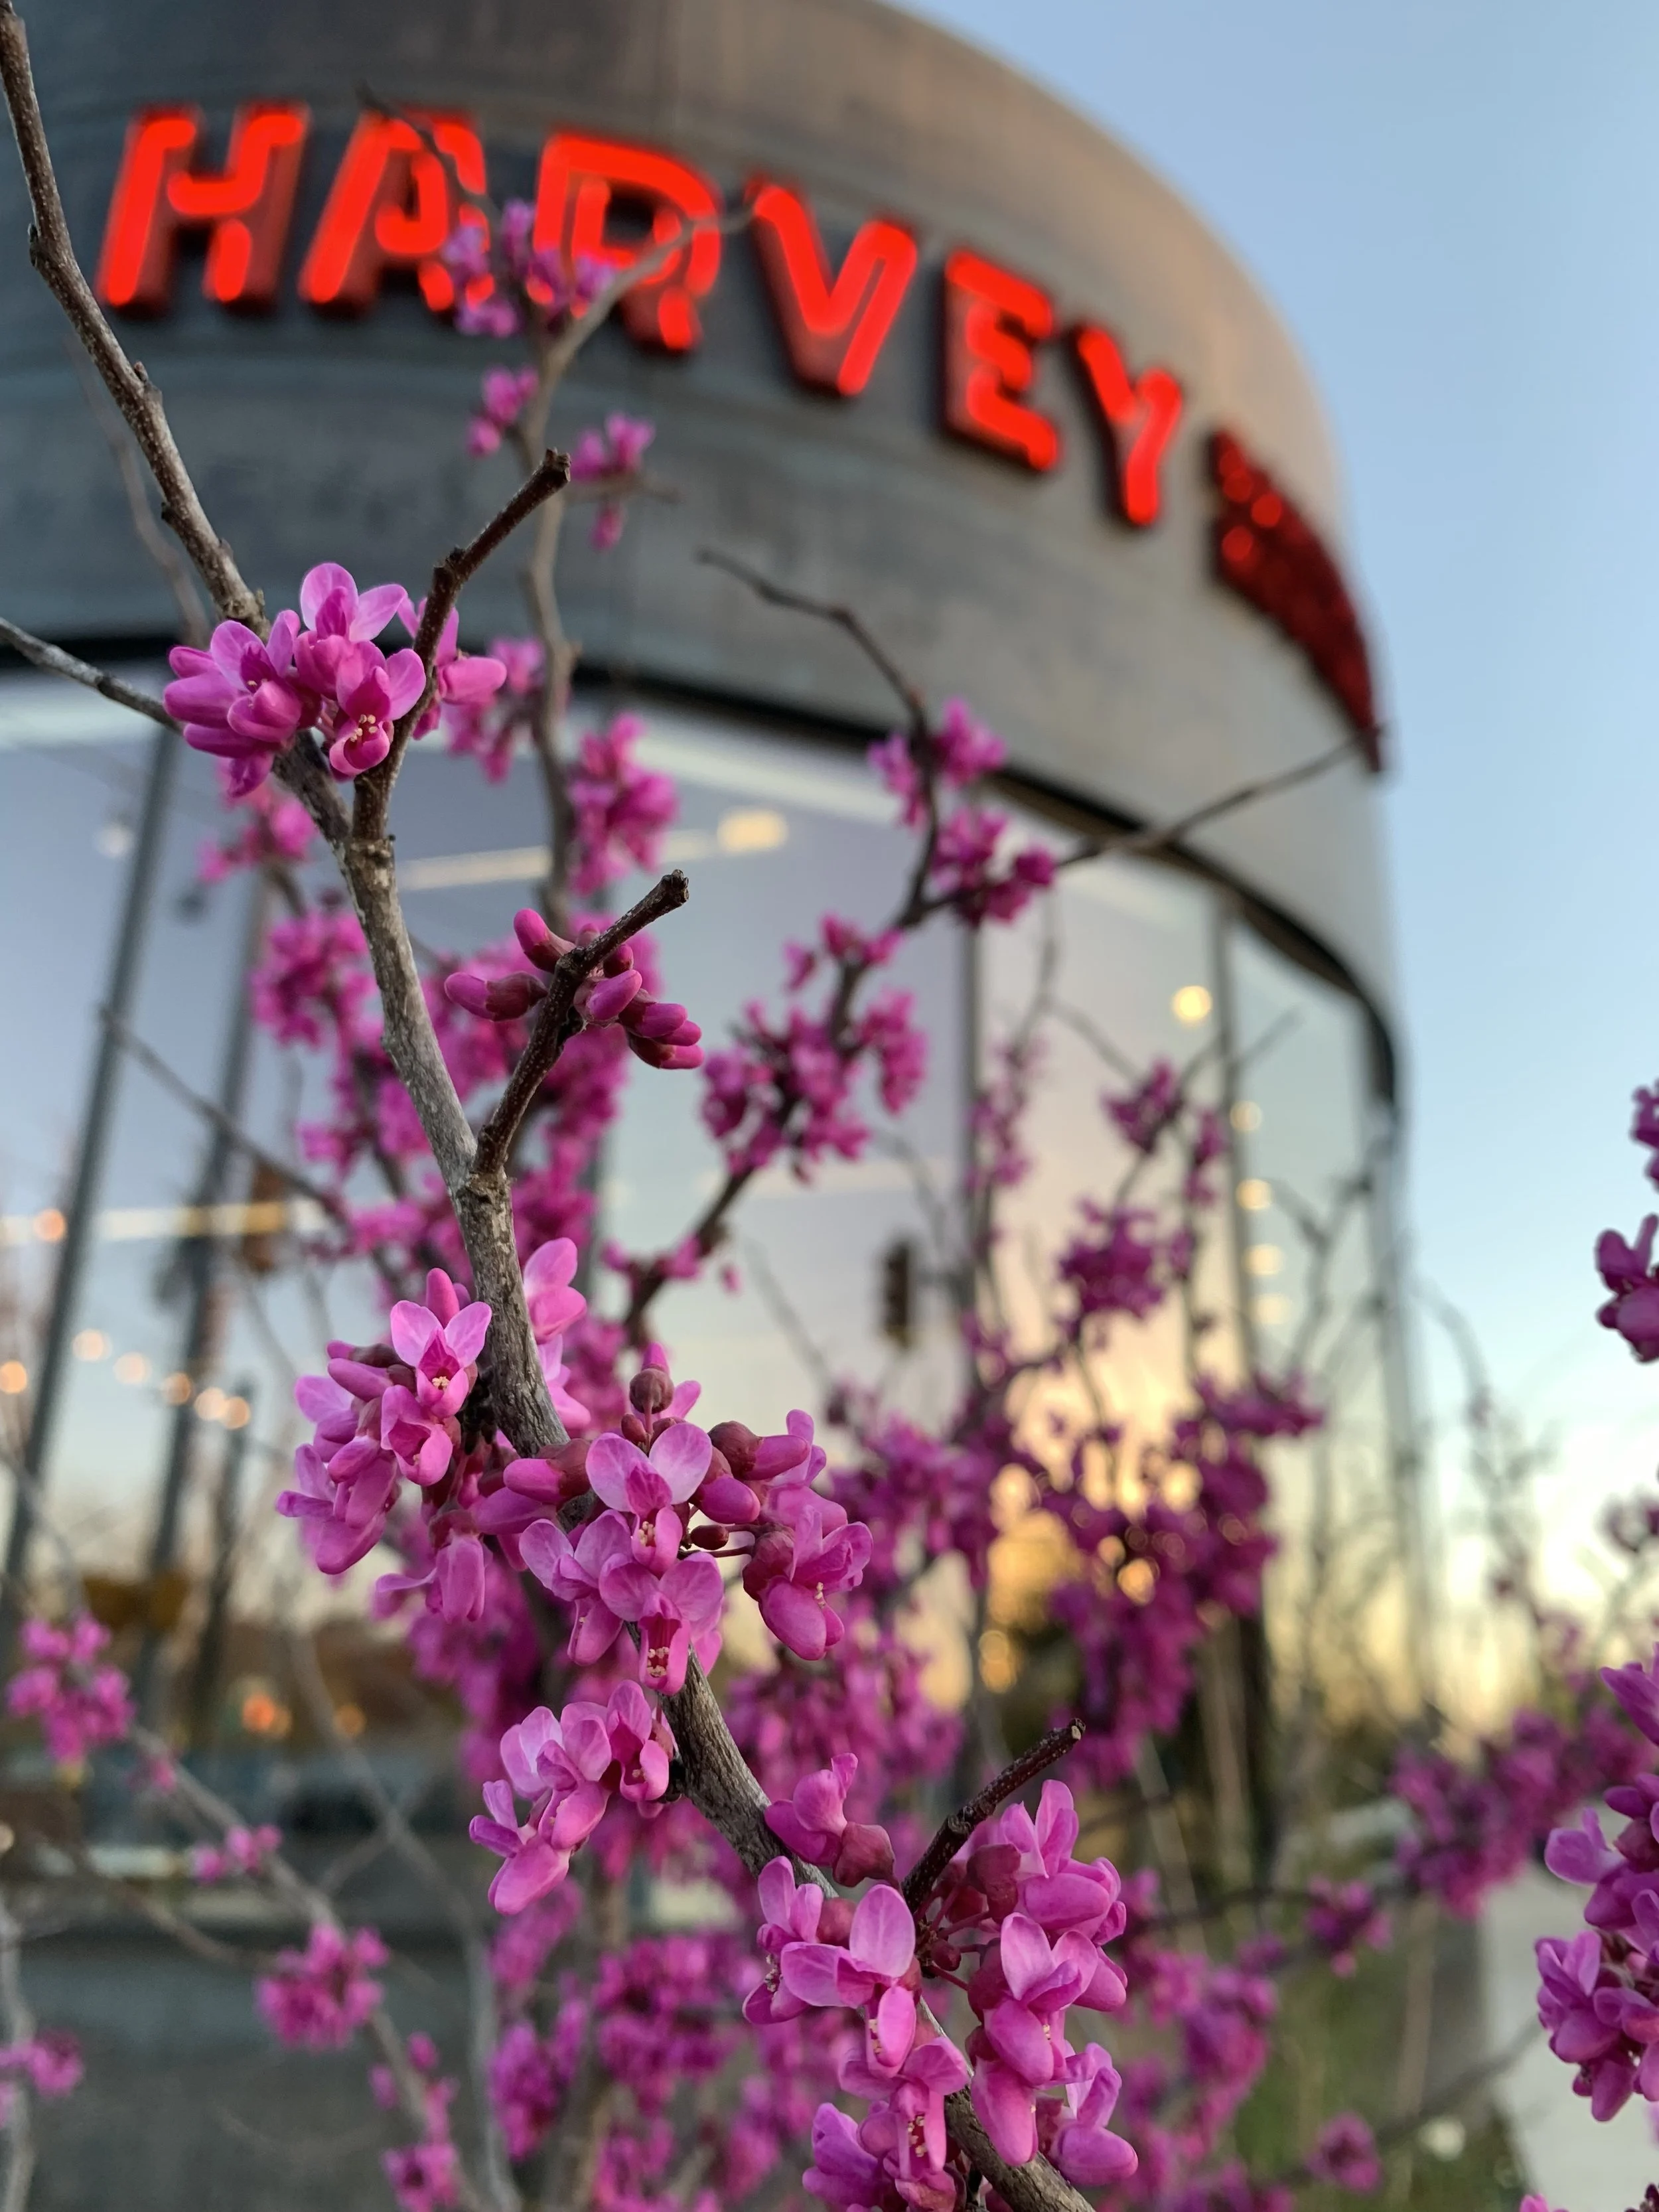
Redbud

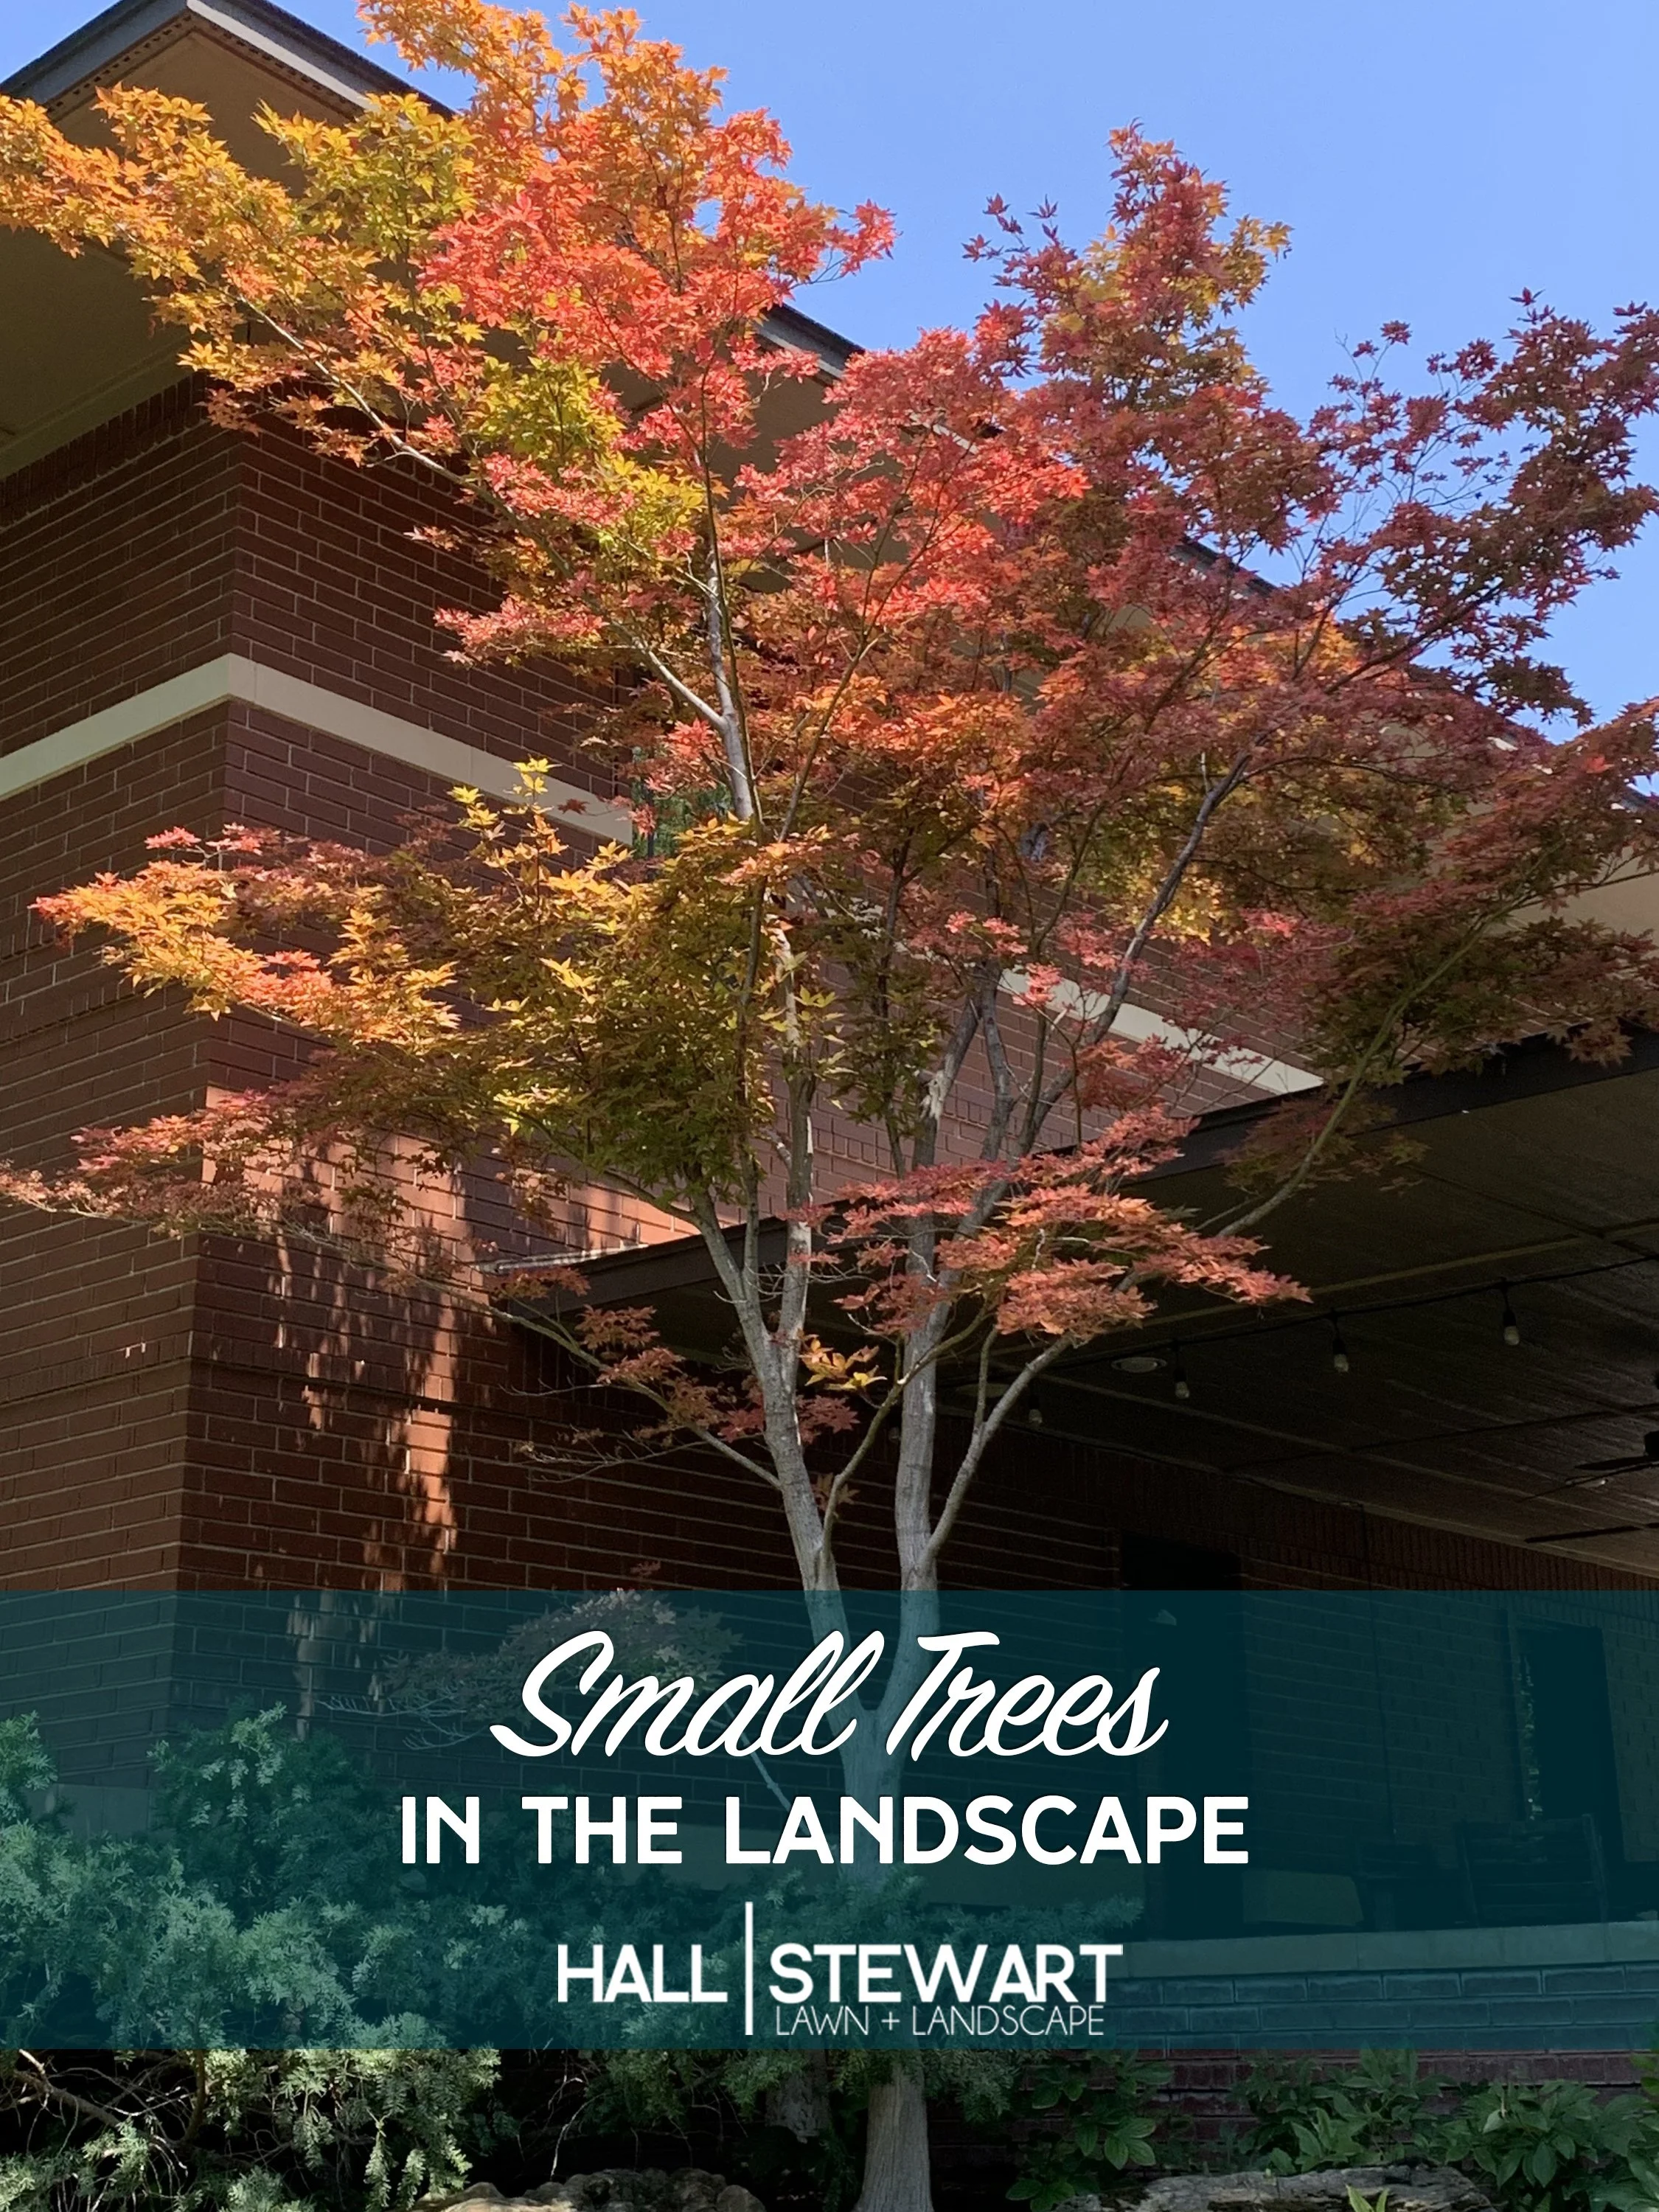
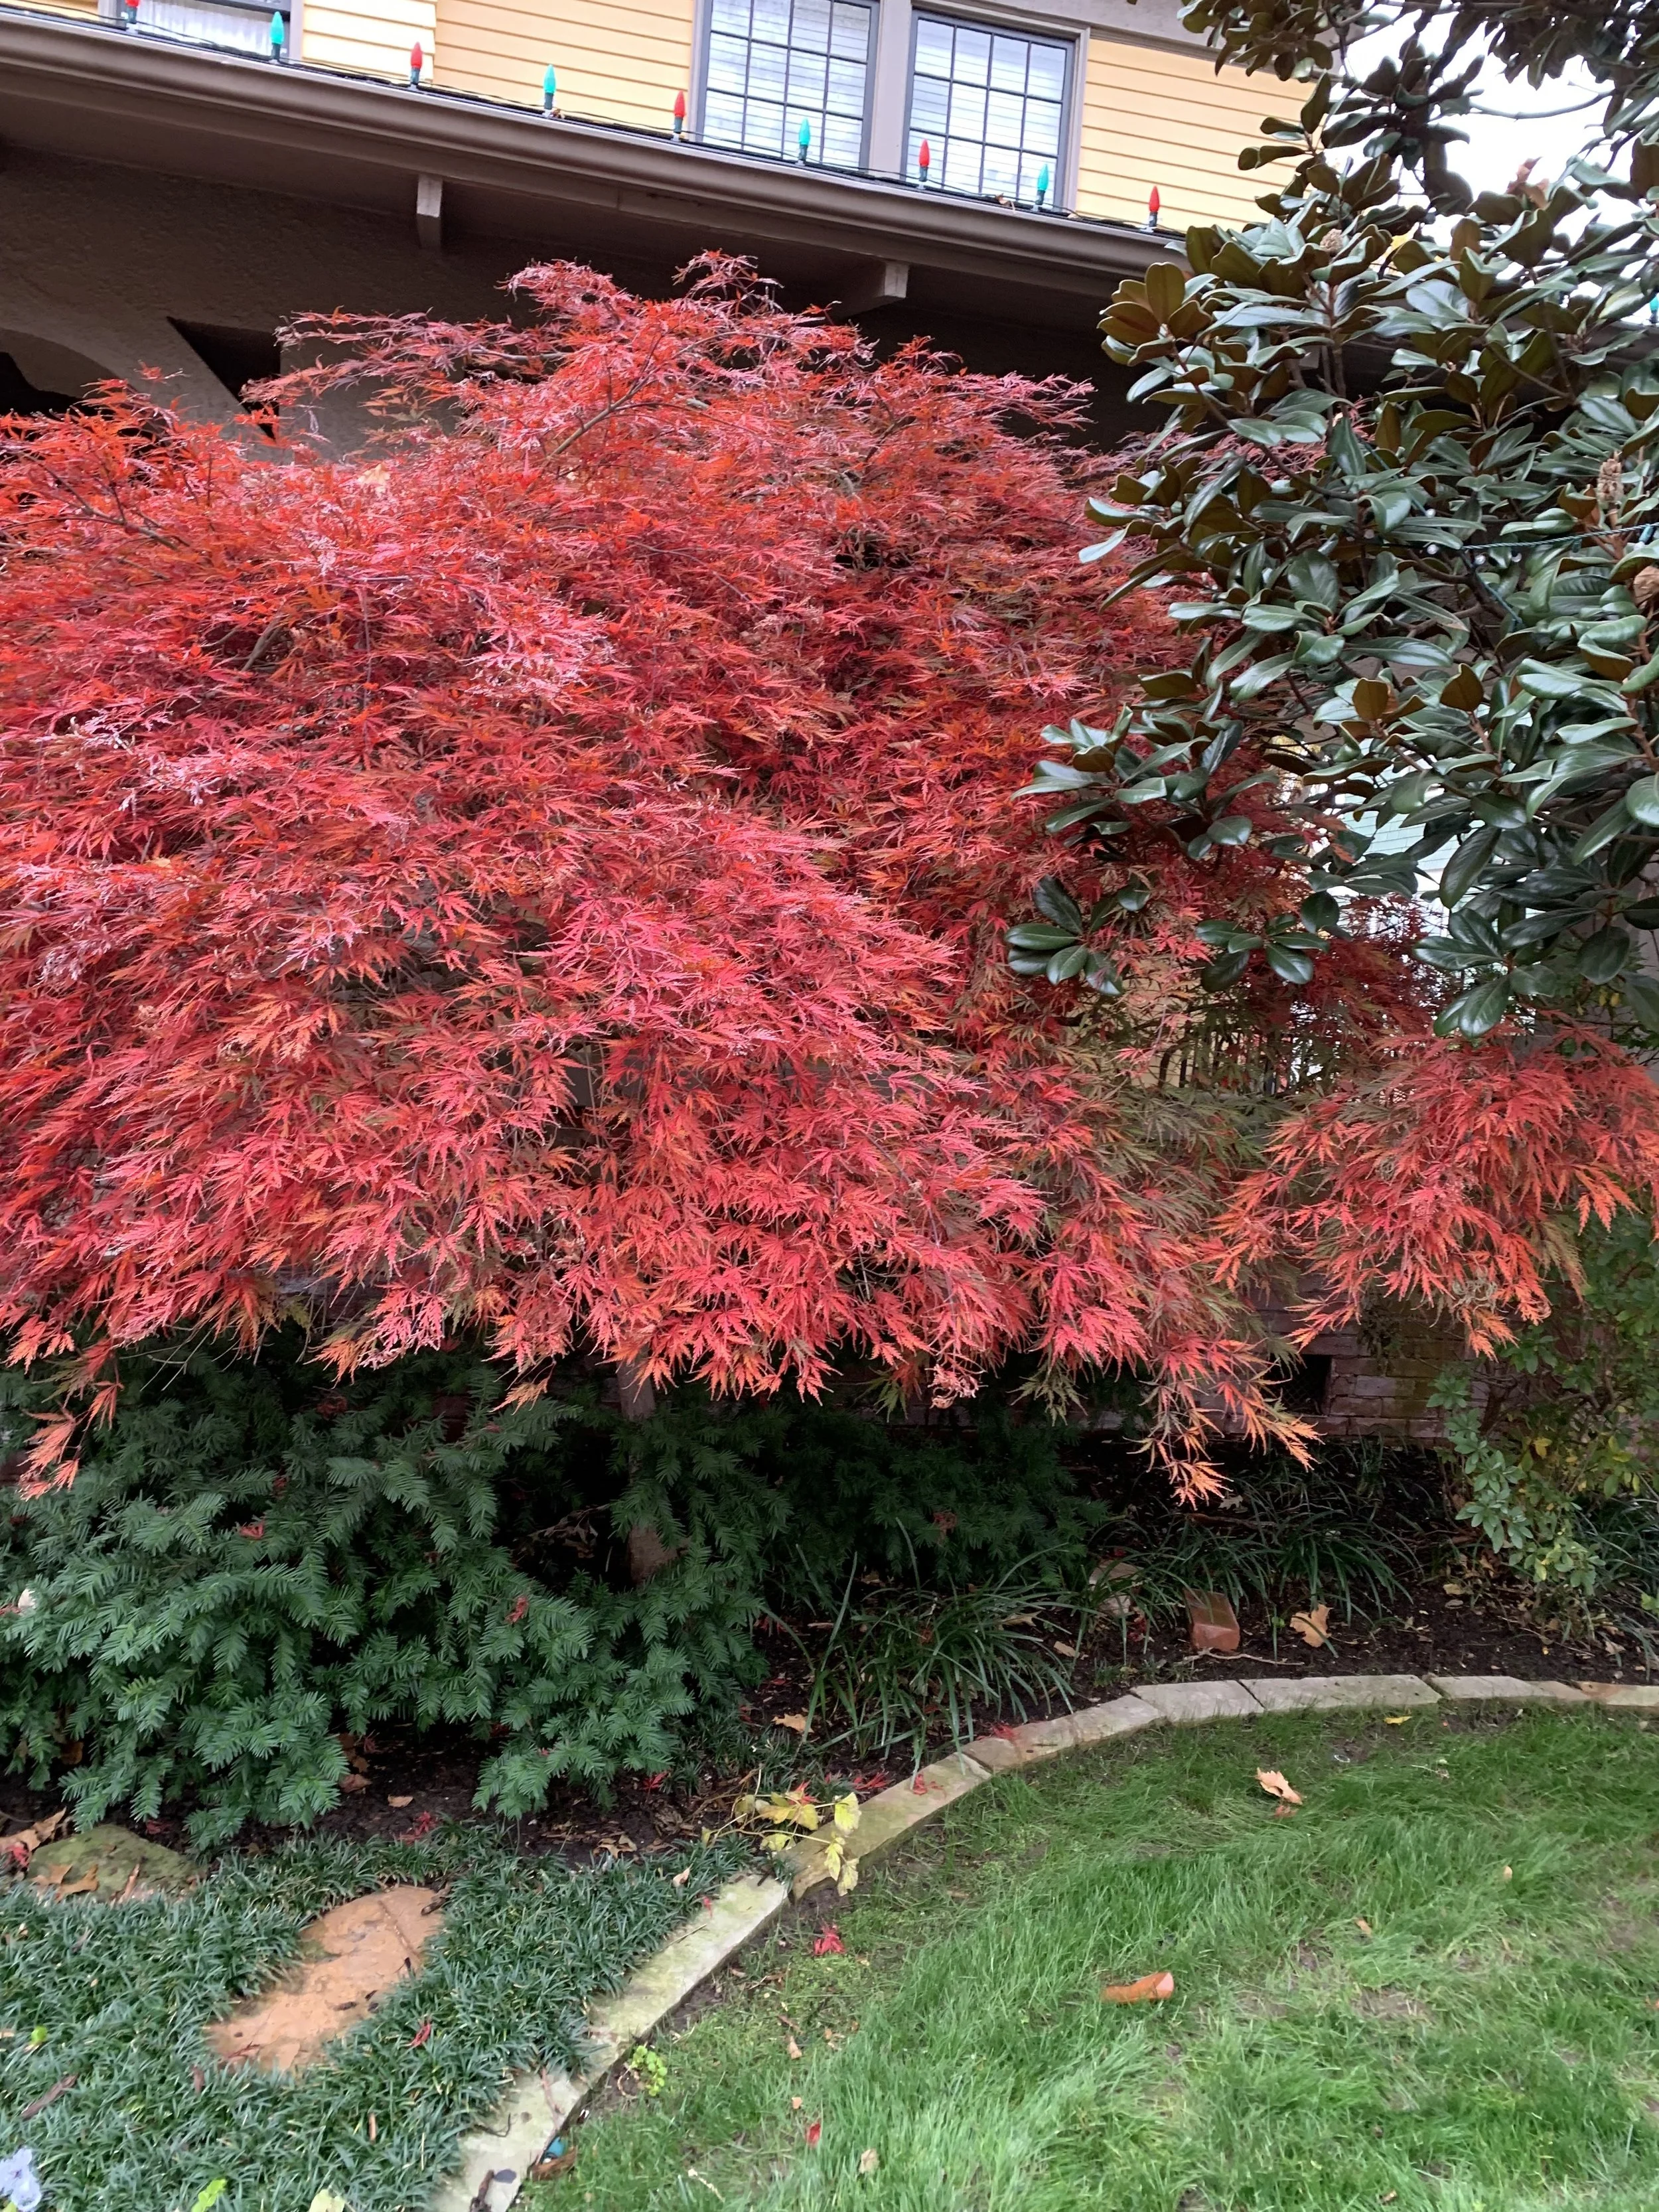
Japanese Maple

Japanese Maple
Japanese Maple – A favorite small tree for the north or east side of a house. There are weeping, upright, and spreading varieties. Varieties with red leaves, purple leaves, green leaves, and yellow leaves. Their color and texture create interest in any shady to dappled sun area. 10-25’ high and wide.
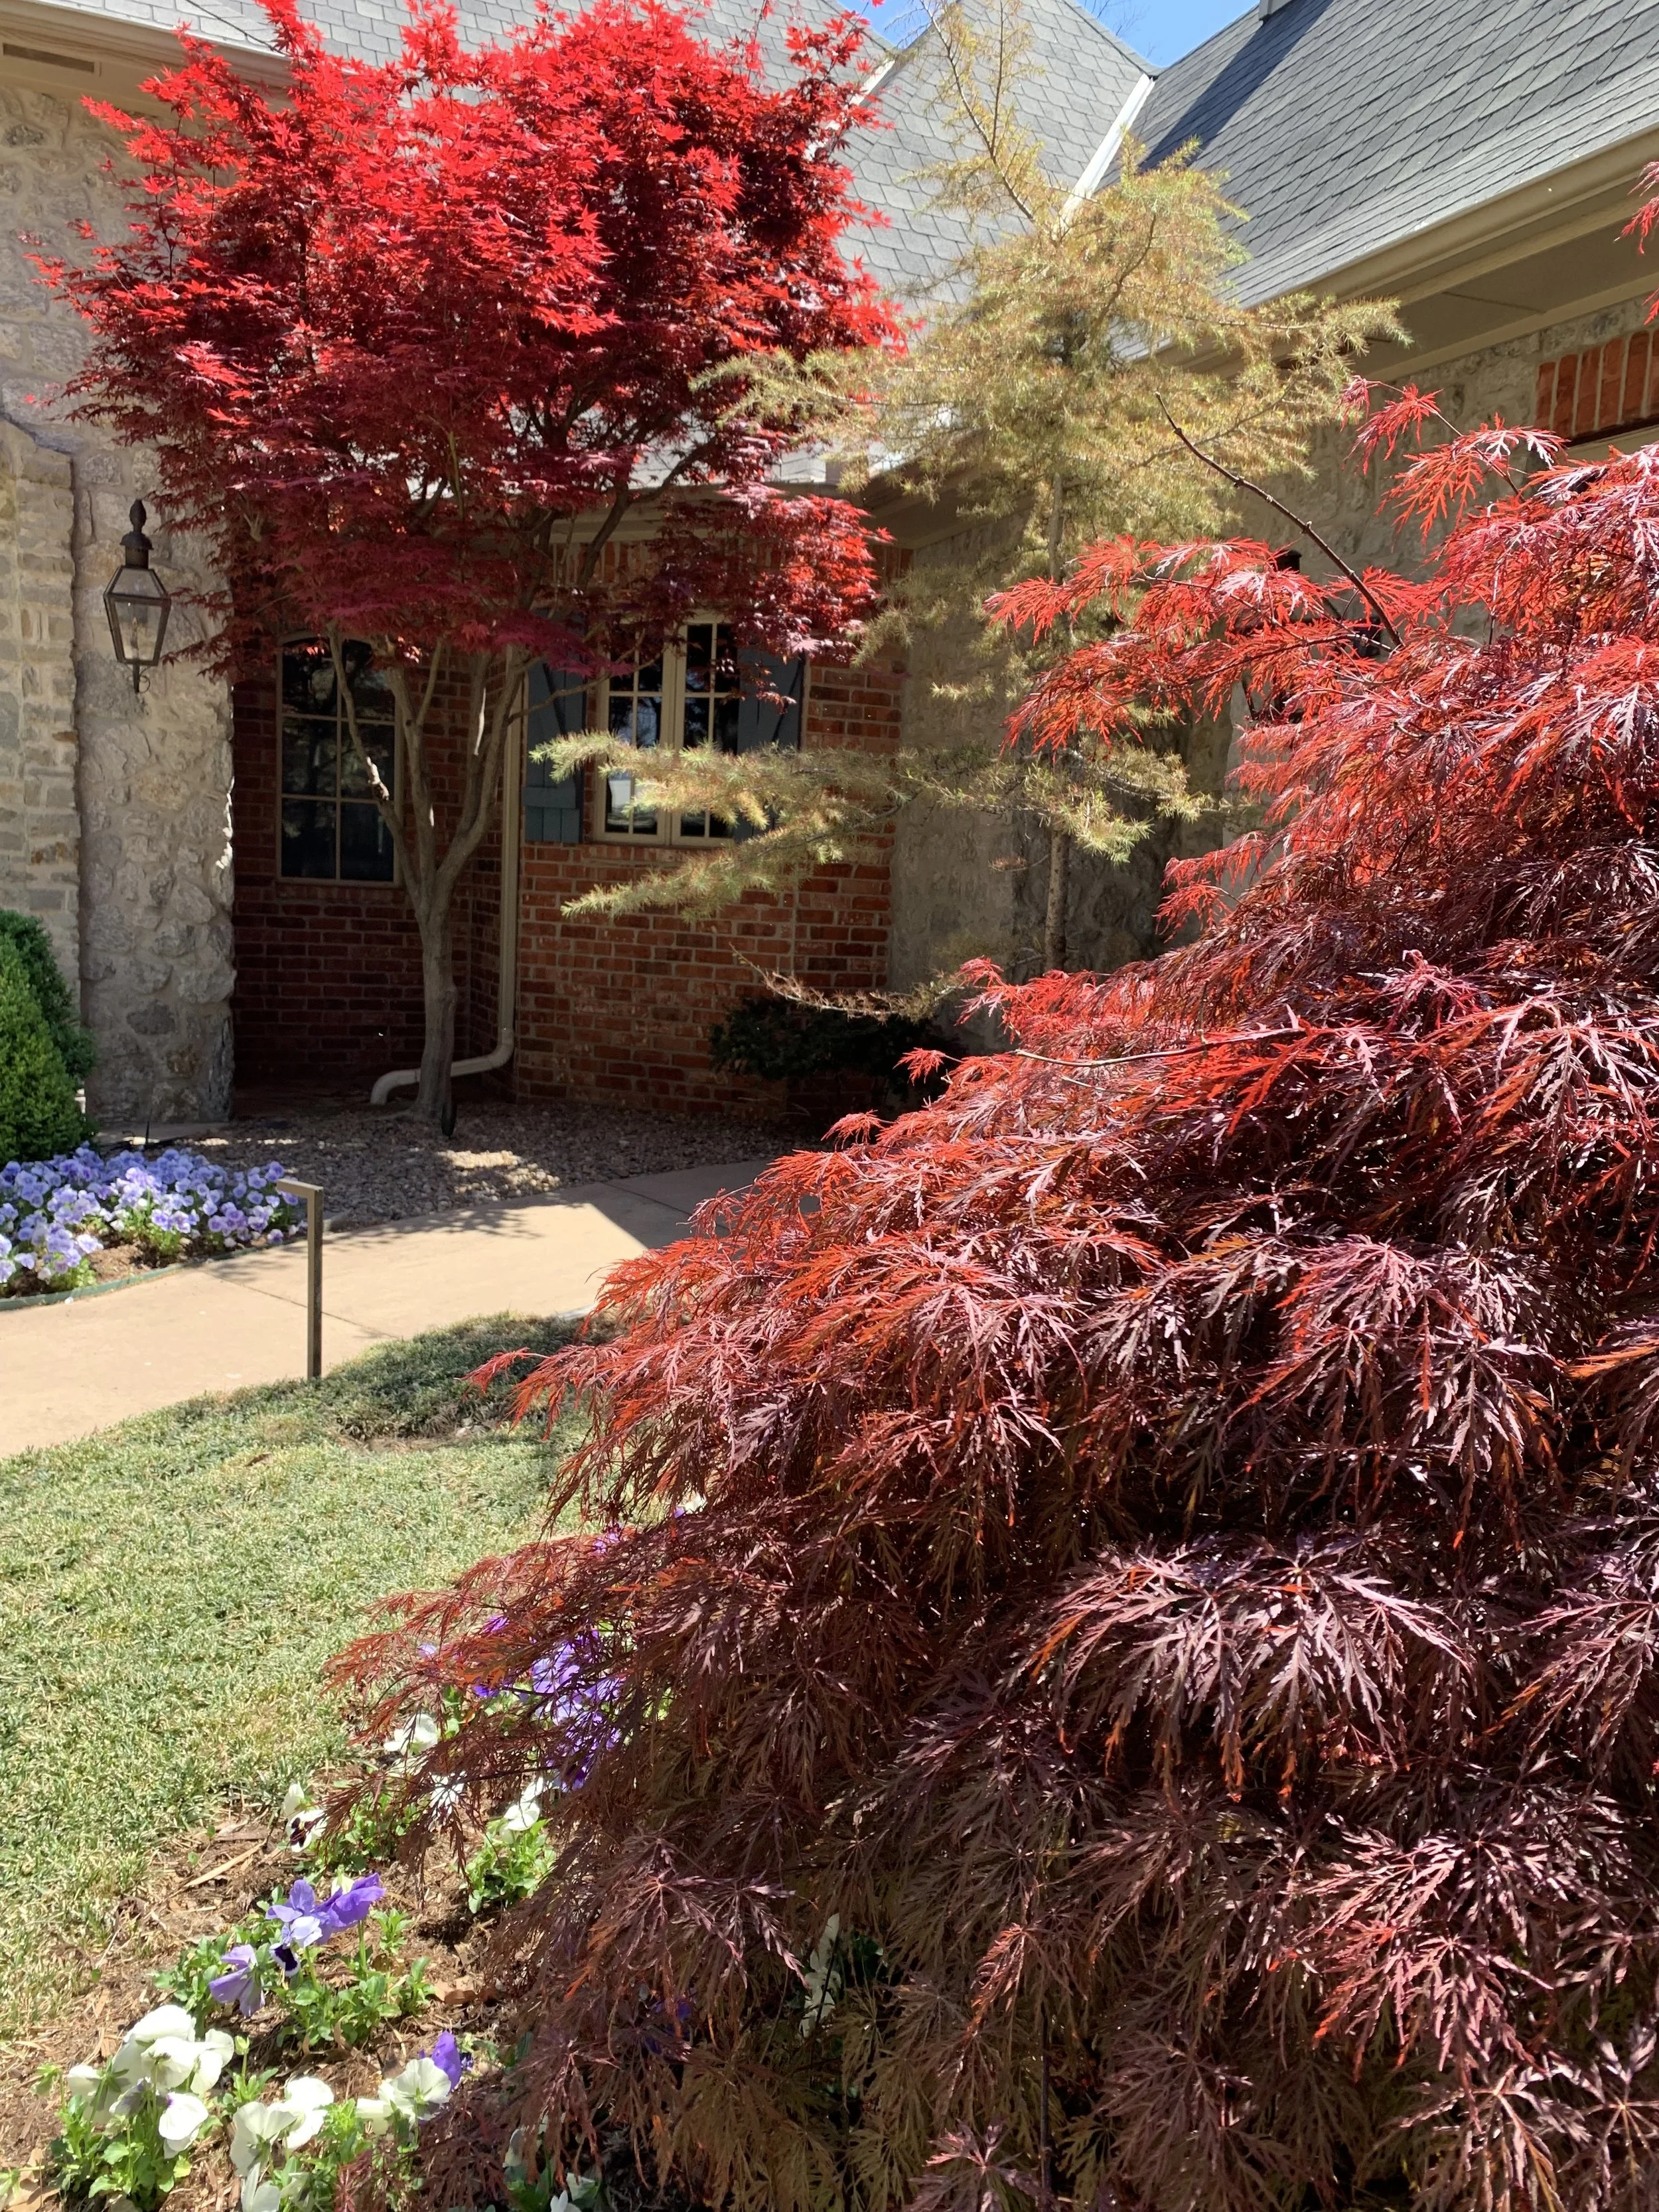
Japanese Maple
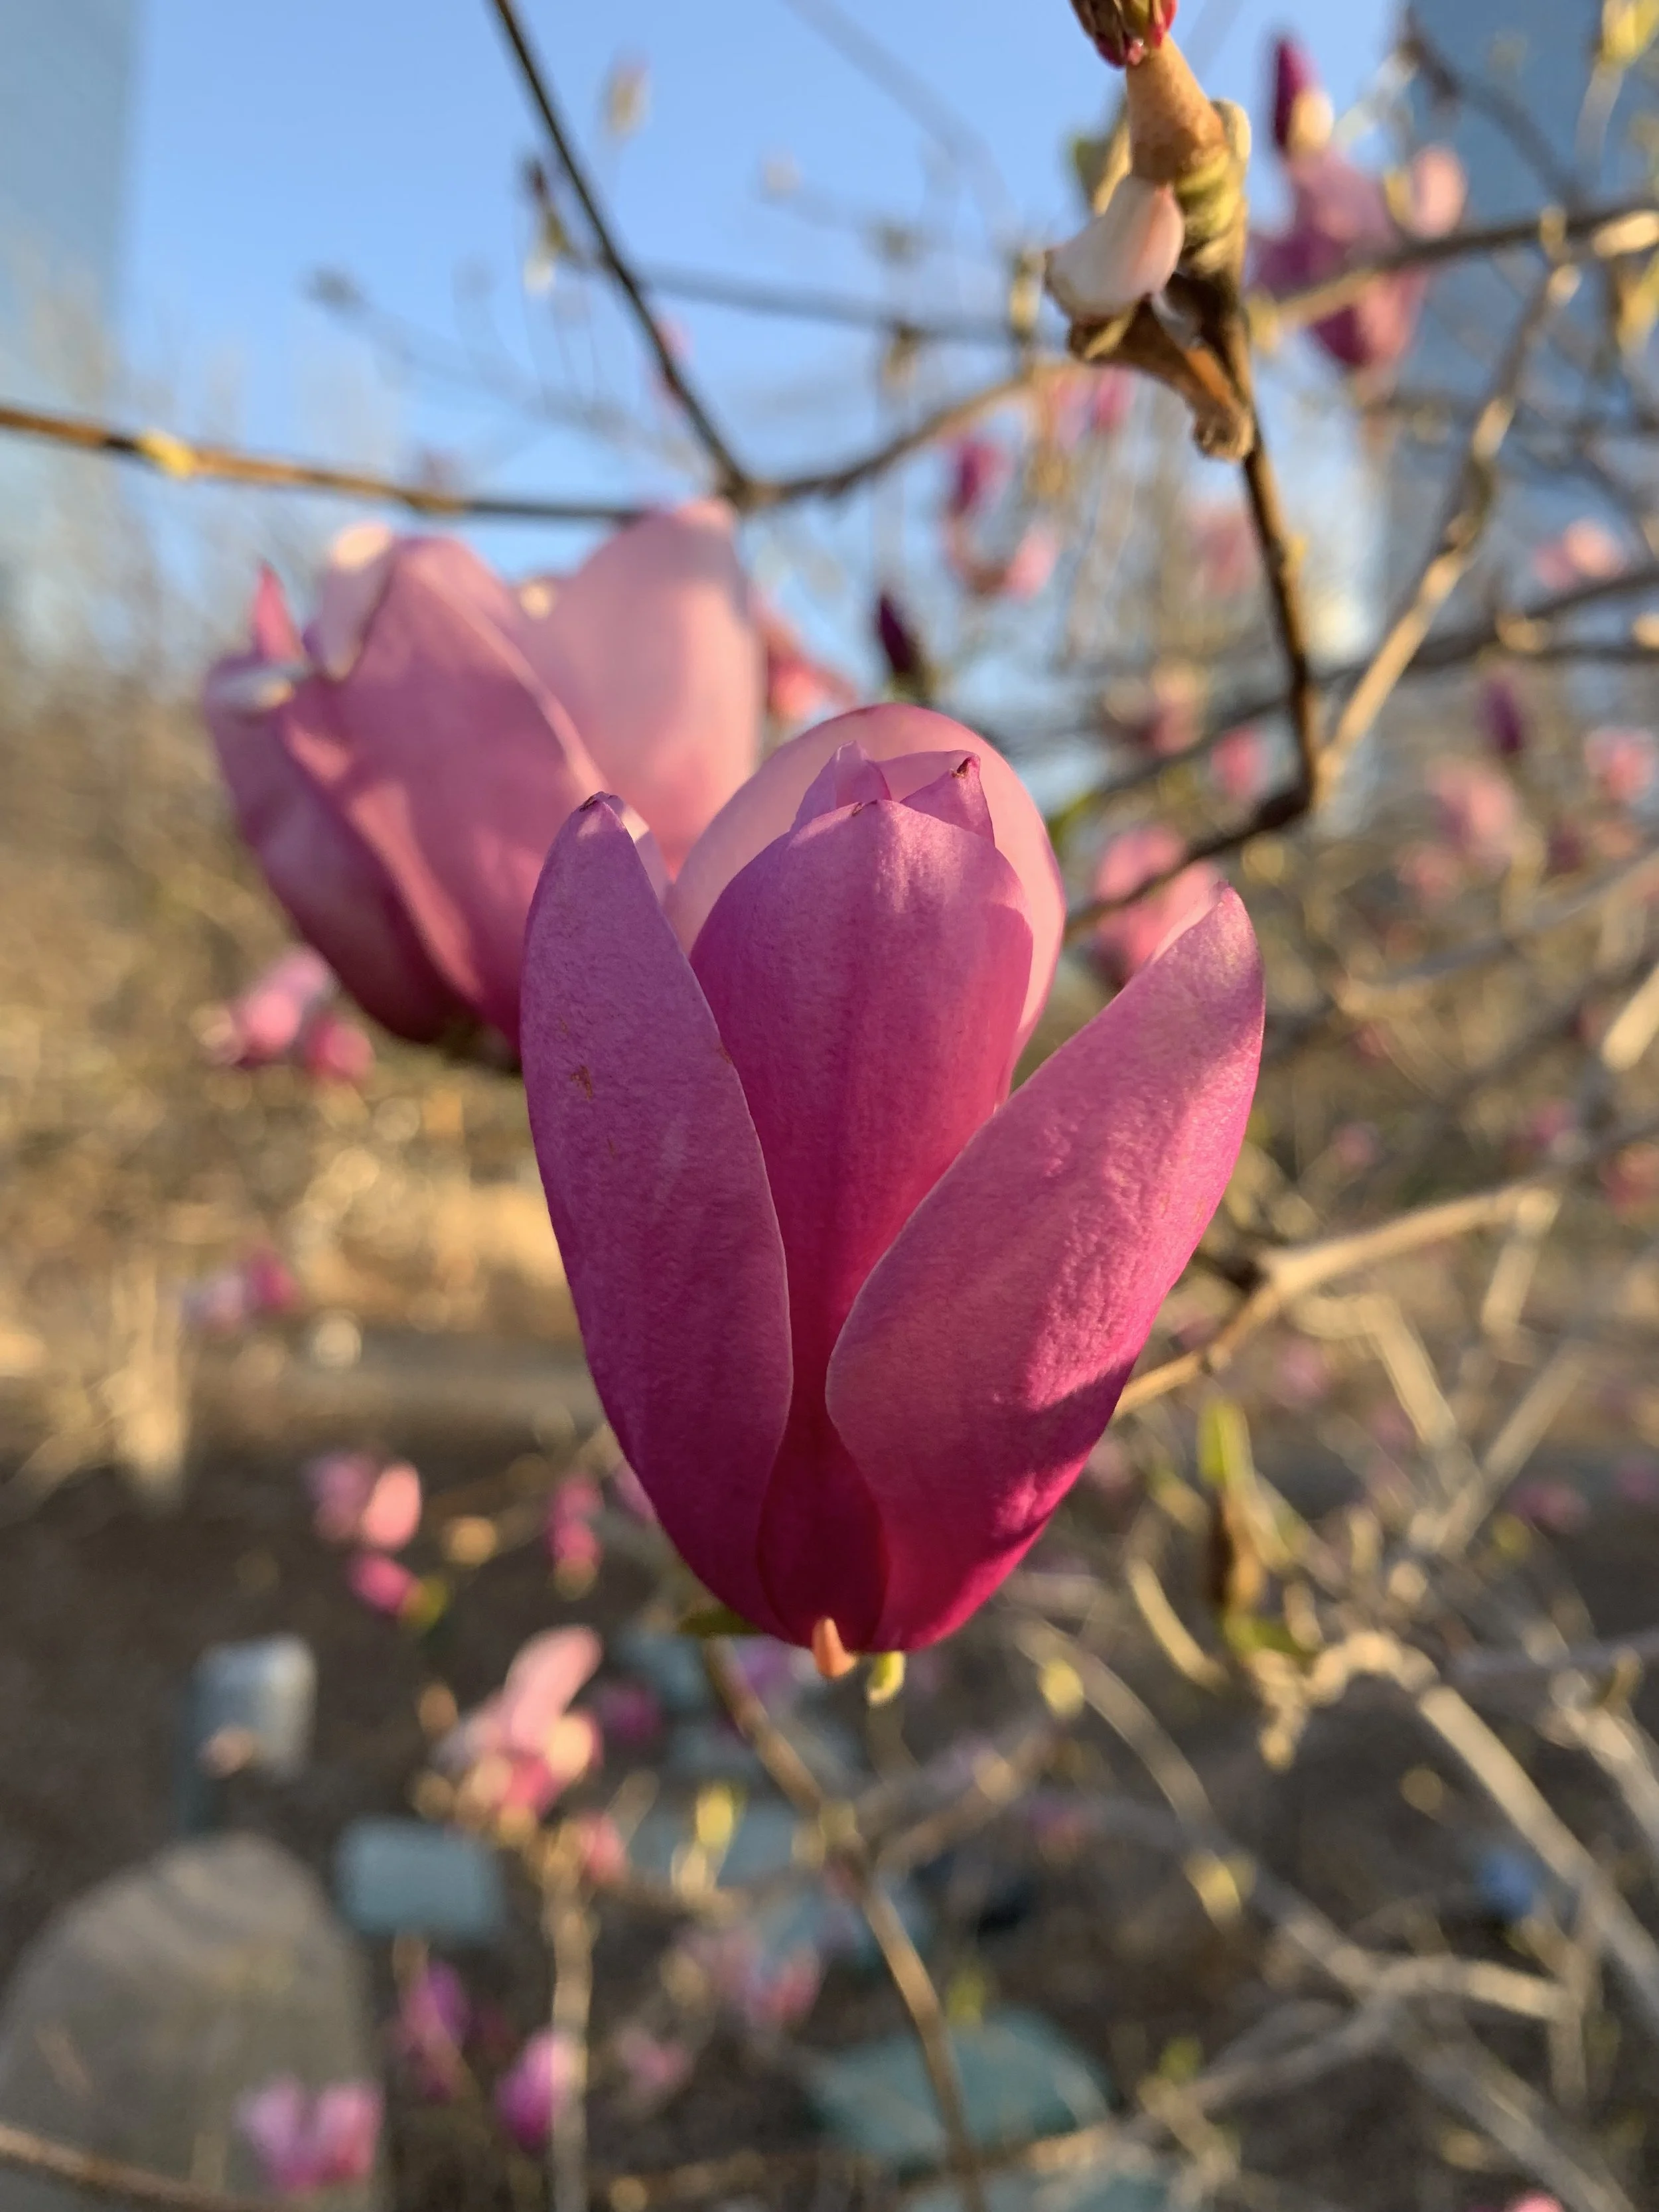
Saucer Magnolia
Saucer Magnolia – Large saucer-shaped blooms of white, pink, or purple in the early spring on spreading multi-trunk branches. 20’ tall and 20’ wide.
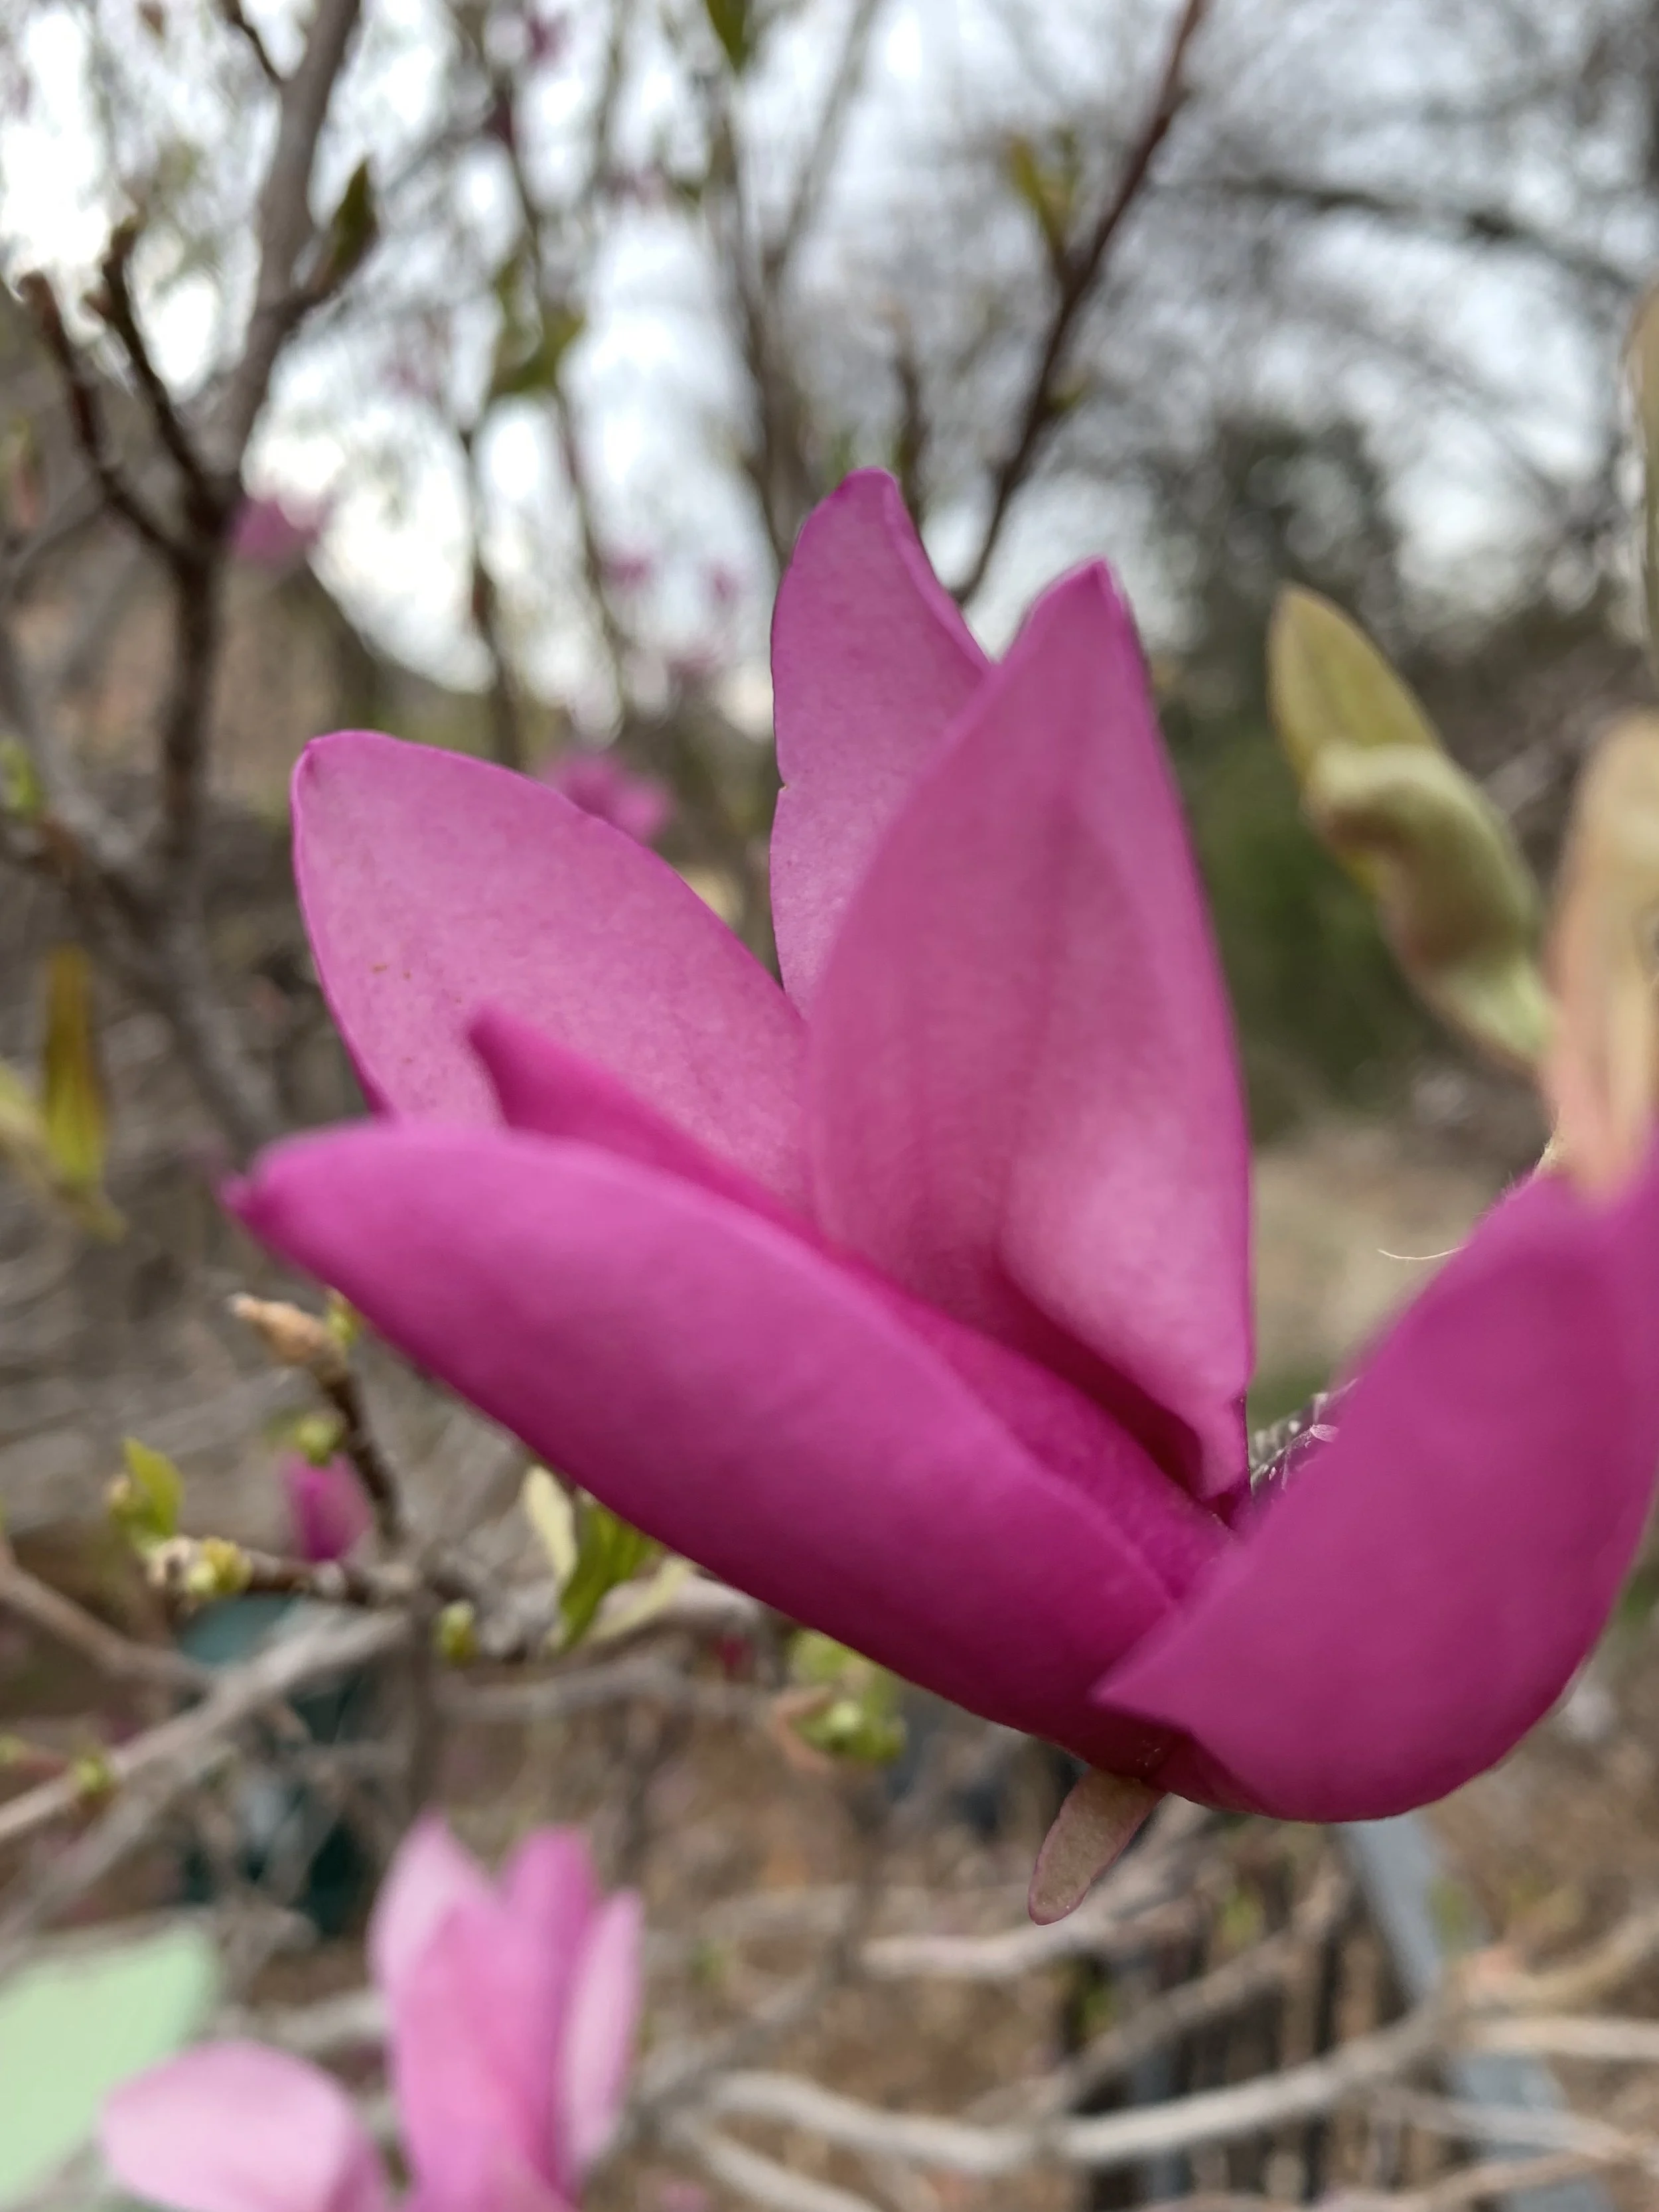
Saucer Magnolia
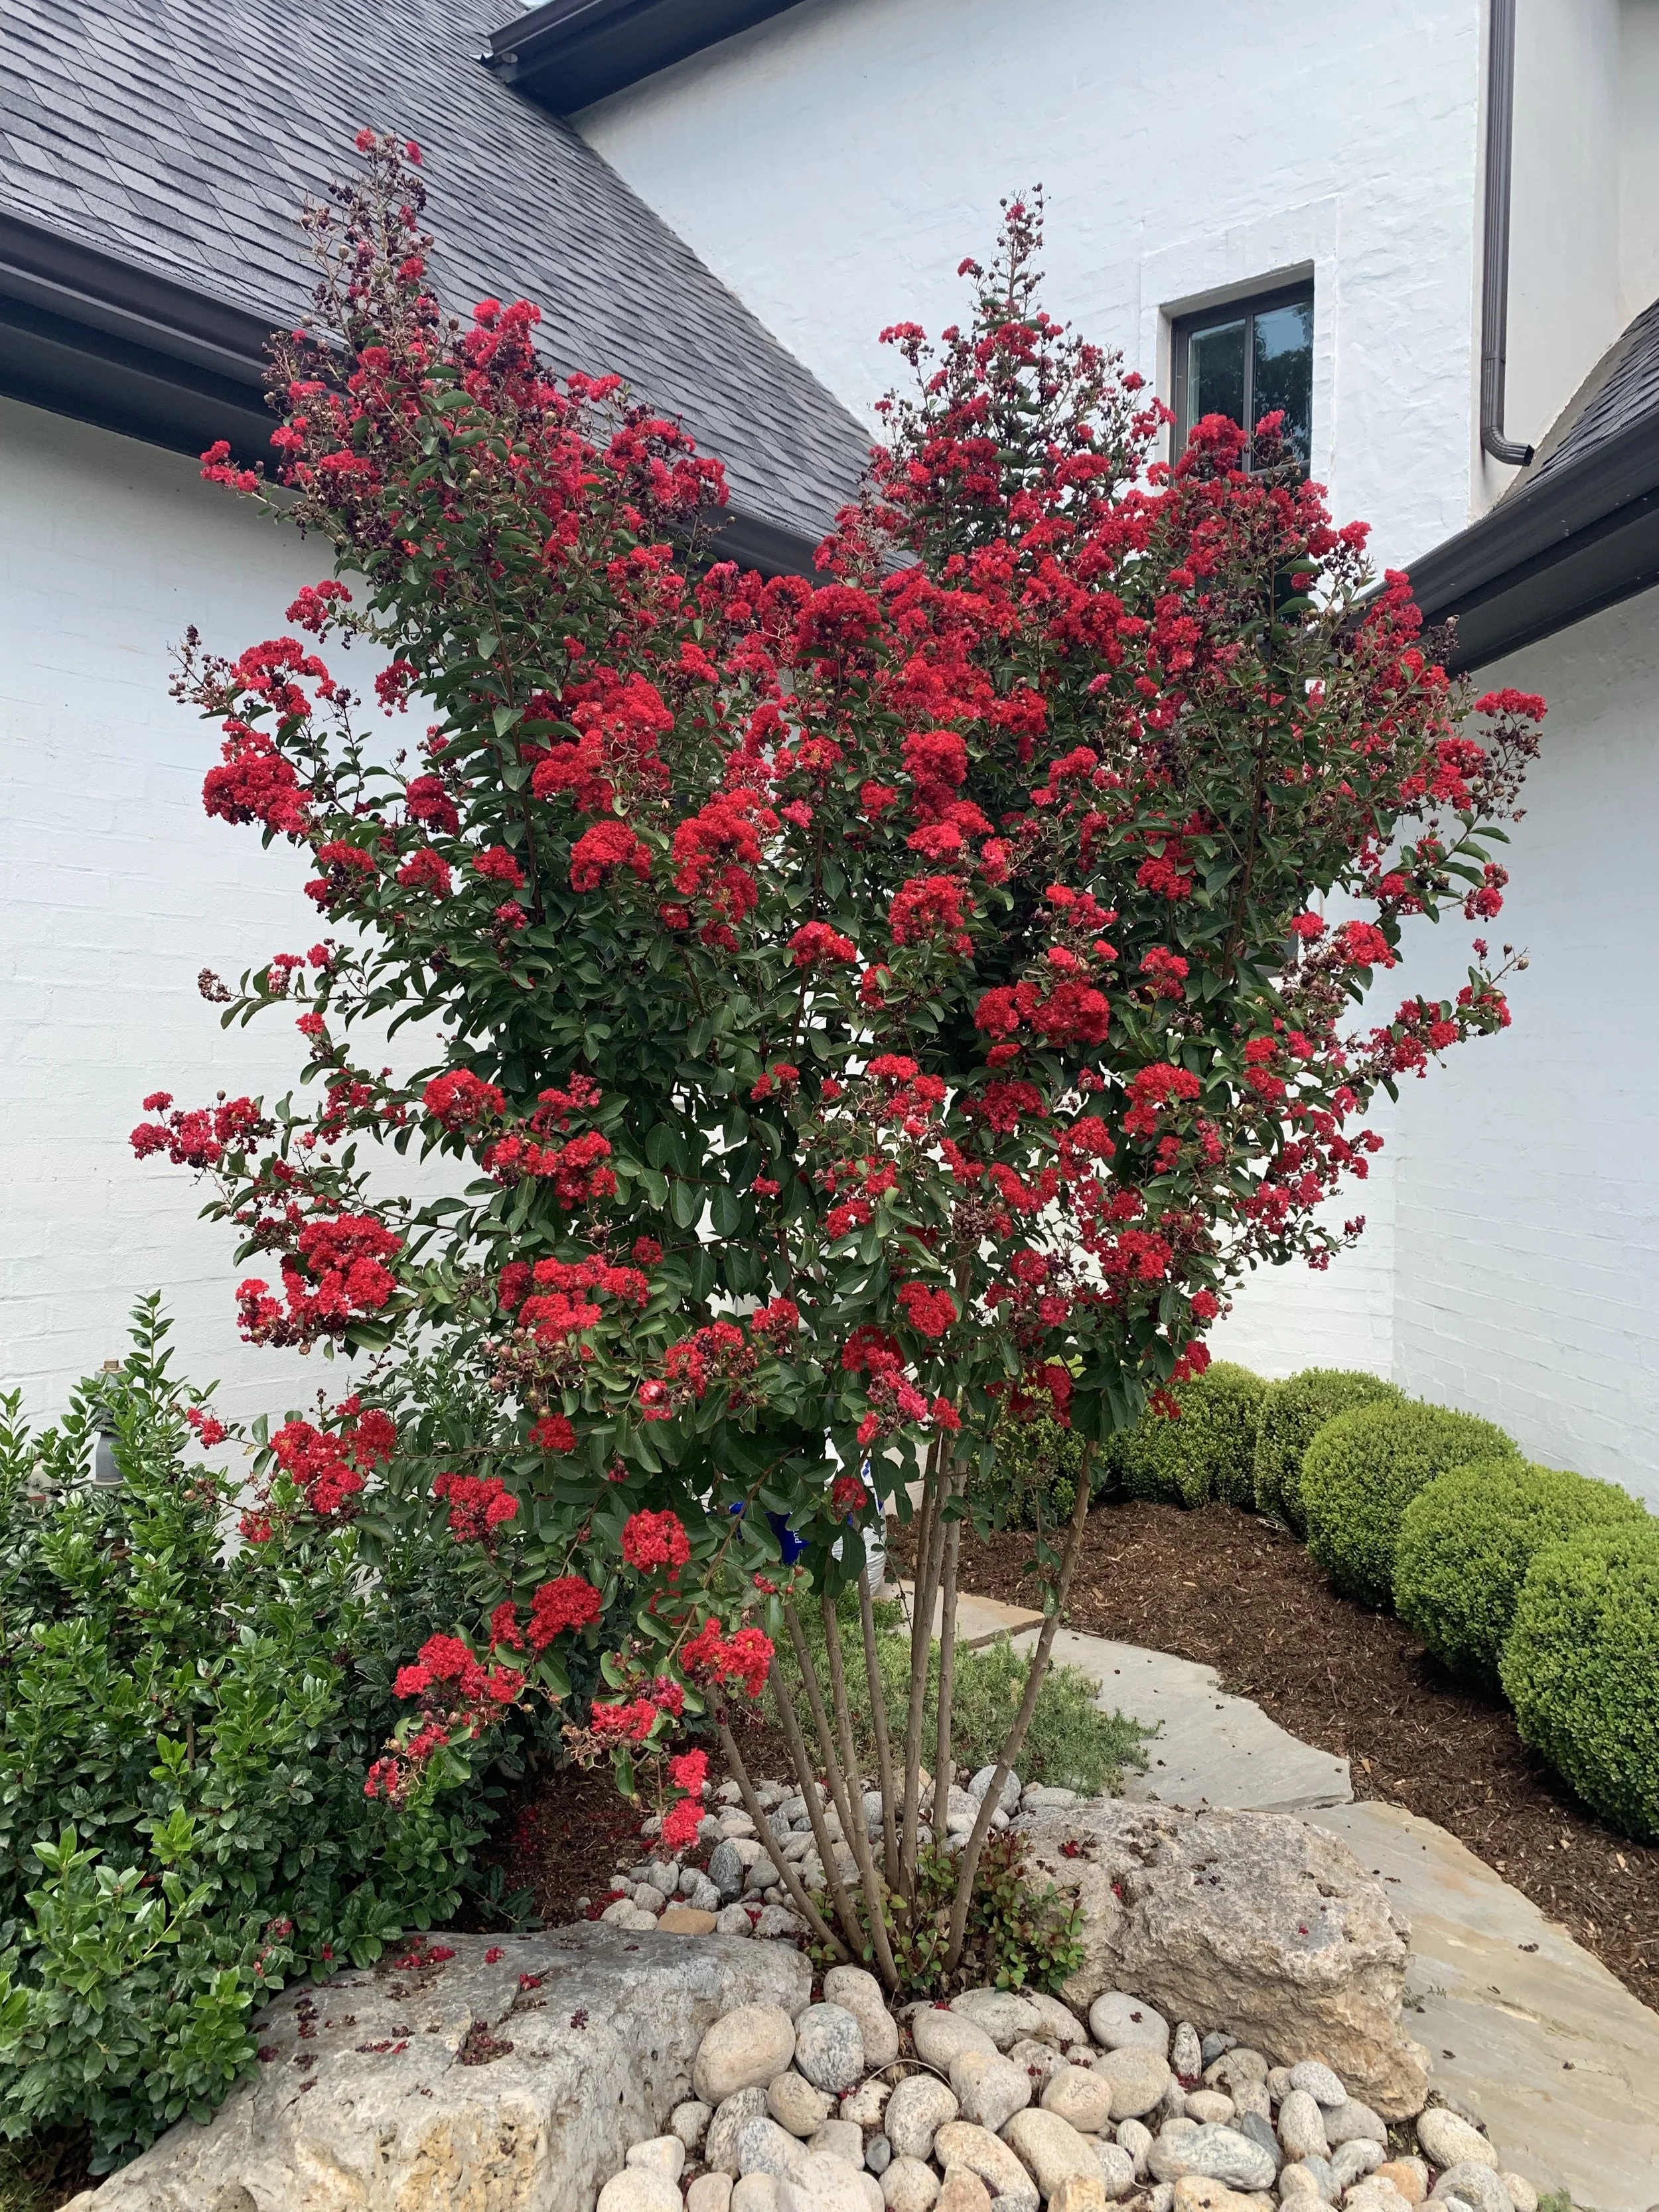
Crape Myrtle
Crape Myrtle – Our longest summer blooming plant with so many colors and growth habits to choose from there has to be one just right for any landscape. 12-30’ tall and 10-20’ wide.
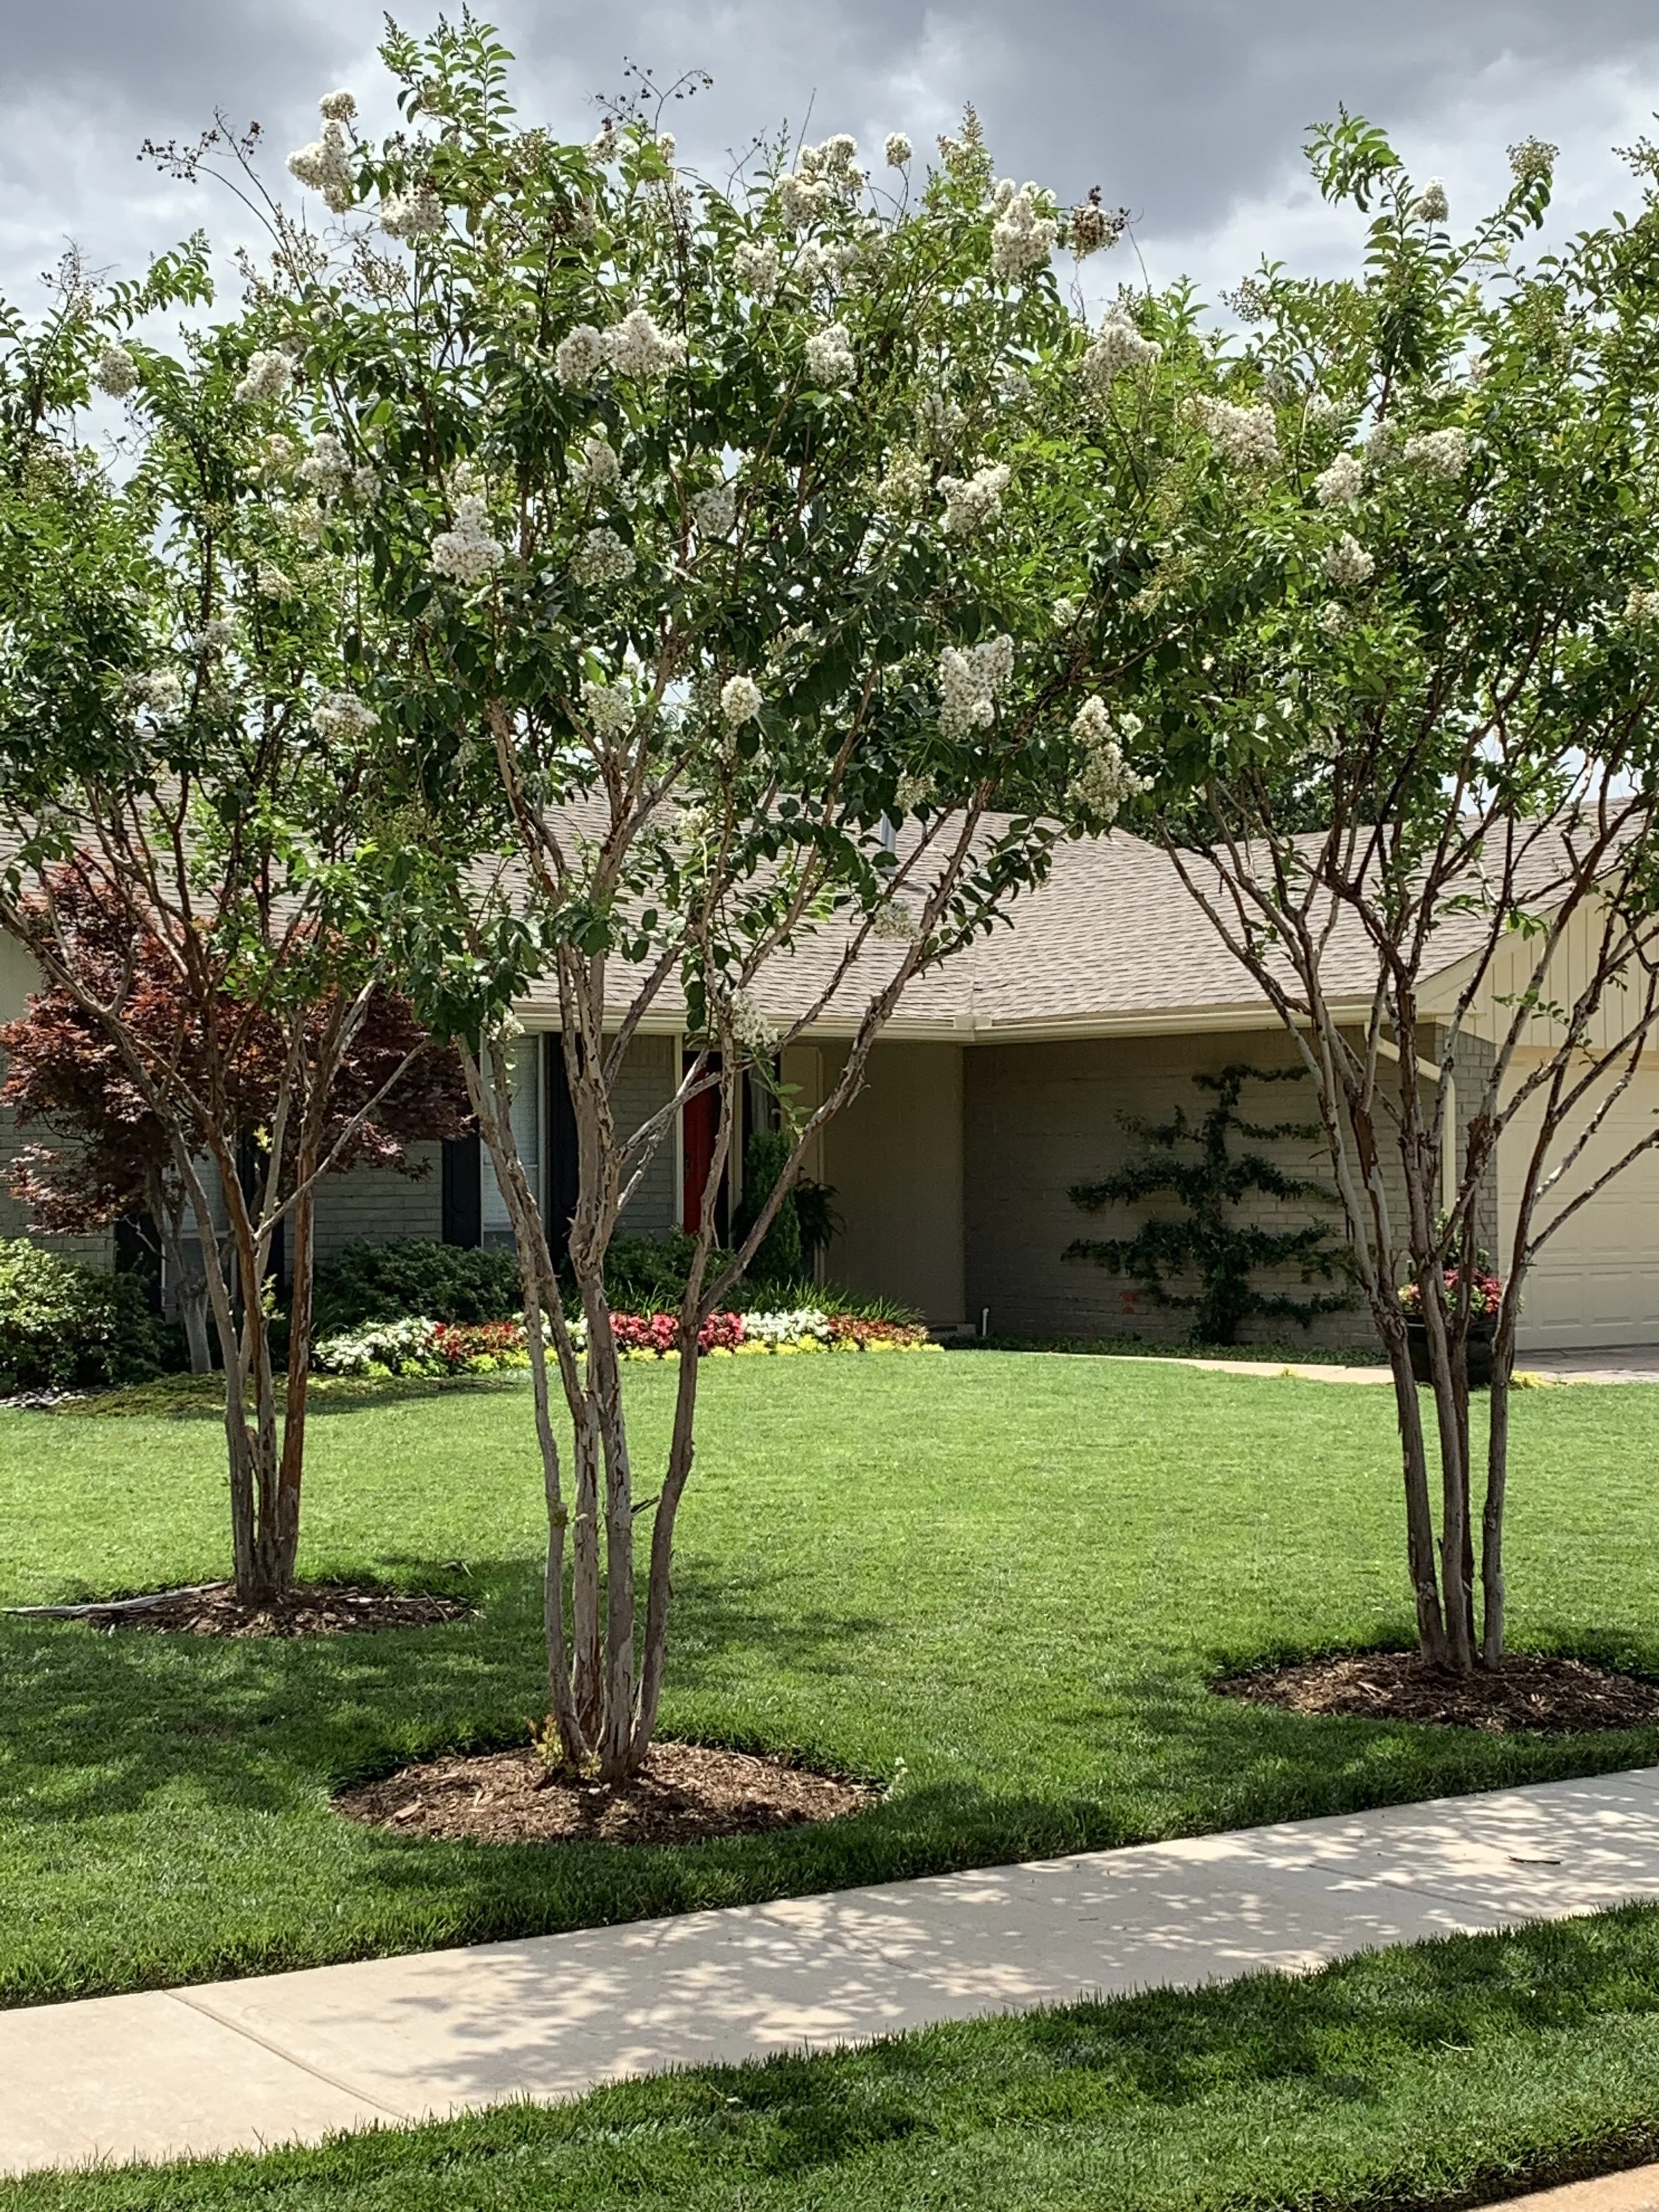
Crape Myrtle
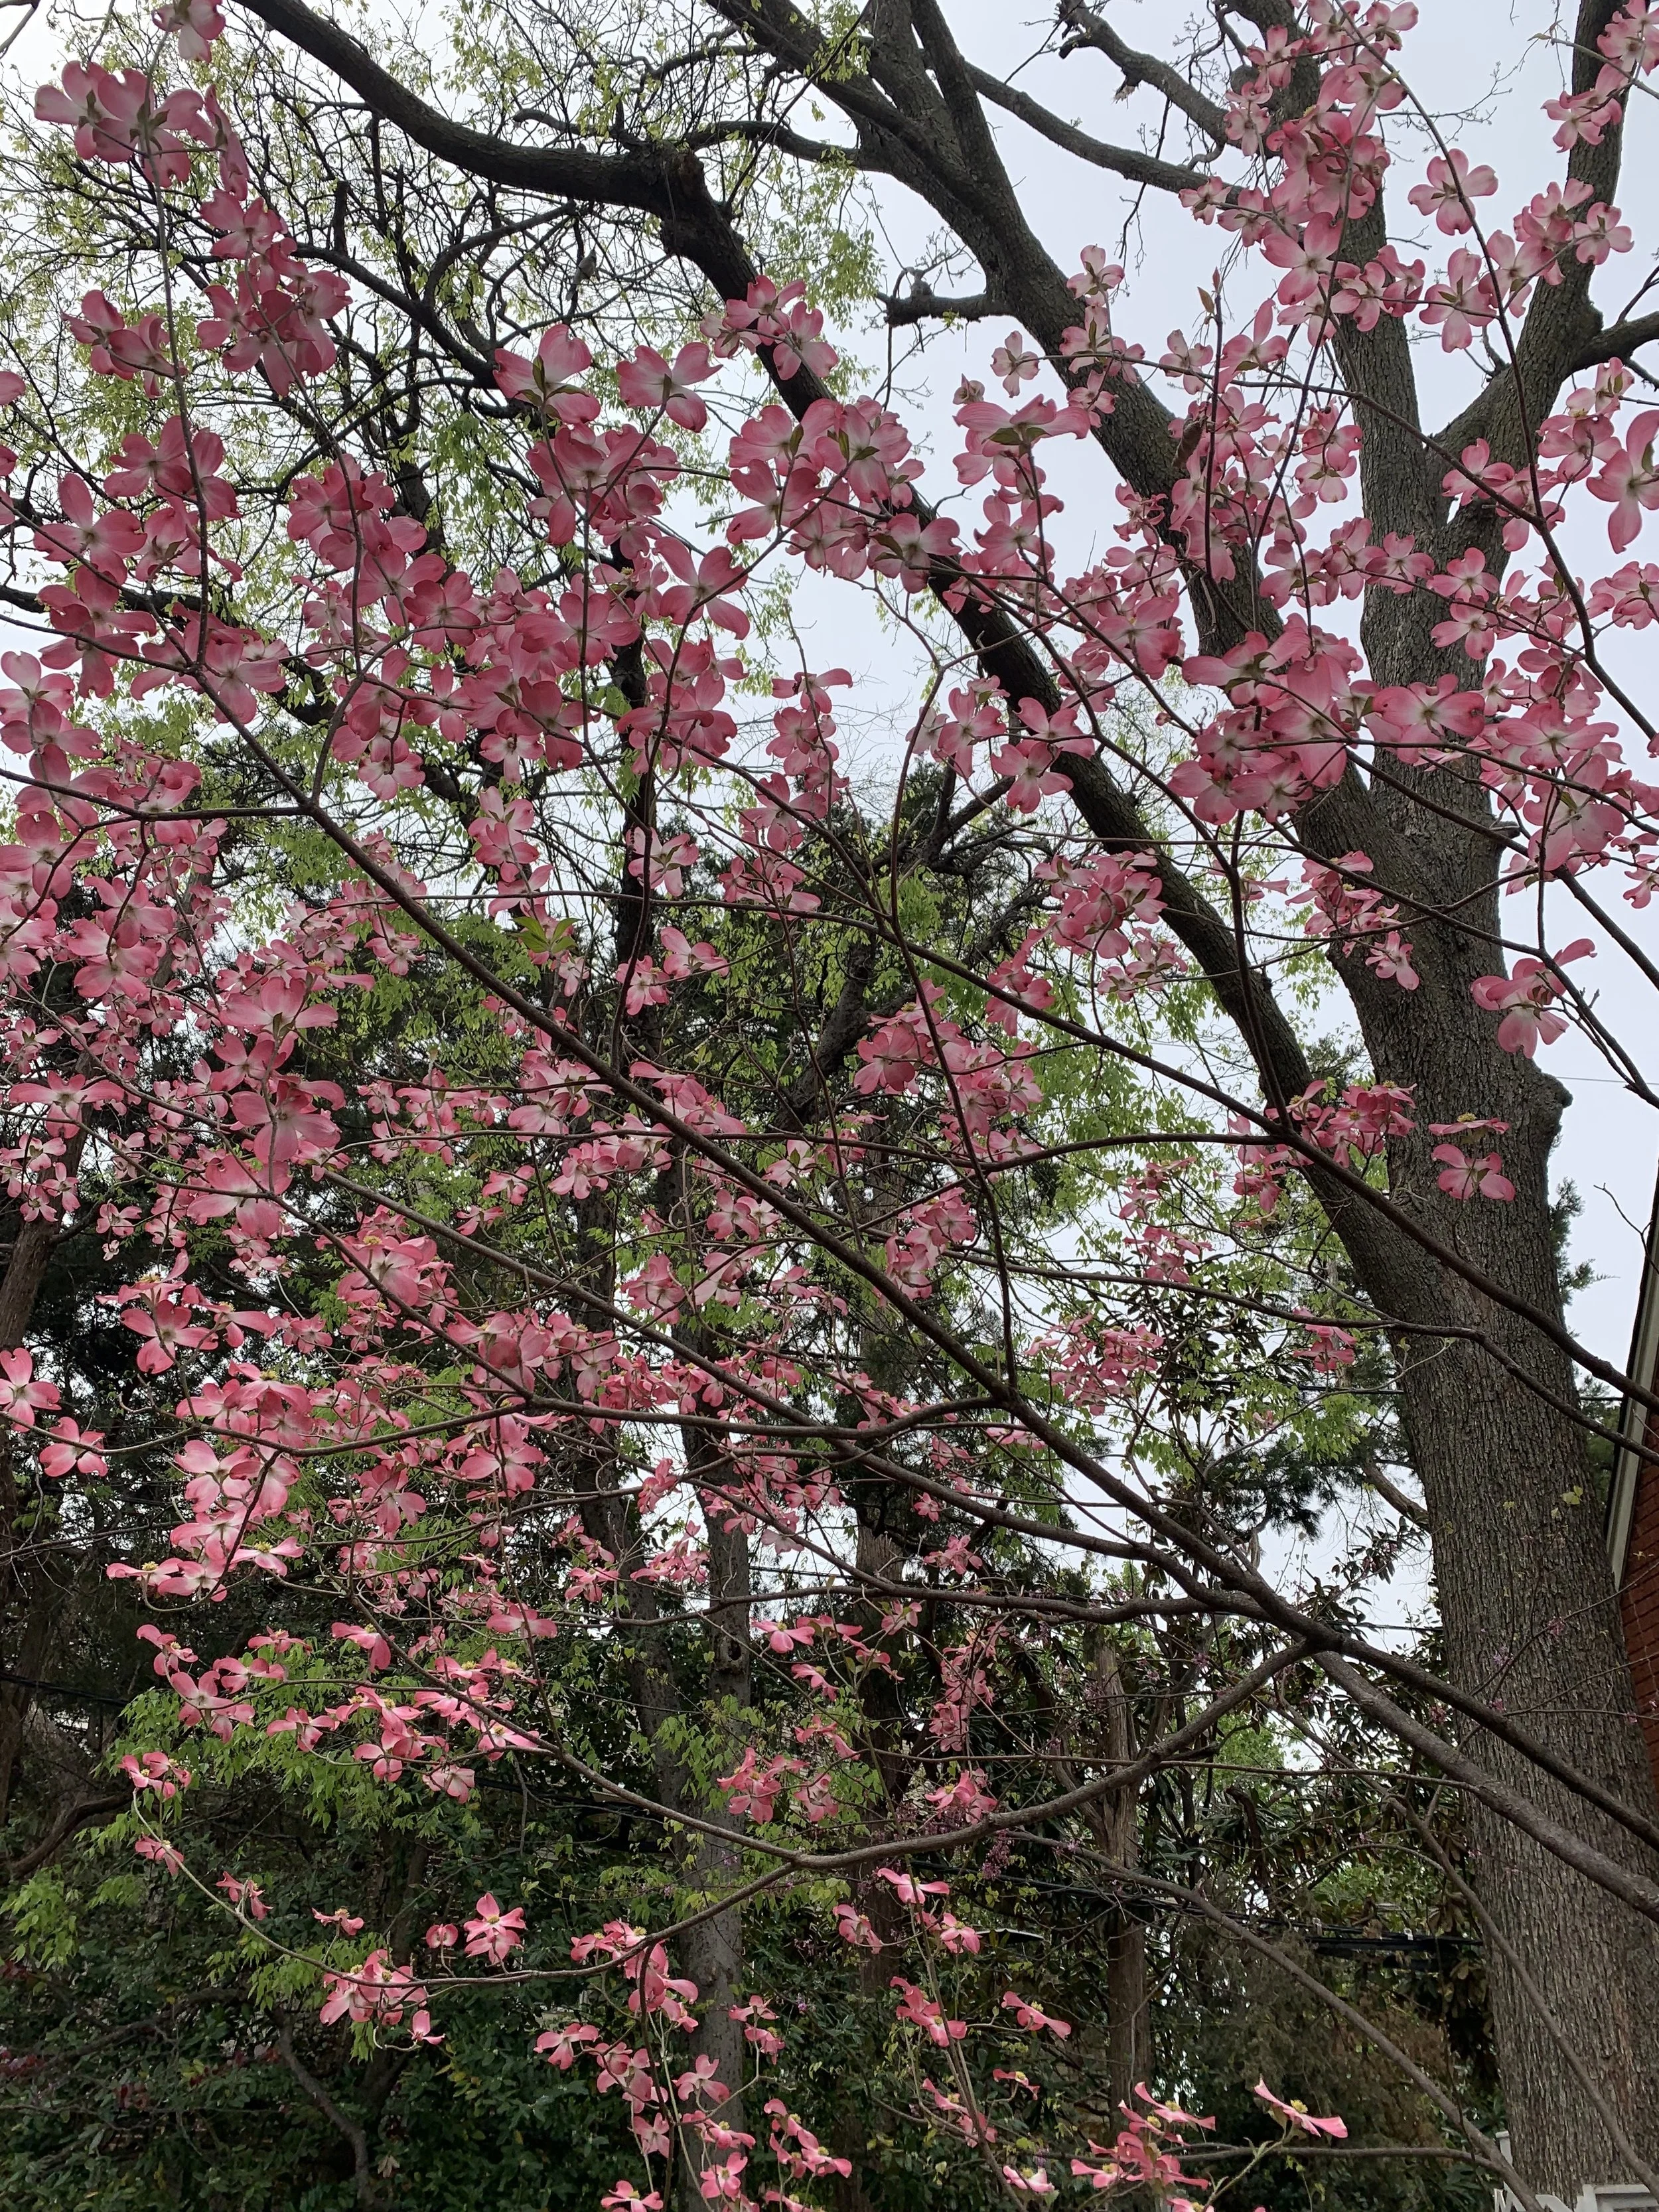
Dogwood
Dogwood – White or pink blooms in the late spring. Great for areas protected from the afternoon sun or as an understory accent tree. 15’-20’ tall and wide.
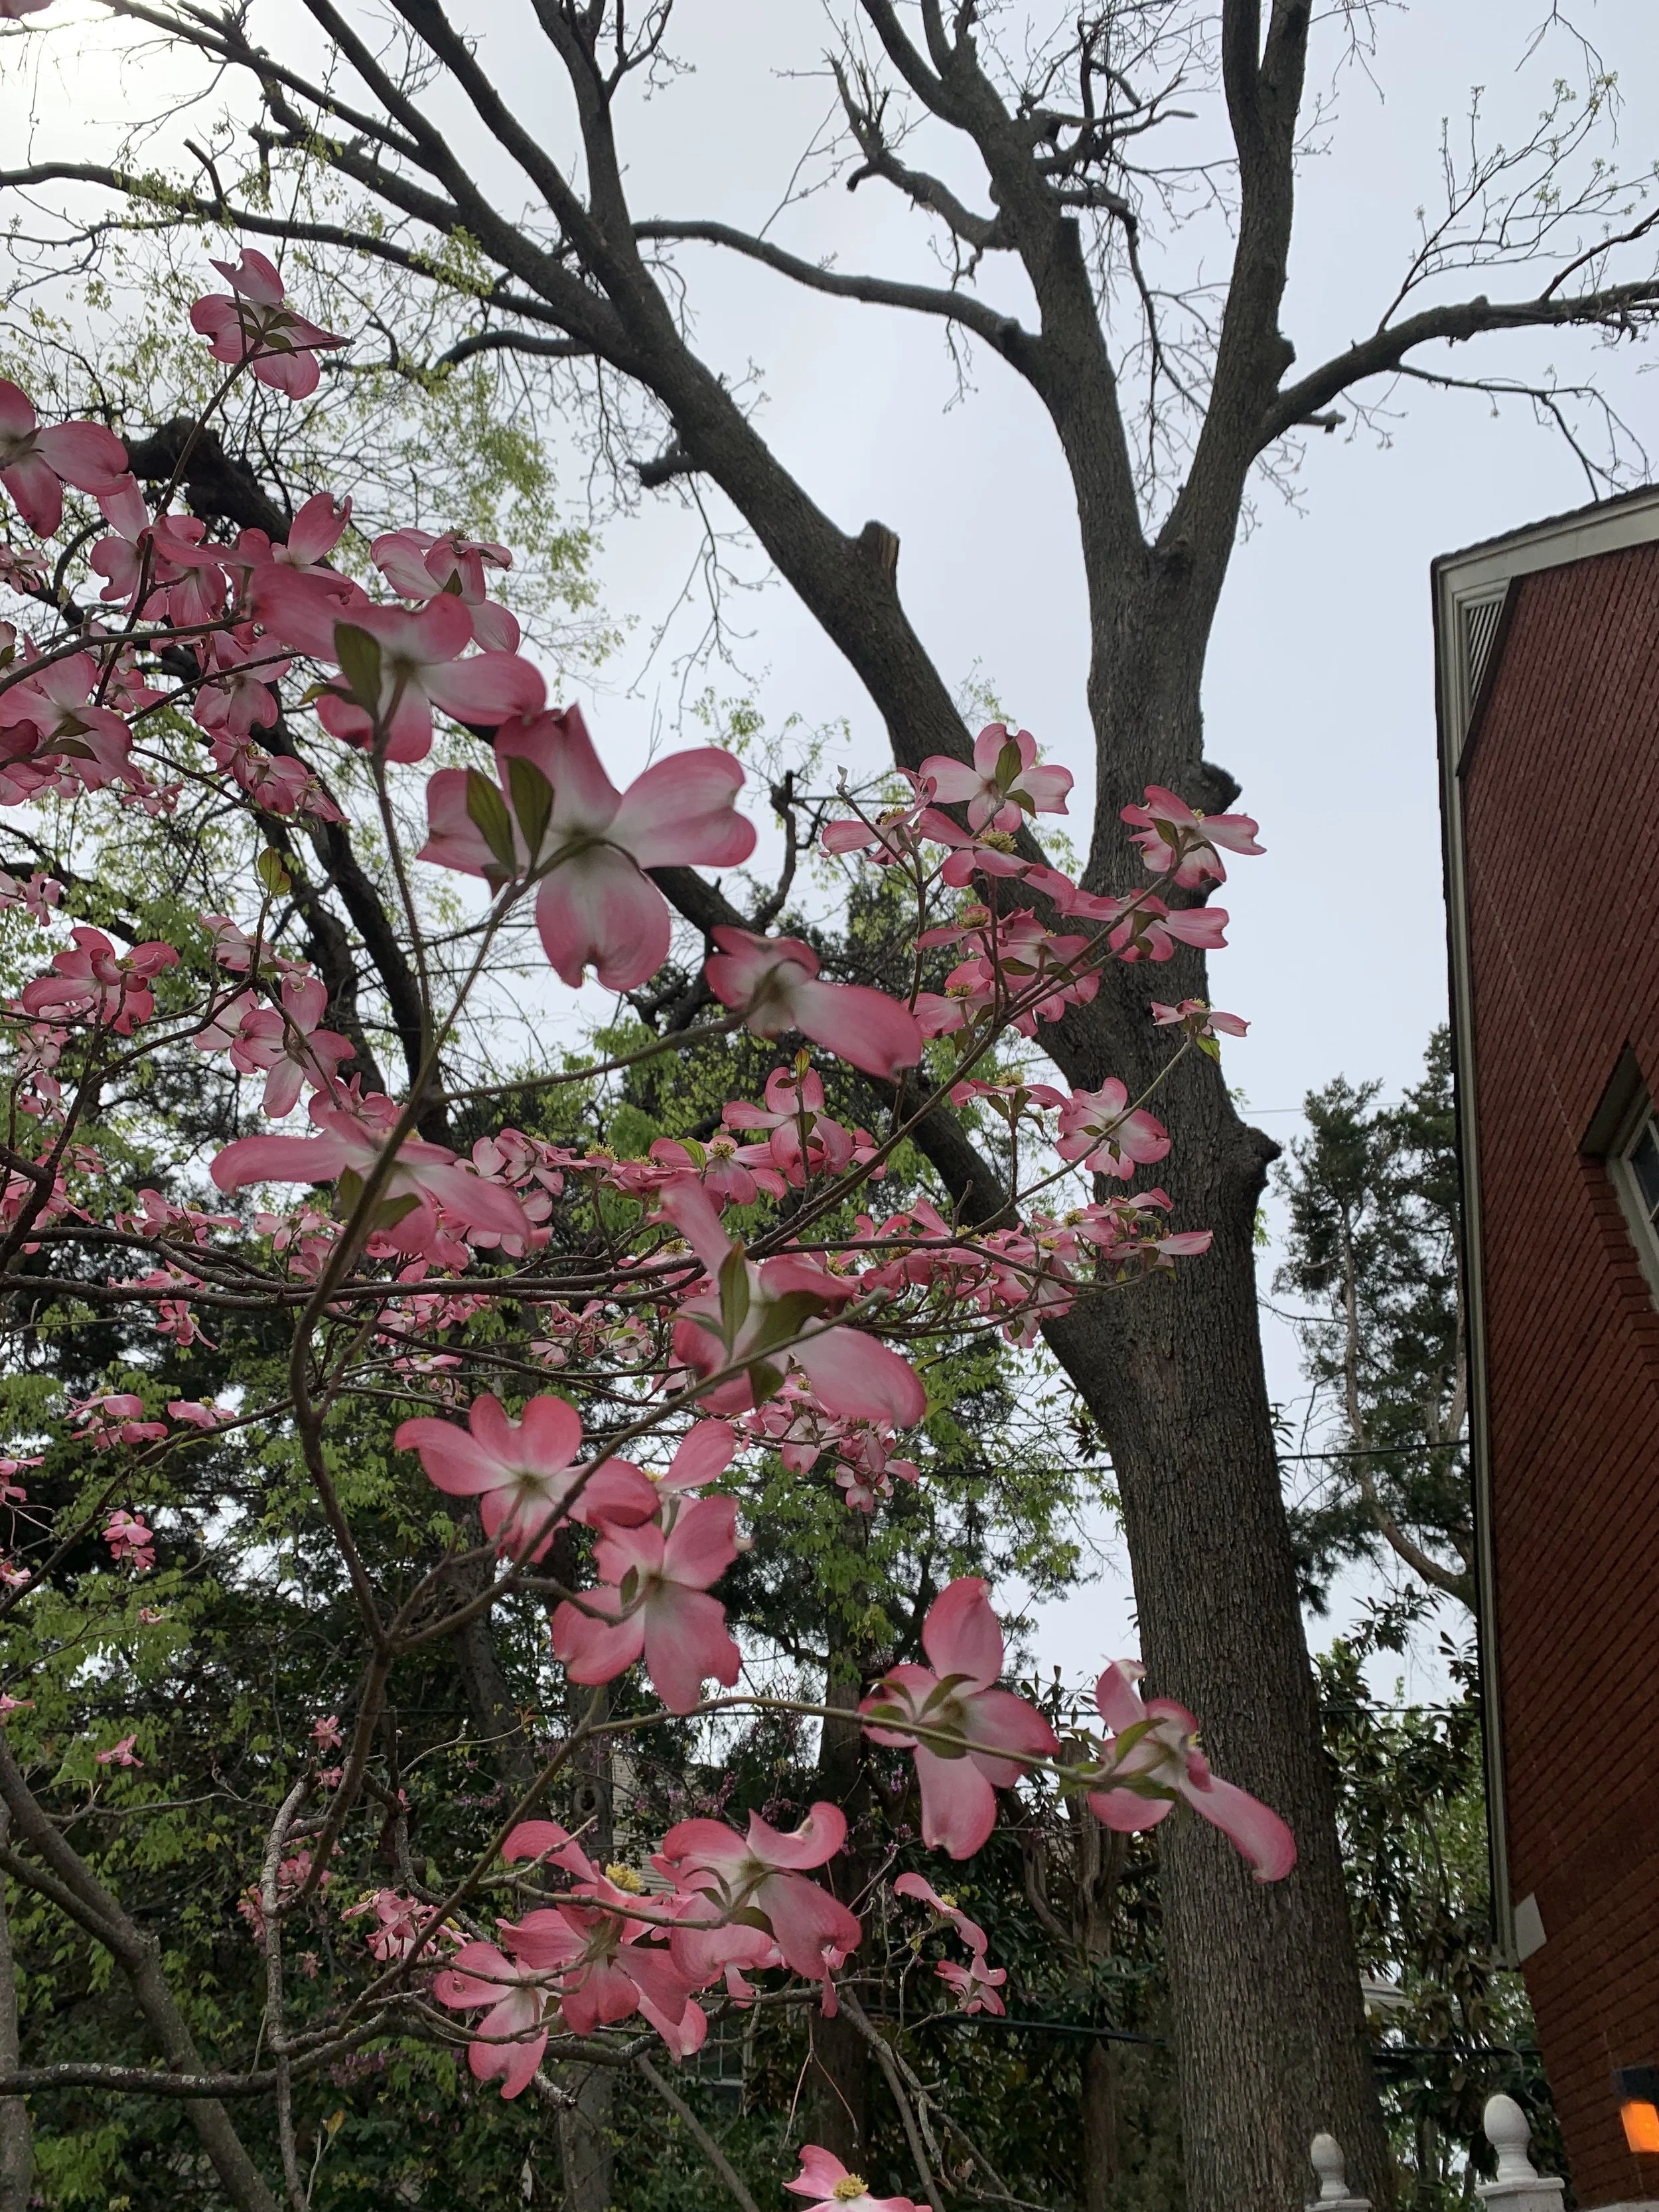
Dogwood
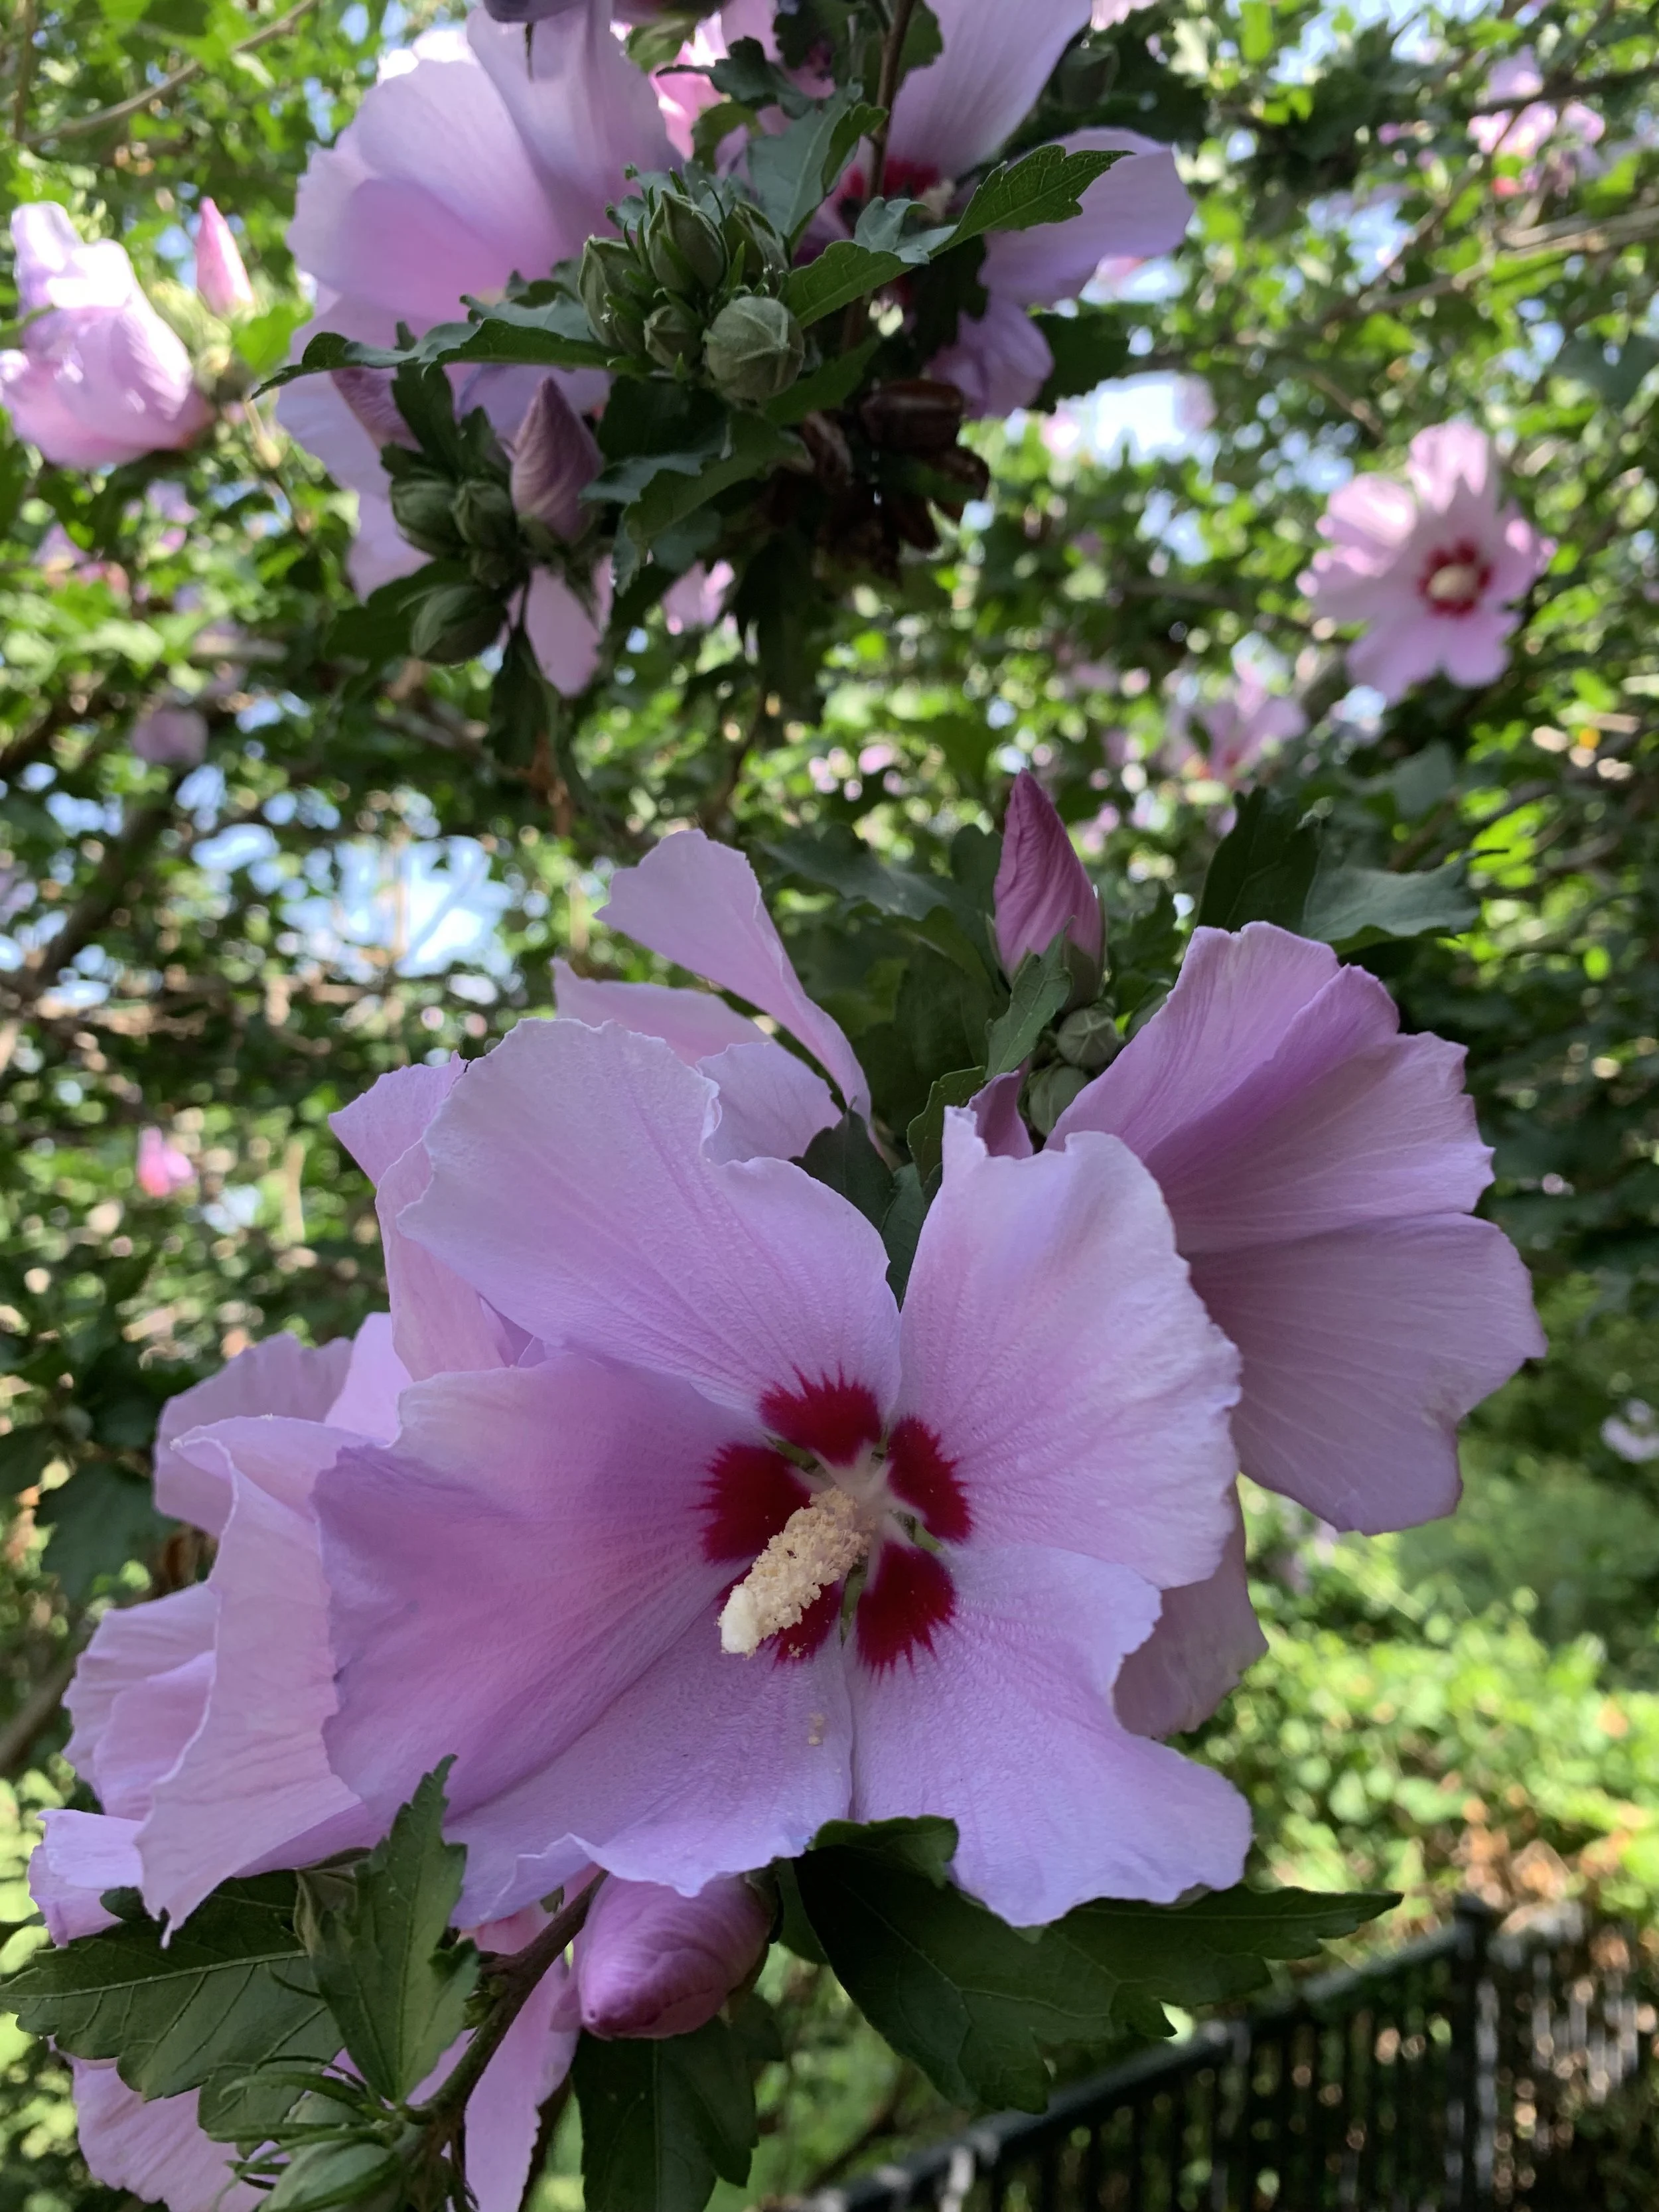
Rose of Sharon
Rose of Sharon – A graceful vase-shaped small tree that adds a tropical look to the landscape. A mid-summer to fall bloomer available in shades of white, red, pink, lavender, and blue. 15’ tall and 10’ wide.
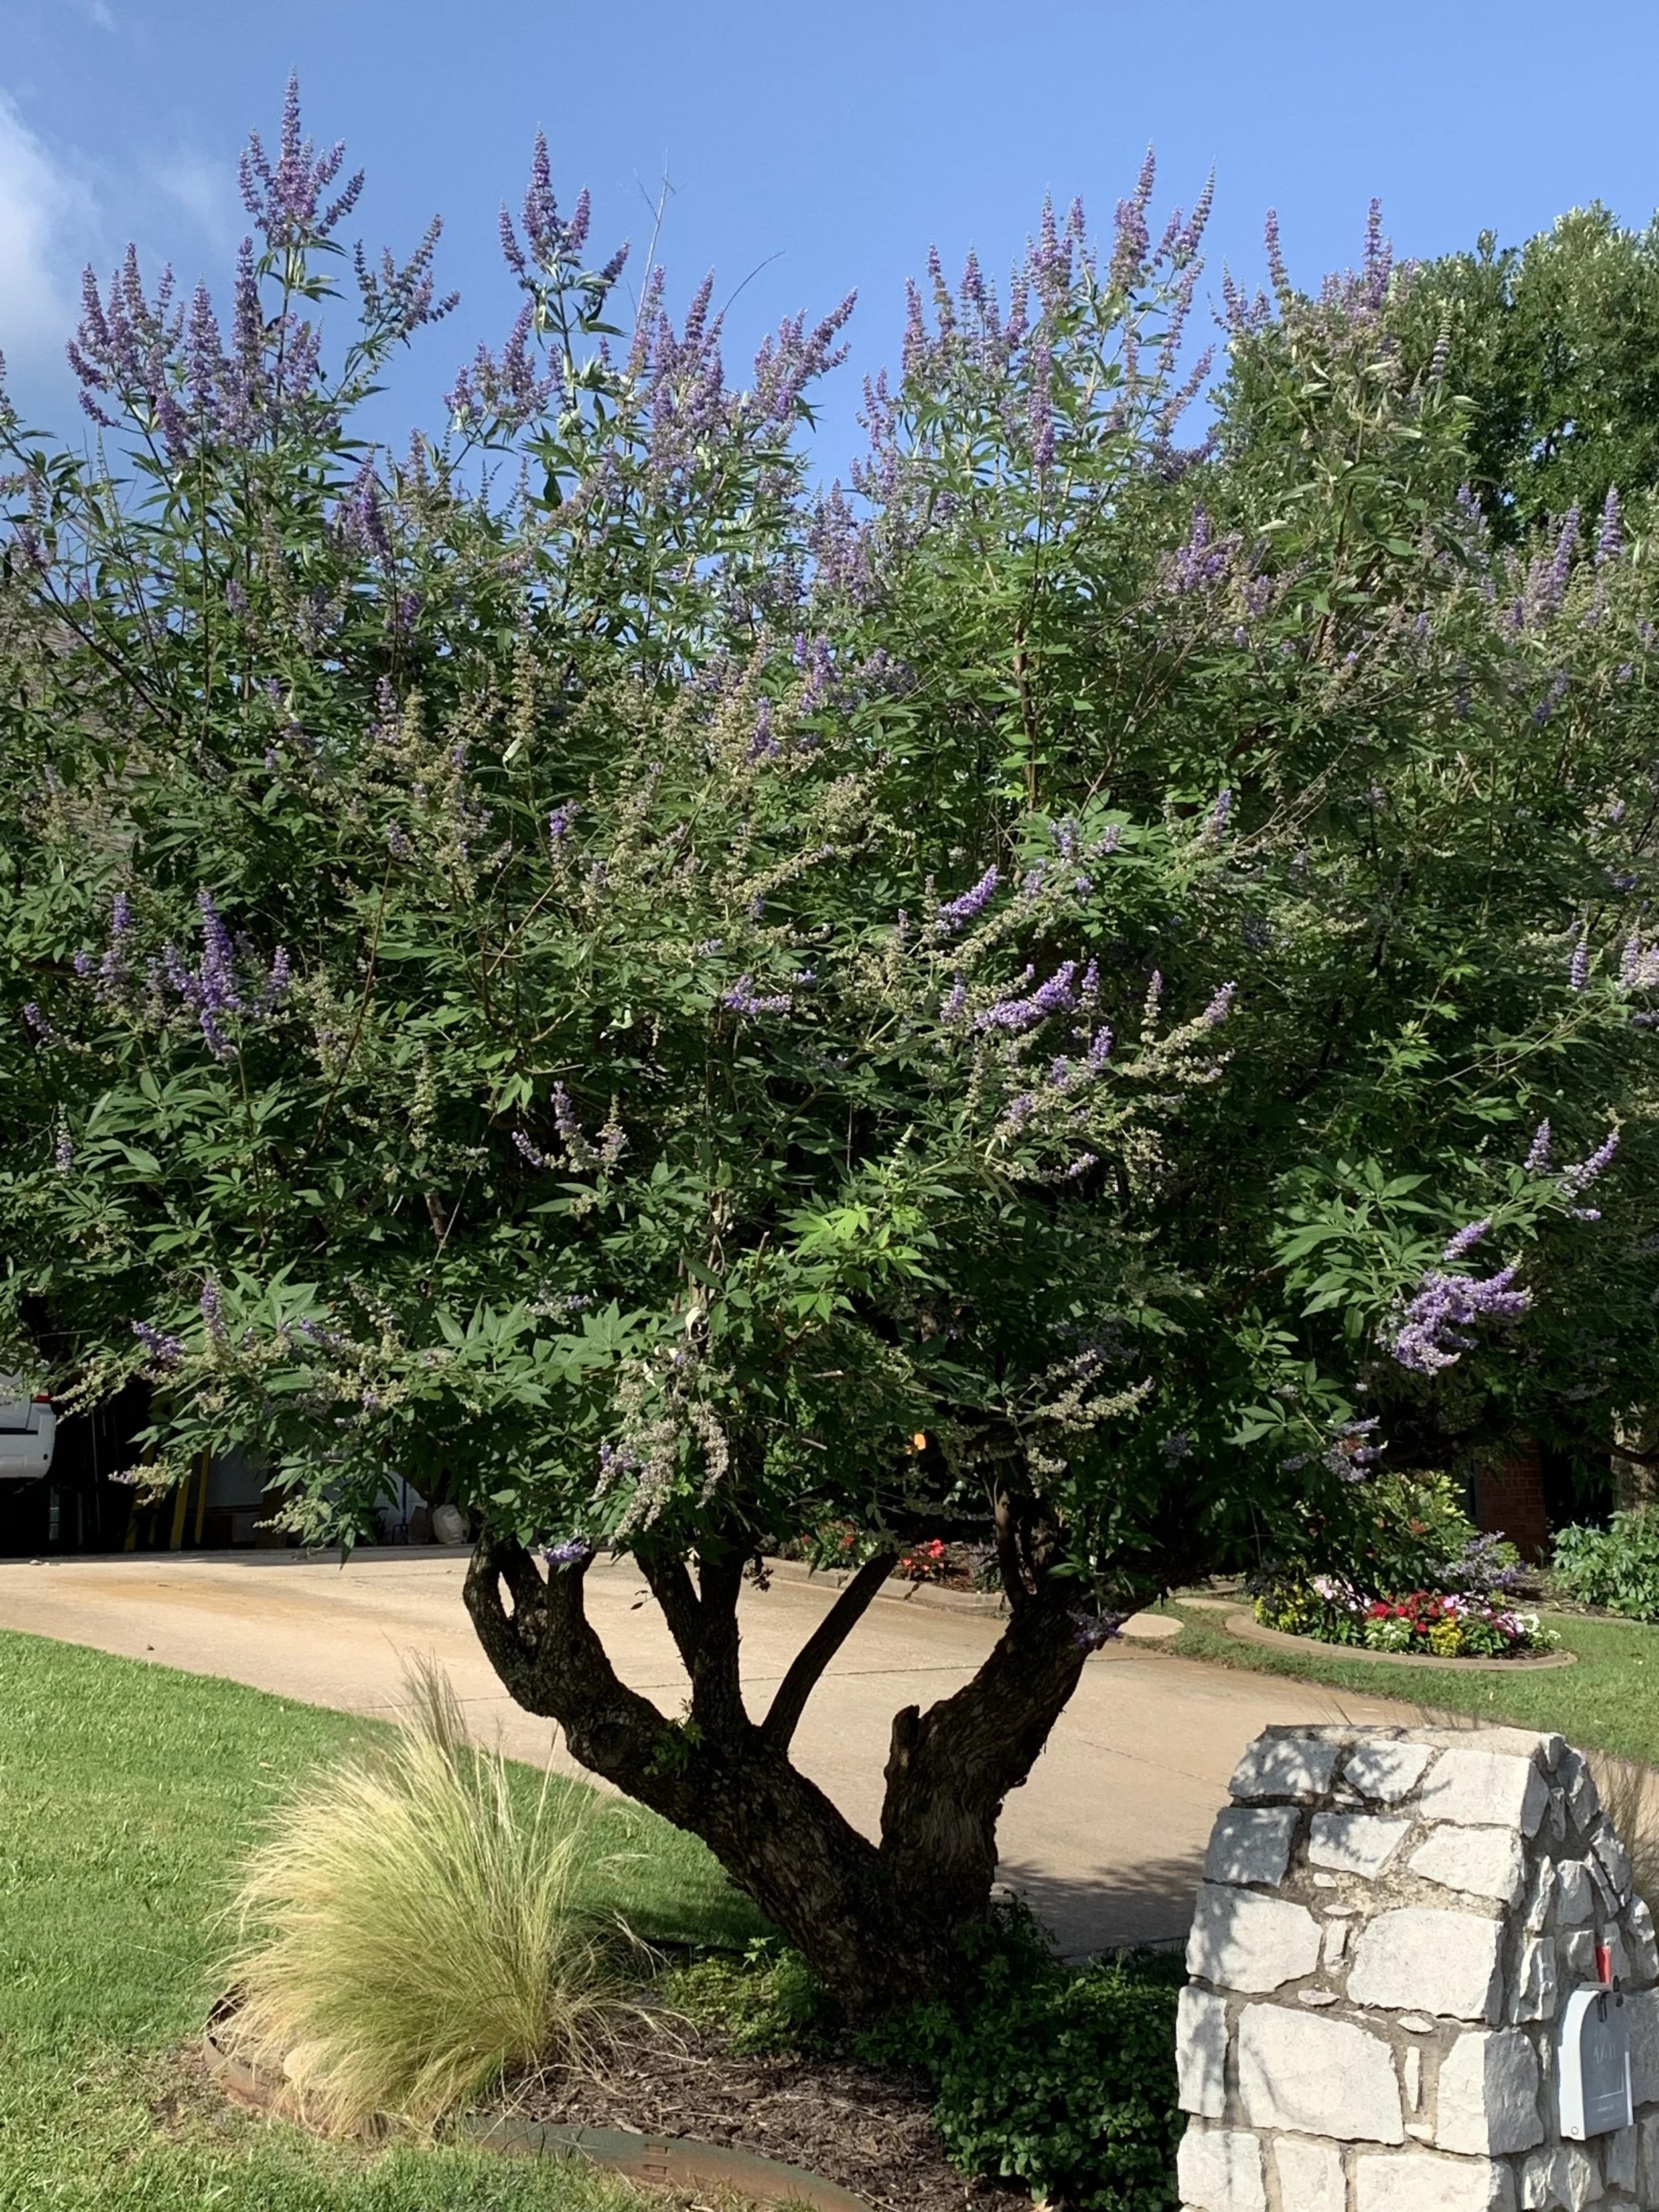
Chaste Tree
Chaste Tree – Also known as Vitex, has summer lilac-colored blooms with grayish-green foliage on a broad, spreading multi-trunk frame. 15-20’ tall and wide.
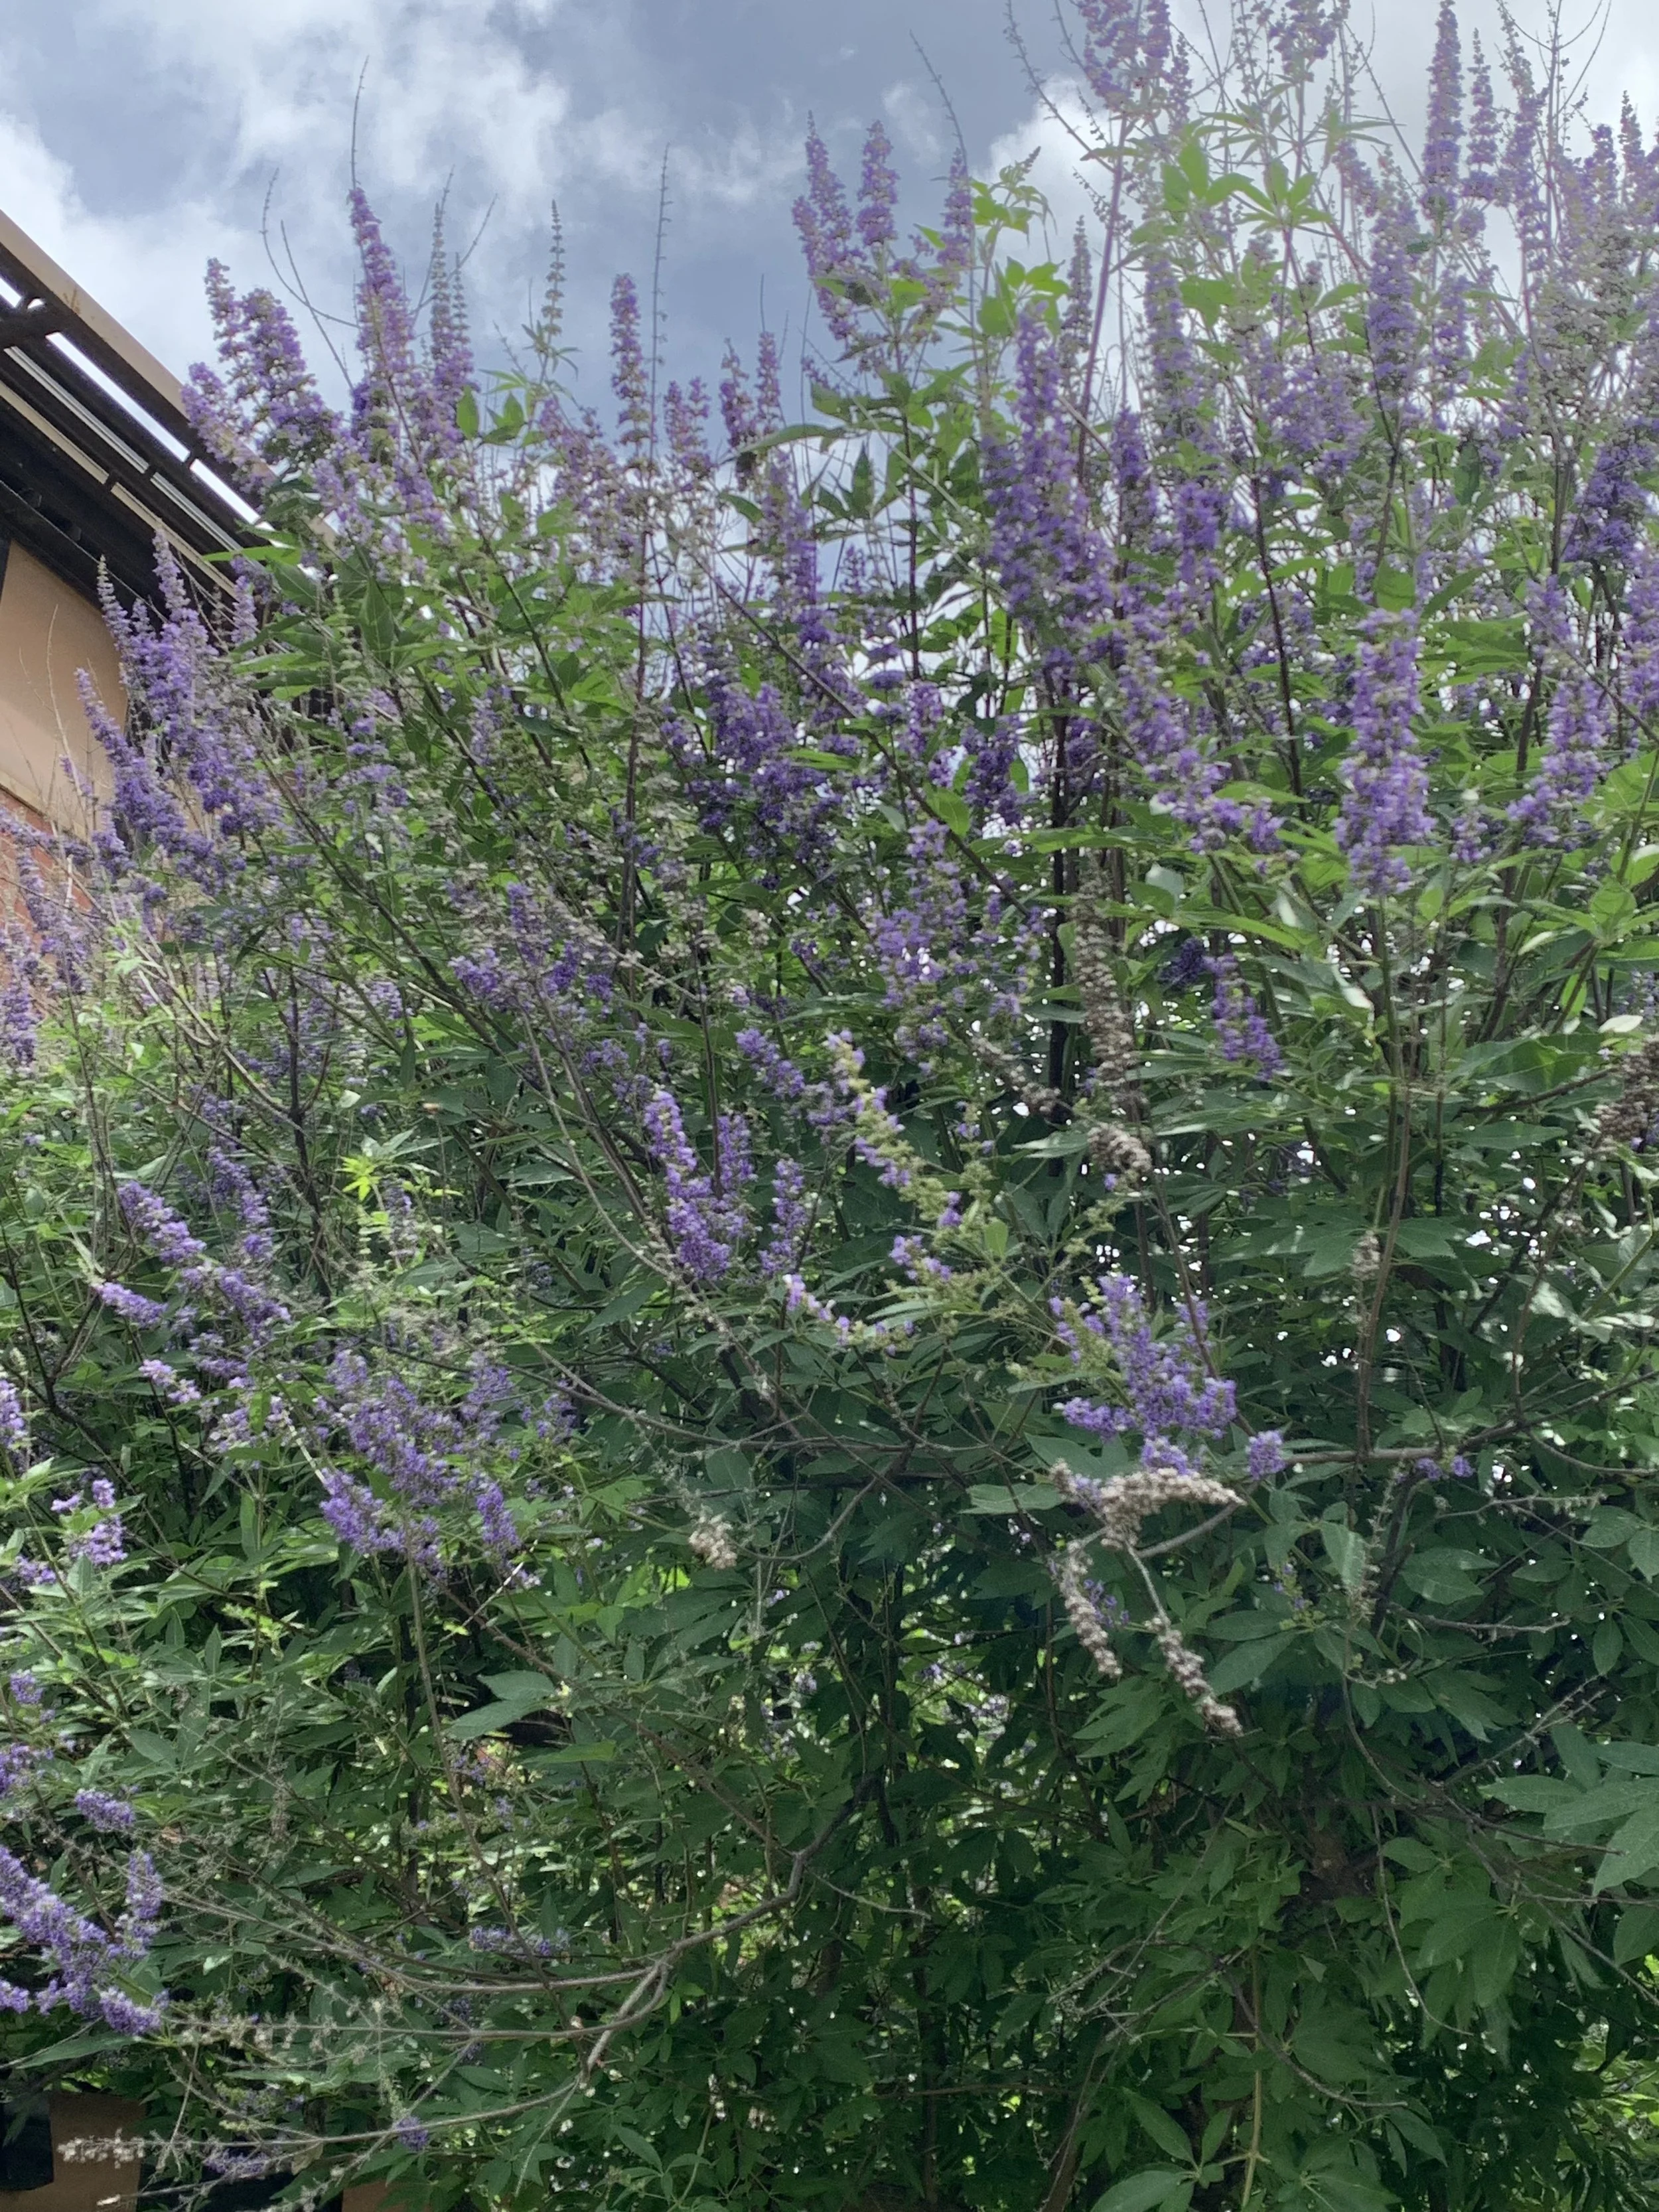
Chaste Tree
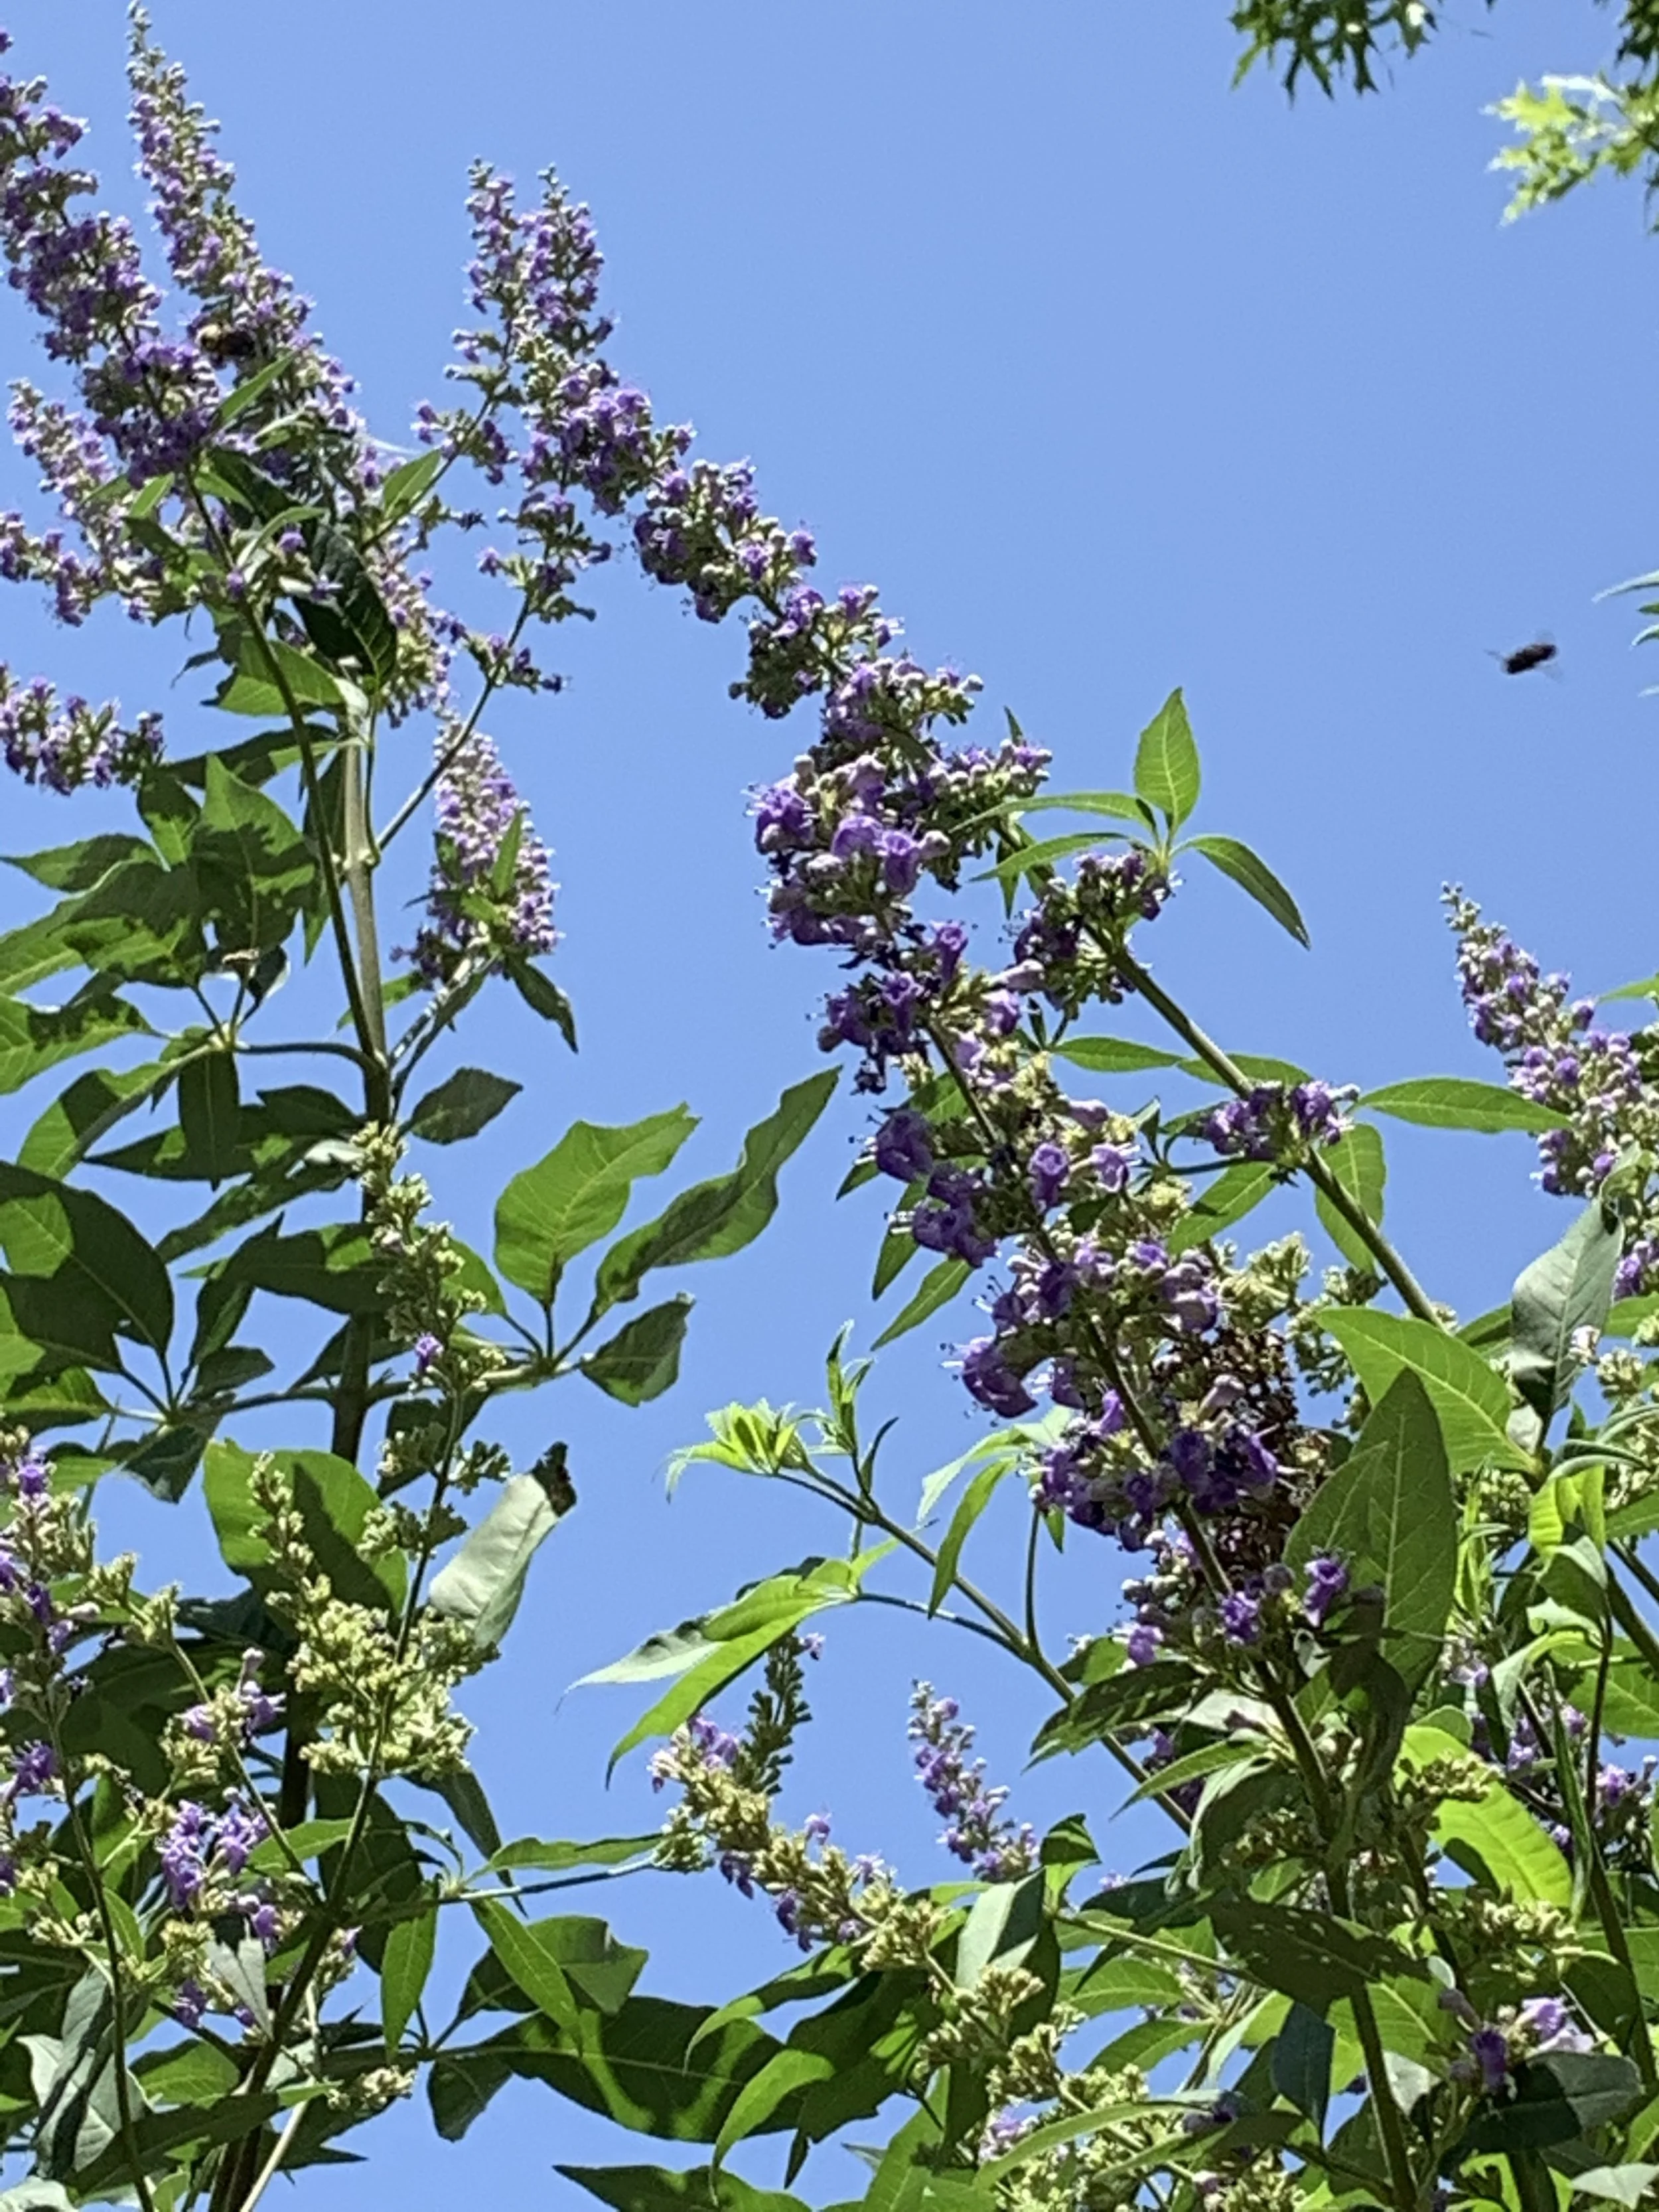
Chaste Tree
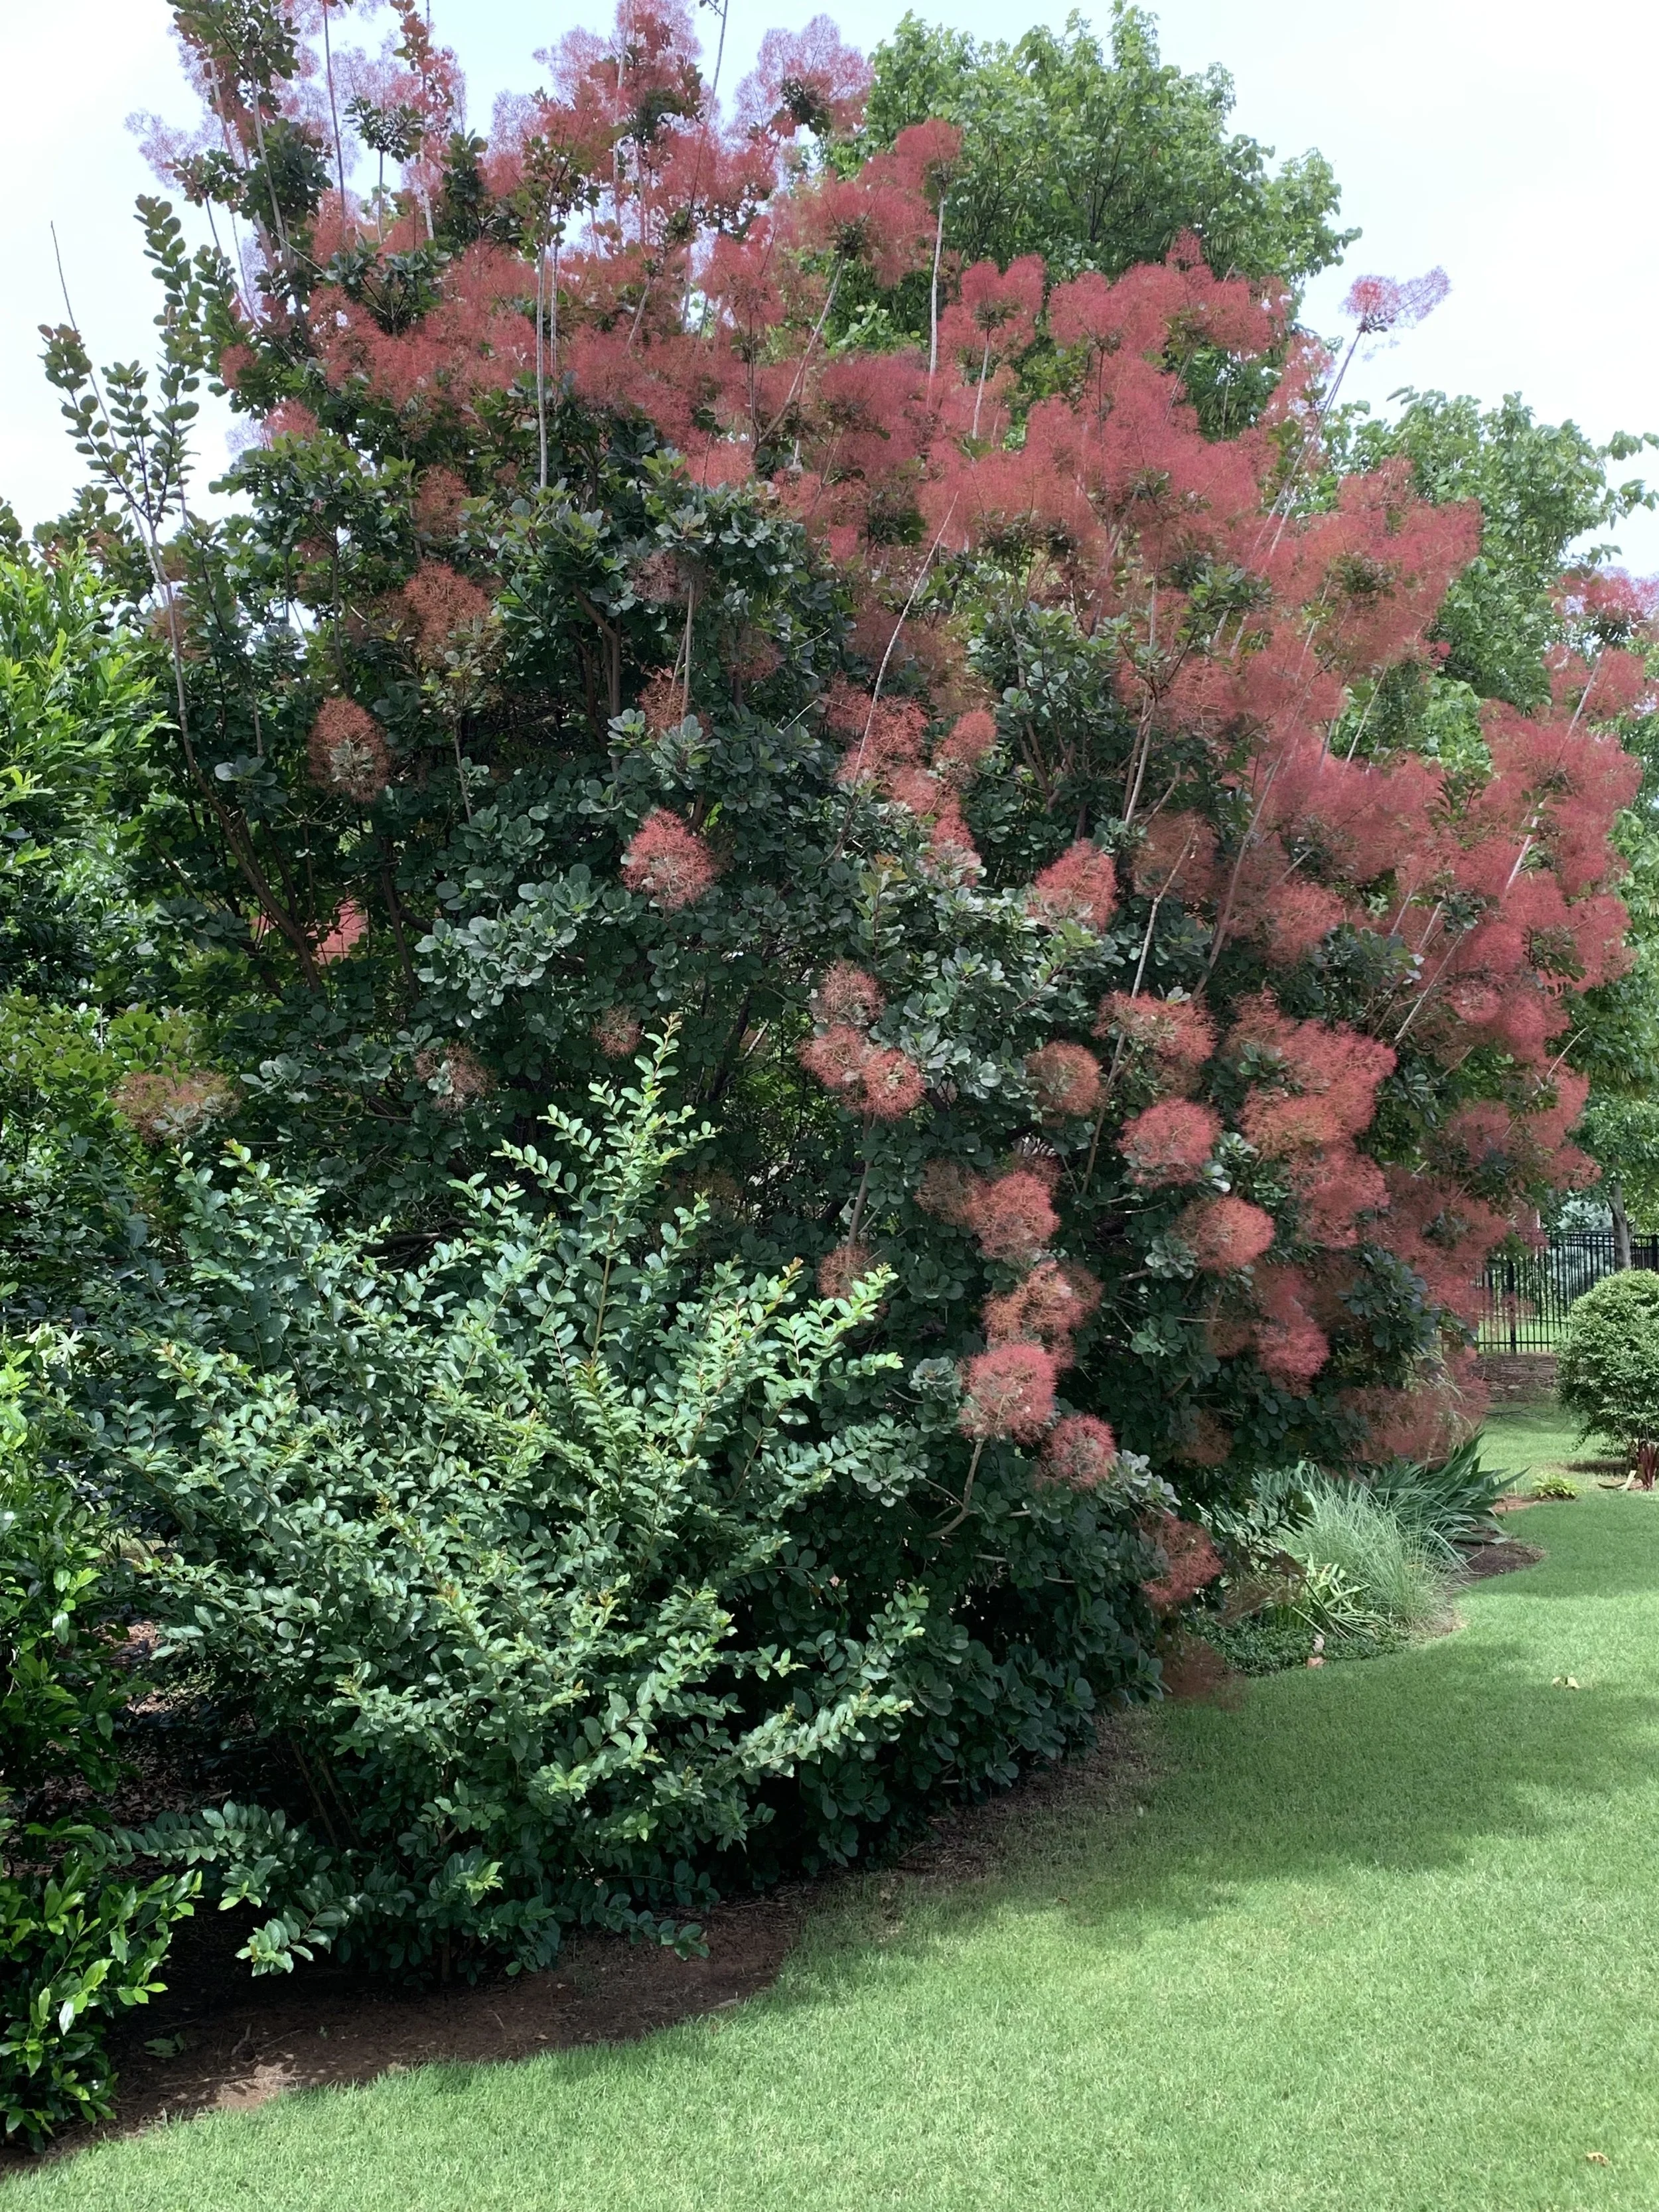
Smoke Tree
Smoke Tree - Varieties of purple or yellow foliage with airy smoke-like plumes in the summer. 15’ tall and 10’ wide.
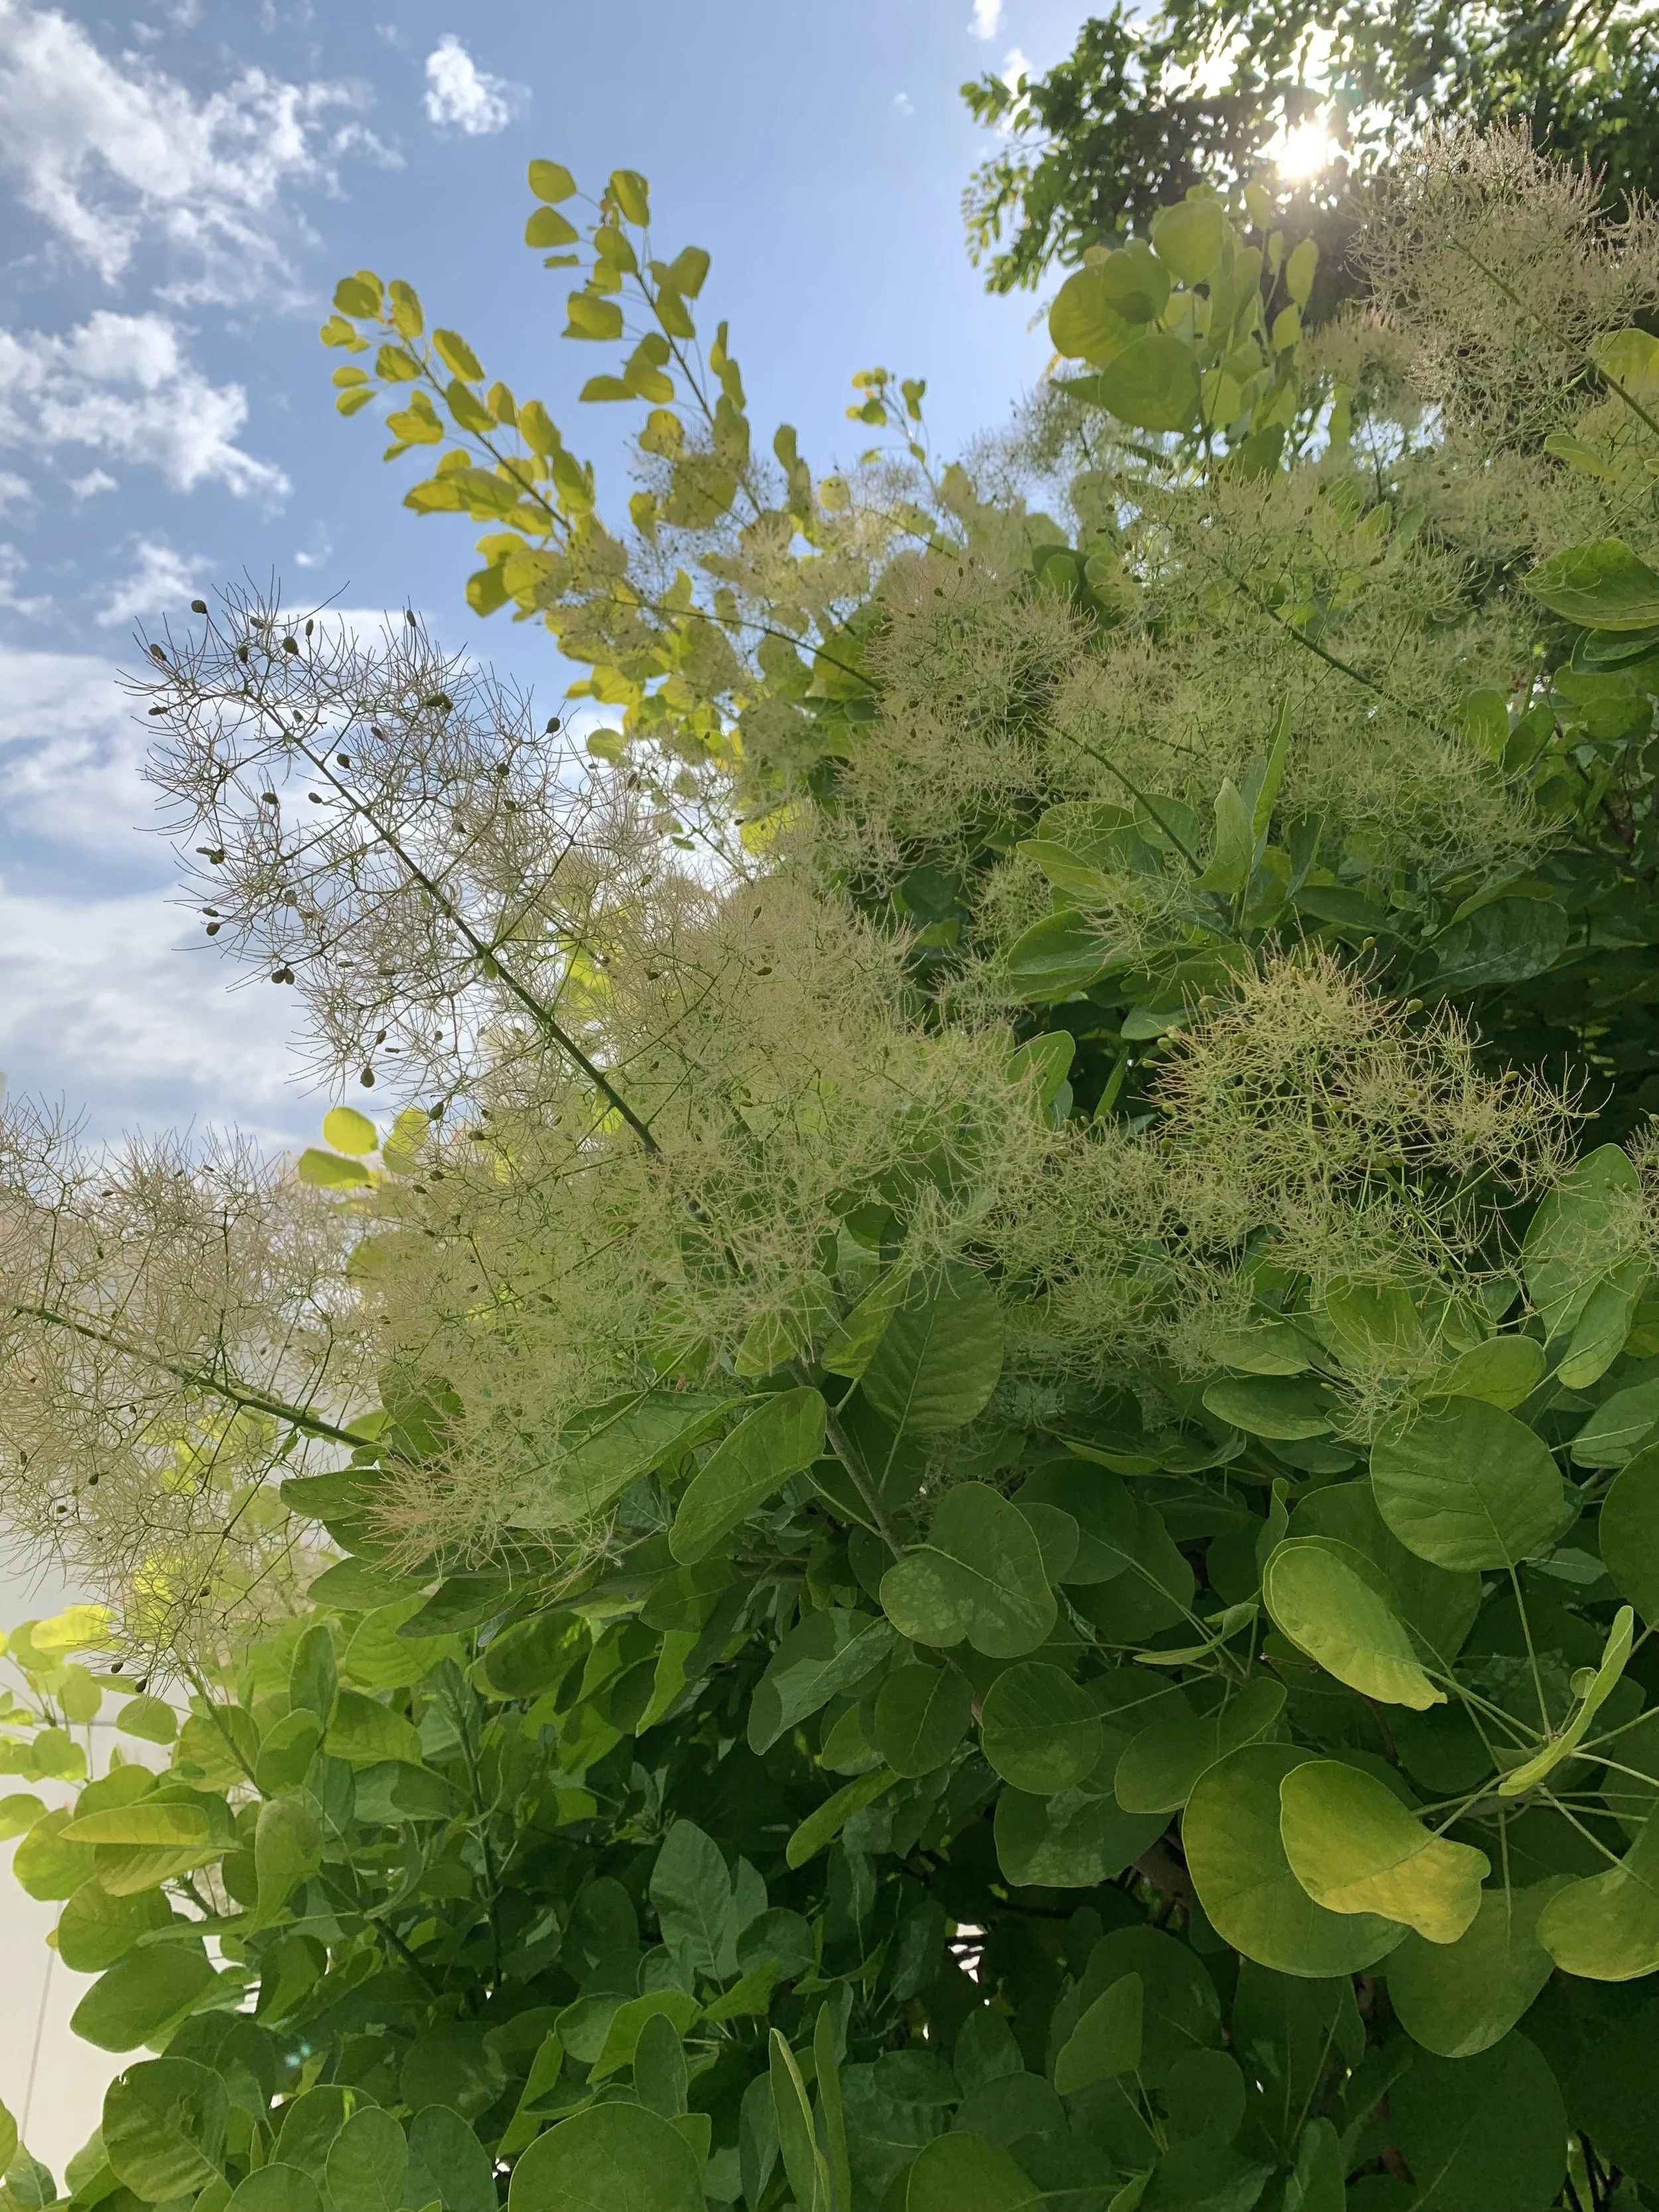
Smoke Tree
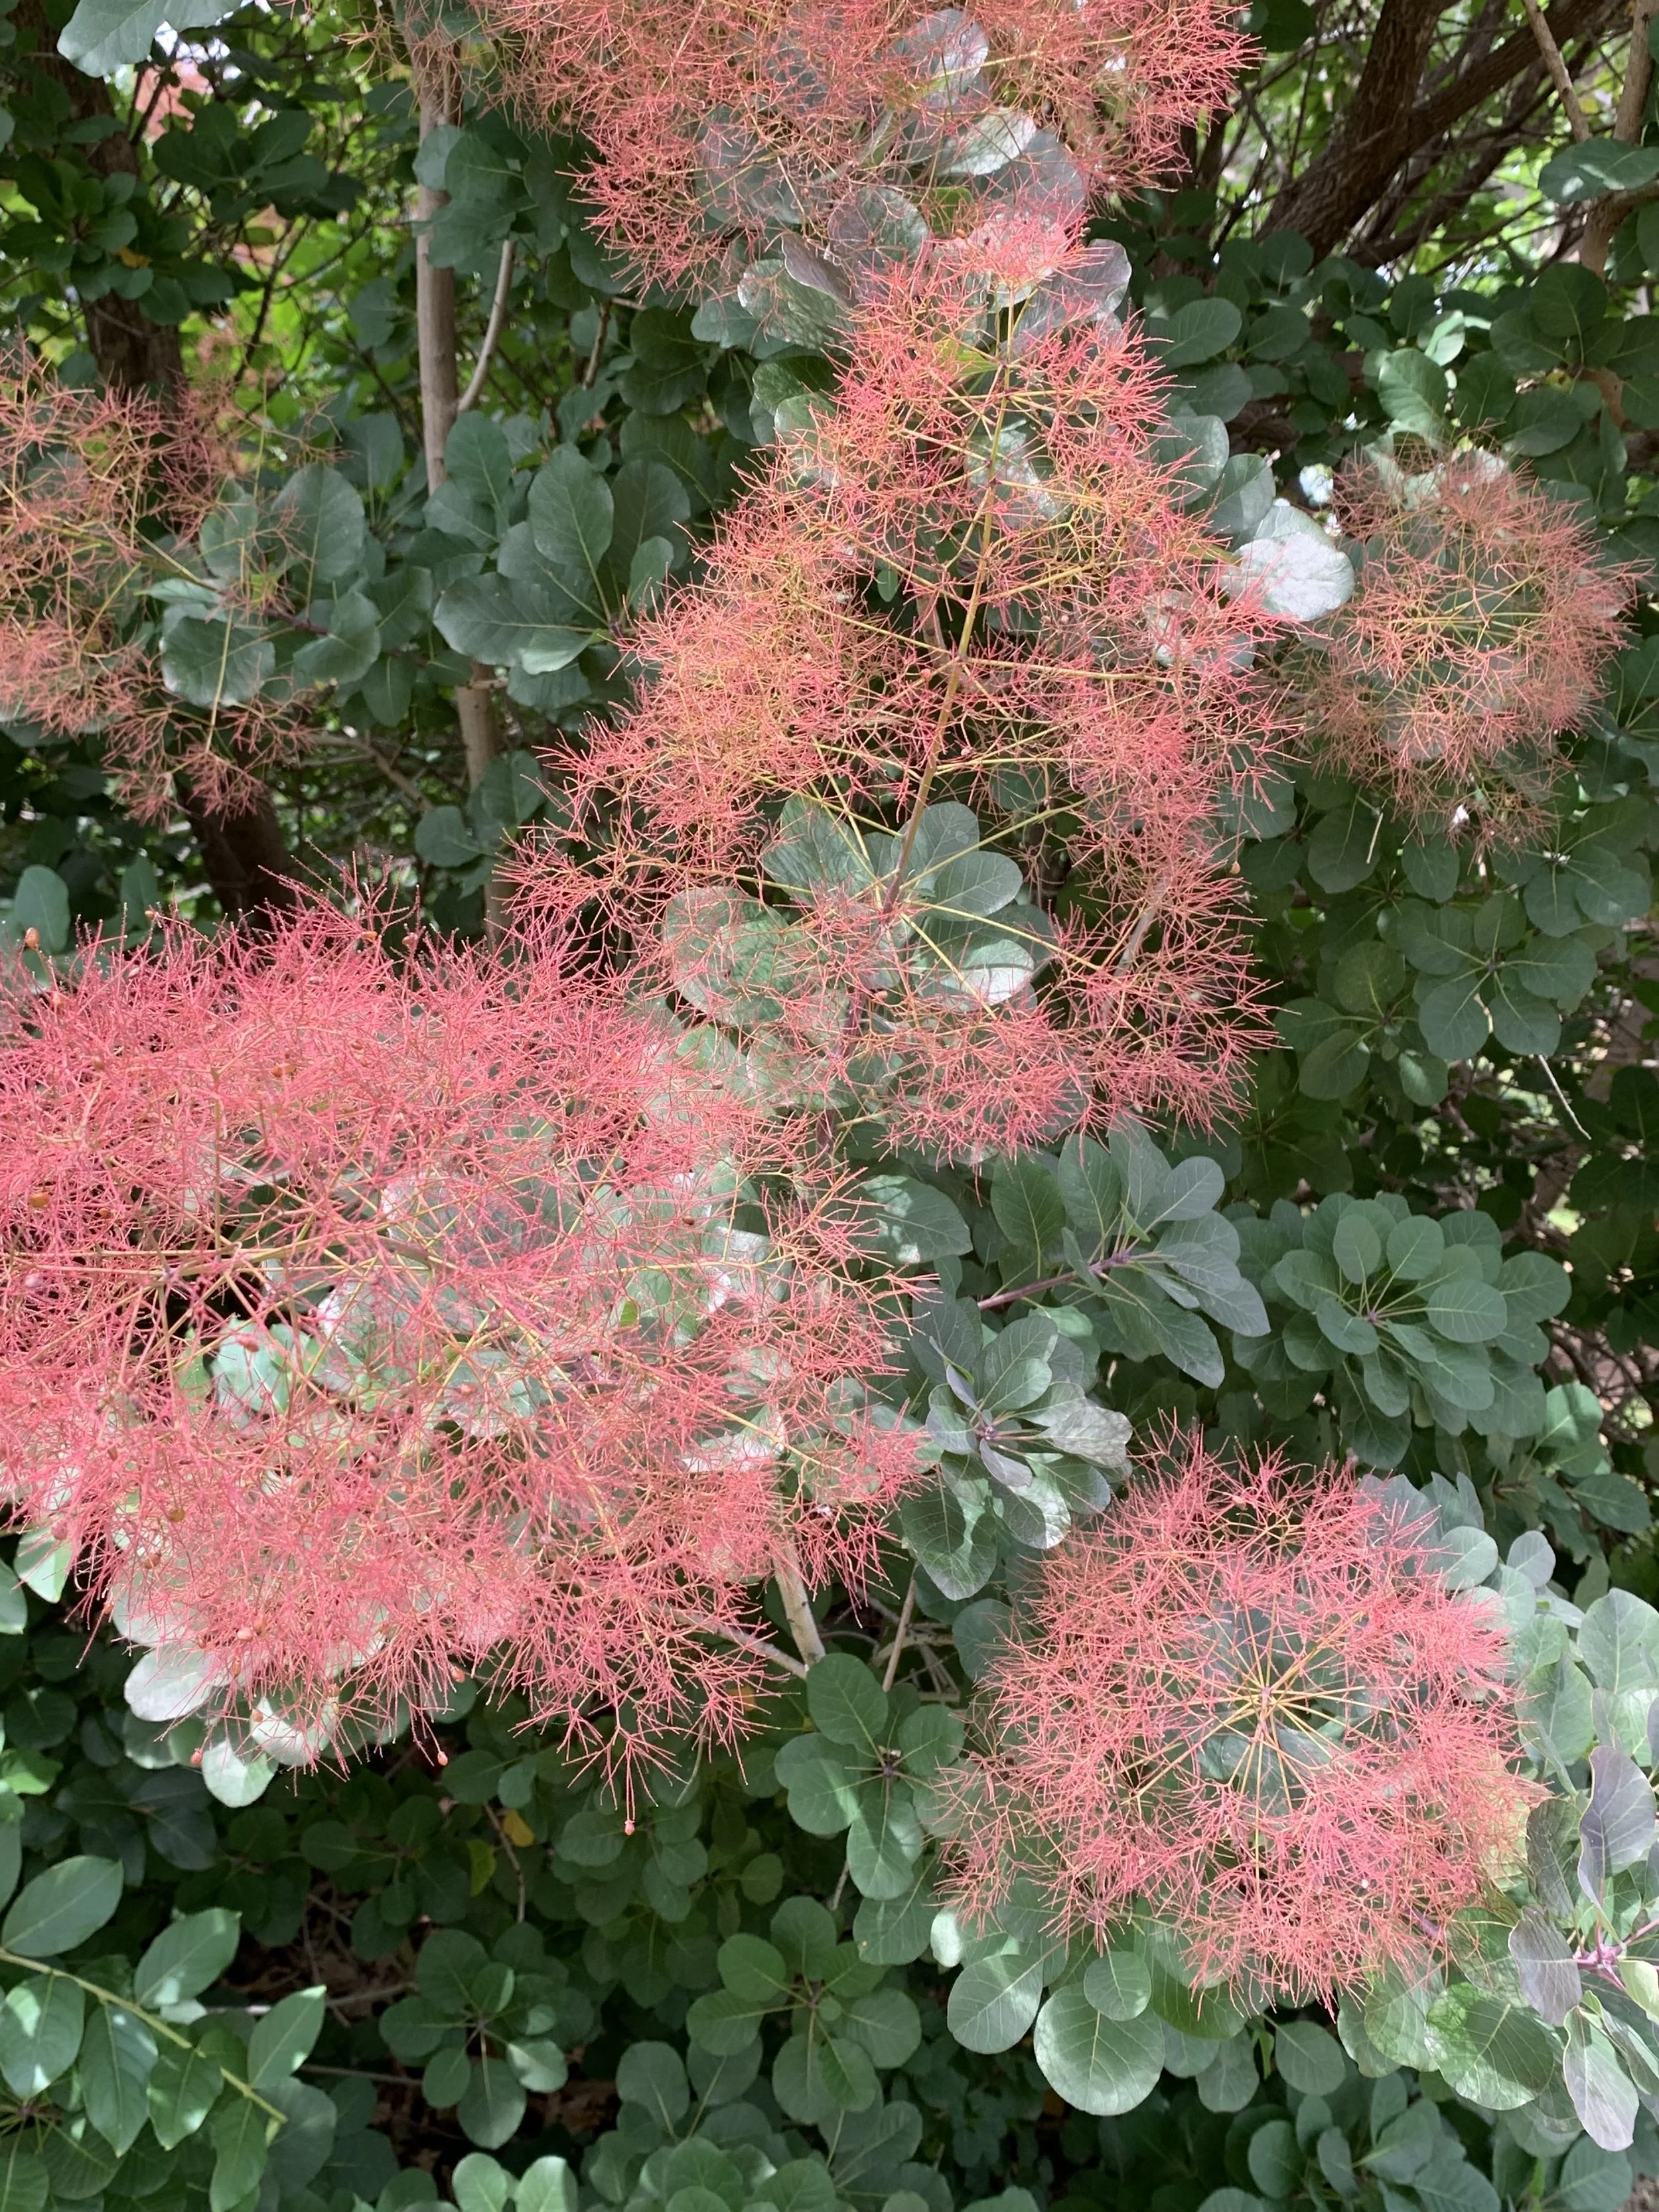
Smoke Tree

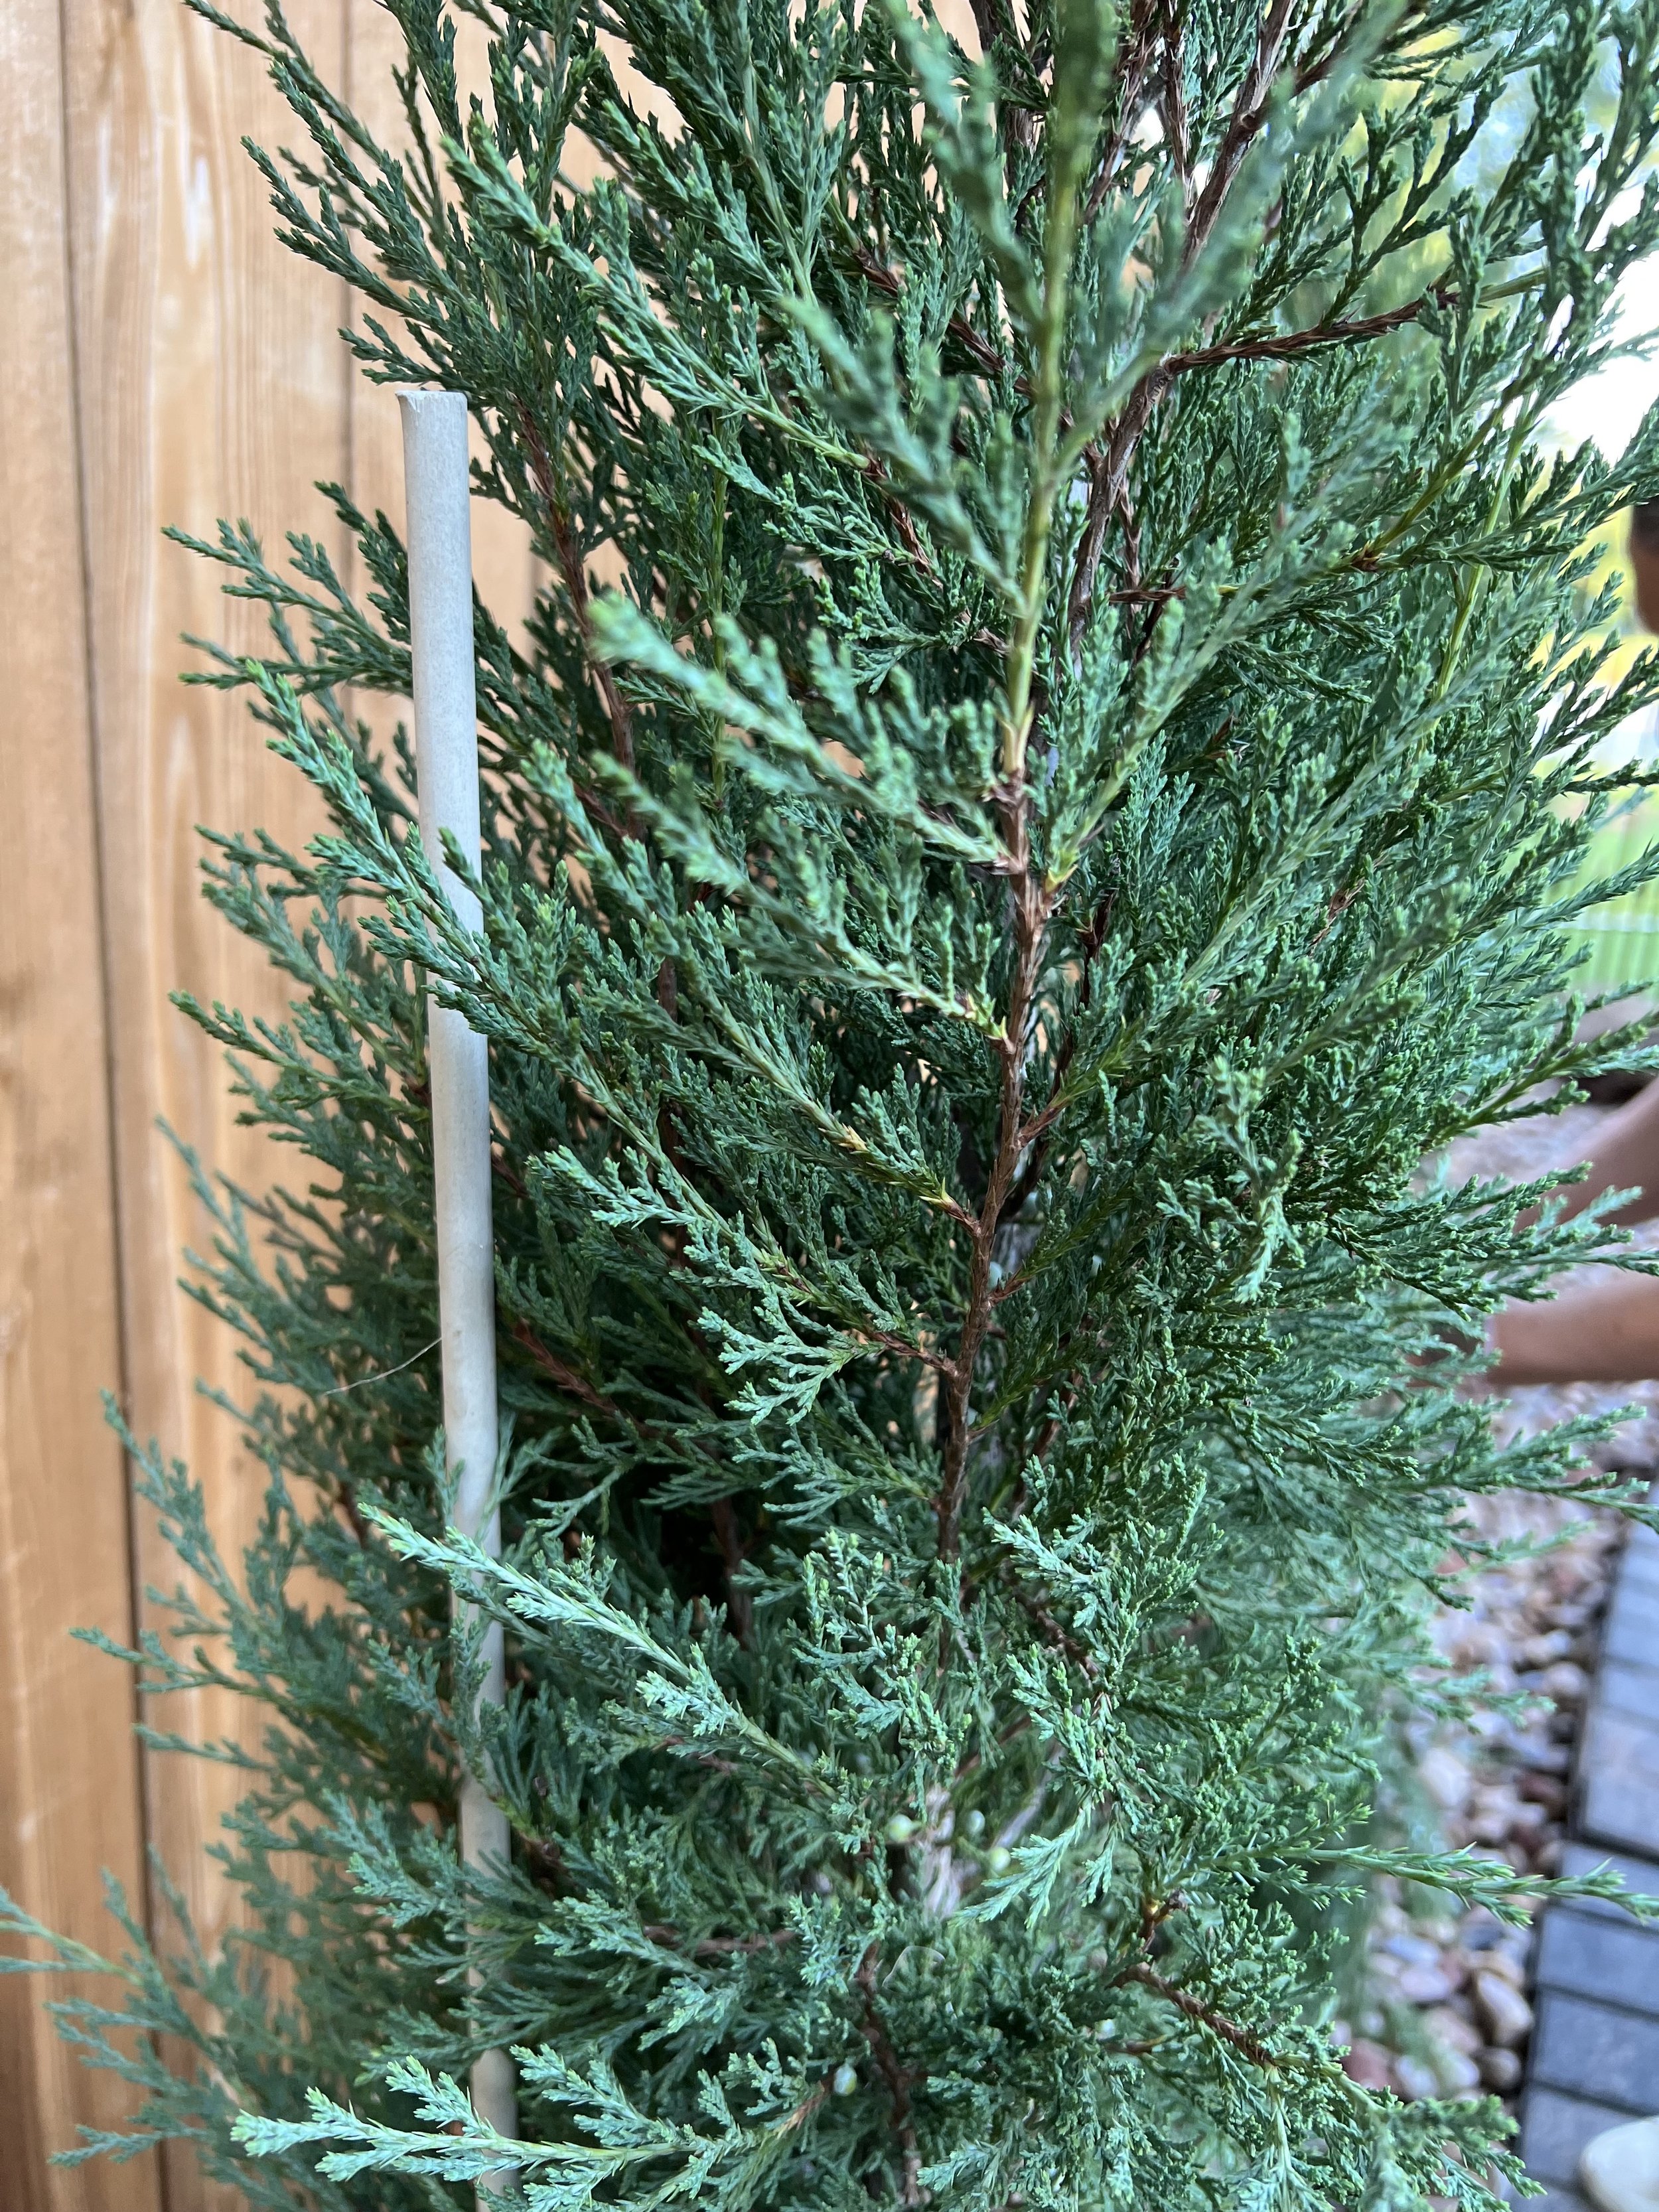
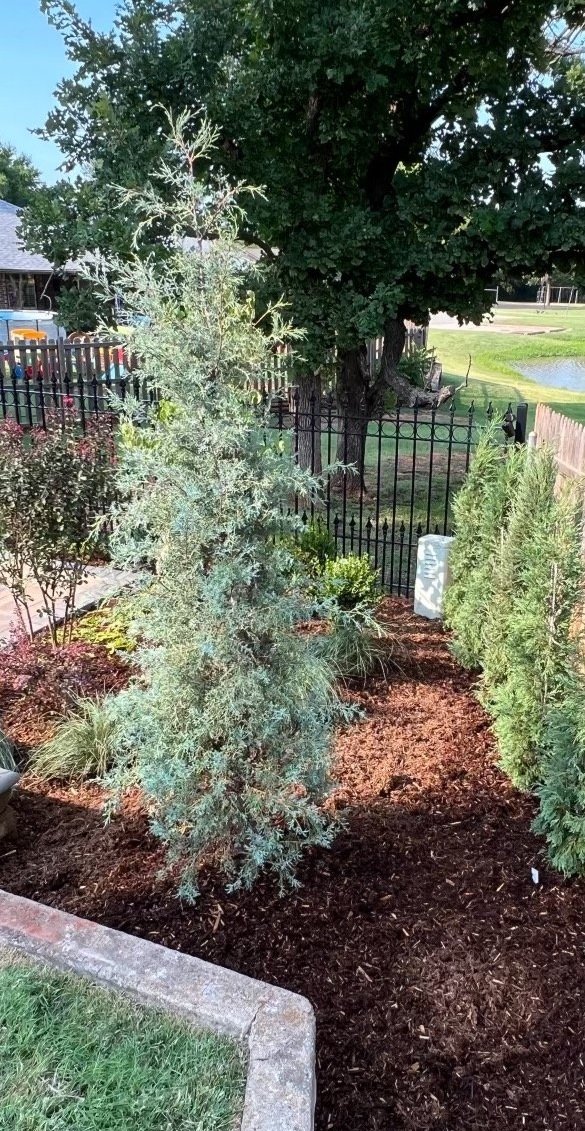
Taylor Juniper
Taylor Juniper - Narrow columnar evergreen with bluish-green foliage creating a formal elegant look. Also, can be used to create screening or privacy. 25-30’ tall and only 3’ wide.

Taylor Juniper

Taylor Juniper
These are only a few small trees to consider. The list could go on and on.
How have you used small trees in your landscape?
What small trees do you have in your landscape?
Lorne Hall
Hall | Stewart Lawn + Landscape
(405)367-3873
Thankful v. Grateful

What? Is this the weekly Hall | Stewart post?
I realize you read this every week for the latest lawn and landscape information and the title appears off subject today. It is. You have my permission to go ahead and hit delete now…you won’t hurt my feelings.
This week, Thanksgiving week, had me pondering the difference between ‘being thankful’ vs ‘being grateful’.
I love this time of year. I believe Thanksgiving may be the best holiday on the calendar. It isn’t over-commercialized. It is simple. It is a break in our busyness to spend time with friends and family and give thanks.
Tuesday morning, at our Hall | Stewart Weekly Huddle, we asked the question “What are you thankful for this year?”
The responses ranged from: “My wife!” to “My family!” to “Our team!” to “My newborn baby boy!” to “Our great customers who we get to help have their best lawns!”
However, one team member’s response started me thinking more deeply about thankfulness. Leo said, “I’m thankful for my changed life, my relationship with my Savior, and a life that is on a totally different trajectory than my old life!”
It started me wondering if that was thankfulness or was that gratefulness.
Is there a difference?
A Google search started. Conversations ensued.
Thesaurus.com states that in most cases they are viewed as exact synonyms.
Dictionary.com says they are close synonyms commonly used to mean the same thing.
Exact? Close? Or is there a difference?
I think there is a difference between thankful and grateful.
For me, being thankful is an event. Thankful is when someone does something for you. A gift. A helpful hand. A kind word. It is an acknowledgment of benefits received.
Grateful is something deeper. It is something richer. Gratefulness is felt in the soul. Gratitude comes from the heart. It goes beyond appreciation to a state of being.
I was very thankful to have another Thanksgiving with my mom whose mind has been fading for the past few years. Rarely does it appear she knows who I am anymore, but nonetheless, I was thankful to be with her on Thursday. I am grateful for her impact on my life and my family. She always wanted more for us than she had and encouraged us to achieve far more than we ever thought we could achieve. I am more than thankful for my mom; I have heartfelt gratitude for her.
Another personal example that has me pondering the difference…
A few weeks ago, a DYI home project took a quick turn for the worse resulting in a Saturday afternoon in the emergency room followed by surgery on Monday to put one of my hands back together. I am deeply thankful for the Integris Baptist Emergency Department doctors, nurses, and staff who practiced their craft so wonderfully that afternoon. I am also deeply thankful for a skilled surgeon who had the knowledge and experience to know exactly how to fix my damaged hand. And, the physical therapist who I am spending, and will be spending, way too much time with over the next few weeks, I am tremendously thankful.
But, it is the deepest heartfelt gratefulness I have for my wife who has so patiently woken up to my early schedule every day for the last 5 weeks to help me get ready and tie my shoes. I am more than thankful for her; I am grateful she is by my side as I heal.
It is gratefulness I feel that my dad was with me when the accident happened, got me to the hospital quickly, and then returned to finish my project in the days that followed. It is gratefulness I feel for family and friends who called, texted, prayed and showed up to check on Lori during my surgery. It is gratefulness that I feel for my Hall | Stewart partner and team members who stepped up to cover the workload I couldn’t do with my one un-injured hand.
Grateful is a deeper, stronger, more emotional version of thankful.
Thankful is recognition of a transaction.
Grateful is recognition, an acknowledgment of the difference others make in our lives.
Seth Godin said it well this week in his Thanksgiving Day post, “The magic of gratitude is that it improves everything it touches.”
Gratitude is a state of being. A position of gratitude changes your perspective.
What are your thoughts? Are they the same or is there a difference?
(I promise to return to talking about what we know best – lawns and landscapes!)
May your days be filled with a spirit of gratitude!
Lorne Hall
Hall | Stewart
(405)367-3873
Your Lawn & Landscape Still Needs Moisture… Even During The Off Season!

As the lawn and landscape season winds down there is one very important never-ending task: Monitoring the weather to make sure your lawn and landscape is receiving enough moisture.
After last week’s 2.5” of rainfall followed by our first freeze this week, the temptation is to turn the irrigation off and roll up the hoses. But, if your lawn and landscape could talk, they would be encouraging you to not cut off the water just yet and be prepared to give them a drink from time to time through the winter.
Most winter plant injury occurs when we receive a harsh cold spell while plant root systems are dry.
Sure, your lawn, trees, shrubs, and flowers don’t need as much water through the winter, but they do need some. Your landscape needs at least ½” of moisture every two weeks through the winter.
Current Watering Recommendation:
Give your lawn and landscape a good deep soaking every 4-7 days.

Pansies need moisture through the winter to survive and make a strong spring show.
Make it a part of your routine from now until spring to check soil moisture and rainfall amounts at least once a week. A great source is the Oklahoma Mesonet. The Oklahoma Mesonet is a world-class network of environmental monitoring stations that consists of 120 stations throughout Oklahoma.
Use this link to check current soil moisture: https://www.mesonet.org/index.php/weather/map/2-inch_fractional_water_index/soil_moisture
Use this link to see the amount of rainfall in the last week: https://www.mesonet.org/index.php/weather/map/7_day_rainfall_accumulation/rainfall
Throughout the off season take advantage of nice, warm, light wind days
and give your lawn and landscape a good soaking.


Evergreens and fescue require more water attention during the winter.

Japanese maples have shallow roots that are susceptible to drying out during the winter.

Fescue and rye lawns will retain more color over the winter if the soil is moist went temperatures below 30 degrees.
Newly sodded lawns, due to a shallow root system, can experience freeze damage if the roots are dry during a winter cold spell.
Finally, all newer landscapes, those installed in the last two years require a little more watering attention over the winter.
Watering Through the Off Season - Monitor the weather. Pay attention to the amount of rainfall we are receiving. Anytime we go a week without a good rain or snow cover, pick a warm day and run your system through a cycle. If you don’t have an irrigation system, pick an enjoyable day, stretch out the hoses and make sure all plant material receives a good soaking.

Pansies are a great winter annual as long as they aren’t bone dry when a cold front arrives.


A dry, windy and cold winter is hard on needle evergreens. Through a dry winter a good deep soaking every other week will help them survive.
Winter watering is particularly critical for evergreen shrubs and trees. Windy days zap the moisture stored in their leaves making them sensitive to winter injury when we receive a harsh cold snap when they are dry.
Shallow rooted plants, such as: azalea and Japanese maple are also prone to winter injury when they do not receive regular moisture during dormancy.
Plants with shallow root systems, such as Japanese Maples and Azaleas, respond best if they receive at least 1/2” of moisture every 7-10 days throughout the winter.
If you have perennials or winter annuals such as pansies or kale, winter moisture is critical to their performance going into the spring.
Fescue lawns will retain more color in the winter and rebound quicker in the spring if they are not allowed to become bone dry during the winter.

Evergreens need moisture during to winter to keep their foliage healthy.

Set your azaleas up for a successful spring by making sure they have enough moisture this winter.

Snow cover has two benefits: 1. It provides insulation from very cold temperatures by trapping warm soil temperatures. 2. As the snow melts it acts as a good deep soaking for your lawn and landscape.
Consider Upgrading Your System – If your system doesn’t have a rain/freeze sensor, add one. A rain/freeze sensor allows you the ability to set the controller to run once per week and leave it. If the temperature is below freezing, or if there has been a recent rain, the sensor will interrupt the scheduled cycle. The benefit is you won’t have to remember to turn your system off when it is too cold, or it has rained.

Another Upgrade to Consider – Install a Rainbird WiFi Link controller and let us control your system for you. We will monitor the weather and adjust the system through the winter based on the amount of moisture the area has received.
Remember – Most winter plant injuries occur when we receive a harsh cold spell while plant root systems are dry.
Give us a call, or respond to this email, if we can help you with irrigation solutions.
Lorne Hall
Hall | Stewart Lawn + Landscape
(405)367-3873
Fall Fertilizer Needs: Bermuda vs Fescue

One of the great things about Oklahoma is that we live in the transition zone.
What is the transition zone?
The transition zone is an area from northern Kansas to the Oklahoma-Texas border where you can grow both cool-season and warm-season turfgrasses. The transition zone can experience both hot summers and cold winters, often making it hard to decide between a warm-season lawn (Bermuda or Zoysia) or a cool-season lawn (fescue).
Why is that a good thing? Because we can successfully grow both warm season and cool season turfgrasses.
The most common turf in Oklahoma is Bermuda.
But, fescue, commonly thought of as only a shade grass, continues to increase in popularity as both a turfgrass suitable for shade and for full sun areas as well. It is now very common to find Bermuda lawns with at least some fescue.
Also, more and more lawn owners are realizing that fescue is more than a shade grass, it is a cool-season grass that can grow in full sun.
But, that can be a problem. You have to think very differently about how you care for a fescue lawn versus a Bermuda lawn.
Problem - Fescue won’t thrive, it will actually struggle to survive if it is fertilized like Bermuda. And, the same is true for Bermuda. Fertilize Bermuda like fescue and the result will be a thin, weak lawn.
Fertilizing cool-season lawns versus warm-season lawns requires a paradigm shift.
While Bermuda is approaching the end of its season, fescue is starting its season.
Let’s look at the differences.

Bermuda lawns are ending a season and need a low nitrogen, high potassium fertilizer to strengthen roots for the winter.

Spring Dead Spot is a disease that impacts bermuda lawns in the spring as the lawn is coming out of dormancy. One of the catalyst is heavy nitrogen applications in October applied in an effort to keep a warm season lawn green and active late into the fall.
Fall Fertilizer Applications:
Bermuda and Zoysia (Warm Season) –
Warm-season grasses are at the end of their growing season. In October and November, warm-season lawns don’t require nitrogen. With shorter days, cooler days, and nights, and the decrease in soil temperature, growth slows, and turf color fades.
Heavy nitrogen fertilizer during October in an effort to maintain color longer into the fall is harmful for Bermuda and a catalyst for Spring Dead Spot Disease.
The chances of having Spring Dead Spot Disease next year increases when nitrogen fertilizer is applied to a Bermuda lawn in the last 4-5 weeks before the first freeze, which in central Oklahoma is typically the first week of November.
So, if you are thinking your Bermuda lawn needs one more shot of nitrogen before the end of the season, don’t do it. There is a good chance you are doing more harm than good.

Bermuda, a warm season turfgrass,, performs best when fertilized with higher nitrogen during the summer month and low nitrogen fertilizer in the fall.

With cooler night time temperatures and shorter days, Bermuda lawns are slowing down. Resist the urgent to try keep them green and growing with high nitrogen fertilizer this month.

Because bermuda starts to thin out when it receives less than 6 hours of direct sunlight it is common to see lawns with both bermuda and fescue. The problem is you try to fertilize them the same, one will flourish and the other will struggle.
Fescue –
Fall is the beginning of a new season for fescue.
As temperatures begin to cool in September, fescue lawns start regaining color, thicken, and actively growing.
For fescue, fall is the same as spring is for Bermuda.
In April and May, as soil temperatures warm and Bermuda starts to grow, a higher nitrogen fertilizer is important. Again, fall for fescue is just like spring for Bermuda. Nitrogen, the first number on the fertilizer bag, helps thicken fescue, encourages new growth, and adds a deep rich color to the lawn.
Fall fertilizer applications on fescue will result in a healthier, thicker lawn. And don’t forget, a dense healthy lawn is the best defense against weeds.
A fertilizer application with at least 25% nitrogen to start the fescue growing season is important.
Newly seeded fescue lawns benefit from a fertilizer application anytime within the first 4 weeks after seeding.
The fertilizer differences continue throughout the year. Between now and next May, fescue performs best if it receives 4 pounds of nitrogen per 1,000 square feet.
Bermuda lawns are at their best when they receive their nitrogen between spring green-up in April and the end of September.
In early summer, while Bermuda needs high nitrogen fertilizer the only fertilizer needed for fescue is a low nitrogen, high potassium fertilizer to strengthen roots headed into the summer heat, similar to only fertilizer needs of Bermuda heading into the winter cold.

Fescue lawns are start a new season every fall. A high nitrogen fertilizer application now will increase color and turf density.

Fescue can be grown in full sun but it requires a very different fertilizer schedule compared to bermuda.
For a successful, fescue lawn, you have to think backward from a Bermuda lawn.
For a successful Bermuda lawn, you must think backward from a fescue lawn.
You can’t fertilize them both the same way and expect them both to respond the same way.
The Good News –
If you subscribe to Hall | Stewart’s 7-Step Lawn Care Program, whether you have Bermuda, Zoysia, fescue, or a combination of turfgrasses, we will make sure each type is receiving the correct fertilizer based on the current season and growing conditions. Our program recognizes that warm-season grasses and cool-season grasses have very different fertilization timing and needs.
If you have a overseeded fescue or are planning to this fall, don’t skip a fertilizer application. New seed grows rapidly and needs plenty of nutrition.

A healthy, thick and deep green fescue lawn next spring is easier to achieve with when a lawn receives the correct fall fertilizer applications.
Let’s cover one more misconception about fescue in the fall:
Myth - If you are seeding fescue in the fall, it should not receive any lawn care applications.
Not true…
Fact - Fertilizer applications are not only very important for the existing fescue, but it also plays a critical role in the establishment of new seed.
Yes, if you are seeding you should not apply a pre-emergent herbicide until the seed has come up and the lawn has been mowed 2 or 3 times.
But, fertilizer anytime within the first 4 weeks of seeding will provide the seed the nourishment it needs as the new seedlings germinate and begin to grow rapidly.

The challenge for lawns with both warm season and cool season turf is they require the exact opposite timing of fertilizer applications for them both to thrive.
Summary:
Bermuda lawns benefit from receiving their last high-nitrogen fertilizer application before the end of September.
Fescue lawns are starting a new season and require a high-nitrogen fertilizer as they regain color, thicken, and grow.
Both are important.
For the best lawn, it is important to know your turf type and fertilize at the correct time of the year.
If you need have questions or need help understanding the fertilizer needs of your lawn, we would love to help.
Lorne Hall
Hall | Stewart Lawn + Landscape
(405)367-3873
Where Are the April Showers?

It is rare to be addressing watering practices in April. Who thinks about watering issues in April?
Regardless of the time of year, one of the best practices for your lawn and landscape is to pay attention to rainfall and supplement with good watering practices when needed.
Good watering practices start with being aware of current weather patterns and making adjustments to watering schedules.
Good watering practices are one of the biggest influences in the health and appearance of your landscape.
The west and north areas of the Oklahoma City metro are way behind on spring moisture. Lawns and landscapes that are not receiving supplemental moisture are showing signs of drought stress. Unfortunately, most people are not used to paying attention to their lawn & landscape’s moisture needs in April.
Best Watering Practices:
Your lawn and landscape need 1” of water per week during the spring.
A common question is “How long should I water?” Every irrigation system is different – different head types, different size nozzles, different head spacing, different areas, etc.
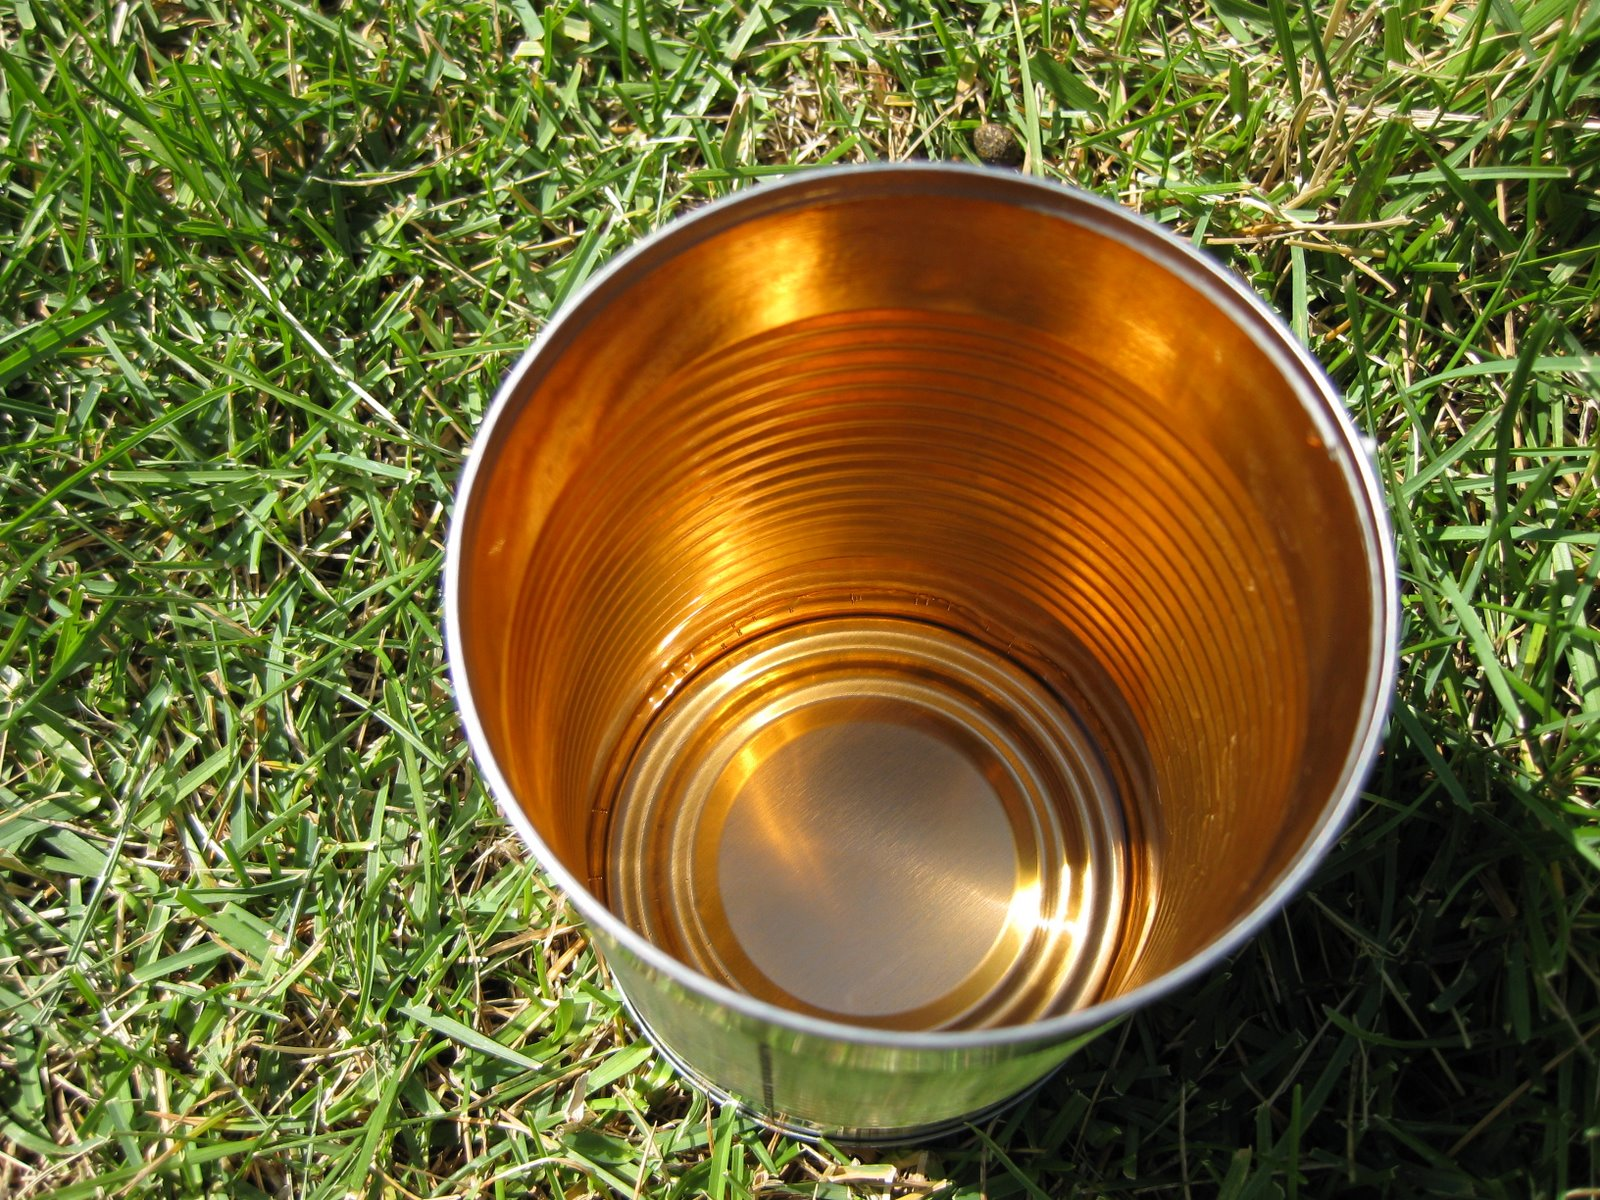
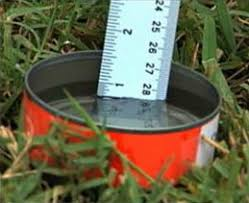
The best way to know how long you should water is to measure the amount of water your system puts out in each zone. Take a few cans and place them around your lawn in a random pattern. Run your sprinklers through a cycle and measure the amount of water in the cans. If the sprinklers ran for 15 minutes and you had .25” of water, you need 60 minutes per week.
Next, determine how long you can run your irrigation before there is excessive runoff. This will tell you how many times per week you need to water.
If you can get away with watering every 4th-day versus every other day, you will have a healthier, stronger lawn and landscape.
If you don’t have the time to audit the amount of water your system puts out, start with these settings, monitor, and adjust:
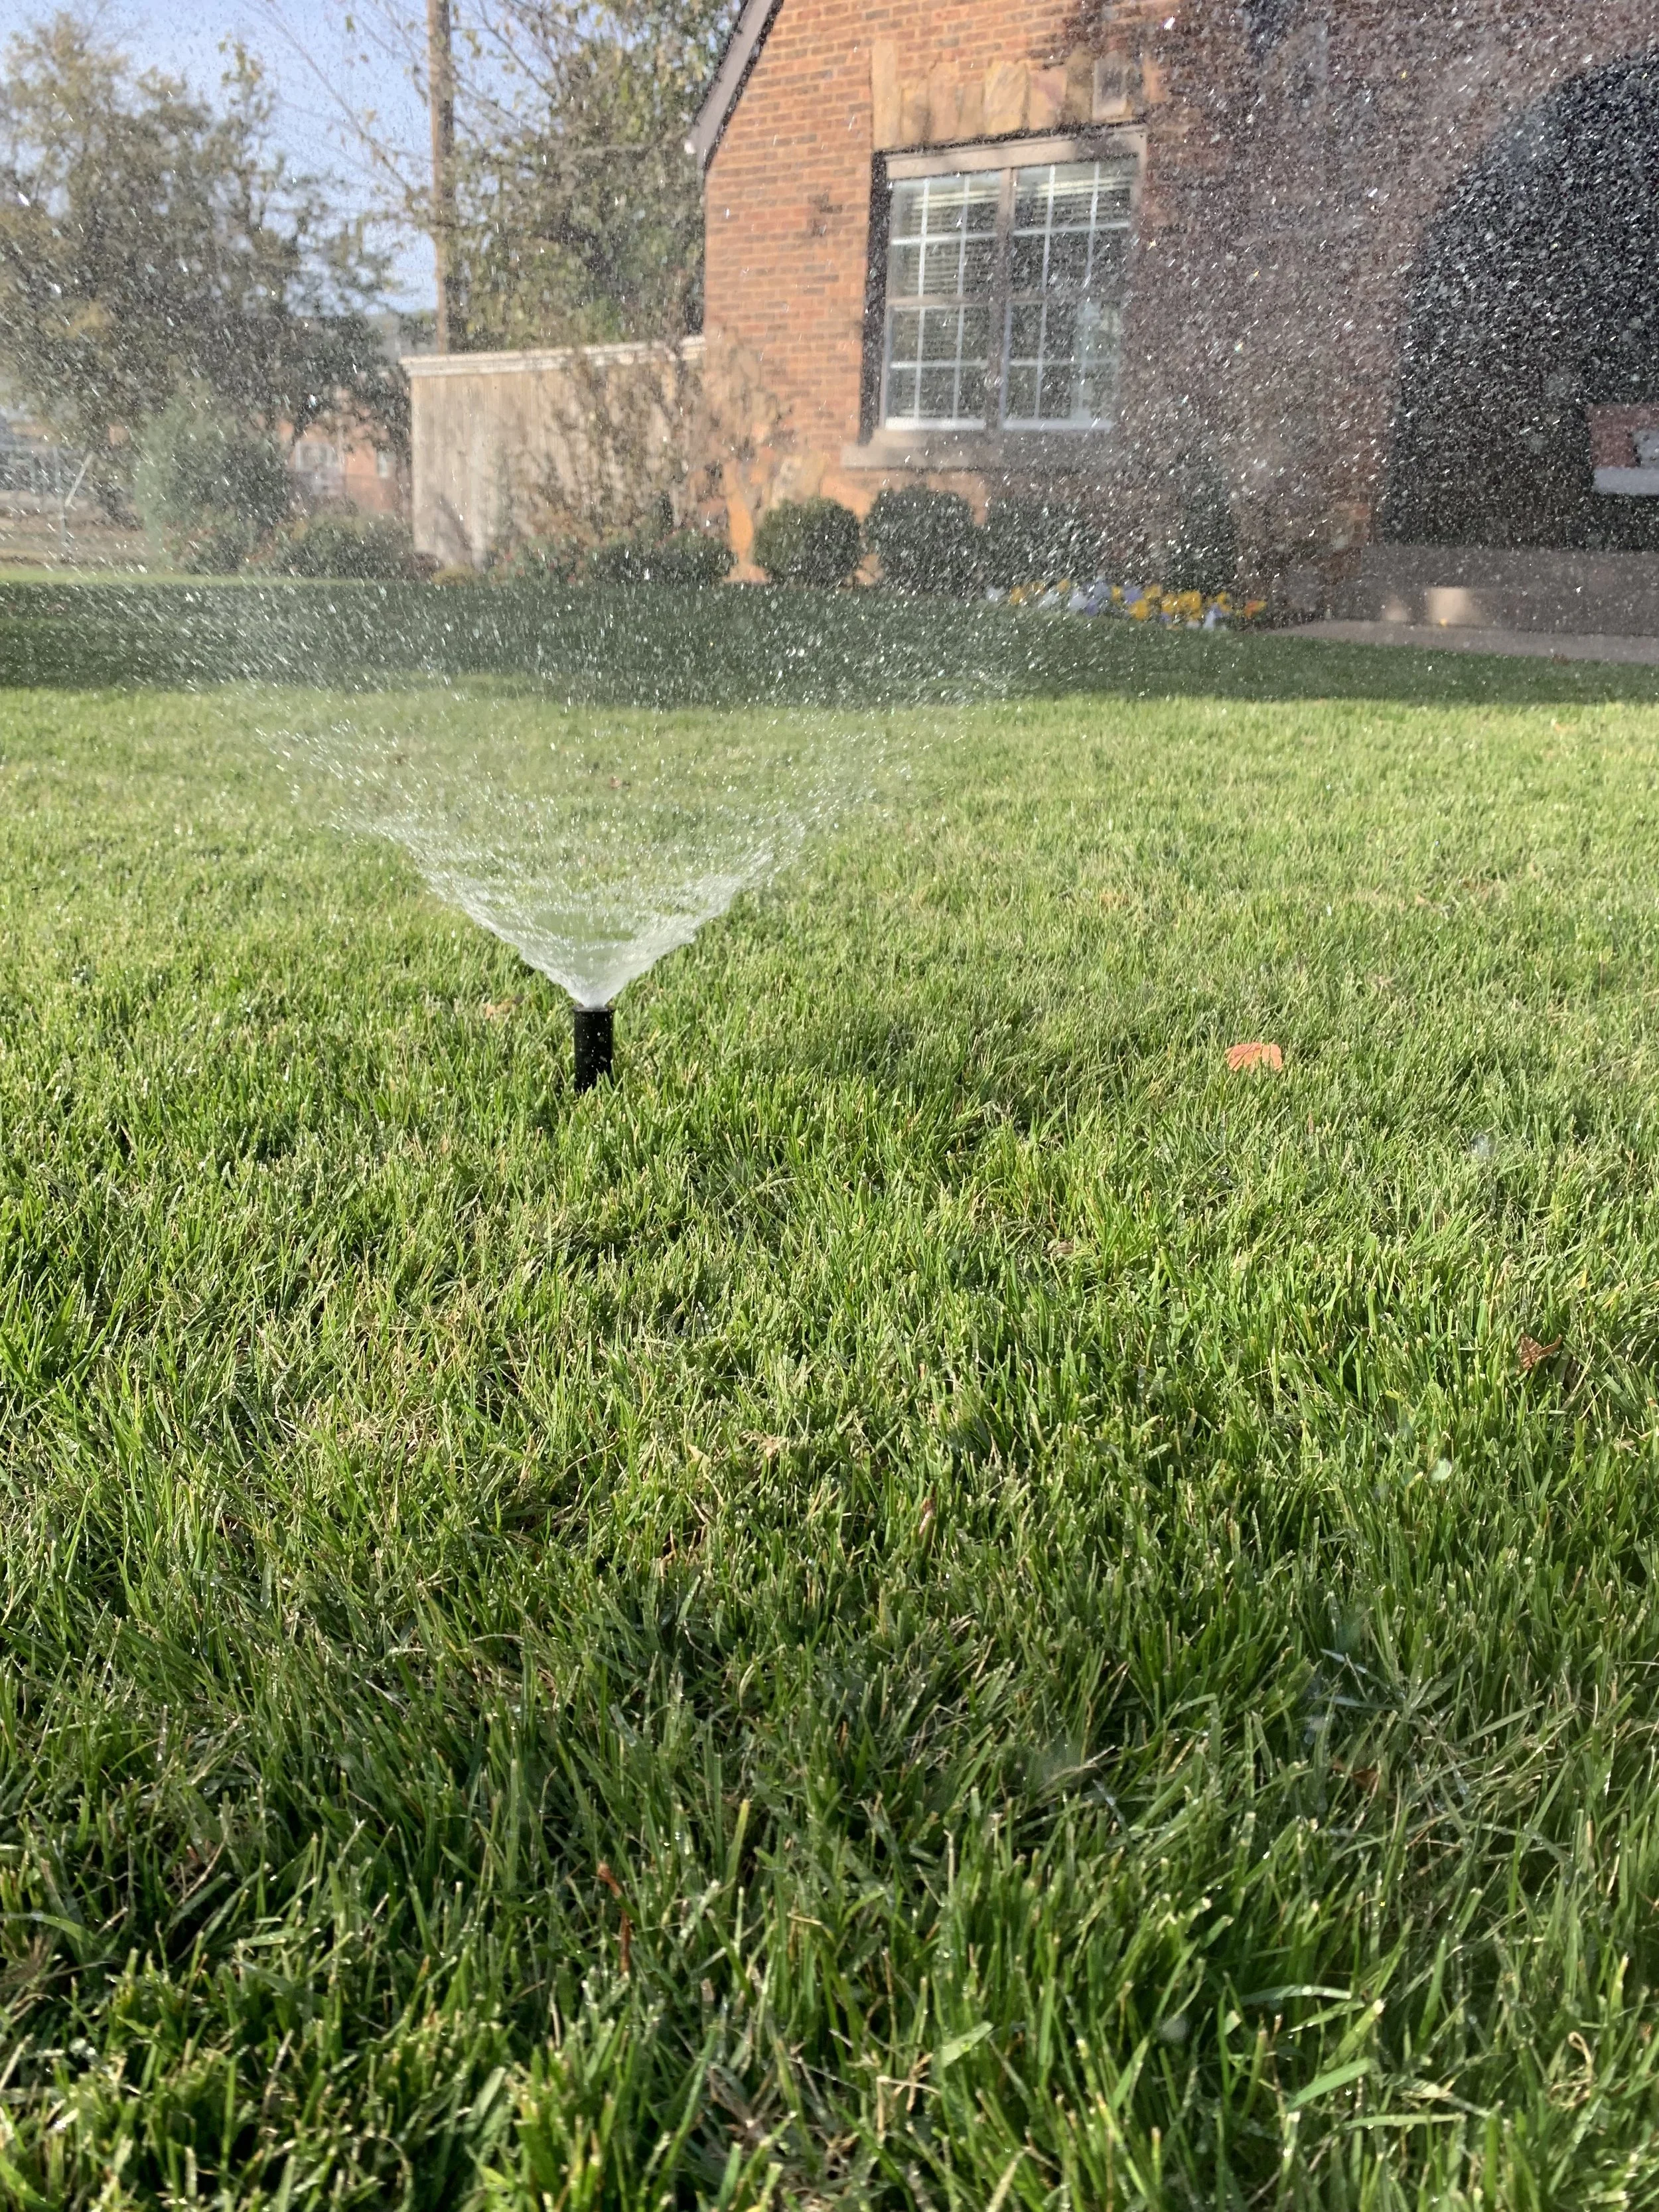
Fixed spray pattern heads with 10-15’ spacings – 15 mins per time.
Larger rotor type heads on 20-30’ spacings – 30 mins per time.

Set your controller to water with back-to-back run times.
For most of our landscapes, if we run our sprinklers long enough to get the recommended amount of water, we end up with a lot of water running down the street. Splitting zone run time in half and setting the controller to run through the zones back to back will improve the amount of water that soaks in and reduce the amount of water that runs off.
Example: Set the controller to run at 4:00 AM and 5:00 AM. When the 4:00 cycle completes, even if it is after 5:00, the controller will start the second cycle.
Moist soil will absorb more water than dry soil. Soil is just like the sponge in your sink. A dried sponge repels water before it starts absorbing water. Your landscape is the same. The first cycle moistens the soil and the second cycle soaks in.
Split, back-to-back, irrigation cycles are an old golf course trick.
I started using split, back-to-back, irrigation cycles a few years ago on lawns with slopes.
After seeing great results, I started incorporating the concept on all lawns.
It makes a difference in watering efficiency.

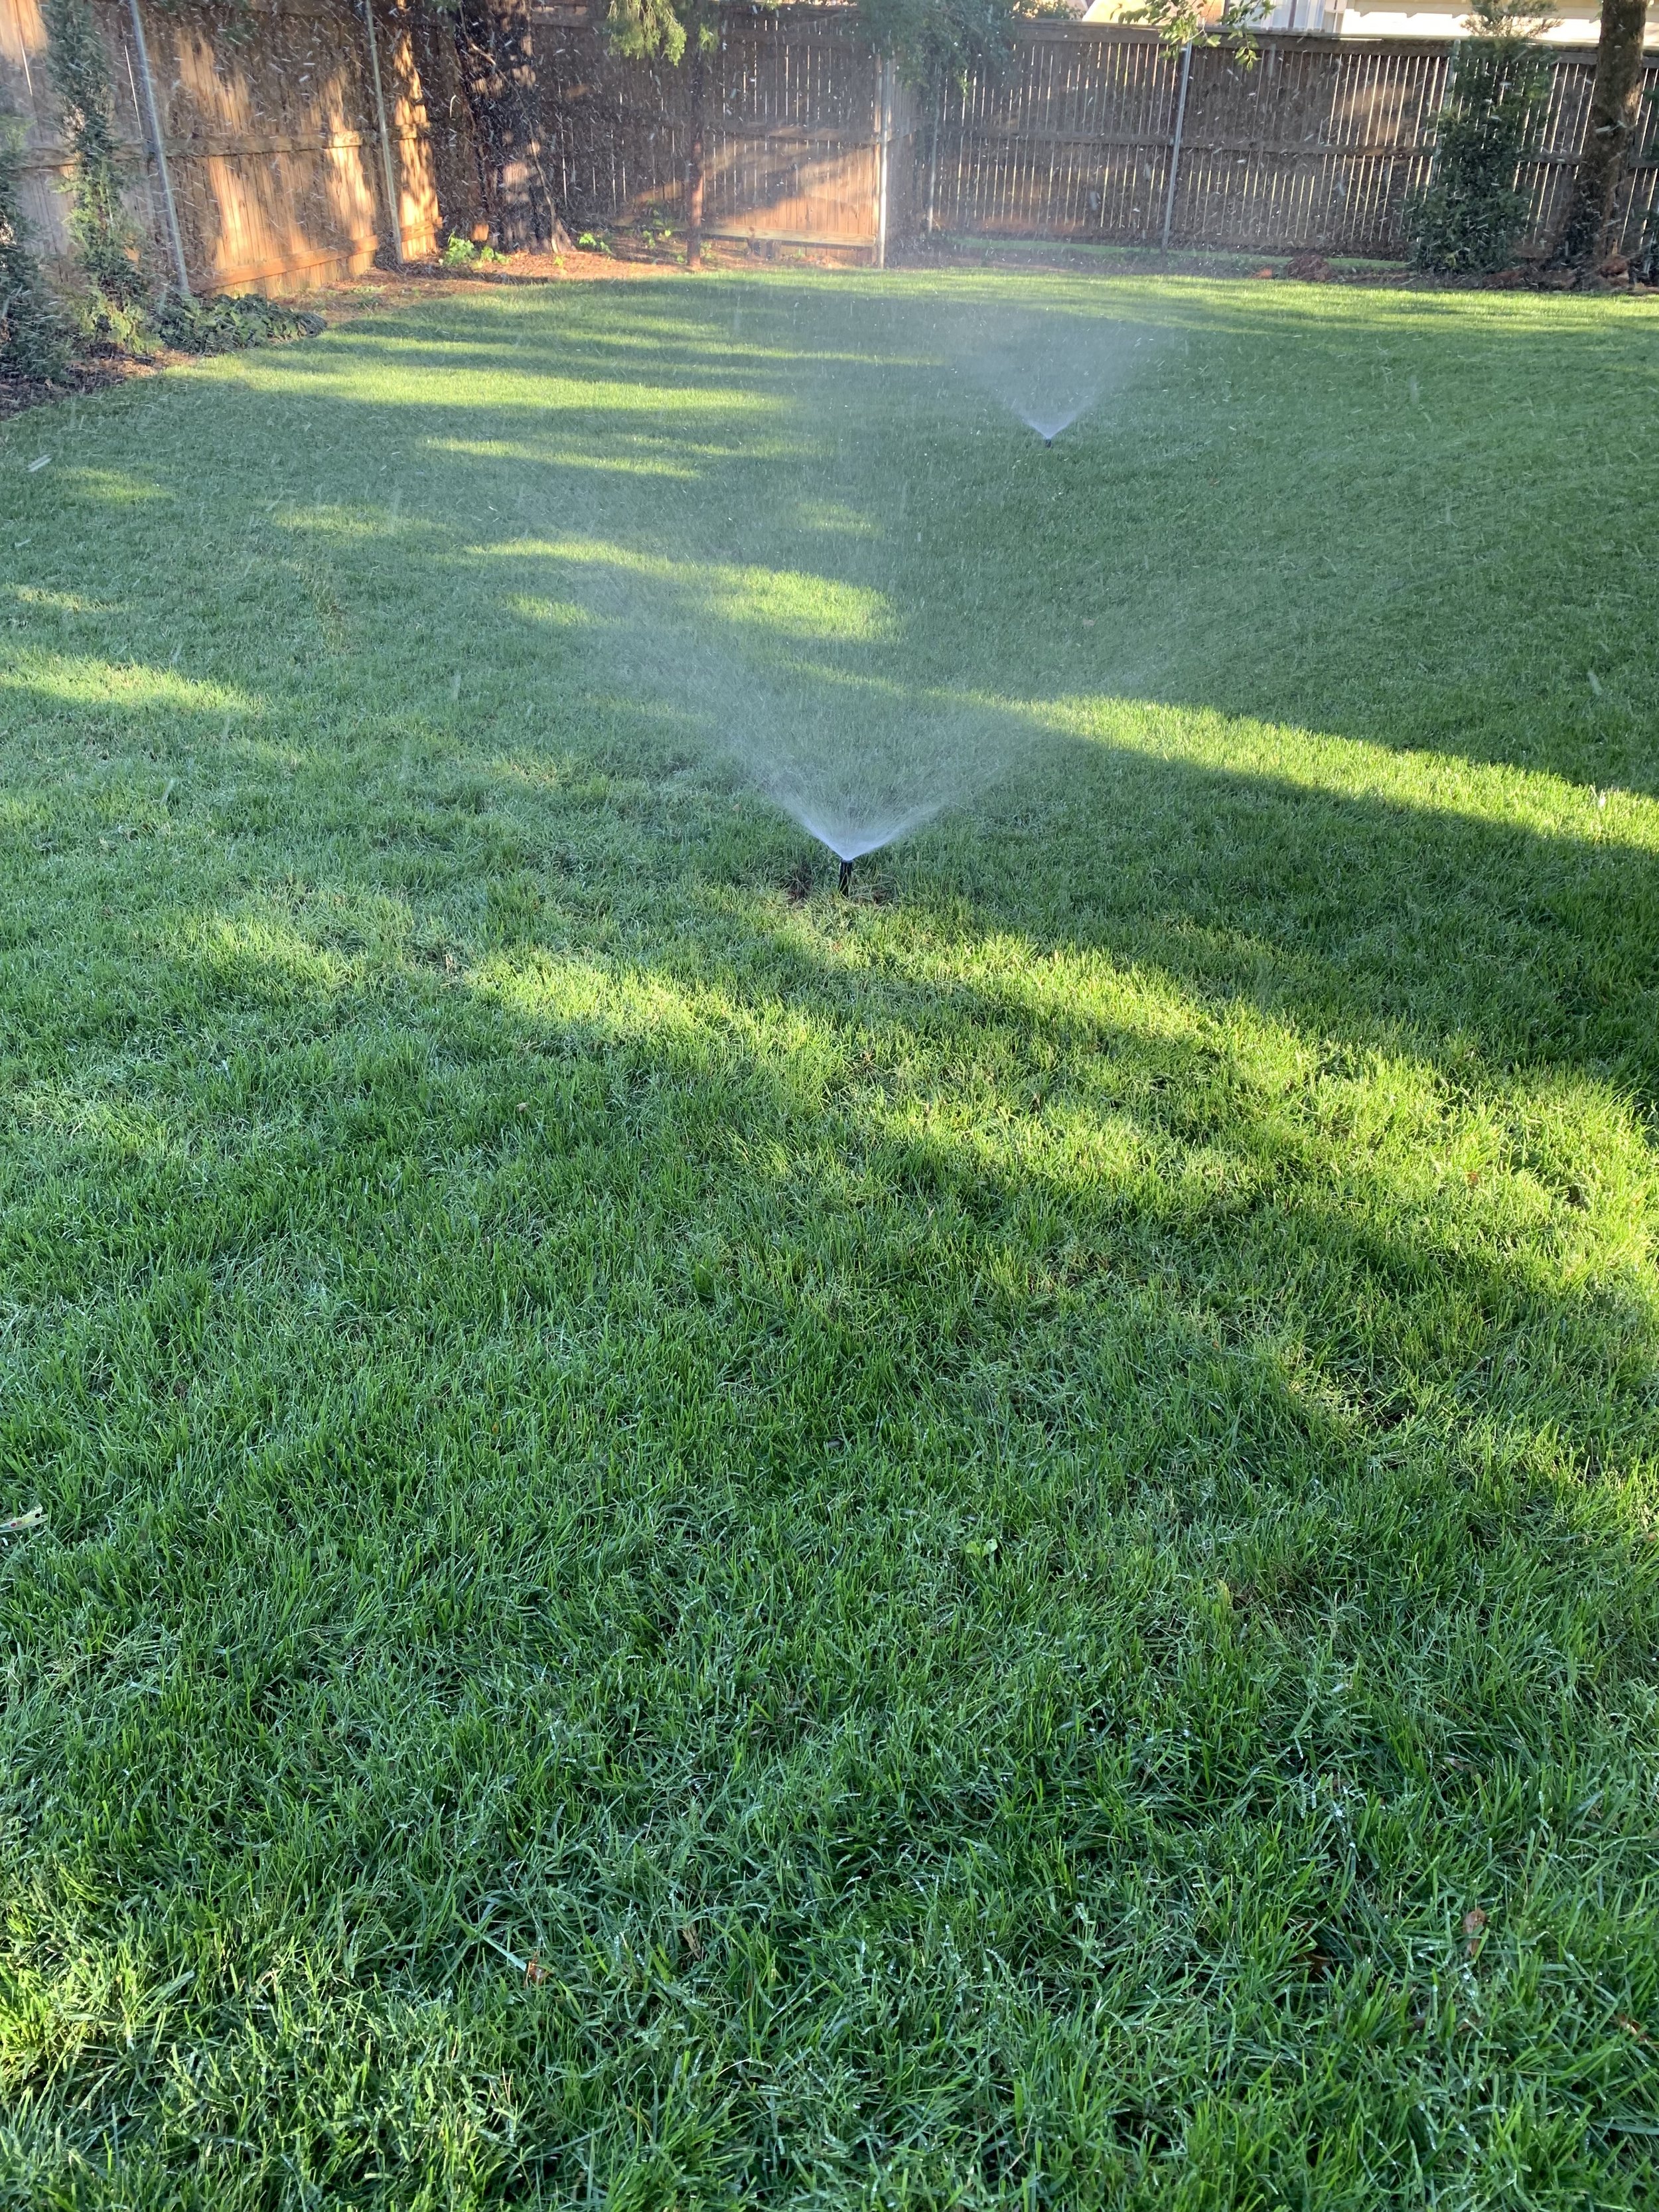
Water in the early morning.
Evaporation is at its lowest point in the pre-dawn hours. Also, the wind is usually at the lowest point of the day in the pre-dawn hours. I prefer to set most irrigation controllers to start at 4:00 AM with the goal of having the cycle completed by 8:00 AM.
Avoid watering in the heat of the day when much of the water will be lost to evaporation. Also, avoid watering in the evening. Watering in the evening promotes many turf diseases because the lawn stays wet too long.

IMPORTANT: Don’t water fescue in the evening during the summer. When water remains in the leaf for more than 6 hours, brown patch disease will develop.

Daily watering is not needed.
Unless you are trying to get newly planted seed to germinate or new sod to take root, there is not a good reason to water every day. Always water deep and infrequent. Daily, shallow watering creates a landscape that is shallow-rooted and more dependent on constant moisture for survival.
Fescue will benefit from a deep soaking just like Bermuda. A common myth I would love to dispel is that fescue requires a lot more water than Bermuda. Yes, it is when you are trying to get newly seeded fescue to germinate, but mature fescue doesn’t require more moisture than Bermuda.
I water my fescue the same way I water Bermuda – deep, infrequent cycles.

It’s April! Fescue should be at their best. If you have areas of fescue that are not rich green, check the soil moisture. If you can slip a large screwdriver several inches into the soil, you need to water.
Aeration improves moisture absorption.
You can’t beat aeration for improving your soil structure. A key benefit of improved soil structure is better water absorption. Lawns that receive annual aeration (or at least every other year) do not experience as much runoff.
Always pay attention to water need.
If we receive .5” of rain or more, turn your controller off for a few days. Install a rain sensor if you are not good at remembering. A rain sensor will pay for itself easily in one season. Don’t assume you can leave your controller in automatic and forget it.
Don’t stress if your lawn and landscape gets a little dry, it will rebound quickly once water is applied.
A good indicator that your lawn is needing water is the footprint test. If the grass retains your footprints instead of quickly springing back, it is time to resume watering.

Fescue growing on the top of a sprinkler head.
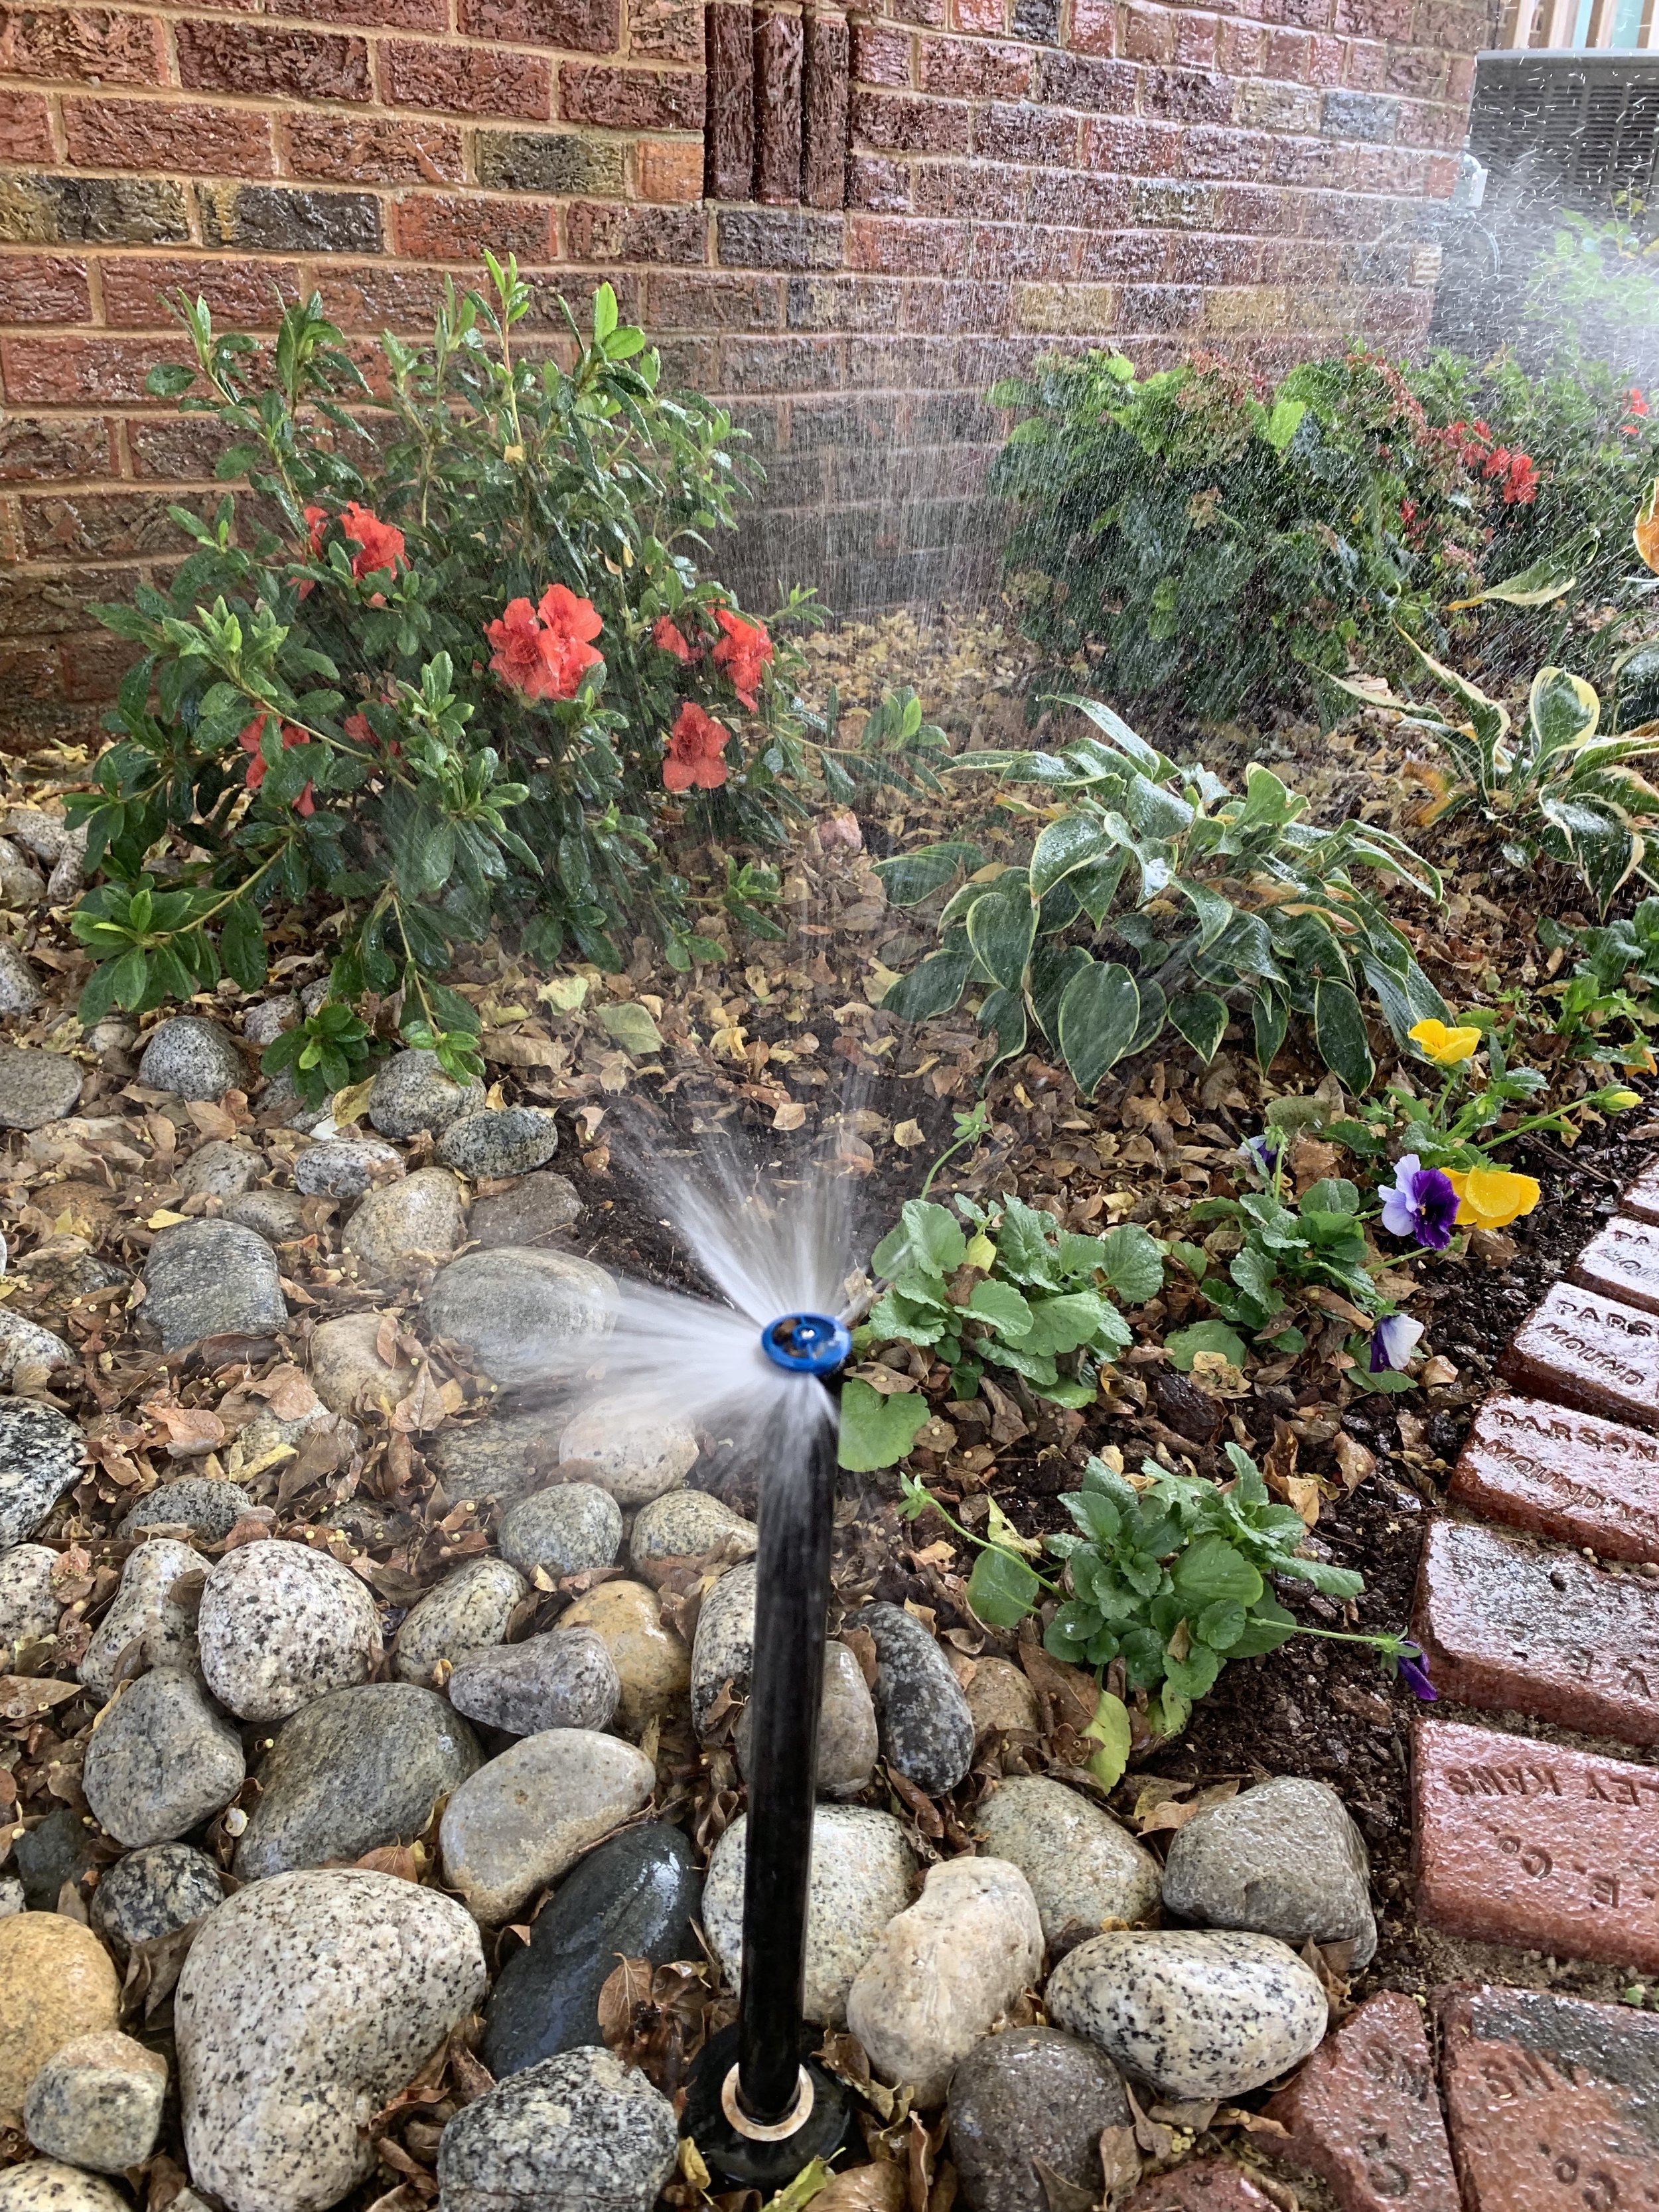
Watch for uneven water patterns.
If you notice areas where the lawn color is fading, you may have uneven moisture patterns. This could be the result of a broken head, a clogged nozzle, or a head that is out of adjustment.

Head to head coverage is when the water from one sprinkler head reaches all the way to the next head. Without head to head coverage, dry areas can develop around heads.

A clue to an uneven watering problem is an arc pattern matching the sweep of an irrigation head.

Even if you don’t have an irrigation system, the concepts of good watering still apply.
It is important to learn how long you need to water when you are using a hose-end sprinkler. Next time you water, set out a few cans. You will be surprised how long you need to water to get the proper amount of water on your lawn. Invest in a digital hose water timer, such as ones made by Orbit. It will make it easier for you to control the timing and frequency of watering.

A healthy landscape is an important part of our environment. A healthy turf helps clean the air, trap carbon dioxide, reduce erosion, improve groundwater quality, absorb noise, reduce temperatures, as well as, adds curb appeal and value to your home.
Let’s hope metro-wide spring moisture arrives soon.
Our environment needs it. Our lawns and landscapes need it.
But, if it doesn’t, be prepared to put the best watering practices in place.
Lorne Hall
Hall | Stewart Lawn + Landscape
(405)367-3873

Two Important March Pruning Tips

If you have overgrown evergreens, this month is the best time for major pruning.
If you have crape myrtles, now is the best time for proper routine pruning.
Evergreen Pruning
As landscapes mature, it is typical for plant material to outgrow the intended space.
Some of the biggest offenders are hollies and boxwoods. It is common to find hollies growing into eves and boxwoods crowding sidewalks. The tendency is to plant shrubs in spaces they will not fit when they reach their mature size.
But, who reads a plant label?
And, if you did read the label you were thinking: “Surely this pretty little holly will never cover up the window.”
Then, a few short seasons later, you find yourself struggling to keep the shrub contained in the space you intended.
Or, possibly you have done a great job of keeping them sheared to fit the space, but they no longer have the natural shape you fell in love with.
What do you do? Tear them out and start over?

Dwarf Burford Holly is commonly used as a foundation planting. If your row of holly have become overgrown late winter through early spring is the best time to reduce their size with major pruning.

Nellie Stevens Holly often look best when they are allowed to retain their natural shape. If your Nellies have become overgrown, or have lost their natural beauty from repeated shearing, mid-February through March is the time to regain their natural shape with major pruning.
I have a better solution - March is your opportunity to do major pruning on most broadleaf evergreens.
The broadleaf evergreen, any plant with leaves year-round, the list includes aucuba, camellia, boxwood, cherry laurel, elaeagnus, holly, mahonia, photinia, just to name a few.
Heavy pruning in the spring before new growth starts allows you the opportunity to regain the shape you intended for the plant.
Twice over the 20 years, since it was planted, I have heavily pruned a large Nellie Stevens Holly on one corner of my house. And, as I do every time, I take a broadleaf evergreen back to no leaves and only major branches, I keep asking myself,
“What if this holly doesn’t re-leaf?”
“Am I ruining a 20-year-old Nellie?”
But, once again the shrub responded just like it should, and within in one growing season, it returned to its natural beauty.

Nellie Stevens Holly

This is the same holly that was pruned back to only branches a couple of years ago.
Take time this week to evaluate your broadleaf evergreen shrubs.
Are they overgrown?
Or, do they have winter damage that needs to be removed?
Or, do they just need to be reshaped?
If so, now is the time to remove dead branches, reshape, and regain control of overgrown shrubs.
March is your best window of opportunity each year for the major pruning of broadleaf evergreens.

If you have boxwood taking over a sidewalk, mid-February through March is the best time to reclaim the sidewalk. You can trim them aggressively and they will recover during the growing season.

Nellie R Stevens Holly is a favorite foundation plant. With a mature size of 15’ tall and 10’ wide they quickly loose their natural beauty with regular sheering in an attempt to make them fit the landscape. Now is the best time to reduce the size and return them to their appearance.

BEFORE: If you have large hollies with damage from last winter, can they be saved or should they be replaced?

AFTER: As long as the evergreen has some green leaves you can remove the dead branches and reshape the plant. If the plant has a healthy root system, you will be surprised at how quickly it regains a good shape.

Why are so many crape myrtles cut back to 4-5’ every year?
Three Reasons for Bad Crape Myrtle Pruning
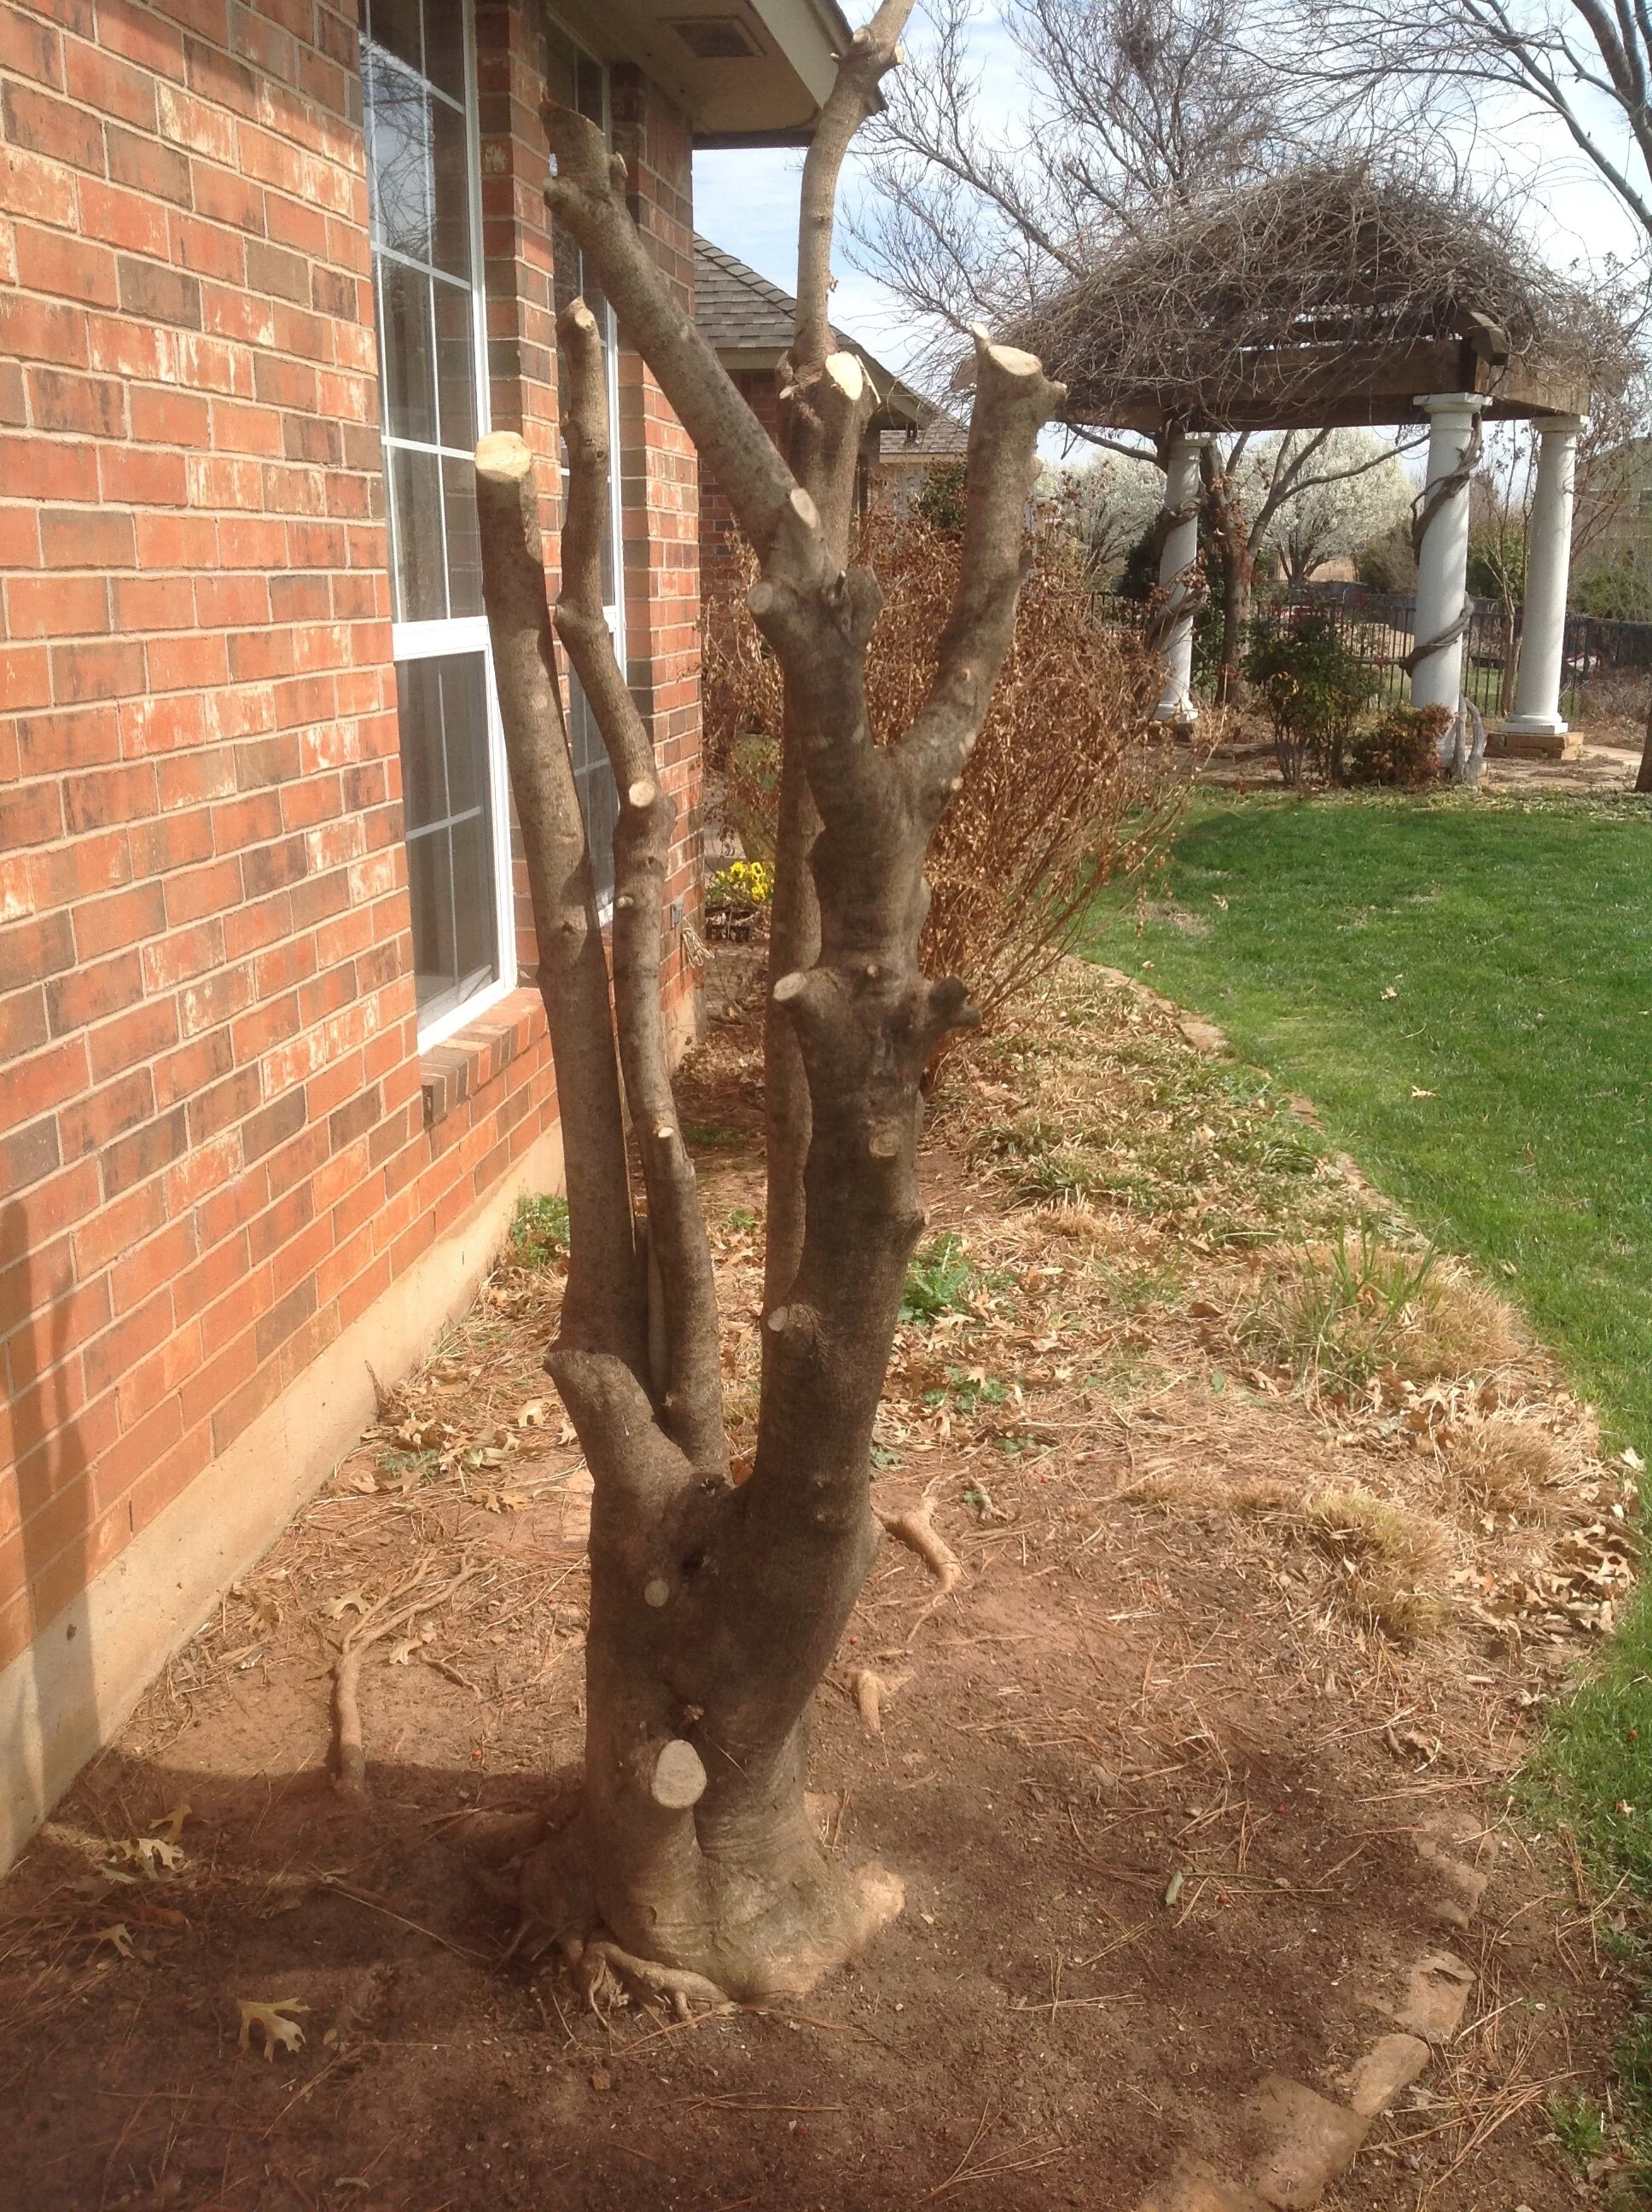
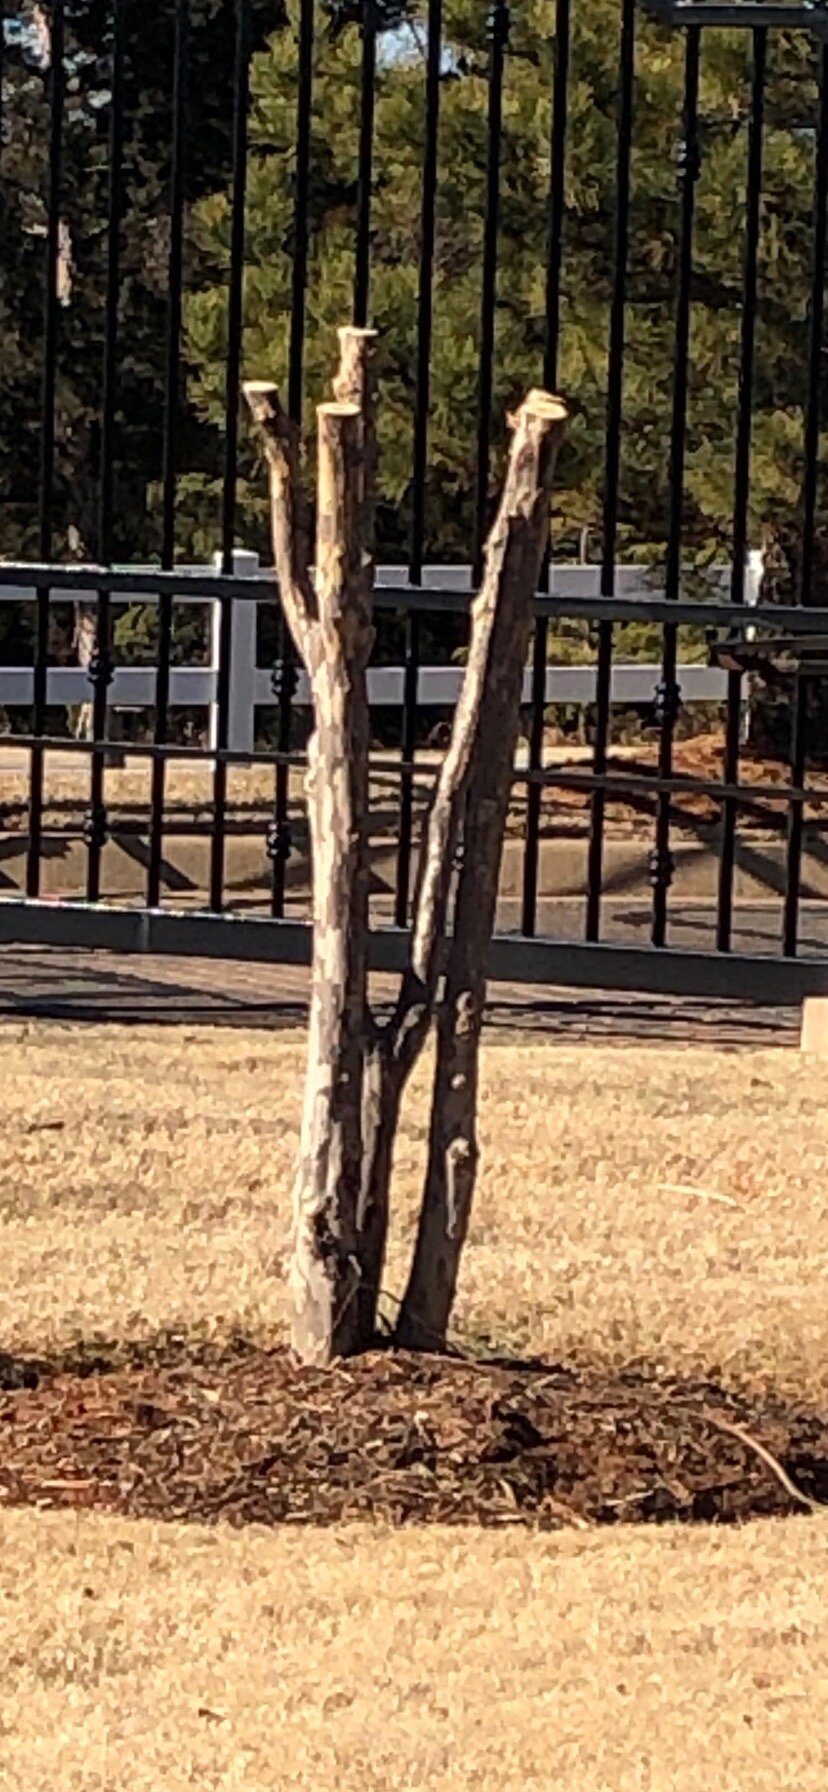
1. It is simply what everyone does to their crape myrtles in the spring. Have you ever wondered if it is the best practice? It pains me to see so many beautiful crapes cut back to ugly stubs every spring. This practice ruins the natural form of the plant. Southern Living termed the practice as “Crape Murder” decades ago, yet it continues as a common practice.
2. The wrong variety was selected for the location and pruning is needed to control the size. Varieties include large tree types that grow 20’ or larger, medium varieties 12-18’, 6-12’ small varieties, and dwarf varieties. When you select the right size for your planting area and are not forced to prune heavily to contain the plant, you will find you will have a healthier plant resulting in less disease and more blooms.
3. They believe the myth that crape myrtles bloom more if they are severely pruned every year. Flowers are produced on new growth every year even if they are not pruned. Without heavy pruning, you will have more branch area resulting in more summer blooms.

Crape Murder destroys the natural beauty of the plant. Mature crape myrtles have wonderful smooth and molten bark with graceful shapes. You will never experience this quality if you murder them every spring.
Crape myrtles in open areas should be allowed to grow to the natural shape as small trees and not pruned to 5’ every year.

When you allow crape myrtle to grow to their natural shape and size you gain the benefit of their attractive exfoliating bark.
Crape myrtles are one of the longest-blooming plants in our region, have attractive branching and bark, and provide great fall color.
Crape myrtles deserve a place in our landscape, planted in a location that allows them to grow into large shrubs or small trees they were intended to.
Lorne Hall
Hall | Stewart Lawn + Landscape
(405)367-3873
Crape Myrtle Pruning
Crape myrtle pruning is a regular topic for Hall | Stewart at this time of year. Sometimes we feel like we are a broken record on the subject and it’s time to move on, but we just can’t.
The over-pruning, the destruction of a wonderfully structured plant, never seems to stop. So, we will keep promoting the proper pruning and care of crape myrtles.
We understand that most crape myrtles require some pruning in late winter to early spring, but way too often crape myrtles are trimmed incorrectly and too severely.
There are cases where the crape myrtle variety is the wrong one for the location and the only choice is to dramatically prune. But, most crape myrtles are over-pruned for no reason.
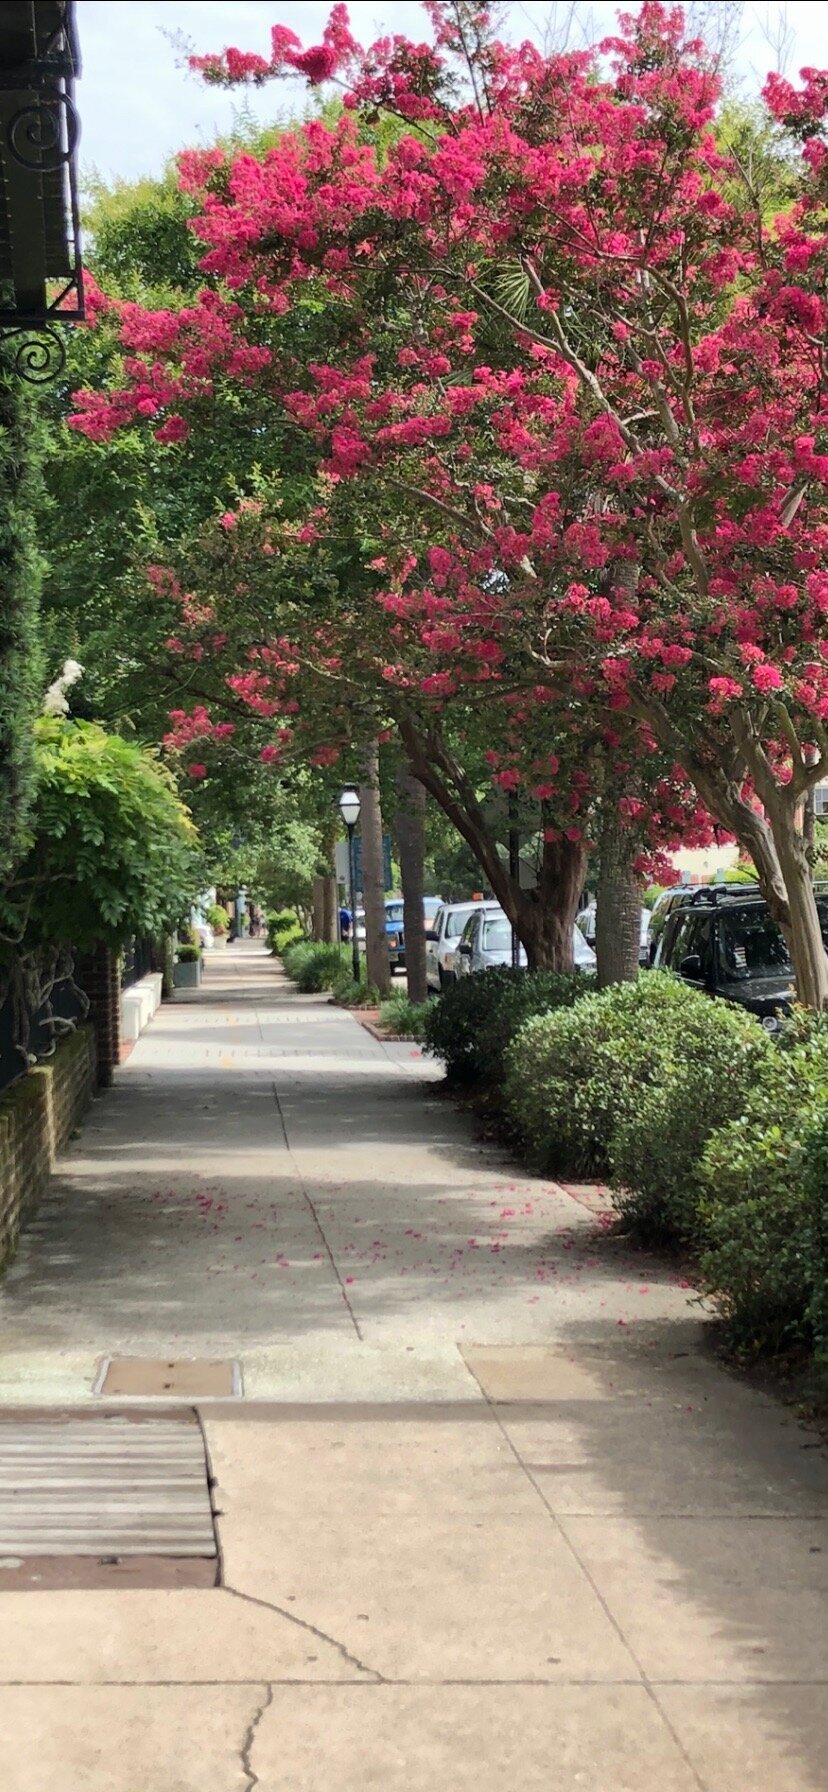
Crape myrtles create a great allee along streets when grown to their natural size.

Great pruning… this Crape Myrtle didn’t fall victim to Crape Murder.
How should crape myrtles be pruned?
Best Pruning Tips
1. Know what your goal is before you start. You can always prune more, but once you have pruned, you can never prune less.
2. Remove last summer’s seed pods from the ends of the branches with hand pruners.
3. Remove all the smaller branches growing toward the center of the plant. This will allow more air and light to reach the center of the plant which will increase blooms and reduce disease.
4. Make cuts back at the main branch and don’t leave stubs.
5. Remove any unwanted branches from the base of large shrub or tree from varieties. Typically 5-7 trunks, free of any branches for the first quarter or third of the plant results in an attractive landscape plant.
What is up with Fescue lawns this winter?


This has been a common question the past couple of weeks, along with:
“Is my fescue dead?”
“Should I reseed my fescue this spring?”
Fescue lawns always lose some color through the winter. Some winters more than others. Others not as much.
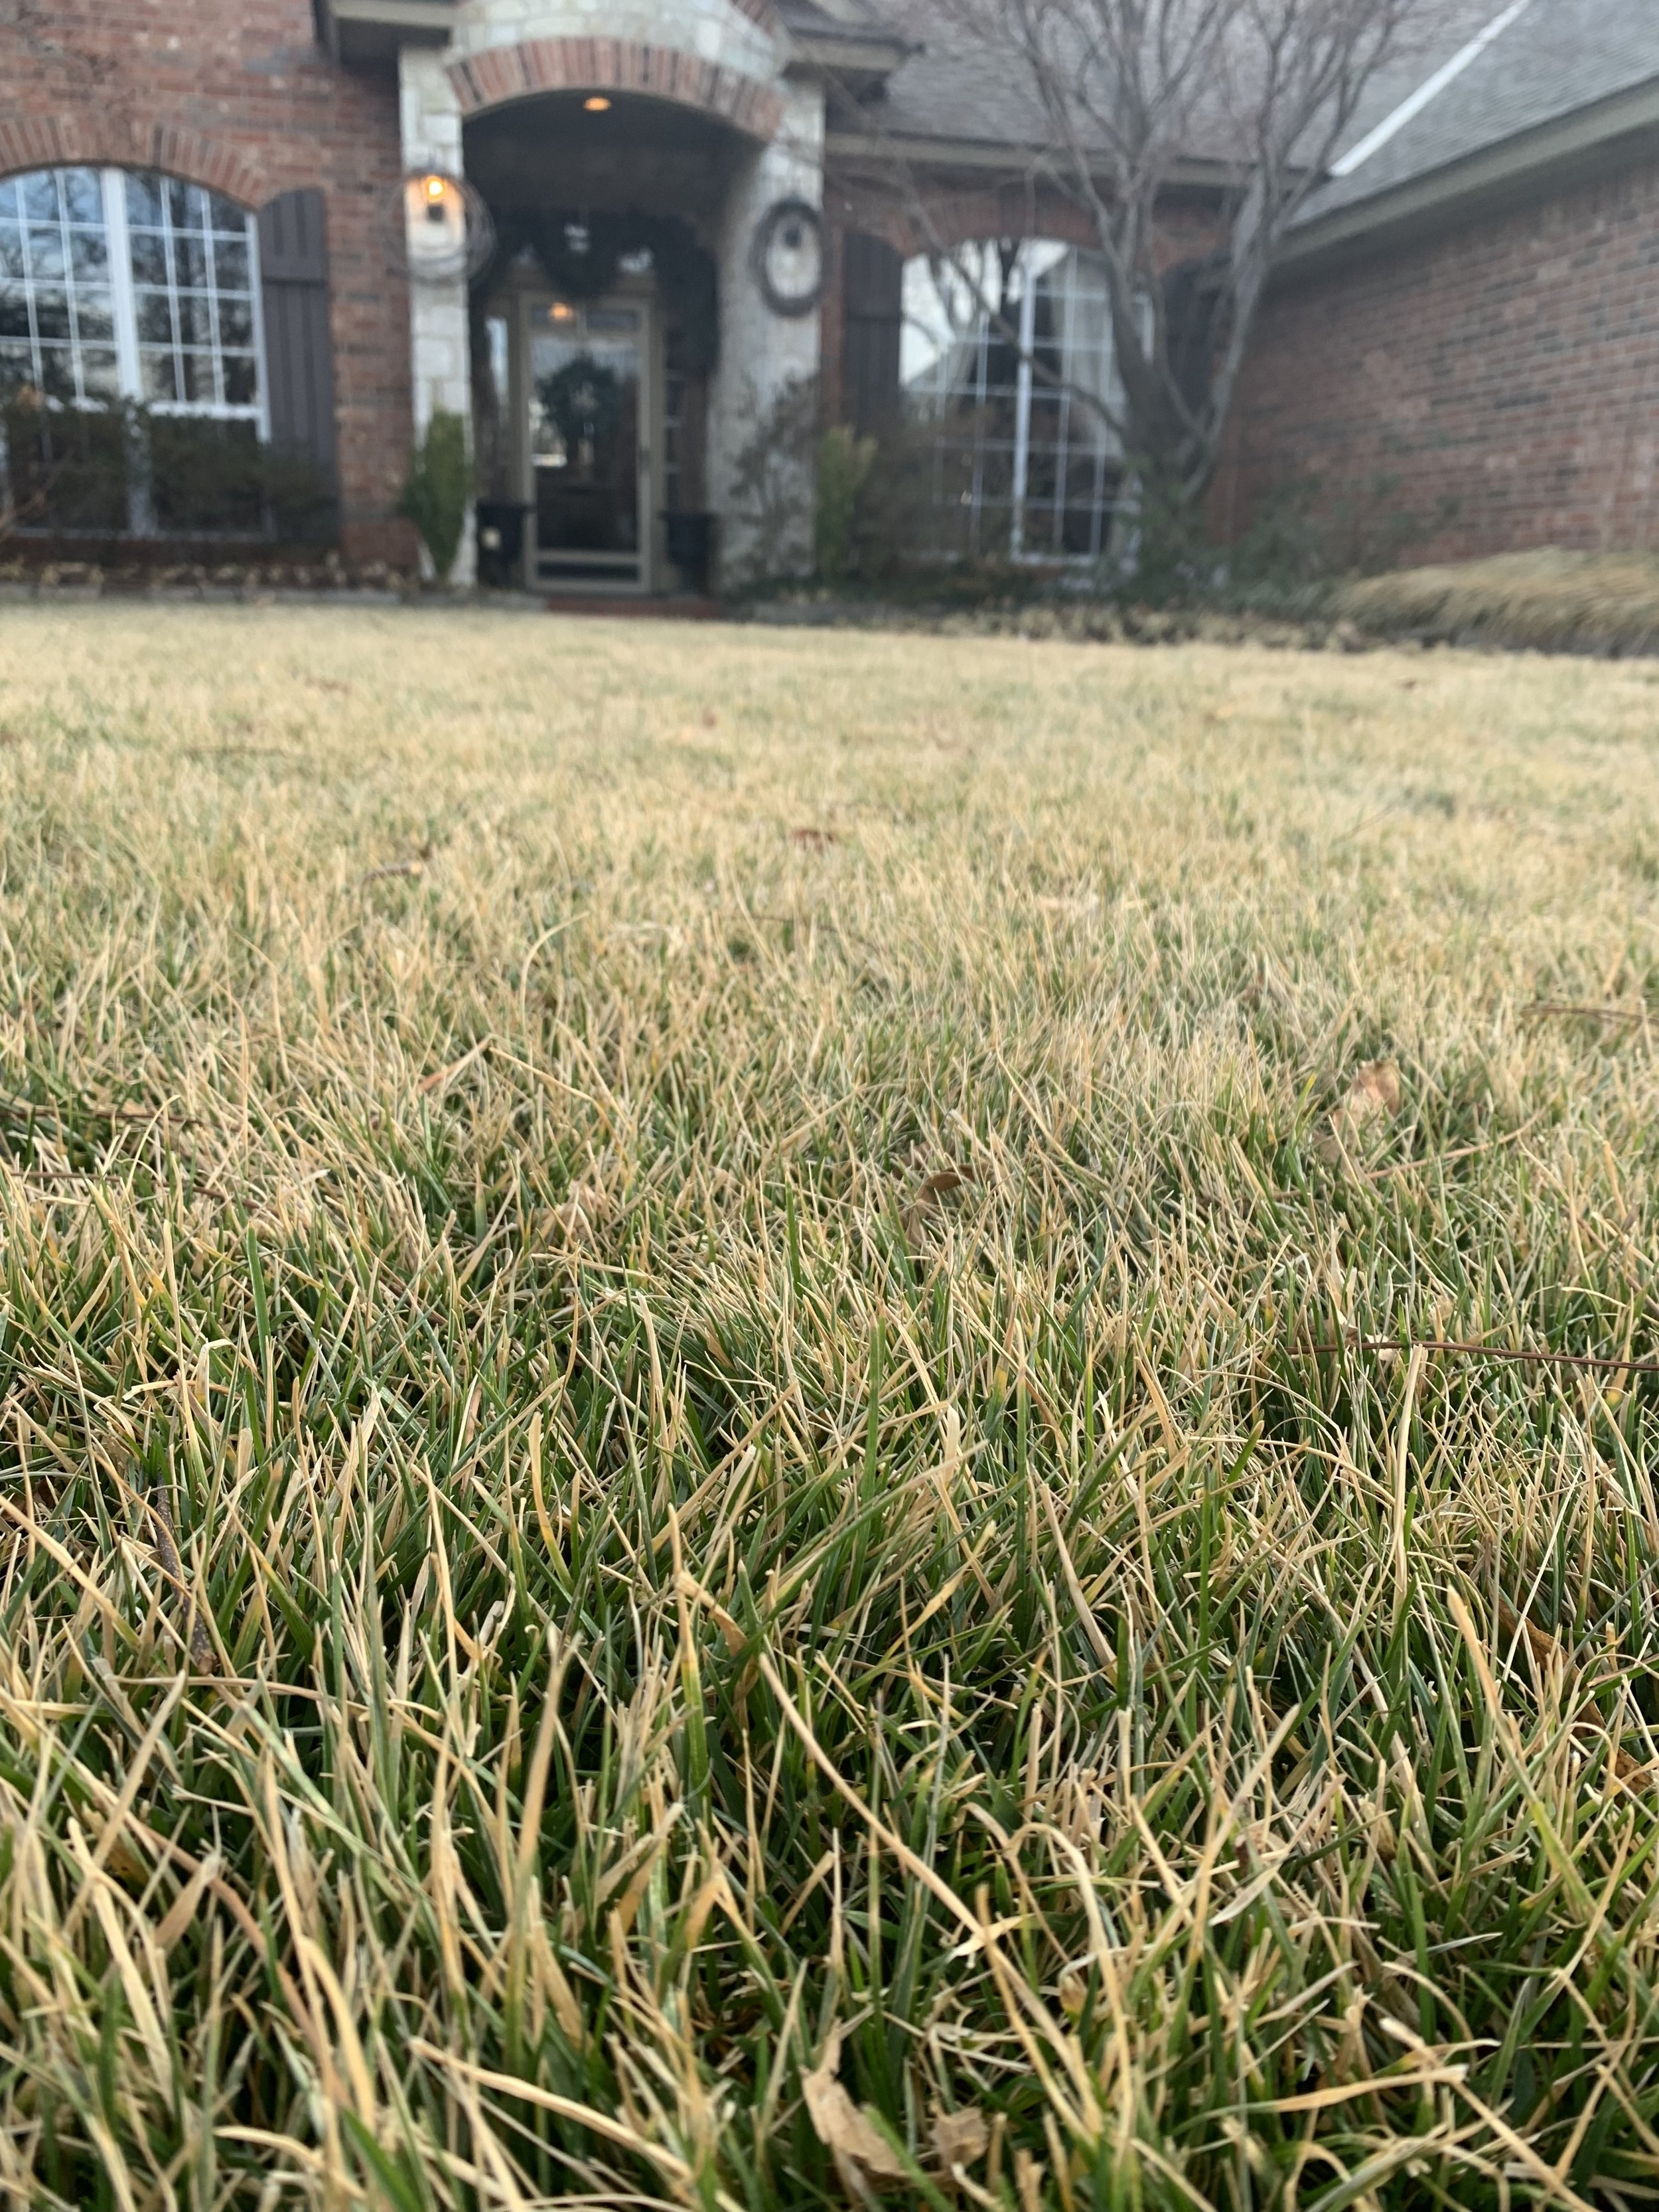
What is unique about fescue lawns this winter is how quickly they developed a brown, freeze-burned appearance.
Reasons Why Fescue Lawns Lost Color So Quickly This Winter

We are used to fescue losing some color, but not as suddenly as they did this year.
1. A Cold Snap Without Snow Cover
Anytime temperatures dip below 20 degrees, especially if it is for a few days, fescue’s rich green color starts to fade. But, if there is snow cover, the loss of color is much less.
Just before Christmas, we had a 2-degree night, followed by a 4-degree night, followed by a 9-degree night. The Oklahoma City area had a run of 60 consecutive hours without the temperature rising above freezing.
(Warning: Avoid getting trapped in a conversation at a party with anyone with this type of information.)
Most winters we will have a cold snap in December that leaves fescue a little less green, followed by one that is a little colder in January and followed by another in late January to early February. With each occurrence, a little more green is lost and gradually most fescue lawns appeared mostly brown.
Not this winter.
This winter the single-digit nights in December left fescue lawns with a freeze-burned brown color almost overnight.
Snow cover when temperatures are below 20 degrees is beneficial because it traps warm soil temperatures below the lawn and it keeps freezing temperatures from damaging fescue leaf blades.
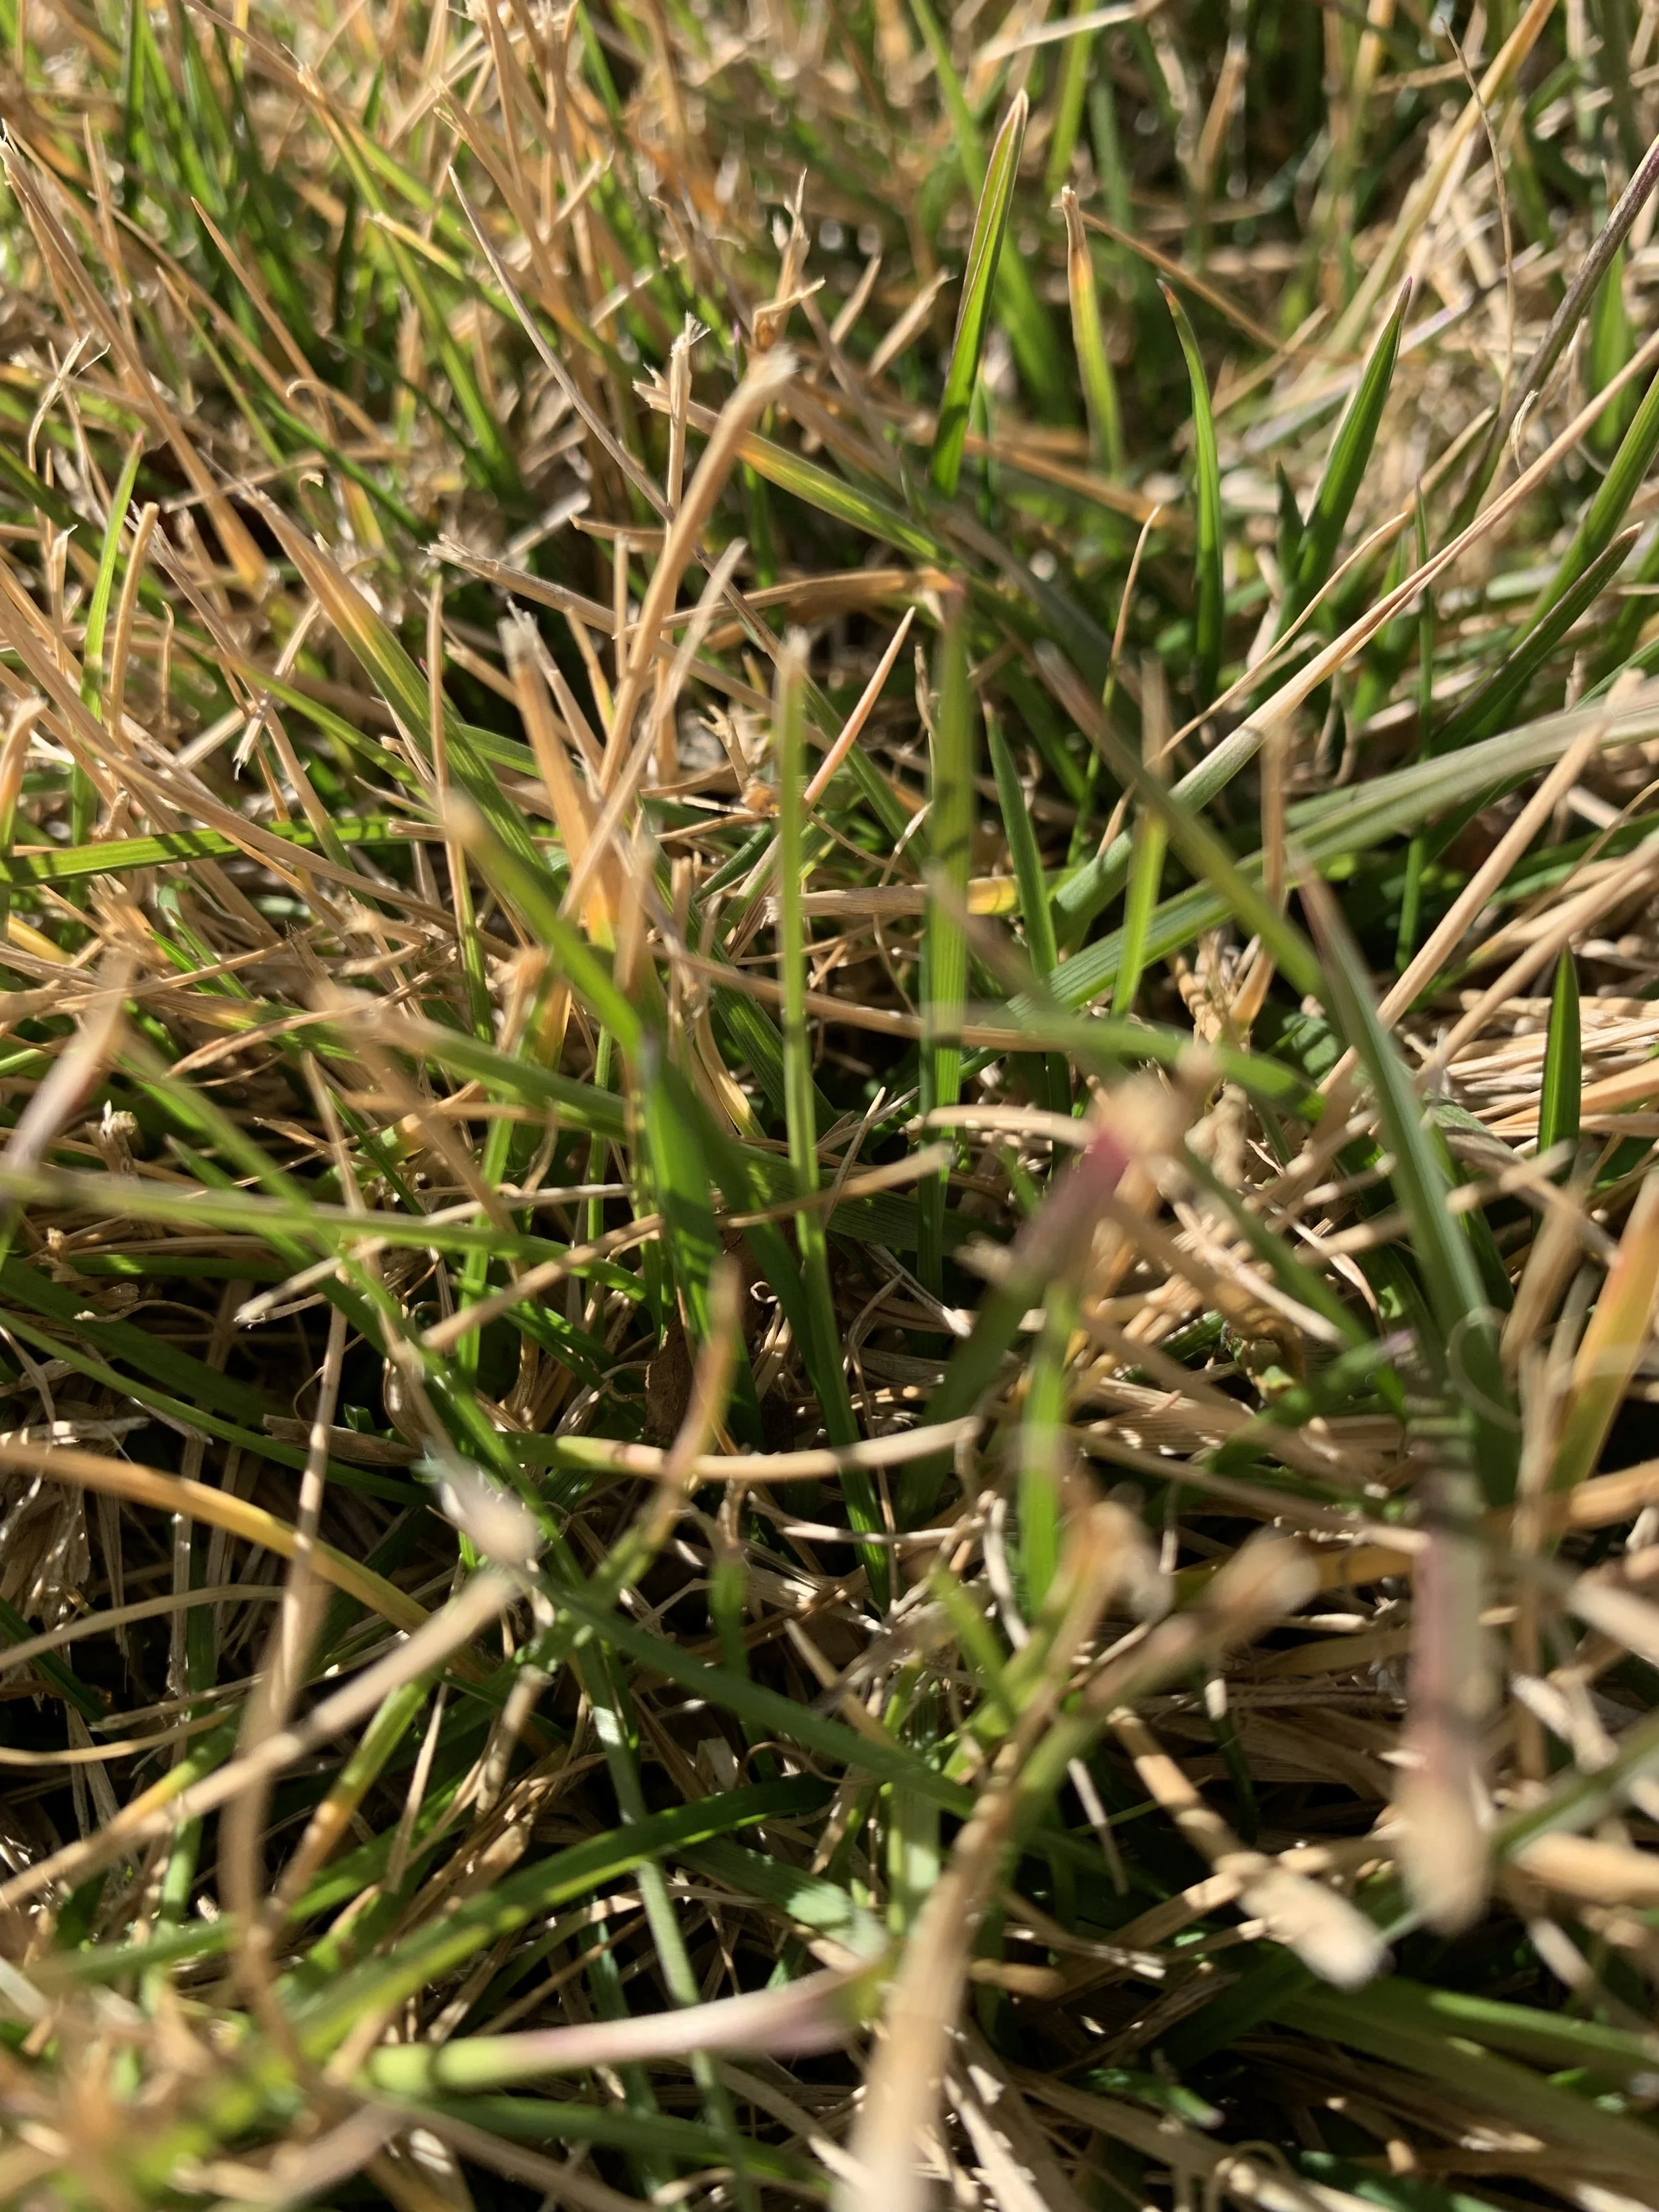
With the warm start to January and this weeks rain, fescue lawns are trying to regain their color.
Why is snow cover important? Snow acts as an insulator trapping the warmer soil temperatures below the surface while preventing cold air temperatures from reaching the leaf blades.

Reminder to keep leaves cleaned up on fescue throughout the winter. Even though the fescue isn’t growing and may have lost some color, light is still important for the health of the grass.
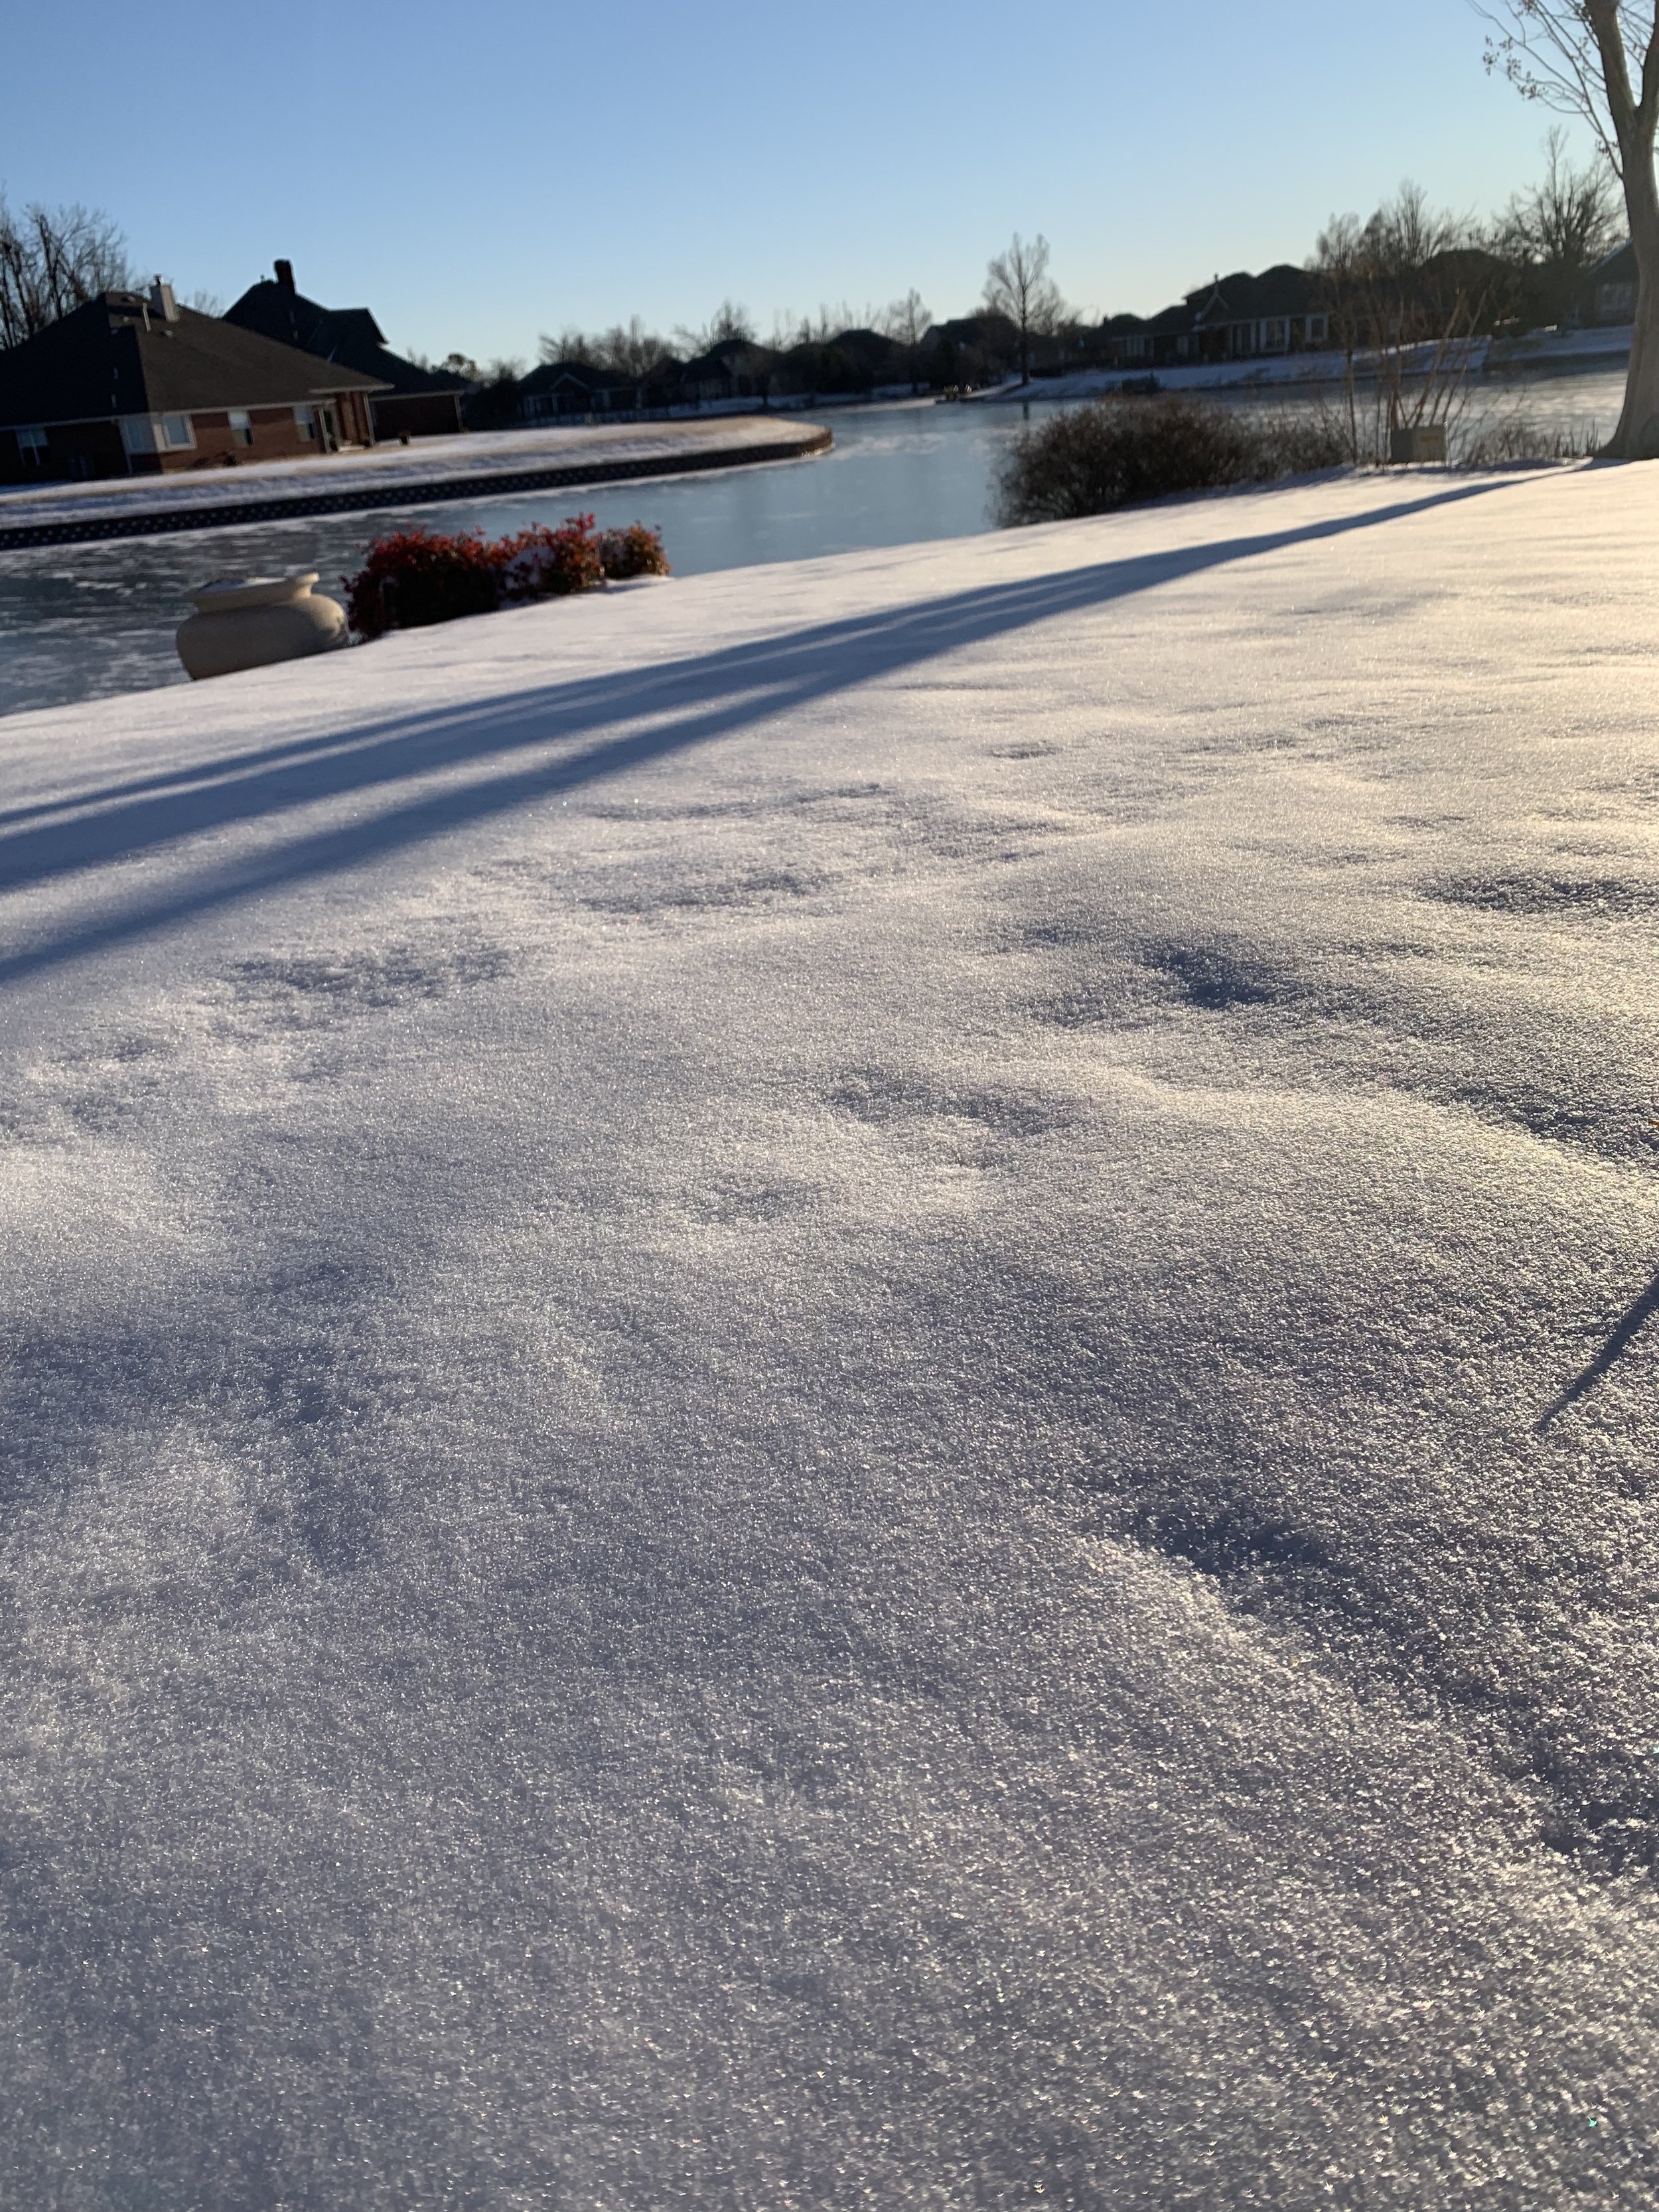
If there had been 2-4” of snow covering the landscape just before Christmas, fescue lawns would have had little to no color loss.
2. Dry Fall & Winter
Our lawns and landscapes have been moisture starved since last June. Most of Oklahoma ranges from a severe to extreme to exceptional drought. Over the last four months, we have received less than 50% of the normal precipitation.
(2nd Warning: Avoid getting trapped in a conversation at a party with anyone who knows these things.)
Fescue lawns that have received moisture and are in protected areas have retained more color than areas that are exposed or dry. Also, mature fescue lawns retained more color than the newly developed grass seed this fall.

Winter dissection has left the tips of fescue blades brown. Mow the lawn a little shorter soon to remove the winter damaged leaf blades.
Winter desiccation, a form of winter injury, is the reason for the loss of color in our fescue lawns this year.
Desiccation is the removal of moisture from something.
Desiccation occurs during periods of cold temperatures and drying winds.
Desiccation is minimized when a plant can move stored moisture to the leaves.
If there is a lack of stored moisture or if temperatures are below freezing, the plant is unable to replenish the moisture lost in the leaves resulting in a loss of green color.

There will be a point in late February to early March when temperatures and moisture are just right and suddenly fescue lawns will return to their rich green color.
Dormancy For Bermuda And Fescue Are Very Different.
We are used to bermuda, the most common turfgrass in our region, having one dormancy period per year – winter.
But fescue has two dormancy periods per year – late summer and winter.
Fescue dormancy occurs when temperatures are in the upper 90s or in the low 40s. For fescue, dormancy is when growth slows or completely stops.
When hot summer temperatures arrive, as long as fescue is receiving moisture, the turf retains color, but growth slows. Fescue lawns continue to need mowing, but compared to spring and fall, growth is greatly reduced.
In a typical winter, fescue will stop growing in late November to early December. While never losing all its green color, fescue will gradually turn to a dingy green starting sometime in December and remain off-color through February.
Bermuda growth slows in October as temperatures cool reaching full dormancy by the end of November. When bermuda reaches full dormancy, the leaf blades turn completely brown and become brittle. During bermuda winter dormancy, root development stops.
As temperatures warmed this week, so did soil temperature allowing fescue lawns to start regaining color.
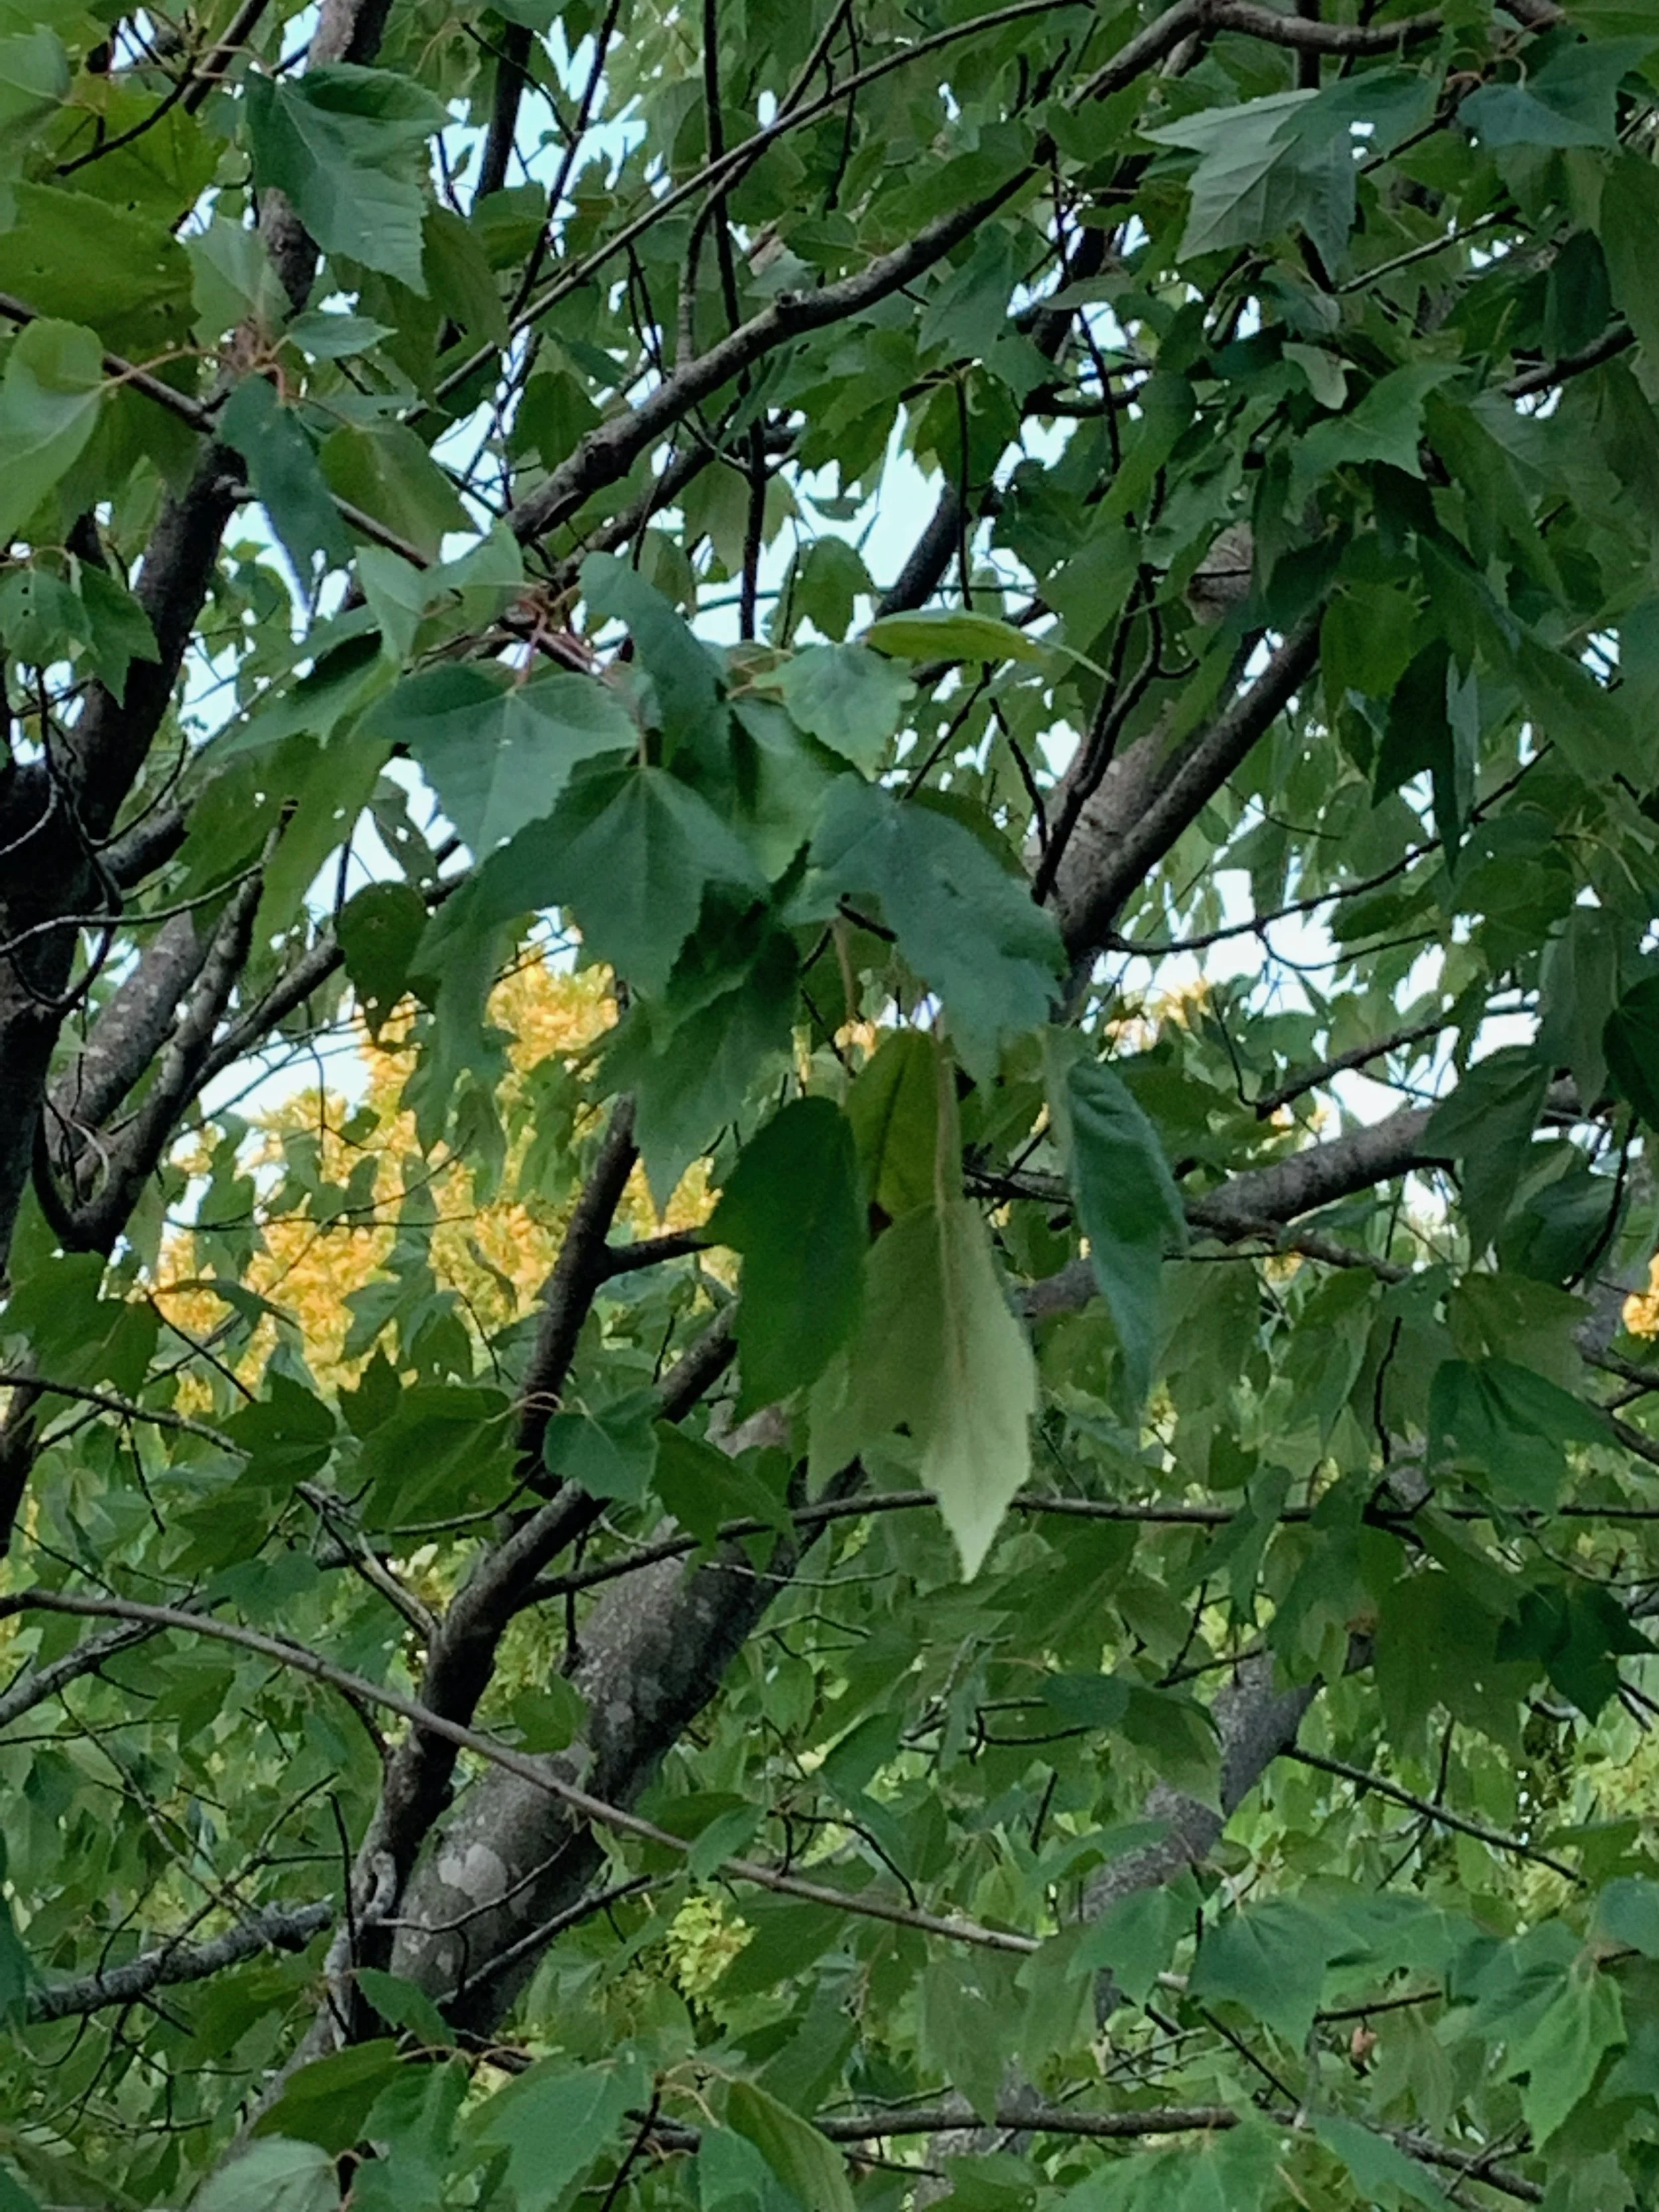
Bermuda grass is like a deciduous tree, such as a maple, when it comes to dormancy. On a deciduous tree all the leaves fall off during winter dormancy and new leaves emerge in the spring.

We can’t wait for the rich green color of fescue to return.
Fescue grass is more like a broadleaf evergreen shrub, such as a holly. During dormancy, the shrub remains green, although the color may not be as rich, and the shrub stops growing. Fescue never goes into full dormancy. As a cool season turf during the winter dormant period root development continues.
When bermuda comes out of dormancy in late March to early April the brown grass left on the lawn does not green up, the plant puts on new growth coming from the roots and stolans.
As fescue comes out of dormancy, the green leaves return to a rich color and the turf starts growing.
How Can You Tell If Fescue Is Dormant Or Dead?
Take hold of grass plant and give a tug. If the plant pulls up easily, it is dead. But if it doesn’t, then the plant is not dead, it is alive. As soon as soil temperatures return consistently to the upper 40’s and there is sufficient moisture color and growth will return.
With warmer than normal temperatures the past two weeks, soil temperatures increasing into the upper 40s, and the ¼” rainfall midweek, we are seeing some color recovery in fescue.

Should You Reseed Your Fescue This Spring?
Unless the turf pulls up when you tug on it (it is dead) or you have bare areas, seeding fescue in the spring is not best. Seeding in the spring is always a band-aid approach. Spring-seeded fescue will come up great, but rarely will it develop enough roots to make it through the summer heat. You will need to reseed the areas next fall. If you need to fill in some areas of your lawn, consider fescue sod in March versus seeding.
Whenever possible, the best approach in the spring, including this spring, is to focus on pre-emergent herbicide applications to prevent weeds, fertilizer to strengthen the turf, and wait until fall to seed.

Between mid-February and early March cut fescue a little shorter than you left it the fall to remove the freeze damaged, brown tips.
When Should You Cut Your Fescue For The First Time?
Between mid-February to early March, cut your fescue lawn a little shorter than you left it last fall removing the freeze-damaged, brown tips.
If you need help determining the condition of your fescue lawn respond to this email or give us a call.
We always enjoy visiting with you about your lawns.
Lorne Hall
Hall | Stewart Lawn + Landscape
(405) 367-3873
Espalier -- The Landscape Solution for Small Areas

Espalier is the art, or process, of controlling plant growth in a flat plane, usually against a wall, or fence, or trellis. It is the process of training through pruning and tying to create a two-dimensional plant.
Espalier dates to the early Romans and was developed in Europe in the 16th century as a practical way to increase fruit production. Today espalier remains very popular in Europe and is gaining popularity in the US.
The technique of espalier is a great way to use larger trees and shrubs in smaller gardens and narrow spaces. Ideal locations are courtyards, patios, and narrow beds between walks and walls. In areas where homes are closer together and often with windows facing a fence or wall, an espalier is the perfect solution to improve a less-than-attractive view. Espalier also comes in handy when you need to screen a view or hide utilities but there isn’t enough area for shrubs to grow to their normal width.
What types of trees and shrubs work best for espalier?
Nearly all trees and large shrubs are candidates, but the best choices are ones that have long, flexible branches.
Fruit trees are a great choice and easy to train because of their soft wooded branches. Pear, apple, peach, and cherry trees are great choices.

Espalier techniques used to incorporate Golden Deodar Cedar and Blue Atlas Cedar into a narrow space between a walk and a wall.
Pyracantha, commonly known as firethorn, is a large shrub that doesn’t get much attention in our smaller landscapes. . But with a mature size of 8-10’ tall and 6-8’ wide, it is most commonly used as barrier hedge in larger landscapes.
The attraction of pyracantha is the abundance of red to orange berries it produces during the fall and through winter. With a showy fall to winter appearance, it really deserves more attention and is a perfect selection for an espalier.
Other great choices for an espalier are yaupon holly, rose of sharon, magnolia, and hydrangea. But, don’t limit your imagination, most any plant can be grown as an espalier.

Pyracantha adds interest with white flower clusters in the spring and orange to red berries in the fall.

Candelabra

Fan
Prune the plant’s central leader 2” above the first tier of the design. As new buds appear select a new central leader and buds that are facing the direction of your wire. As the new buds grow into branches tie them into place while they are young, soft, and easy to manipulate. During the growing season make minor prunes monthly to maintain the design. The best time to make major prunes to the espalier is in late winter to early spring. Remove ties as the branches grow and mature.
The only negative to an espalier is they are not suitable to the low maintenance landscape. They do require frequent attention and care to maintain the design.

Espalier is the perfect way to enjoy a fruit tree in a smaller landscape.

This pyracantha was planted this wall for the purpose creating an espalier on the fence. Over the winter wire will be installed on the fence. Next spring training and pruning will be used to develop the design.


Pear tree. Europe developed the practice of espalier fruit trees as a practical way to increase fruit production in the 16th century.
How do you create an espalier?
Once you have chosen your plant and your location, you need to decide the pattern. A few common designs are the candelabra, horizontal cordon, fan and Belgian fence. Again, imagination is a good thing. Any pattern you can imagine is good.
Use eye hooks, wire and turn buckles to create the pattern.
Plant the tree or shrub approximately 6-8” away from the structure. Remember, most plants desire well drained, organic soil.

Horizontal Cordon

Belgian Fence

Let your imagination run. There is no limit to espalier designs.


Even shade trees, such as this ginkgo, can be used as an espalier to create a focal point.
As you evaluate your landscape this fall and winter, if you have a narrow space, a fence you want to soften, or something you want to screen, consider a favorite large shrub or tree in the form of an espalier.
Espalier is a good way to add decorative accents to the landscape. When well done, espaliers become focal points of living sculpture adding a structural elegance to an otherwise drab garden location.
Lorne Hall
Hall | Stewart Lawn + Landscape
(405)367-3873
Ornamental Grasses... adding interest to your late summer & fall landscape!

As the landscape transitions from summer to fall a common plant in the most dramatic landscapes will be ornamental grasses. As many plants begin to fade, many varieties of ornamental grasses fill the void with dramatic plumes. But, the interest they add to the landscape doesn’t end this fall. Ornamental grasses add texture to the winter landscape as their leaves and plumes rustle in the wind. As the landscape emerges from winter new growth appears from the freshly cut back grasses gradually reaching the perfect height for summer breezes to add movement to the landscape.
What is an ornamental grass?
Ornamental grasses come in two forms: medium to large upright grasses and groundcovers. Simply, they are any grass used in the landscape as a plant instead of as turf.
The ways to use ornamental grasses in your landscape are nearly endless:
They can be used as a single specimen plant to add color and texture to the landscape year-round,
They can be used as a screen to hide undesirable objects or views,
They make great landscape borders,
They can be planted in small groupings to a splash of texture and color to a bed, and
They can create a field of interest when mass planted.
Most ornamental grasses are very adaptable to heat, drought, and humidity. They also grow in most soils.
There are both cool season and warm season ornamental grasses. Cool or warm season refers to the time of the season they bloom. The cool season grasses start growing earlier in the spring and look stunning in early summer. But, warm-season grasses emerge later in the spring and add interest to the landscape as they flower in late summer to fall.
Ornamental grasses require little maintenance, needing attention only once per year. Grasses do best when their dormant top is removed in early spring before new leaf blades emerge. For upright grasses, cut them back to 12-18” while liriope growing as a ground cover needs to be cut back to 2-3”.
Tools and tips for your once-per-year ornamental grass maintenance:
For upright grasses use either hand shears or power hedge trimmers. Tying up the foliage with twine before you make the cut will make clean-up a lot quicker.
For liriope, a string trimmer makes the job quick and easy. Or, if you have a large area, set your mower in the highest setting, and simply mow over the liriope.
Every 3-5 years it is a good idea to divide grasses in the spring after you have cut them back. Use a sharp shovel to slice through the clump dividing it into 2 or 3 clumps adding the clumps to other areas of your landscape or to give to friends. Liriope can also be transplanted after cutting back in the spring by simply digging up clumps and replanting.
Dividing and transplanting ornamental grasses is an inexpensive way to expand your landscape.


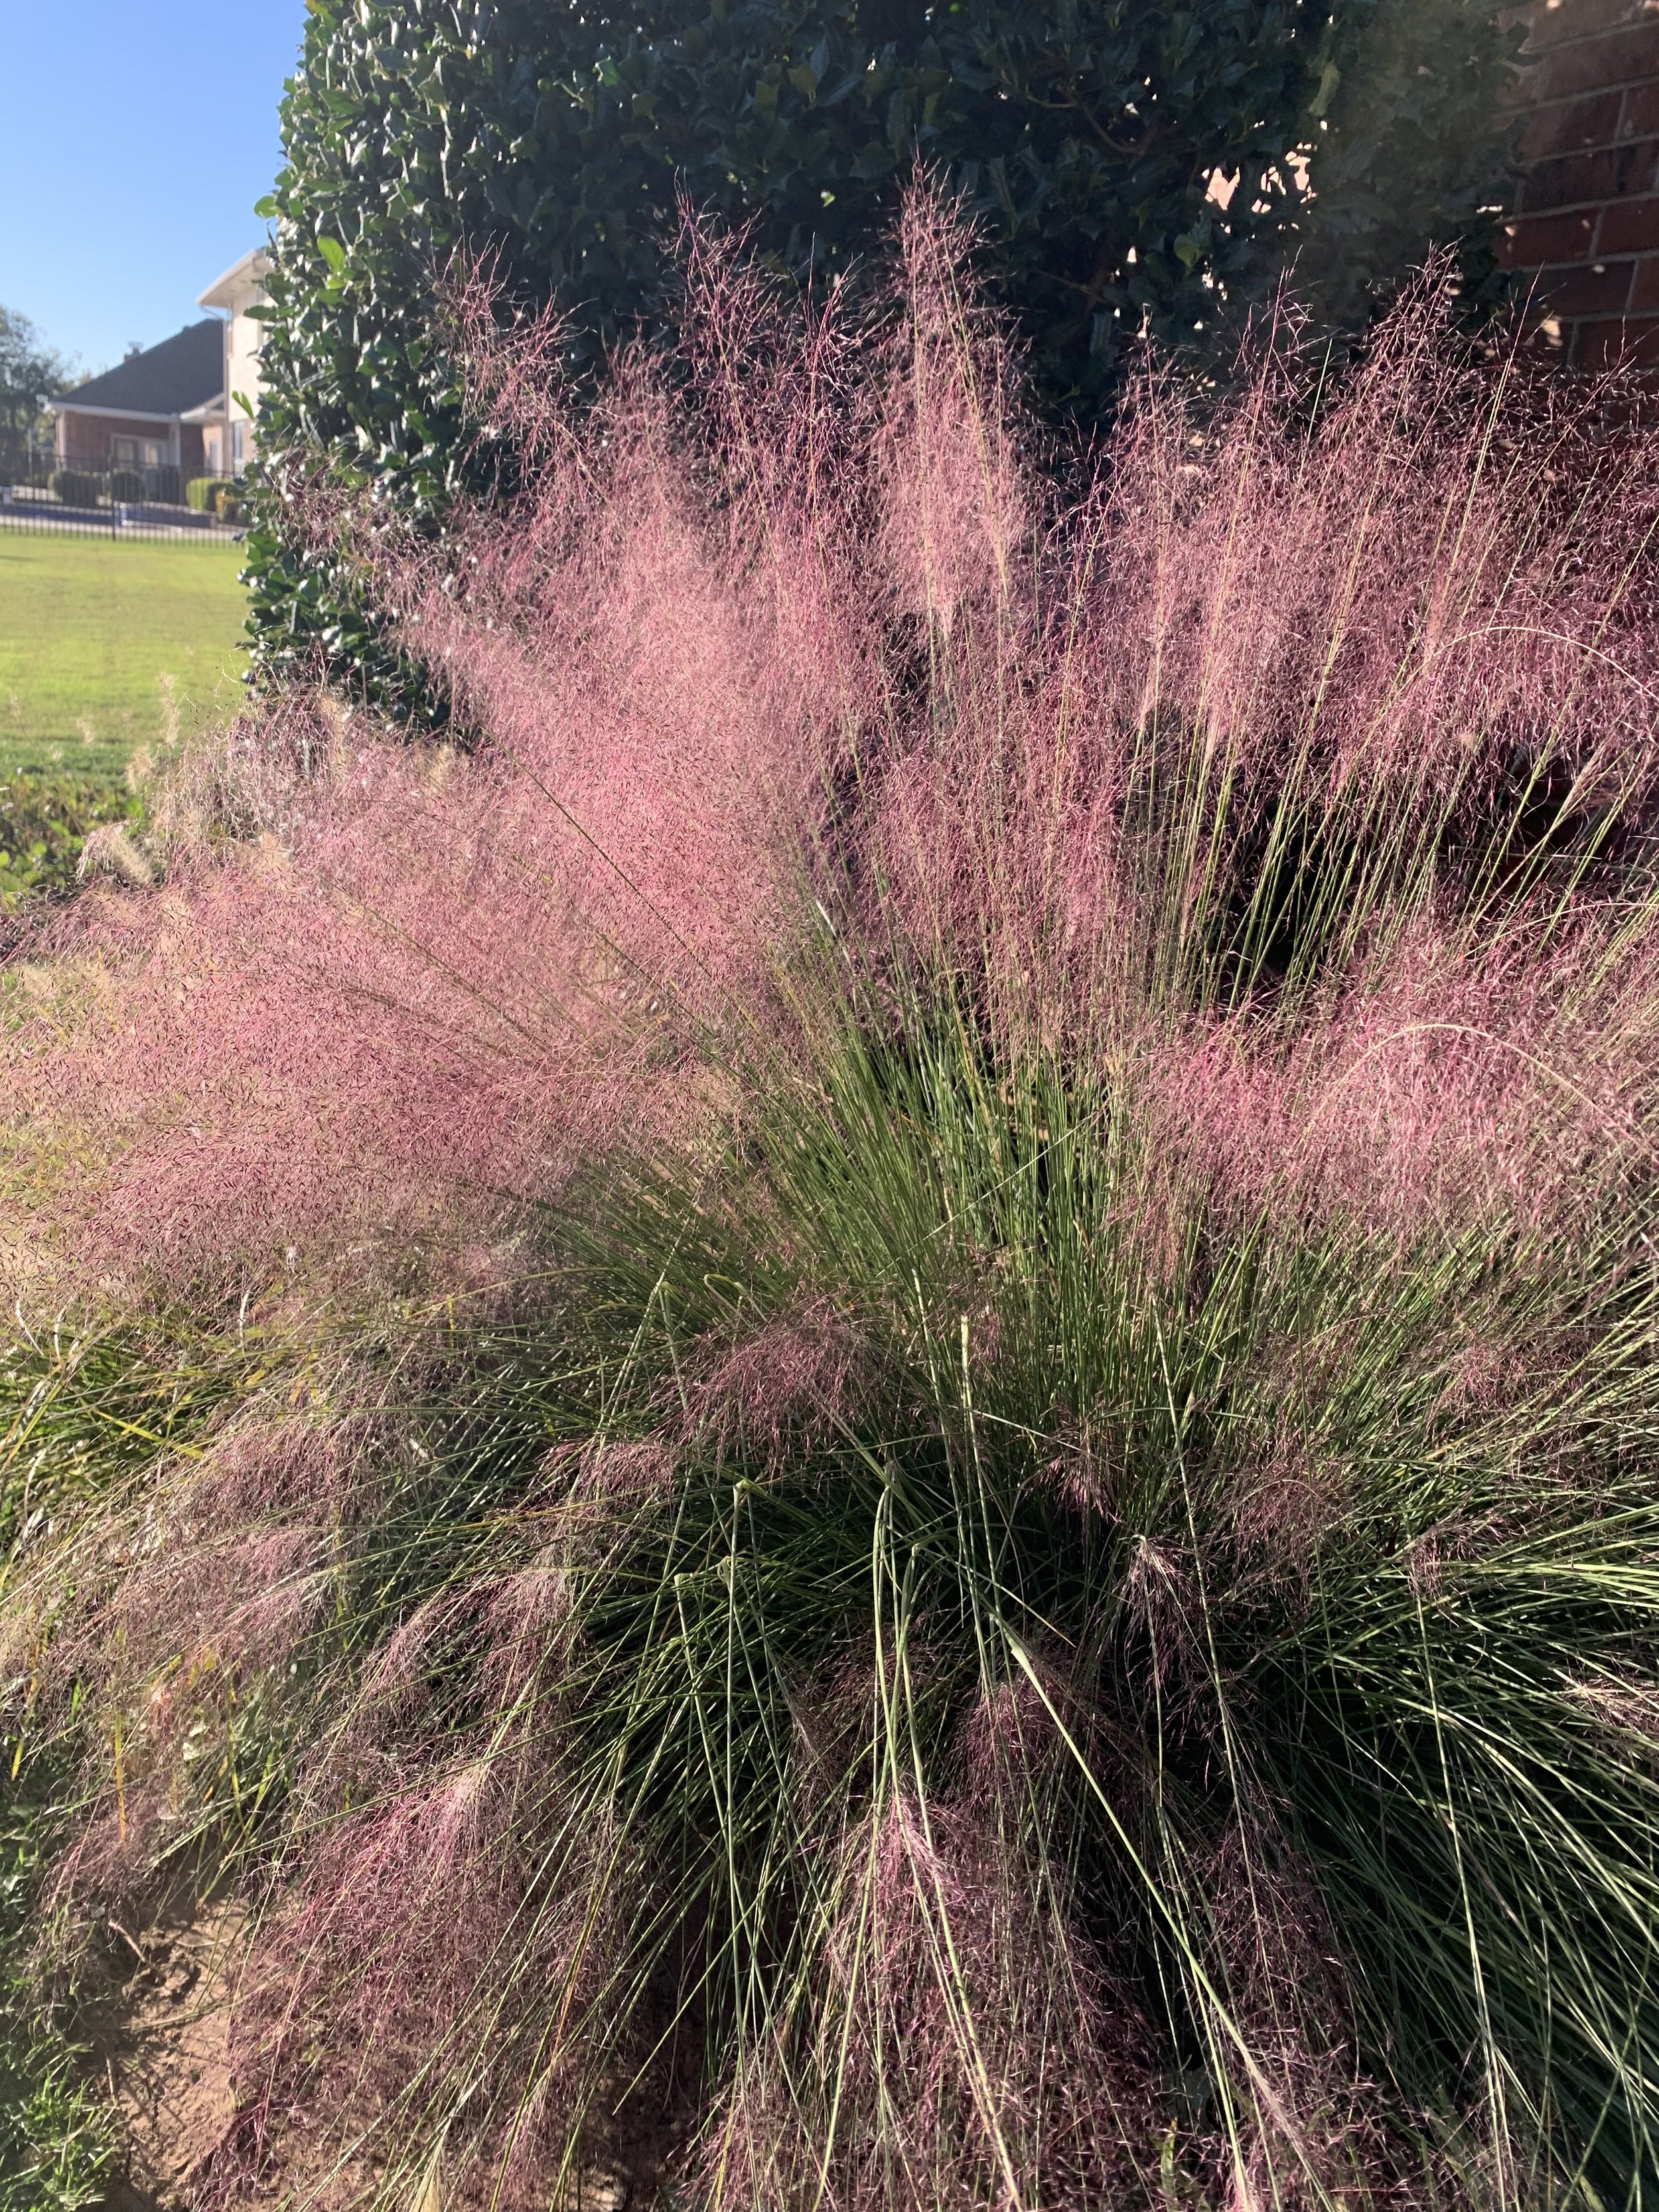
Pink Muhly Grass has an attractive thin leaf blade during the growing season that burst with pink-purple soft plumes in late September to early October.
There are too many varieties of ornamental grasses to cover them all, but here are just a few favorites:
Pink Muhly Grass – Pinkish-purple lacy plumes in the late summer to fall. As a warm season grass it is often one of the last to start to grow in the spring and one of the later bloomers. Pink Muhly grows in full sun to partial shade and reaches 3-4’ in height.

Pink Muhly Grass has an attractive thin leaf blade during the growing season that burst with pink-purple soft plumes in late September to early October.
Pink Muhly Grass
Maiden Grass – Slender blades with creamy white to shimmering silver small plumes. 5-6’ tall. Plant in partial to full sun.

Maiden Grass creates a wonderful statement with its shimmer plumes when planted as a focal point. There are several varieties of Maiden Grass, I’m sure there is one just right for your landscape.


Blue Grama Grass – Native grass with golden summer flower on stiff stems. Great for adding texture to the landscape. Plant in full to partial shade. Once established this grass does not require much water. Grows about 3’ tall.
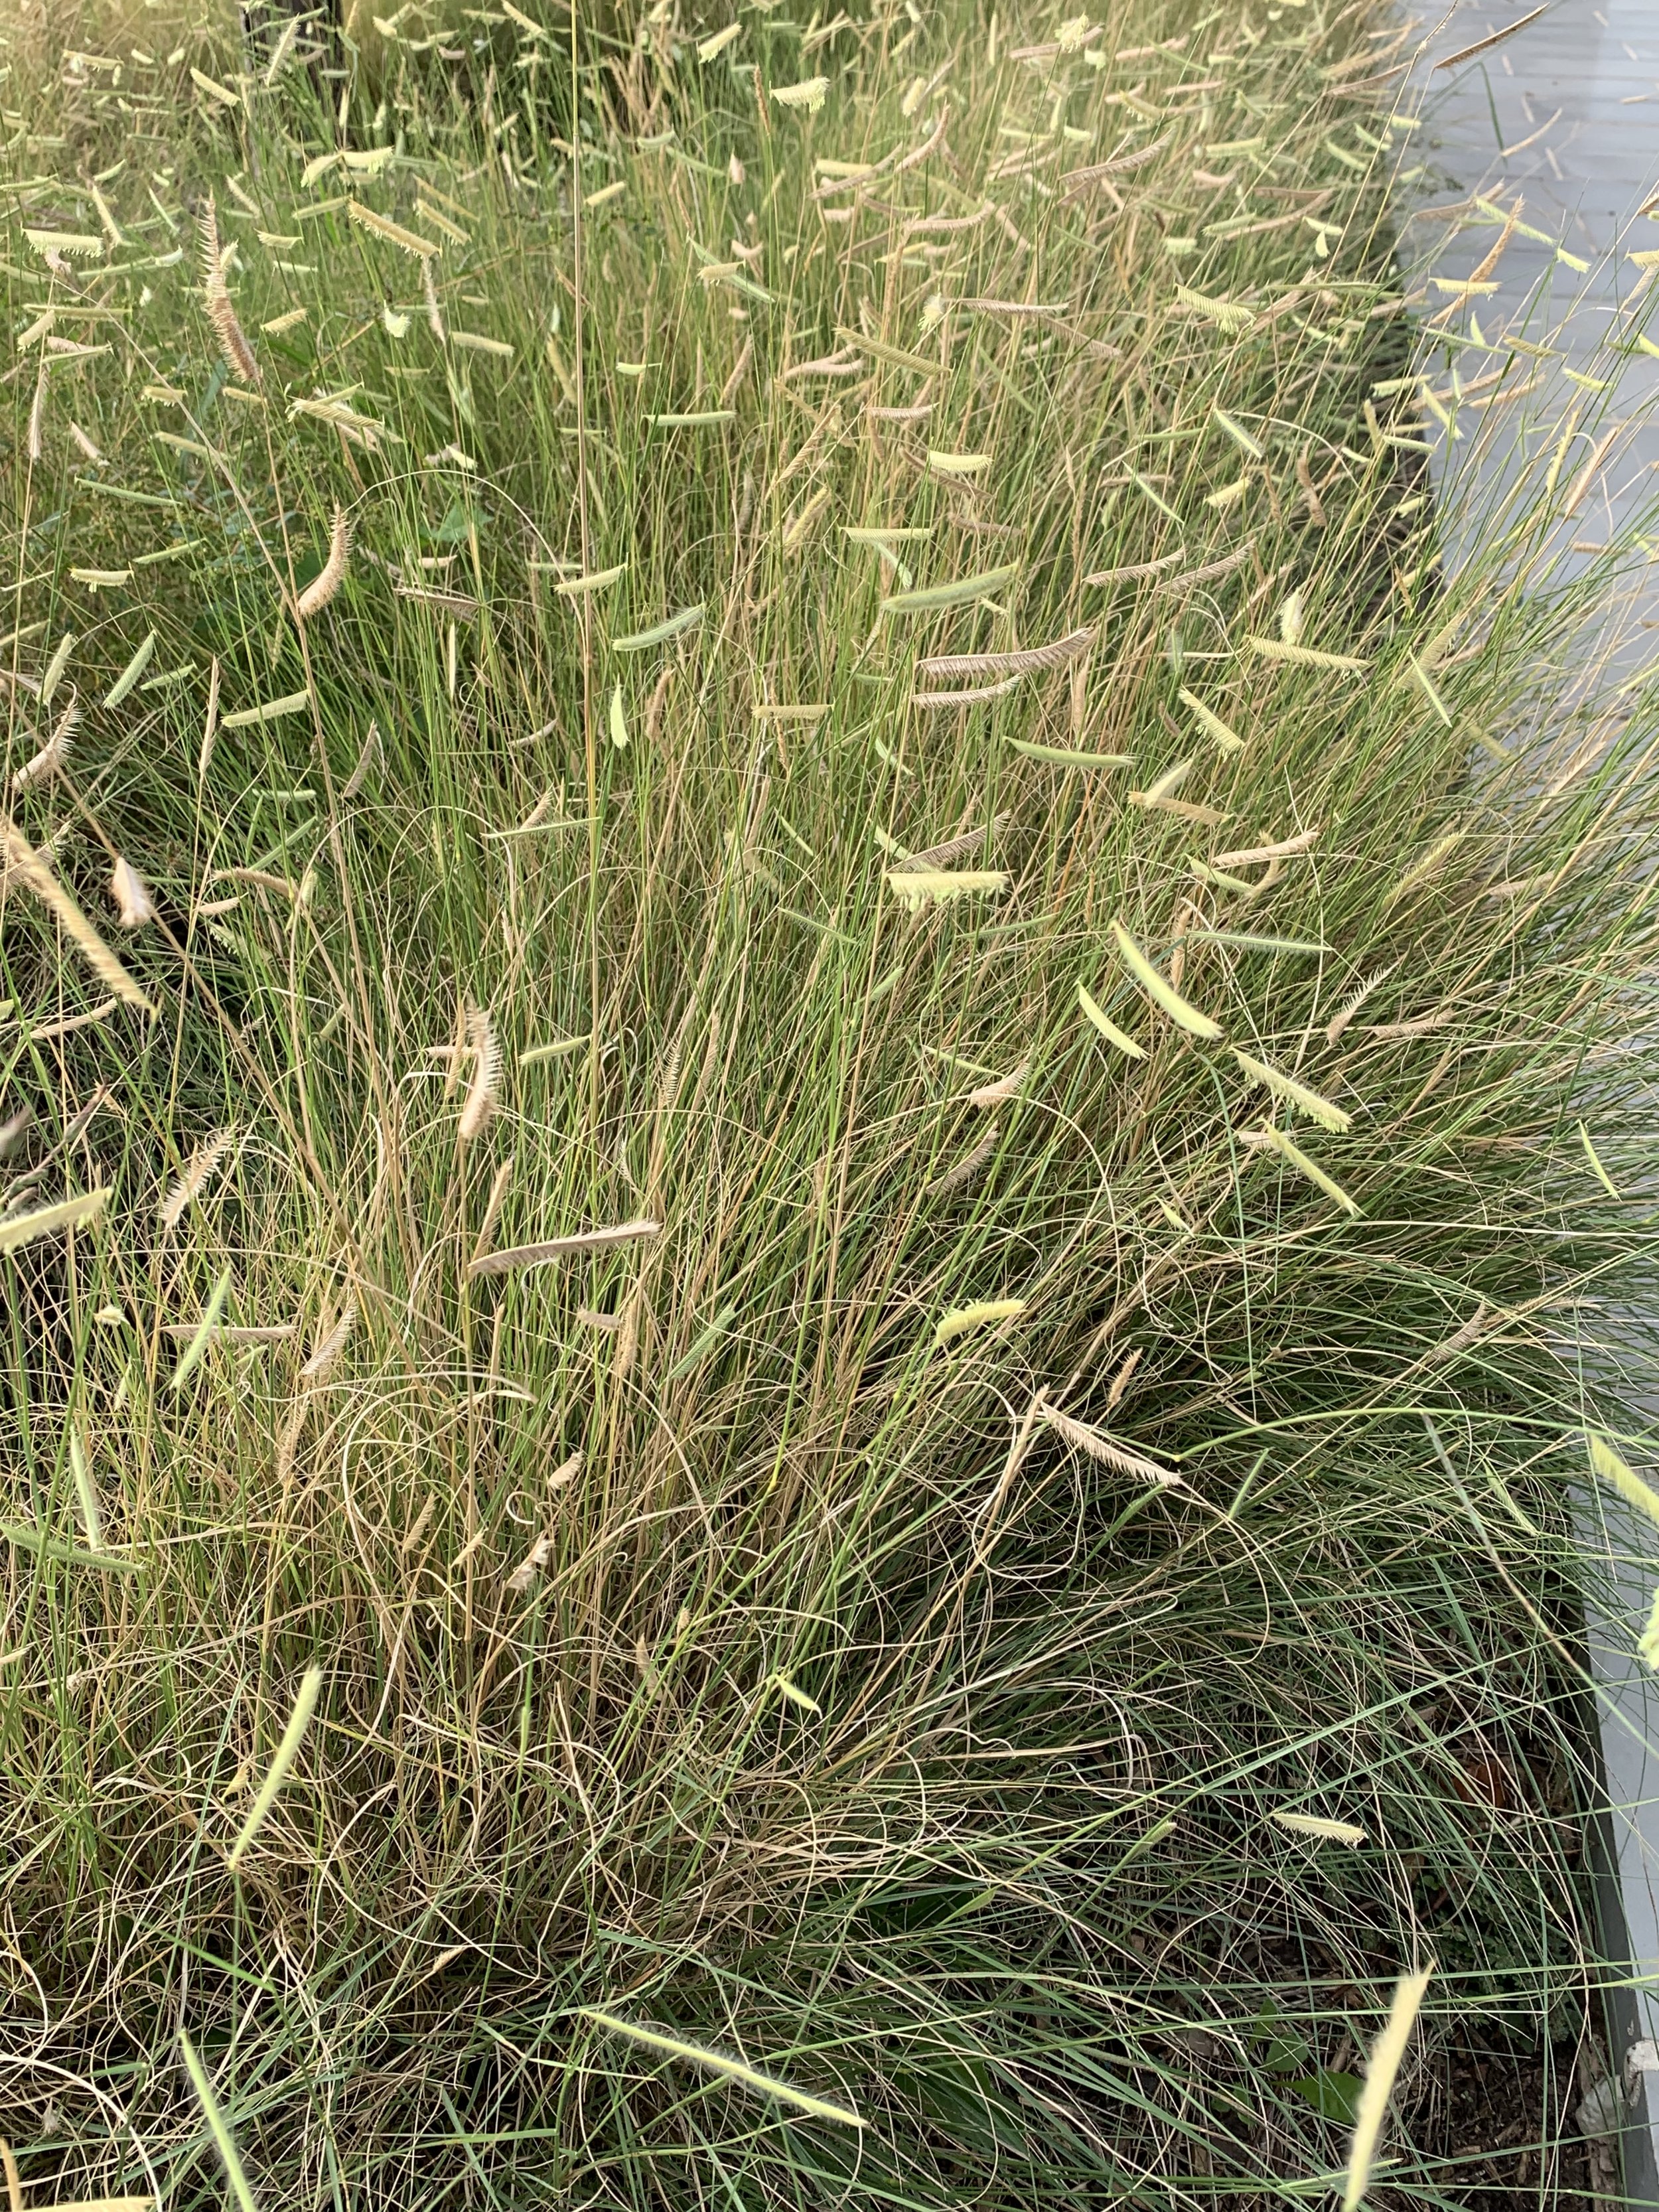
Blonde Ambition Blue Grama Grass is a great choice for a low maintenance mass planting.
Little Bluestem – Blue to pink to burgundy hues in the late summer and rich copper tones in the fall. Requires full sun. A native grass that is loved by birds. Grows 3-4’ tall.


Little Bluestem adds a rich copper tone to the fall landscape.

Switch Grass – An Oklahoma Proven perennial grass that grows in full sun to partial shade. It has lacy sprays with a purplish cast in the fall. There are several cultivars and great used as a single accent or in groups. Reaches 6’.

Switch Grass is known for lacy small plumes that grace its purple leaf blades in the fall.
Mexican Feather Grass – Another Oklahoma Proven grass with a feather like, graceful fine texture and silver flowers. Best grown in a grouping in full sun to partial shade. It prefers well drained soil and is very drought tolerant once established. Different from most grasses in that it prefers to not be cut back in the spring. Only grows 2-3’.
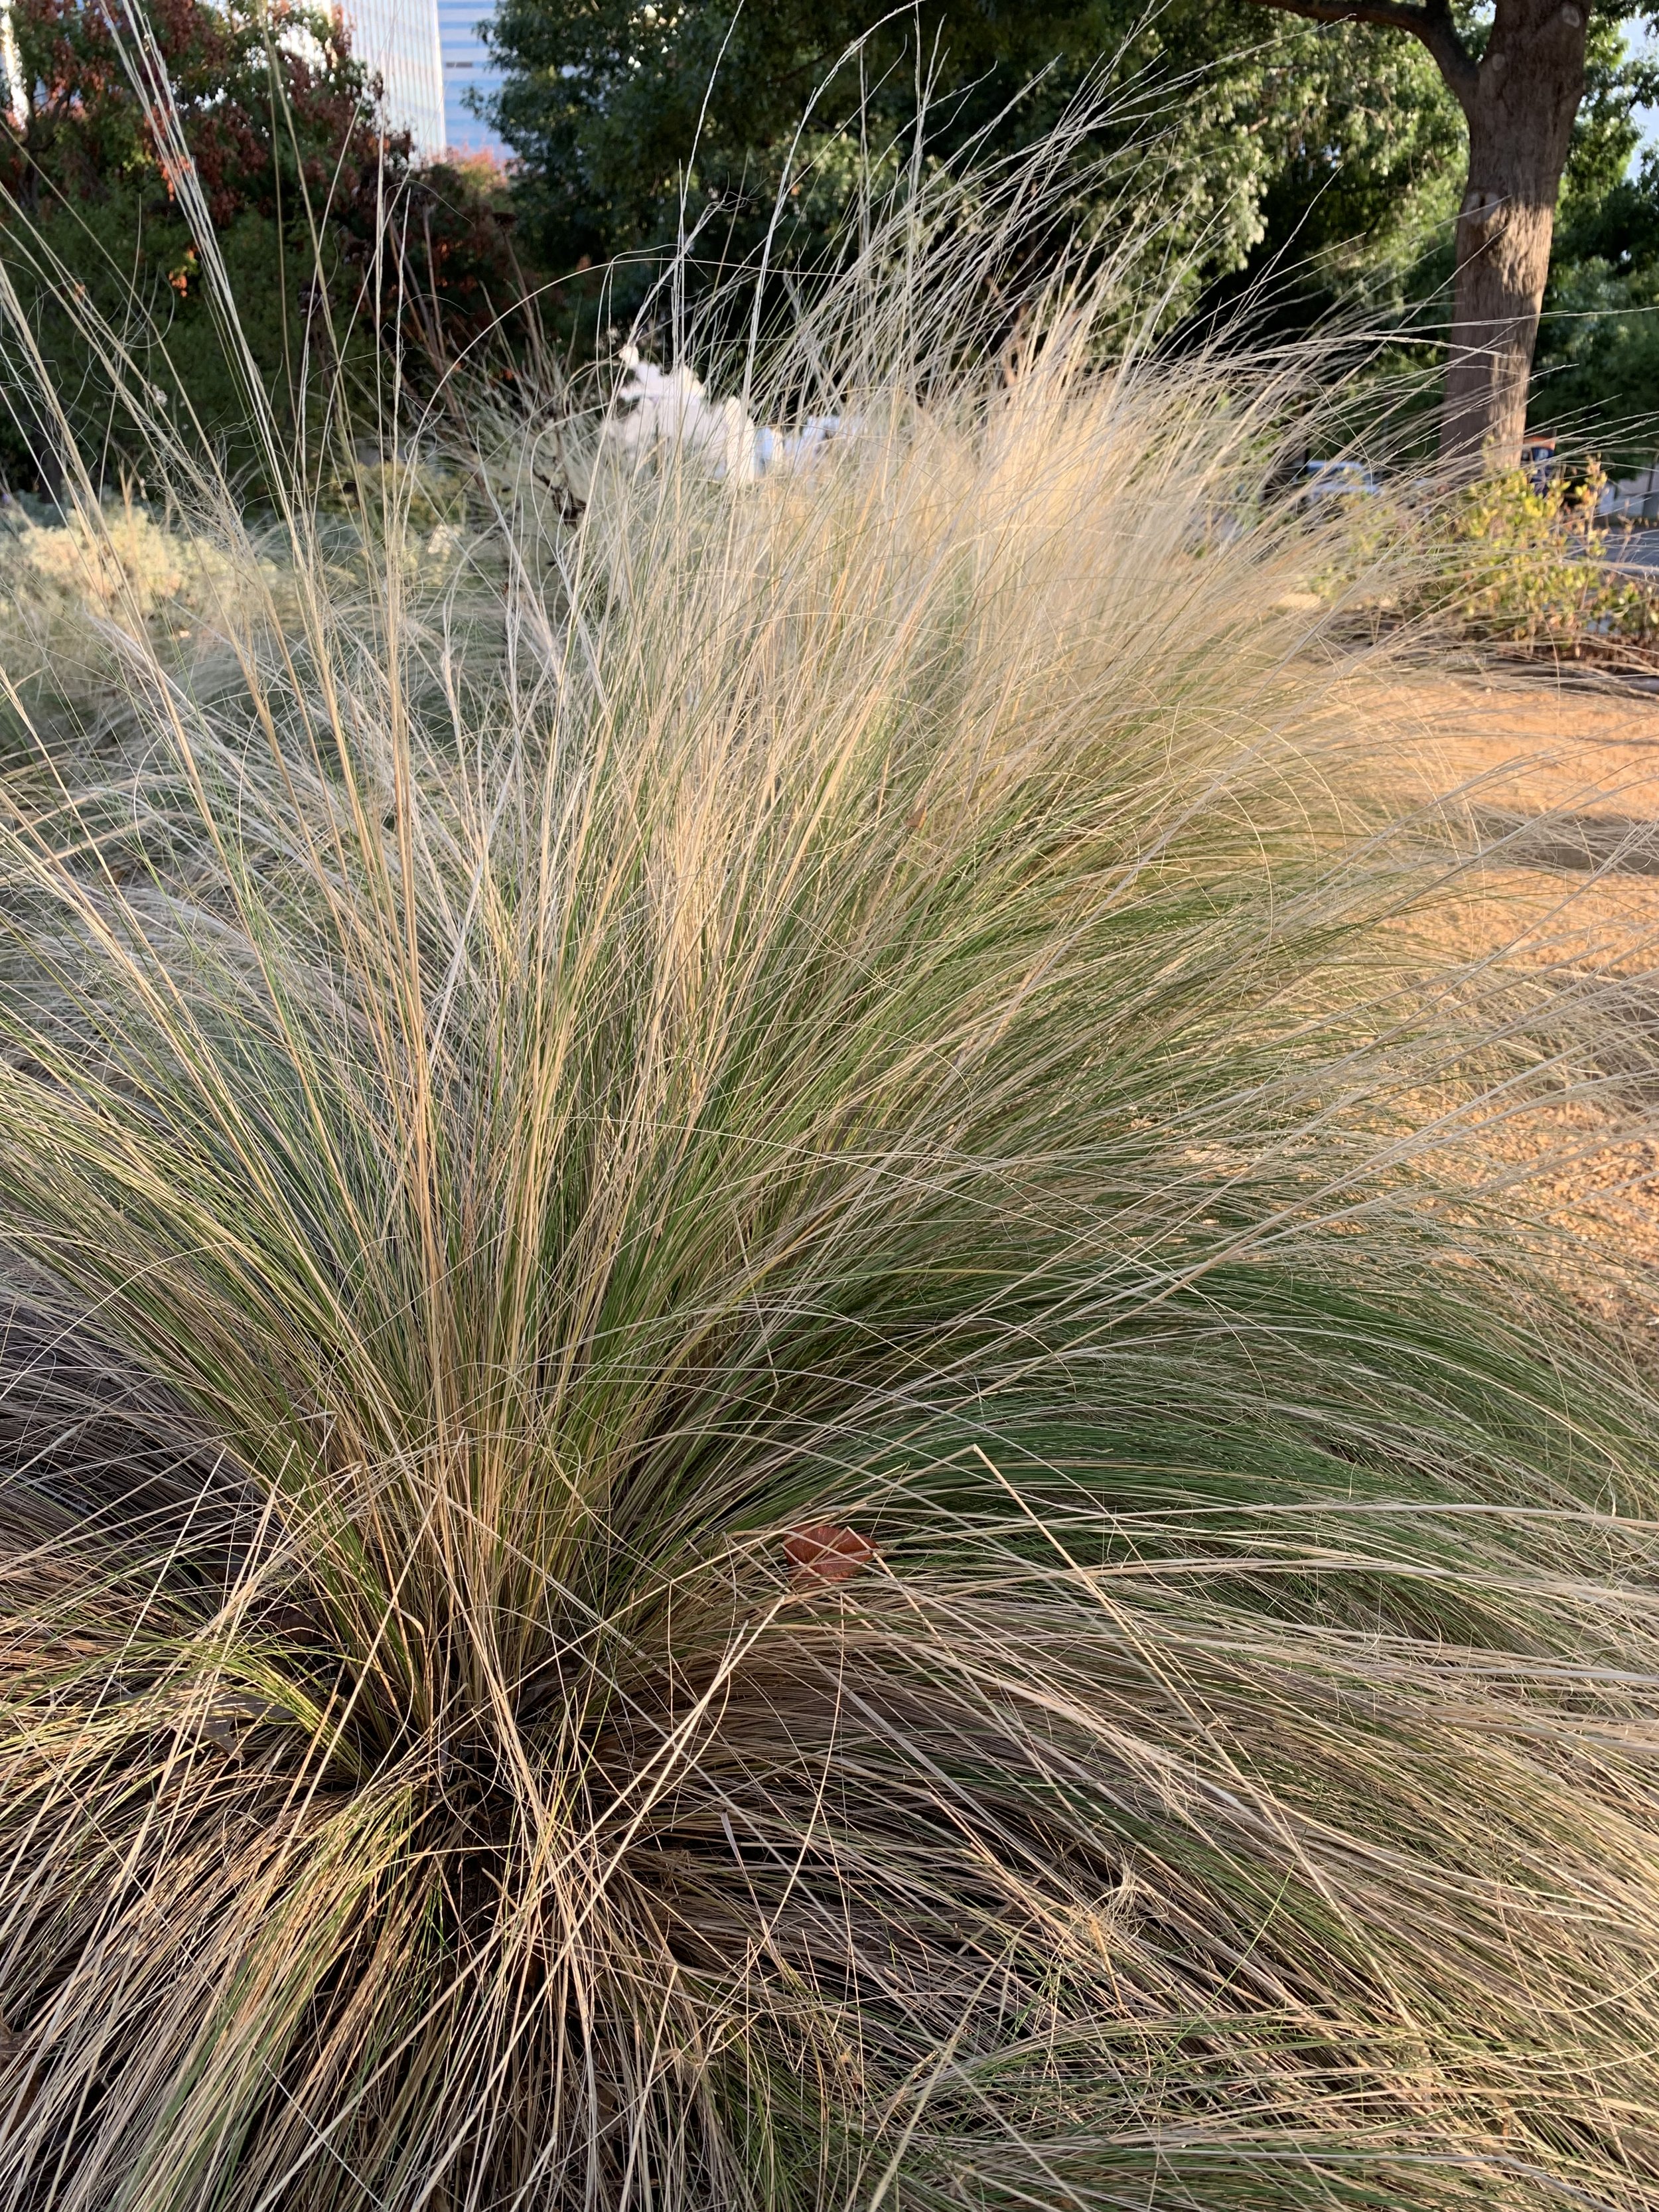
Mexican Feather Grass planted in groupings create a feather like feeling as they sway in the breeze.


All Gold Japanese Forest Grass – Best planted in shade to partial shade, the light green color is a great accent to dark green shrubs in a shade garden. Grows 1-2’ with a cascading habit. Requires rich, loamy soil and does not do well in tight, clay soils.
Karl Foerster Feather Reed Grass – One of the most common cool season grasses with reddish bronze plumes in early to mid-summer. Grows 4-6’ tall in full to partial sun.

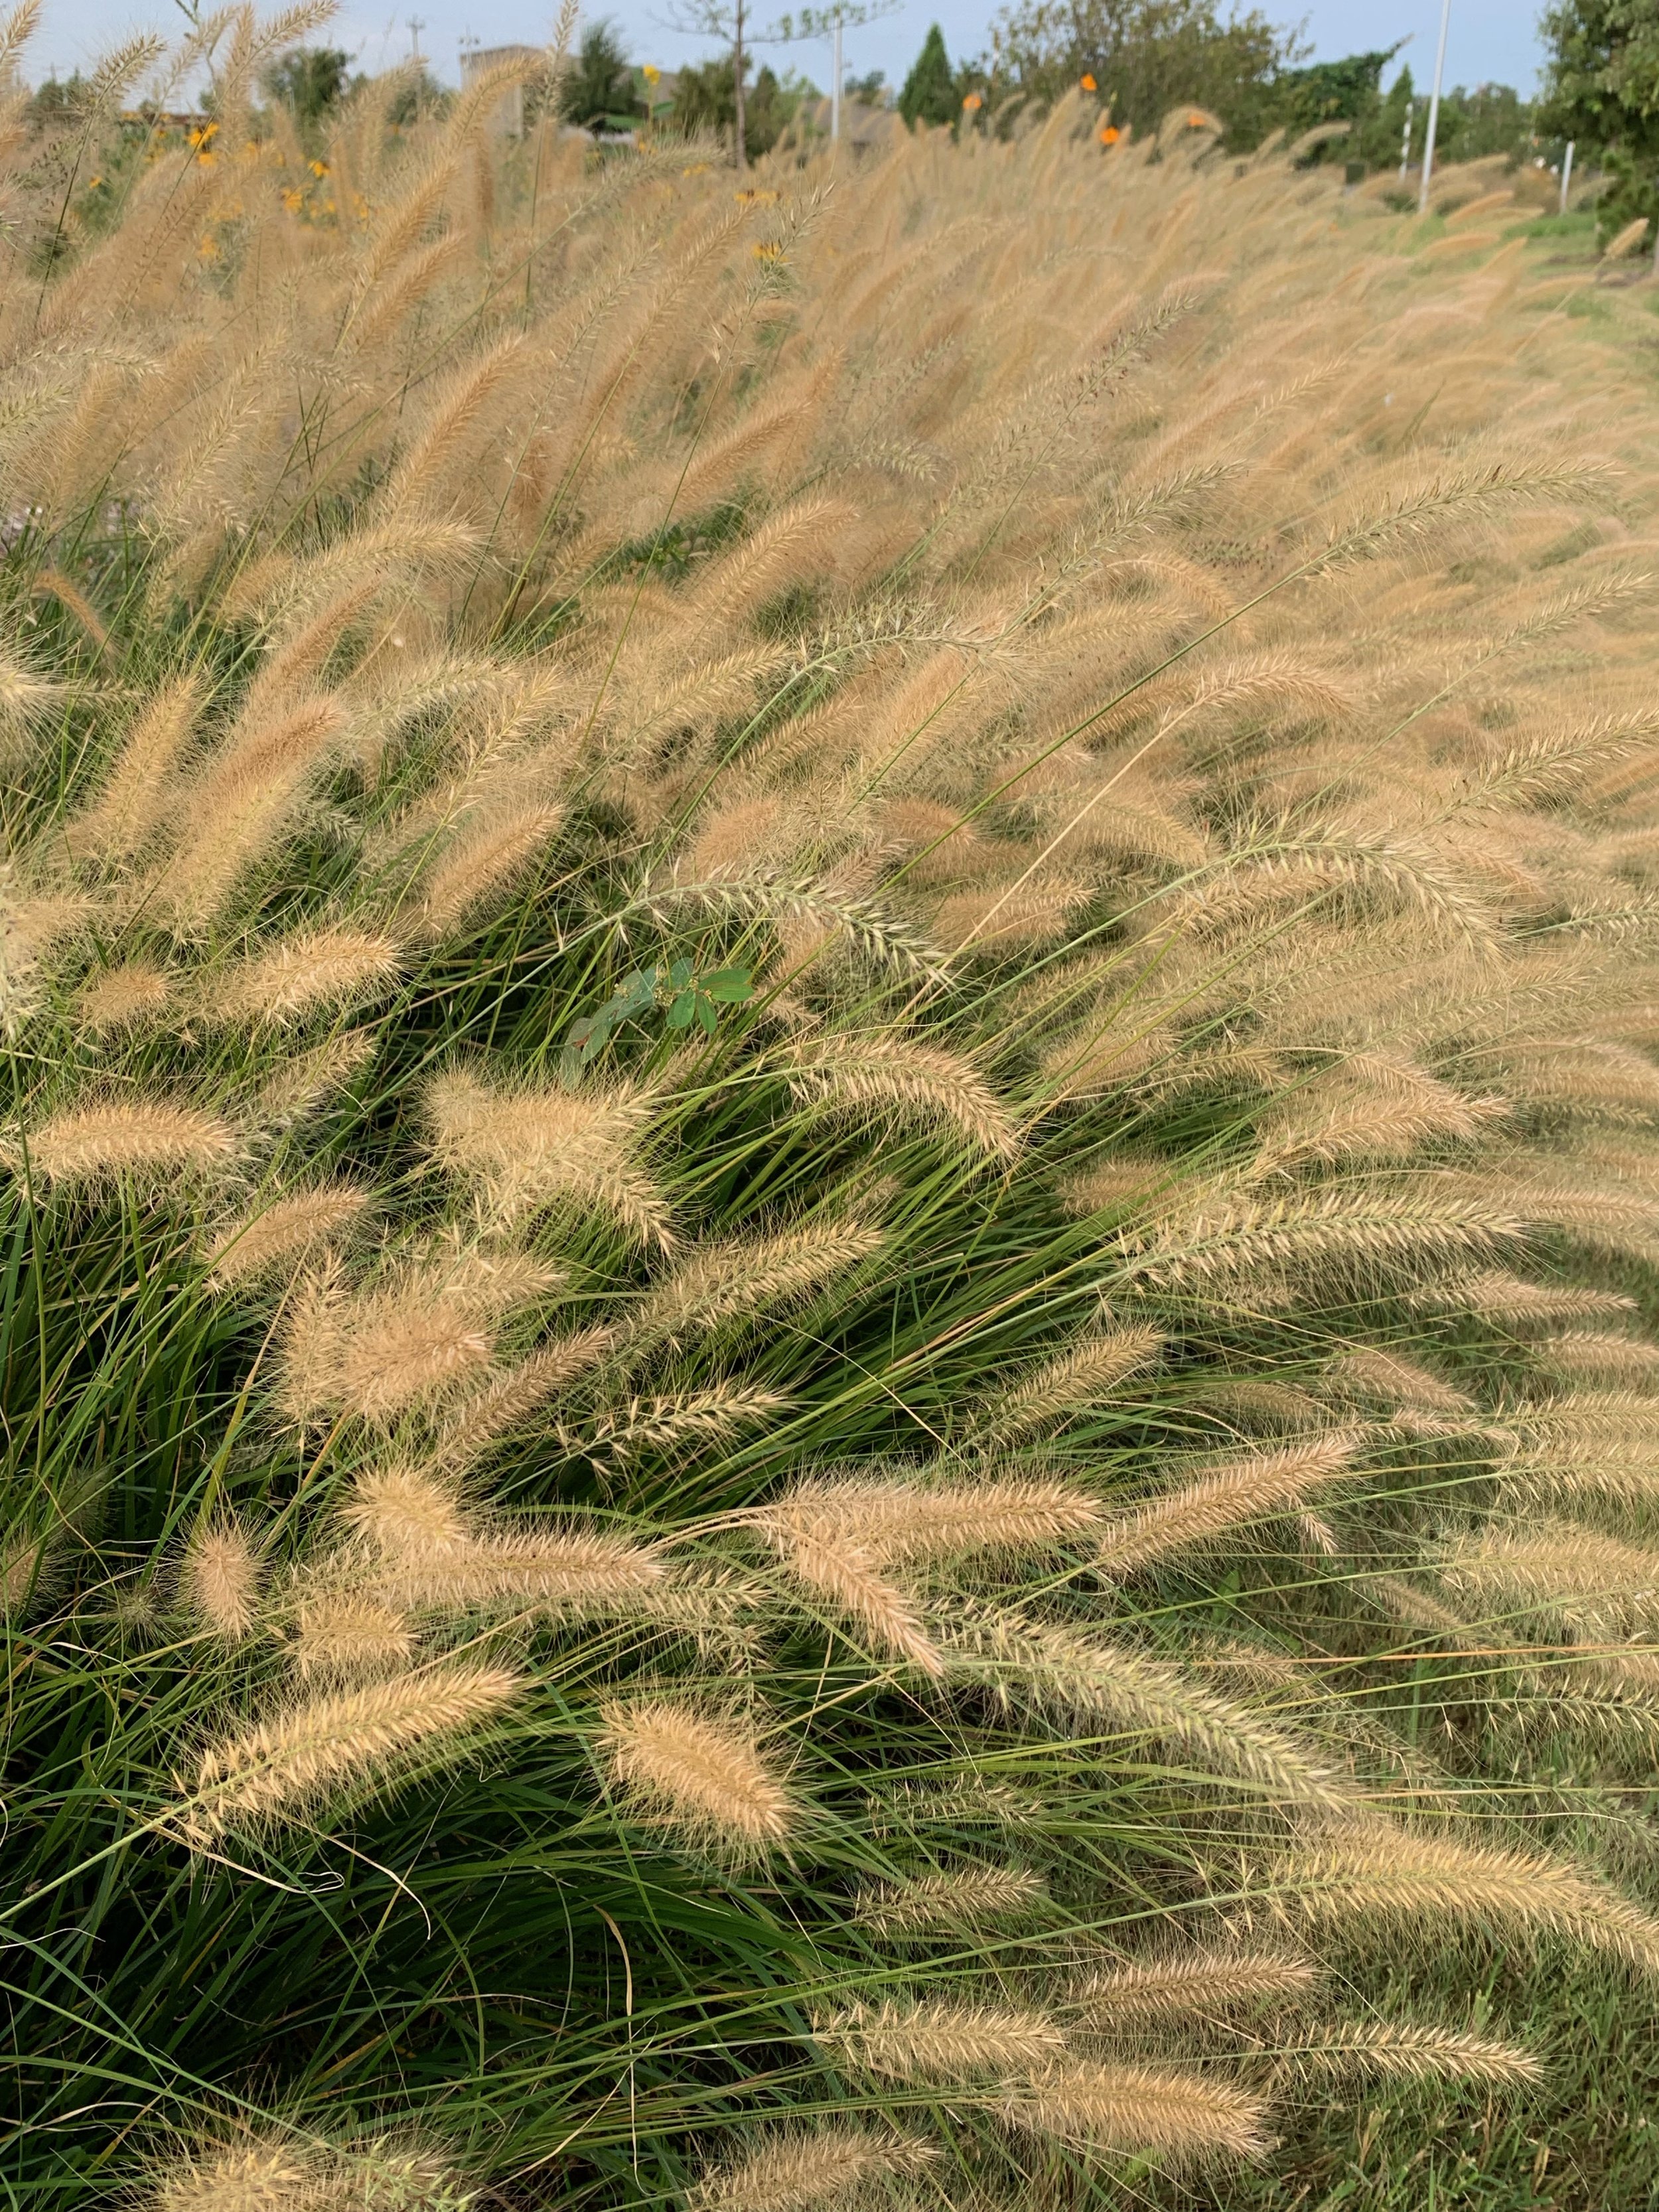
There are many varieties of Fountain Grasses. A favorite Dwarf Fountain Grass is ‘Hameln’. It has rich green foliage in the summer that turns a golden color in the fall with buff colored plumes in the late summer and fall.
Fountain Grass – Graceful arching shaped grass that will reach 5’ with tuffs of green seed heads on rich green grass blades. Little Bunny, a dwarf variety, only reaches 1-2’. Little Bunny is great for borders and smaller landscapes. Grows in full to partial sun.
Zebra Grass – A great accent grass with bands of yellow on green foliage. Grows 4-5’ tall in full to partial sun.


Purple Fountain Grass – An annual ornamental grass (does not come back next season) with rich dark purple color. It reaches 3-4’ tall and looks great planted as a single accent plant with yellow or pink summer annual flowers.
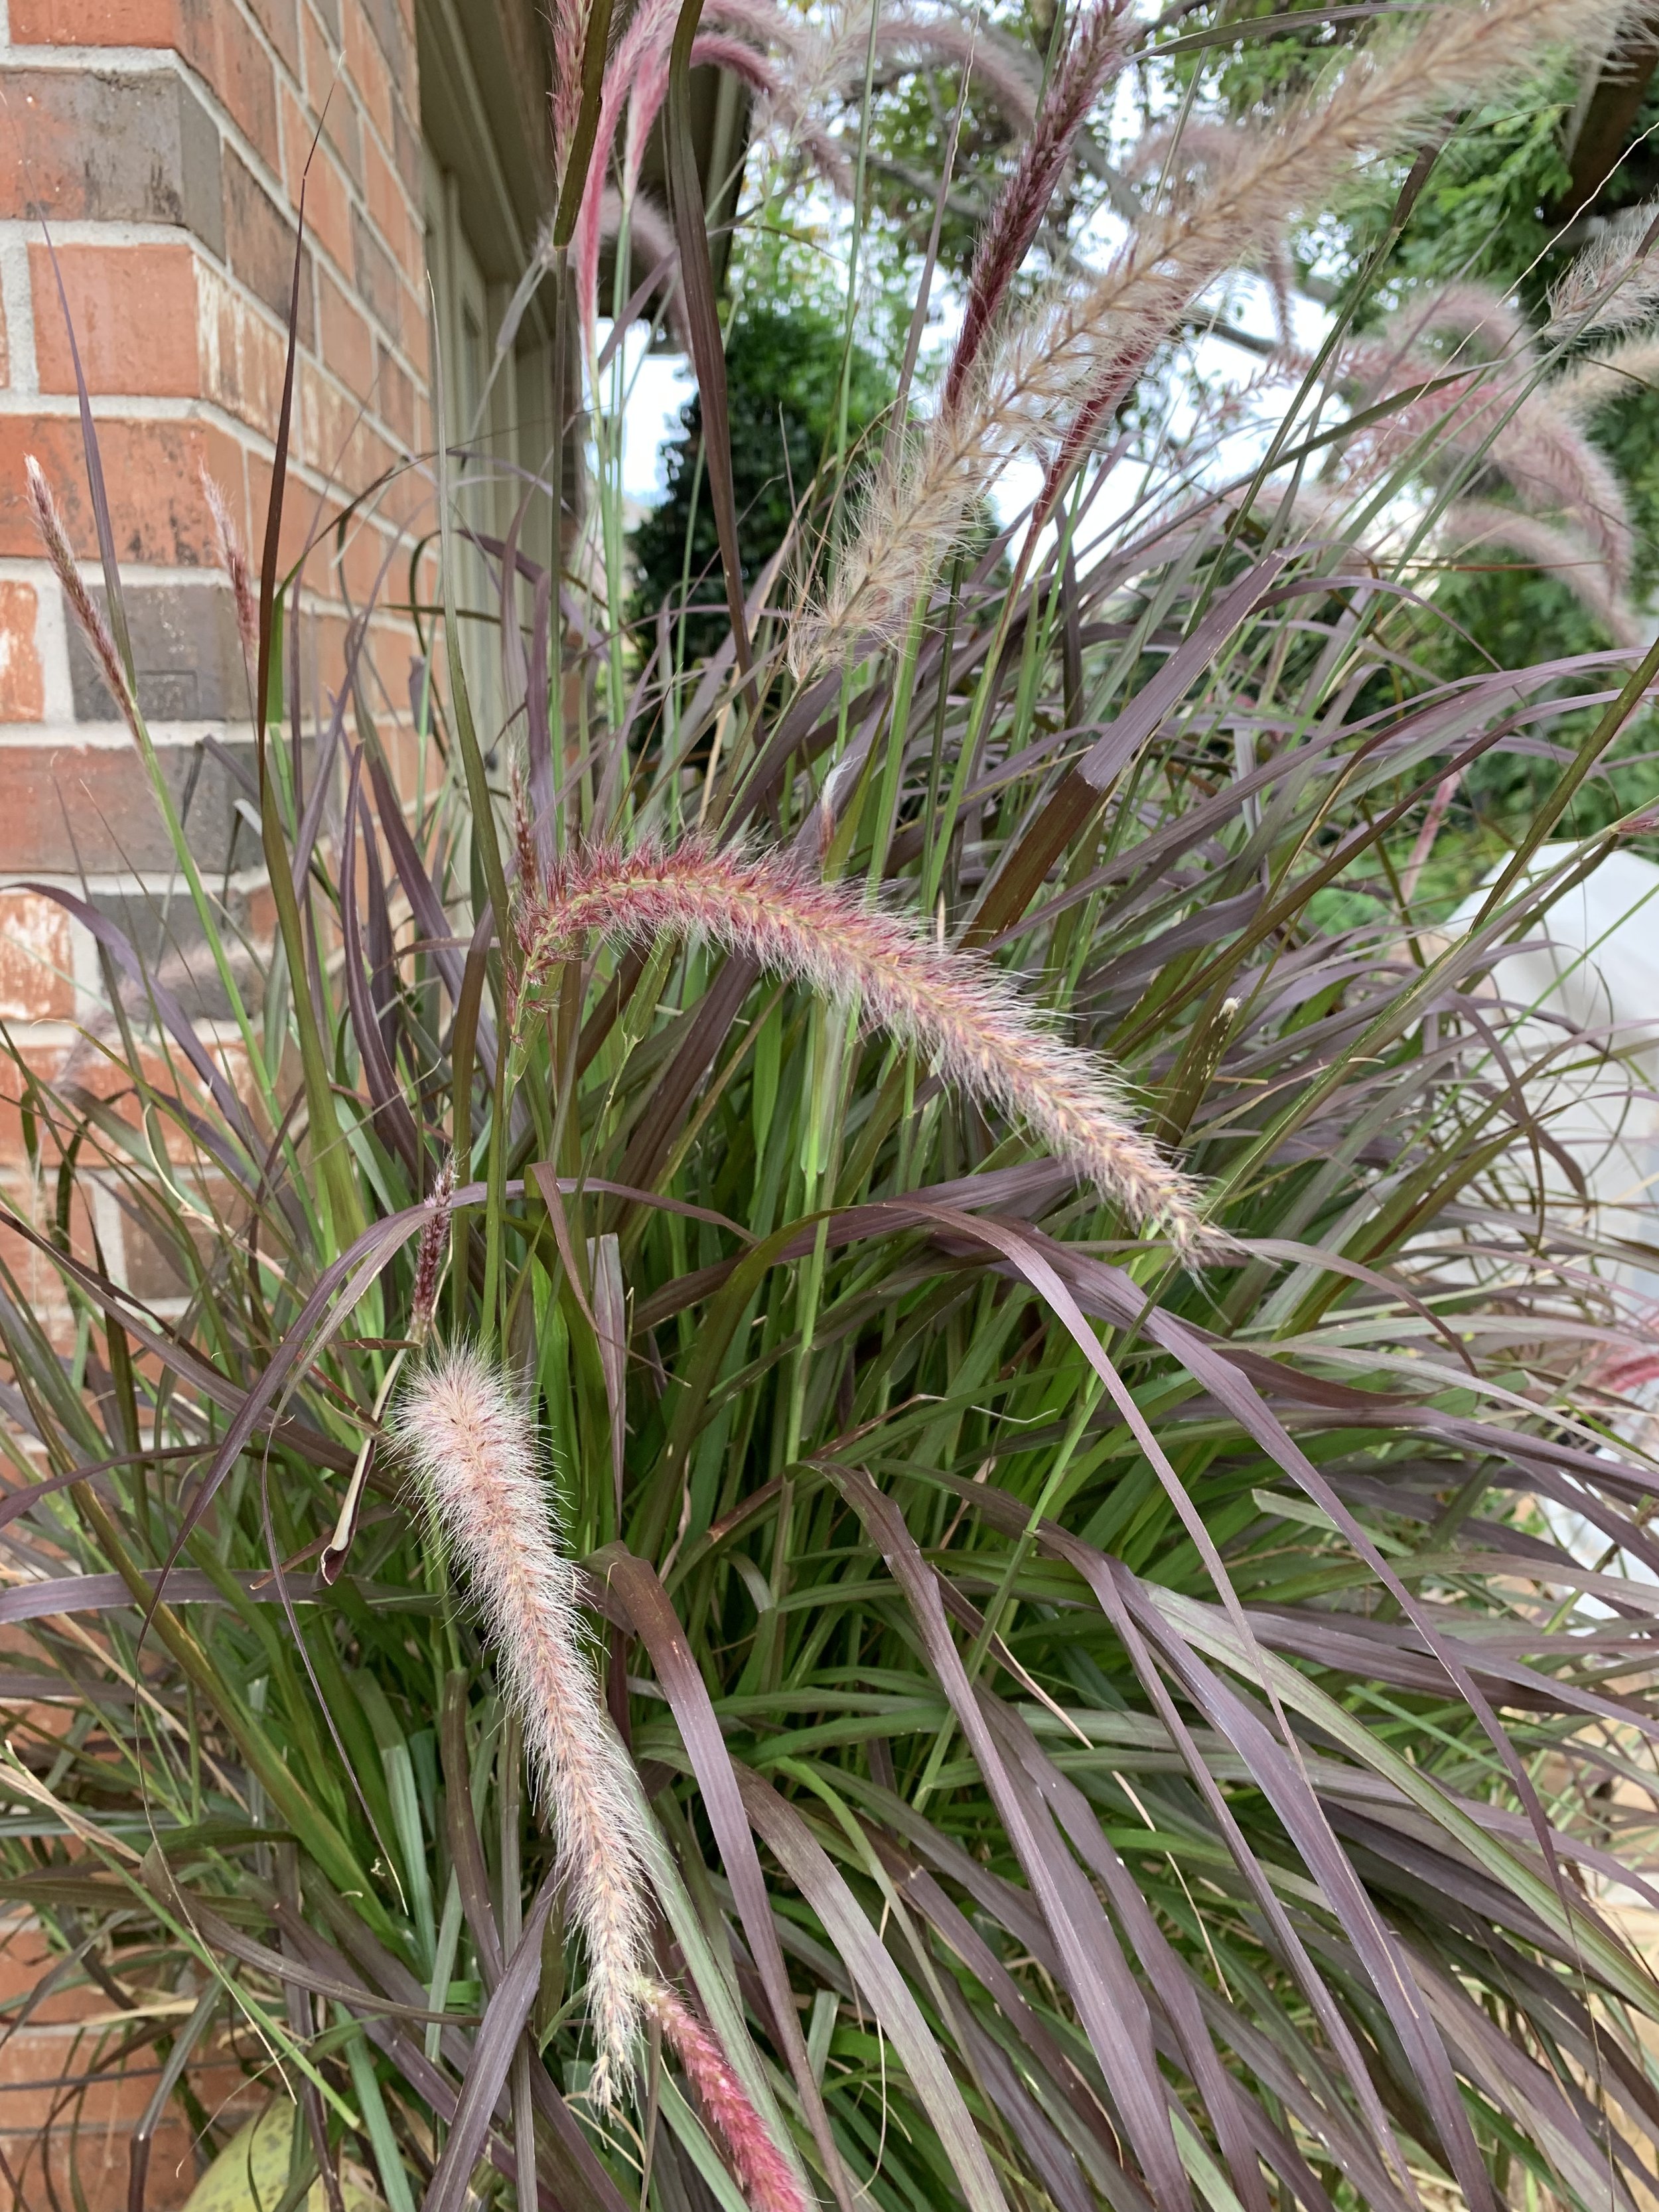
Purple Fountain Grass is an annual ornamental grass (only lasts one season) that you can always count on for brilliant purple leaf blades and plumes even in the hottest of summers.
Blue Fescue – A small silvery-blue grass that makes a great boarder or mass planting. Prefers well drained soil in full sun. Only reaches 12”.

Blue Fescue is a small blueish gray grass that is great used with seasonal color plantings or planted in a mass.


Dwarf Pampas Grass – Don’t let “dwarf” fool you, this grass reaches 4-5’. One of the most common ornamental grasses with large, showy white plumes in late summer. Giant Pampas Grass can reach 10’ and best used as a screen in large landscapes.

Dwarf Pampas Grass adds a big splash to the late summer and fall landscape with large showy plumes. Don’t be fooled by the ‘dwarf’. They will reach 4-5’ and make a great screening plant.

Often over looked as an ornamental grass, Liriope is a one time per year maintenance ground cover, you simply mow it short early in the spring and then just let go for the rest of the season. Oh, there are many varieties, but the ones with big blueish to purple flower spikes in the late summer are my favorites.
Both the Myriad Gardens and Scissortail Park are full of ornamental grasses and most are labeled. Go for a walk in both of our downtown parks over the next few weeks and pick out a favorite grass to add to your landscape.
A good source for more information on ornamental grasses:
Landscape Design with Ornamental Grasses: Top 5 ways (monrovia.com)
Do you have a favorite ornamental grass? (If you don’t, you should.)
Lorne Hall
Hall | Stewart Lawn + Landscape
(405)367-3873
Drought Stress on Trees

It has been 6 weeks since most of the Oklahoma City metro area has received a ¼” rainfall.
If the lack of rainfall wasn’t enough stress for your landscape, the number of 100+ degree days is now into double digits.
Lawns and landscapes are looking tired and tattered.
Lawns are struggling. Shrubs are struggling. Trees are struggling.
A lot of attention has been given to keeping lawns green, but what about your trees?
Your trees represent an enormous value to your landscapes.
Mature trees increase property values on average by 7%.
Trees are a critical component in our efforts in creating a healthy environment.
Trees reduce energy consumption.
Trees make the places we live, work, and play more attractive and enjoyable.
Afternoon wilting and drooping leaves is the first signs of drought stress.
Every effort to reduce stress and protect a tree is worth it.
Stress? What is stress for a tree? Stress is anything that keeps a tree from growing.
Your trees are feeling the stress of the drought and heat of 2022!
Drought stress on trees typically follows these steps:
Temporary Wilting – Wilting and drooping leaves in the afternoon on a 95+ degree day isn’t a problem as long as the following morning the leaves have returned to normal.
Permanent Wilting – Wilting and drooping leaves in the morning and all day long.
Yellowish and/or Fall Color Leaves – Fall color is not a good thing in July!
Leaf Scorch – Leaf margins have a brown or burned appearance.
Defoliation – Leaves begin dropping from the top of the tree and the ends of branches.
Long-term drought results in dead branches, thin canopies, unusually small new leaves, increased pest problems, and trees that are slow to close wounds.
Supplemental watering during periods of drought and heat is very important
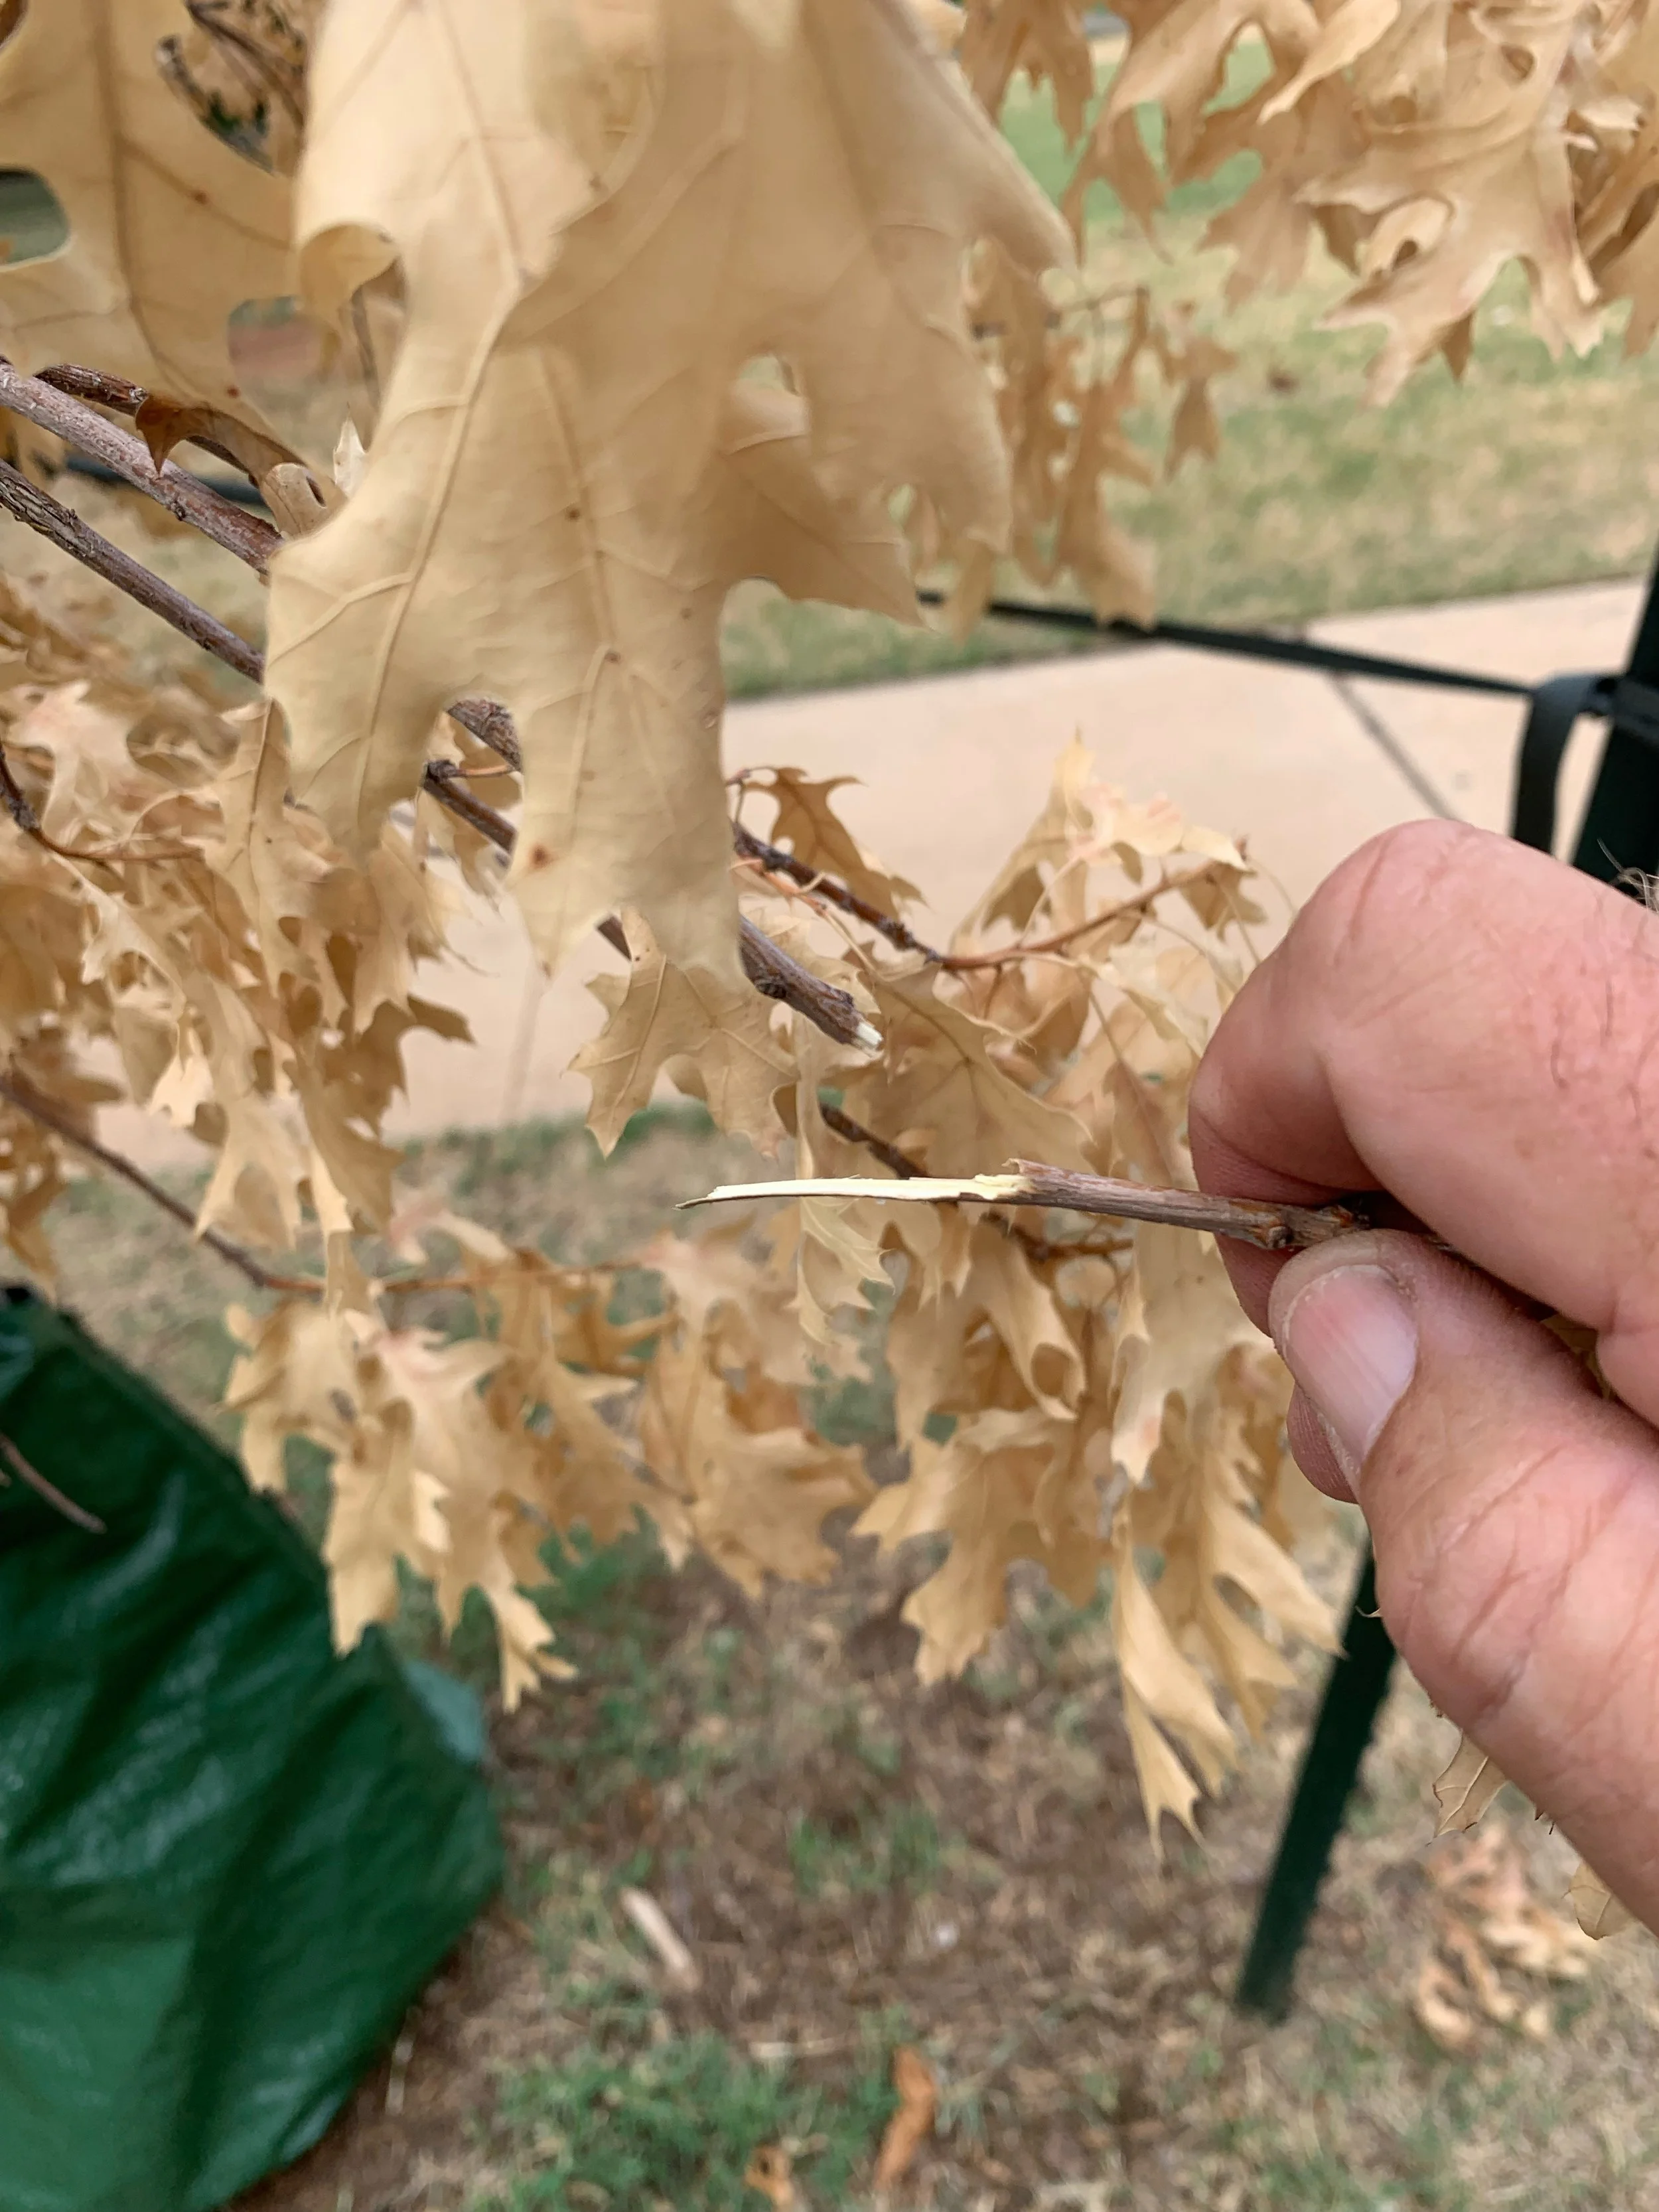
Often when leaves turn brown during a drought and the leaves remain on the tree it is a sign the tree does not have enough moisture to put on new buds. In this case the ends of the branches are brittle and the chances of recovery are slim.
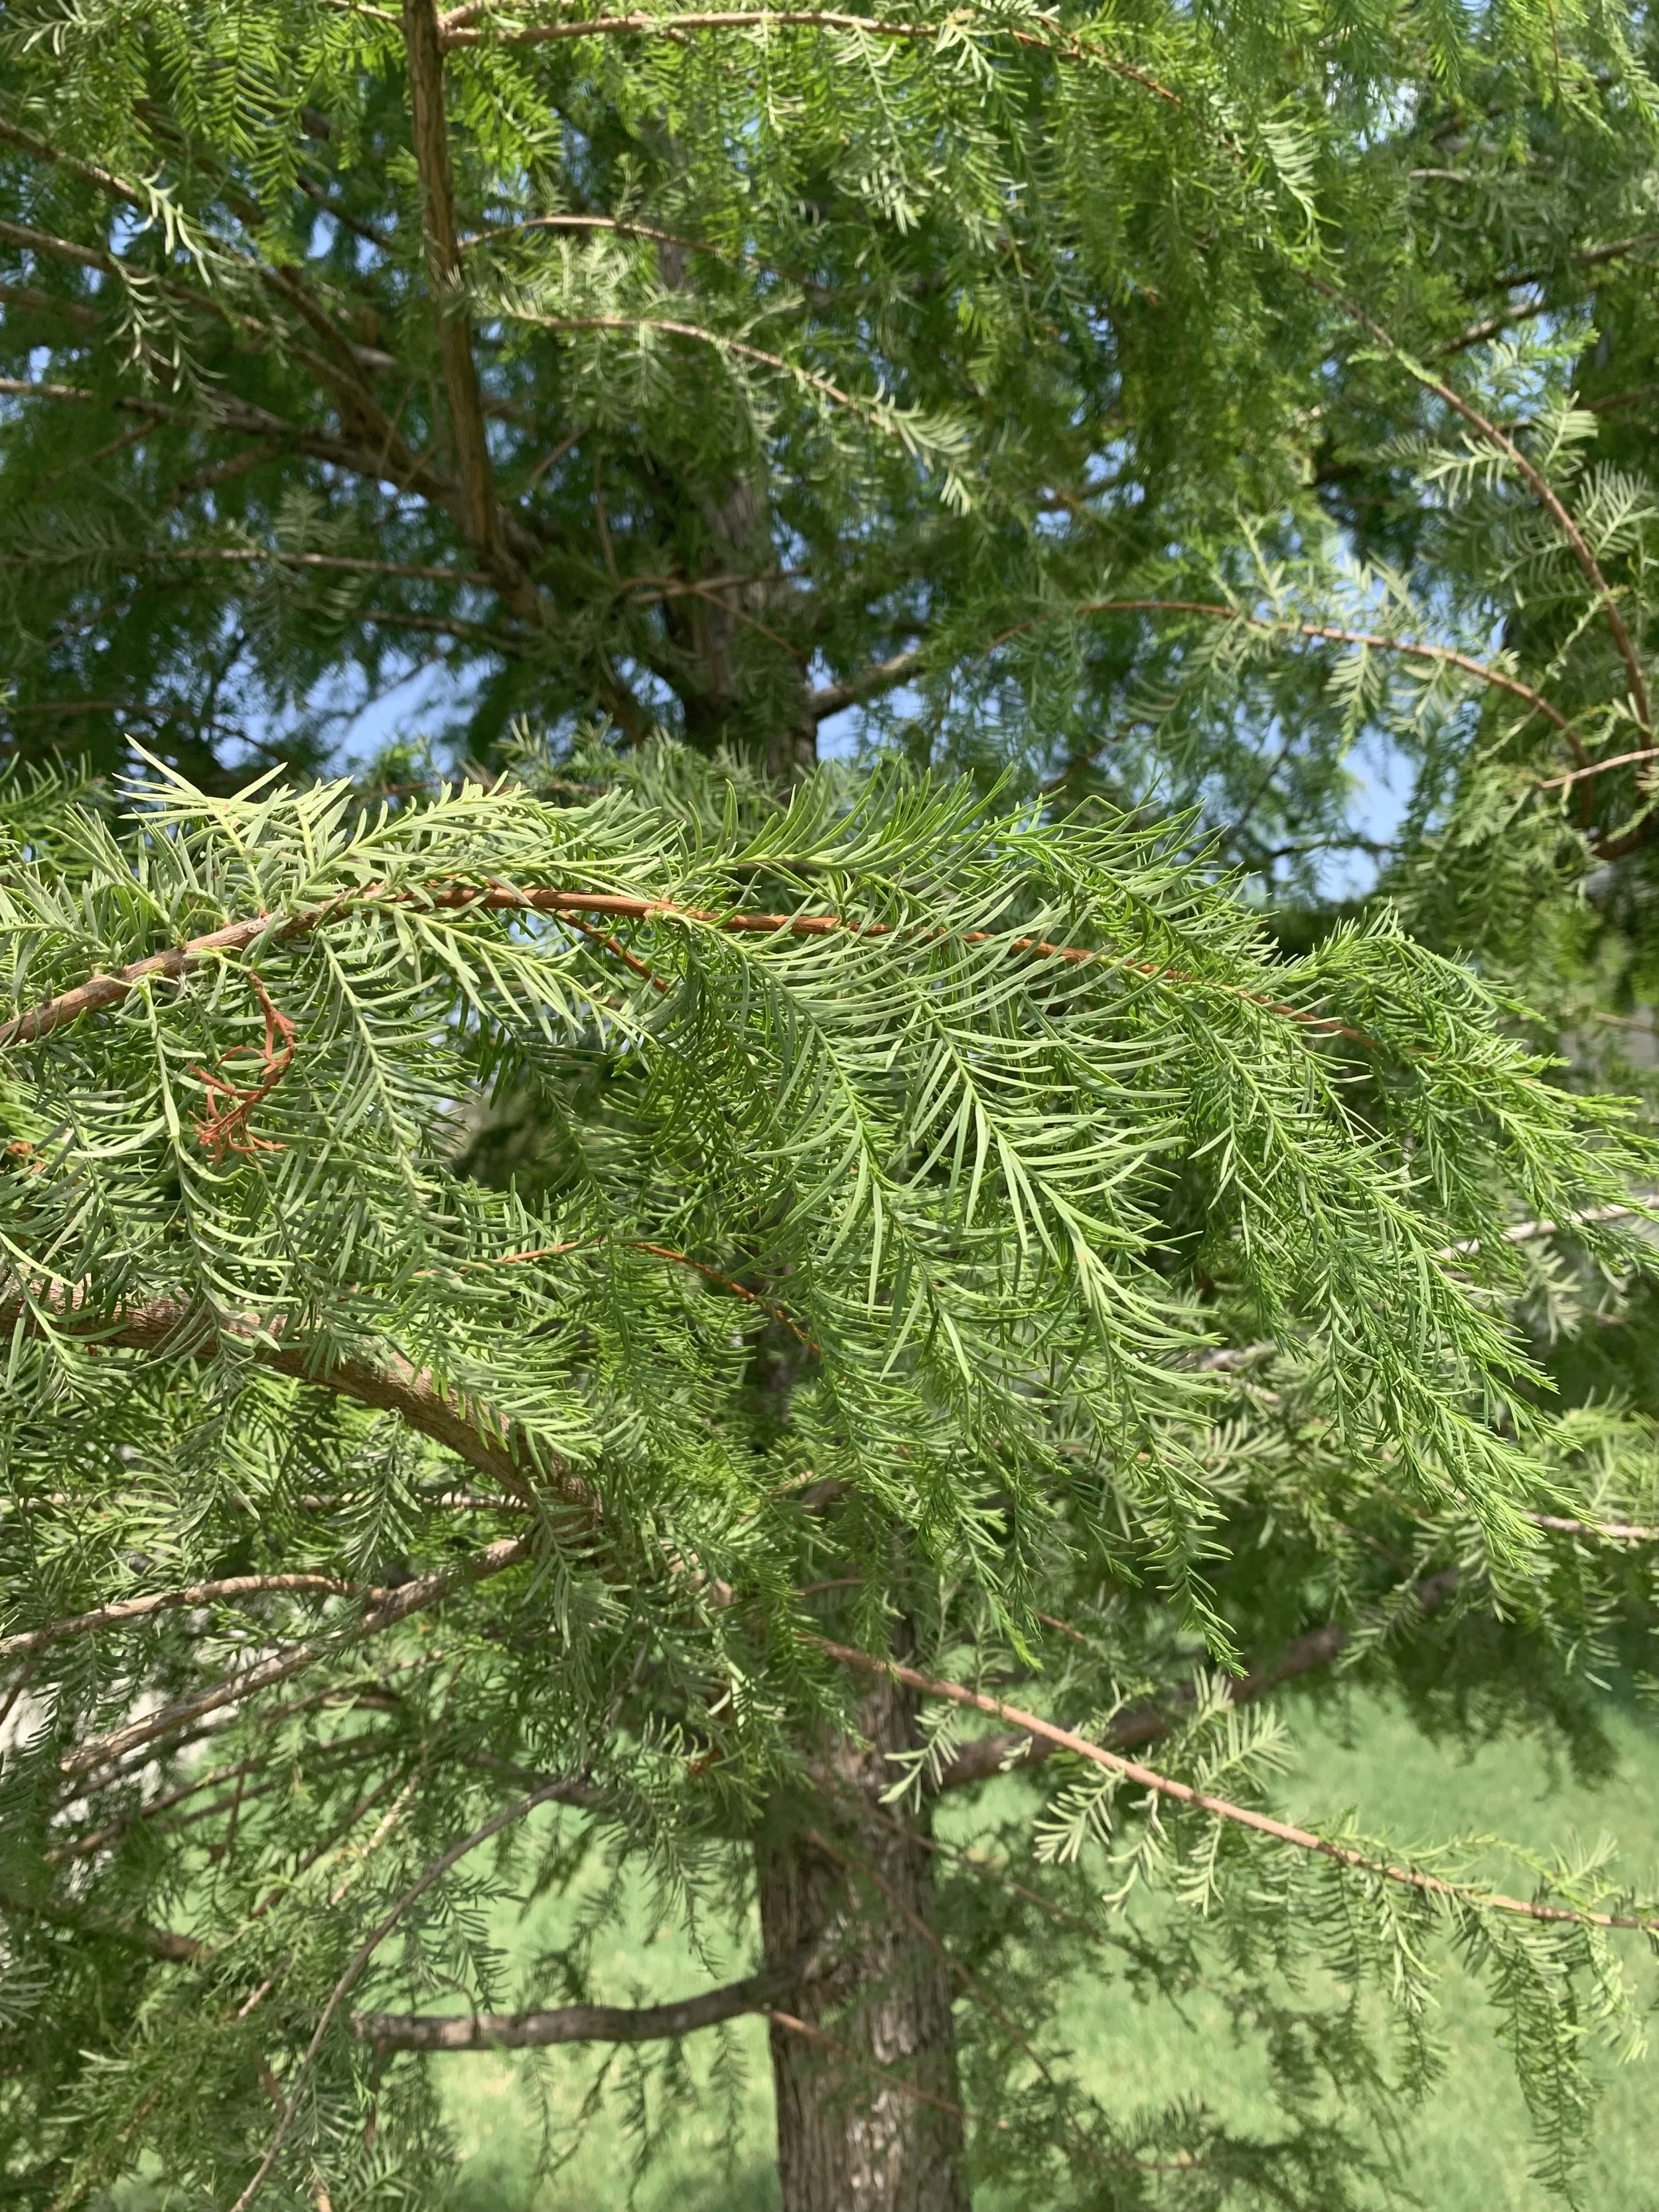
An early indication of drought stress is drooping or wilting leaves in the afternoon, such as the needles on this bald cypress are doing. If the next morning the needles look normal, no extra watering is needed.
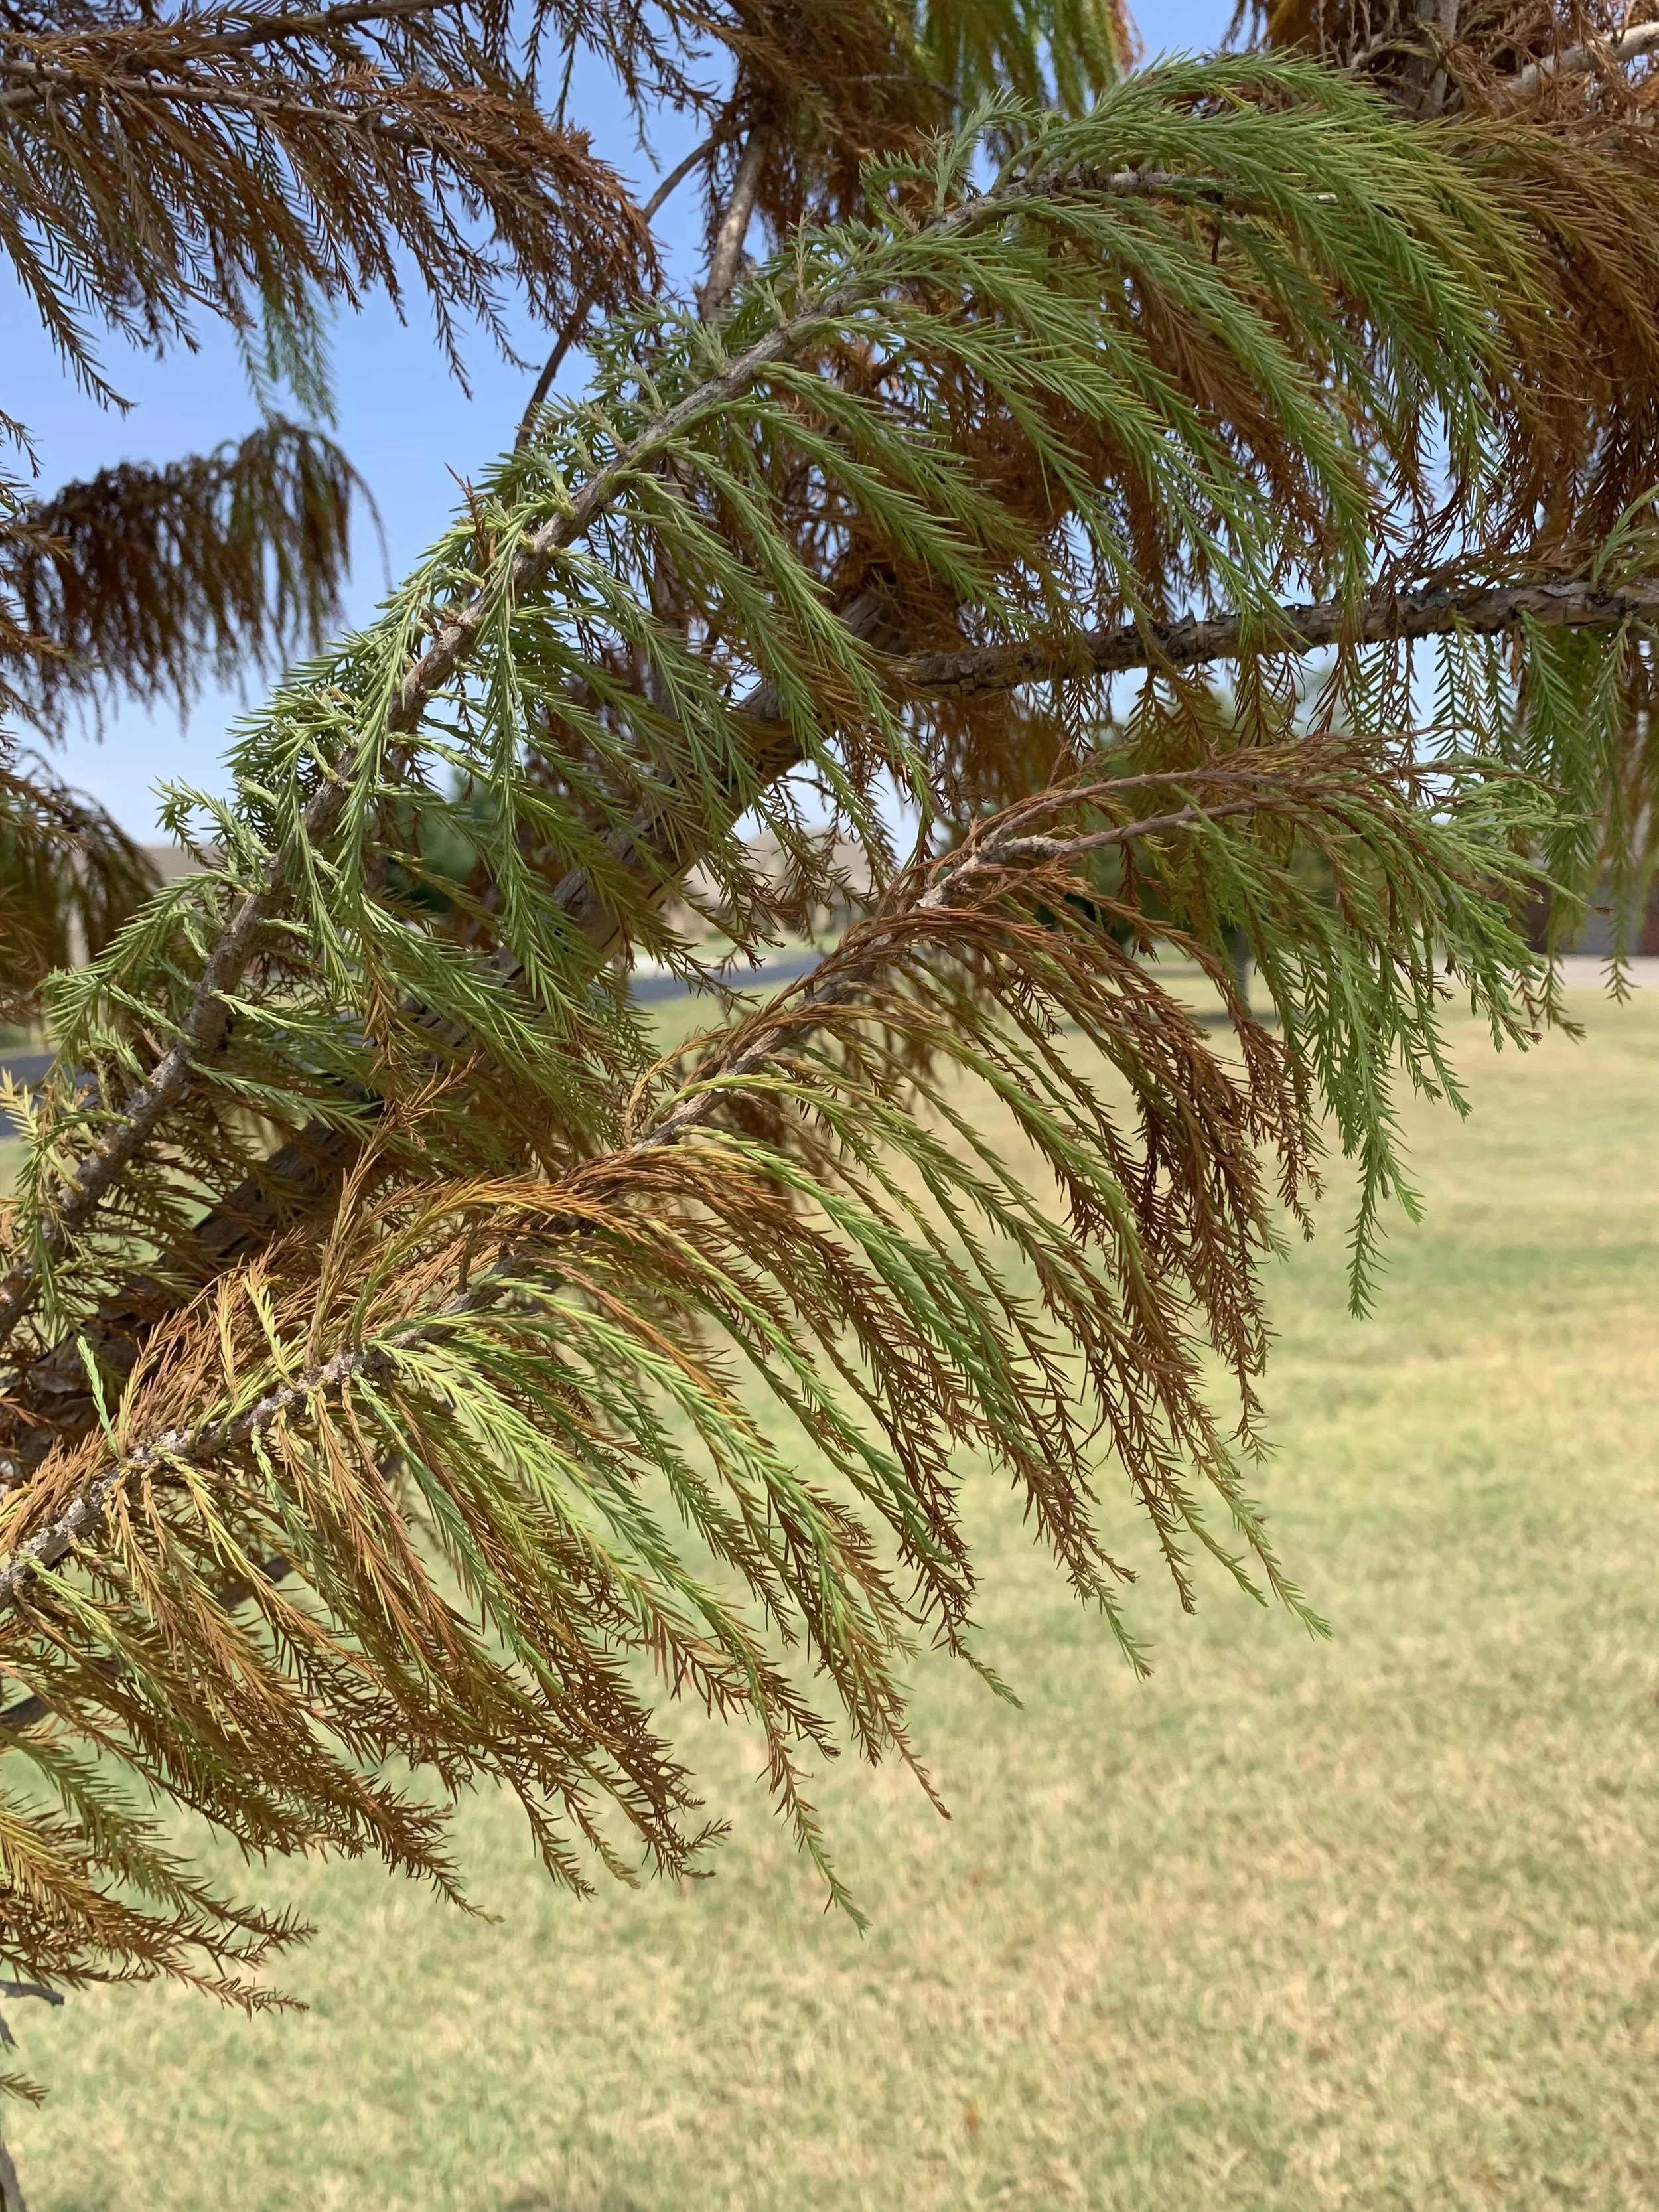
Permanent wilting is underway on this bald cypress. Supplemental watering is needed to reverse drought stress.
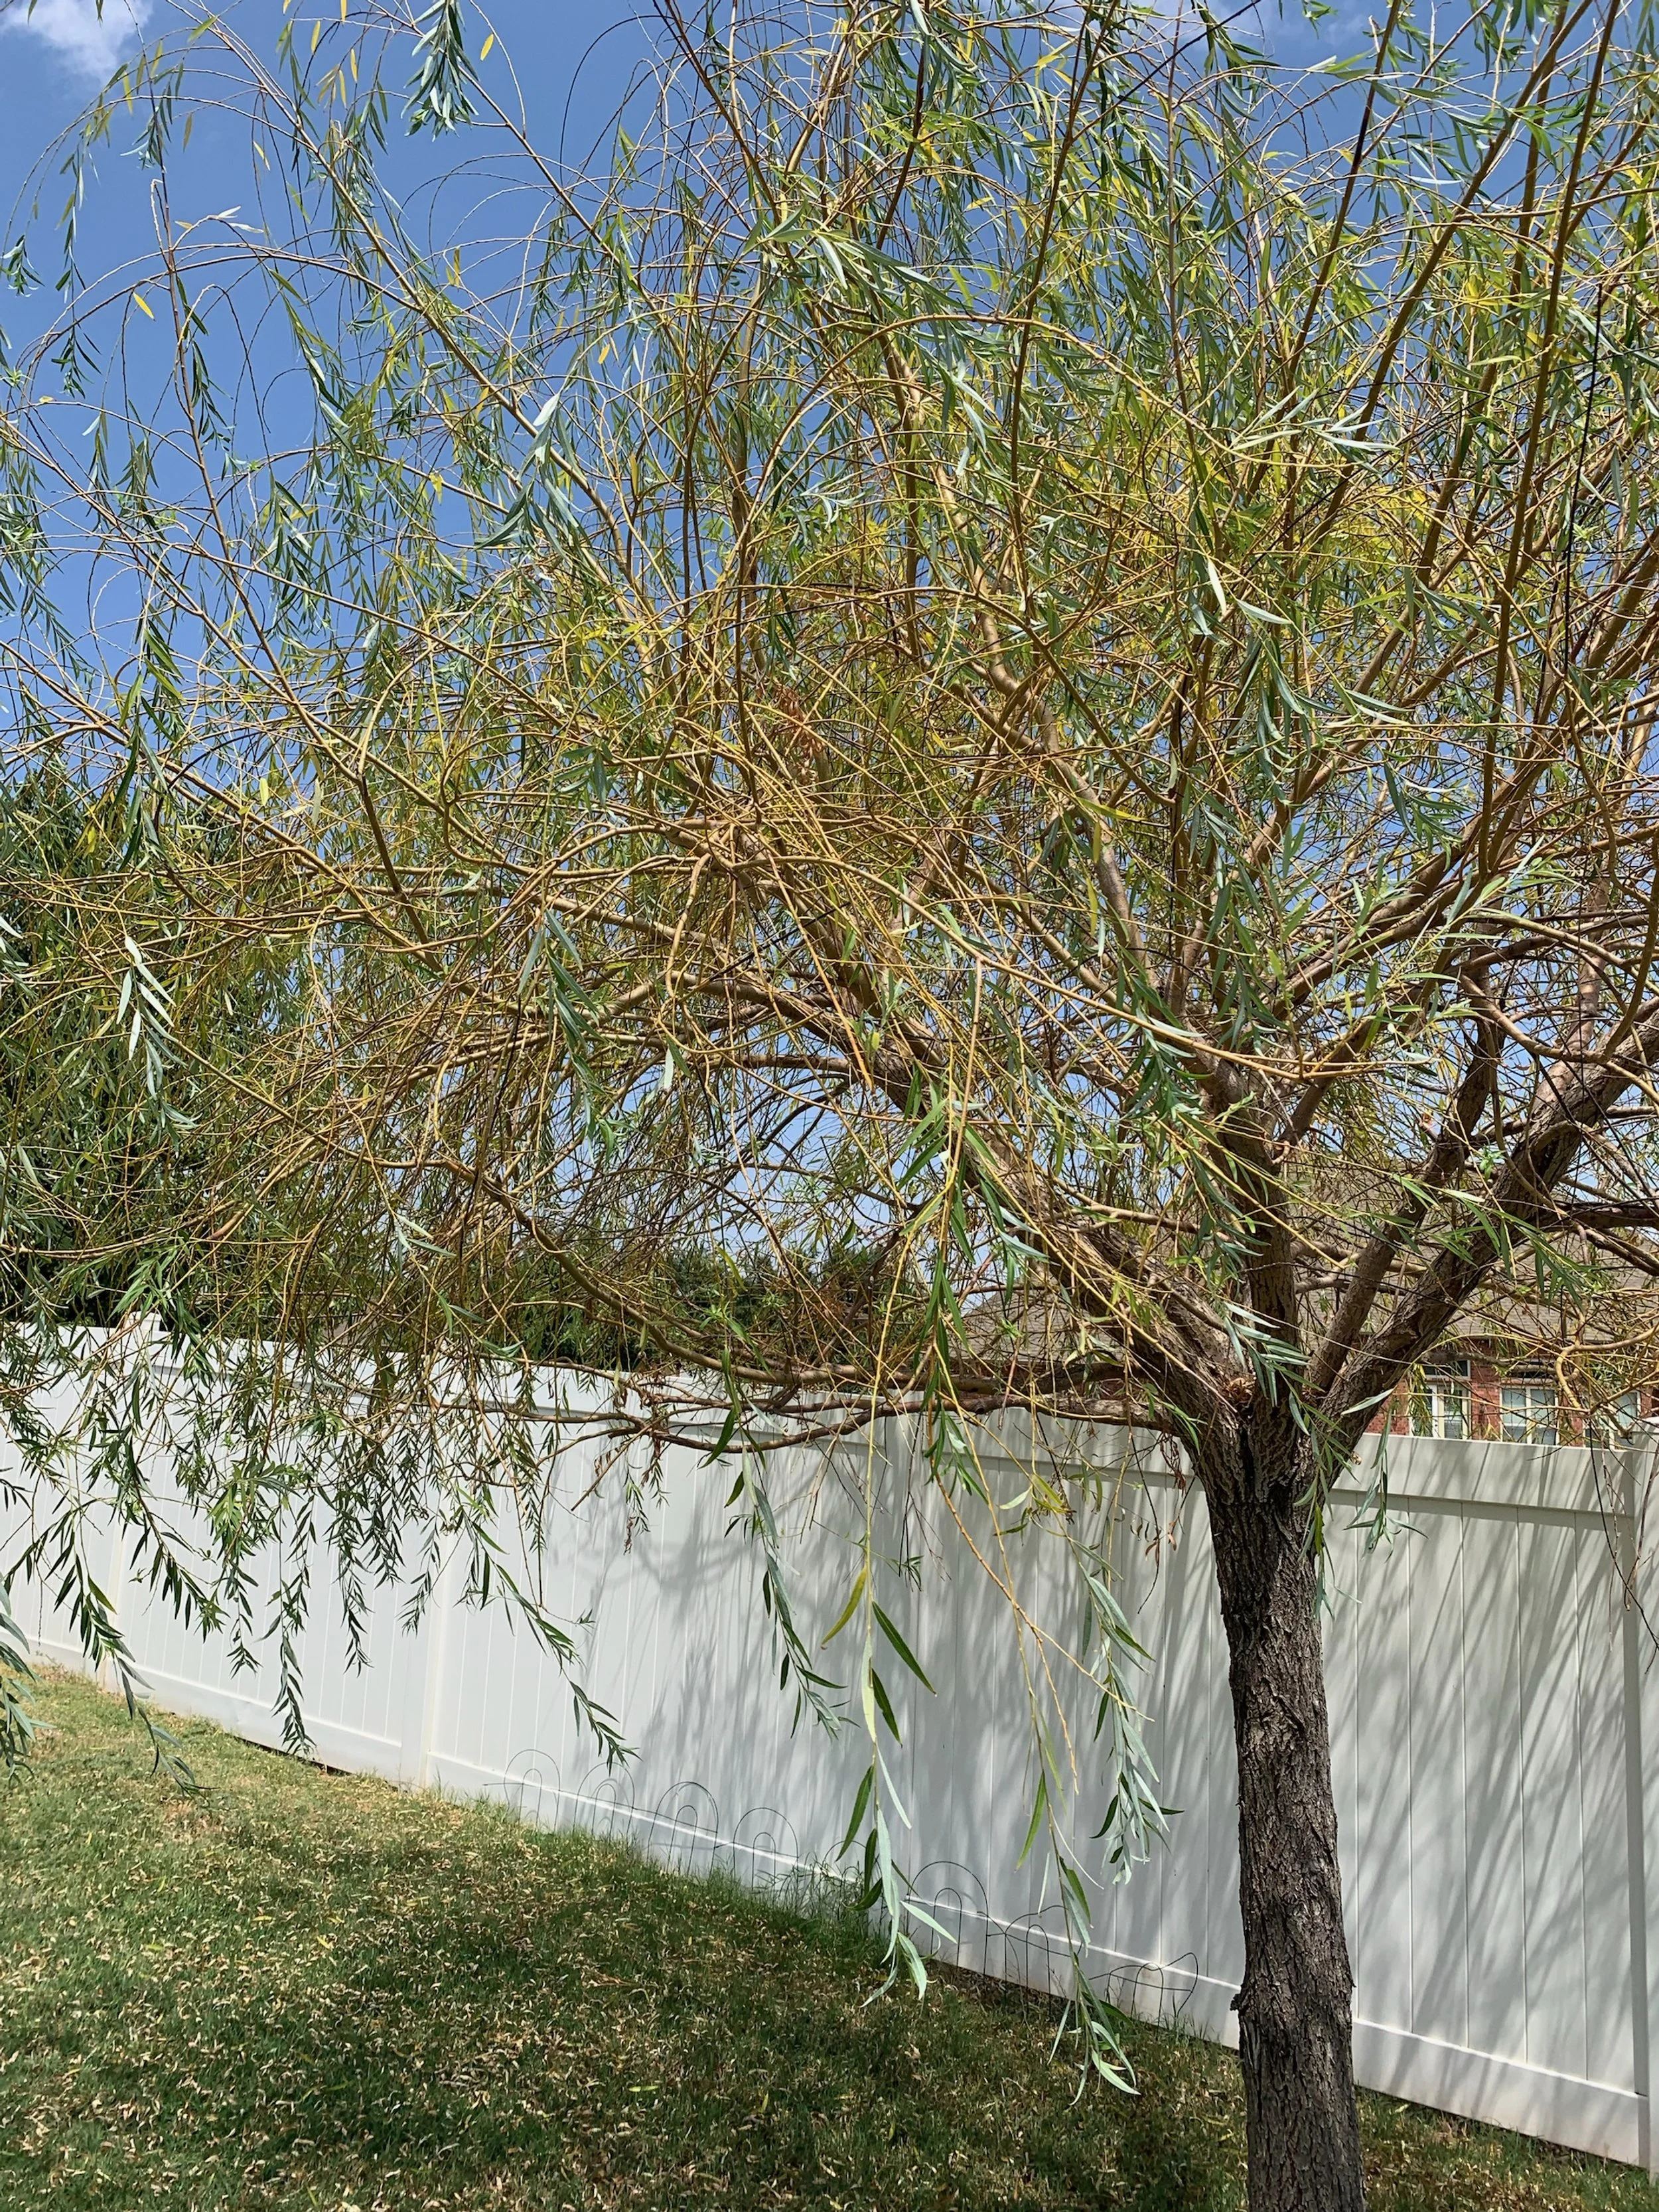
Willow trees love moisture. It is not uncommon for willows to be one of the first trees to show drought stress by dropping excess leaves. Some leaf drop is good during a drought and part of a trees defense system to survive.
Depending upon the species, a full-grown tree can use up to 250 to 500 gallons of water per week when temperatures are high.
A 10-year-old tree in your landscape is looking for 50 gallons of water every day.
A tree’s need for water is high on hot days because 90% of the water a tree takes in is being lost through transpiration.
What is transpiration? Water is absorbed by the roots, and moves up the trunk to the branches out to the leaves where the water is released as water vapor. Transpiration is not all bad. The water vapor cools the leaves 10-15 degrees as it is released.
Do not assume if your grass is green that the trees in your lawn are receiving enough water. Trees and grass are competing for the same water. Deep soaking is required to get enough water for both the turf and tree roots.
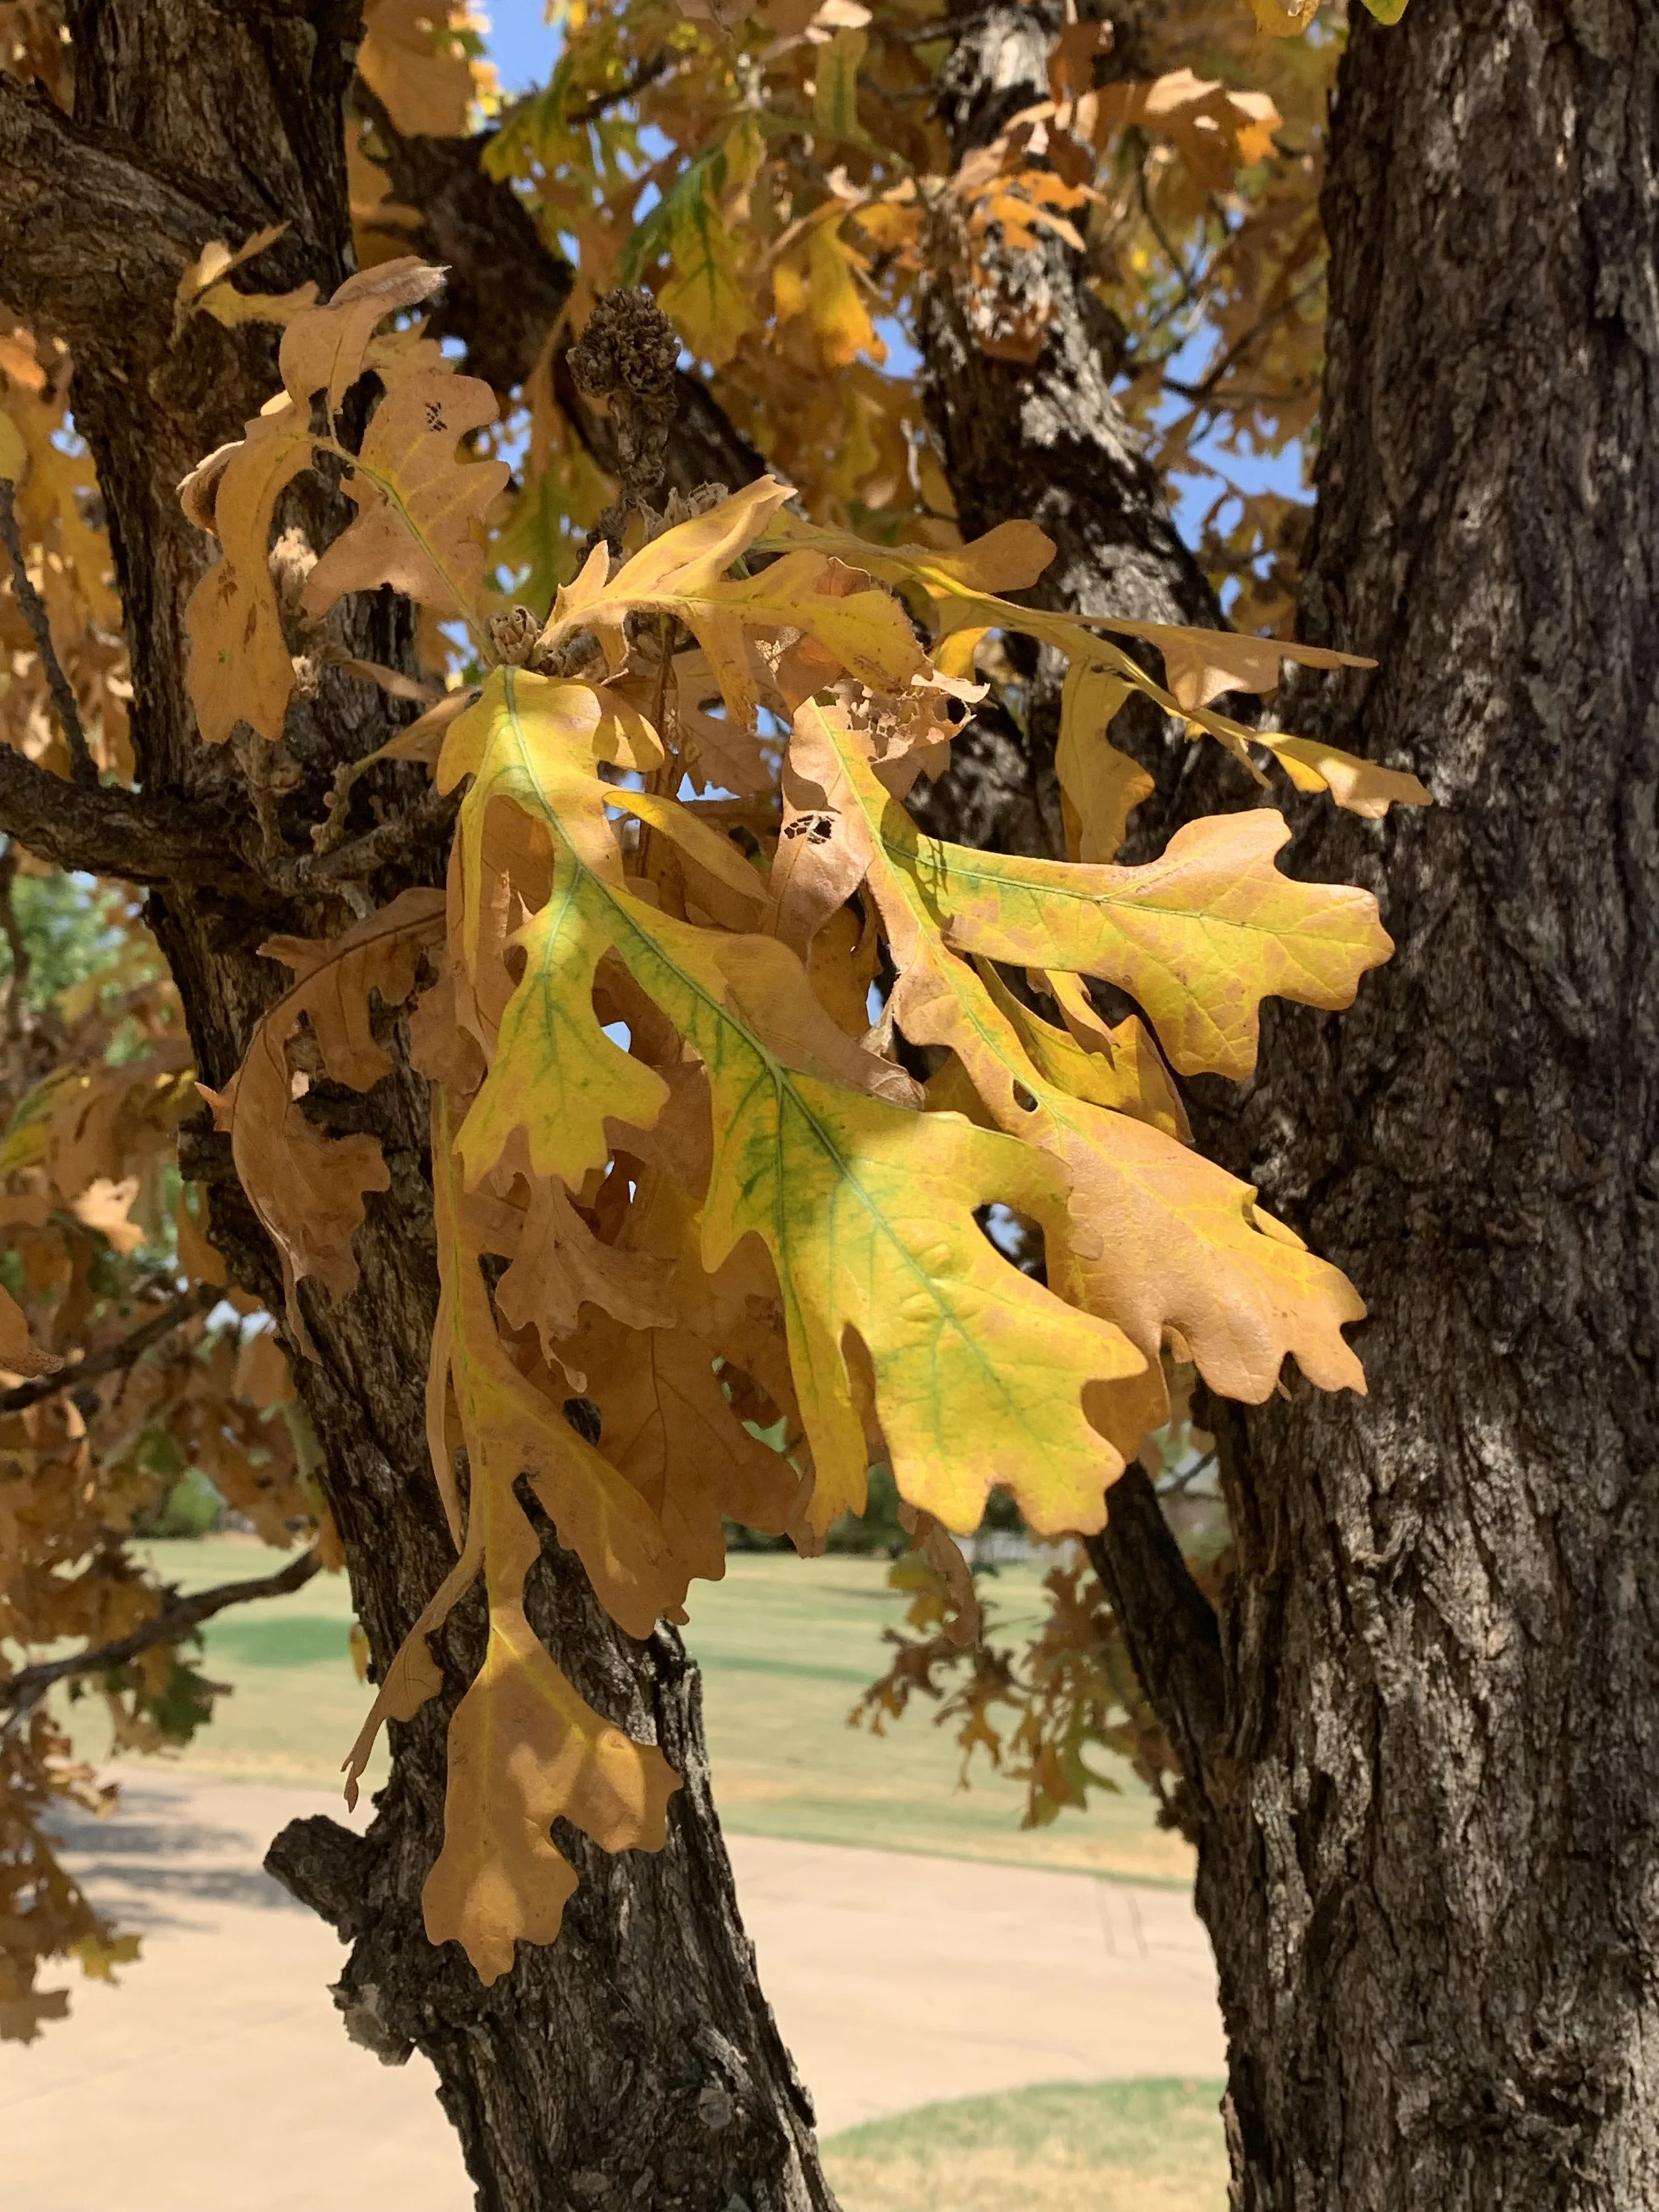
Yellowing or fall-colored leaves during the growing season is a sign that drought stress is advancing. Deep soaking of the entire area under the canopy of the tree every other day should be started immediately.
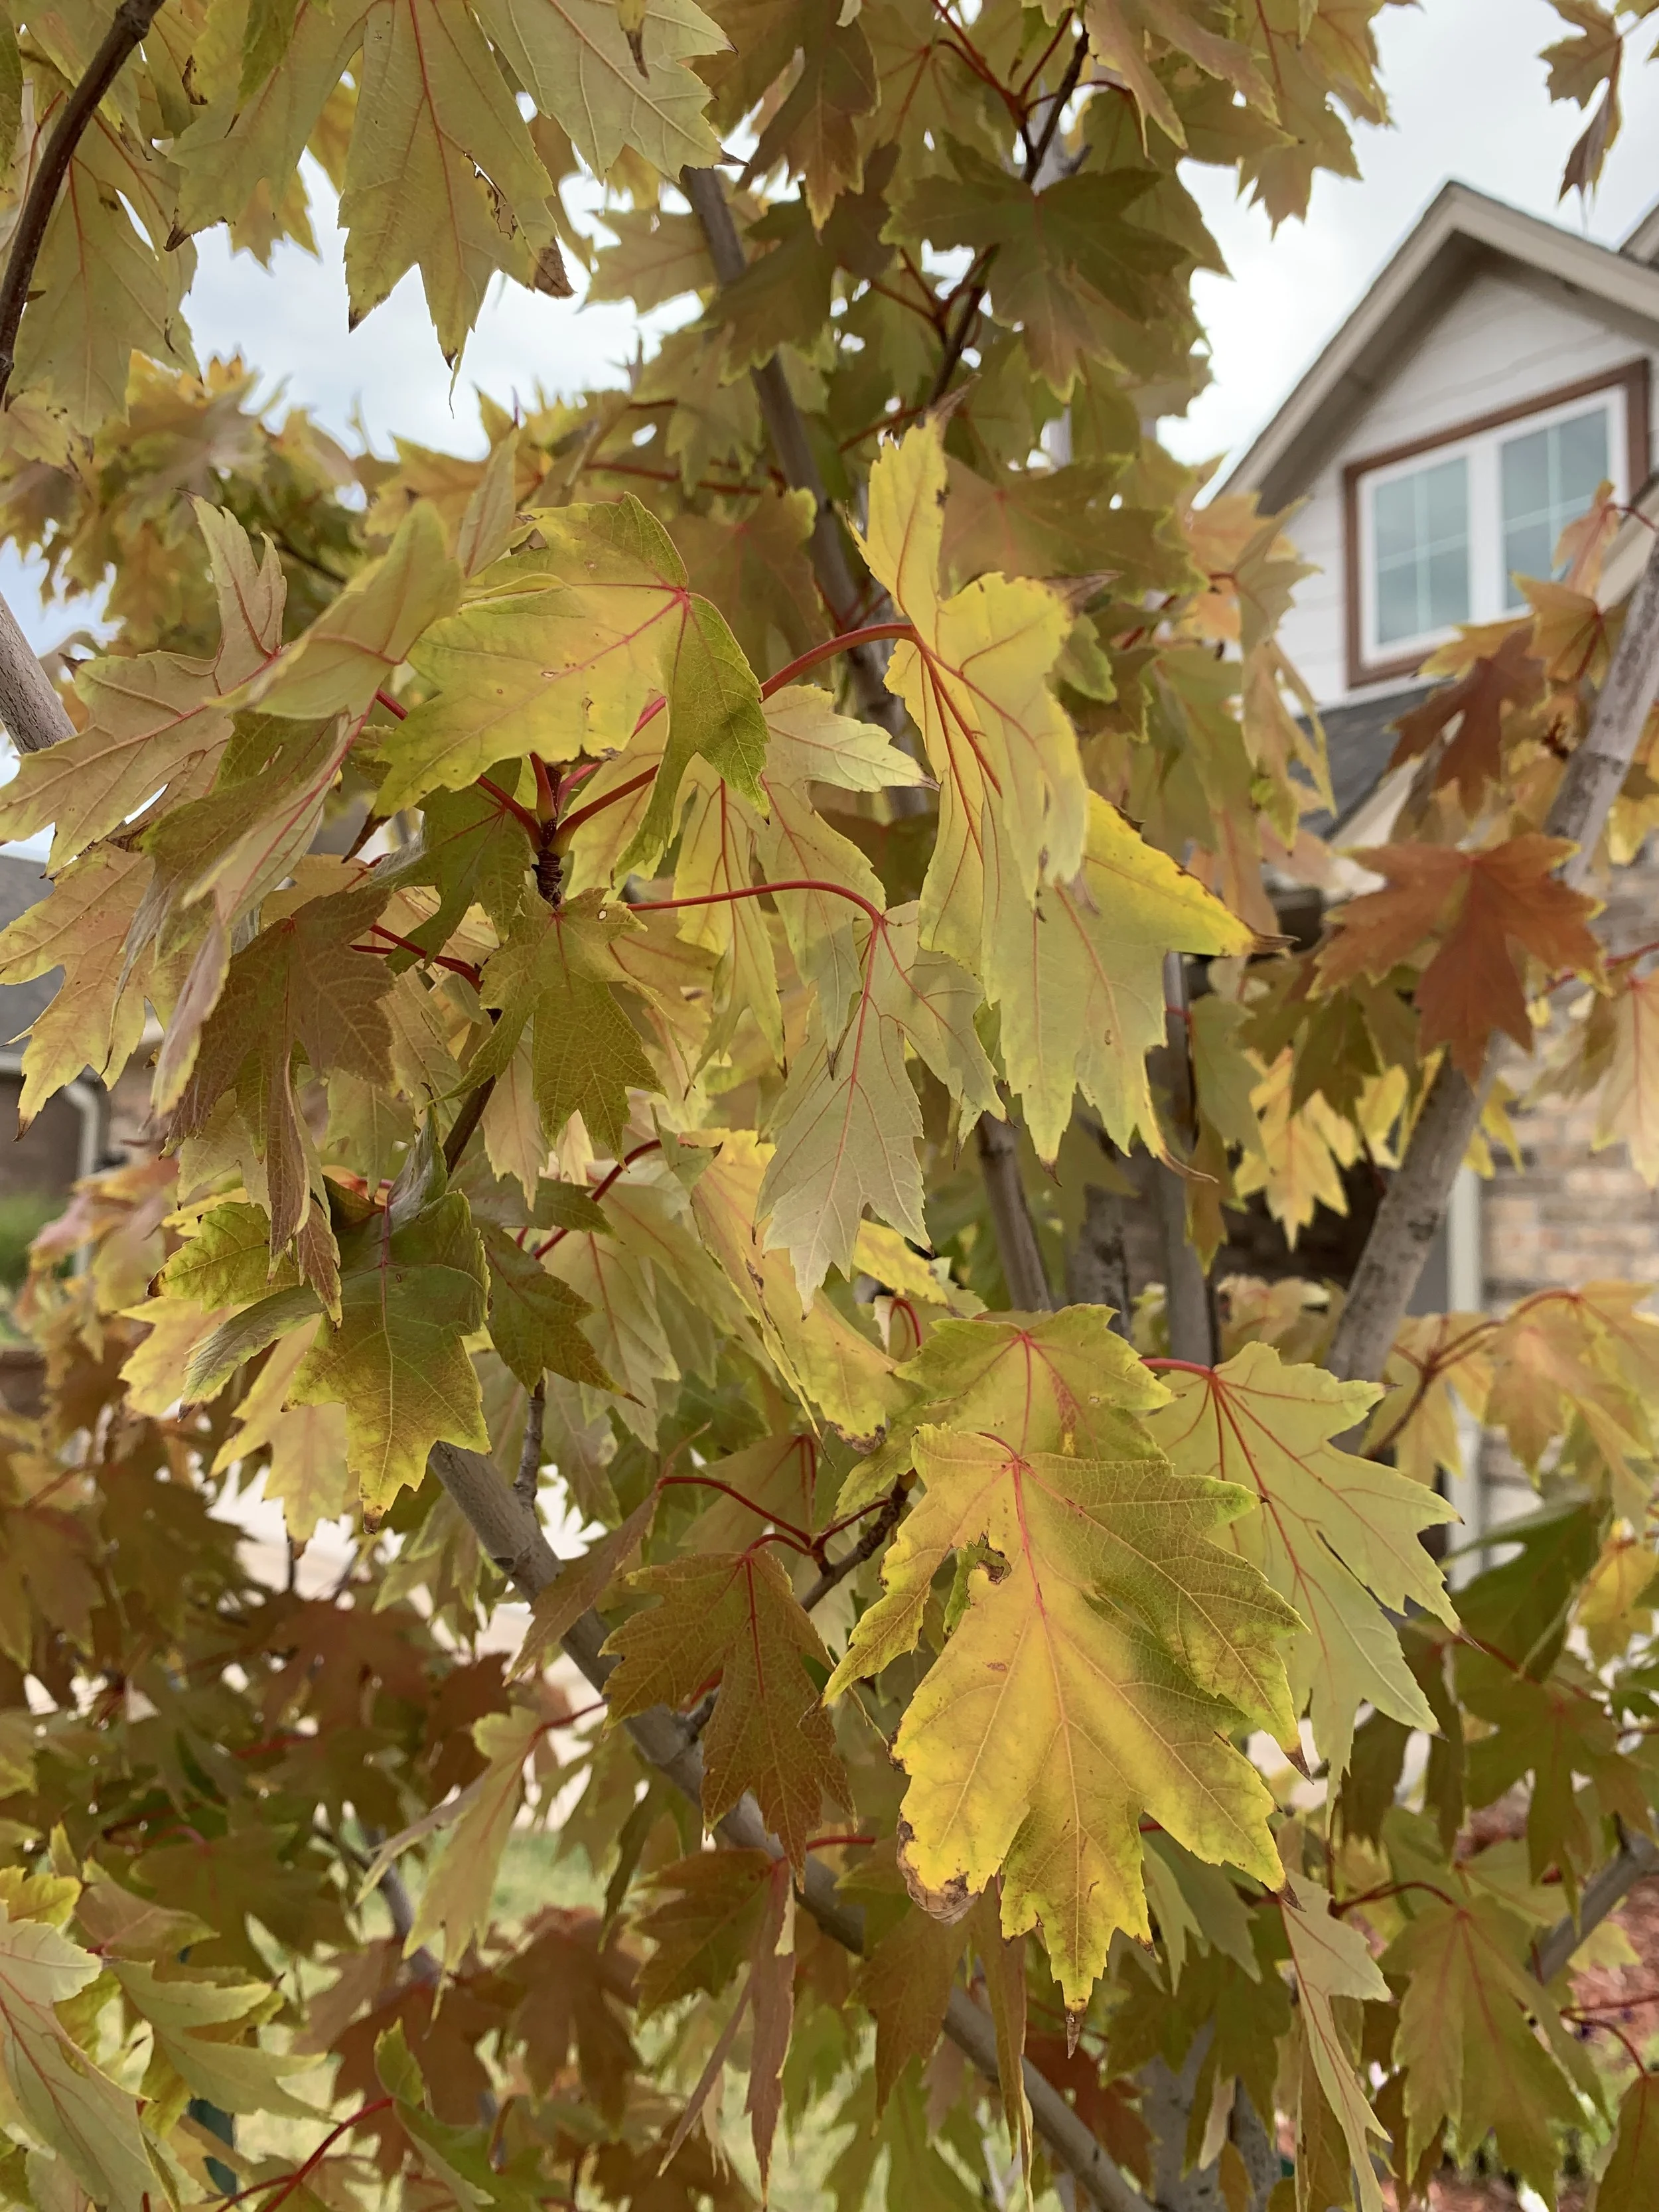
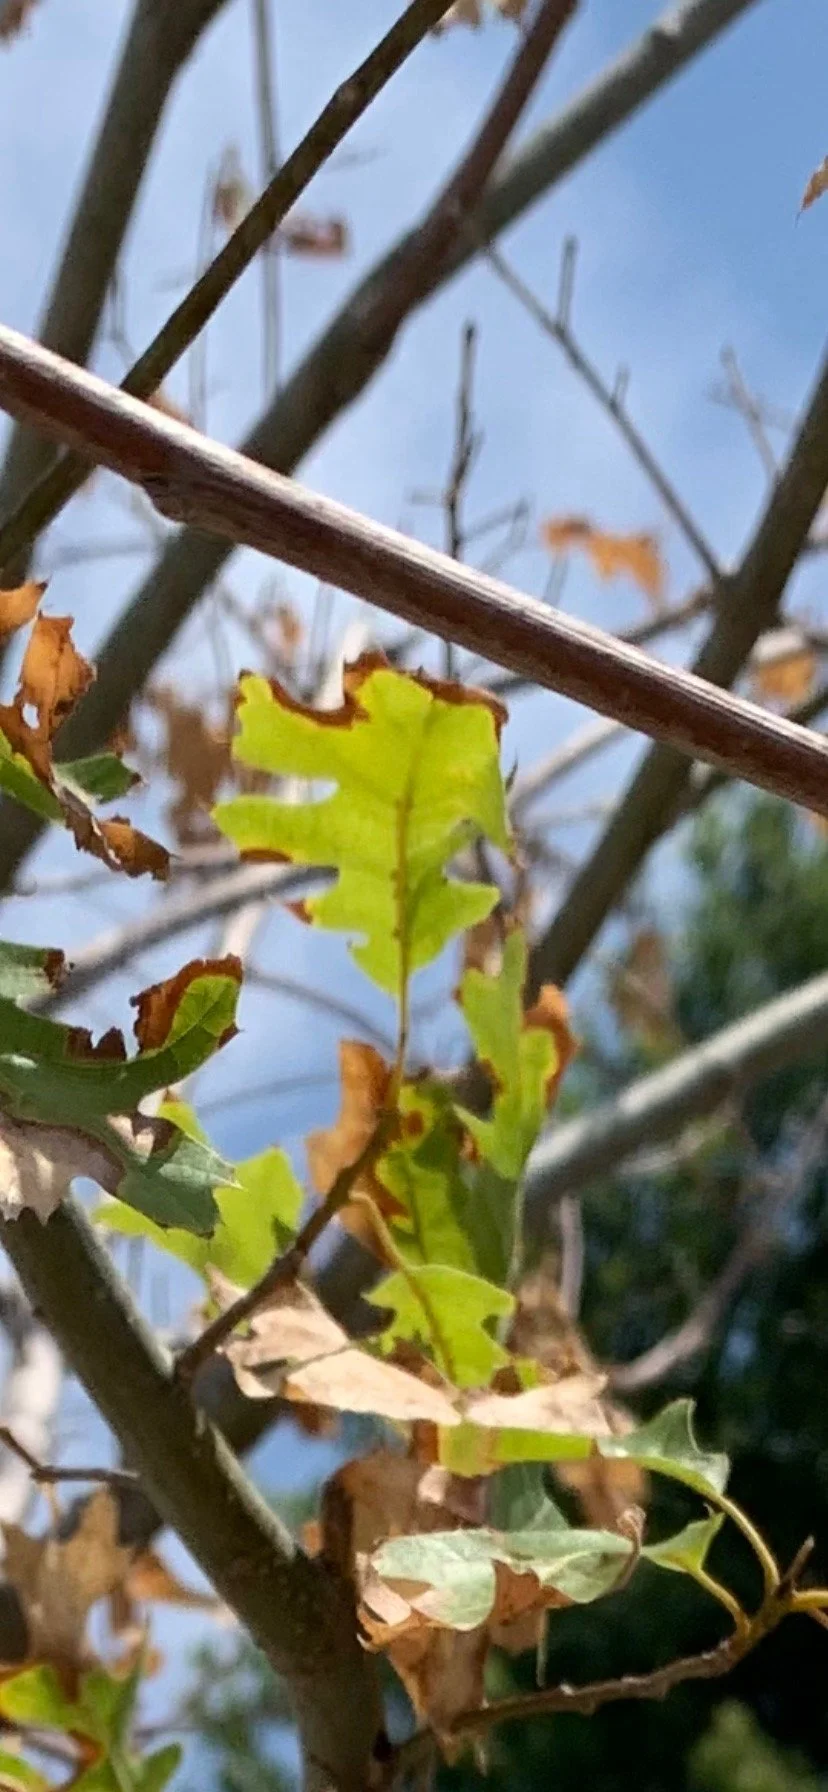
When the edges of the leaves are brown or have a burned appearance the tree will soon begin to defoliate.
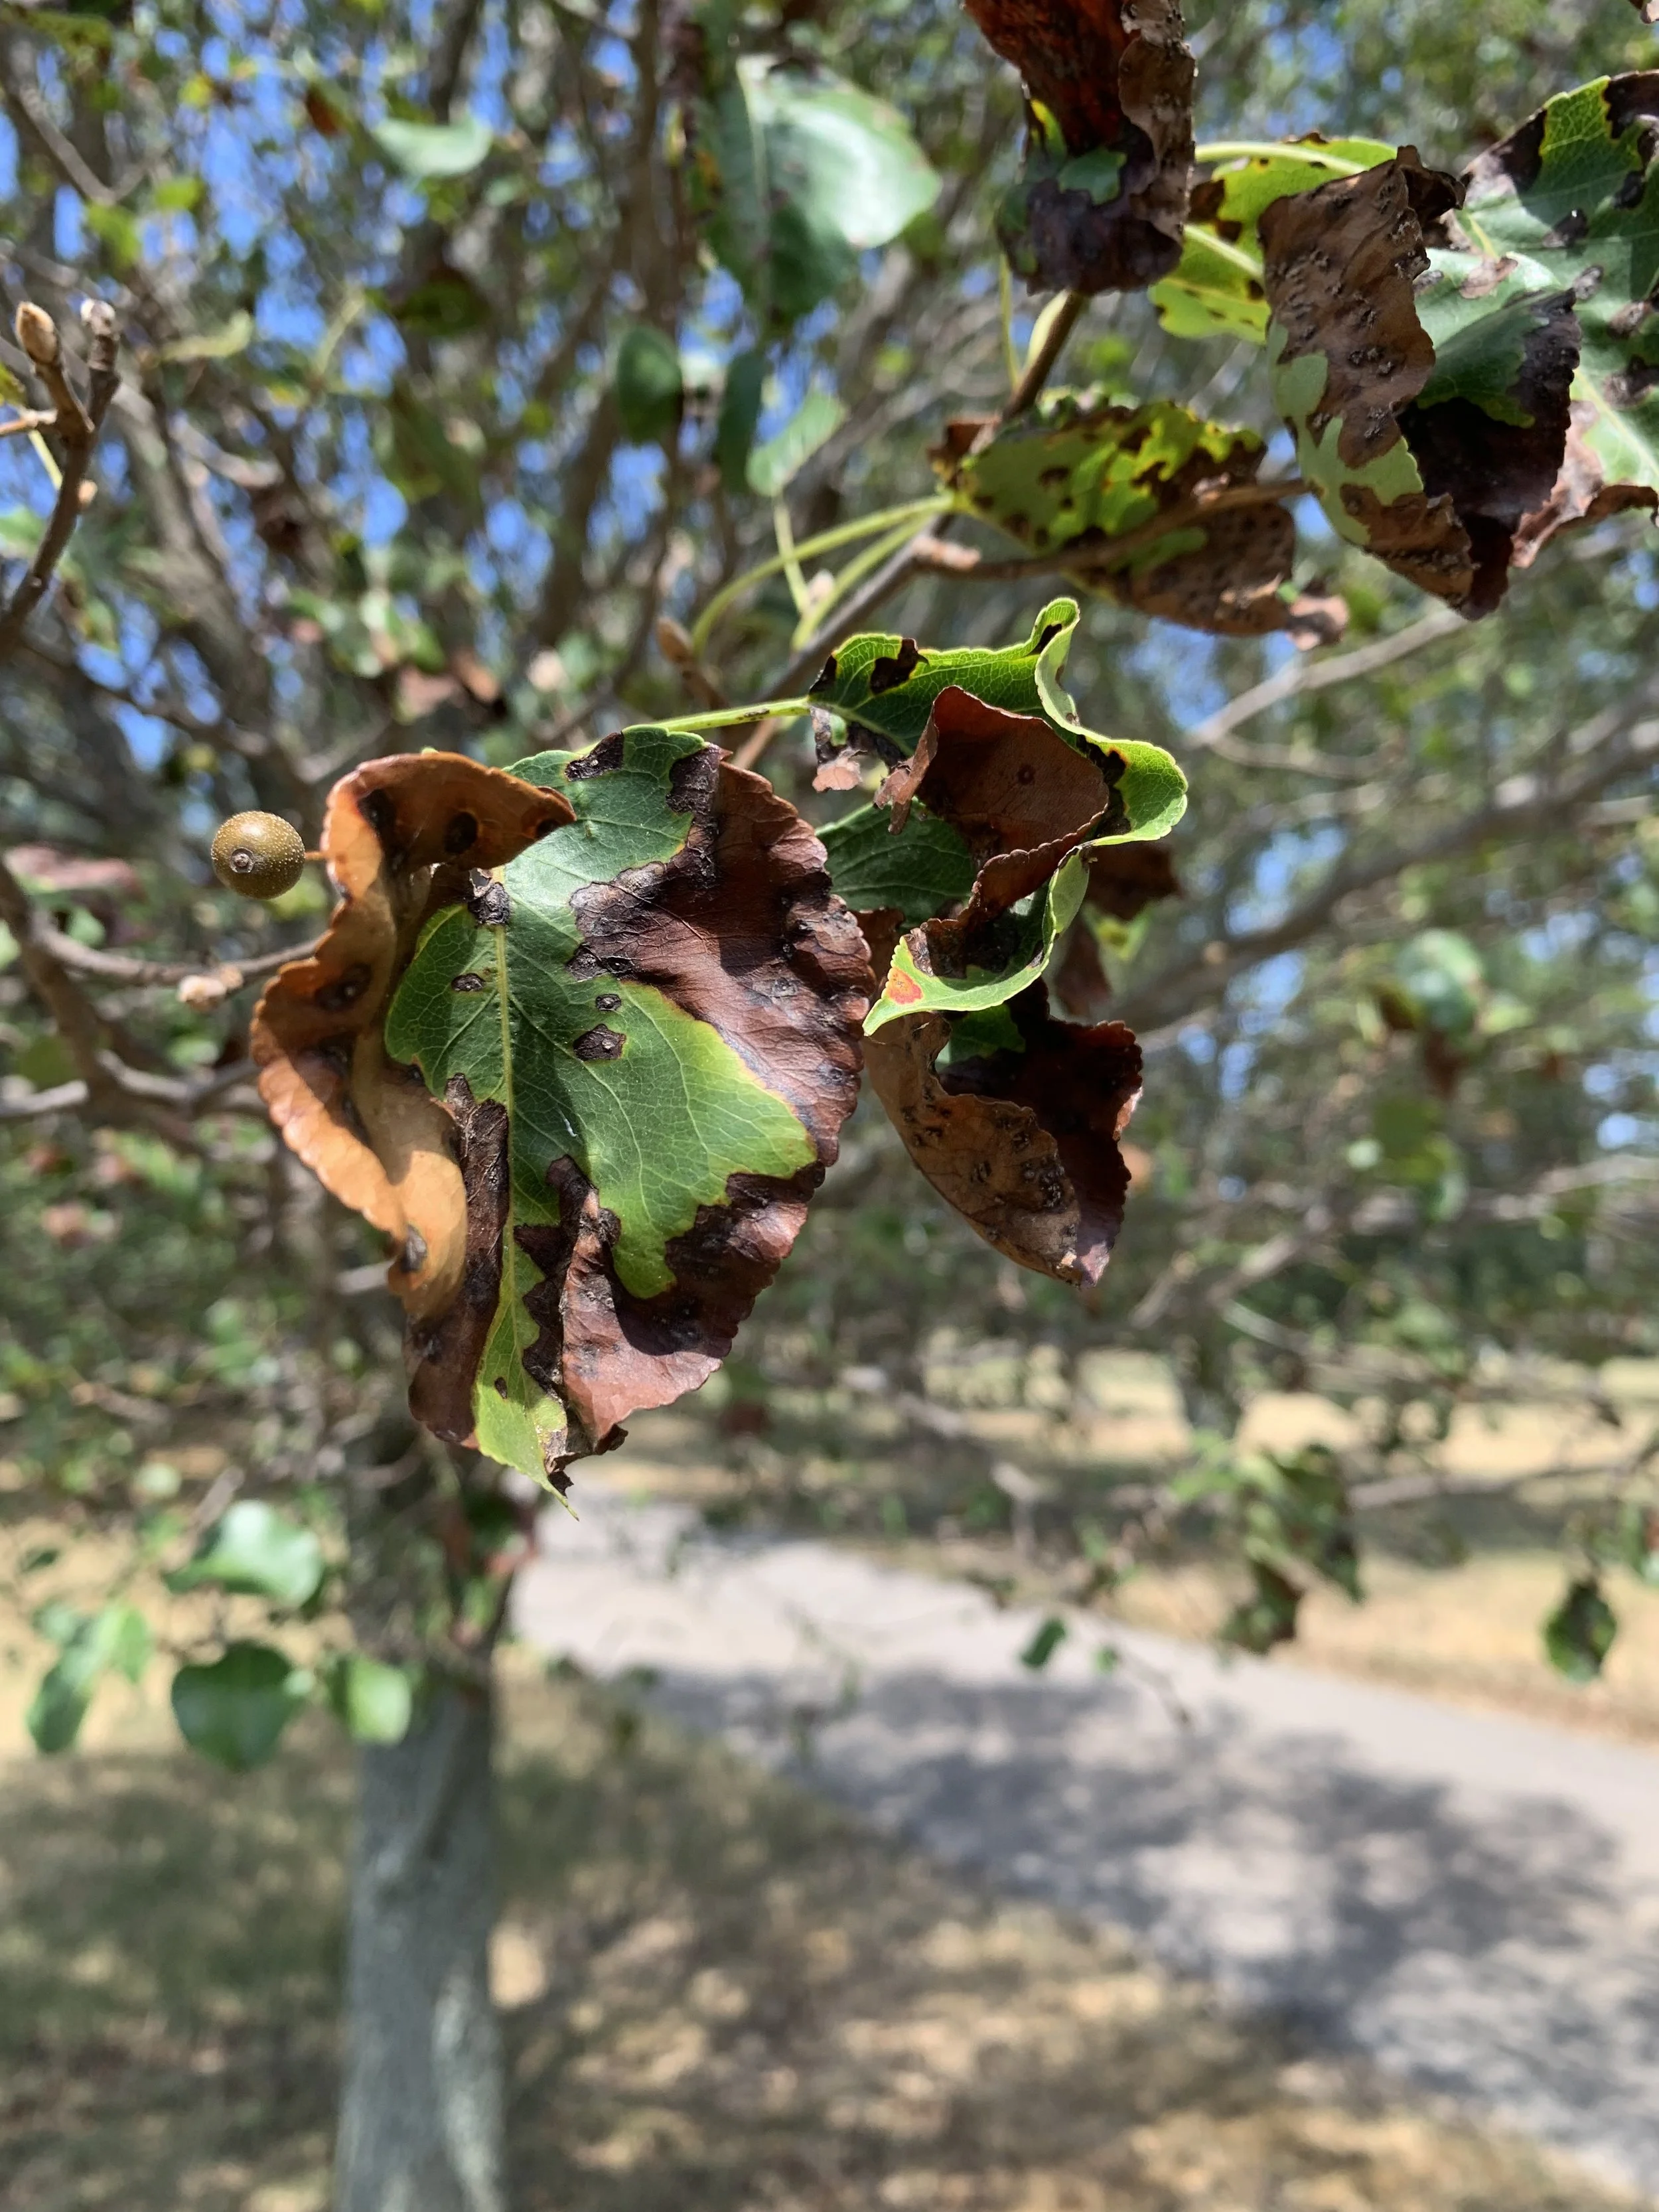
Browning or burnt edges are a signal you need to start deep soaking the area under the trees canopy now.

As long as the buds located at the end of the branch remain soft and supple, the tree will put on new leaves as soon as it receives sufficient moisture.
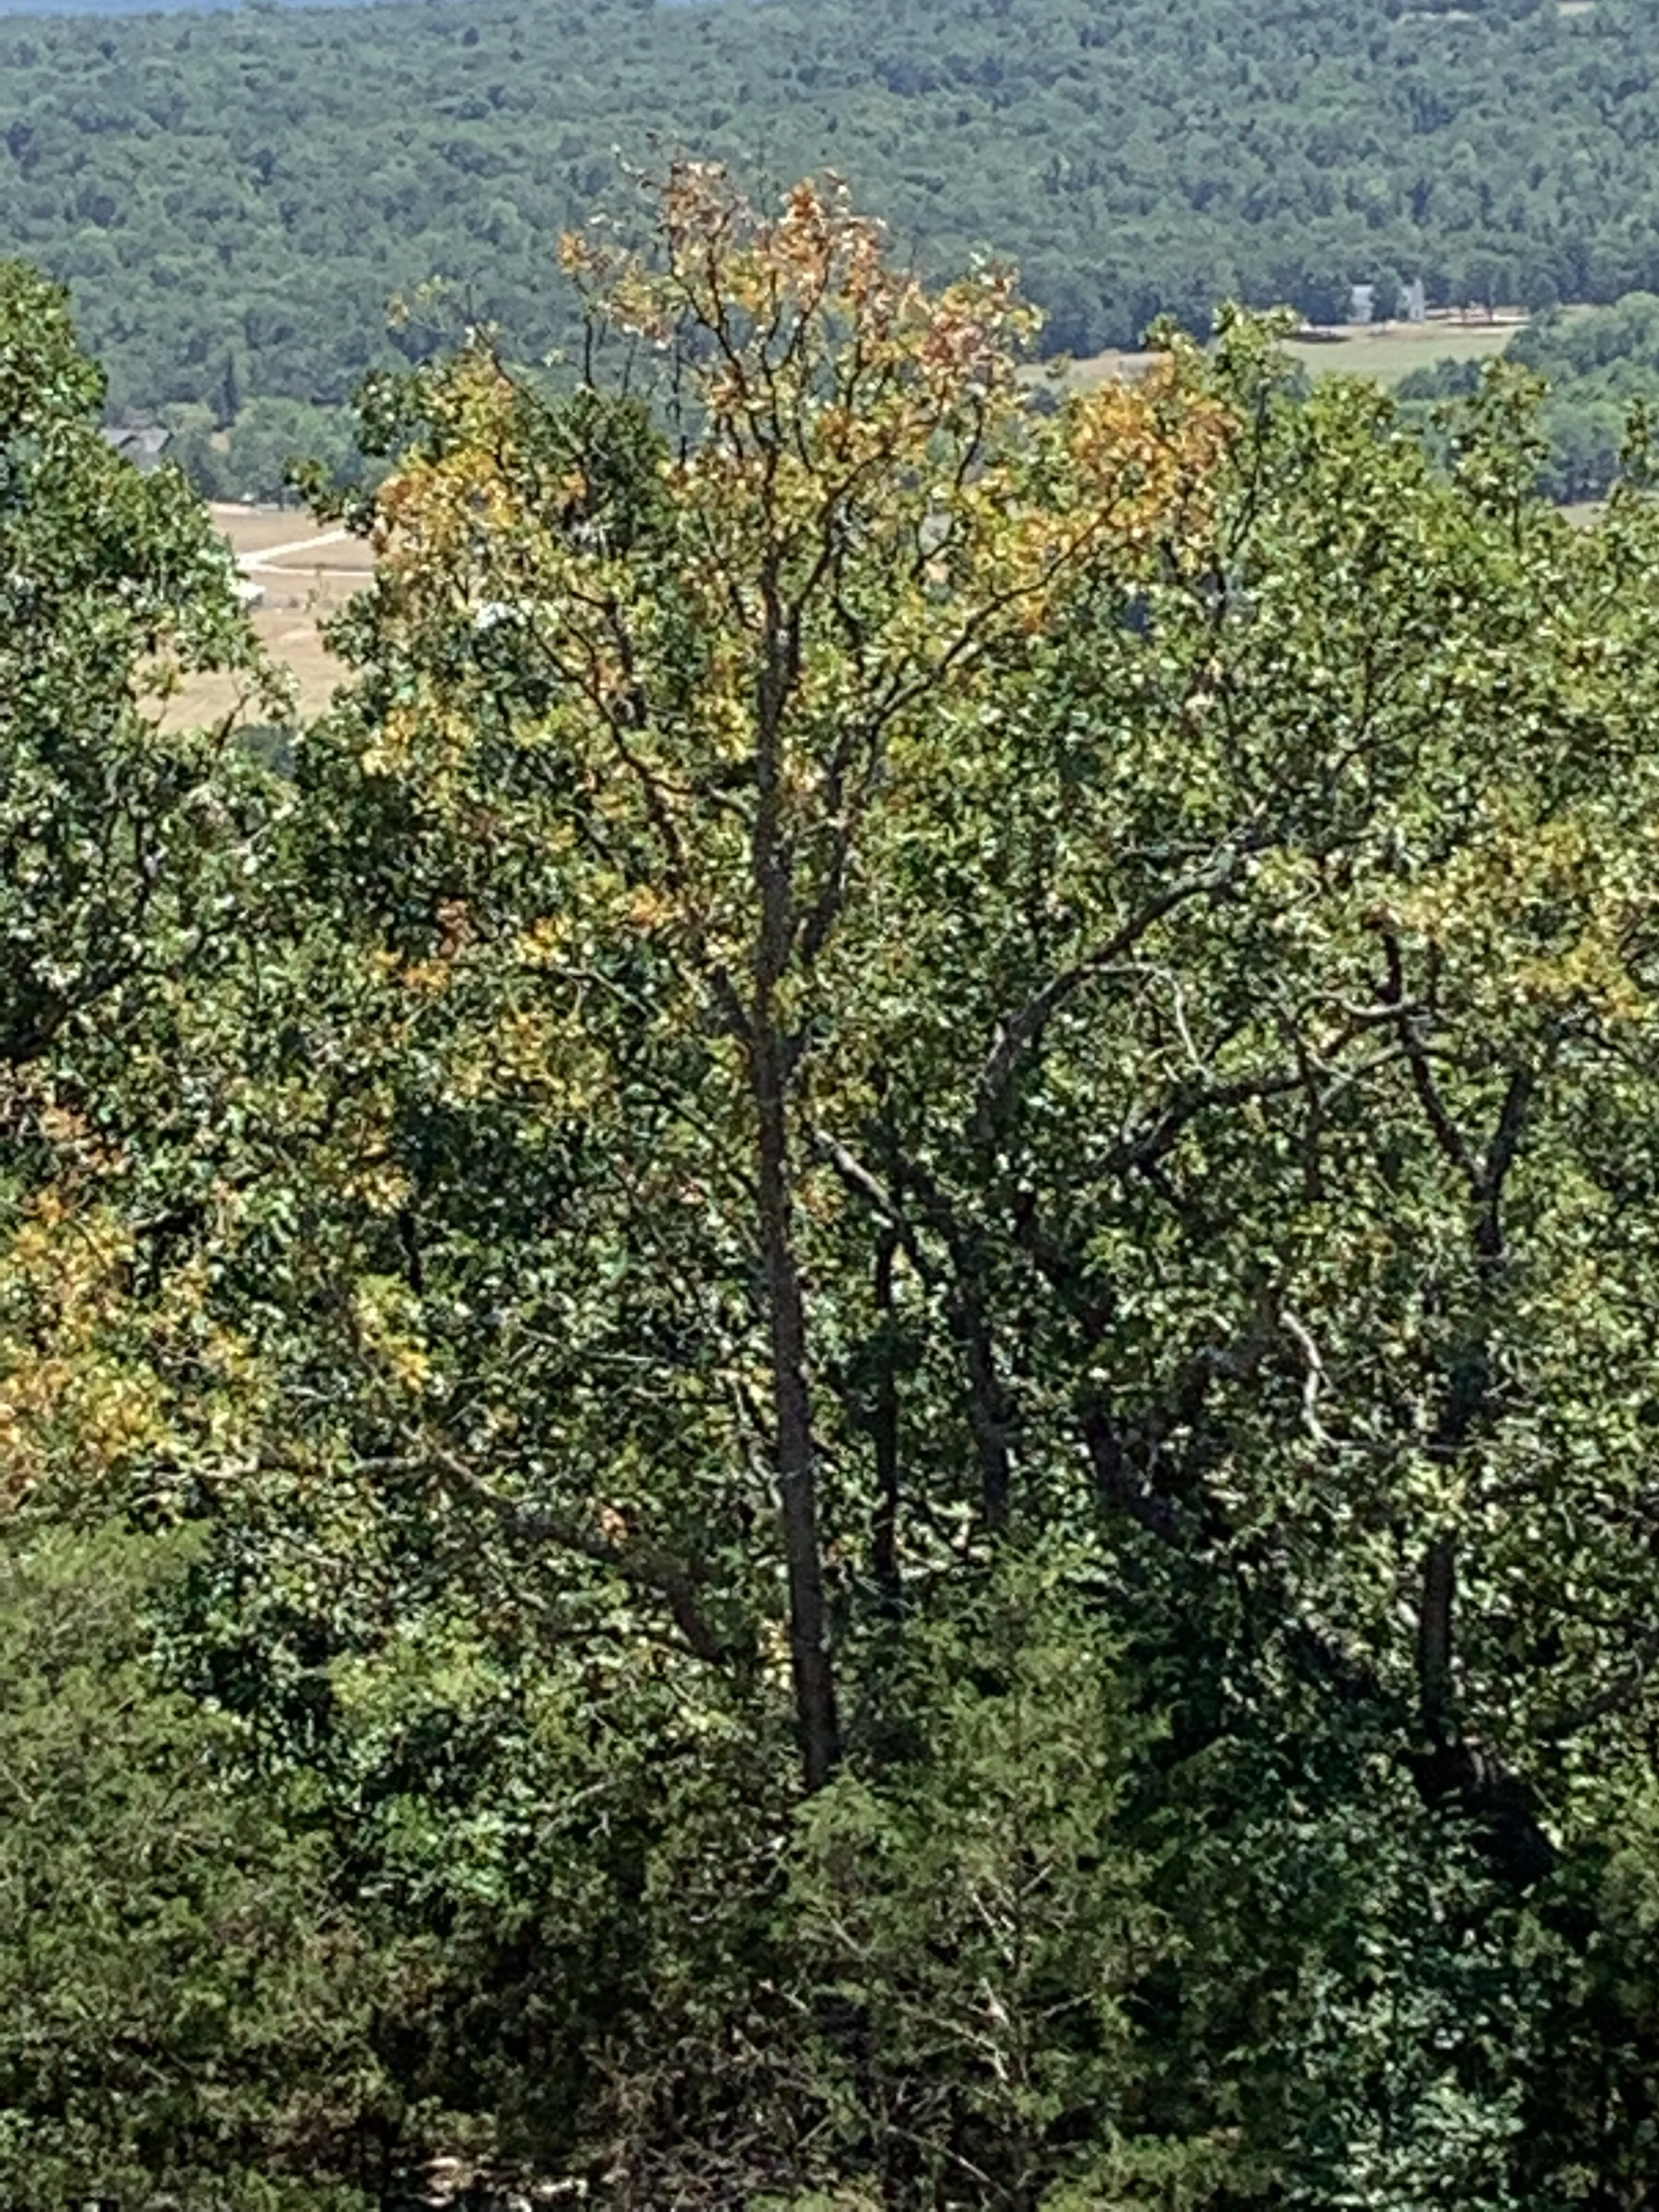
It is common for mature trees suffering drought stress to start yellowing in the top of the tree first.
Mature Tree Survival
Most healthy, mature trees (trees with at least a 6” wide trunk and have been planted for at least 2 years) can sustain a drought without supplementary water because of their large root system. Trees that are weak because of previous stress will be the first trees to show signs of drought stress.
How do you know if your mature trees need supplementary watering during a drought?
Water if there are visible signs of drought stress.
Water if the area under the tree canopy is dry. A good way to test dryness is to take a large 6-8” screwdriver and press it into the soil in a few locations under the canopy of the tree. If the screwdriver doesn’t easily slip into the soil, it is time to start watering.
Even during a drought soil around a tree should be moist enough you can easily slip a 6-8” screwdriver into the soil.
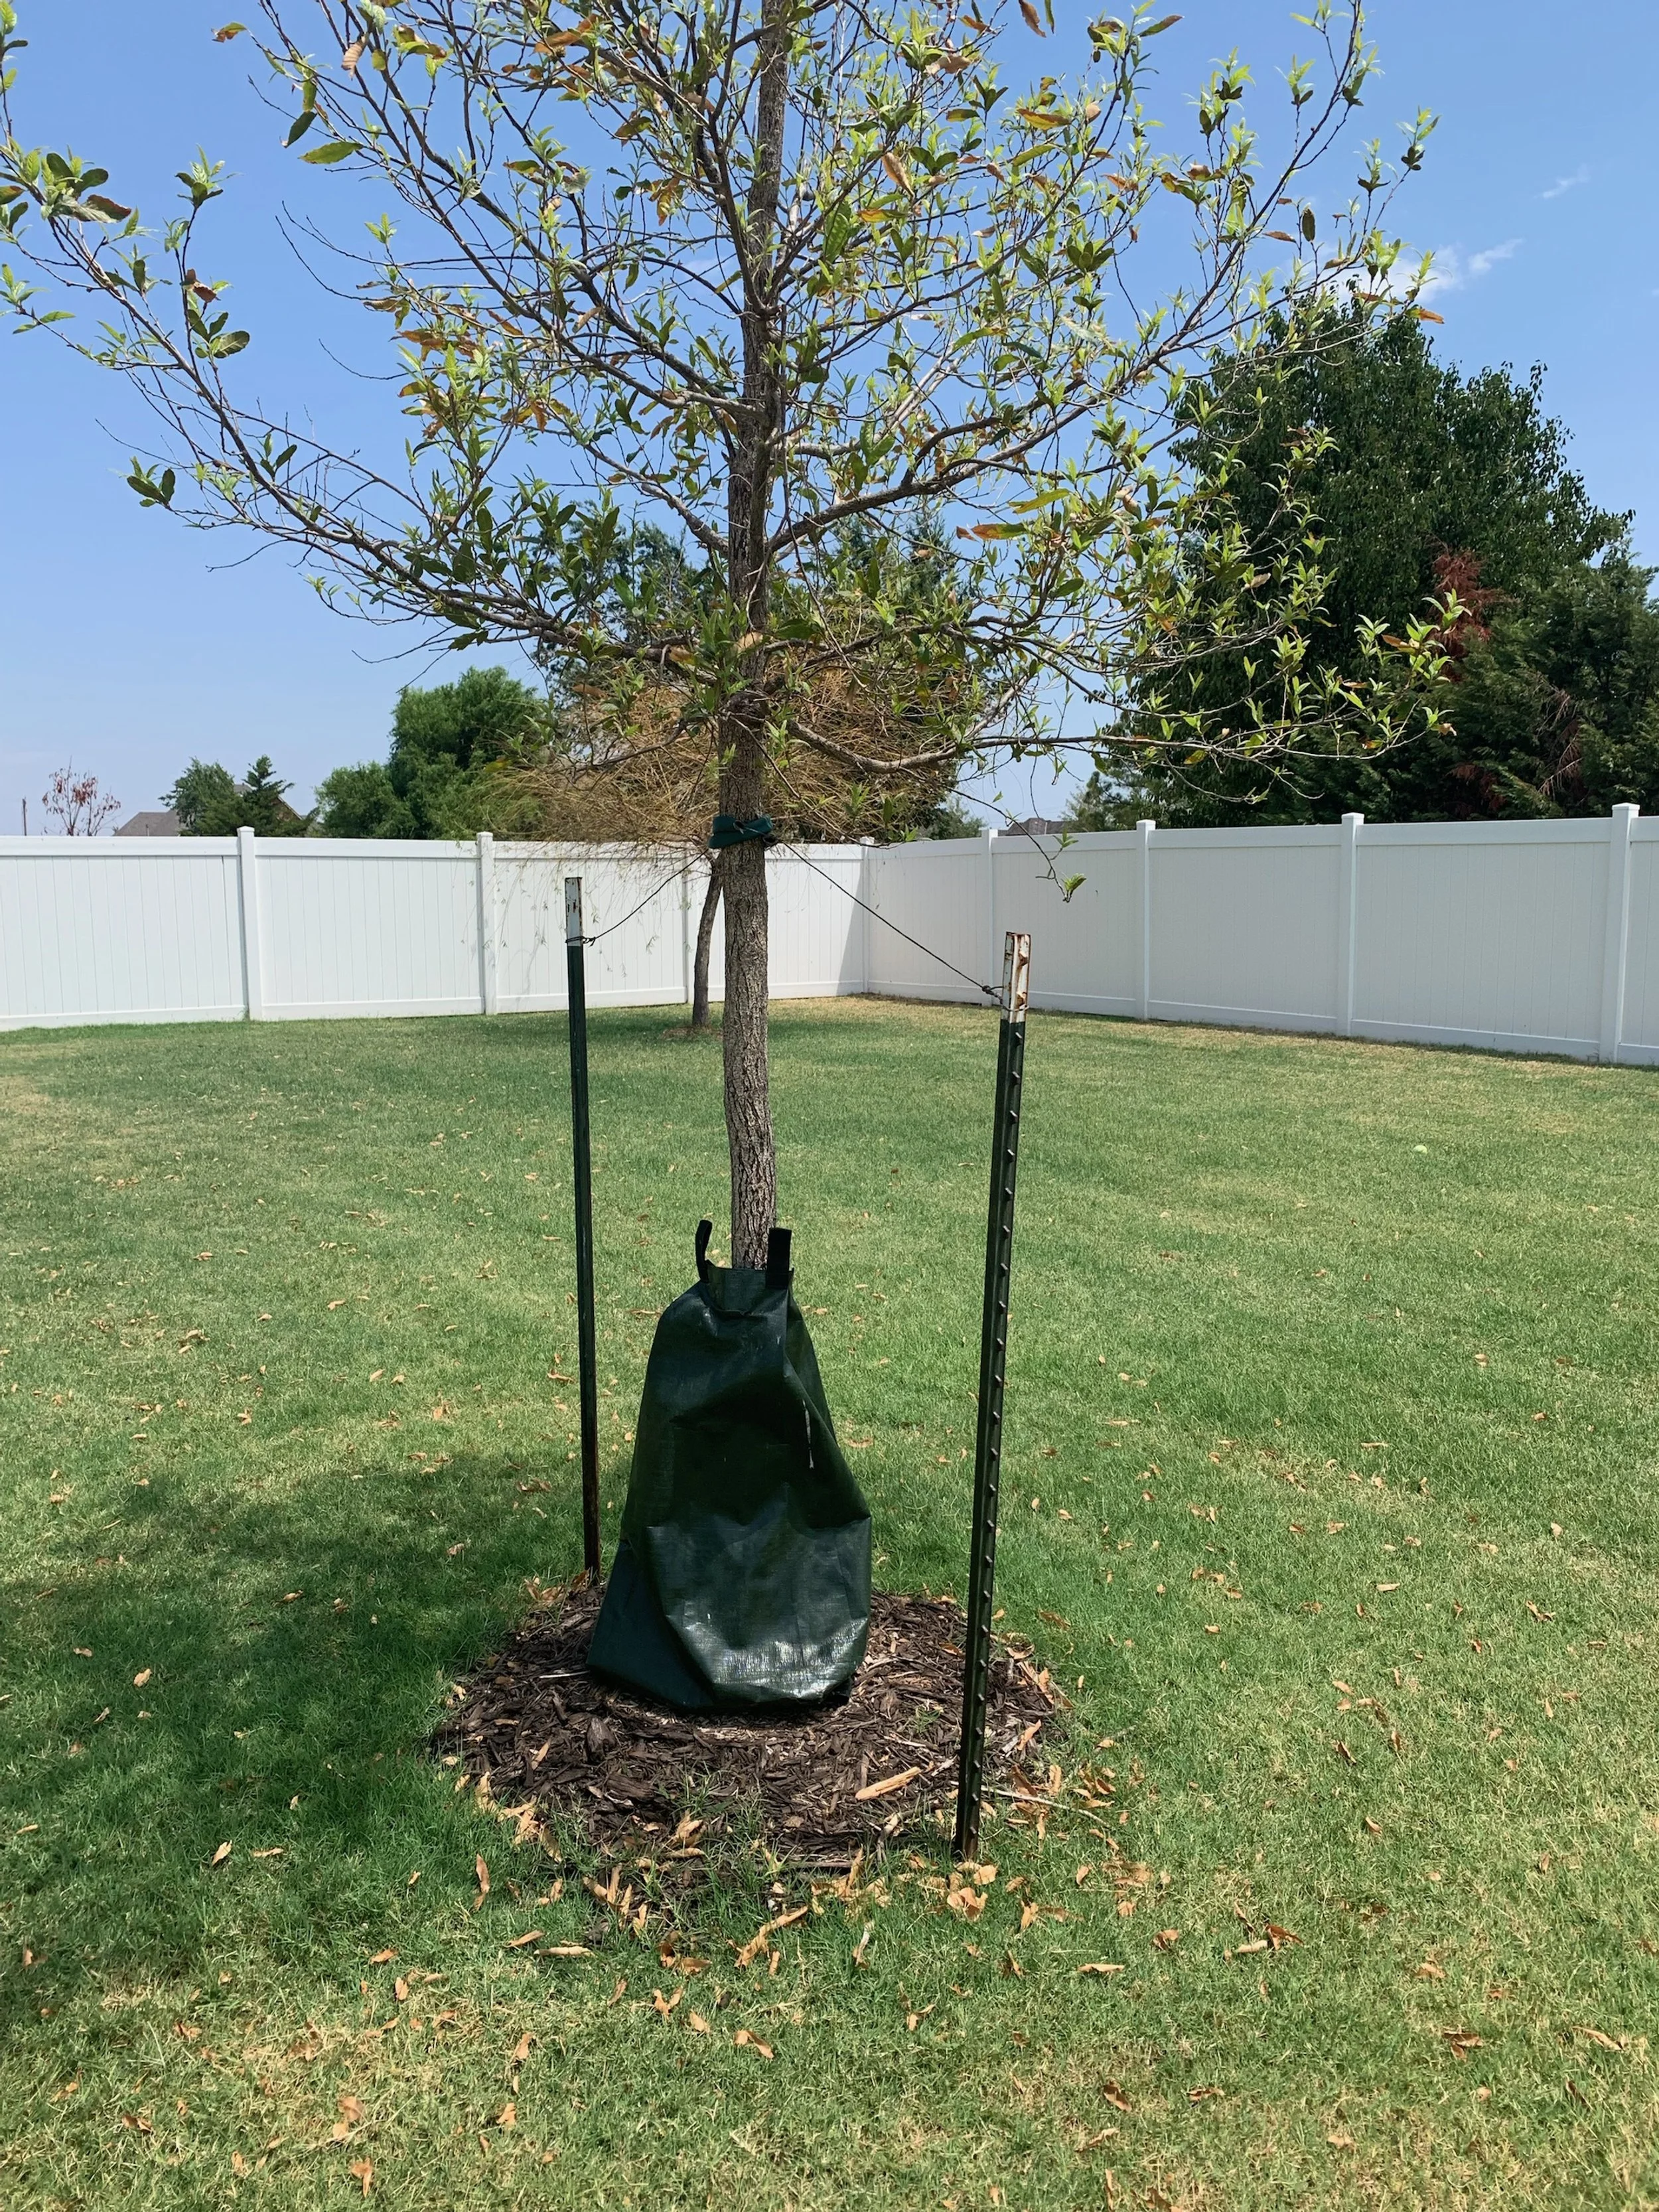
A 20 gallon Treegator bag is a good tool for deep soaking any tree planted in the last two years. The bag will slowly release water for two days. Refill the bag every 3-4 days during hot weather.
Watering mature trees:
Water the entire area under the canopy of the tree.
Water deeply every 3-5 days in 95+ degree weather.
Allow 1-2 days between deep soakings for the area to dry. Roots need air as much as they need water. When the soil is saturated all the air is replaced with water and root damage will occur.
Daily shallow watering is not helpful. The most active tree roots are in the top 12” of the soil. The goal is to get water 12” deep.
Place small containers around the area to measure the amount of water. Water long enough to get at least 1-2” of water on the area per week.
Young Tree Survival
Trees with trunks that are smaller than 6” in width or have been planted in the last two years are showing signs of drought stress if they have not received supplementary water the past few weeks.
Watering young trees:
In excessive heat and drought trees that have been planted in the last 30 days, need to receive at least 10 gallons every other day. Even if you have an irrigation system, additional watering is required during the heat of the summer.
Trees planted anytime in the last two years need at least 10 gallons of water every 2-3 days during our current weather pattern.
Treegator bags are a good tool for watering new trees. The original Treegator holds 20 gallons of water that slowly drips out over two days.
During the first two years of a tree’s life, maintain a grass-free 2-3” thick mulched area around the tree.
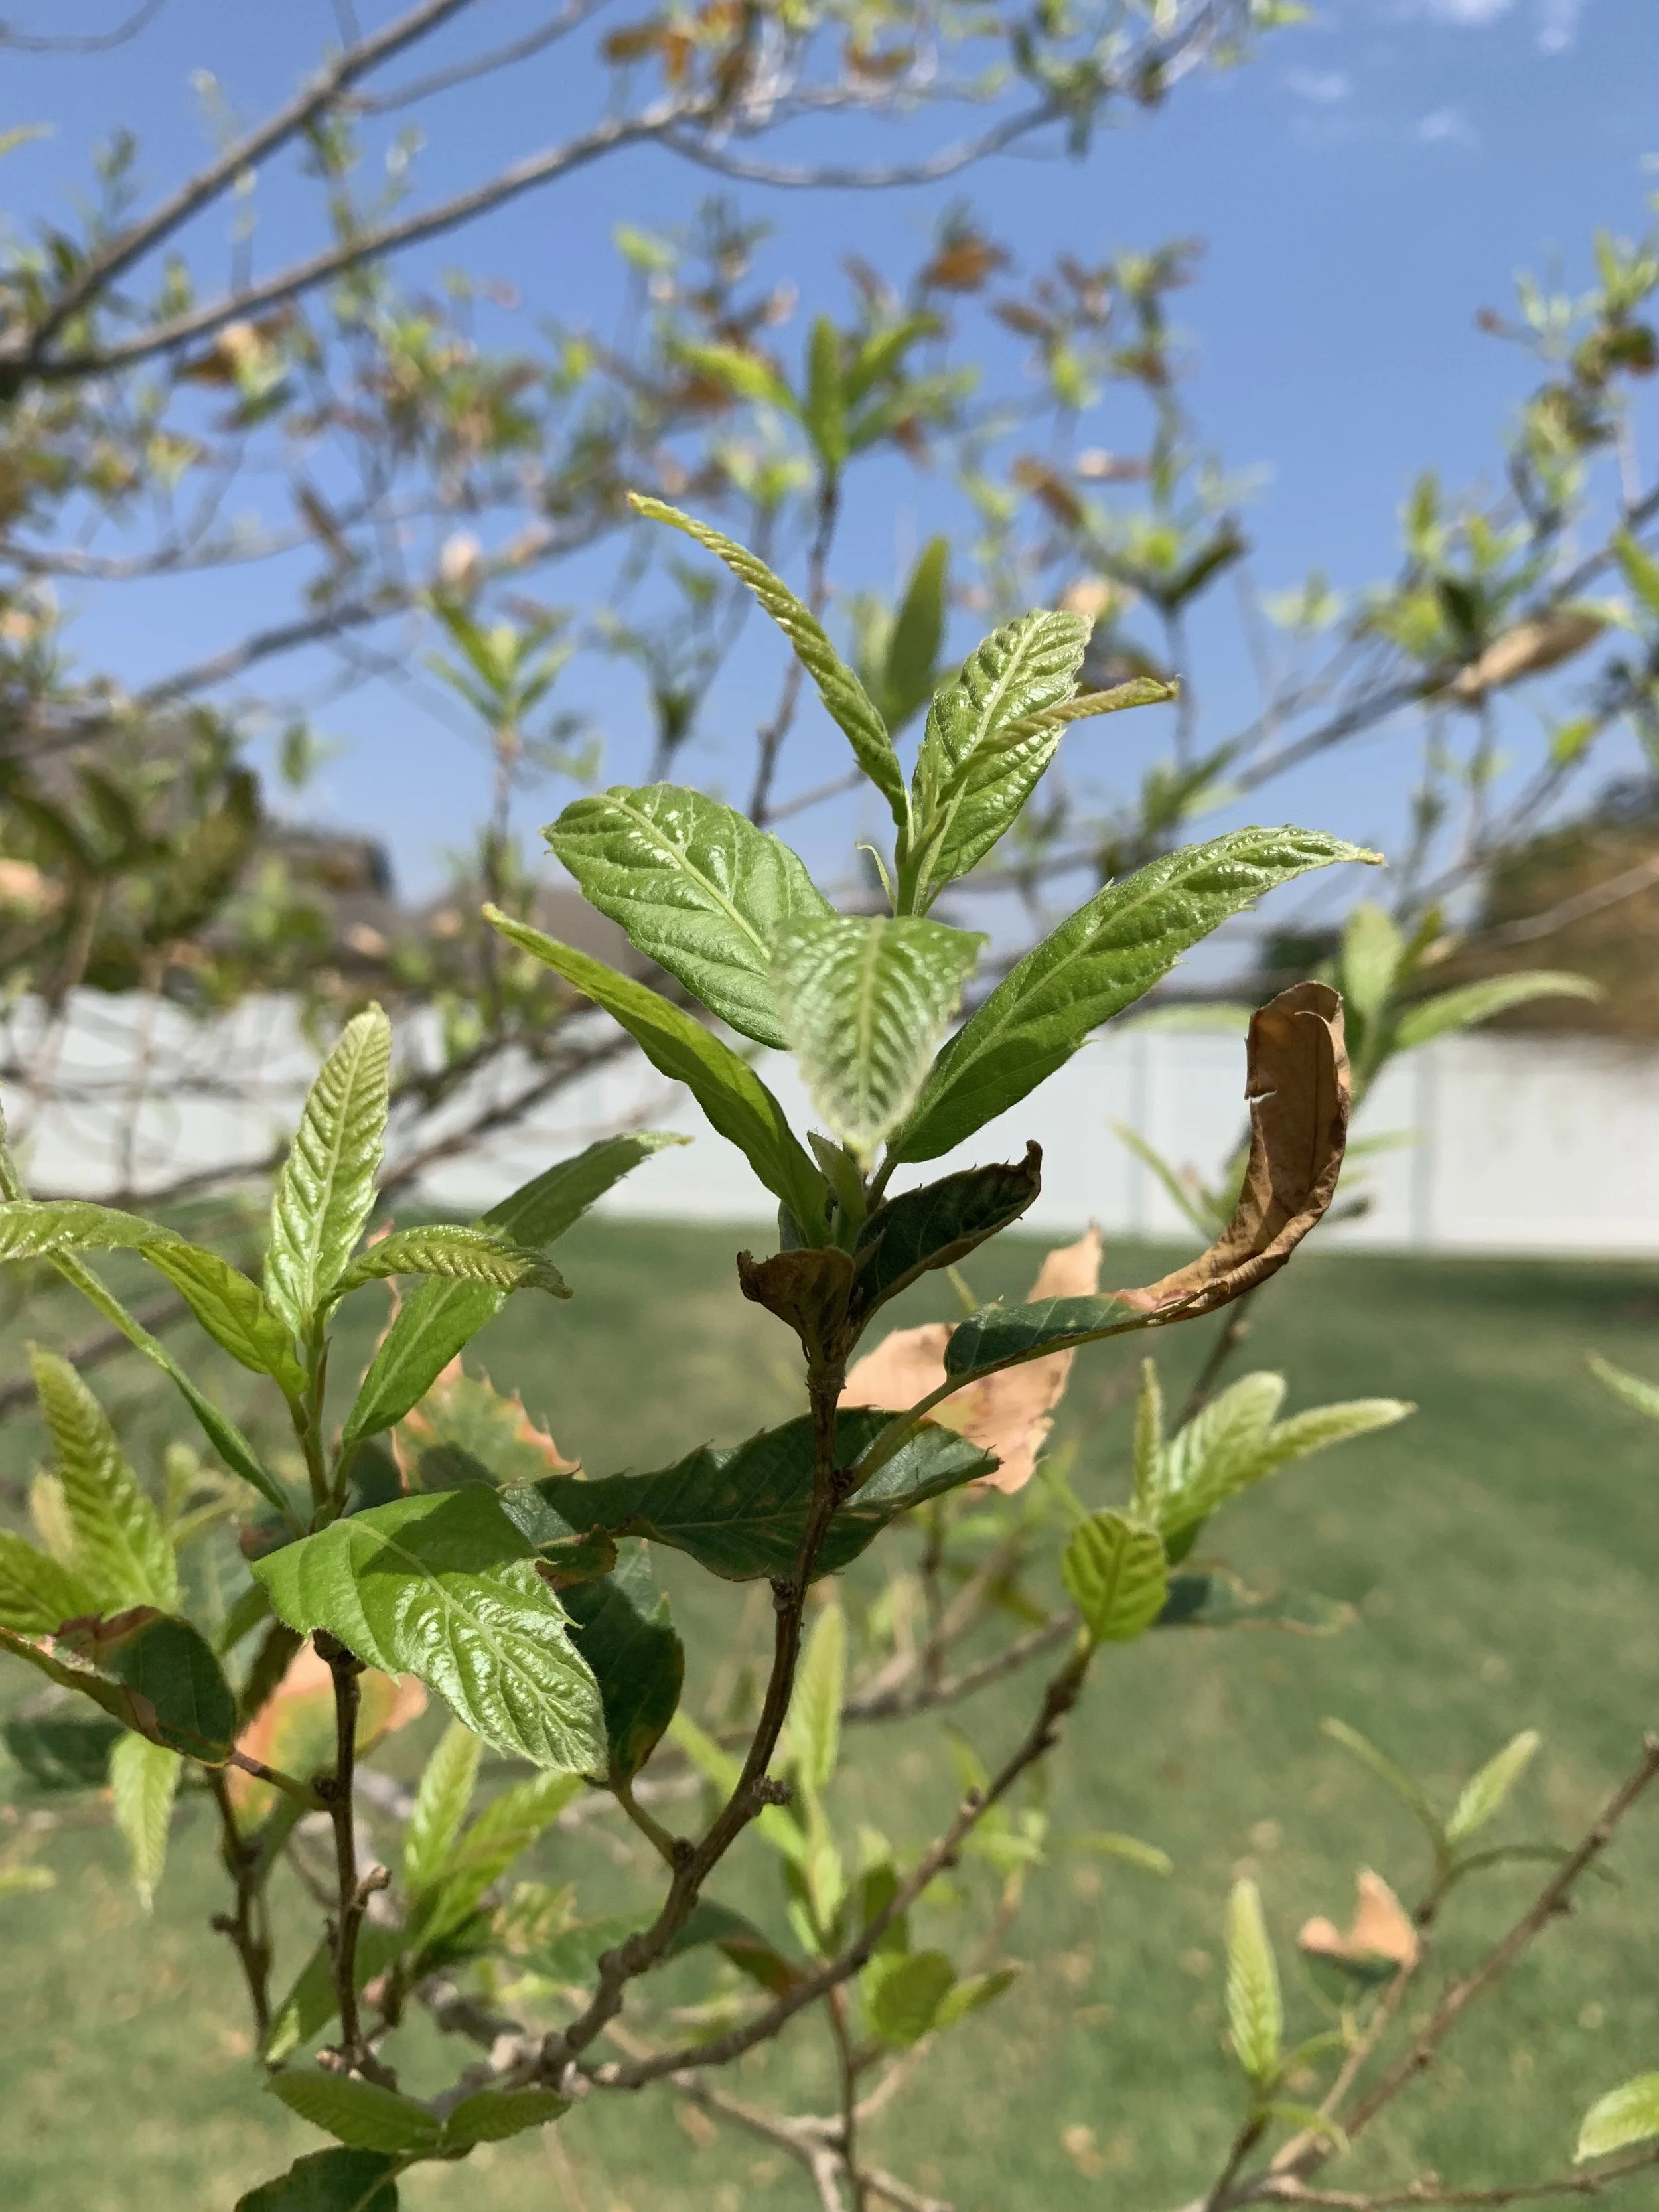
Two weeks ago this one year old tree began defoliation. The owner placed a Treegator bag around the trunk of the tree allowing water to slowly drip over the top of the root ball. The tree rebudded and now is producing leaves.
Most tree varieties, if healthy, can drop all their leaves during a drought and rebud once rain returns.
Once rain moisture returns energy stored in the roots is used to produce new leaves. As the tree gains leaves, the photosynthesis process starts again rebuilding energy in the root system.
A tree has a good chance of survival if enough energy can be stored in the root system before the tree endures more stress. An extreme winter, insect, or disease stress before the tree has a chance to replenish energy could be detrimental to the tree.
Drought alone may not kill your trees, but it may be the final blow to a tree that is already under stress. Most trees die from a combination of stressors, such as drought followed by pest or disease issues, or drought followed by winter injury.
Finally, increase inspection of trees the rest of the season, through the fall and next spring. Drought-stressed trees are prone to insect damage.
Remember, your trees and your lawn are competing for the same moisture. And right now, there may not be enough for both. Each week the drought continues, the need to supplement water your trees increases.
Protect your investment in your trees.
Protect the value of trees in our environment.
Do all you can to reduce the stress on your trees by inspecting for drought stress and supplementing water as needed.
Lorne Hall
Hall | Stewart Lawn + Landscape
(405)367-3873
Where Do Weeds Come From?

Ask a homeowner what their number one lawn concern is, and the most common response is “weeds.”
When a lawn care professional is asked what their number one lawn concern is for a client’s lawn, the most common response is “turf health.”
Both the homeowner and the lawn care professional have the same goal in mind: A thick, healthy turf.
Where do weeds come from and what is their relationship to a healthy lawn?

Developing a healthy, thick turf is 75% of battle in the fight against weeds.
Let’s start with defining a weed. A weed is anything growing where it is not wanted.
We automatically think of weeds in lawns or flower beds, but any plant in an unwanted location is a weed by definition. A weed is any unwanted, undesirable plant.
Some weeds can be pretty. Fields of henbit with their purple flowers are attractive. But, henbit growing in a Bermuda lawn is not desirable.
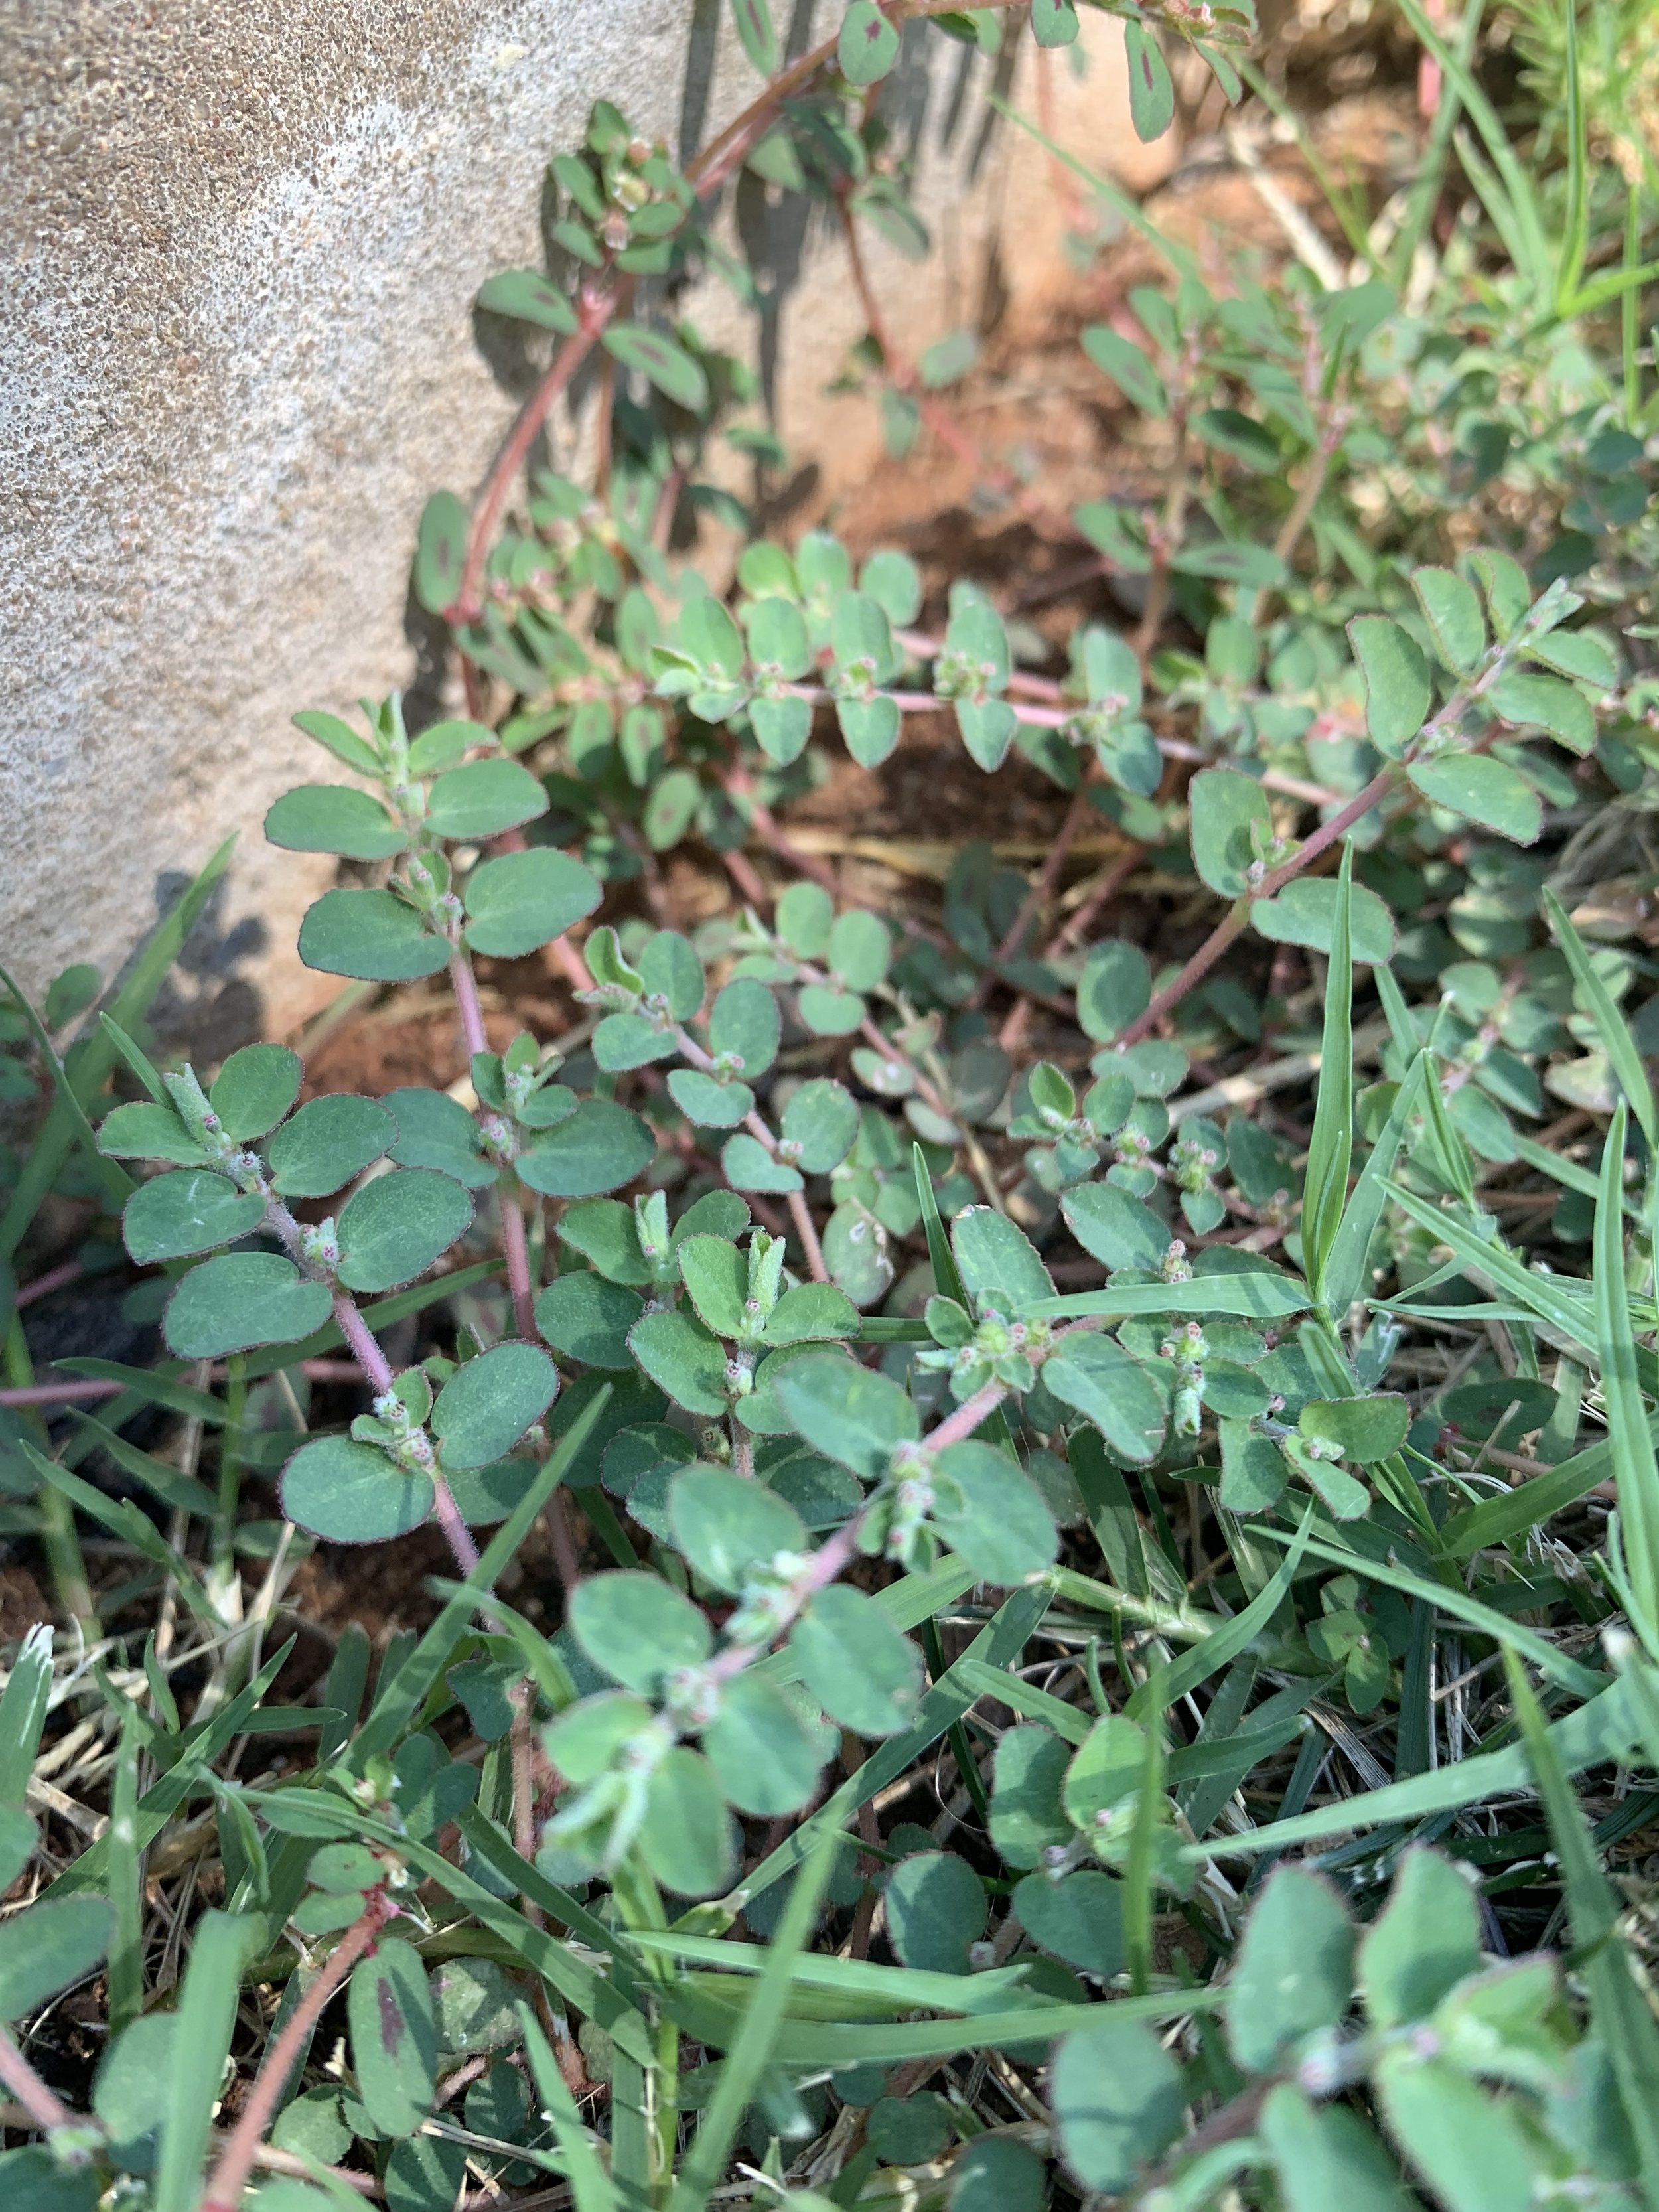
Spurge is a summer annual broadleaf weed that thrives in compacted dry soil. During periods of drought, it is common to find spurge growing along the edges of drives and walks where the soil is often compacted and dry.

Crabgrass is the most prolific summer annual weed. A single crabgrass plant will produce thousands of seeds. It is a weed that you are guaranteed to have in your lawn every summer if you do not apply a spring pre-emergent.
Weeds are not desirable because they compete with the desirable plant, your lawn, for resources. They steal water and nutrients. They rob the lawn of what is needed to be healthy. They interfere with the cosmetic appearance of your lawn. They spread rapidly when left unattended. And, one weed can produce thousands of seeds.
Weeds seem suddenly to appear. You can have a perfect lawn and all of the sudden it is as if weeds just magically showed up out of nowhere.

Weeds are very opportunistic. Give them a thin, bare area in a lawn and they will magically fill the void very quickly.
Weeds are the ultimate opportunist!
They grew wherever there is an opportunity!
Where do weeds come from?
Wind spreads weed seeds the most. April and May this year was one of the most consistently windy periods we have experienced. During the summer of 2020, the southern US experienced a massive Saharan dust storm. All those windy days and rare dust storms from the other side of the planet bring more than just dust. Wind distributes weed seeds from regions around the world into our lawns and landscapes. And, then on top of that there is an ordinary Oklahoma windy day scattering weed seeds from around your neighborhood or the native fields close to your home into your lawn.
Bird poop is another very common source of weed seeds. Birds’ primary food source is seeds and they are very good at depositing seeds around. Side note: Did you know the only way a seed from an Eastern Red Cedar can germinate is if it has passed through a bird. The blue-green berries (seeds) of Eastern Red Cedar attract birds, they devour them and scatter the seeds.
Rain is very good at distributing weed seeds, especially around the edges of the lawn as raindrops splash dust and weed seeds from the surrounding hard surfaces onto the lawn.
Seeds are also commonly carried onto the lawn by equipment, shoes, and pets.
This summer we have encountered a weed that we previously have not seen, marsh parsley. We have also had conversations with horticulturists about new weeds they are seeing this year. The common belief is they are a result of the excessive winds of April and May.
Environmental conditions and maintenance practices often bring about more weeds:
Seeds can also lay dormant for years and then germinate when the conditions are just right. A warmer than normal winter, a cooler than normal summer, an extended wet period, or even an extended dry period followed by heavy rain can change the environment just enough for dormant weed seeds to start growing.
Cultivating the soil in preparation for a new lawn or cultivating the soil in landscape areas can bring seeds to the surface where they will receive enough sunlight and water to germinate.

Marsh Parsley is a summer broadleaf weed that is new to our area. Most likely the consistently windy days of April and May delivered the wind seed to the area.
Pre-emergent herbicide applications with a quality product at the correct time are an important part of preventing the spread of weeds. But more importantly, is a healthy turf.

Poa Annua is the most common winter annual grassy weed. Pre-emergent herbicides help but don’t always prevent all poa annua from germinating. The best defense against poa annua is a healthy thick turf. Under trees, if you don’t have a healthy stand if fescue, most likely you will have poa annua.

Yellow rocket is a summer annual weed that was rarely seen in our area until just a few years ago. Now, it is very common in thin lawns, flower beds, and hardscape areas.
The best way to deal with weeds is to make sure your lawn has what it needs to grow and thrive:
Climate – Growing a turf best suited for the climate is important. If you are attempting to grow a type of grass that is marginal in central Oklahoma, you will most likely have a thinner turf and more weeds.
Soil – Very important to having a healthy turf. If the soil isn’t healthy, the turf will be weaker. With our tight clay soils, reduction of soil compaction through annual aeration is a big first step toward healthy soil.
Light – Attempting to grow a turf that needs at least 5 hours of direct sunlight, such as Bermuda grass, in shade will result in a thin tuft. It is important to grow the best turf for your light levels.
Water – An actively growing, healthy turf requires moisture, 1 to 1.5” of water per week during the heat of the summer. If you choose not to water and allow your lawn to go dormant during periods of drought, it doesn’t necessarily mean the lawn will die, but it often results in a thinner turf that is more prone to weed growth in the future.
Fertilizer – A thick, healthy, weed-free lawn requires a lawn that is properly fed during the growing season. If you apply pre-emergent herbicides at the right time but fail to feed your lawn, you can still expect to have weeds because of thin turf.
Mowing Frequency and Height – Lawn health is best when the lawn is mowed often enough that you are never removing more than 1/3” of the leaf blade and the lawn is mowed at the best height for the type of grass. For Bermuda in the heat of the season, 2 to 2.5” is perfect. For fescue lawns, 3 to 3.5” is ideal.

This Bermuda lawn was very weedy and thin when a regular lawn care program of well-timed weed control applications and fertilizer was started last year. After a full year, the lawn was thick and nearly weed free.
We believe at least 75% of a weed-free lawn is having a healthy, thick lawn.
Fertilizer, mowing, watering, and soil health are critical to weed control.
This summer is bringing us tough conditions. Truth is it isn’t just the drought and heat of this summer. It was a dry winter. And, before that, it was an extremely cold February. All will have an impact on the health of your lawn.
Our goal is to do all we can to help your lawn and landscape not only survive but thrive.
Our goal is to help you have a healthy lawn.
A healthy, weed-free lawn.
Lorne Hall
Hall | Stewart Lawn + Landscape
(405)367-3873
Your Lawn & Landscape Summer Survival Guide

The forecast is for hot and hotter with little to no chance for rainfall.
We haven’t had a ¼” rainfall in the Oklahoma City metro area for three weeks, the abundant soil moisture of early June has faded, and much of the landscape is starting to show signs of stress.
Hey! Your grass, shrubs, flowers and trees have been whispering amongst themselves.
They want to know “What is your plan to make sure we survive the next few weeks?”
What they need is not much different than what you need in the heat… hydration, nutrition, and to avoid stressful activity.
It’s that simple… your lawn and landscape needs hydration, proper nutrition, and to avoid as much stress as possible.
Here are a few hot tips to help:

This Bermuda lawn is being maintained at 2.5”, mowing occurs 5-7 days, and clippings are returned to the lawn with every mowing. But, the amazing thing is the lawn has not been watered yet this year. A properly maintained, healthy lawn is very heat and drought tolerant.
Mowing
Mow your lawn on the recommended highest setting for your type of grass. Your turf does better in the heat at the optimal height.
Bermuda, maintain between 2-2.5”.
Fescue should be maintained at 3-3.5”.
Leaf blades are 80-90% moisture. When you increase the amount of leaf space, it is as if you are giving your lawn a water bottle to take small sips throughout your day.
Grass maintained at the optimal height will also have the strongest root system. Cutting below the leaf blade into the stem creates additional stress and results in a reduction of root density.
Additionally, taller grass will shade the soil resulting in cooler soil temperatures and moisture retention.
Sharpen your mower blade. A dull blade tears the leaf making it more susceptible to stress and disease.
Mow often enough that you are not cutting more than 1/3 of the blade off. If you are trying to maintain your lawn at 2”, mow before the lawn exceeds 3”, etc. When you cut too much off at one time the lawn will use nutrients stored in the roots to produce more leaf space. This results in a weaker root system at a time of the year when your lawn needs strong roots. If you fall behind, raise your mower up, then mow again a couple of days later at the desired height.
Don’t bag the clippings when you mow. Allow the clippings to decompose on the soil returns moisture and nutrients back to the root system. Leaving your clippings is like applying a slow-release fertilizer to your lawn each time you mow. Always remove any noticeable, excessive clippings.

A fescue lawn’s best chance to survive the summer 95+ degree heat is mowing at 3-3.5” and deep soaking every other day. Shallow watering everyday, or as some attempt, twice per day, results in a heat stress lawn.
Watering
Deep soakings are always best. Short, shallow watering is detrimental to your lawn and landscape in the heat. The healthiest landscapes are watered to the point of runoff and then allowed to dry for a day.
Except for newly planted trees, shrubs and lawns, daily watering is not beneficial, even in 100-degree heat.
Water in the early morning, not in the evening. Watering in the evening increases the potential for disease adding stress to your lawn.
Lawns need 1-1.5” of water per week.
Flowers, shrubs and trees need 1-2” of water per week.
Trees planted in the last two years need 10-20 gals per week in the hottest times of the year. This may require a slow soaking hose placed at the base of the tree once per week even if you have an irrigation system.

How long do you need to water to apply 1-1.5” of water per week? Every irrigation system is different. Head types, nozzle size, head spacing, shade/sun, etc., all make it hard to have one answer for all.
The best way to know how long you should water is to measure the amount of water your system puts out in each zone by placing a few cans around your lawn in a random pattern. Run your sprinklers through a cycle and measure the amount of water in the cans and do the math. If your sprinklers ran 15 minutes and you have .25” of water, you need to run that zone for 60 to 90 minutes each week.

All sprinkler systems need an occasional adjustment during periods of drought for lawns to look their best. A small adjustment to a nozzle would keep this lawn moist all the way to the walk.
The goal is to water deep. If you could run the zone for 90 minutes one time per week the result would be a healthy lawn with a deep root system. But, with our tight soil and sloops, you will need to divide the total run time by three and water on your designated ODD/EVEN day.
Don’t have the time to do a water audit? Start with these general settings, monitor, and adjust:
Fixed spray pattern heads with 10-15’ spacings – 15 to 20 minutes per time.
Rotor type heads on 20-30’ spacings – 30 to 40 minutes per time.
One way to water deeper with less runoff is to split the total run time into two back-to-back run times. Set the first start time to come on early in the morning with half the minutes each zone normally runs. Set a start time an hour or two later. When the system completes the first cycle, it will automatically run through the zones another time.
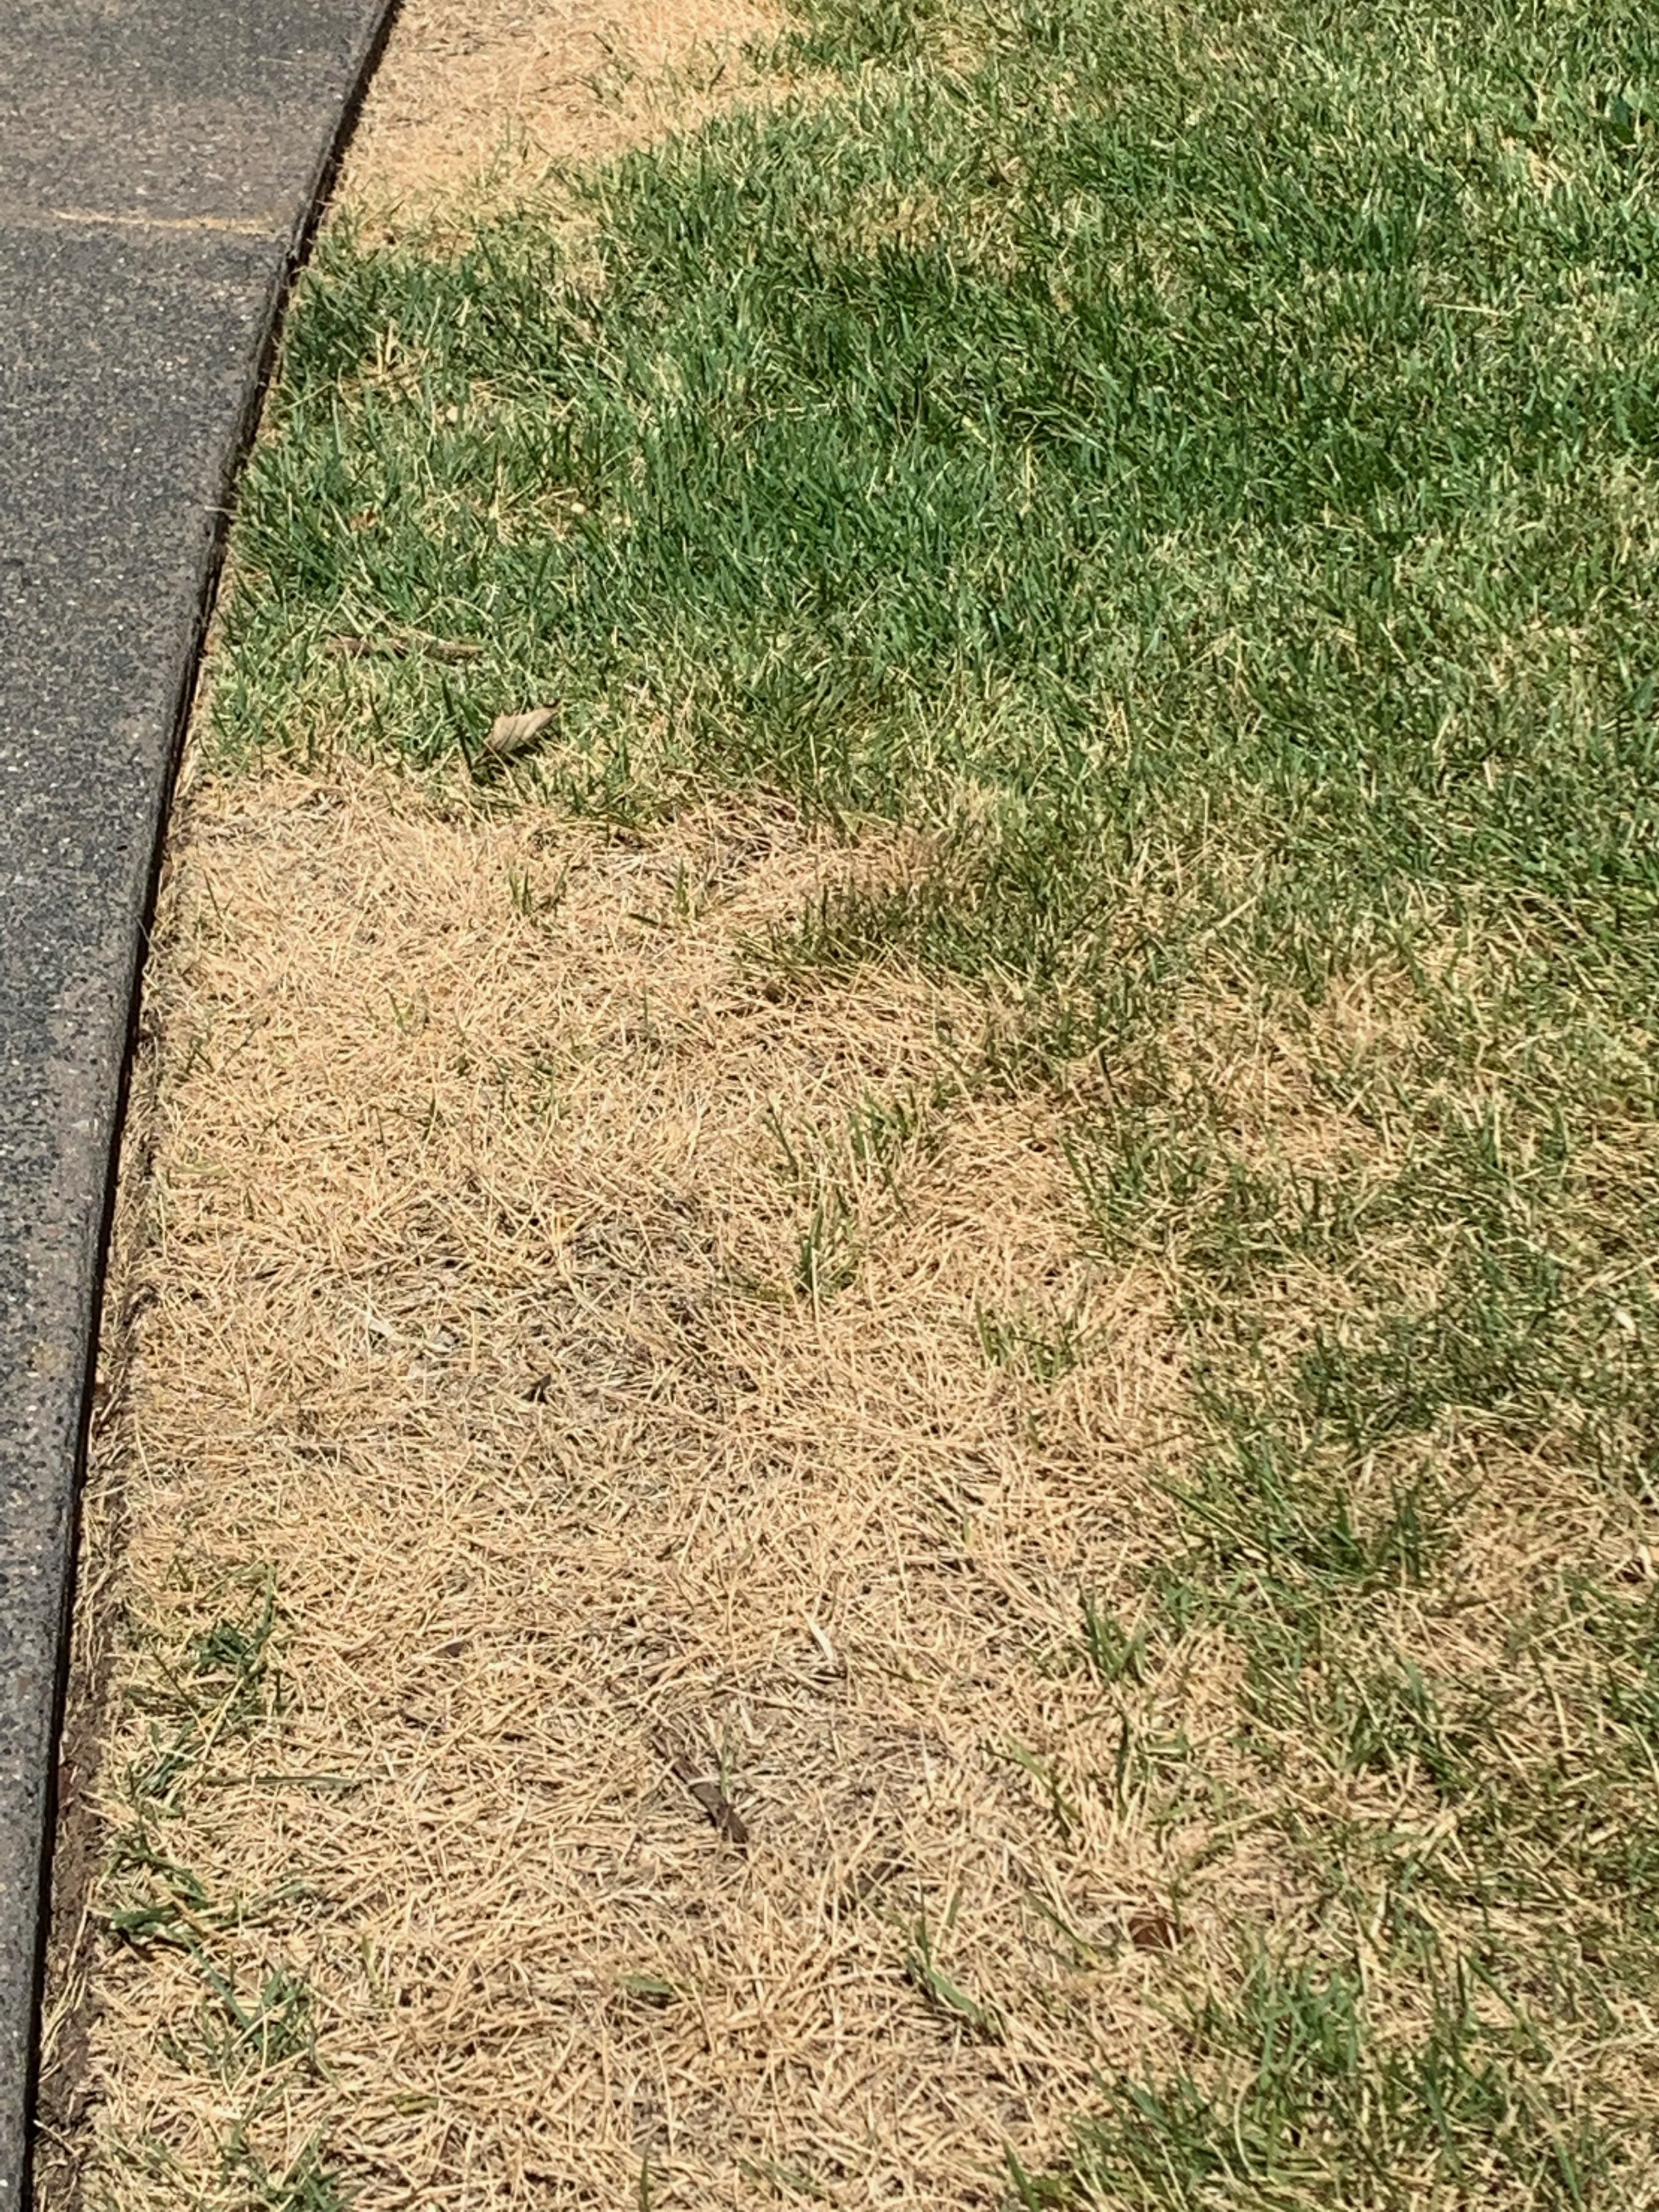
What is wrong with this picture? There is a sprinkler head located in the green turf area at obviously needs to be adjusted to properly reach the edges of the lawn.
If you are noticing areas where the lawn is losing color while areas near are keeping good color, check the soil moisture in the area and what the system run. It could be your system needs a few adjustments to improve the water distribution.
If you don’t have the ability to water, if the cost of water just doesn’t fit the budget, or if your municipality restricts watering, we understand. Healthy lawns that are not watered don’t die, they just go dormant, including fescue. Lawns with strong root systems will recover when temperatures cool and moisture returns.
Should you need to cut back on watering, continue deep soaking, just do it less often. It would be better to water every 4 days on your designated ODD or EVEN water day than to water every other day for a shorter period.
Shallow watering in an effort to reduce your water bill isn’t good for your lawn. Shallow watering promotes a shorter, weaker root system that is very dependent on frequent watering.

A clue to an uneven watering problem is an arc pattern matching the sweep of an irrigation head.

Head to head coverage is when the water from one sprinkler head reaches all the way to the next head. Without head to head coverage, dry areas can develop around heads.
Fertilizer
Bermuda lawns can be fertilized at this time of year, but only with slow-release fertilizers.
Watering the fertilizer into the soil with a good deep soaking is very important. Turf burn occurs when fertilizer is lightly watered resulting in partially dissolved fertilizer sitting on the leaf blades causing burn.
With slow-release fertilizer, no water is better than light moisture.
Fescue should not be fertilized at all in the heat.
Trees and shrubs should not be fertilized again until the fall.
Weed Control
Herbicides to control and kill weeds need special care during periods of extreme heat. Weed control products always create some stress on the lawn and during periods of high temperatures the stress is magnified. The goal is to kill the weed with minimal stress to the lawn because a healthy, thick turf is the first step toward a weed free lawn. Stressed turf, weak turf, leads to more weeds. So, while the lawn is under stress due to heat and/or drought, the first goal is to protect the turf.
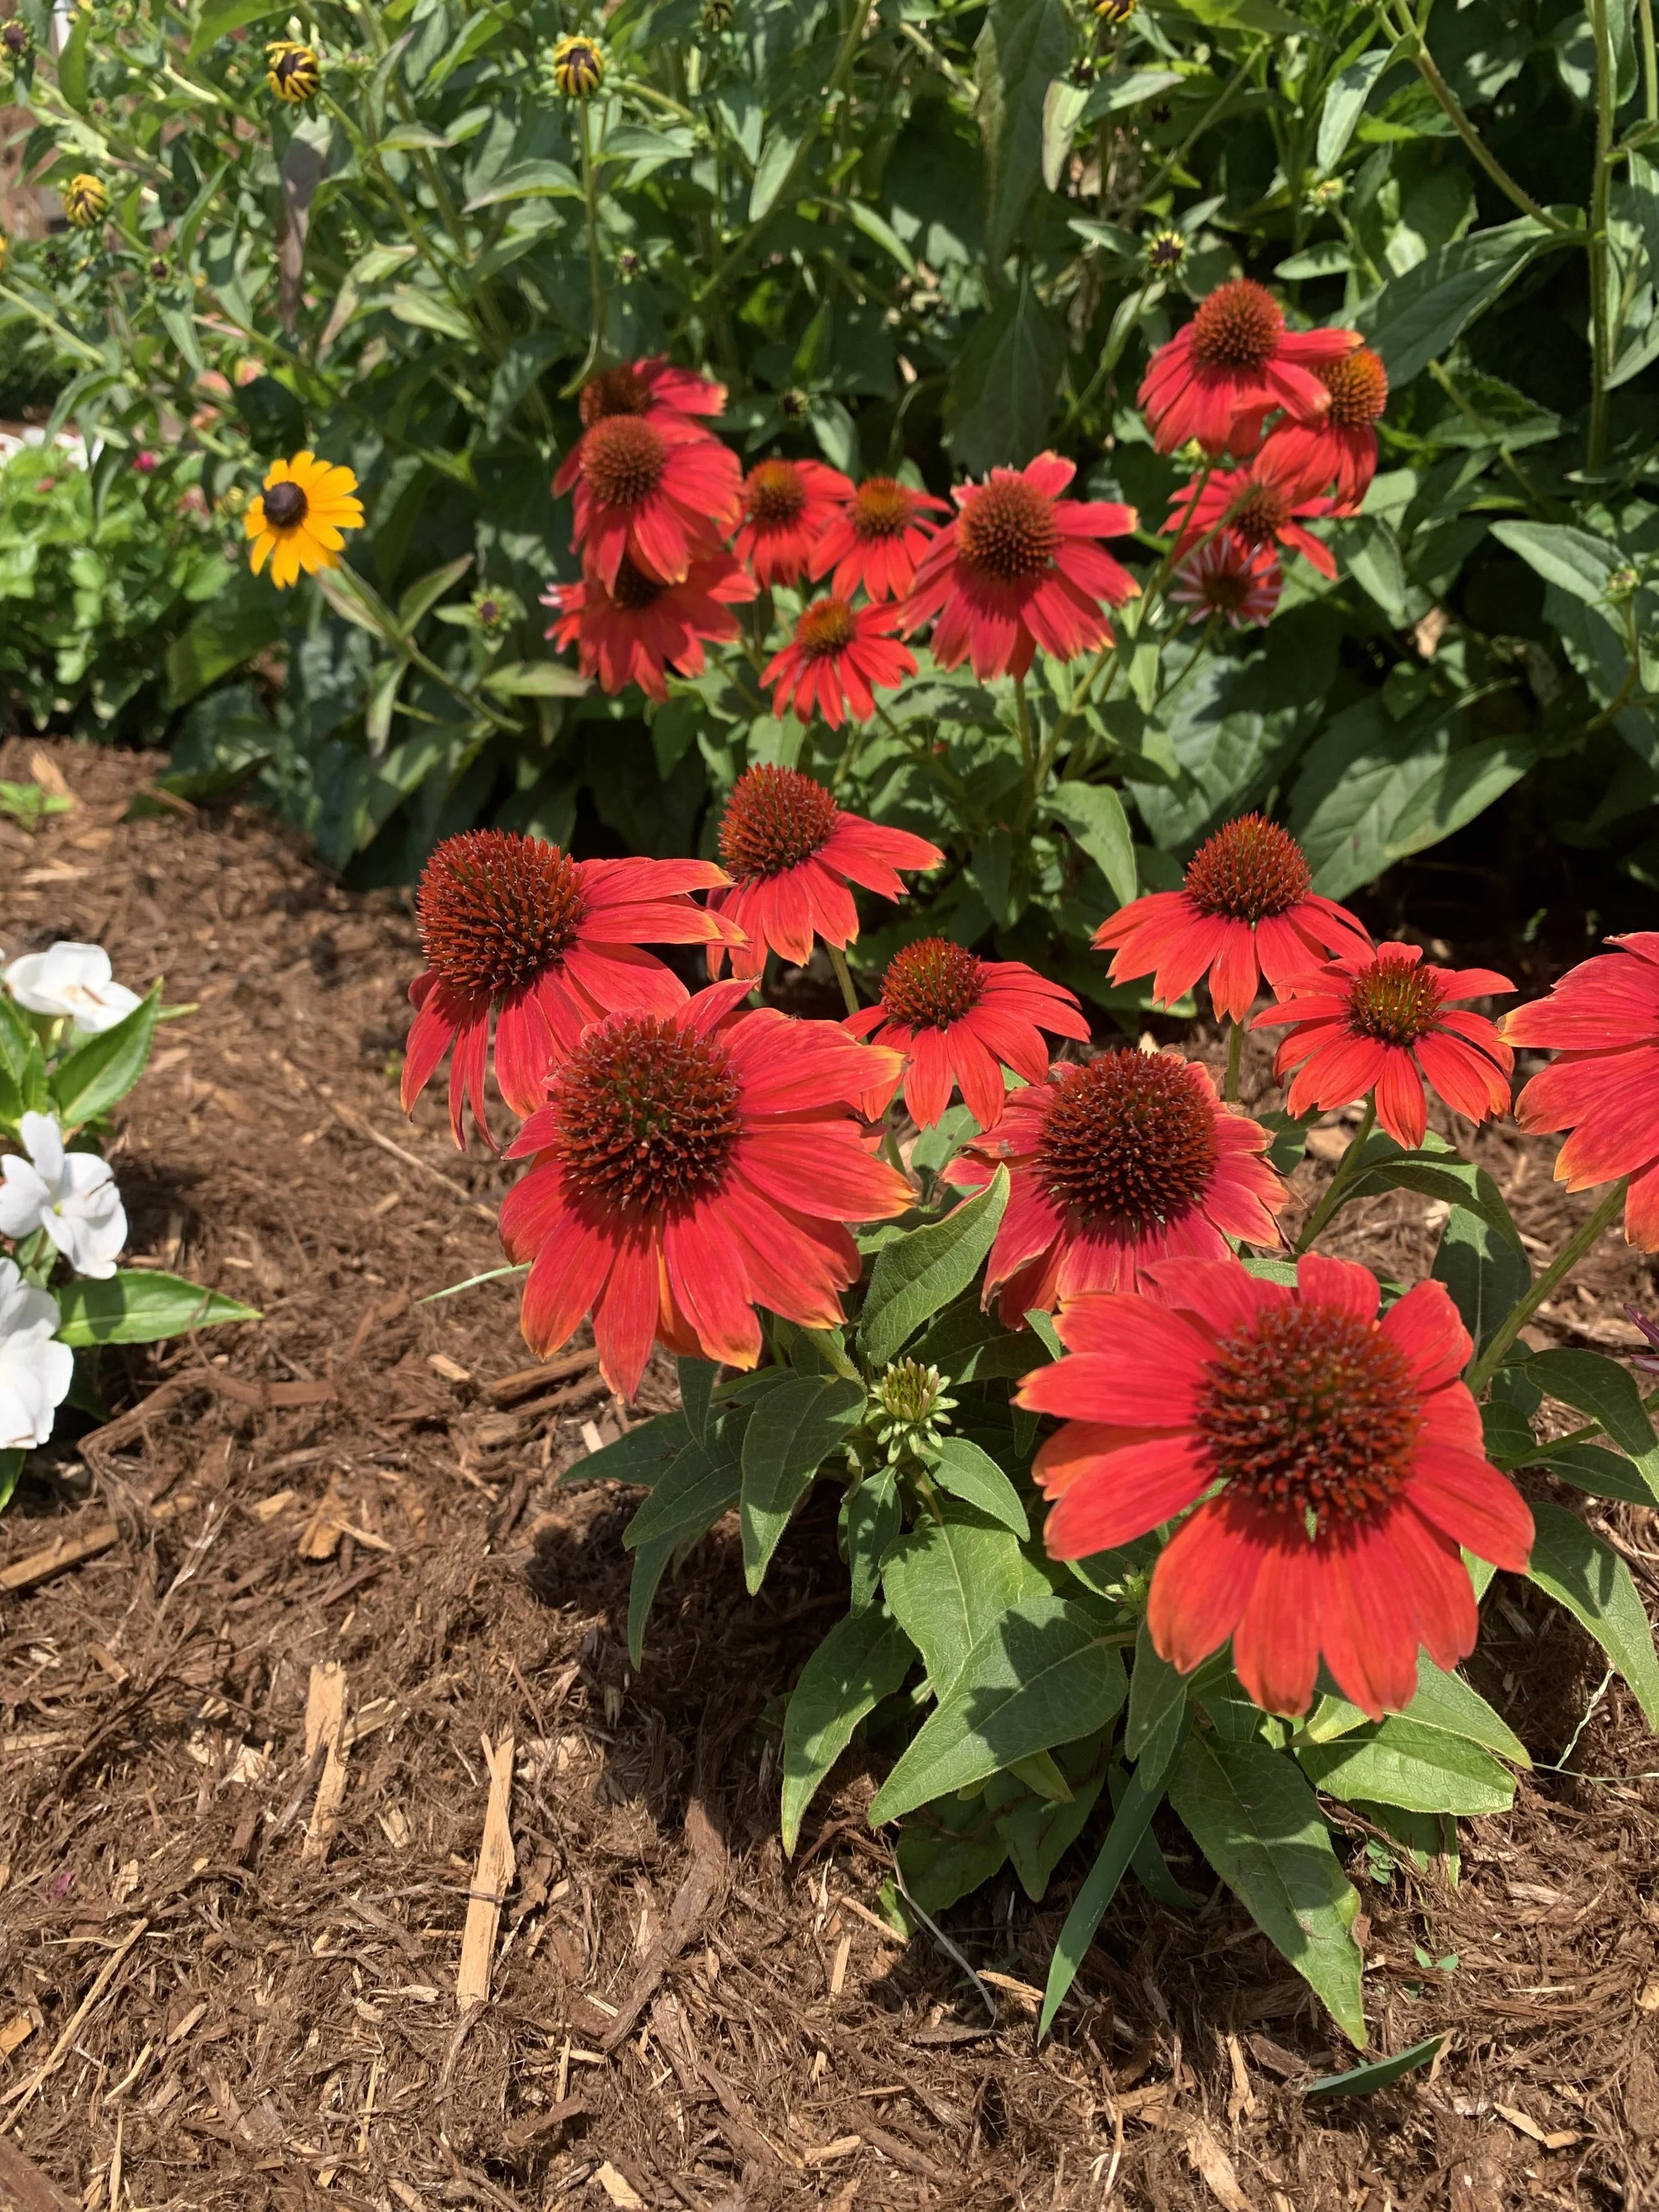
A fresh 2-3” of mulch will cool the soil and retain moisture around your landscape plantings.
This week we visited several lawns where clients were concerned about declining turf. Many were concerned last year’s army worms had returned. But, in every case, we discovered lawns suffering from lack of moisture. Some were the result of short, shallow watering habits while others had dry areas due to uneven distribution of water.
Our goal is to help your lawn and landscape survive the heat and drought of an Oklahoma summer. Your landscape represents a big investment of time and money creating an outdoor environment. Not only does your trees, shrubs, and lawn add curb appeal to your home, there is the added benefit of lower temperatures created by the green environment surrounding your home.
If you have questions or need help, give us a call or respond to this email.
Lorne Hall
Hall | Stewart Lawn + Landscape
(405)367-3873


Time To Assess Your Evergreen Shrubs!
As landscapes mature it is typical for plant material to outgrow the intended space.
Some of the biggest offenders are in the holly family. A Dwarf Burford Holly, commonly used as a foundation plant, can reach 6’ in height and width.
But who reads a plant label?
And, if you did read the label you were thinking:
“Surely this pretty little holly will never cover up the window.”
Then a few short seasons later, you find yourself struggling to keep the holly contained to the space you intended.
Or, possibly you have done a great job of keeping them sheared, but they have lost the natural shape you fell in love with.
What do you do? Tear them out and start over?
I have another solution - Mid-February through March is your opportunity to do major pruning on most broadleaf evergreens.
The broadleaf evergreen, any plant with leaves year-round, the list includes aucuba, camellia, boxwood, cherry laurel, elaeagnus, holly, mahonia, photinia, just to name a few.

There are two good reasons to assess your evergreen shrubs now…
1. Do they still have leftover damage from last winter?
2. Have they become overgrown?
If your shrubs still have damage from last year’s storms or if they have become overgrown, the next 6 weeks is the best time to take action.
As landscapes mature, it is typical for plant material to outgrow the intended space.
Some of the biggest offenders are in the holly family. A Dwarf Burford Holly, commonly used as a foundation plant, can reach 6’ in height and width.
But, who reads a plant label?
And, if you did read the label you were thinking: “Surely this pretty little holly will never cover up the window.”
Then a few short seasons later, you find yourself struggling to keep the holly contained to the space you intended.
Or, possibly you have done a great job of keeping them sheared to fit the space, but they no longer have the natural shape you fell in love with.
What do you do? Tear them out and start over?
Dwarf Burford Holly is commonly used as a foundation planting. If your row of holly have become overgrown late winter through early spring is the best time to reduce their size with major pruning.
Nellie Stevens Holly often look best when they are allowed to retain their natural shape. If your Nellies have become overgrown, or have lost their natural beauty from repeated shearing, mid-February through March is the time to regain their natural shape with major pruning.
I have another solution - Mid-February through March is your opportunity to do major pruning on most broadleaf evergreens.
The broadleaf evergreen, any plant with leaves year-round, list includes aucuba, camellia, boxwood, cherry laurel, elaeagnus, holly, mahonia, photinia, just to name a few.
Heavy pruning in the spring before new growth starts allows you the opportunity to regain the shape you intended for the plant.
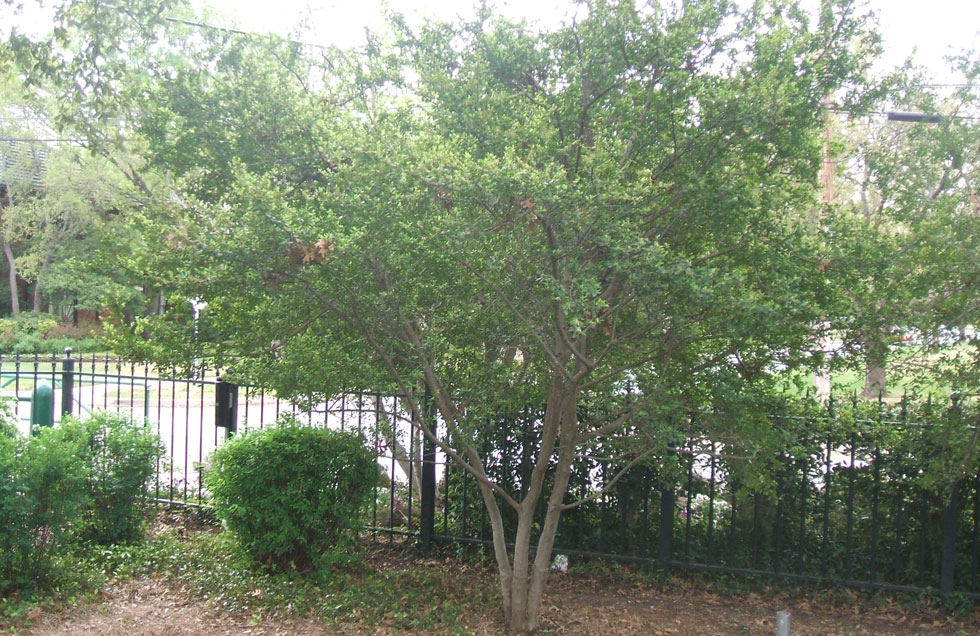
If your Yaupon Holly has outgrown its intended shape, now is the time for major pruning.
My first experience with major pruning of a holly was 30 years ago. A customer had a large overgrown, out-of-control, Yaupon Holly they really wanted to keep, but it was completely covering the front of the house. After a few hours of cutting limbs, pruning, and then pruning some more, the overgrown 15’ Yaupon was reduced to nothing but 5 major trunks 6’ tall.
With every major cut, I doubted my knowledge.
“Am I really doing the right thing? Or am I ruining a perfectly good plant that took years to develop?”
Nellie Stevens Holly
A few weeks later, I visited the site. The Yaupon Holly’s trunks were budding.
On my next visit, the branches were covered with new growth.
And, by the end of the season, the customer’s house which had been hiding behind an overgrown plant for years, was now gracefully accented by a small evergreen tree.
A couple of years ago I heavily pruned a large Nellie Stevens Holly on one corner of my house. And, as I do every time, I take a broadleaf evergreen back to no leaves and only major branches, I keep asking,
“What if this holly doesn’t re-leaf?”
“Am I ruining a 15-year-old Nellie?”
But, once again the shrub responded just like it should, and within one growing season, it returned to its natural beauty.
If you have boxwood taking over a sidewalk, mid-February through March is the best time to reclaim the sidewalk. You can trim them aggressively and they will recover during the growing season.
Nellie R Stevens Holly is a favorite foundation plant. With a mature size of 15’ tall and 10’ wide they quickly loose their natural beauty with regular sheering in an attempt to make them fit the landscape. Now is the best time to reduce the size and return them to their appearance.
BEFORE: If you have large hollies with damage from last winter, can they be saved or should they be replaced?
AFTER: As long as the evergreen has some green leaves you can remove the dead branches and reshape the plant. If the plant has a healthy root system, you will be surprised at how quickly it regains a good shape.
This is the same holly that was pruned back to only branches a couple of years ago.
Take time this week to evaluate your broadleaf evergreen shrubs.
Are they overgrown?
Do they need to have winter damage removed and reshaped?
If so, now is the time to remove dead branches and regain control of overgrown shrubs.
Mid-February through March is your best window of opportunity each year for major pruning of broadleaf evergreens.
Lorne Hall
Hall|Stewart Lawn + Landscape
(405)367-3873
January Lawn + Landscape Tips
Happy New Year!
After a couple of weeks of holidays, family, fun and leisure, we are ready to get back to talking lawn and landscapes.
And you are thinking…
“Woah! It’s too early to start thinking about lawn work. It’s January!”
Just because your lawn and landscape are taking a winter break, it doesn’t mean you are totally off the hook.
The list of things to do outdoors isn’t long, but there are a few critical things that will make a big difference in the success of your lawn and landscape this year.

Happy New Year!
I’m ready to push the restart button on a new year!
How about you?
I know your lawn and landscape are definitely ready for a new year. They found the weather patterns and environment of 2021 very challenging. Record cold last February left most landscapes scared and began a pattern of unusual weather that continued through the entire year. Bermuda lawns found the cooler than normal first half of the growing season difficult while fescue lawns looked better than ever. Then came the second half of the summer and the march of the armyworms. Overnight nearly perfect fescue lawns were devastated. The warmth of September resulted in Bermuda lawns looking their best at the time of the year when they are normally slowing down. To finish the year….the Oklahoma City area has gone over 60 days without any moisture.
Here’s to hoping for a return to normal, as normal as possible, weather patterns in 2022!
The list of things to do outdoors in January isn’t long, but there are a few critical things that will make a big difference in the success of your lawn and landscape in 2022.
Lawn Pre-Emergent – Your best chance to have a weed free lawn this year is to apply a pre-emergent between now and the end of February. The purpose of a pre-emergent is to prevent weed seeds from germinating. The next weeds to germinate in your lawn will be the ones that haunt you all summer. Spring and summer weeds will start growing as soon as soil temperatures start to warm in early March.

Nonselective herbicides can be used while the turf is completely dormant to control any weeds that are actively growing.
If you are a subscriber to a Hall | Stewart’s Lawn Care Program,
we will be visiting your lawn very soon to apply the critical
first application of the year to prevent spring and summer weeds.
Lawn Post-Emergent – If you have a warm-season lawn (Bermuda and Zoyia), now that we have received freezing temperatures it is one of the best times to gain control of troublesome grassy and broadleaf weeds. Nonselective weed control (herbicides that control anything that is actively growing) can be used while the turf is completely dormant. Now is also a good time to control broadleaf weeds growing in fescue, but do not use a nonselective herbicide on fescue. Always read the labels, know your turf type, and only apply herbicides labeled for your turf type.
Moisture – Pay close attention to plant and lawn moisture over the winter. Fortunately, we received a critical 1/3” to 3/4” rainfall in the metro area as the cold temperatures arrived this weekend. Through the winter keep an eye on rainfall and soil moisture. If we go over 7 days without any moisture, rain, or snow, be prepared to water. Evergreen plants, both needle and broadleaf, are most susceptible to winter damage when we have a dry winter. Don’t forget to inspect containers, raised plantings, and plantings under the eaves of your house are the first to become too dry.
Tree Trim – During winter dormancy, tree trimming is a great practice. Most trees are in need of restorative tree pruning this winter to correct damage from last year’s ice storm. With the leaves off the trees, it is much easier to see damage and branching problems. Remove low hanging branches, crossing branches, and branches growing into the interior of the tree. Also, remove branches that may compete with the central leader.
For more information on tree trimming, visit our post from December 19, Winter Tree Pruning – Improve Your Landscape Investment.

Dormant Oil – During January and February one of the best things you can do to prepare your landscape plants for the season is to treat them with a dormant oil. Dormant oils smoother overwintering insects (aphids, scale, mites, etc.) that often are some of the most difficult to control.
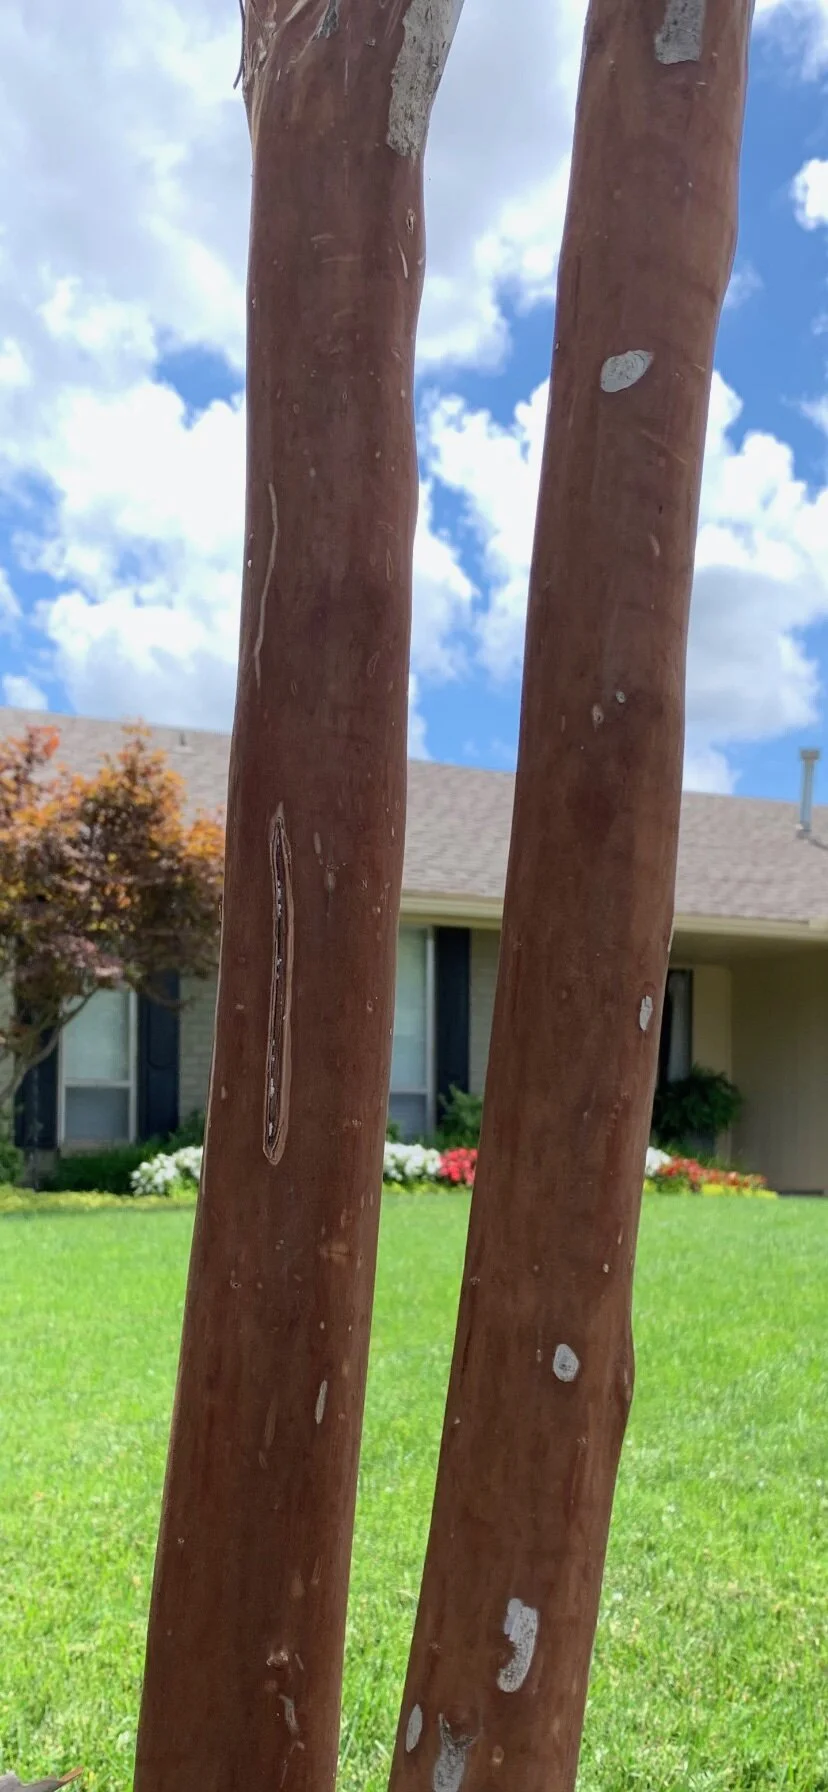
Crape myrtle bark scale activity has increased over the past few seasons. Scale is a white insect with a hard shell that appears on the bark. Dormant oils applied in January-February is the first step for controlling the pest. If your landscape includes crape myrtles, you need a dormant oil application every year.

When leaves accumulate in the corners of your lawn during the winter they become a collecting place for insects and disease.

Leaf Clean-up – Keep your lawn and landscape clear of leaves through the winter. If you allow leaves to collect on your fescue lawn, in the corners and around objects, you will find the fescue thinner in the spring. Also, leaves are a collecting place for insects and disease over the winter.
Soil Test – If your lawn, shrubs, or trees struggled this year, now would be a great time to check the soil pH and nutrients. Fill a quart sized plastic bag with soil from at least 6 spots in the area of concern. Take soil from just below the surface. Remove roots from the soil. Use a separate bag for soil from your lawn and landscape areas. Take the soil sample to your local Oklahoma State University County Extension Office. They will test the soil and send you a report for a nominal fee. The Oklahoma County office is located at 2500 NE 63rd St., Oklahoma City, OK 73111. Or, give us a call and we will gather a sample and take it to the lab for you.
Mower Maintenance – During the mowing off season take your lawn equipment in for annual winter service. Most lawn equipment stores offer specials during January on oil changes, lubrication, blade sharpening, and repairs. Annual preventive maintenance often keeps you from experiencing the frustration and hassle of repair issues during the growing season and extends your mower life.
If have any questions, or if you need help making 2022 your best lawn and landscape year, please give us a call.
One last thought – Avoid walking on fescue lawns when temperatures are below freezing or there is a frost as it will cause damage that will last into the spring.
Lorne Hall
Hall | Stewart Lawn + Landscape
(405)367-3873.
Merry Christmas!

"Who can add to Christmas? The perfect motive is that God so loved the world. The perfect gift is that He gave His only Son. The only requirement is to believe in Him. The reward of faith is that you shall have everlasting life." — Corrie Ten Boom
While we try to add to the joyous season of Christmas, we hope you & your family are reminded of the perfect gift we’ve received — the birth of Jesus Christ.


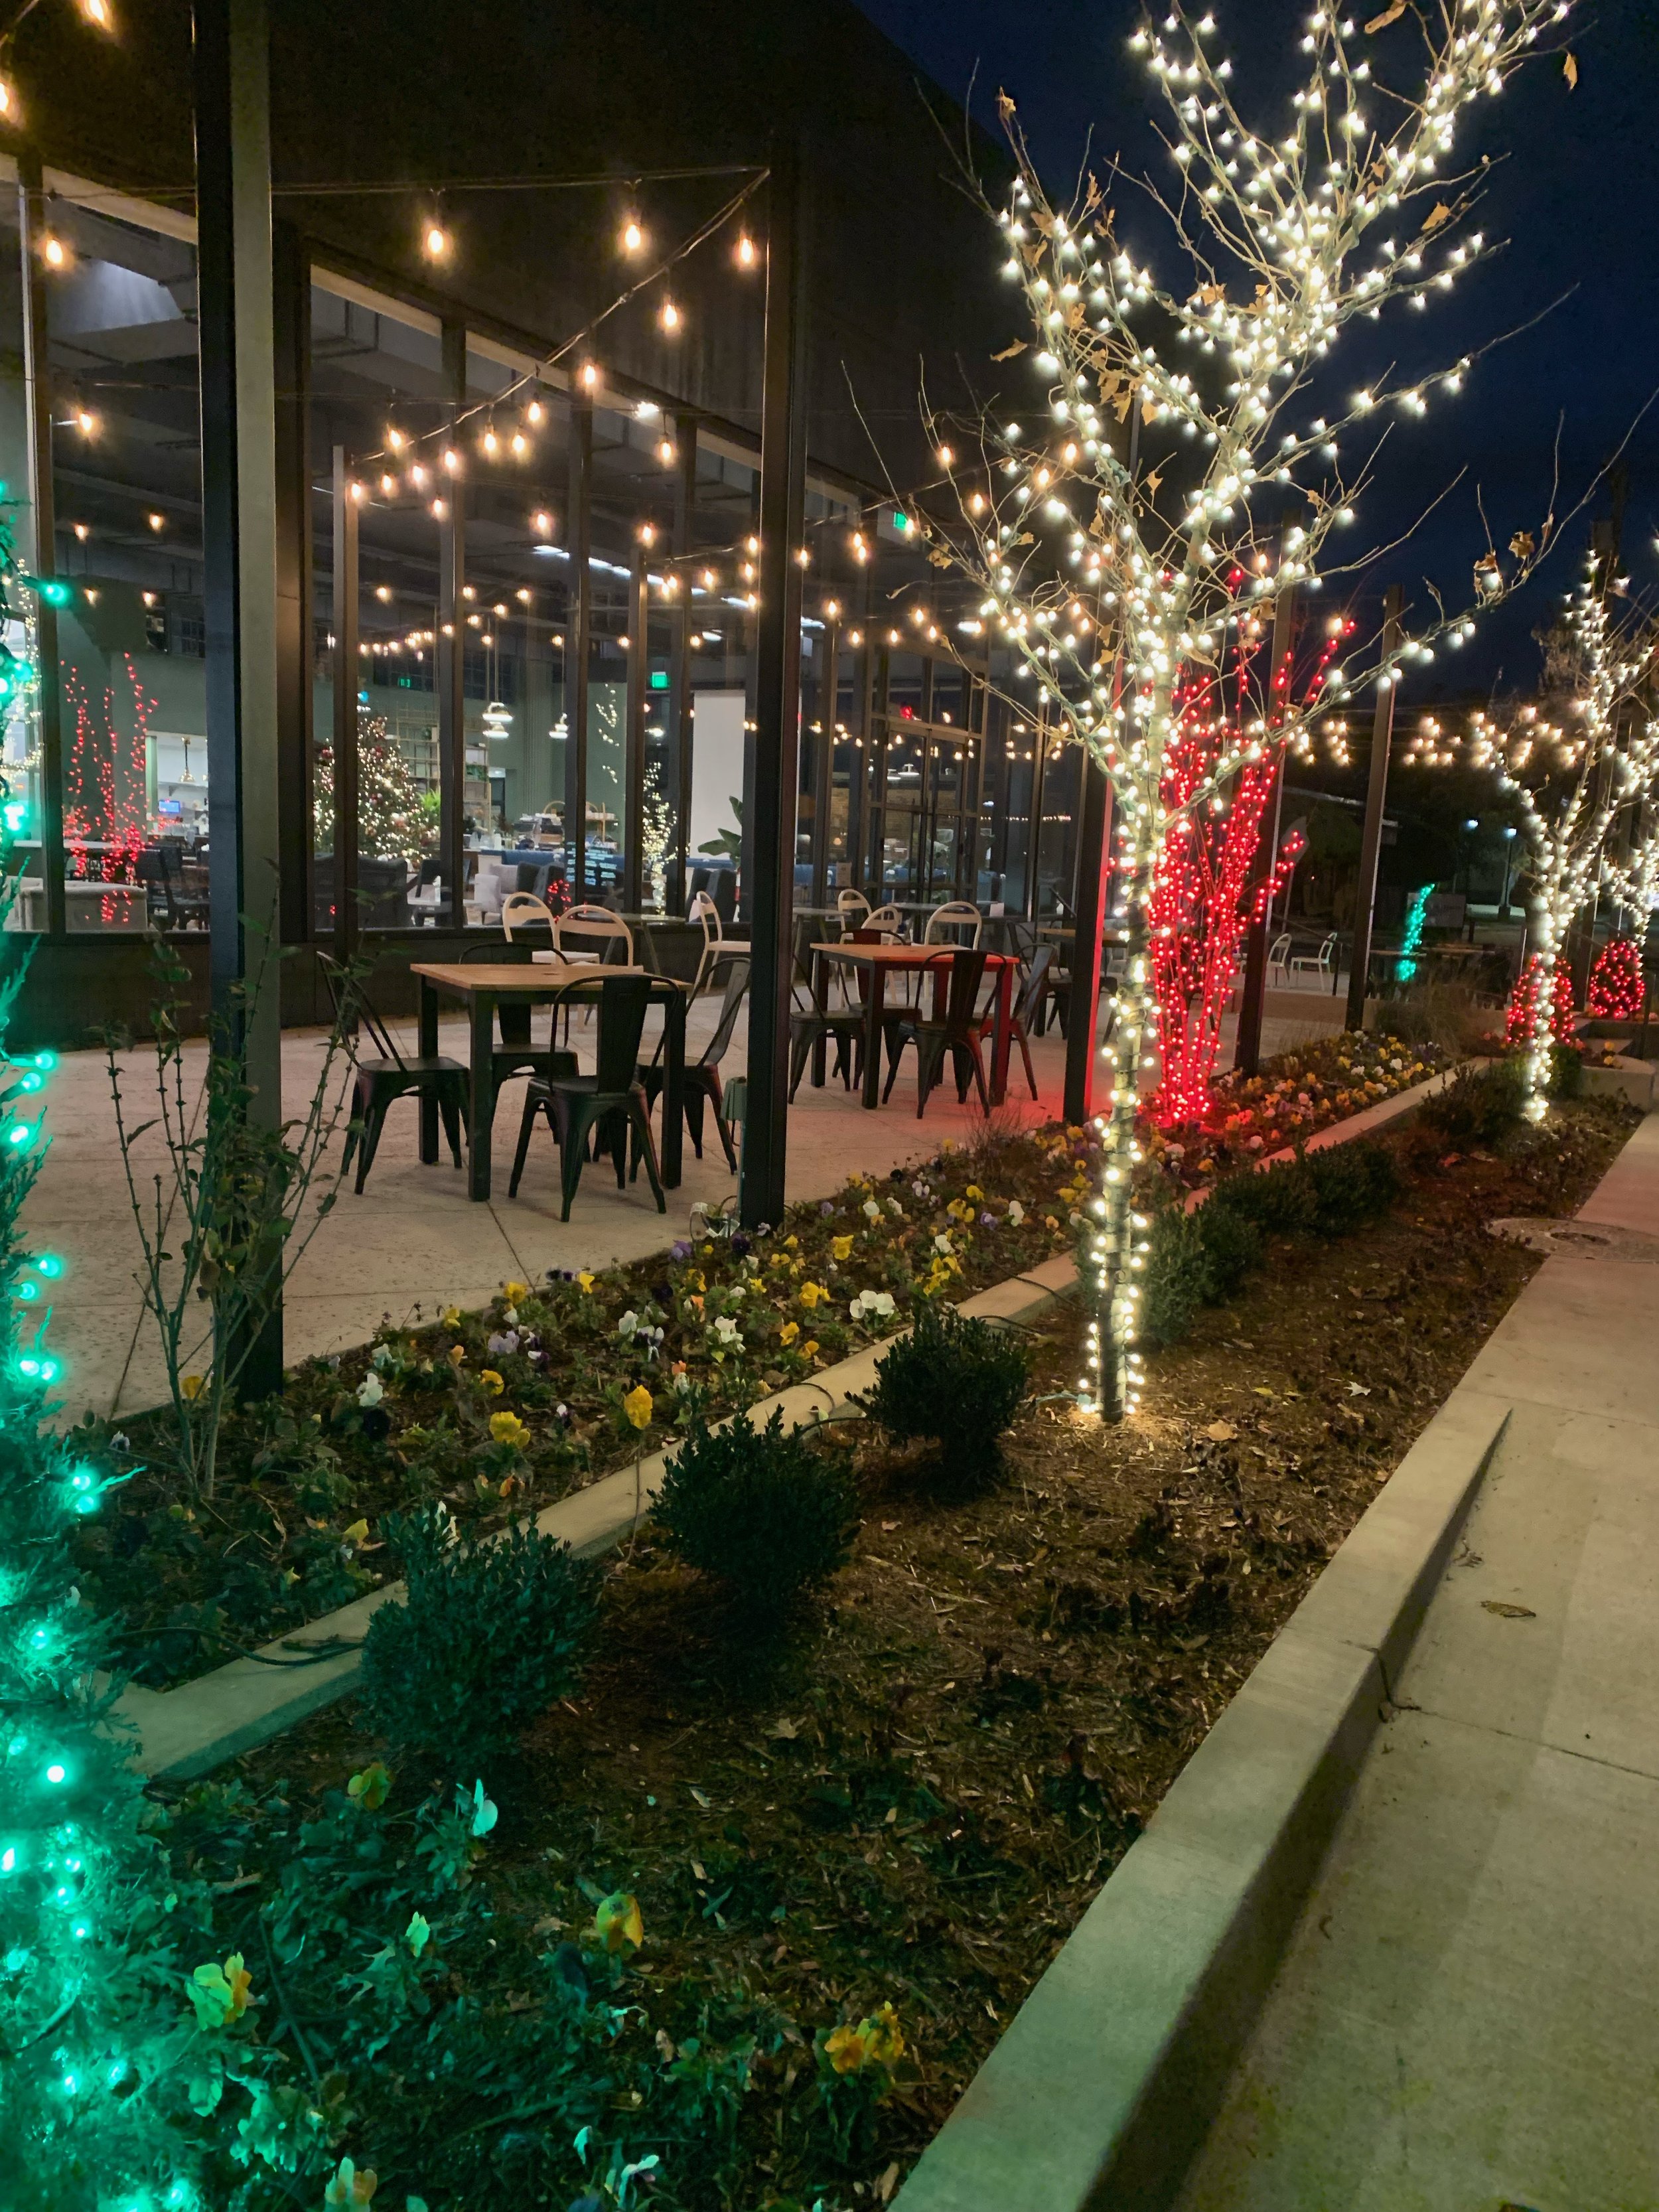

“For to us a child is born, to us a son is given; and the government shall be upon his shoulder, and his name shall be called Wonderful Counselor, Mighty God, Everlasting Father, Prince of Peace.” – Isaiah 9:6
We hope you & your family have a great Christmas celebrating the birth of our Prince of Peace!
Merry Christmas from your friends at Hall | Stewart Lawn + Landscape!

BRADY
Lawn Care Technician
Edmond Area

BAILEY
Lawn Care Technician
West Metro Area

LEONEL
Special Projects Team Member

TOM
Co-founder & Partner

JOHN
Lawn Care Technician
Northwest Oklahoma City Area

RIGOBERTO
Special Projects Crew Leader

PAULA
Office Administrator

LORNE
Co-founder & Partner

Your Lawn & Landscape Still Needs Moisture… Even During The Off Season!
The tendency this time of year is to turn the irrigation off and roll up the hoses, but if your lawn and landscape could talk, they would be encouraging you to not cut off the water just yet and be prepared to give them a drink from time to time through the winter.
Sure, your lawn, trees, shrubs, and flowers don’t need as much water from through the winter, but they do need some.
Your landscape needs at least ½” of moisture every two weeks through the winter.
It has been 3 weeks since most of the Oklahoma City metro has received a ¼” rainfall.
Soil moisture is dwindling and there isn’t a strong chance of a good rainfall for several days.
Throughout the winter take advantage of nice, warm, light wind days and give your lawn and landscape a good soaking.
Pansies need moisture through the winter to survive and make a strong spring show.
Winter watering is particularly critical for evergreen shrubs and trees. Windy days zap the moisture stored in their leaves making them sensitive to winter injury when we receive a harsh cold snap when they are dry.
Evergreens and fescue require more water attention during the winter.

Japanese maples have shallow roots that are susceptible to drying out during the winter.
Fescue and rye lawns will retain more color over the winter if the soil is moist went temperatures below 30 degrees.
Newly sodded lawns will experience winter damage if they are not kept consistently moist at this time of year.
Finally, all newer landscapes, those installed in the last two years require a little more watering attention over the winter.
If your irrigation system has an insulated cover and heat tape protecting the backflow, or if your system is an older system with an inground backflow, or if your backflow is inside your house, winterizing your system is not required during most Oklahoma winters. Even last year during the extreme cold, we saw little freeze damage to systems with protected backflows.
Pansies are a great winter annual as long as they aren’t bone dry when a cold front arrives.
Picture of the week: Discovered a Crape Myrtle in a customer’s landscape putting on new blooms in November while it’s leaves are changing colors. The last 12 months has been very confusing for our landscapes.
Shallow rooted plants, such as: azalea and Japanese maple are also prone to winter injury when they do not receive regular moisture during dormancy.
Plants with shallow root systems, such as Japanese Maples and Azaleas, respond best if they receive at least 1/2” of moisture every 7-10 days throughout the winter.
If you have perennials or winter annuals such as pansies or kale, winter moisture is critical to their performance going into the spring.
Evergreens need moisture during to winter to keep their foliage healthy.

Set your azaleas up for a successful spring by making sure they have enough moisture this winter.
Fescue lawns will retain more color in the winter and rebound quicker in the spring if they are not allowed to become bone dry during the winter.

A snow cover can be very helpful when temps go below freezing because warmer soil temperatures are trapped in.
Current Watering Recommendation - Continue to water one to two times per week until we receive an extended cold spell.
Watering Through the Winter - Monitor the weather. Pay attention to the amount of rainfall we are receiving. Anytime we go a week or two without a good rain or snow cover, pick a warm day and run your system through a cycle. If you don’t have an irrigation system, pick an enjoyable day, stretch out the hoses and make sure all plant material receives a good soaking.
Consider Upgrading Your System – If your system doesn’t have a rain/freeze sensor, add one. A rain/freeze sensor allows you the ability to set the controller to run once per week and leave it. If the temperature is below freezing, or if there has been a recent rain, the sensor will interrupt the scheduled cycle. The benefit is you won’t have to remember to turn your system off when it is too cold, or it has rained.
Another Upgrade to Consider – Install a Rainbird WiFi Link controller and let us control your system for you. We will monitor the weather and adjust the system through the winter based on the amount of moisture the area has received.
Remember – Most winter plant injury occurs when we receive a harsh cold spell while plant root systems are dry.
Give us a call, or respond to this email, if we can help you with irrigation solutions.
Lorne Hall
Hall | Stewart Lawn + Landscape
(405)367-3873