
Four reasons fall is the best time to plant

Have you ever wondered when is the best time to plant new shrubs and trees?
Spring is the best time to plant, right?
Spring is when we all get the bug to add something new to our landscape.
Spring is when garden centers are loaded with colorful plants just begging us to take them home.
The belief that spring is the best time to add new shrubs and trees to your landscape is a myth.

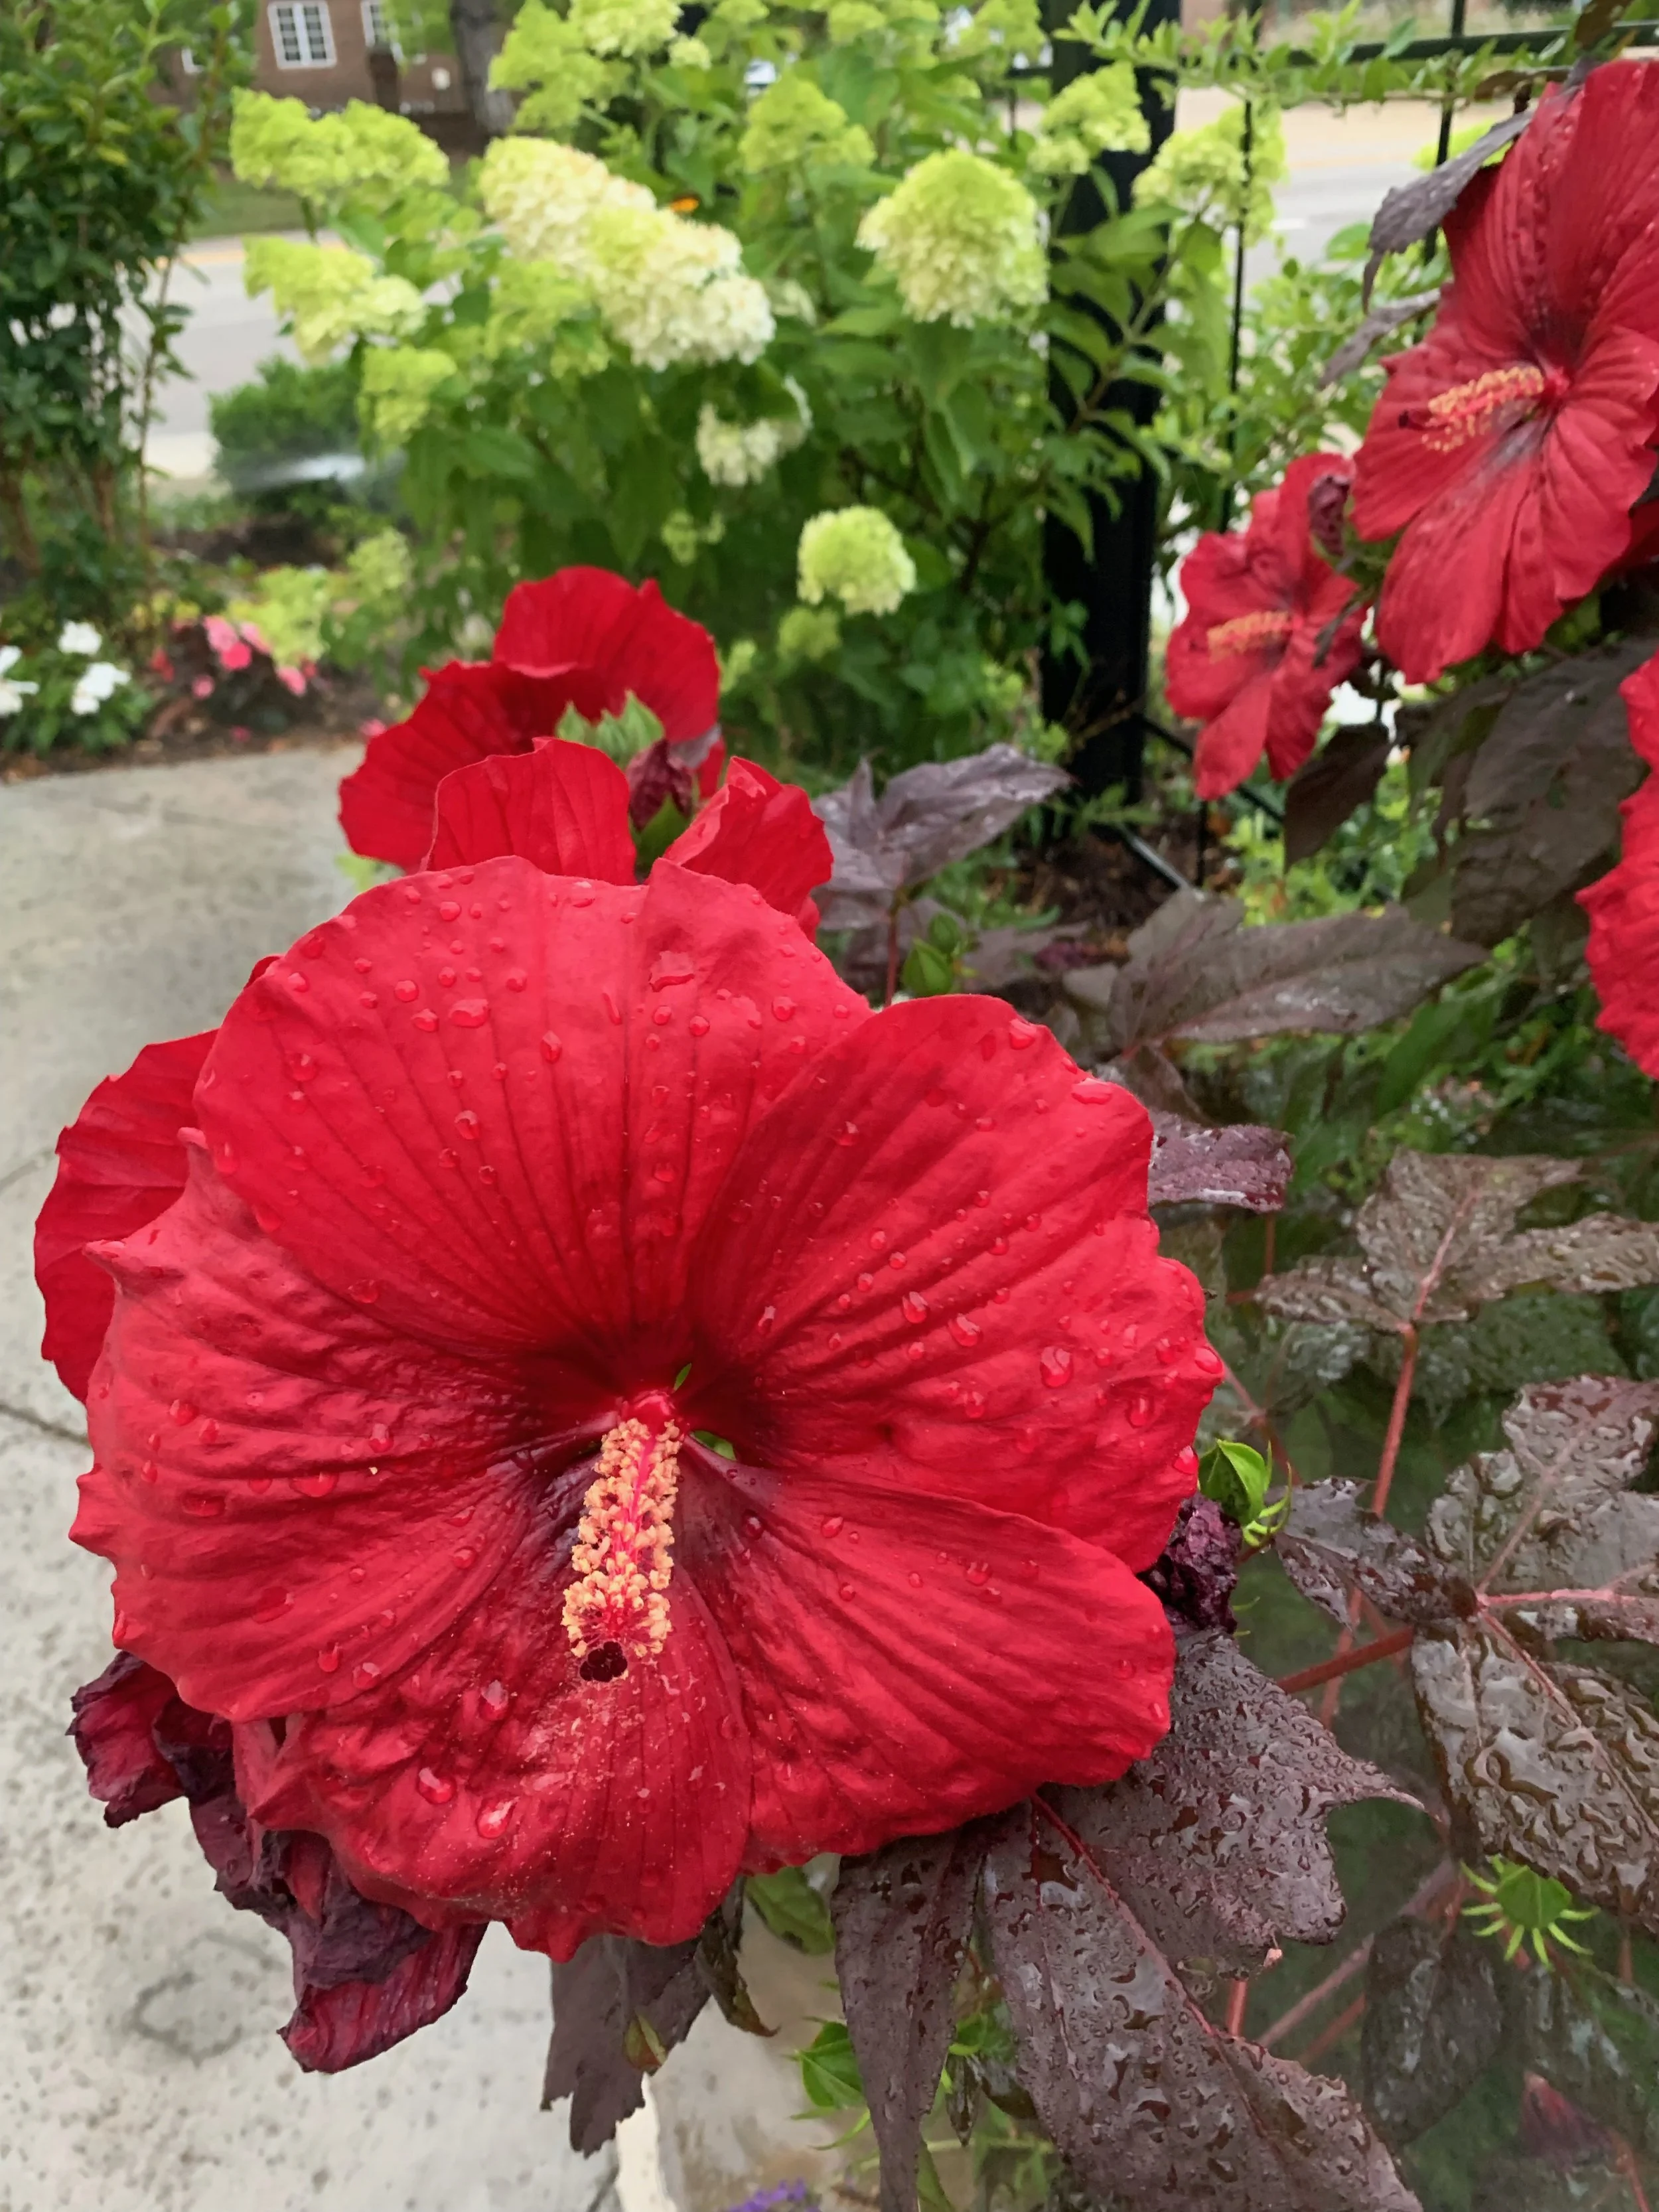
Hardy Hibiscus is a large, shrub type perennial with large flowers through the heat of summer.
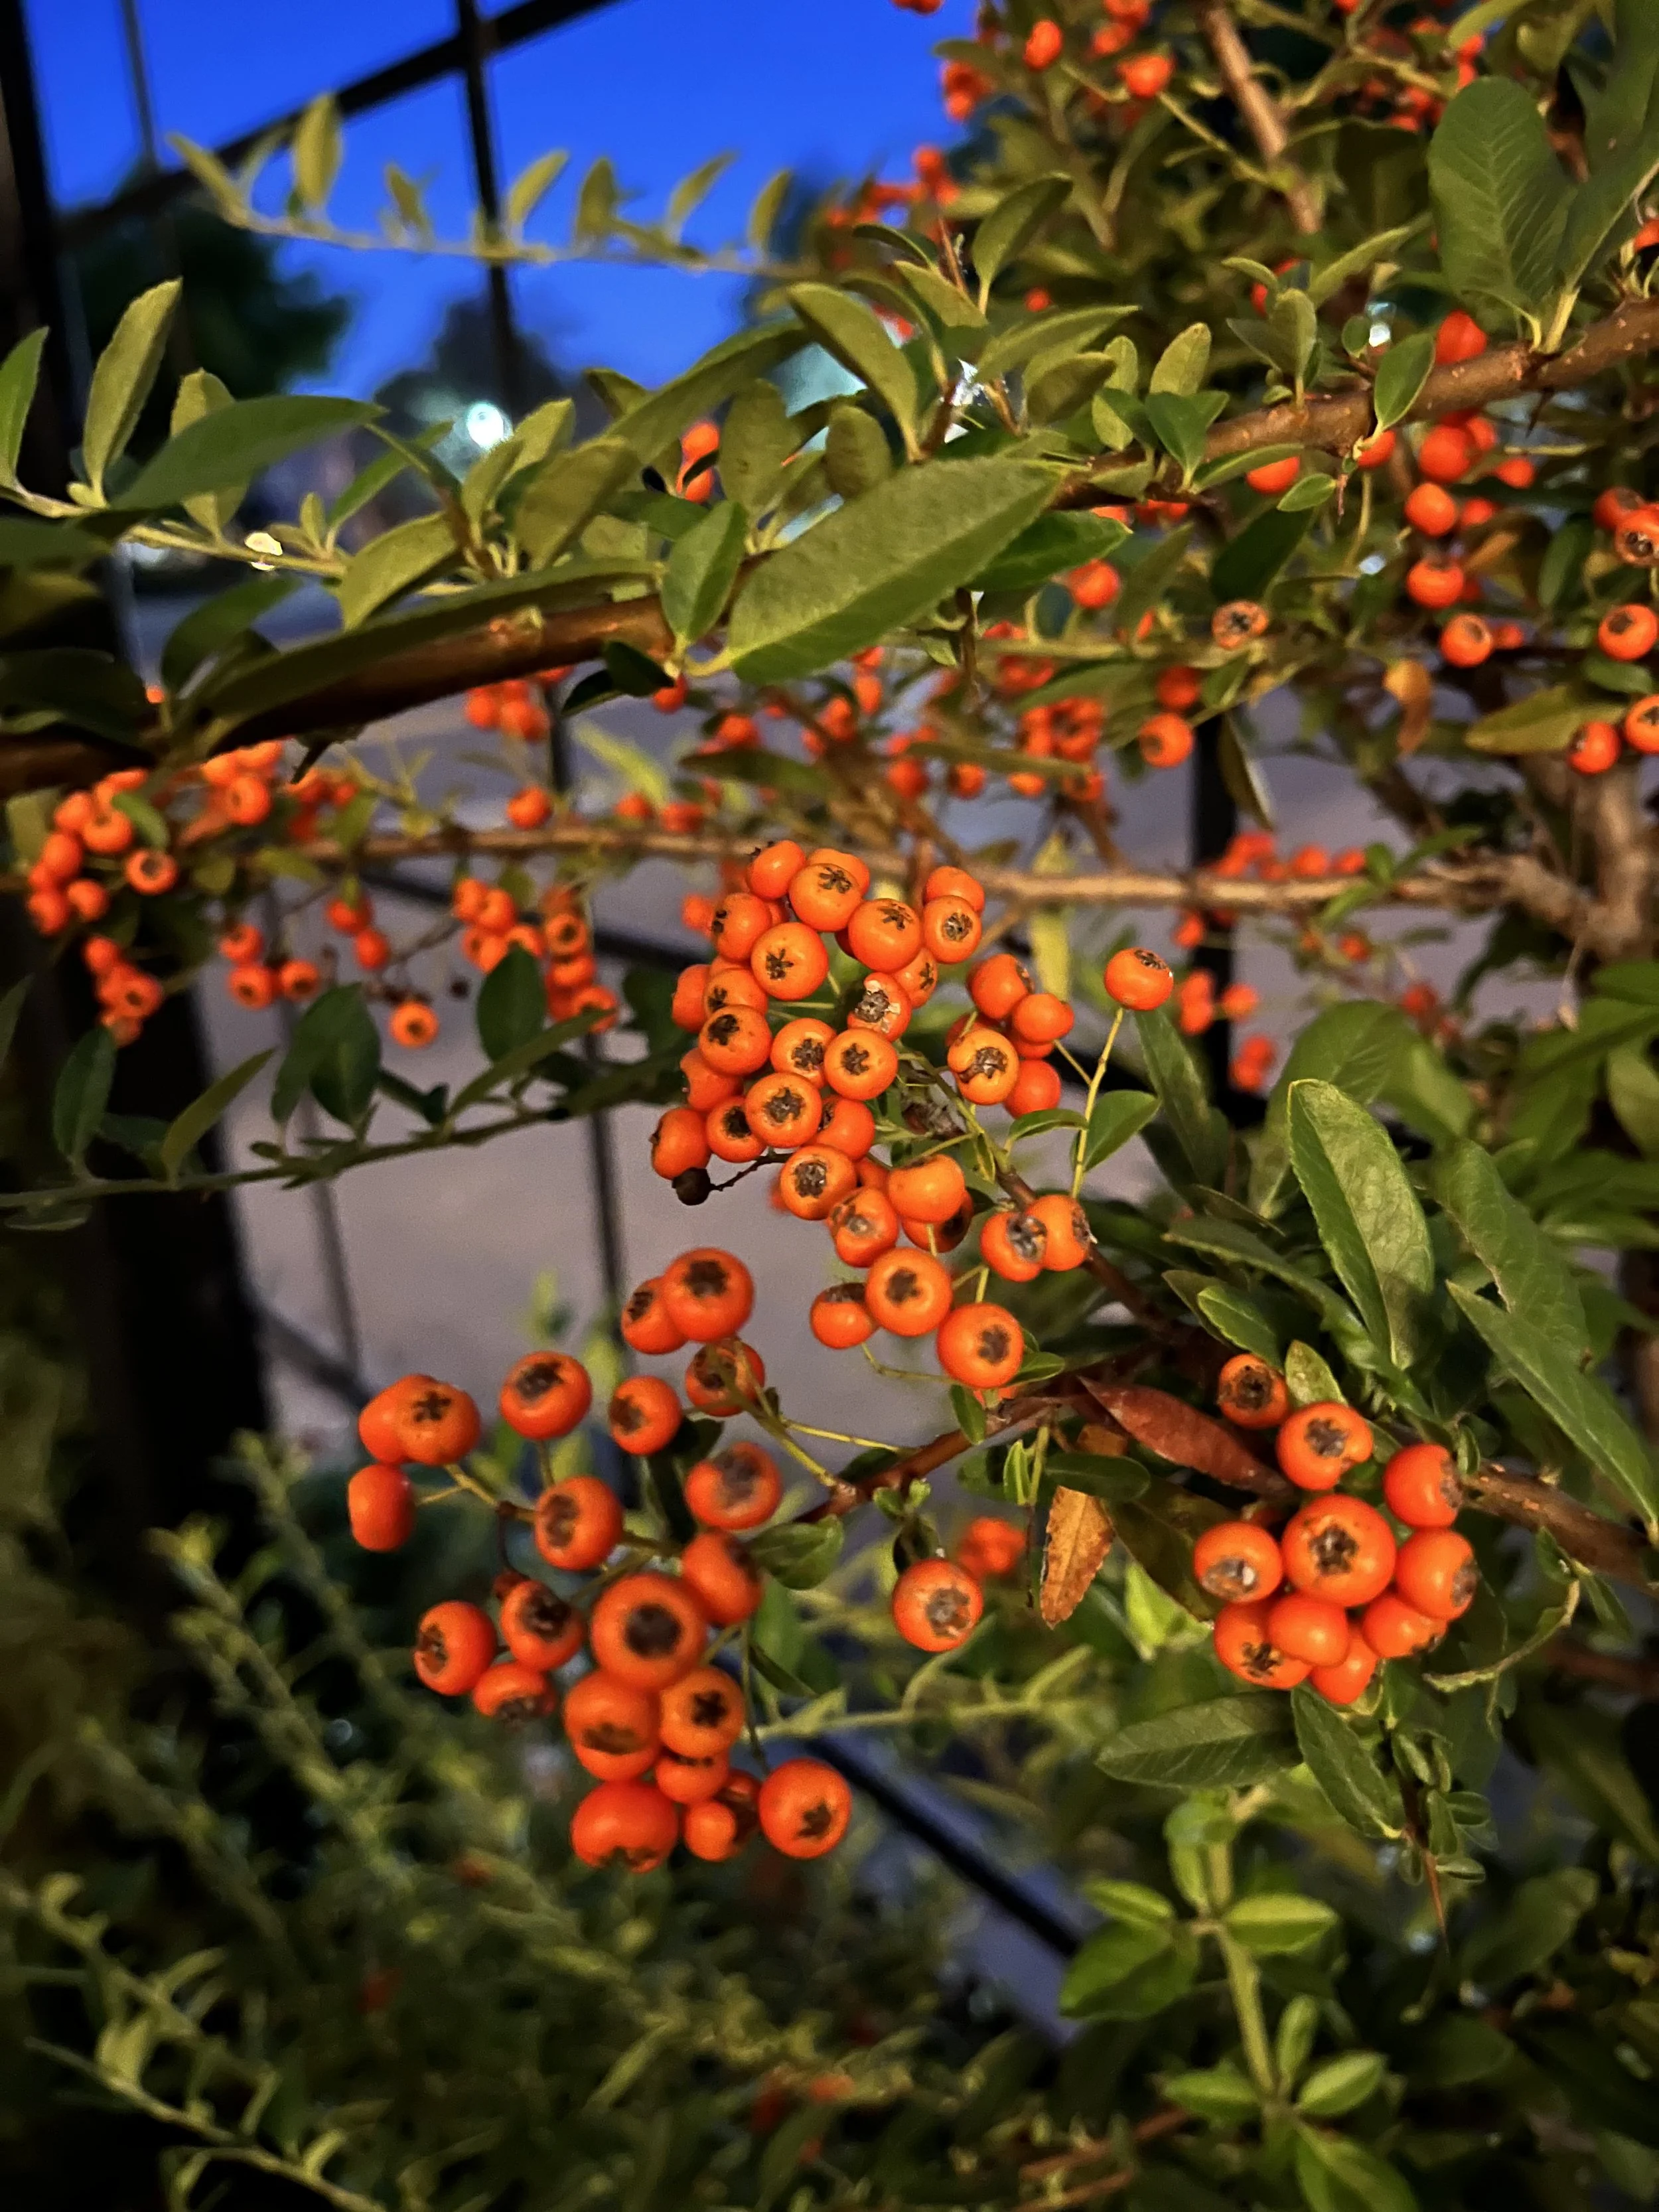
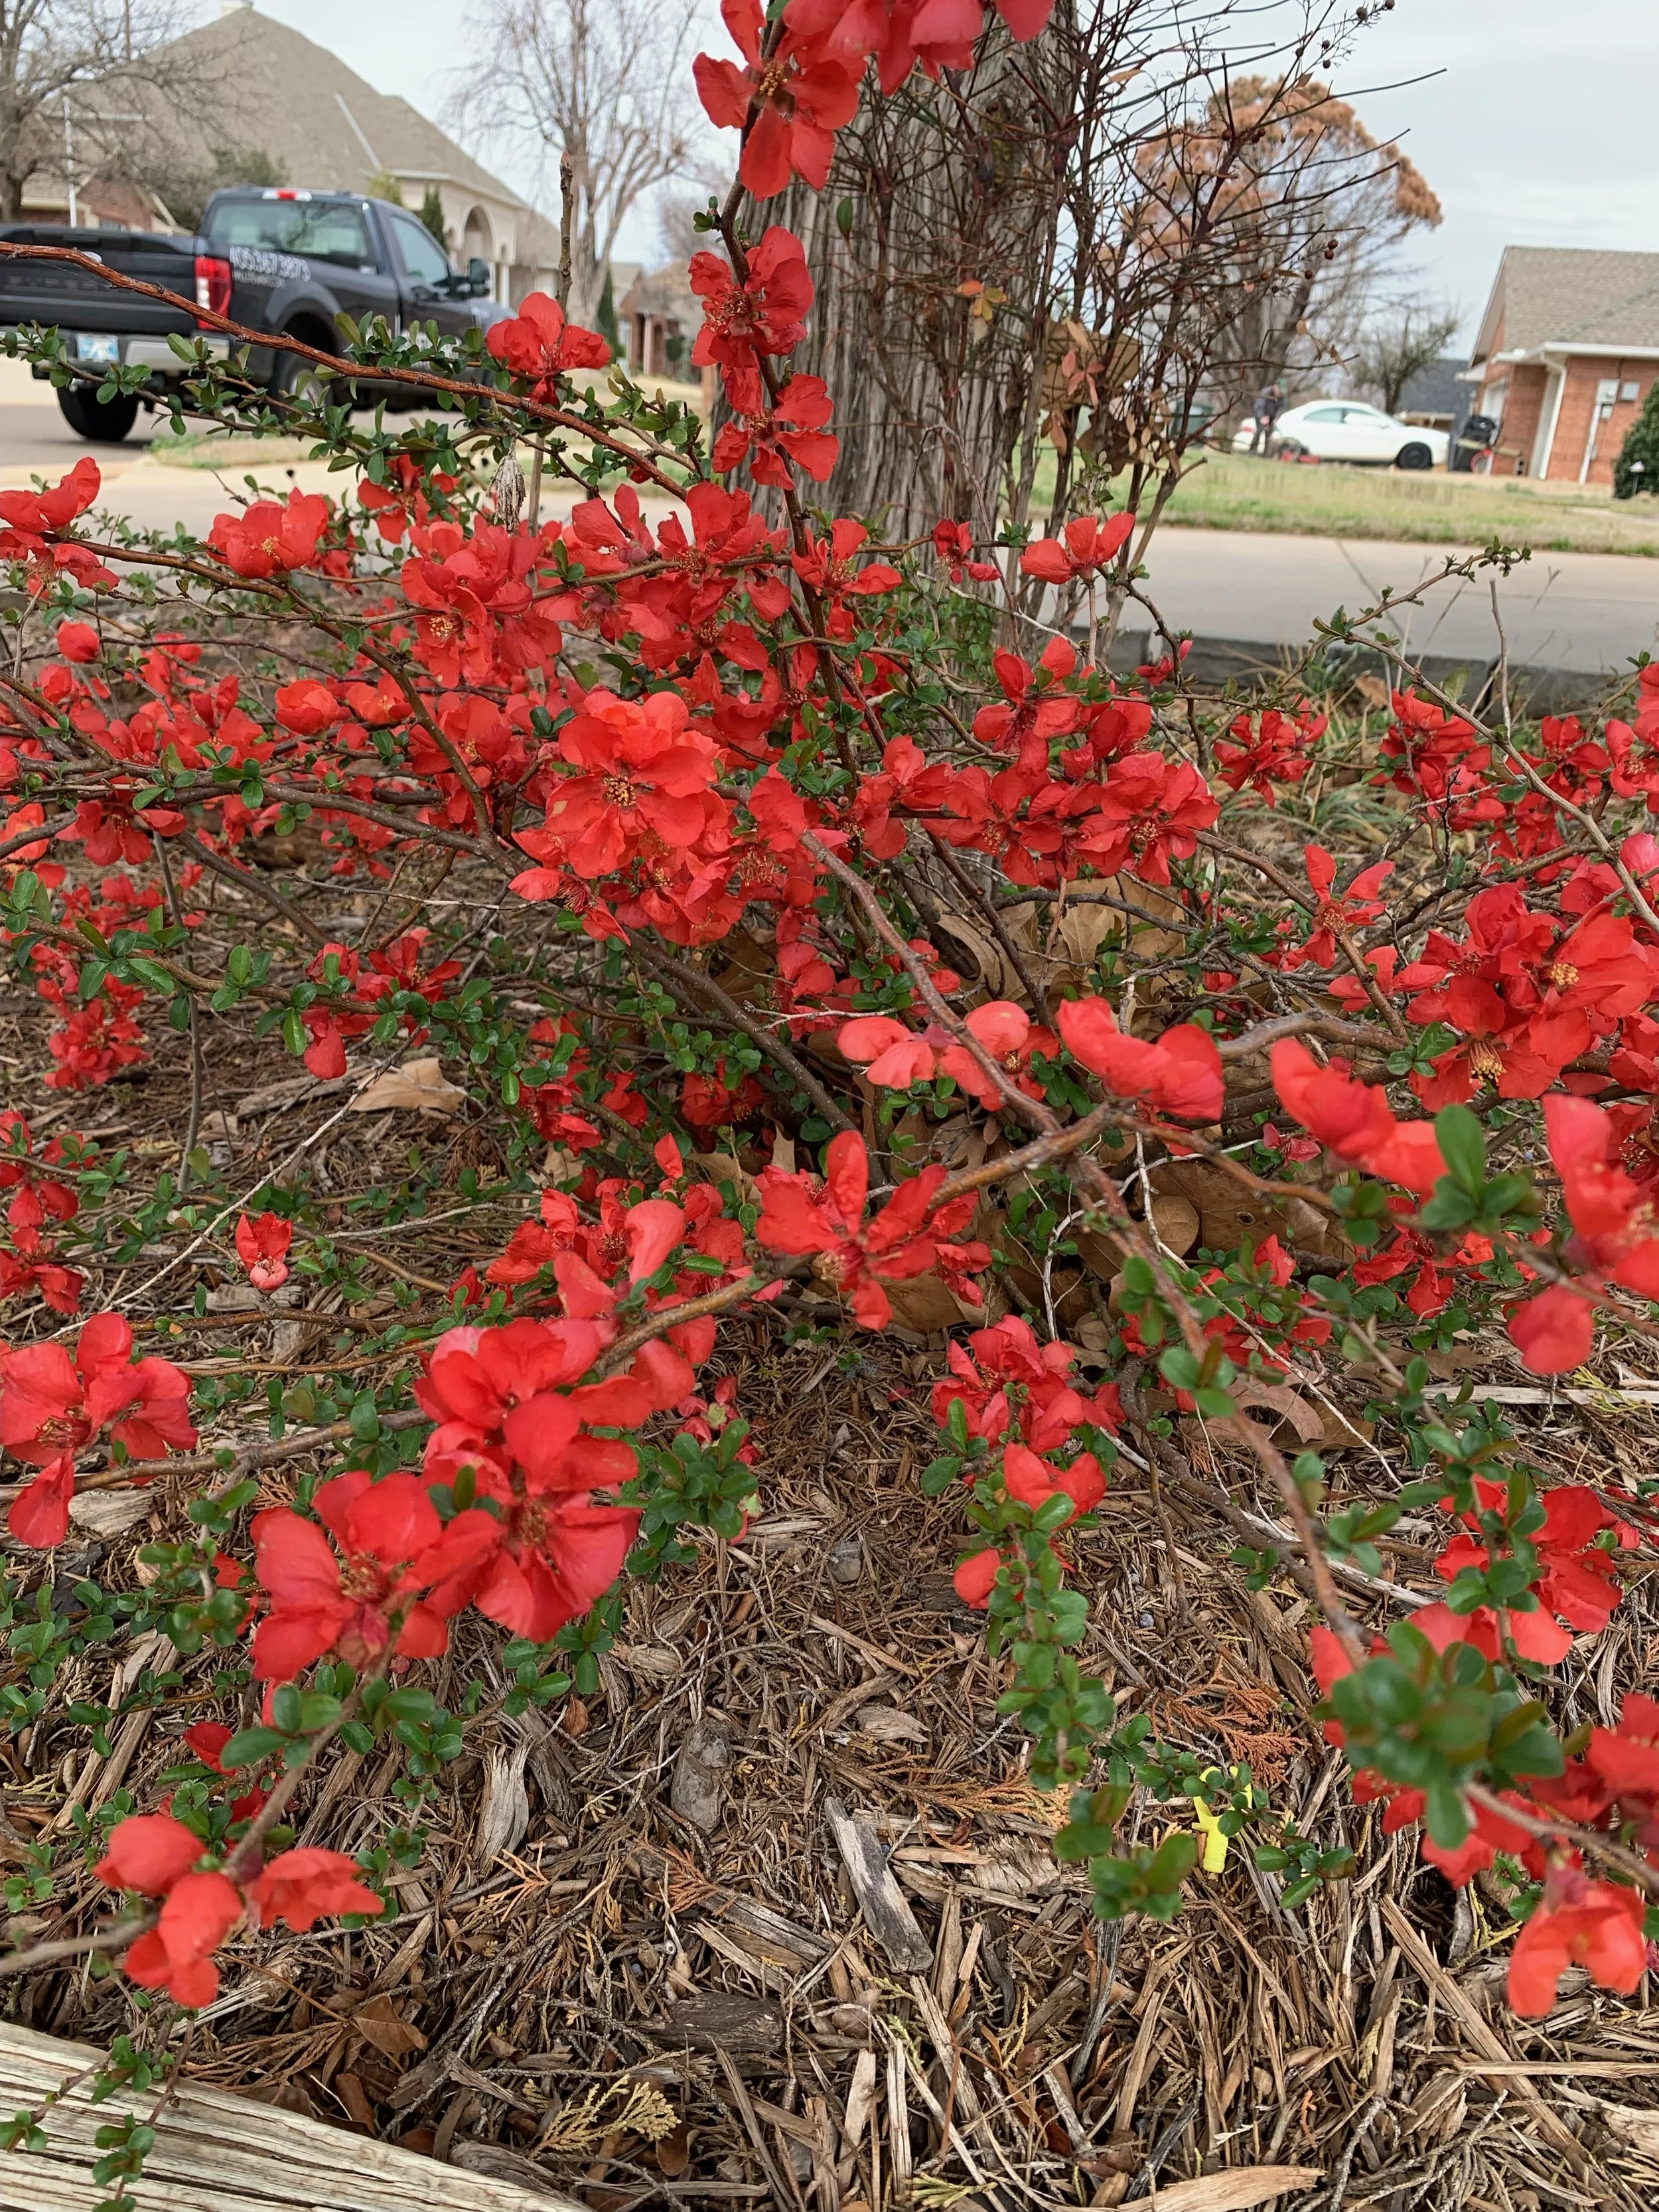
Pyracantha is an old fashioned shrub with bright orange to red berries in the fall and winter.
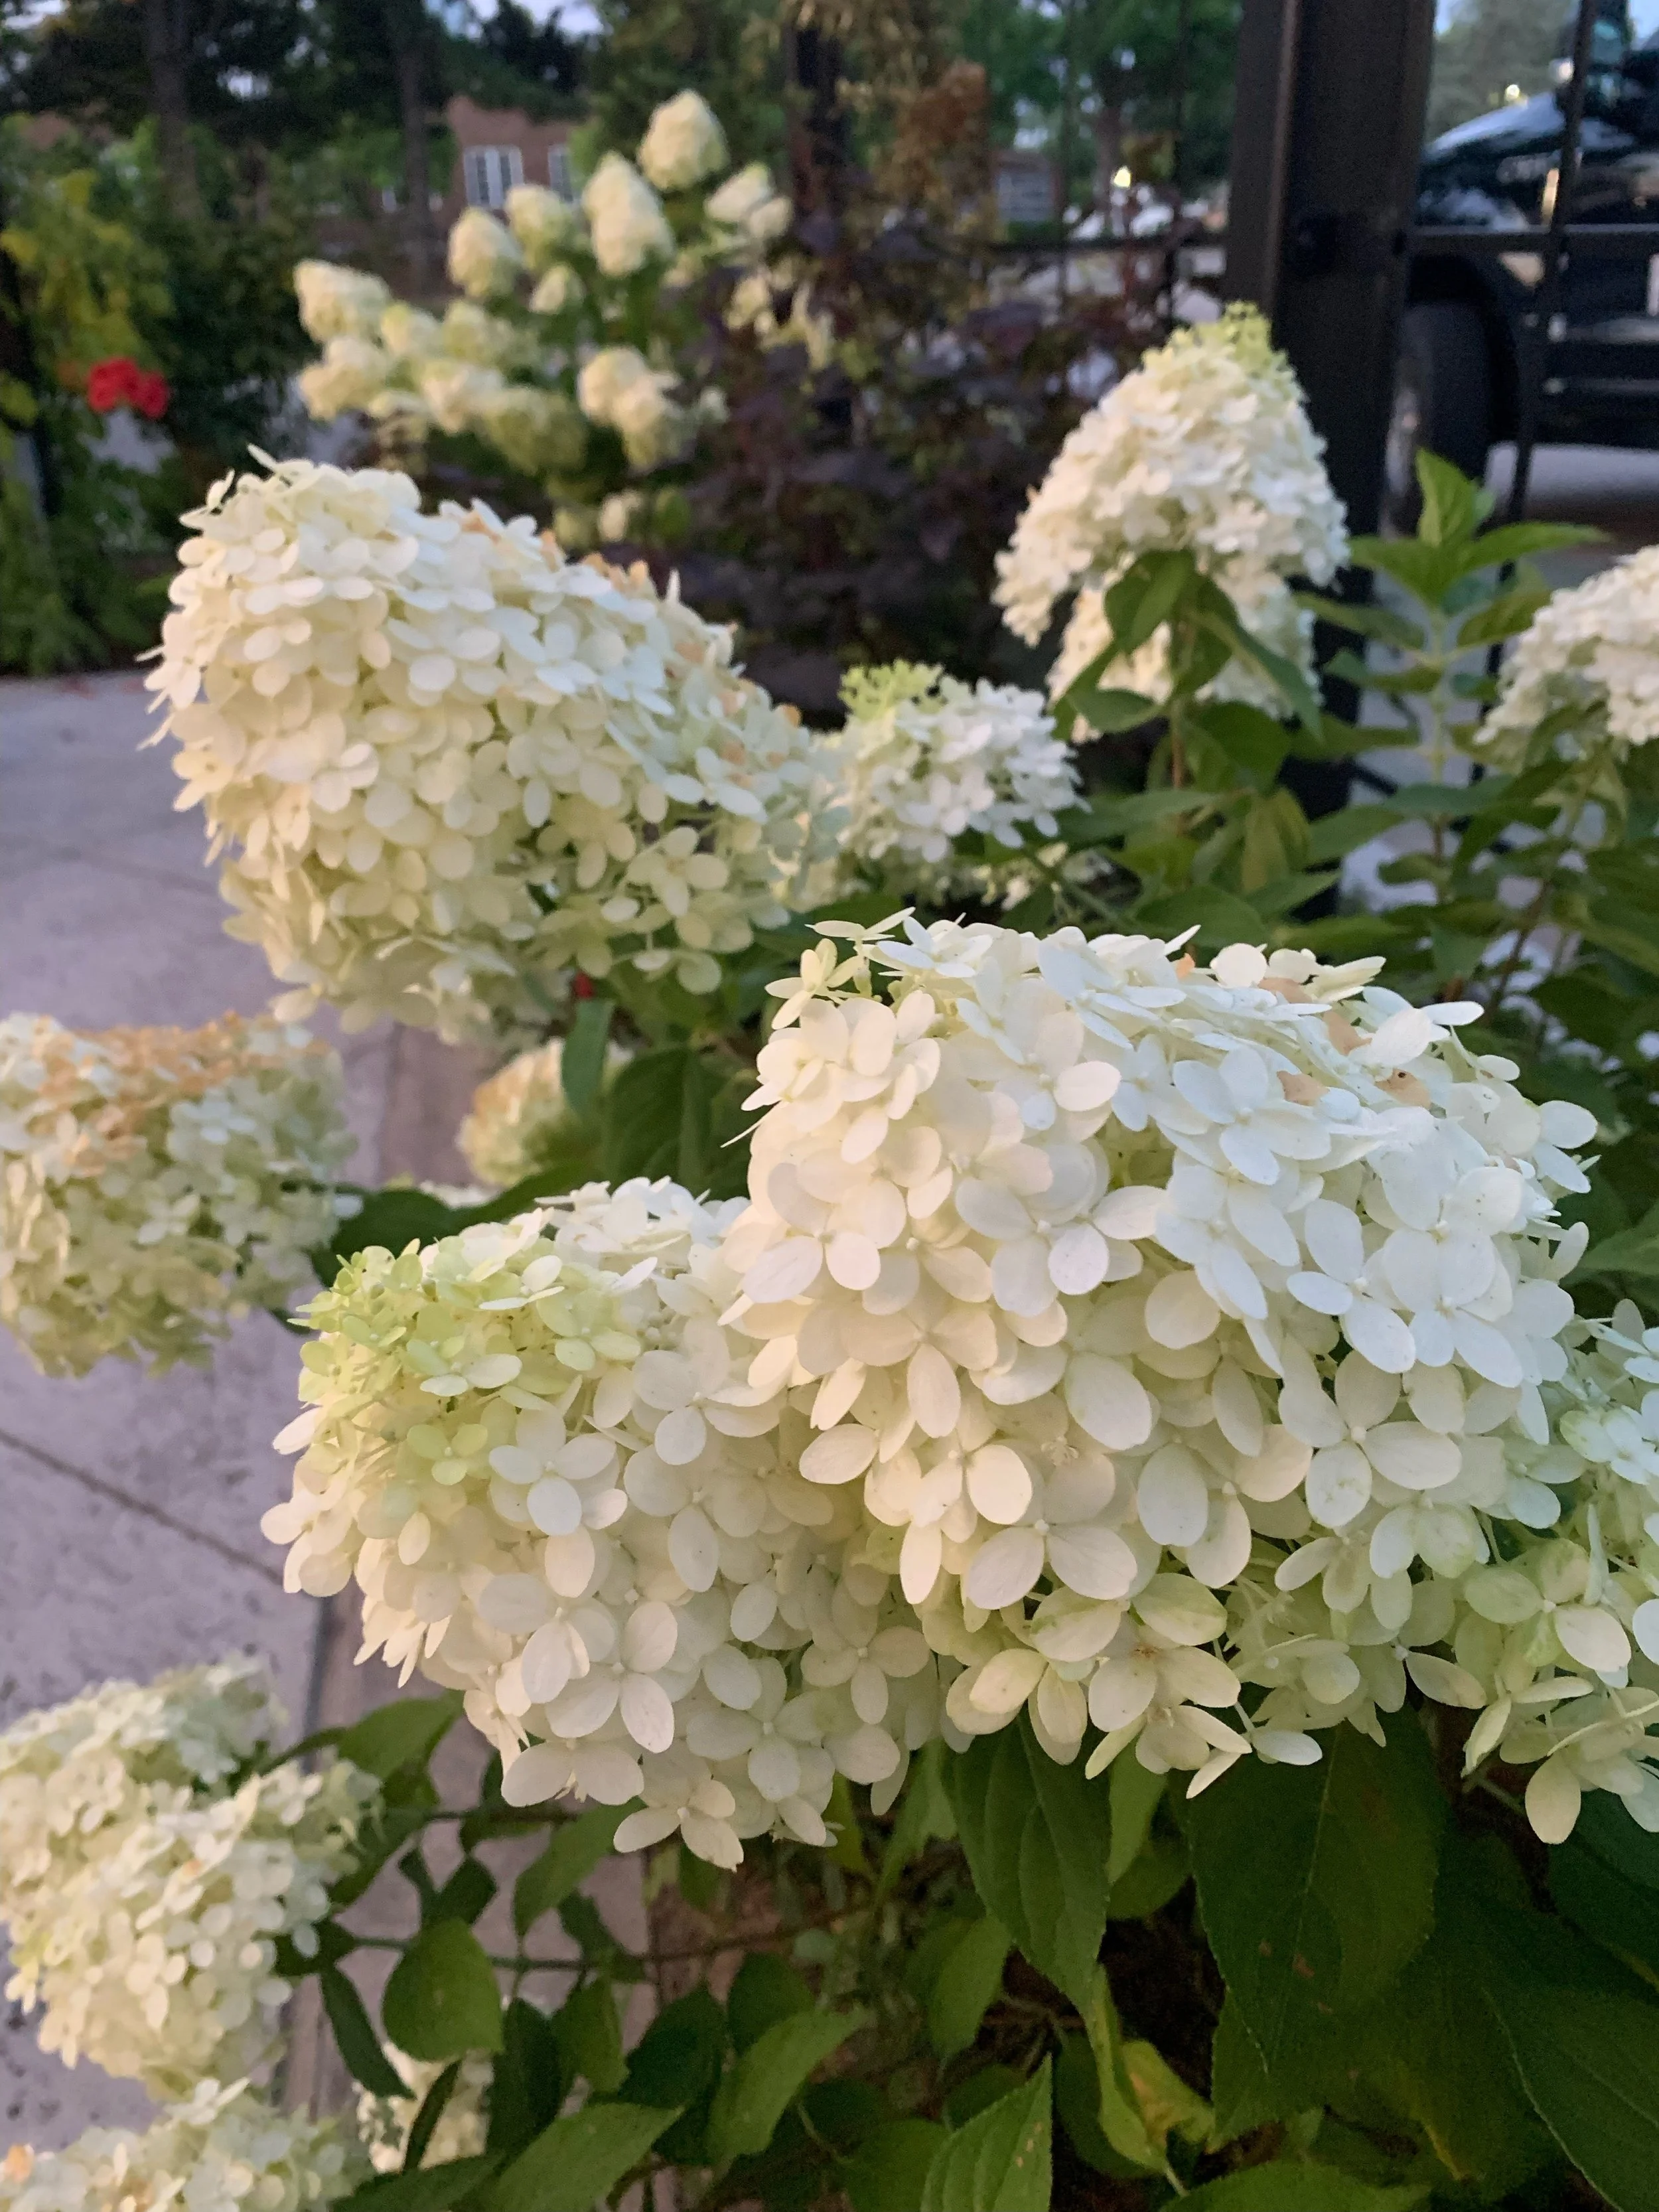
Limelight Hydrangeas brighten the late summer landscape with white blooms that fade to like green.
Four reasons why fall is the best time to plant:
1. Warm Soil Equals Root Growth
Soil temperatures remain warm well into the fall and early winter resulting in root development. Shrubs and trees put their energy into growing roots more in the fall than any other time of the year. Fall planted landscape materials have more time for the root system to become established before the onset of summer heat. Plants installed in the spring don’t have the root system needed for growth and spend the first summer just trying to survive.
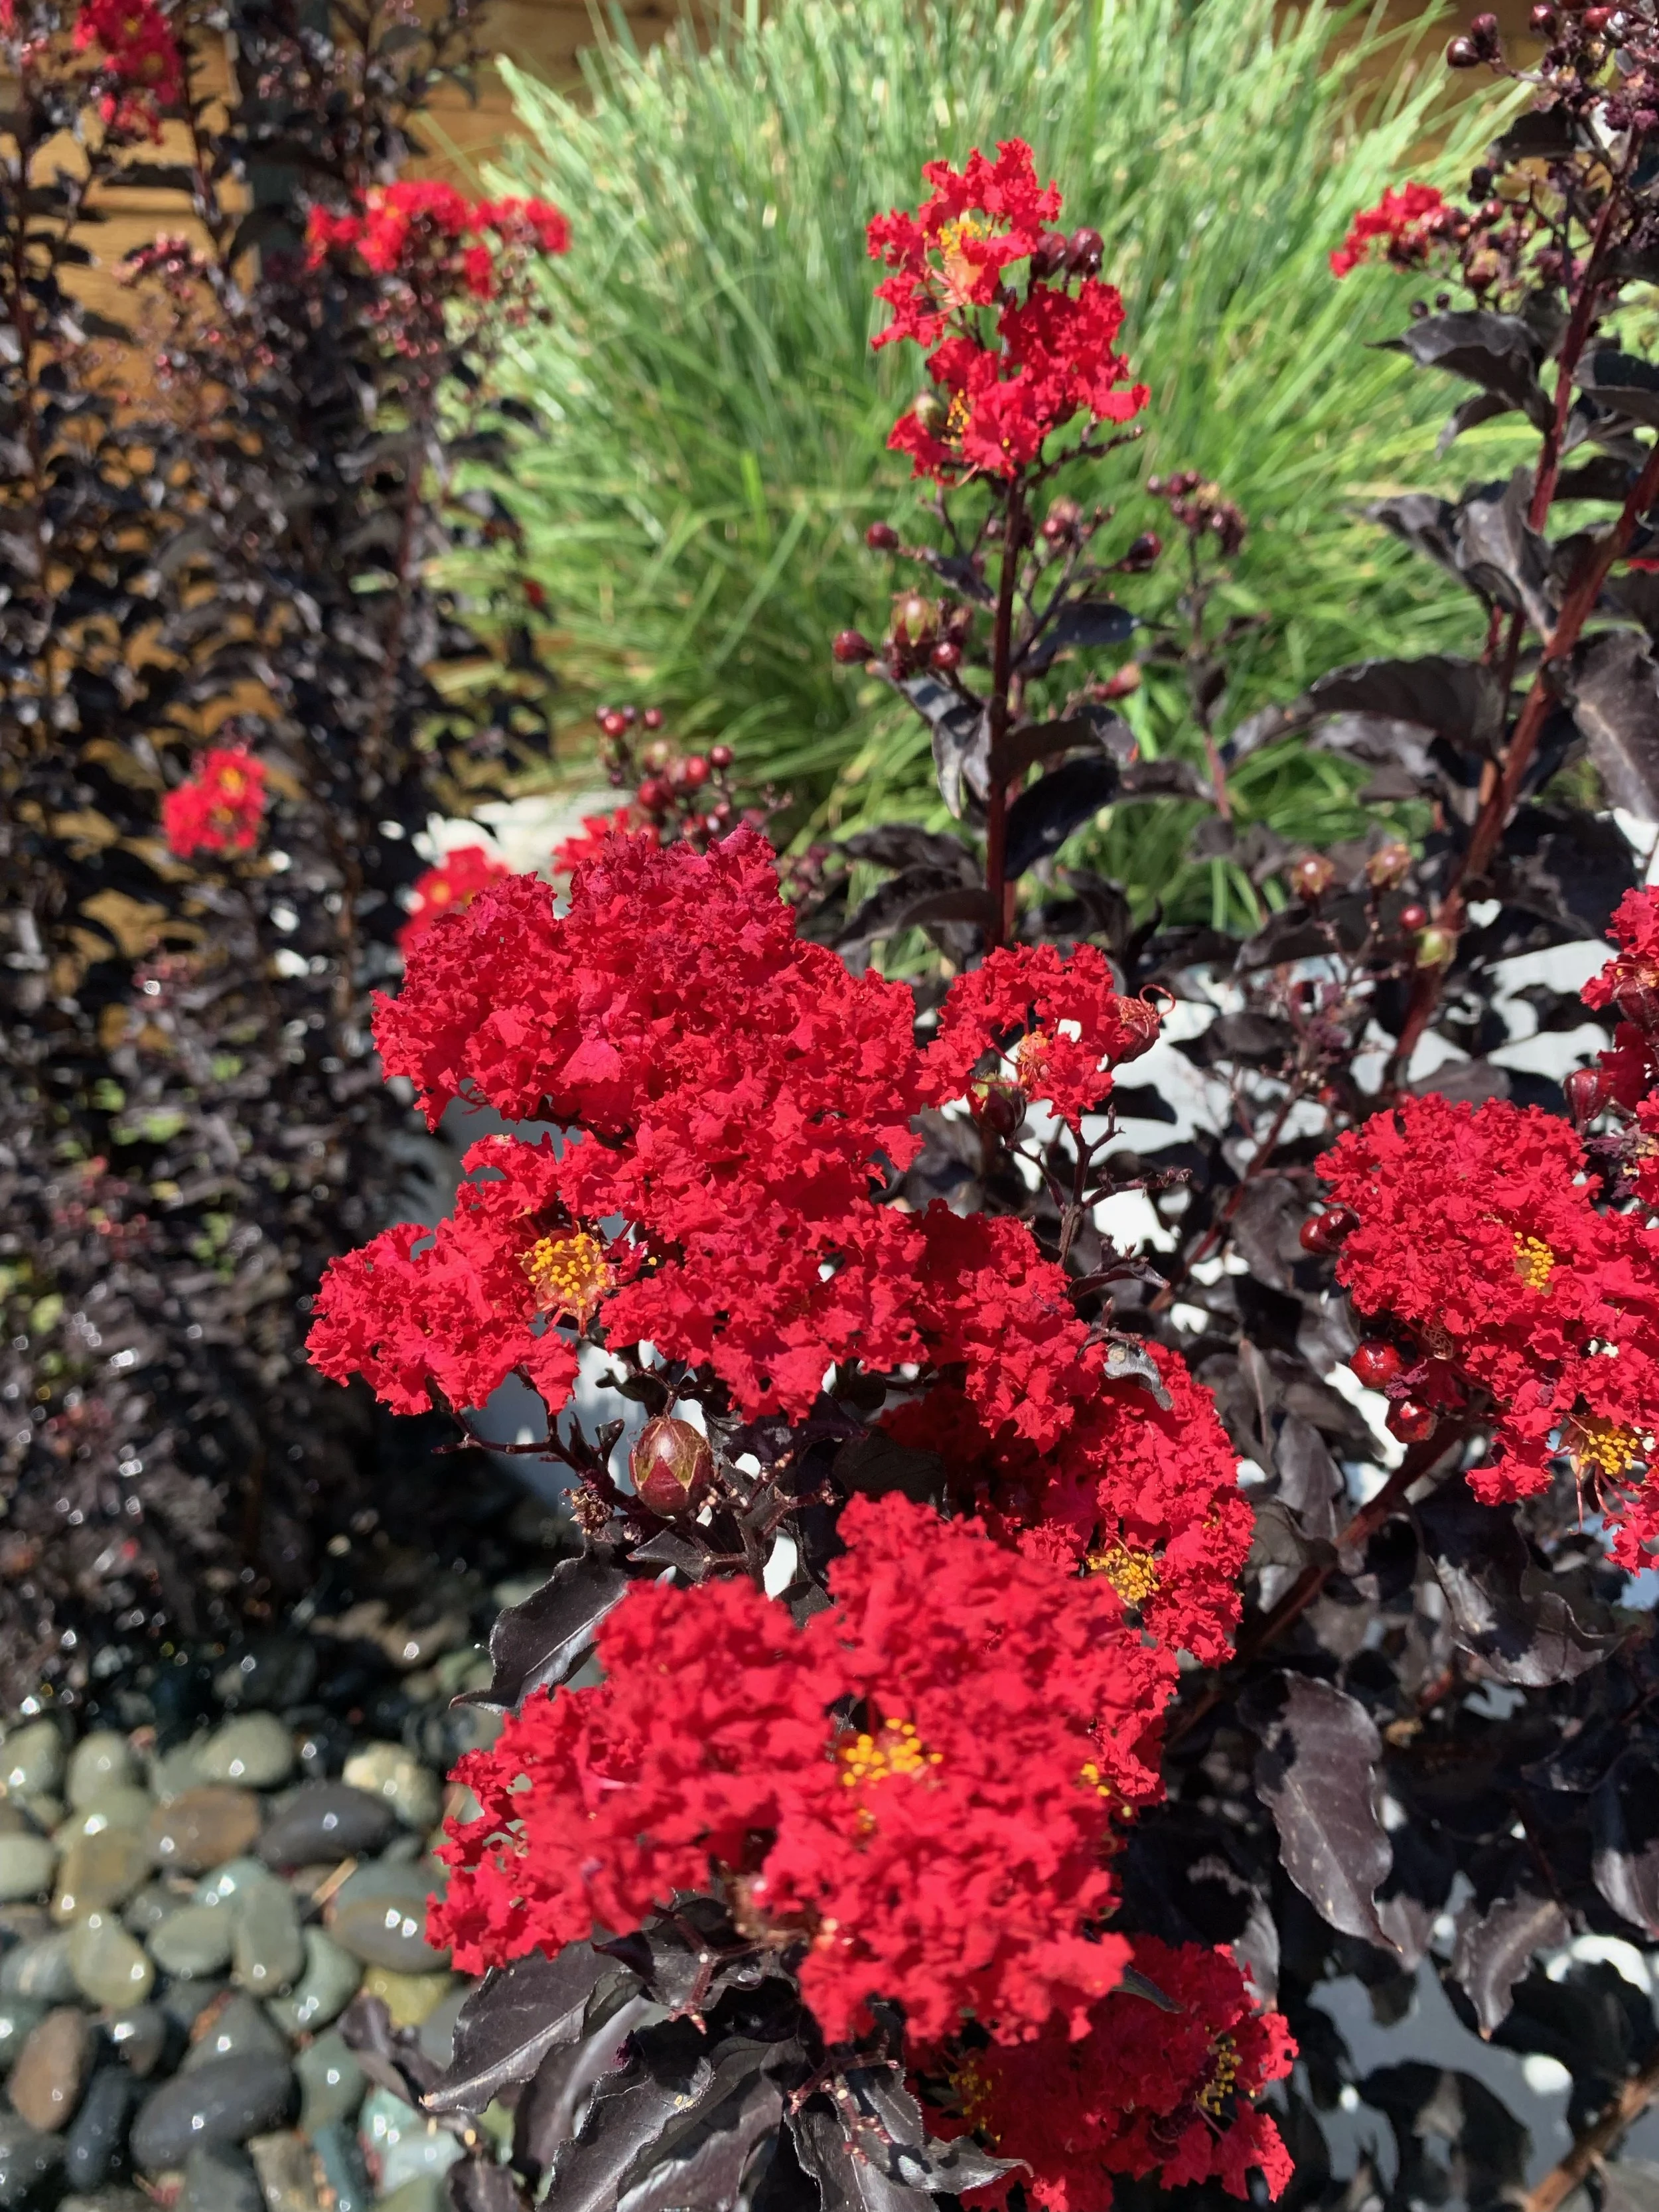
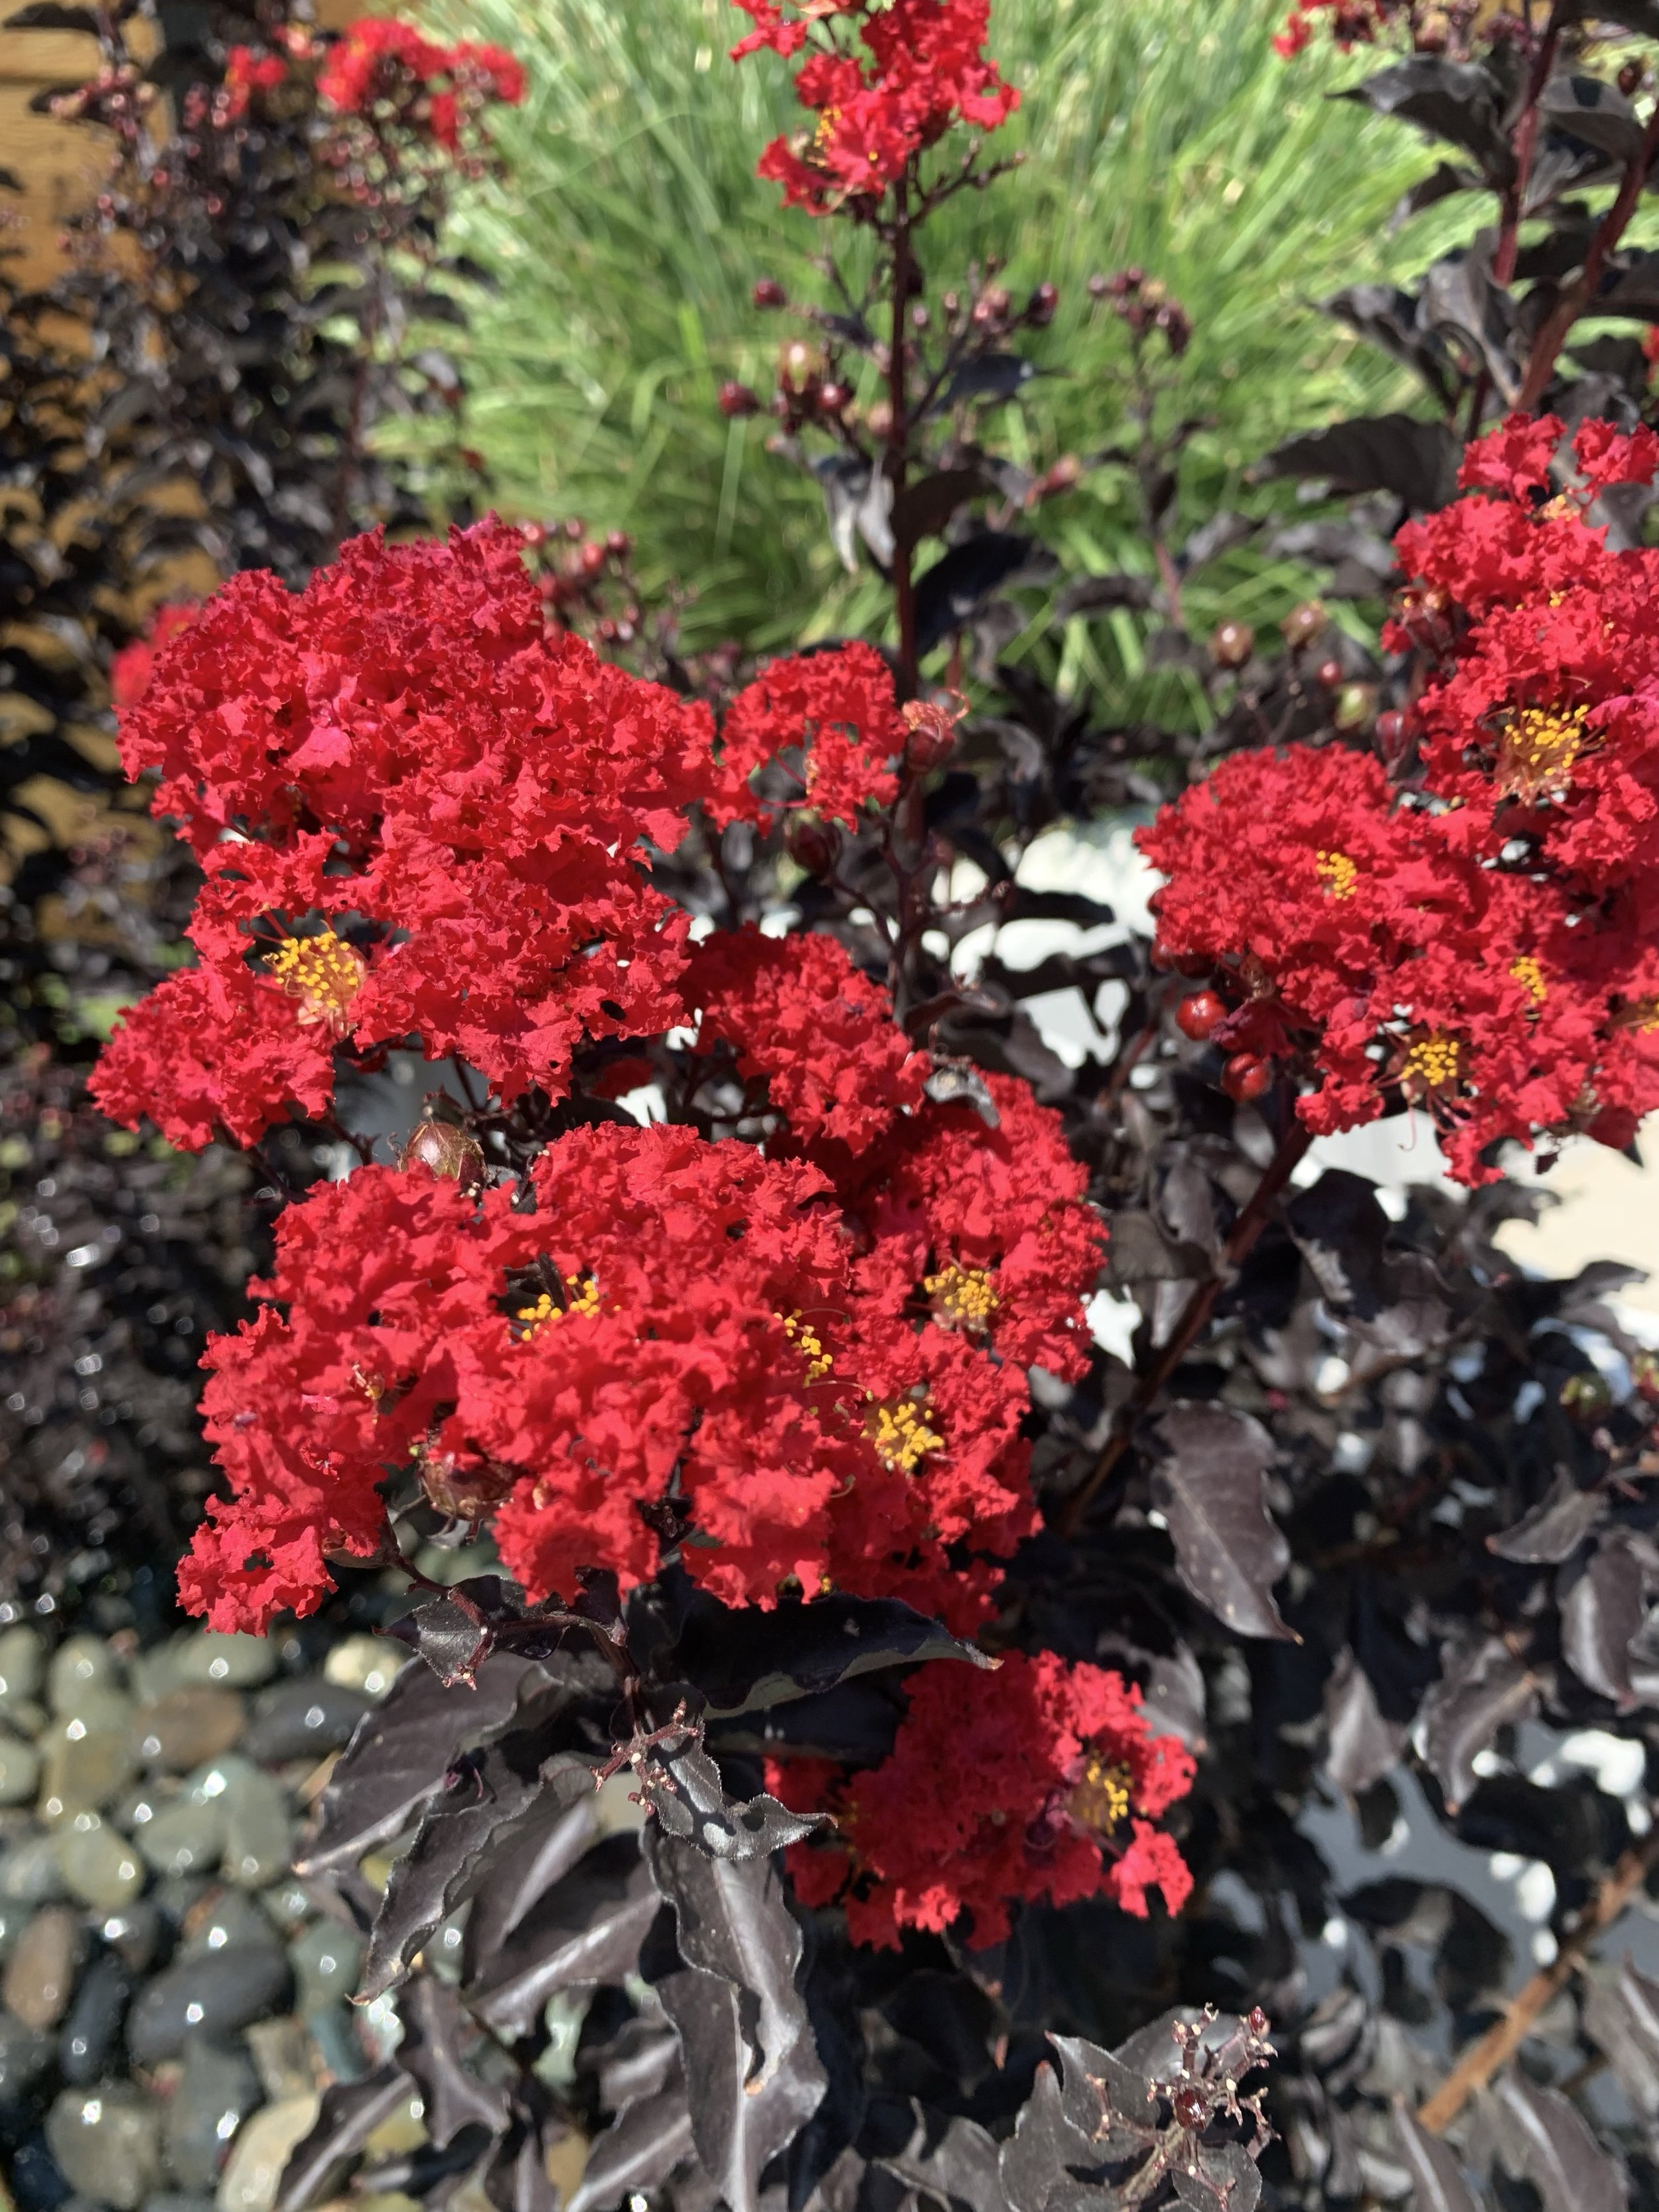
Ebony Fire Red Crape Myrtle with intense, black foliage, is a fun twist on a traditional plant. Ebony and Ivory is a white blooming black leaf Crape Myrtle.
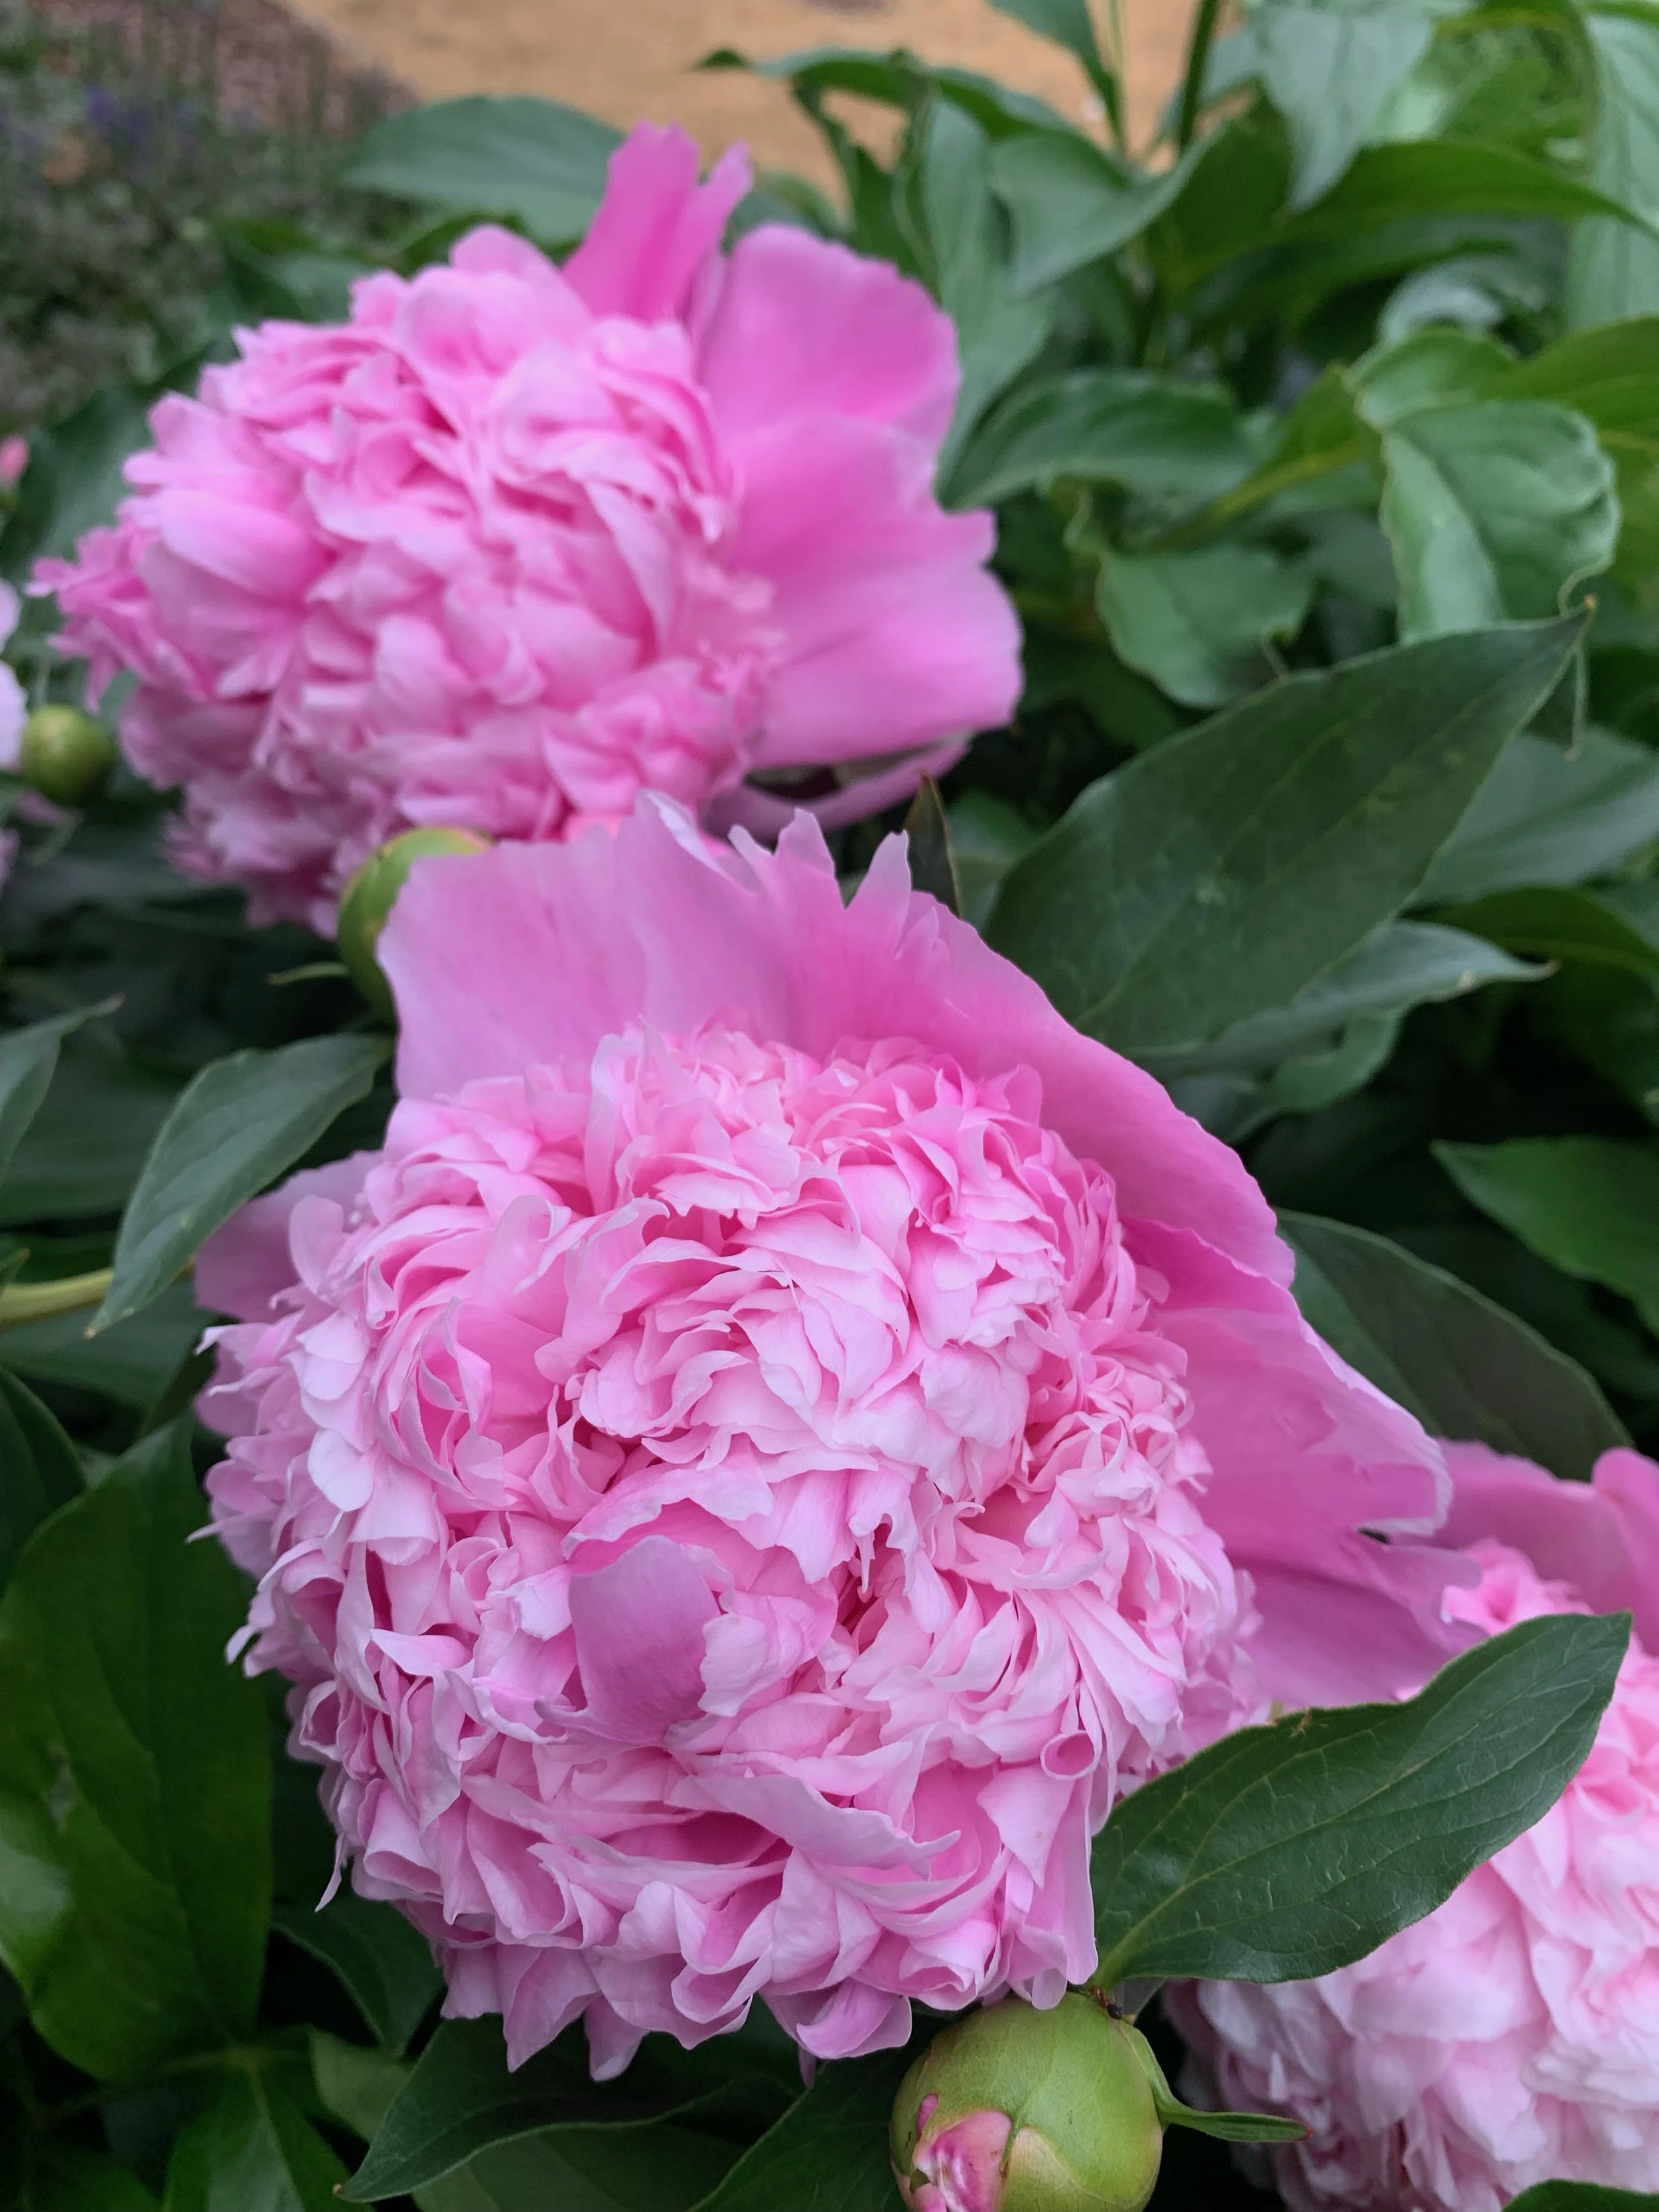
Peonies, a perennial, puts on a dynamic burst of color in mid spring with large blooms that are great for cut flowers.
3. Fall Weather Brings More Moisture
Spring and summer planted shrubs and trees require supplemental, deep soaking during the summer. During the summer newly planted trees and shrubs need at least 2” of moisture per week. But, during the fall and winter, when temperatures are cooler, plant materials require a lot less moisture, only ½ to 1” of moisture per week, which is much more likely to occur naturally. During the summer, chances are you will be spending time hand watering your new plants just trying to keep them alive.

Plant a Japanese Maple this fall and have more red in your landscape next spring when leaves emerge.
4. Head Start on Next Year
This is the biggest reason you should plant in the fall…. Fall planted materials can gain an entire year of development over spring and summer planted shrubs and trees. Fall plants will start developing roots soon after planting. Next spring and summer they will have a root system that will produce top growth. Spring and summer planted materials produce little growth until they develop roots in the fall. It has been my experience that a 3-gallon shrub planted in the fall will be the same size as a 5-gallon shrub planted in the spring after one season. Save money. Plant in the fall.

Crape Myrtles planted in the fall will bloom more their first season than ones planted in the spring or summer.

Limelight Hydrangea adds large white blooms to the late summer landscape.
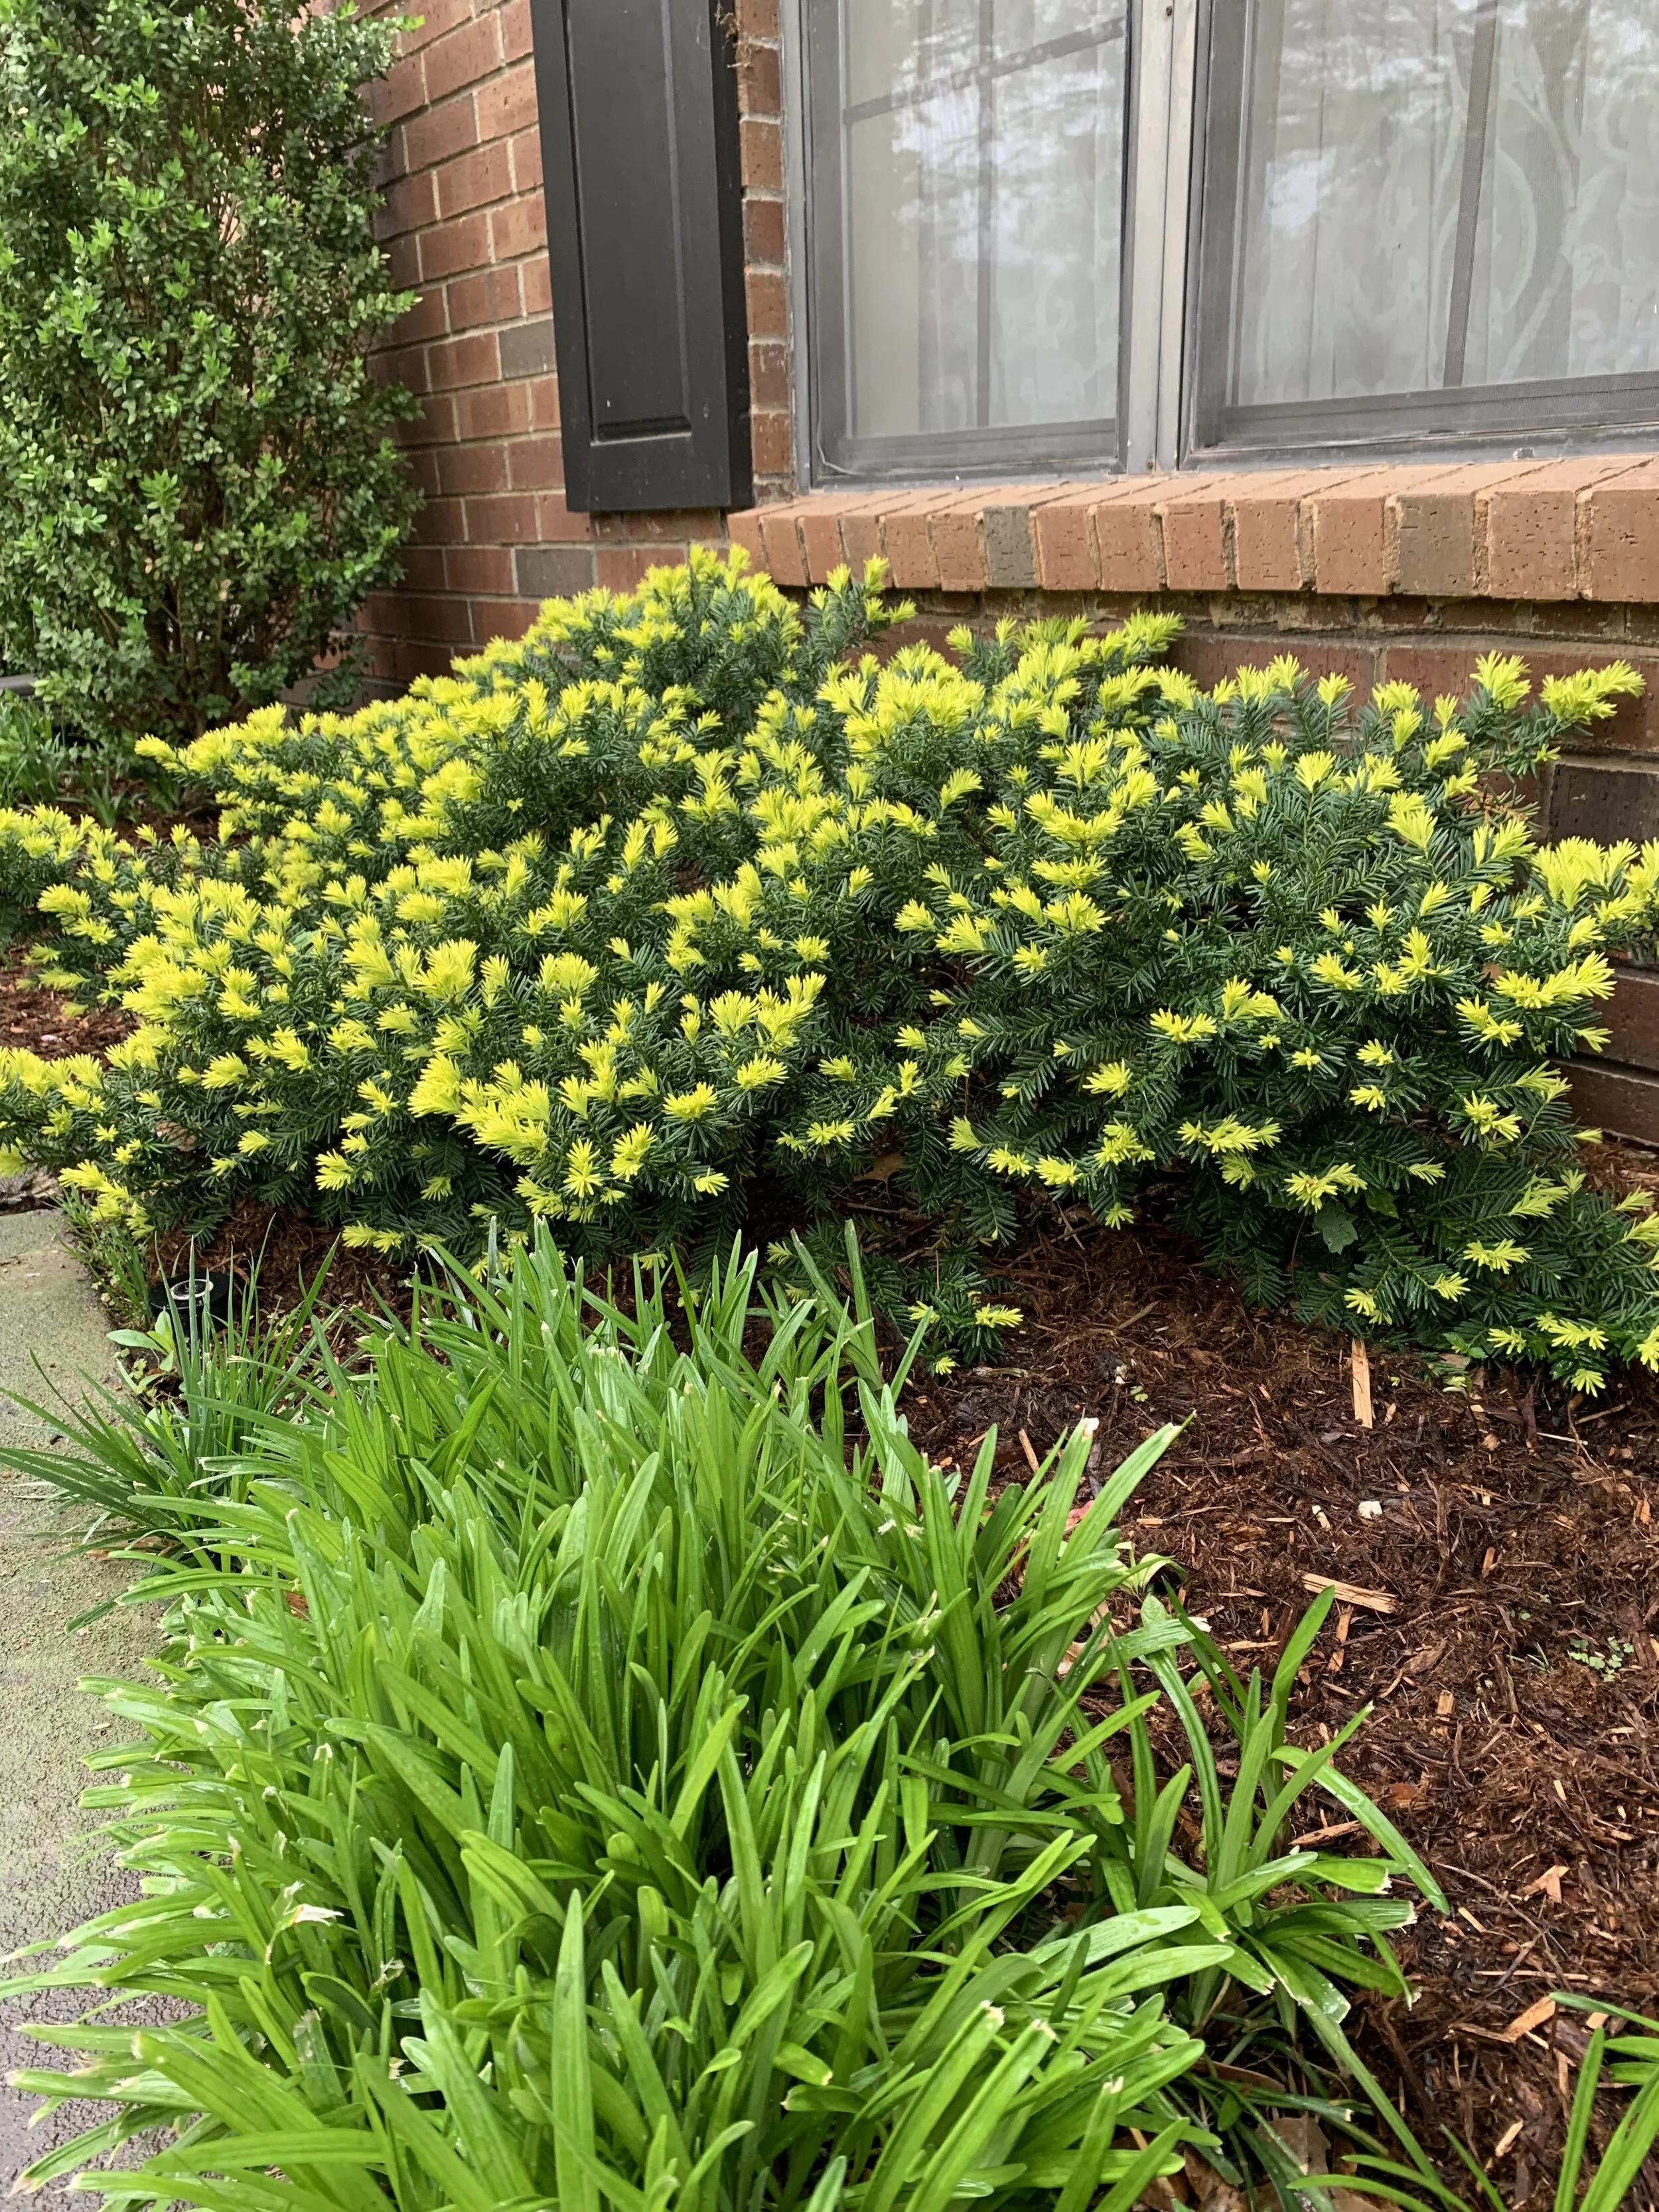
A great evergreen shrub for shady areas is the Japanese Yew.

Goldmound Spirea is very similar to Limemound only with yellow-gold foliage.
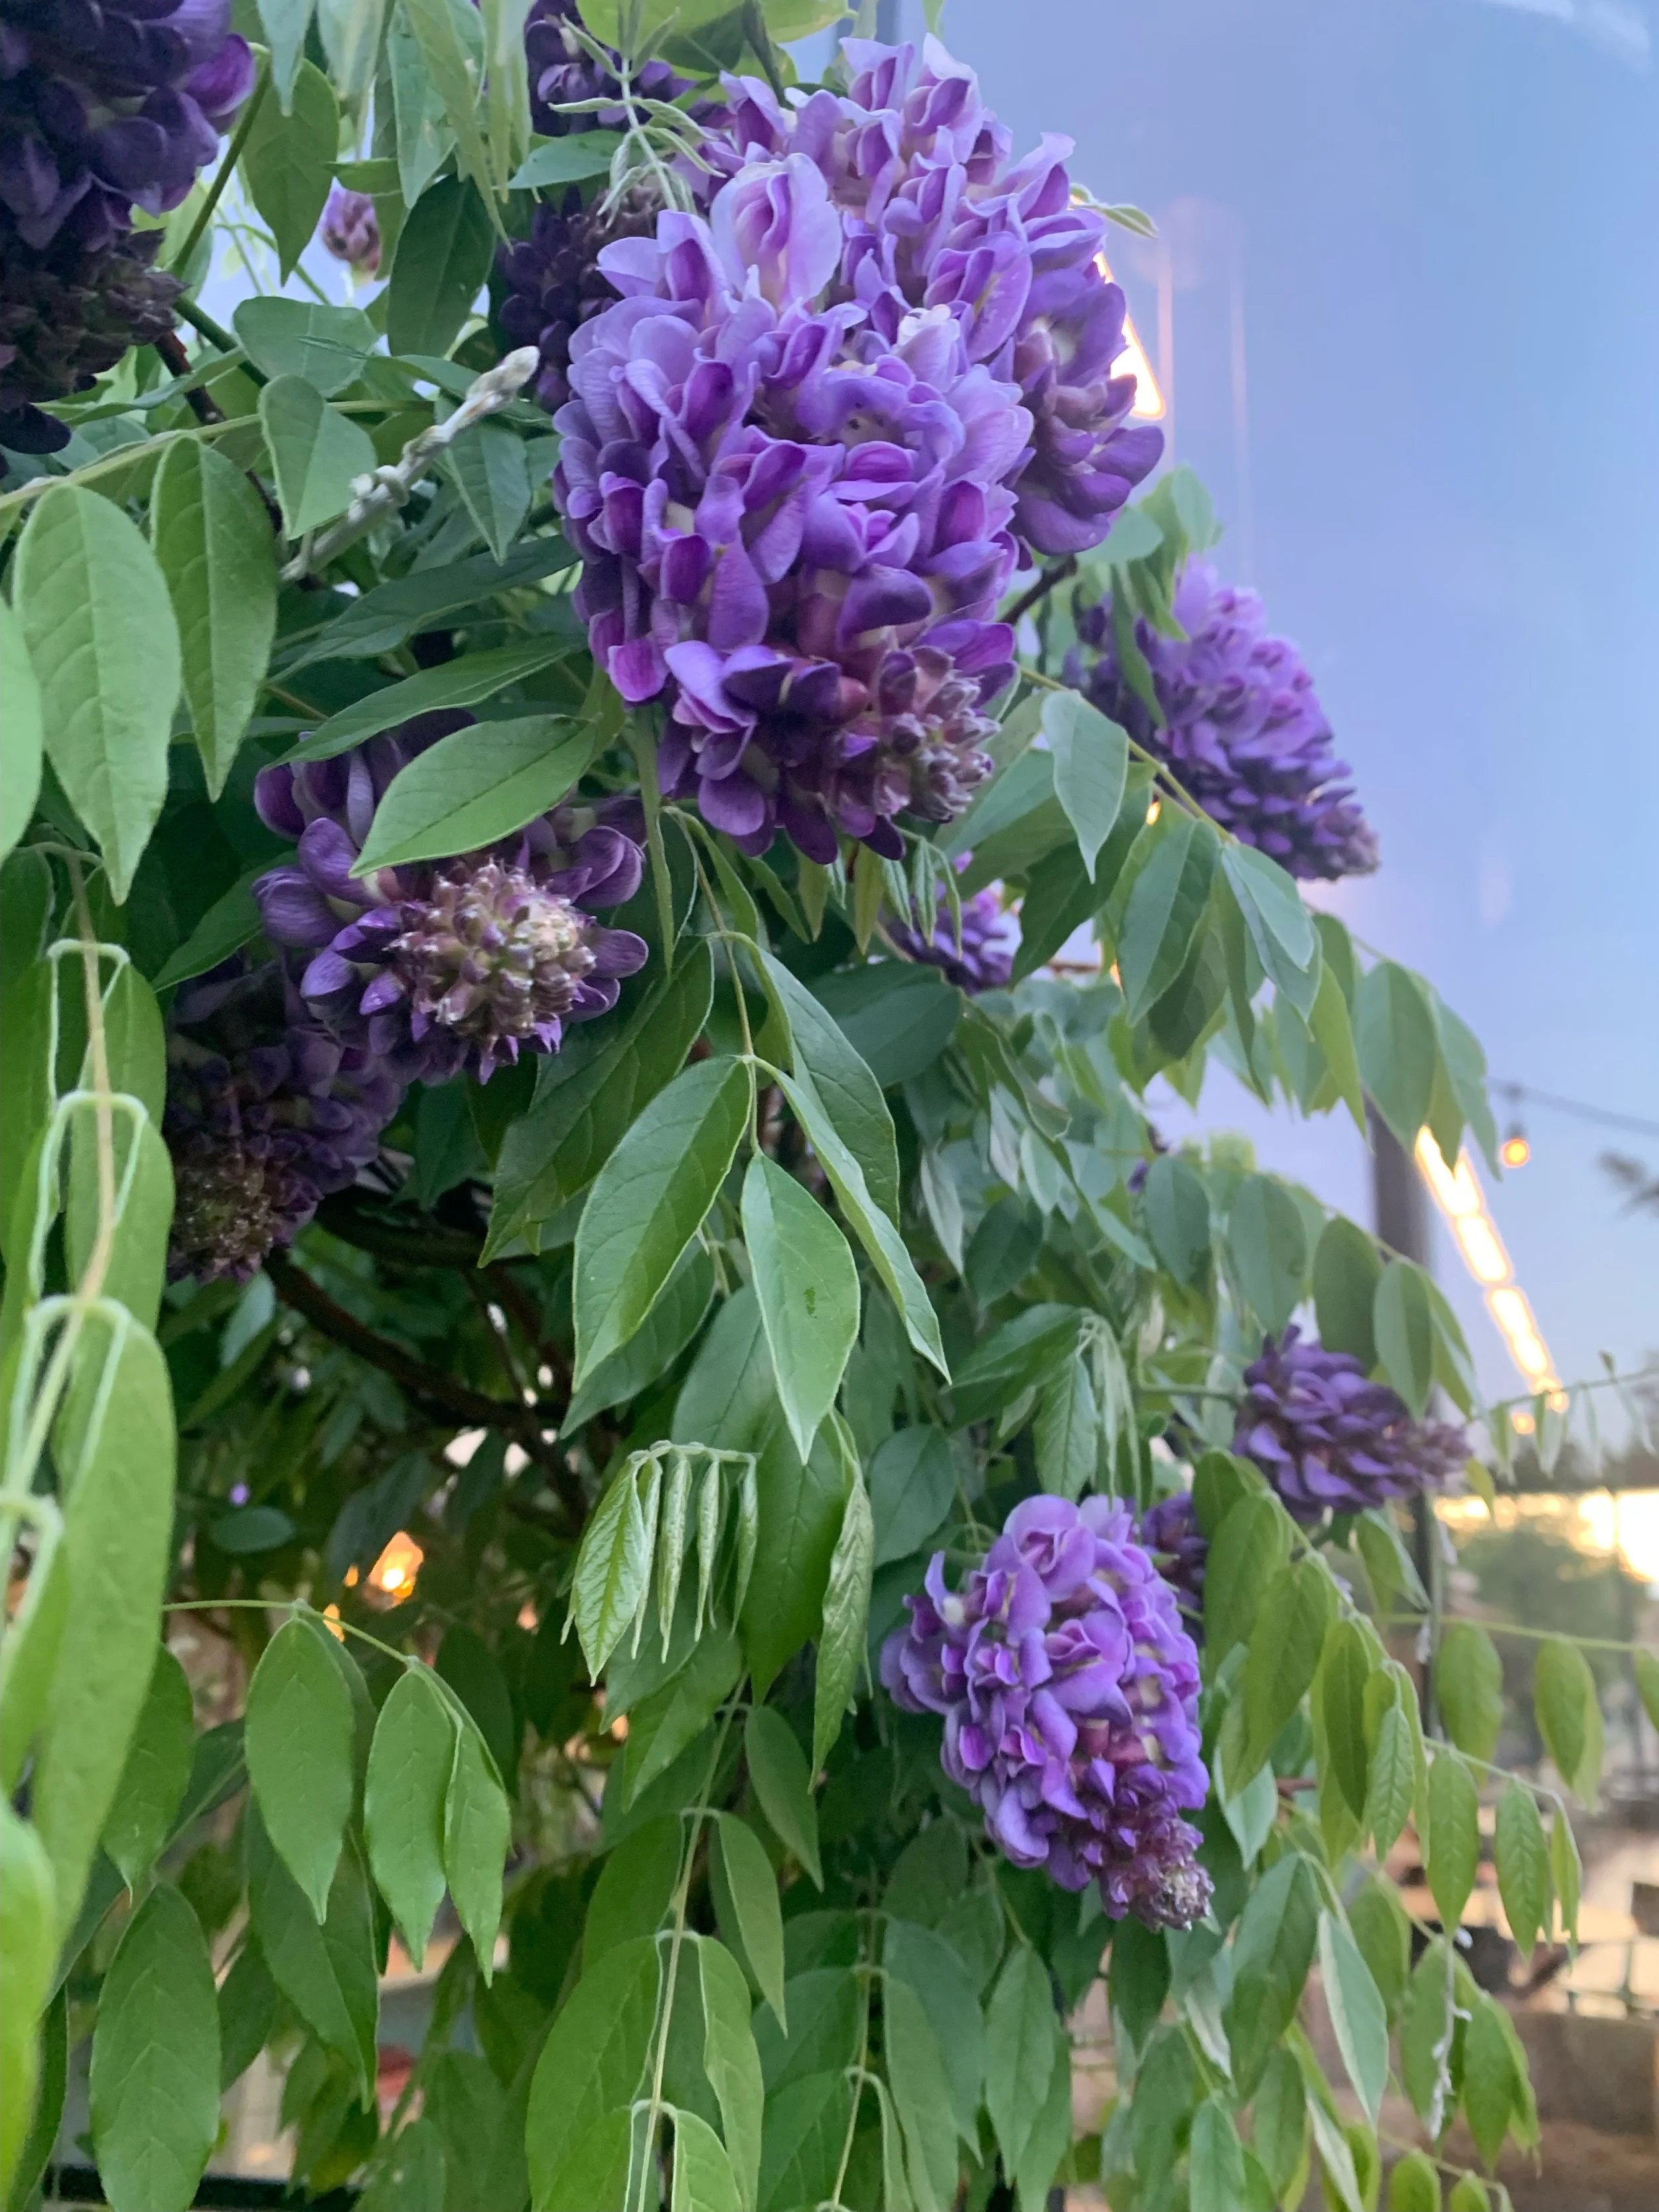
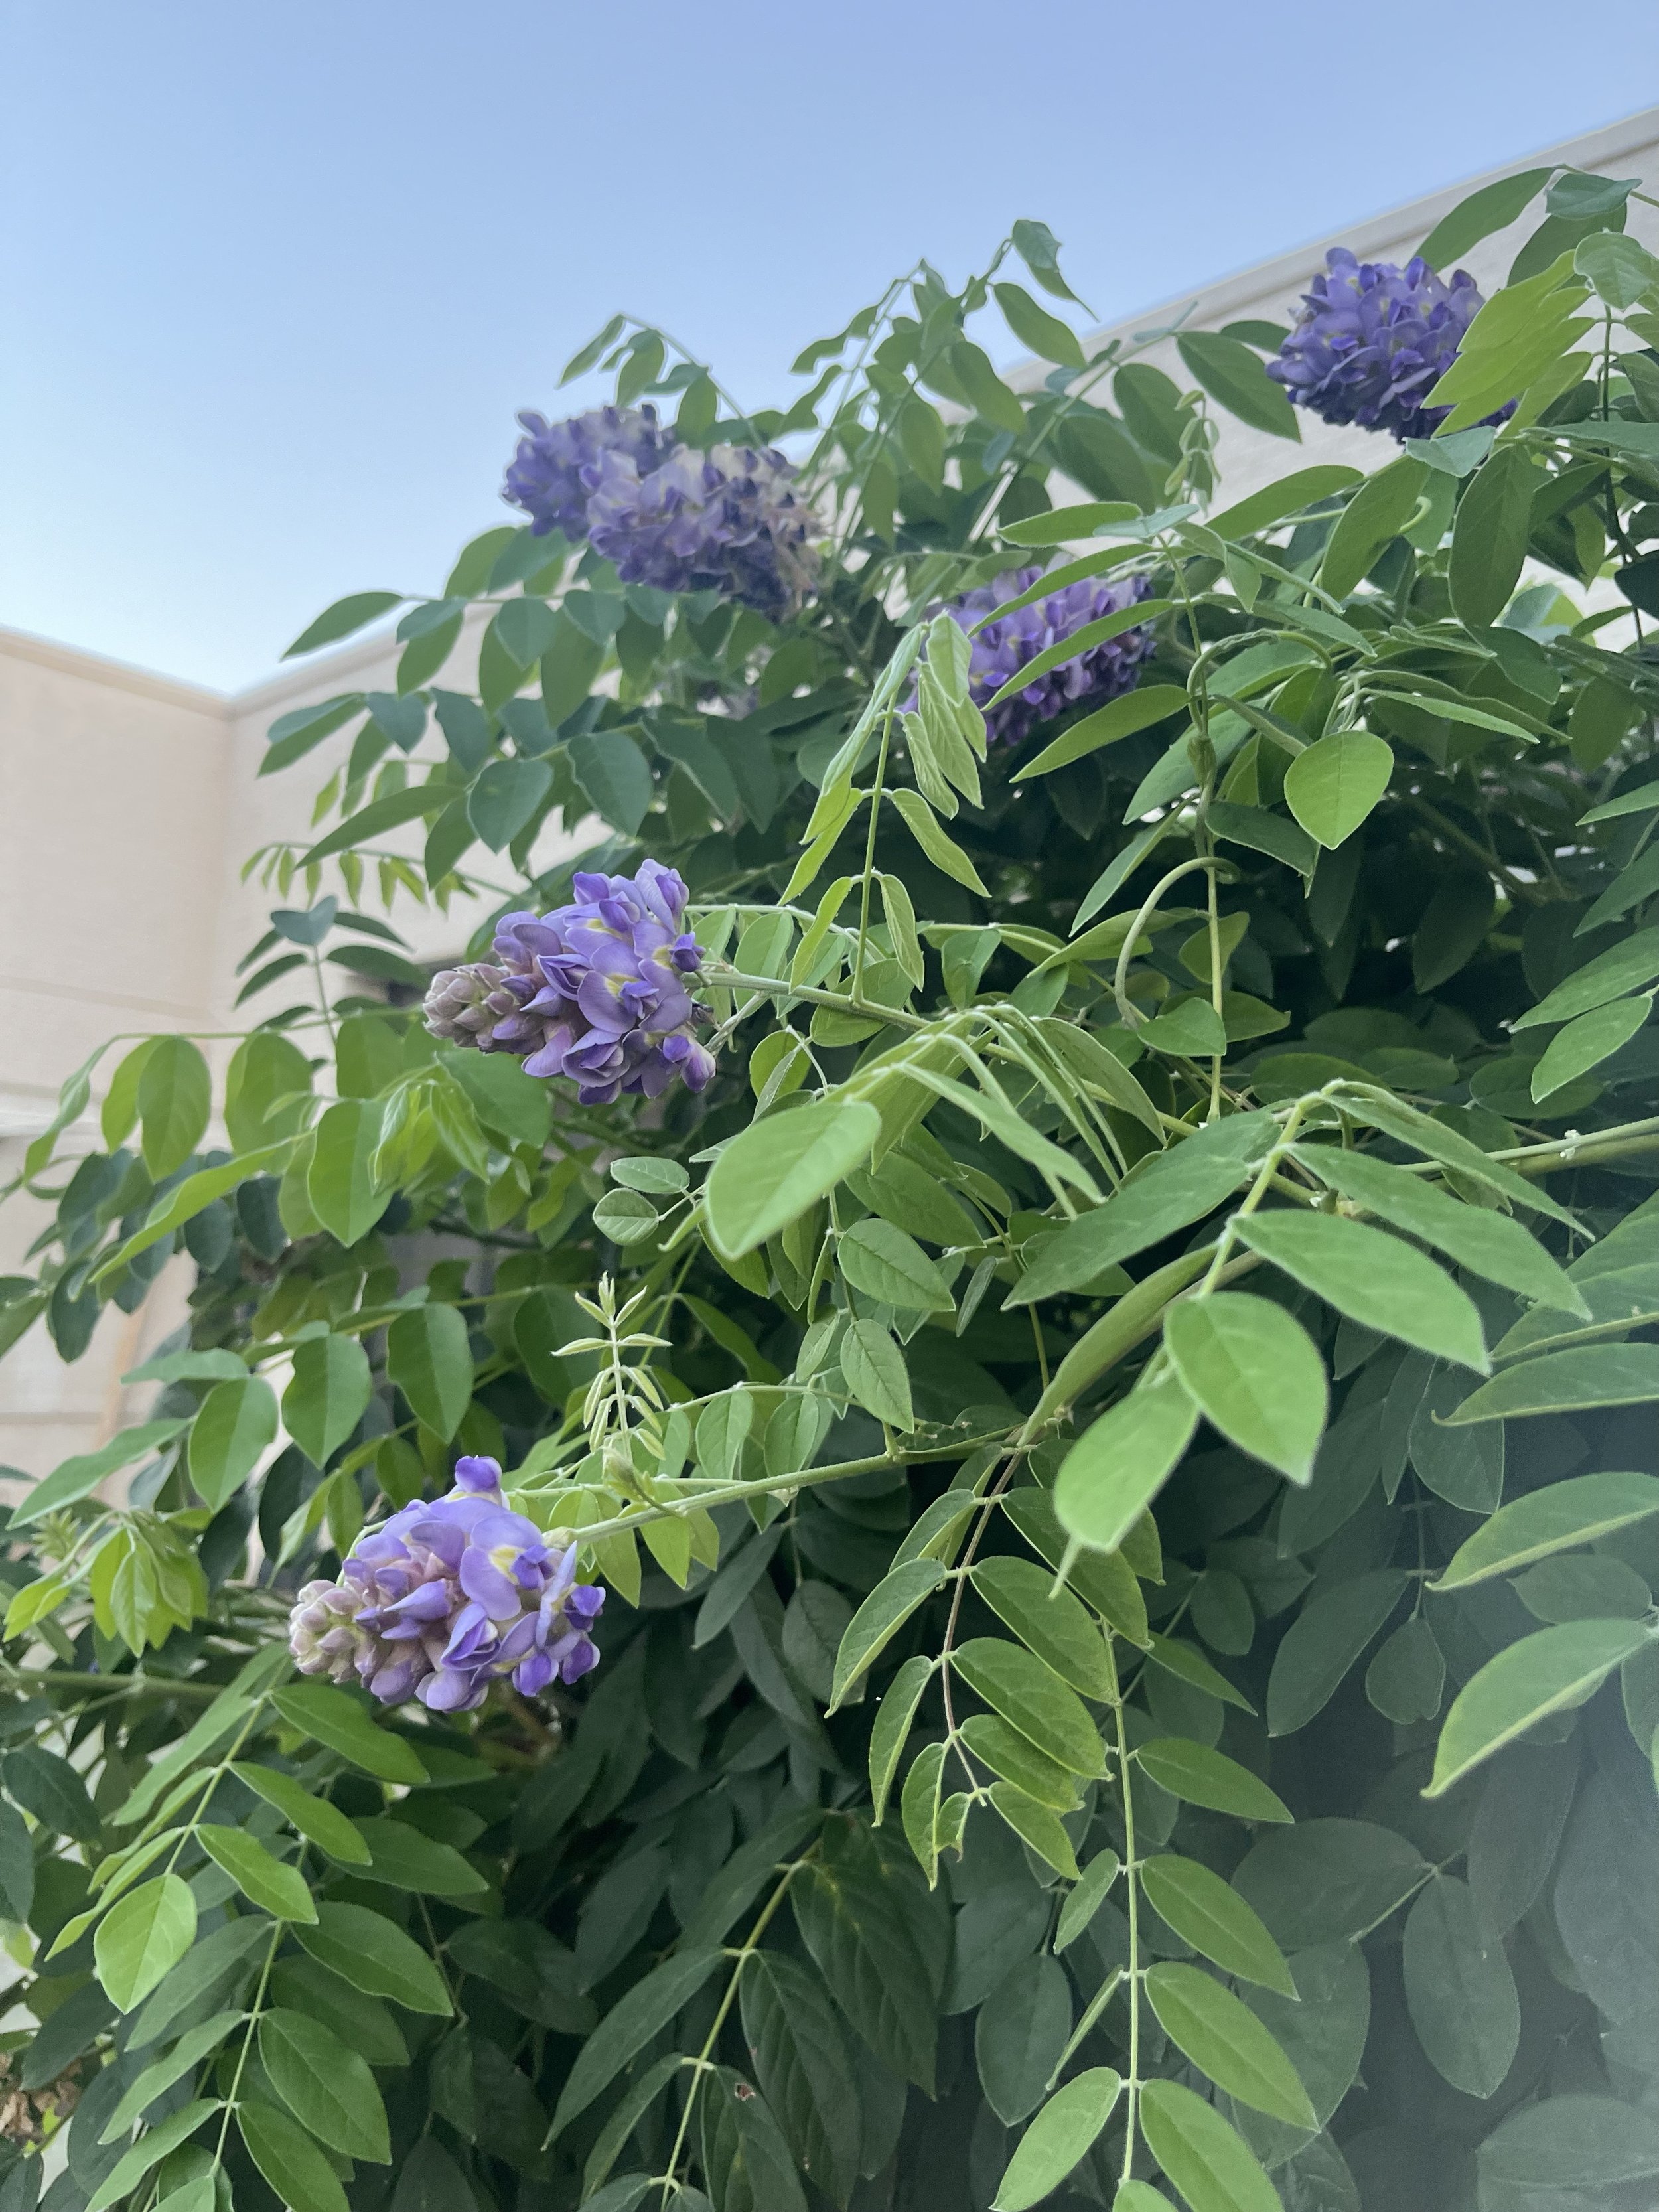
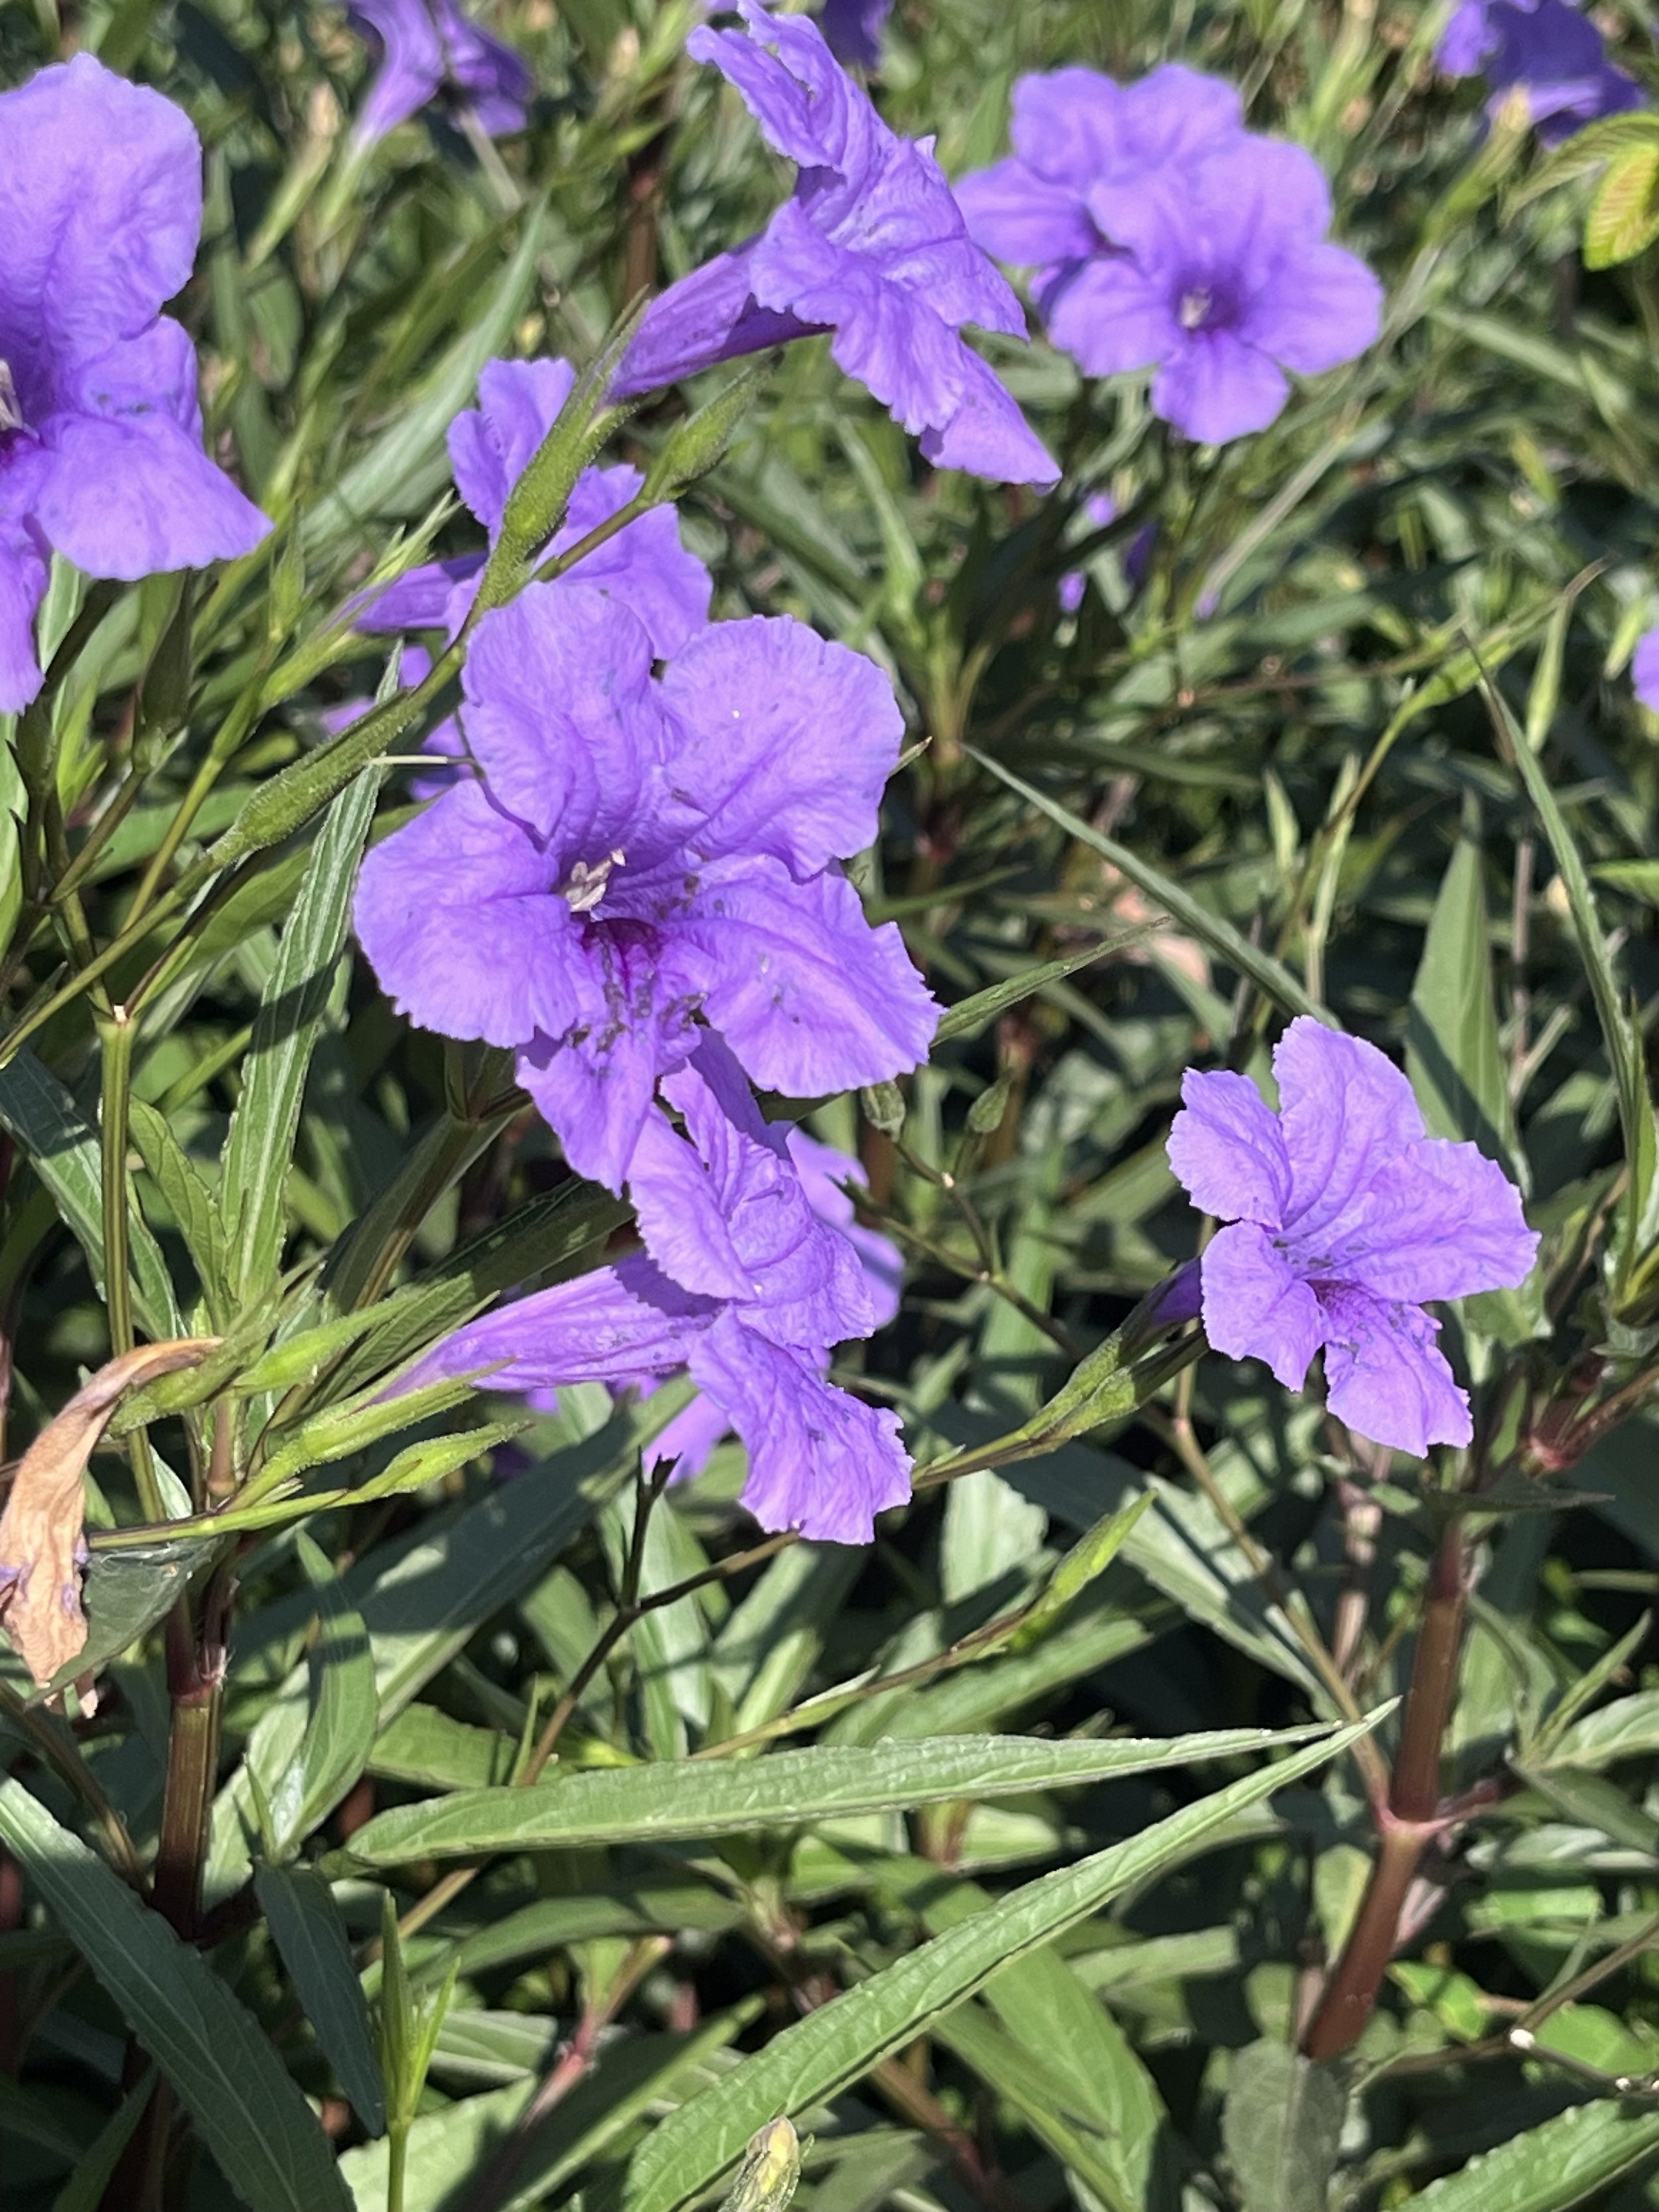
Wisteria produces showy clusters of fragrant purple flowers. Great for training on an arbor, trellis or fence.
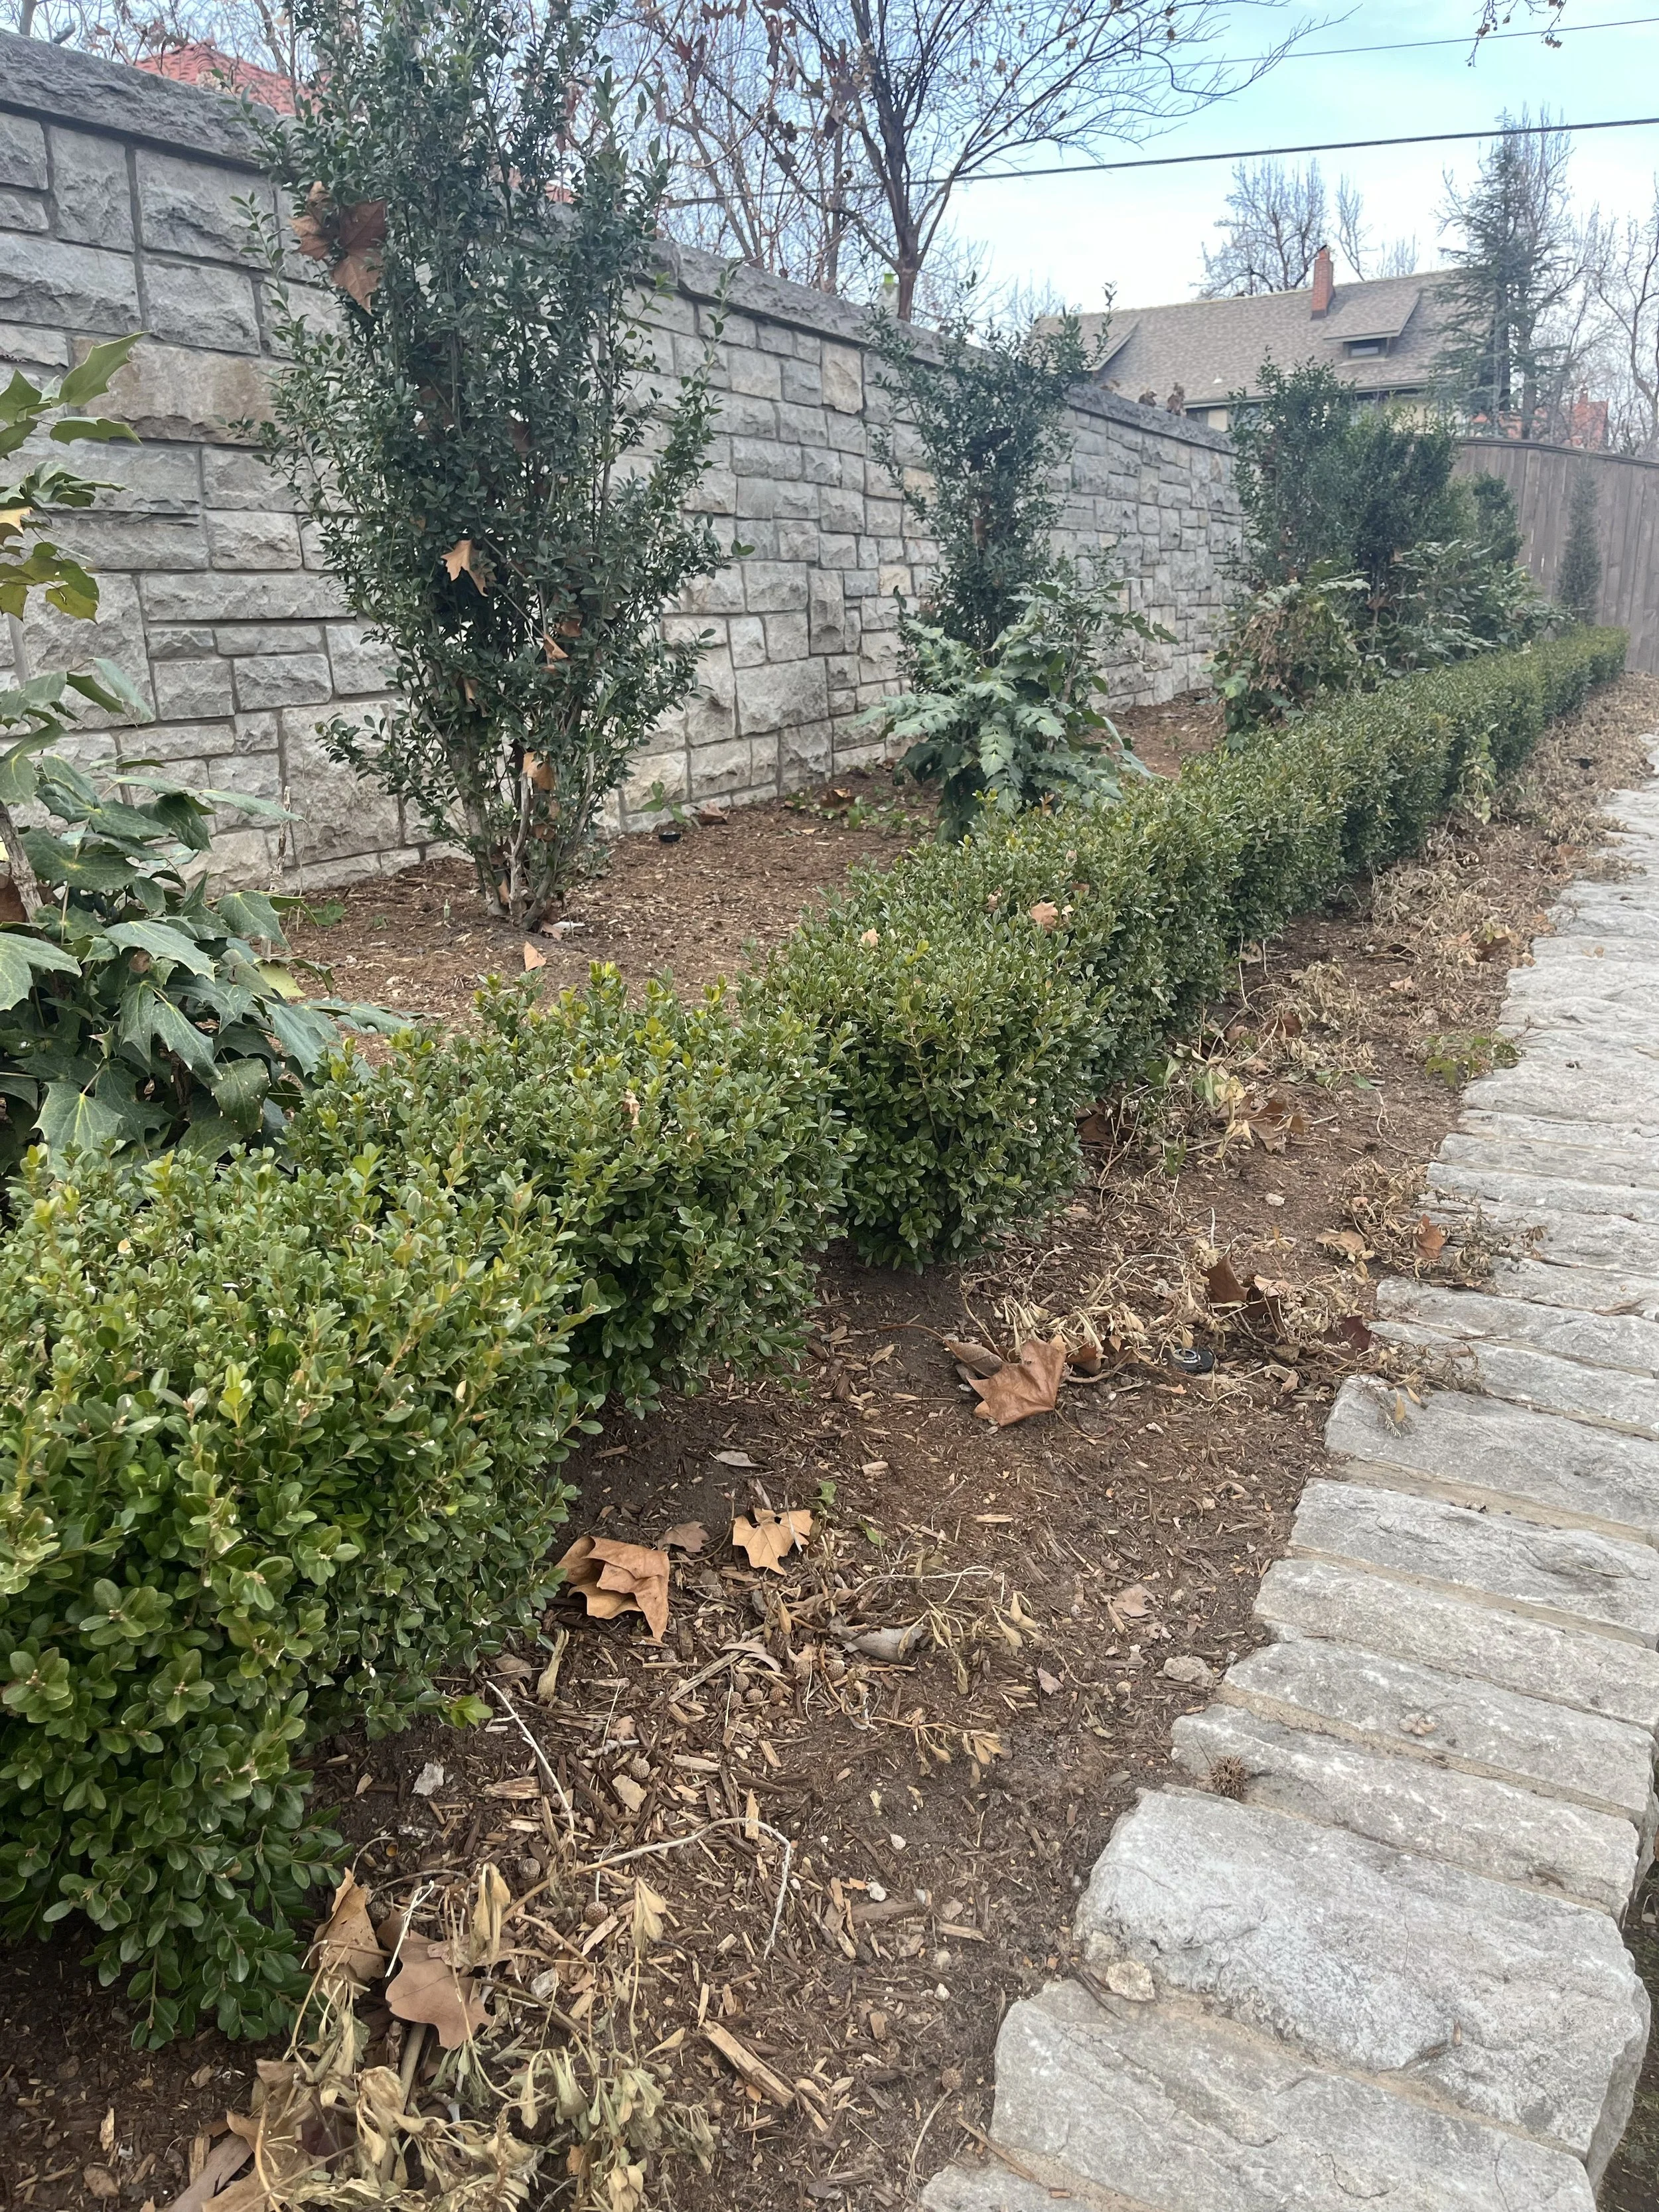
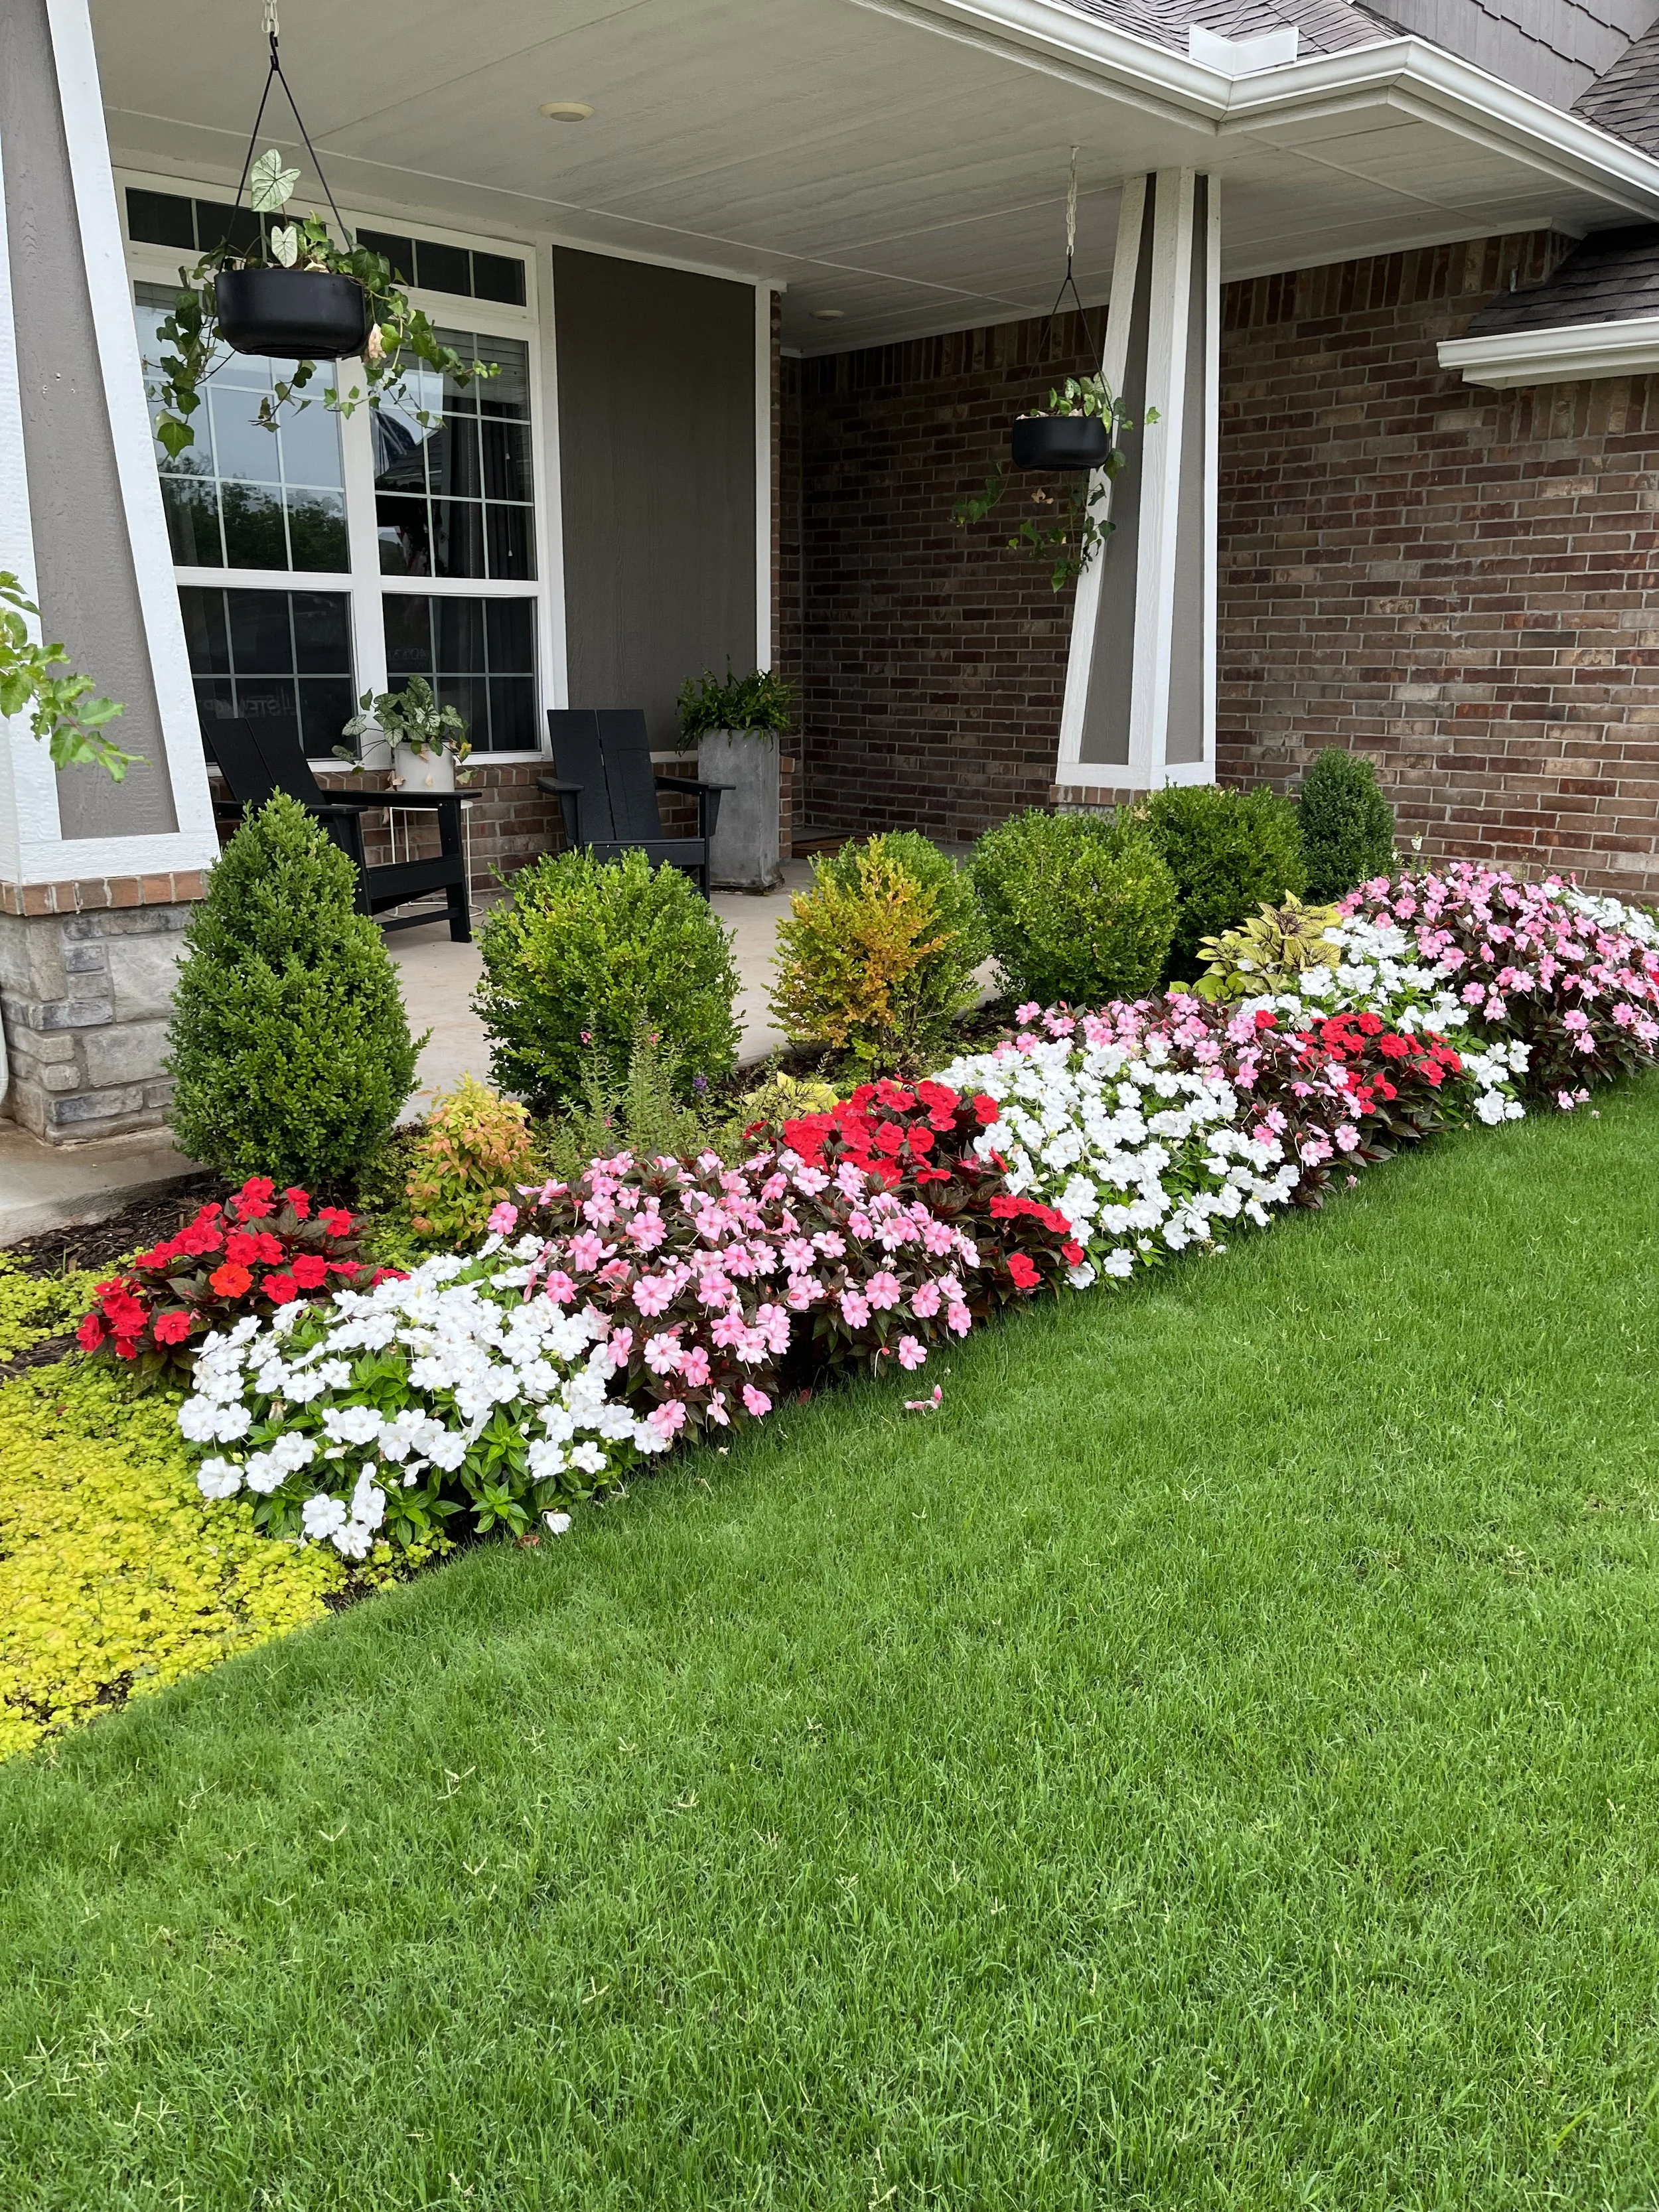
Thinking of adding a row of shrubs to your landscape? Save money by using a smaller size in the fall. Often they will catch up in size the next spring.
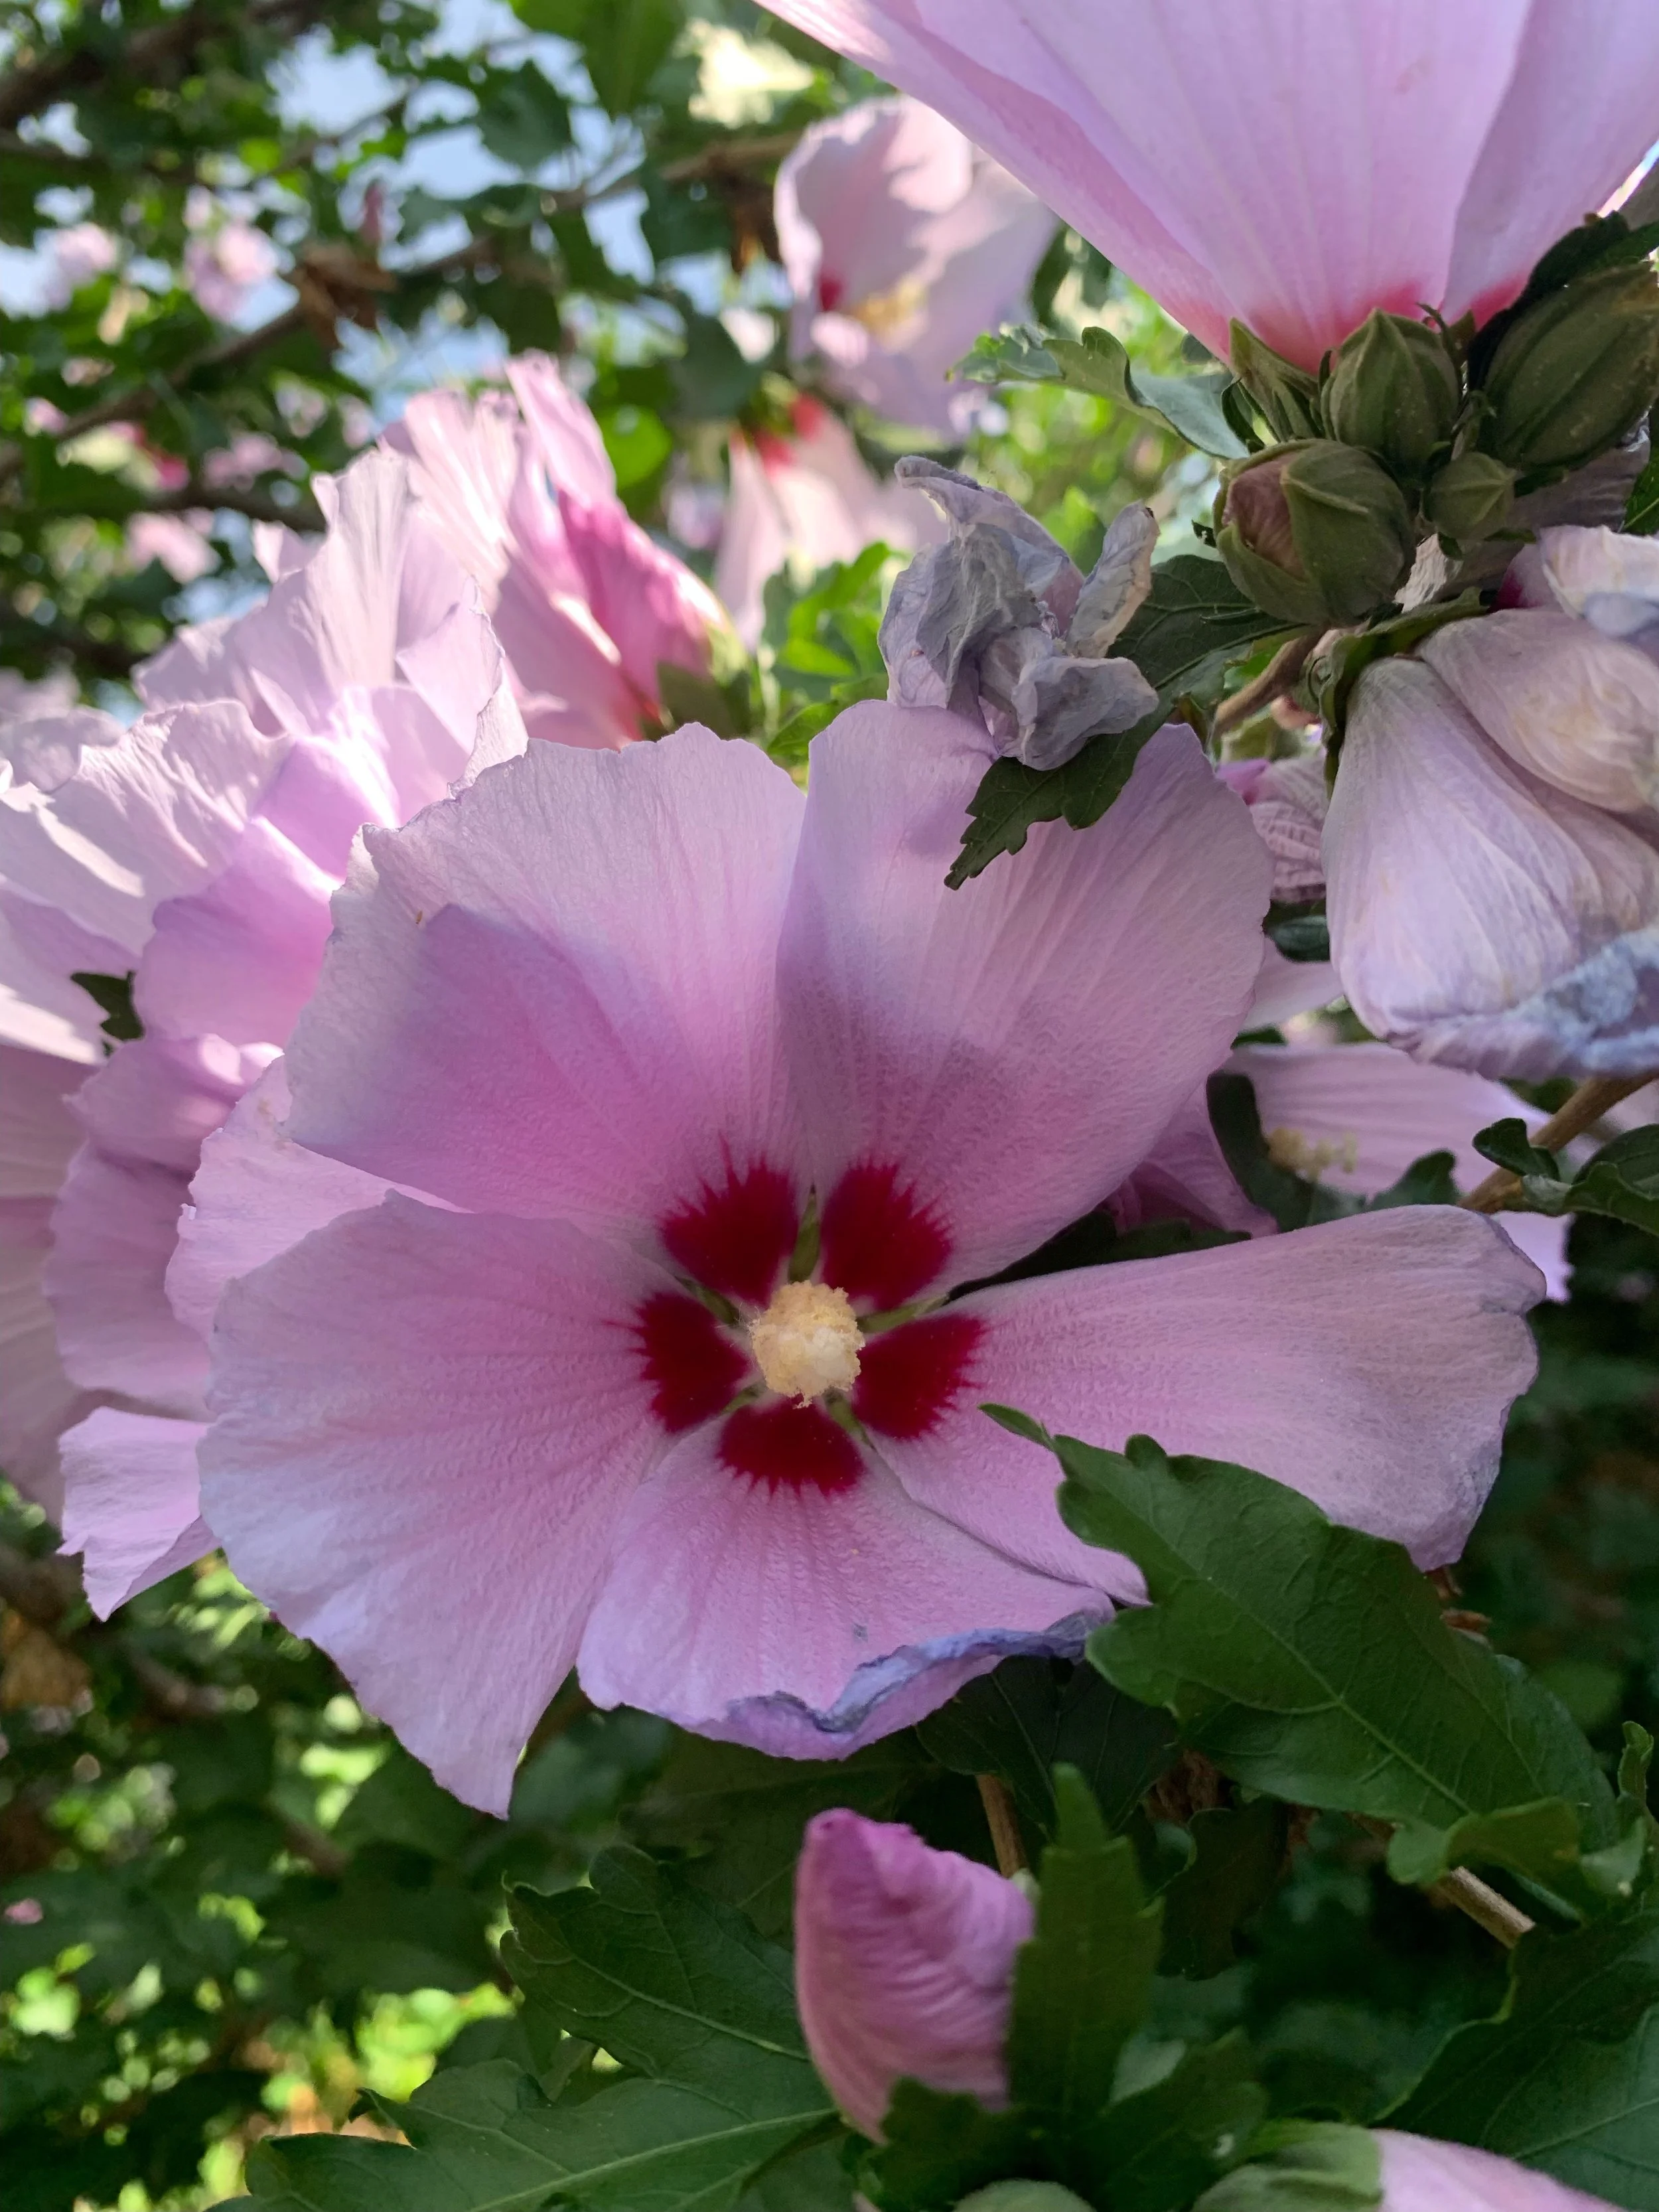
Rose of Sharon is a blooming large shrub to small tree that adds a soft color to the summer landscape. Blooms range from white, pink, and purple shades.

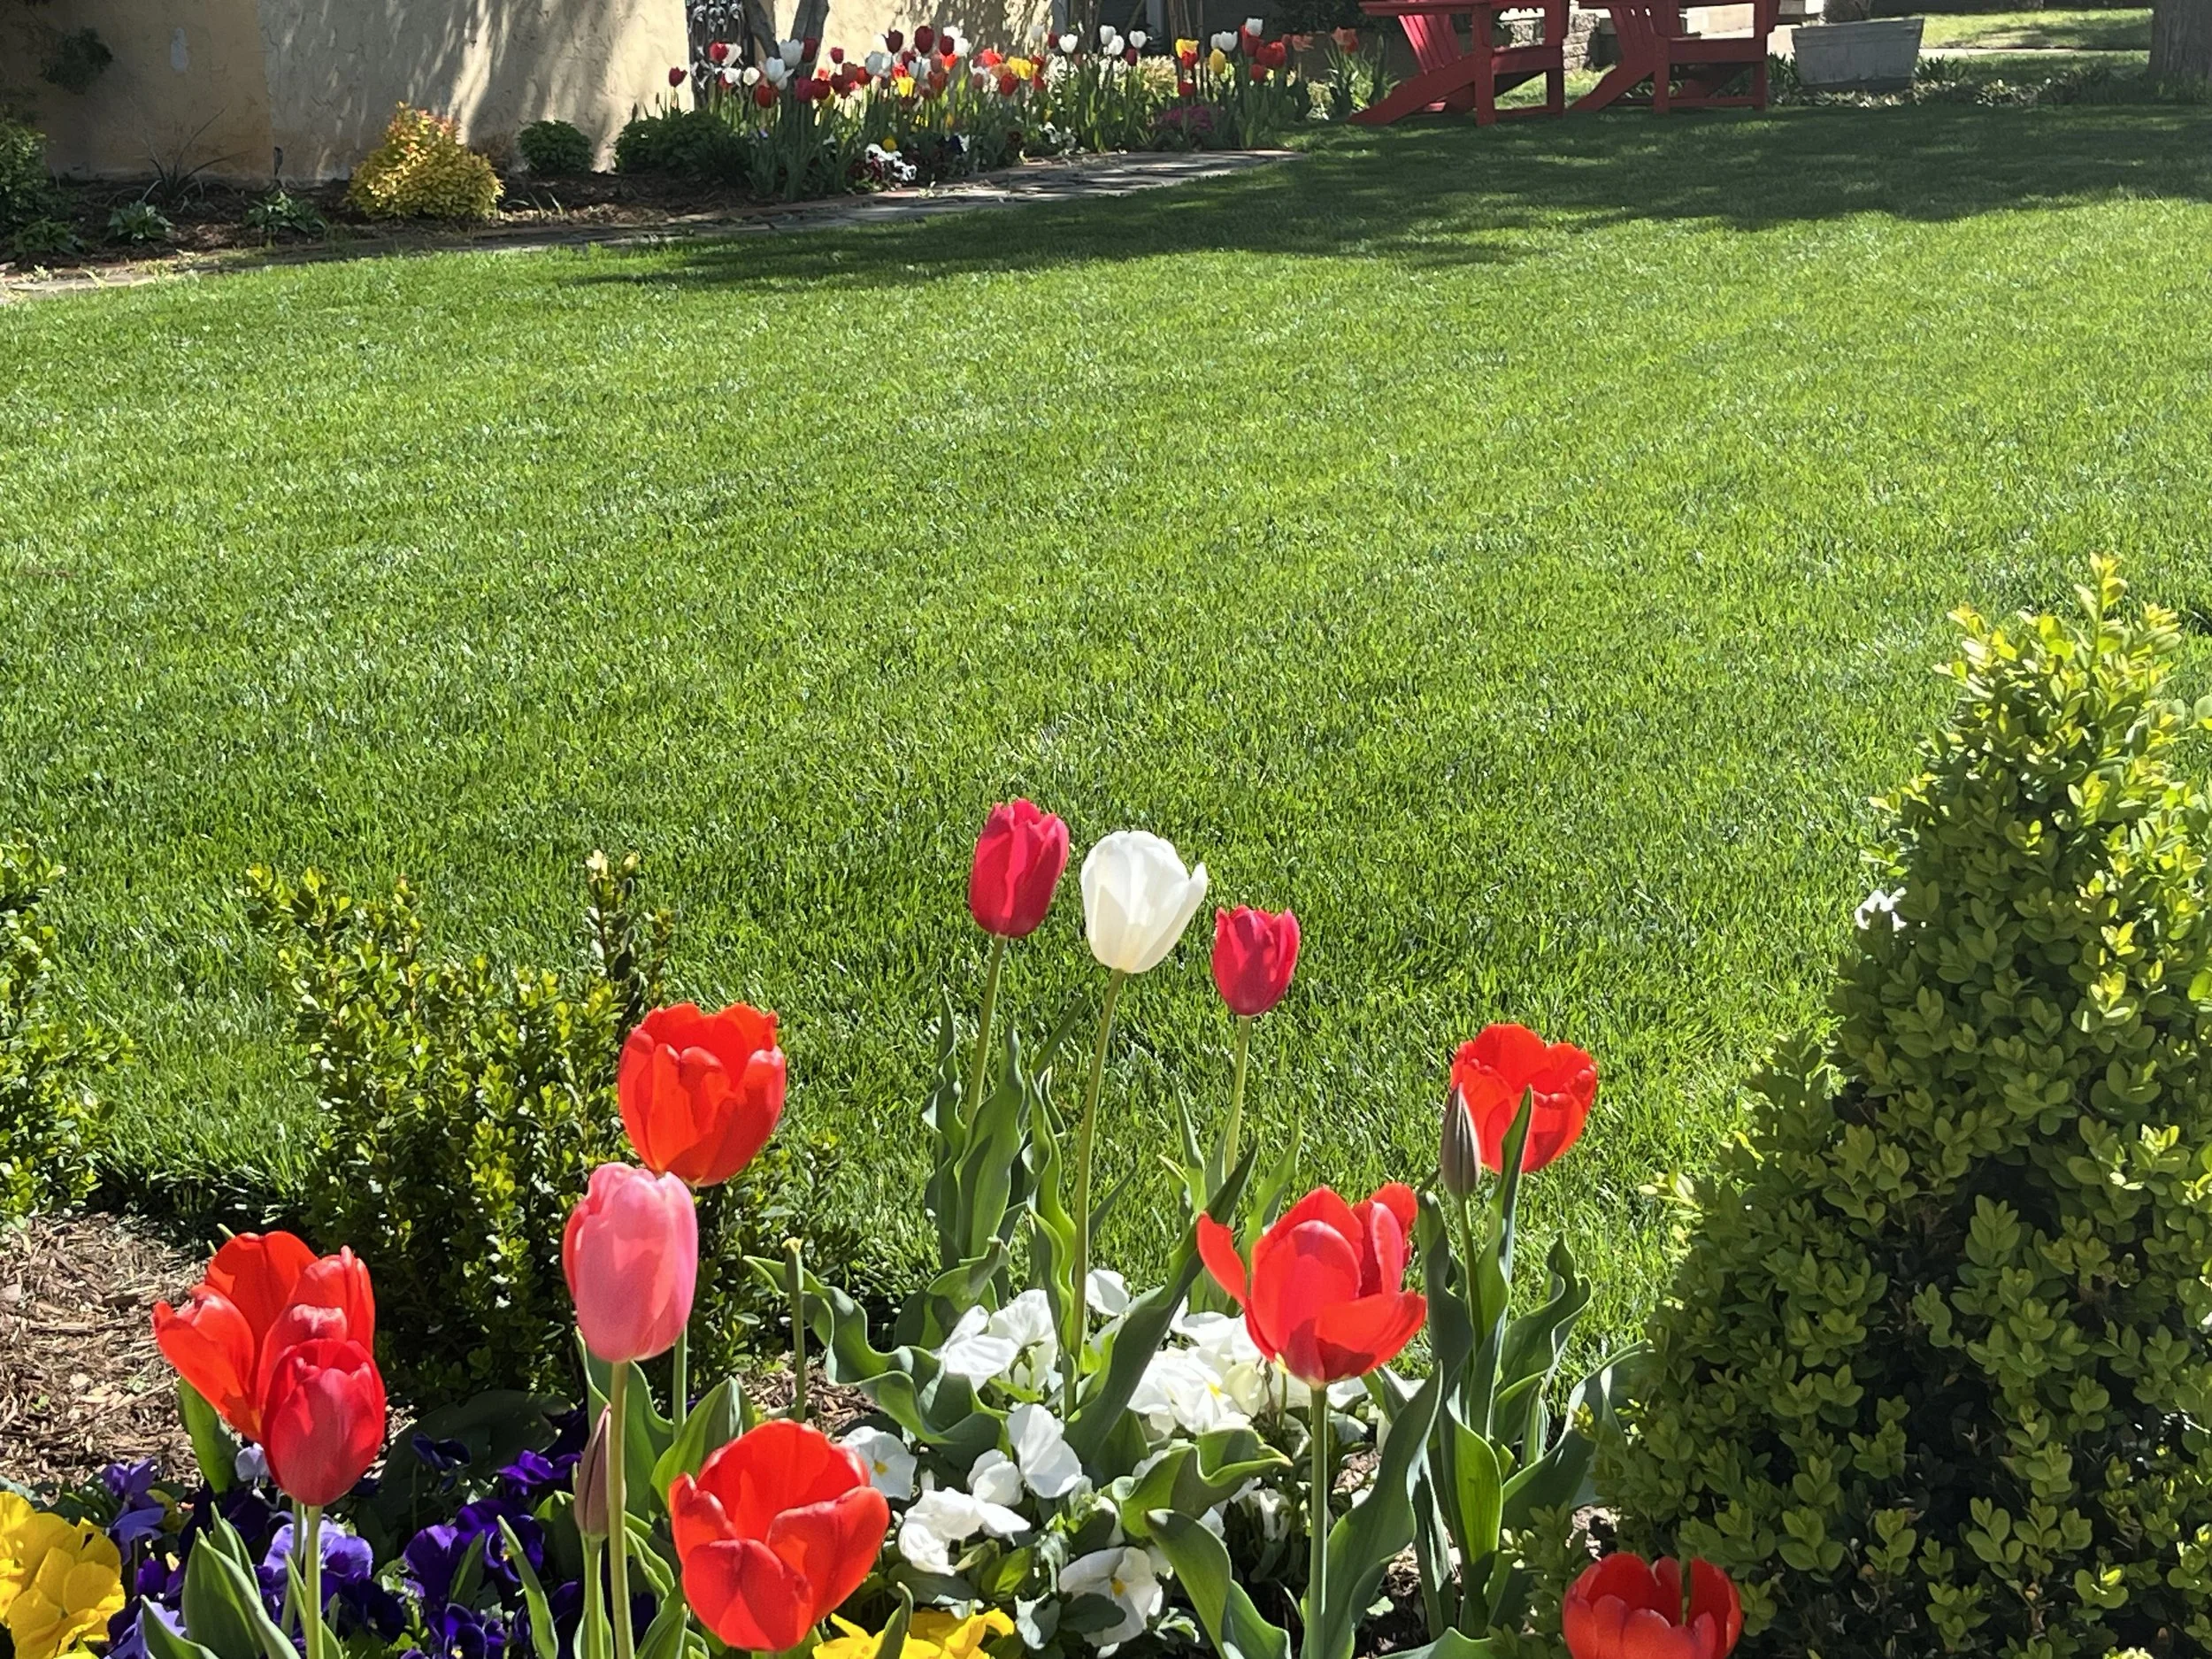
Plant perennials in the fall for great early blooms next spring.

Limemound Spirea returned to my favorite list this year for their hardiness and the interest they add to the landscape with their soft pink blooms and light green color.
2. Cool Days Are Less Stressful
Warm days are hard on all plants and are particularly hard on the newly planted. New shrubs and trees have a limited root system that struggles to support plant leaves in the heat resulting in desiccated, burnt leaves.
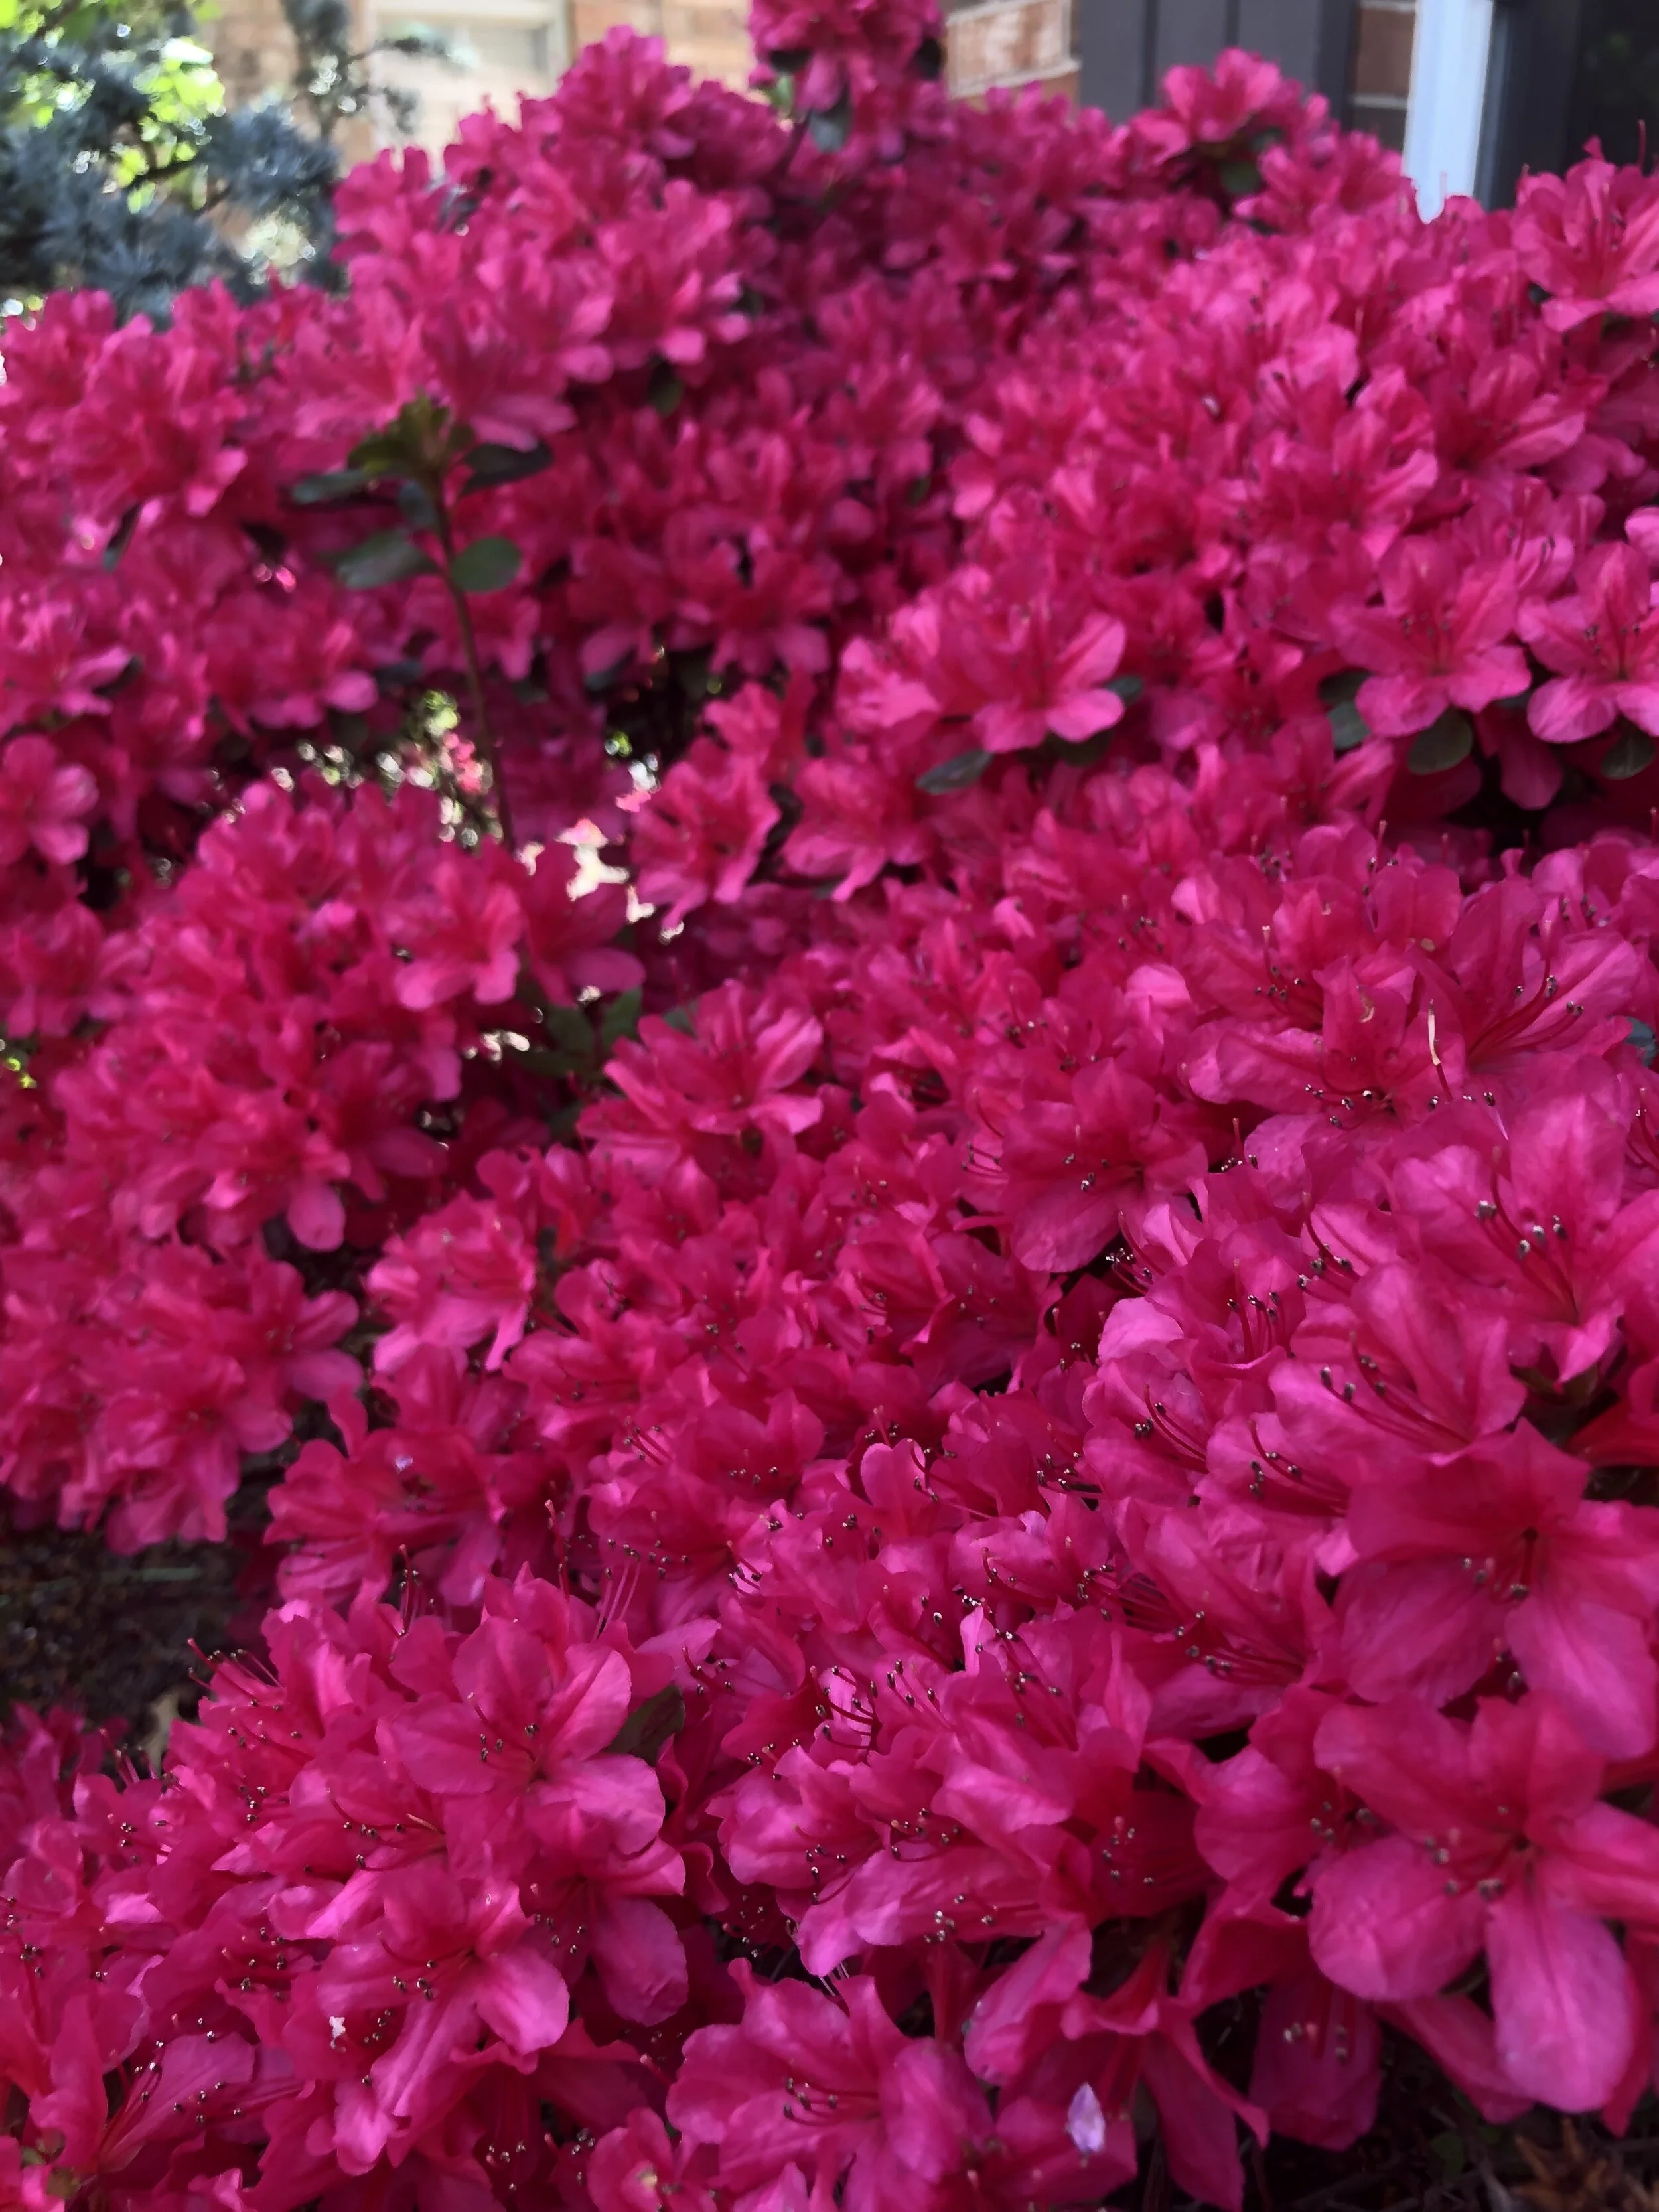
When azalea are planted in the fall, they establish roots and bloom well next spring.
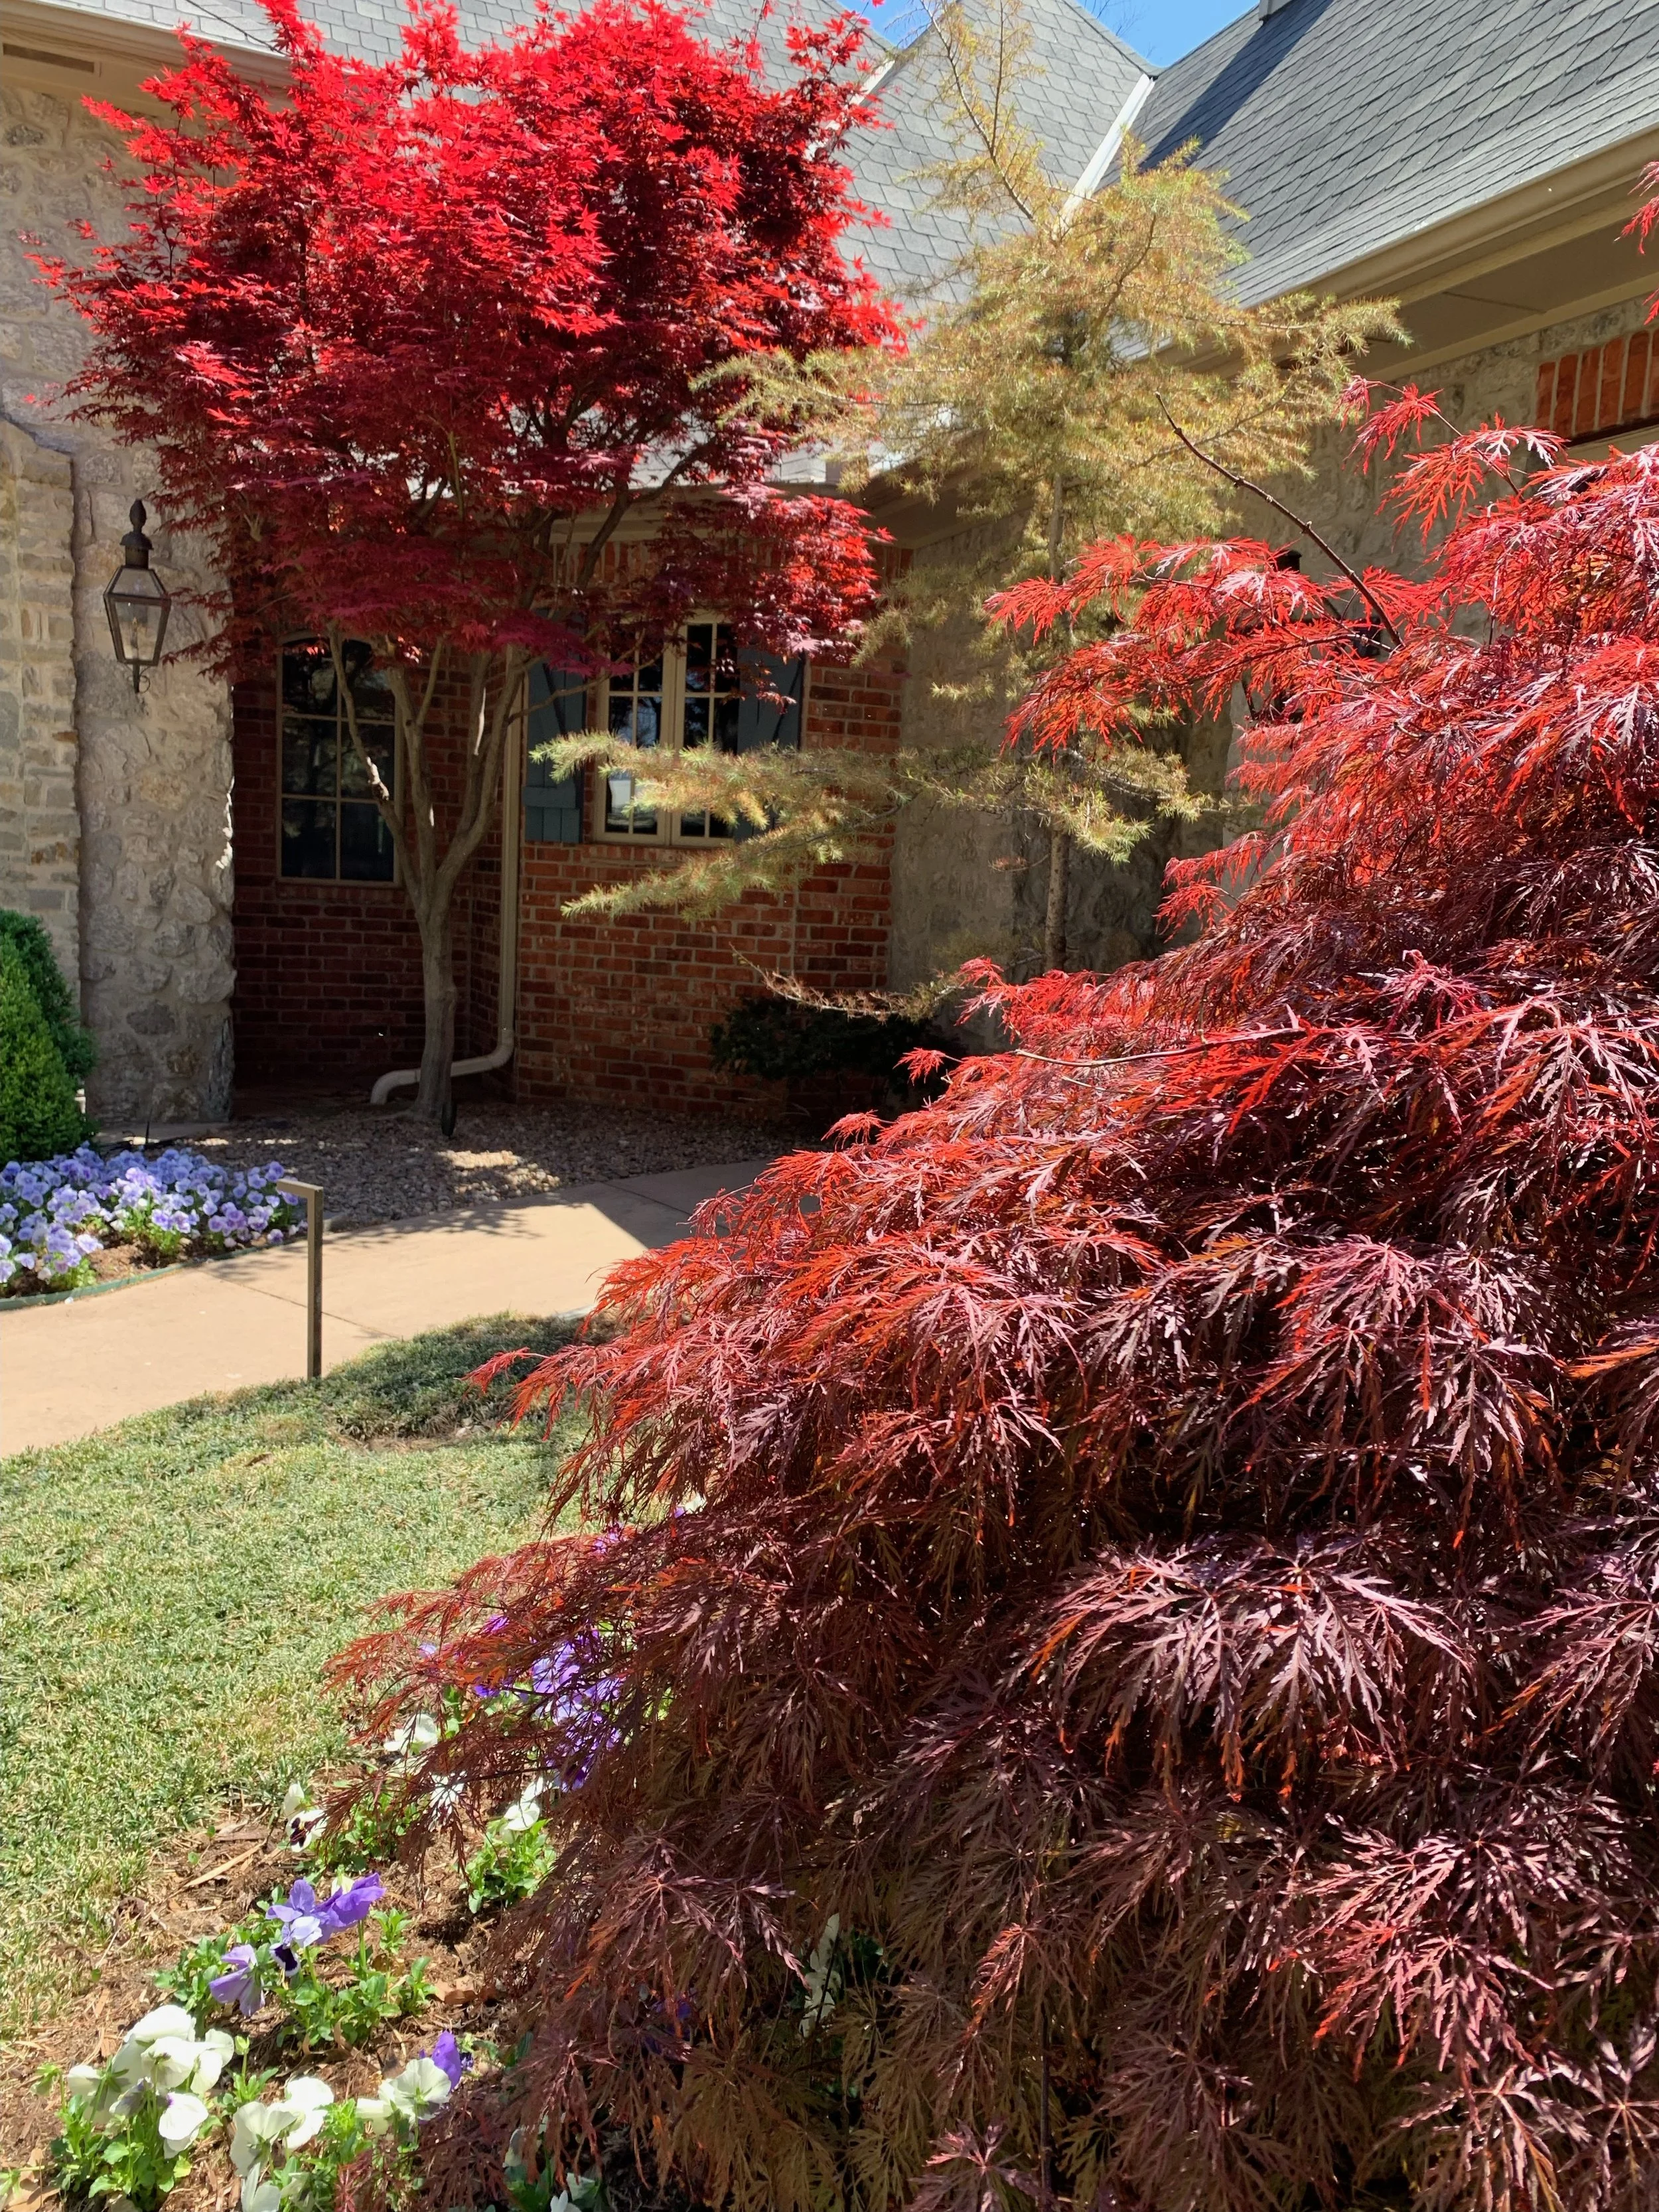
Japanese Maples add bright red leaves to the spring landscape.
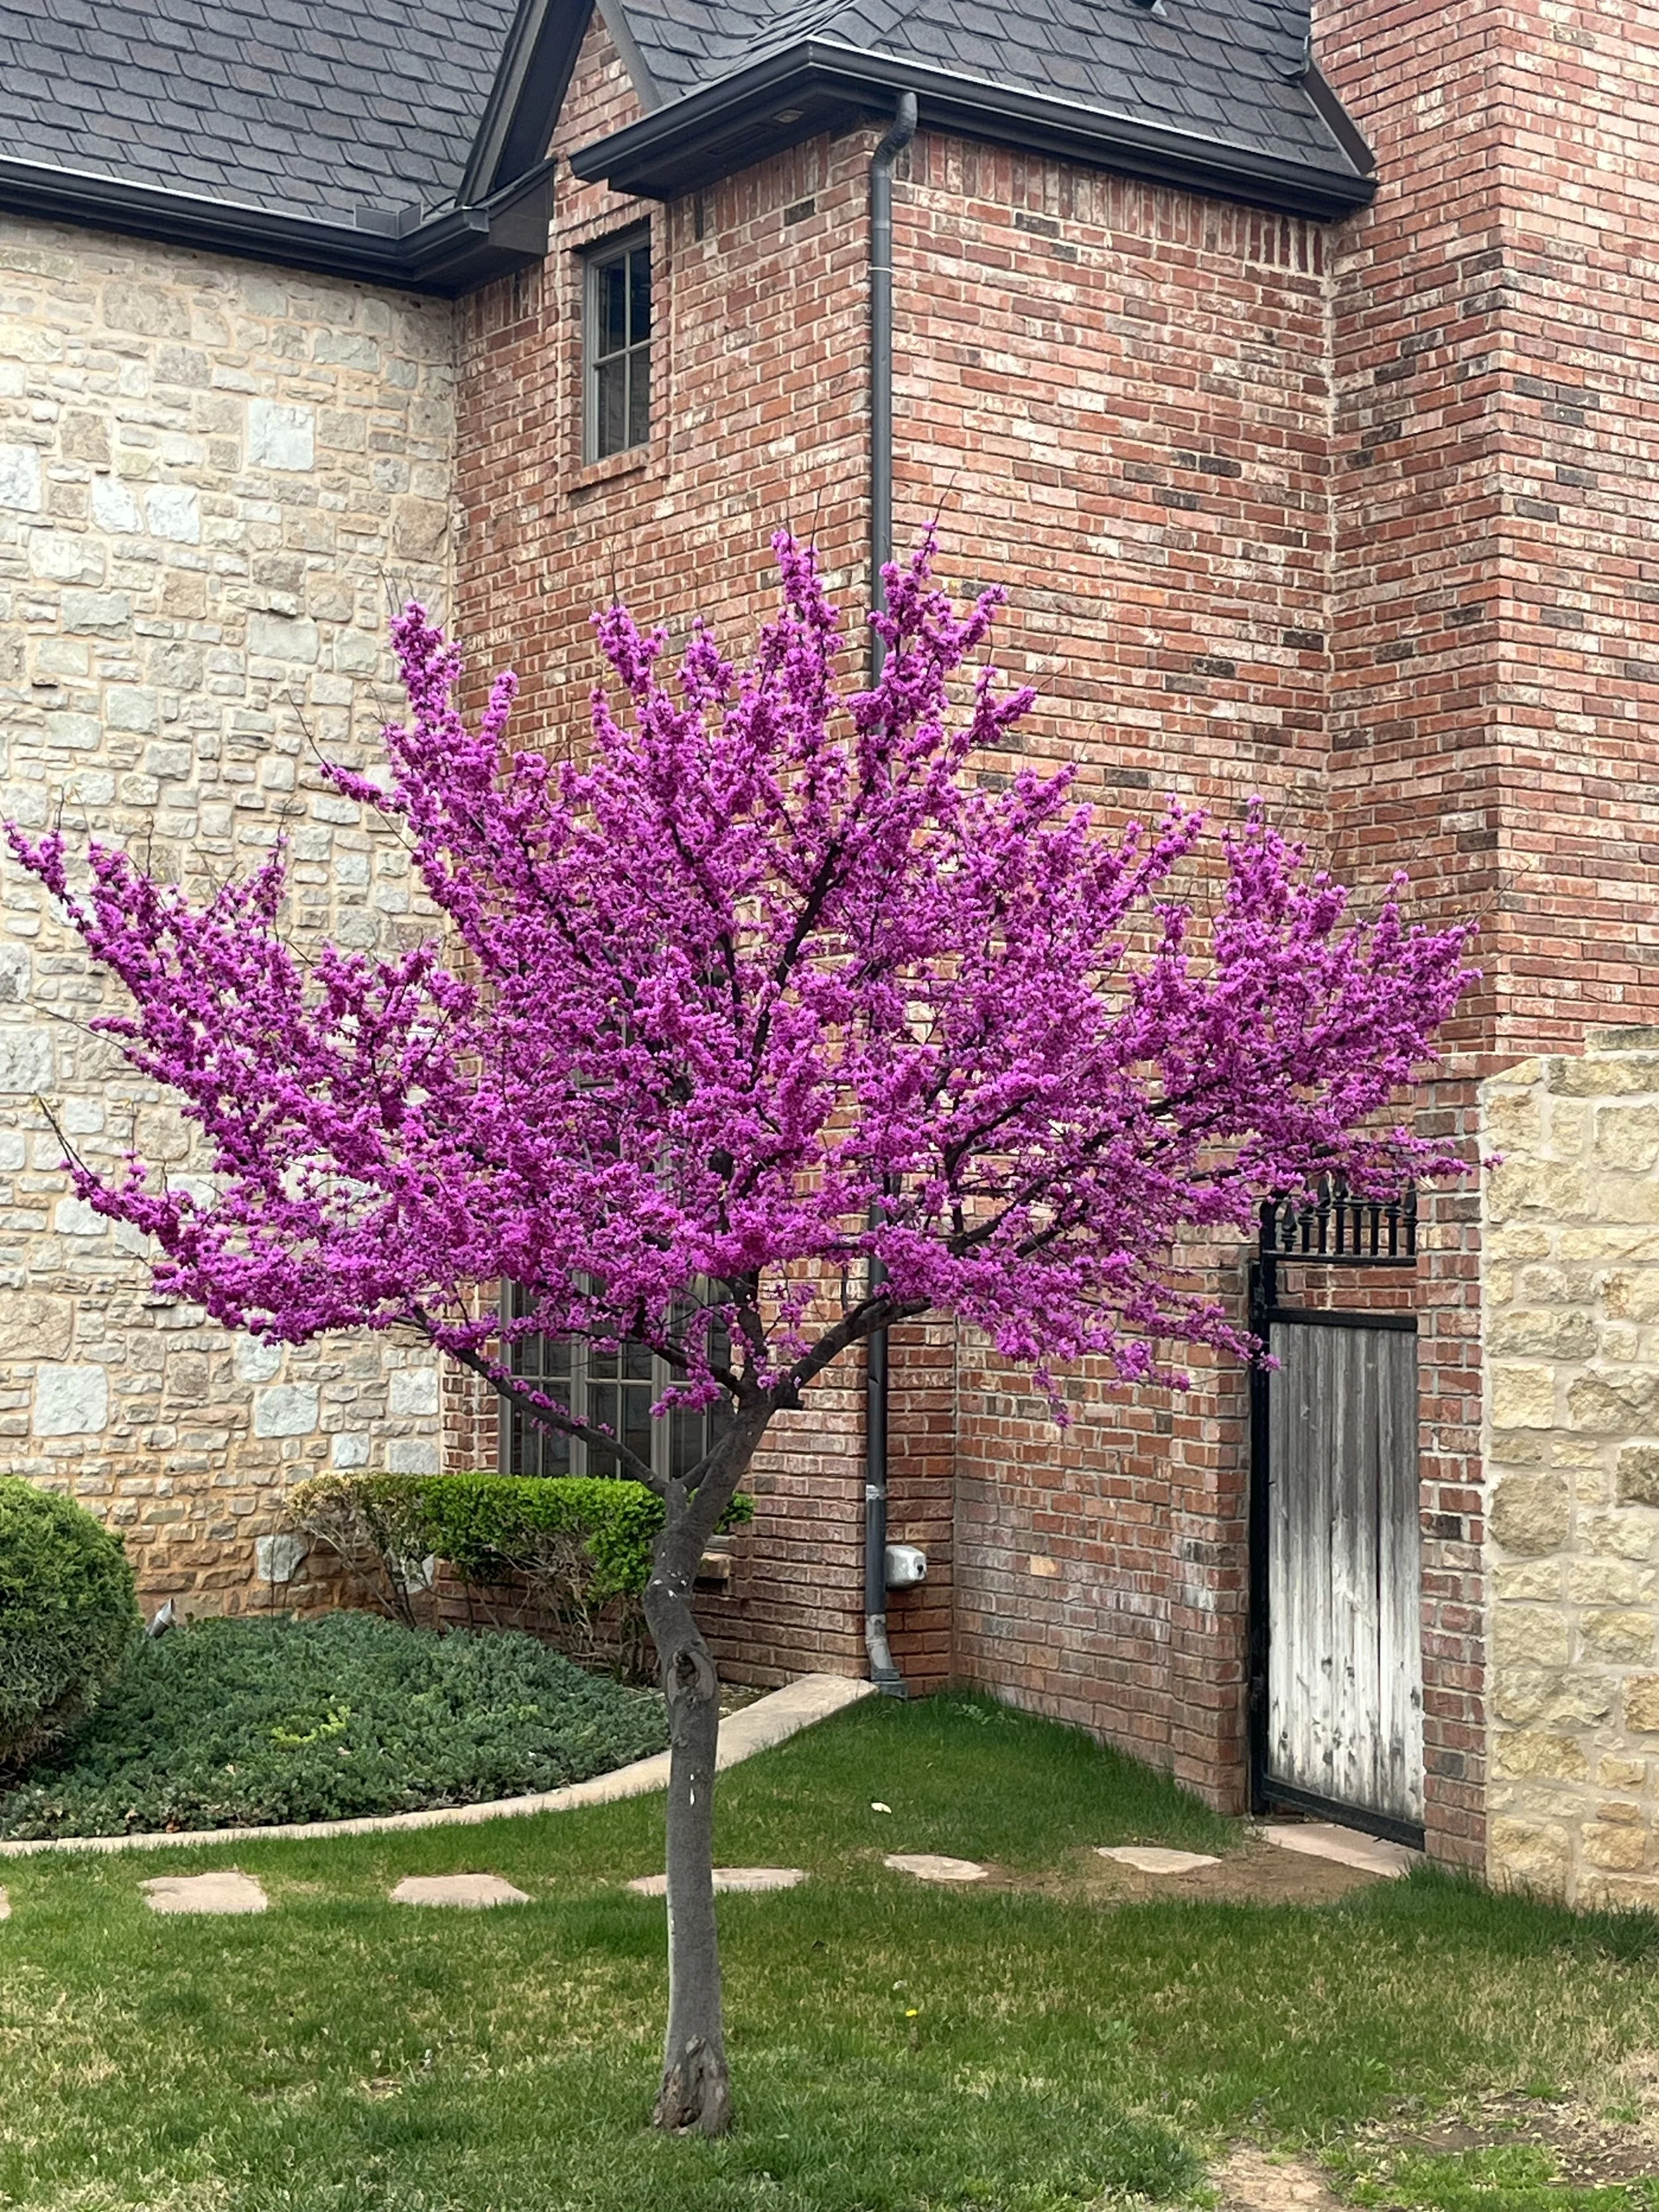
Looking to add more spring color to your landscape? Add an Oklahoma Redbud to your landscape this fall or winter.

Planting creeping phlox this fall will give you a carpet of color in the spring.

Big Blue Liriope with spikes of purple-blue flowers in the late summer is a good ground-cover for both shady and full sun landscapes.
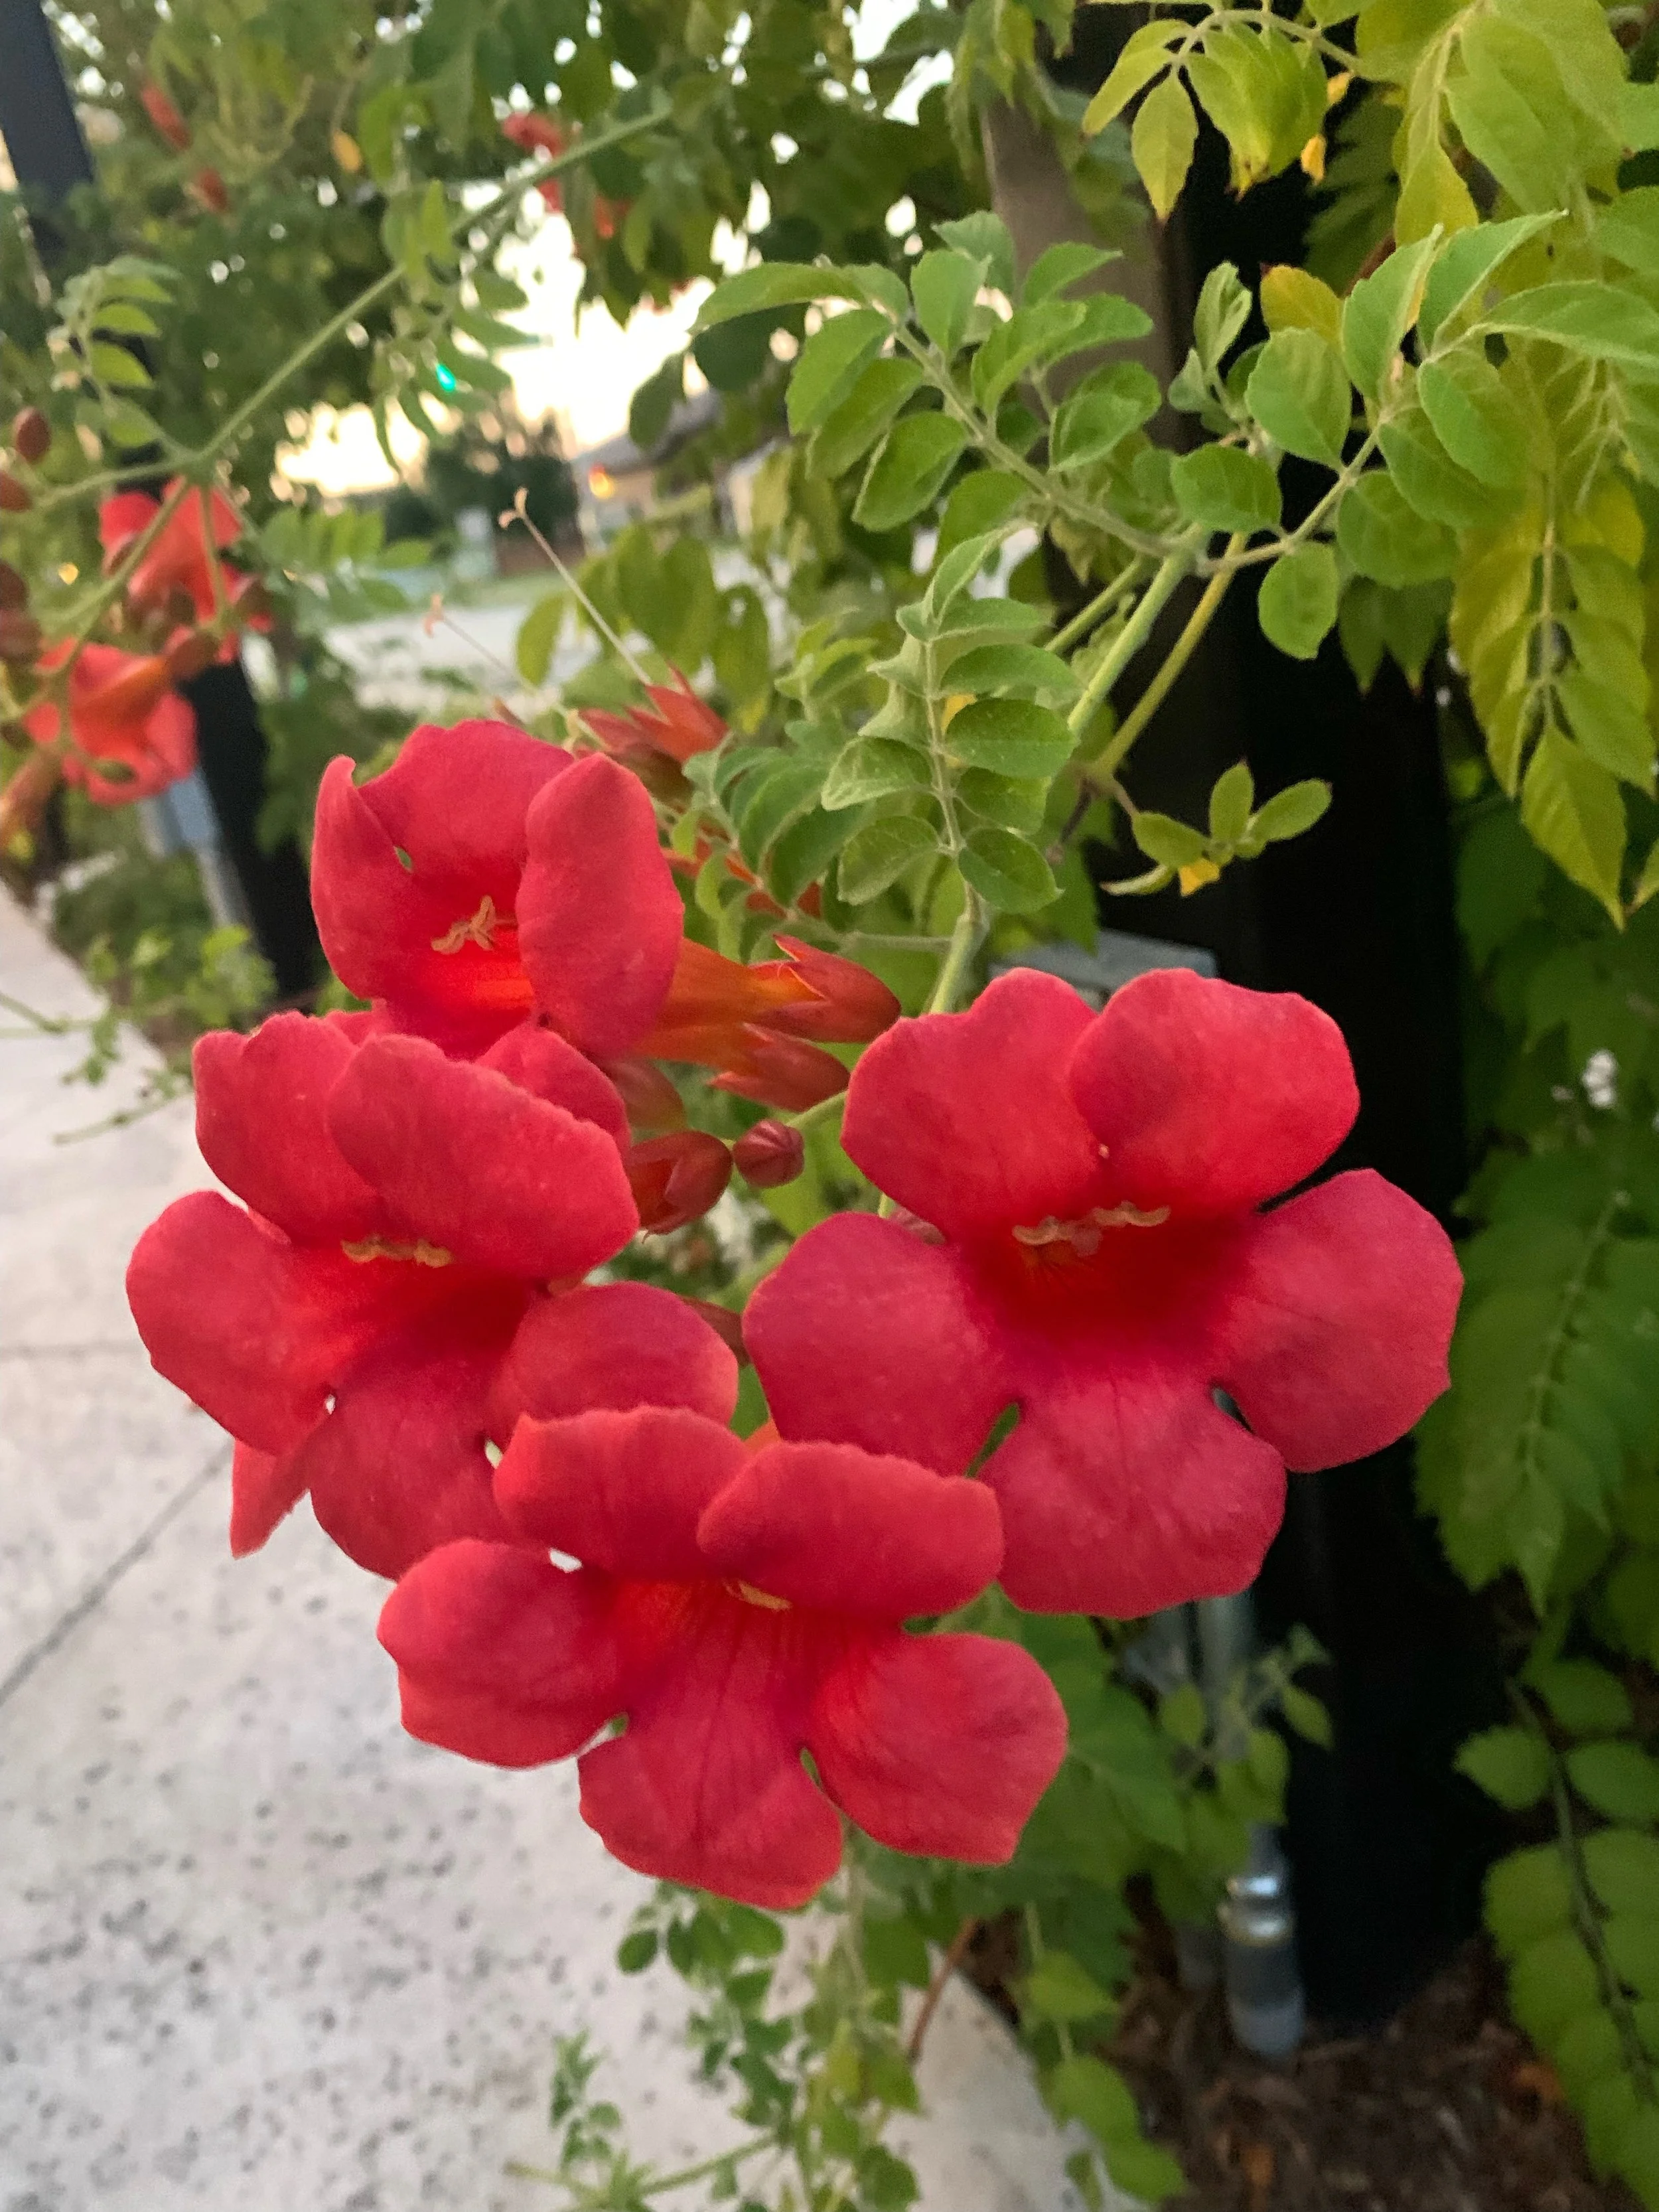
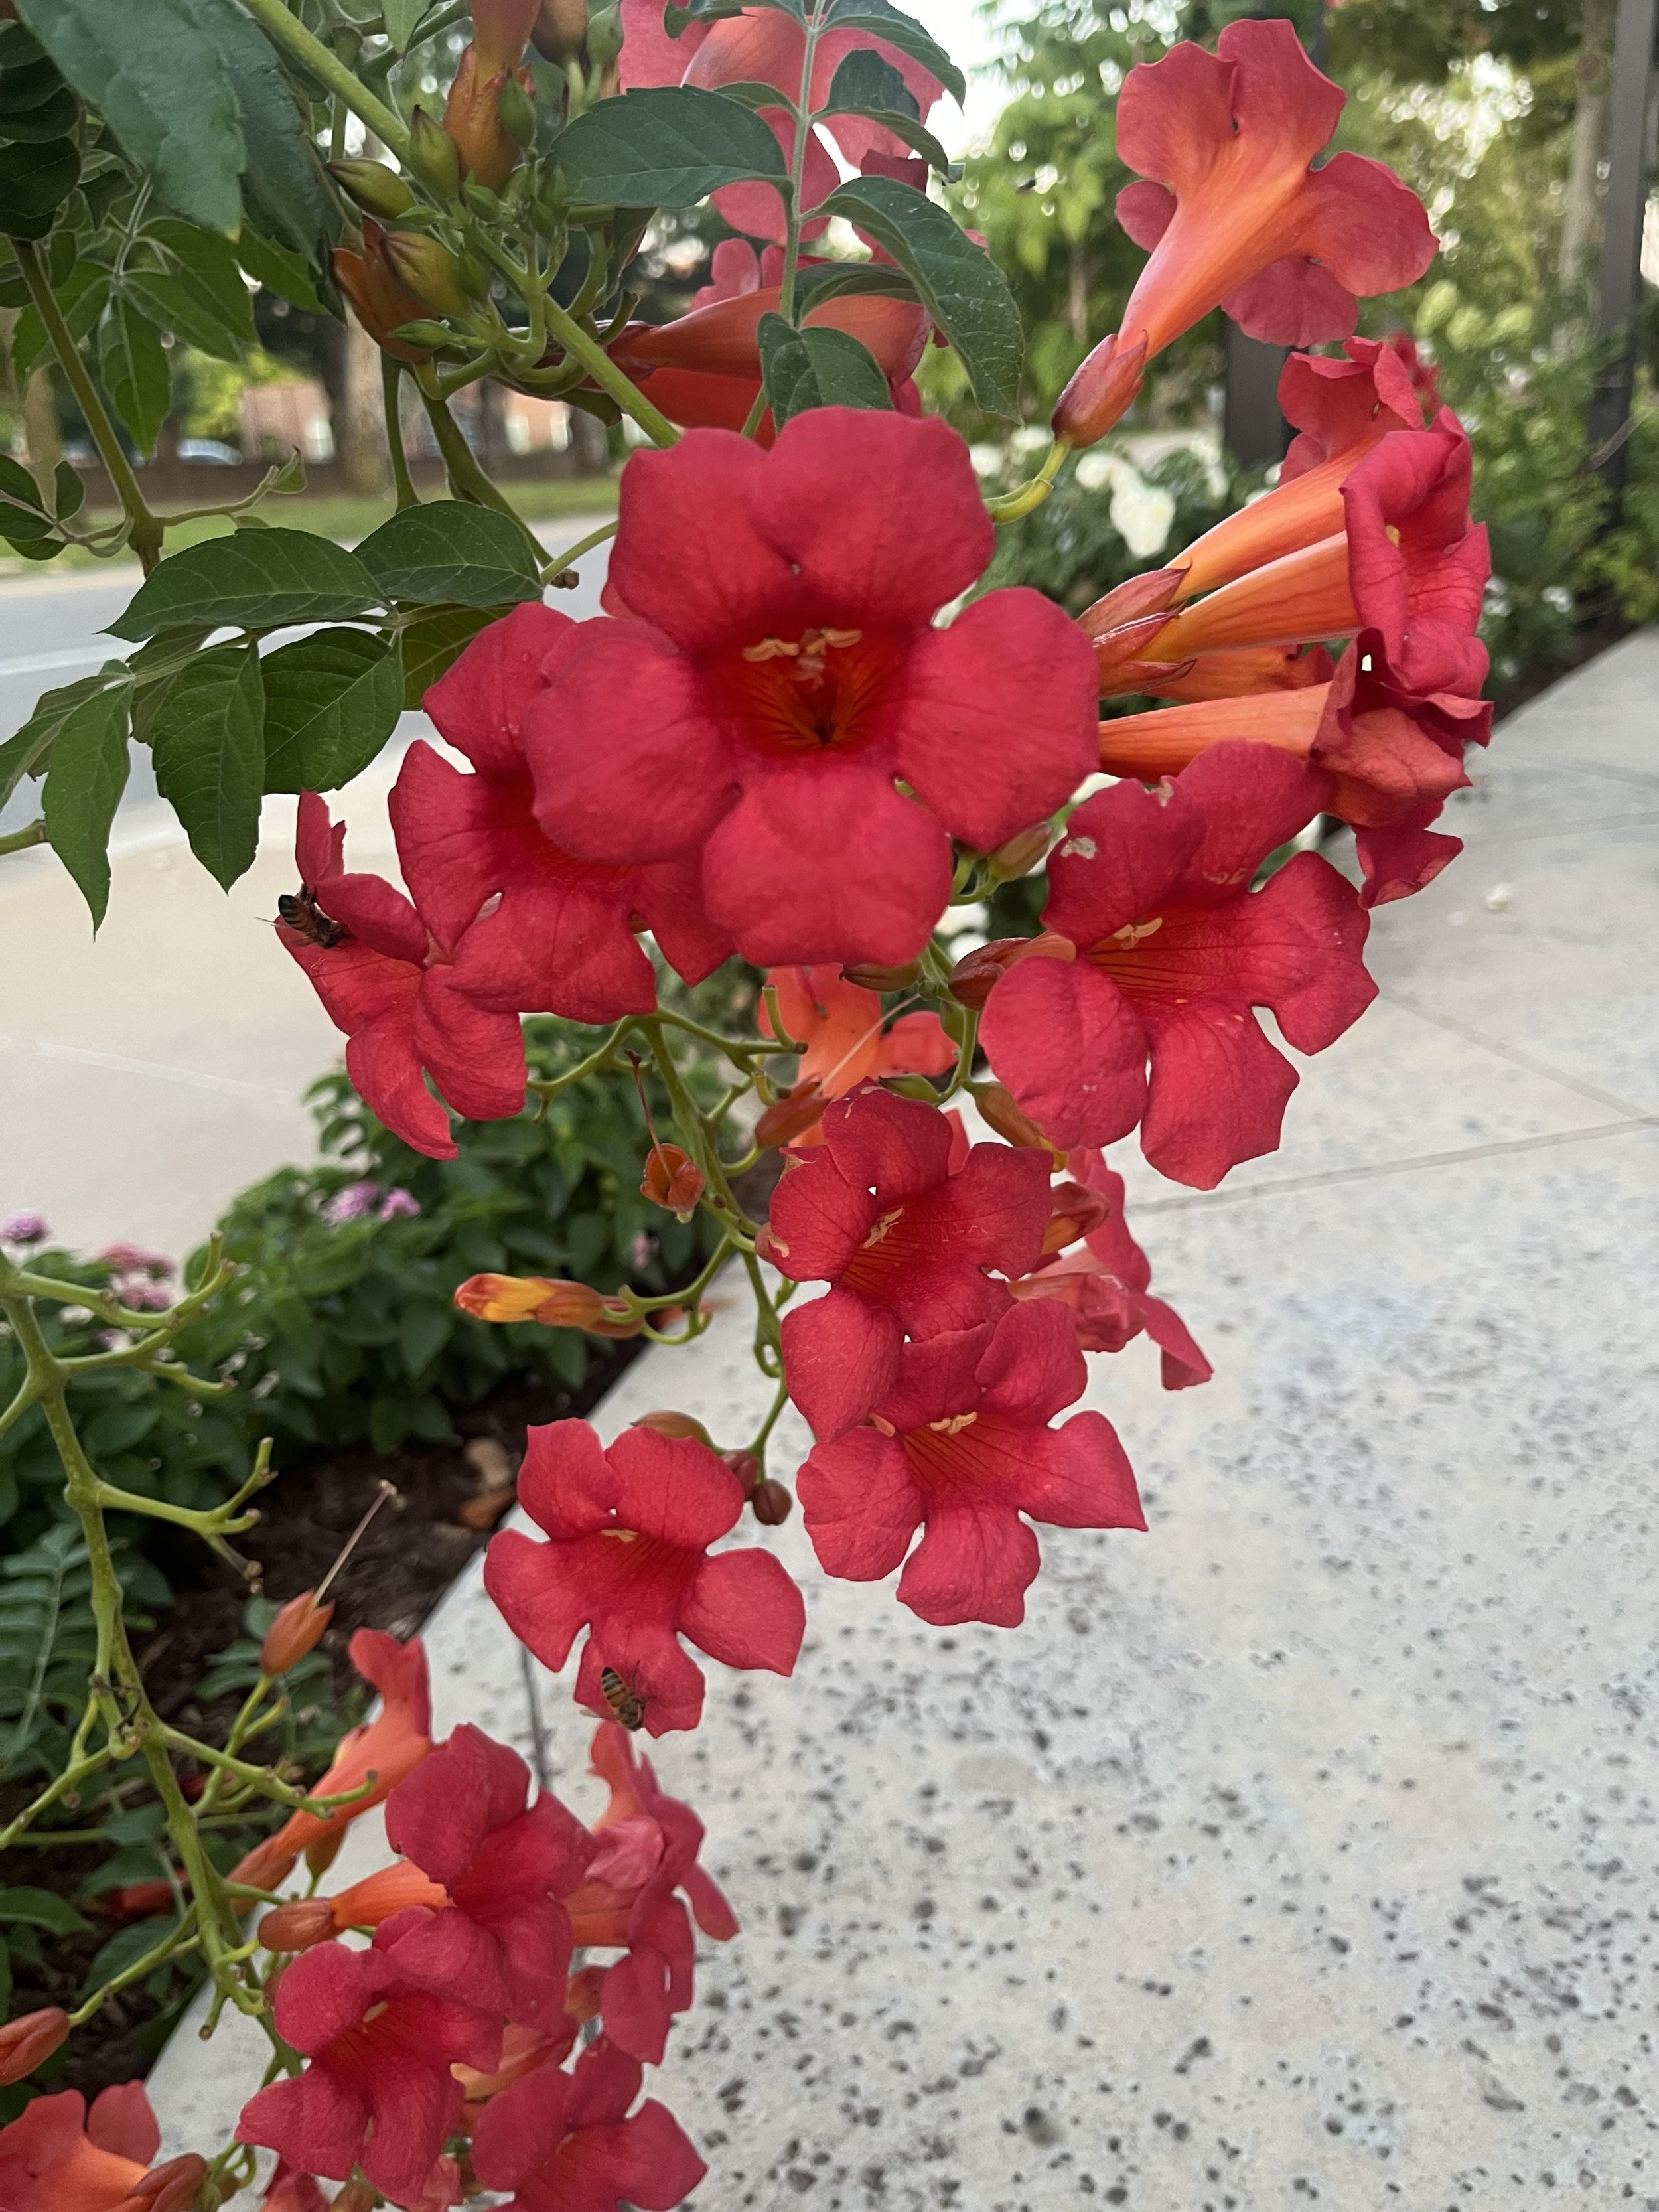
Madame Galen Trumpet Vine produces bright flowers through the summer. Great for covering fences and climbing on arbors.

Endless Summer Hydrangeas start blooming in May and rebloom through the summer.

In the fall, blooms left on Endless Summer Hydrangeas turn brilliant pinkish red.

Looking for cascade white blooms in your spring landscape? Add a Bridal Wreath Spirea this fall.

Plant a Double Play Candy Corn Spirea this fall and you will enjoy bright shades of yellow, orange and red next spring.
Yes, with good care and extra attention most shrubs and trees can be planted year-round, and because they can, it is common to plant at any time.
But, the best time to add new plants to your landscape in Oklahoma is September through December. For deciduous trees, the best time to plant is during winter dormancy, November through February.
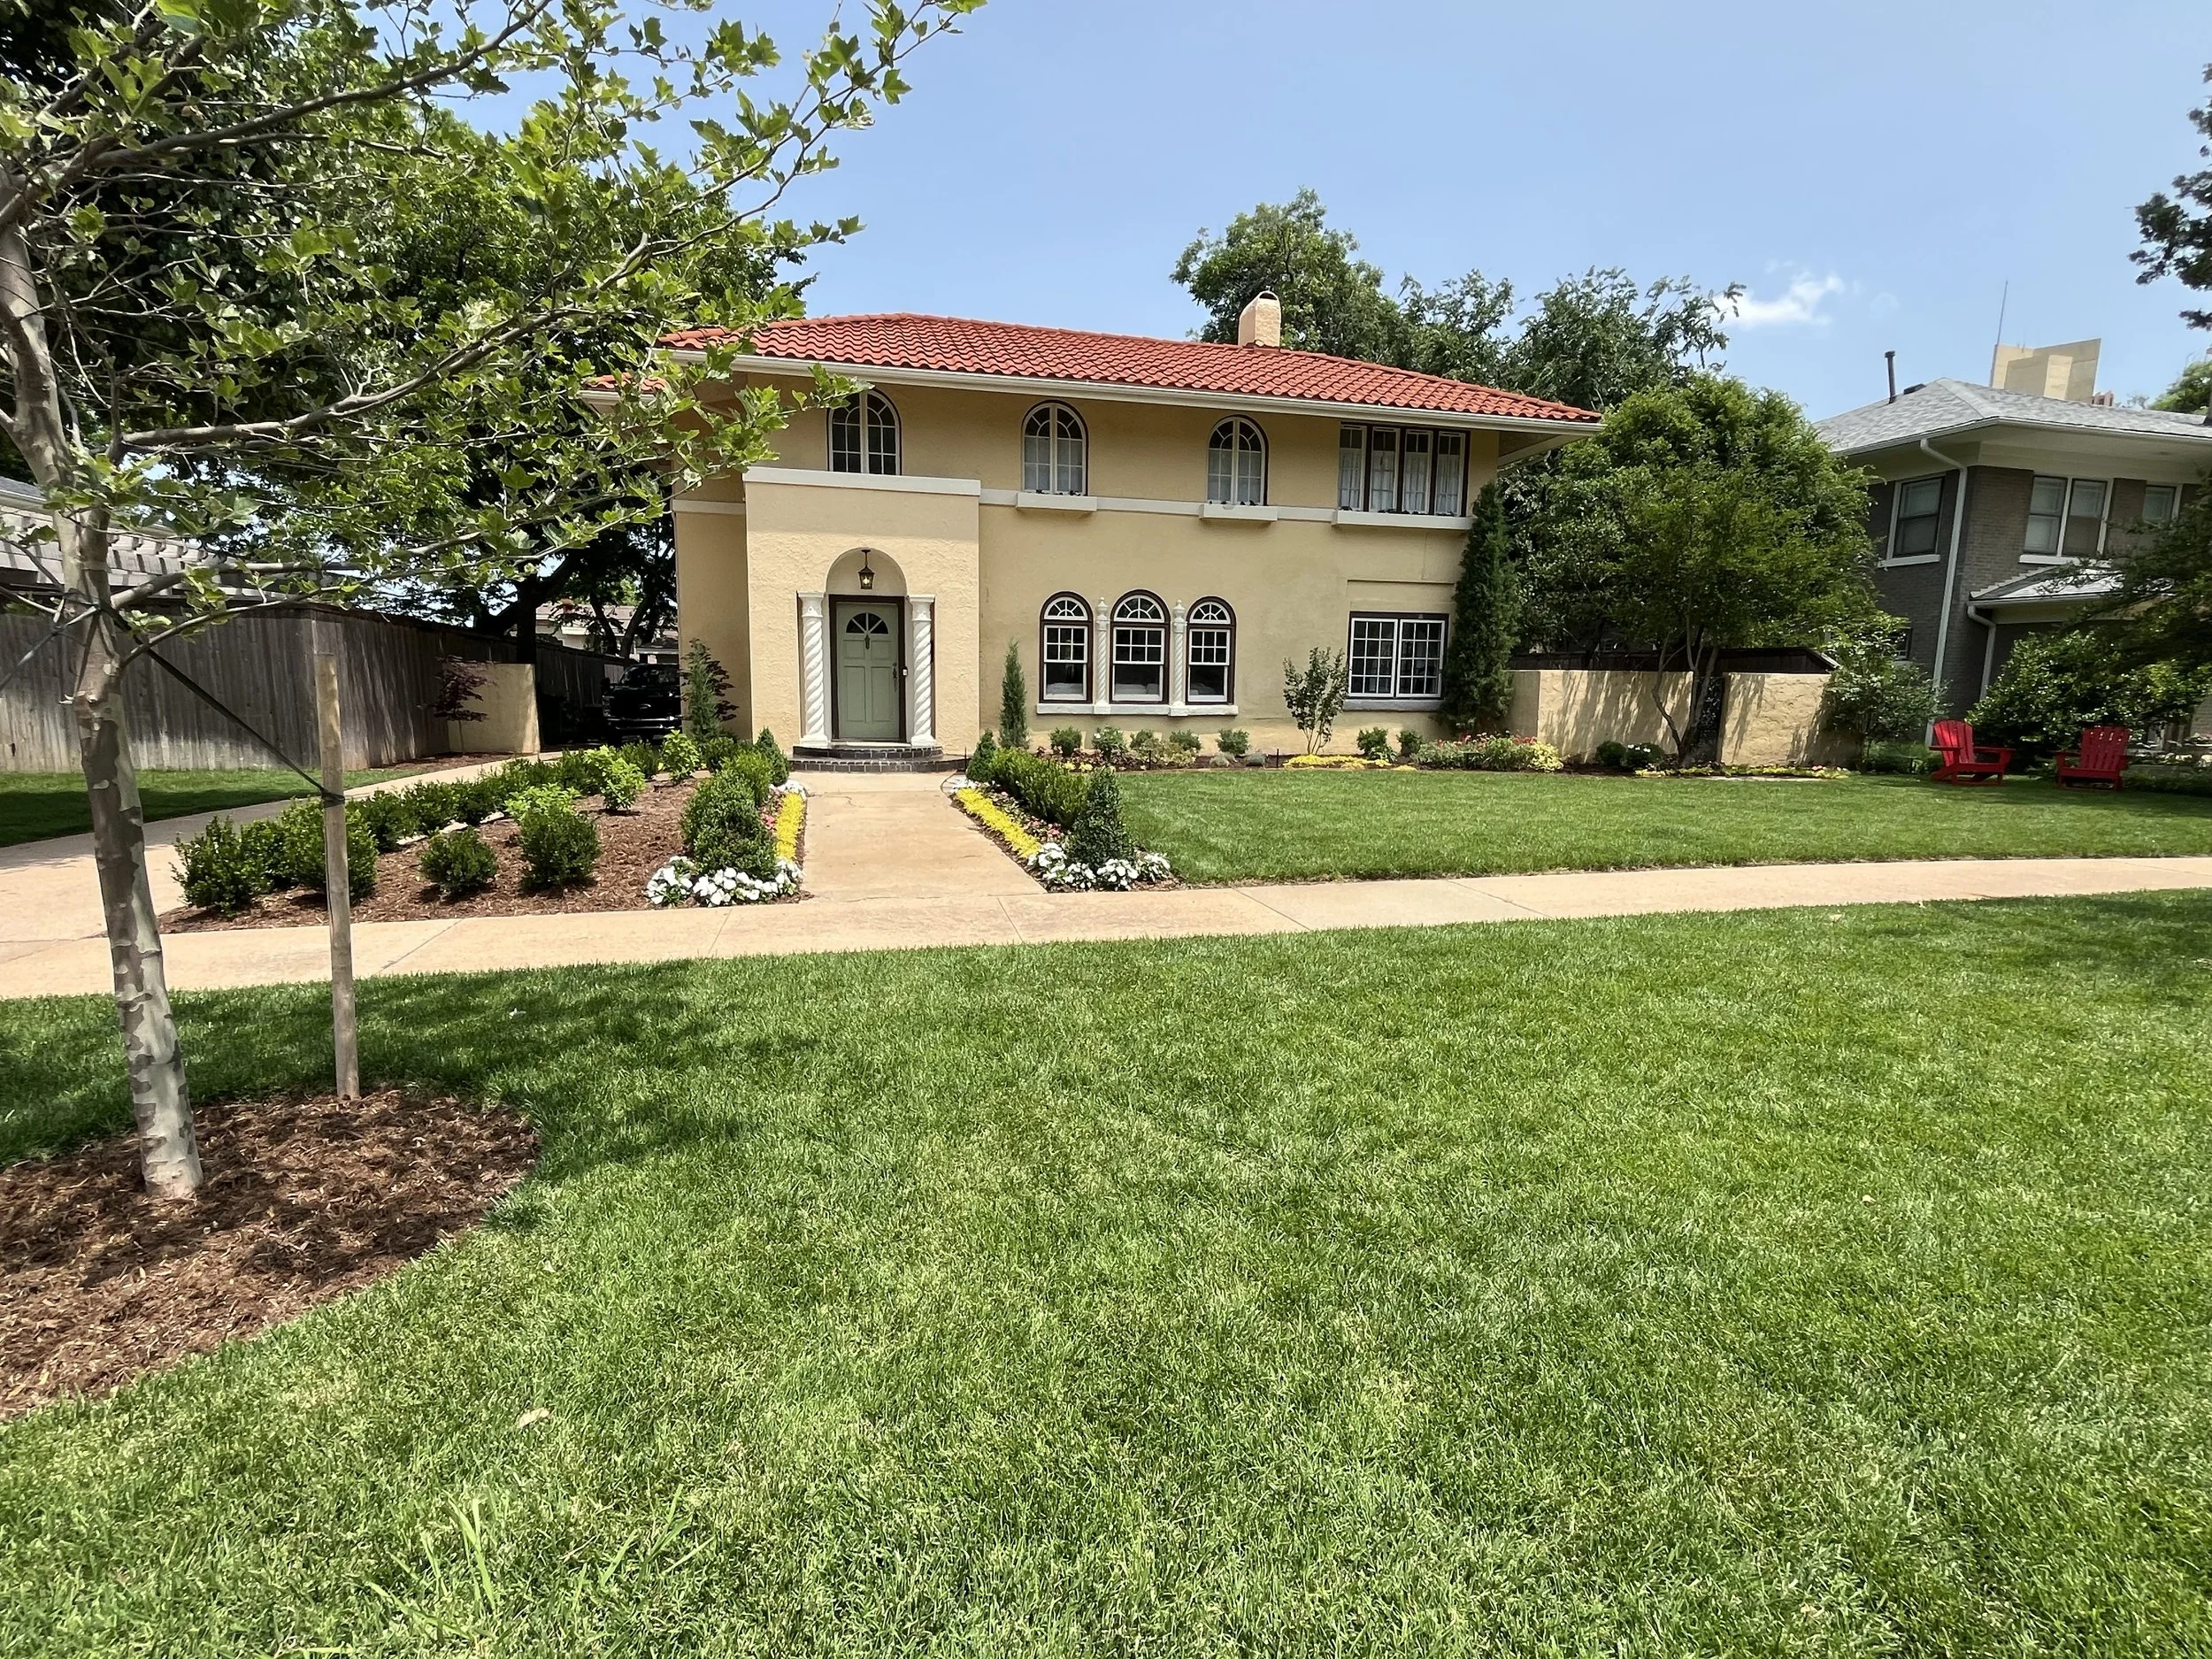
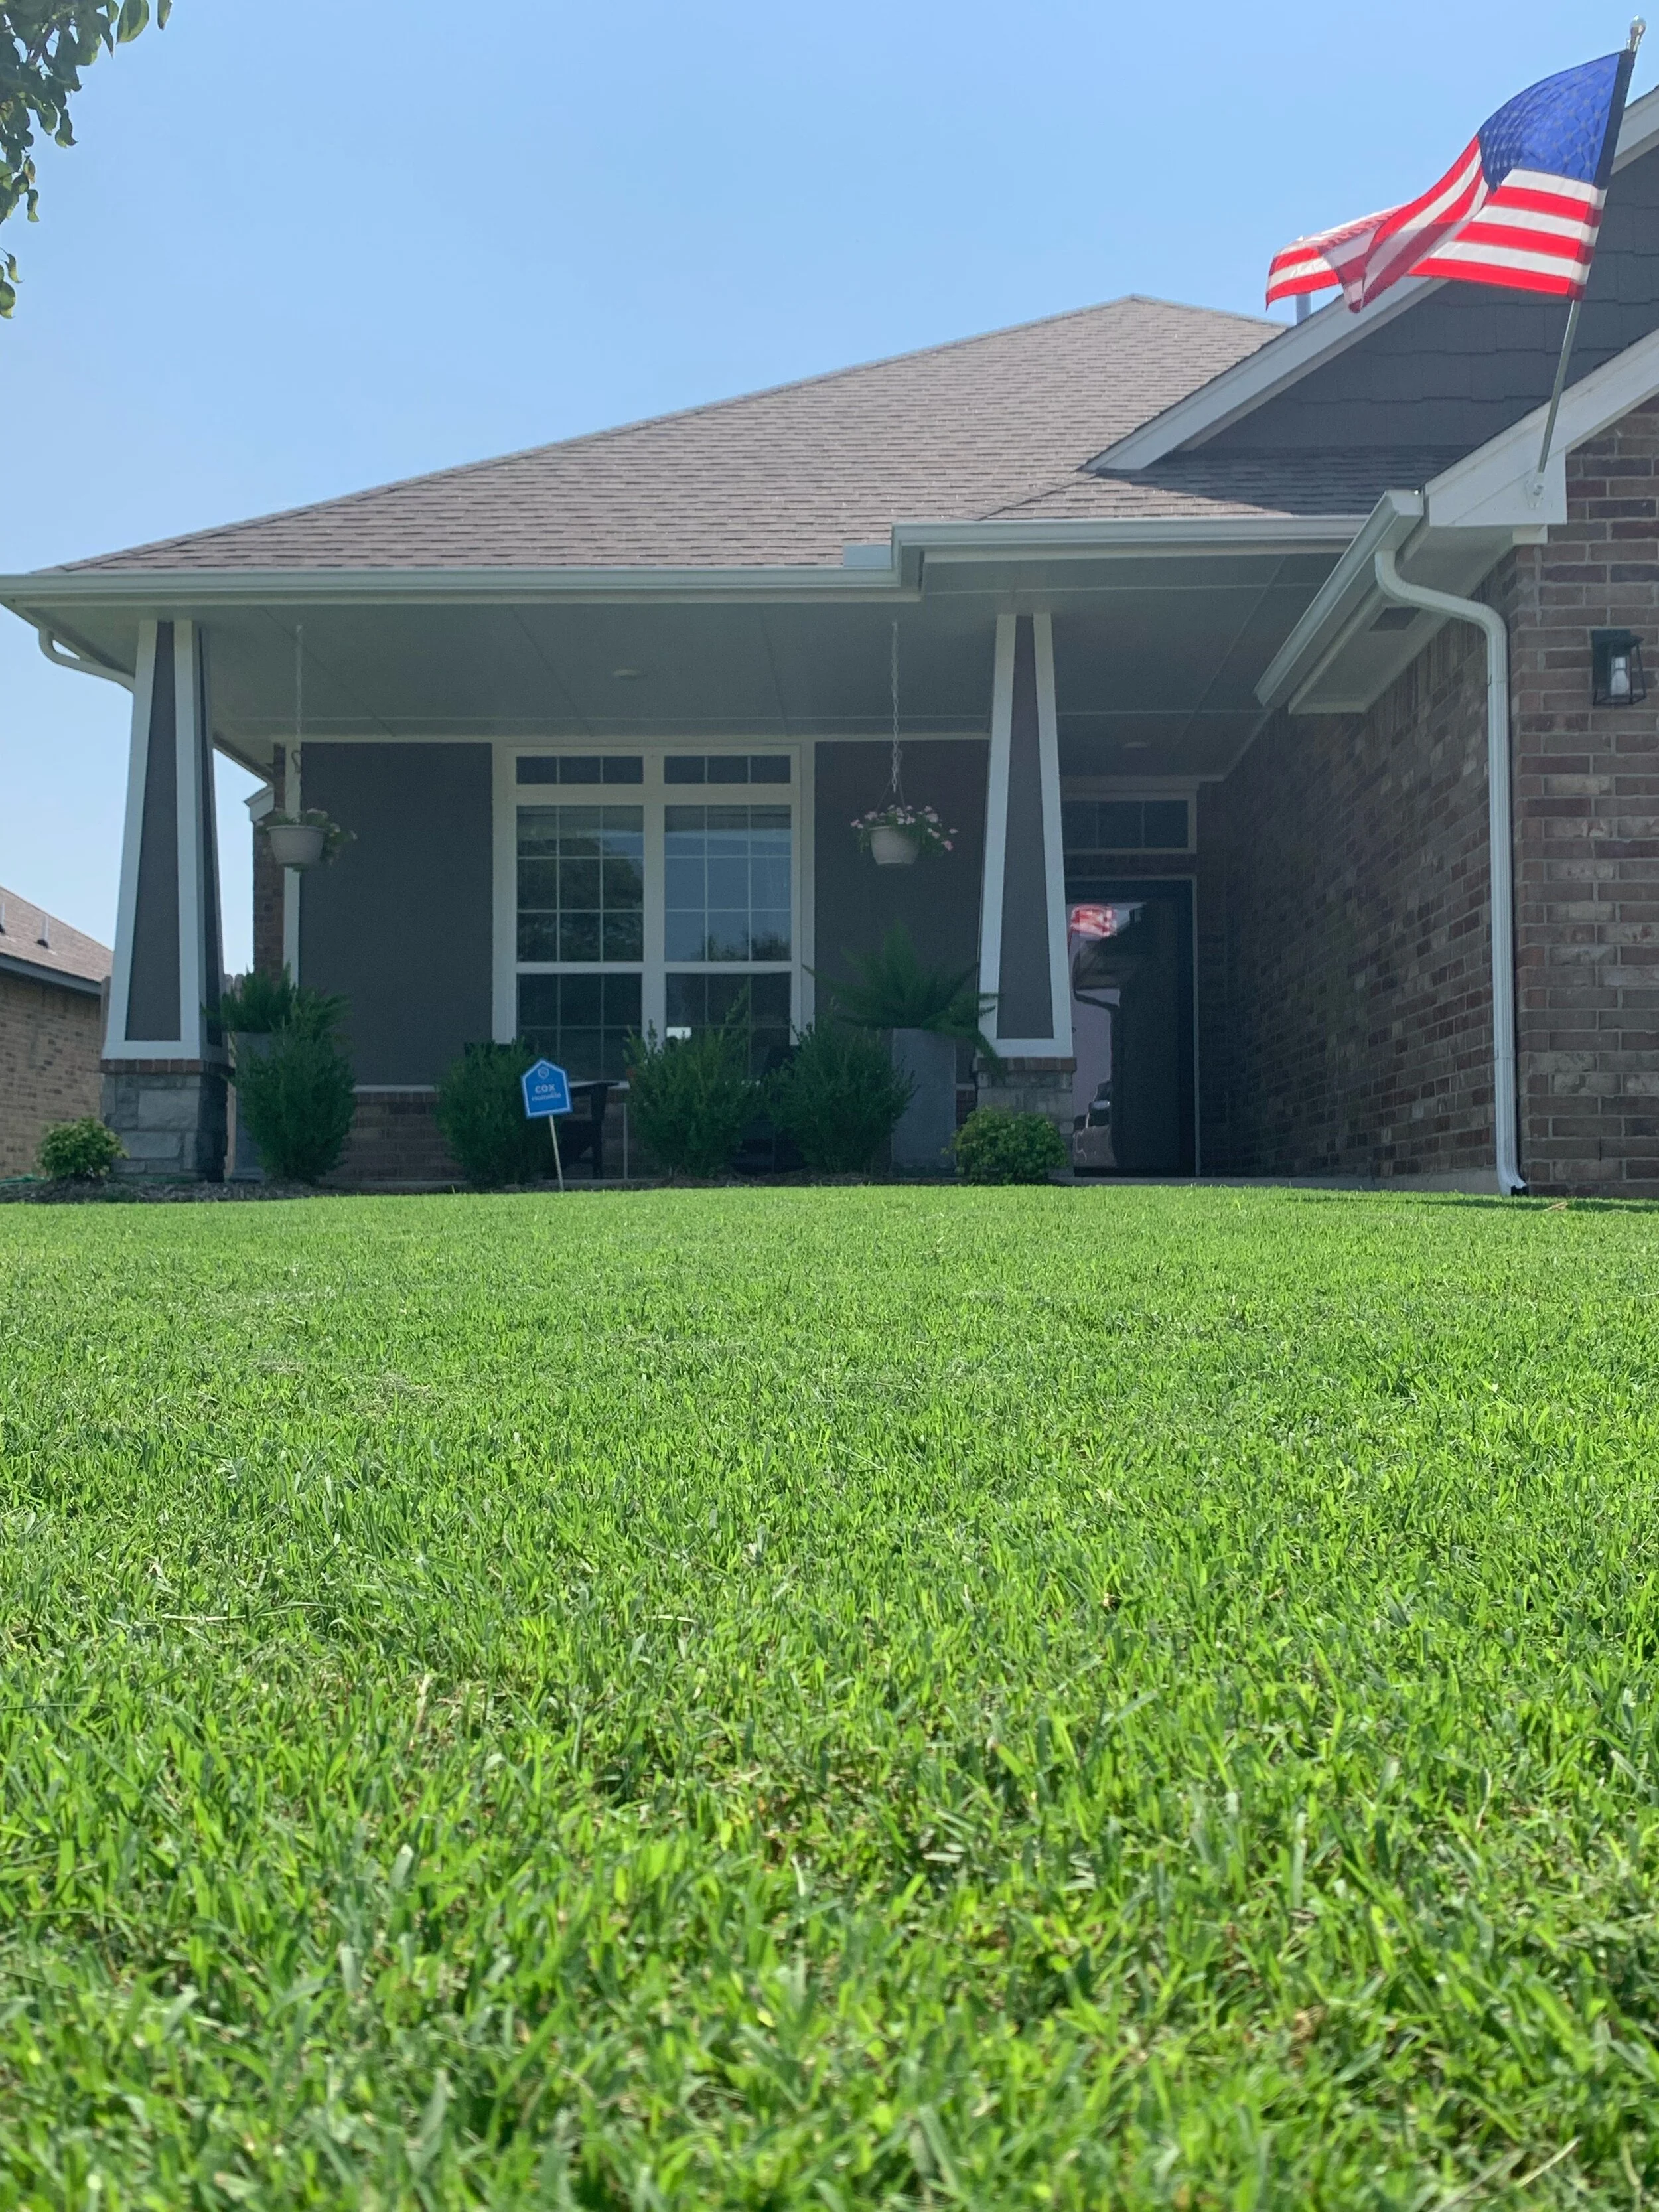
Your landscape has a big impact on your property value and greatly impacts your curb appeal.
Plant something new this fall.
You won’t be disappointed.
Lorne Hall
Hall | Stewart Lawn + Landscape
(405)367-3873
The 4 Most Common Ways to Fail at Establishing Fescue

This week, something happened to me that in nearly 40 years of working in the lawn and landscape industry in Central Oklahoma, has never happened:
It’s the first week of September and twice I was asked: “Is it too late to overseed fescue?”
Usually, it is the exact opposite – the first week of September & Oklahomans are worried it’s too early.
The weather hasn’t been typical. Summer’s usual fight to hold on into September has been replaced with the pleasant feeling of the early days of fall.
We are just at the start of the perfect window for establishing fescue, September through October.
As we discussed on August 17th in Bermuda vs Fescue The Choice is Yours, there are two approaches to using fescue in your lawn: Fescue in shady areas only or a full fescue lawn.
After evaluating your lawn, if you decided to establish fescue for the first time or if you decided you should add more fescue to your already fescue areas, we don’t want you to fail.
What are the four most common ways to fail at establishing fescue?


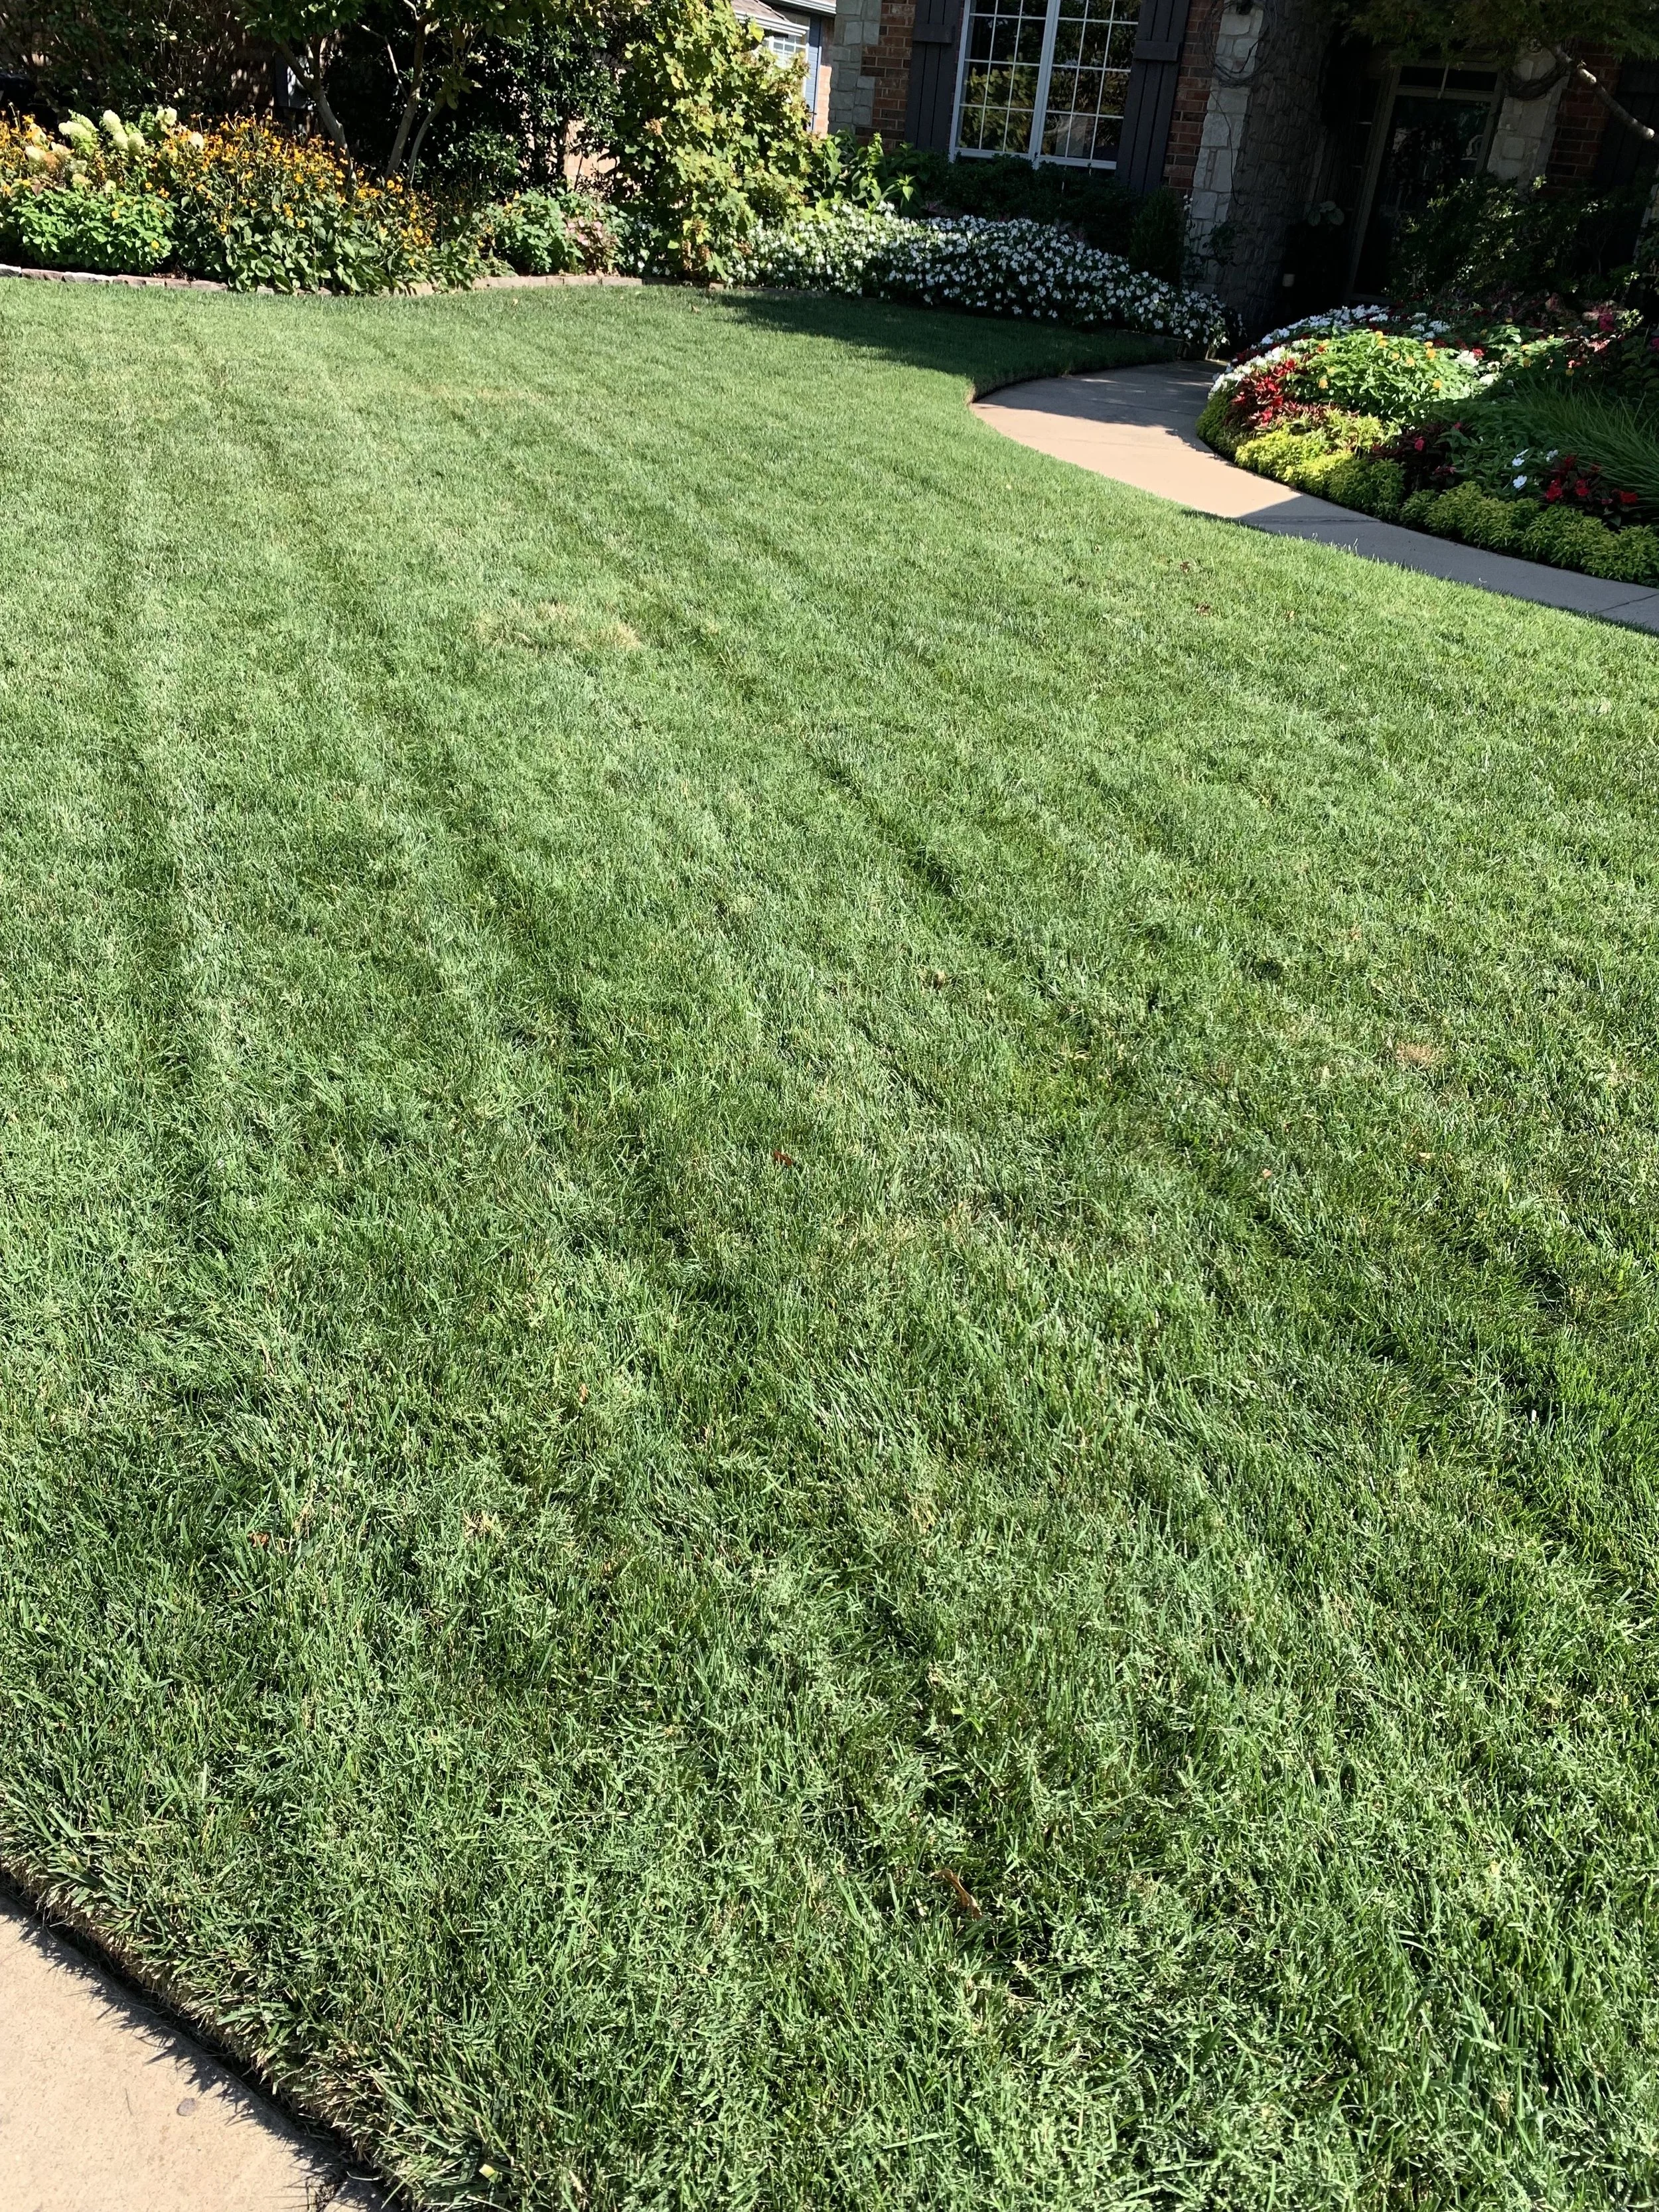
Small, shady areas in your lawn where there is low air movement and shade are prime candidates for annual fall seeding with fescue.

Fescue the last week of September last fall after overseeding in early September.
Failure to Seed in the Fall
Because fescue is a cool season grass, there are two times per year you can plant fescue seed: Fall (September through October) and Spring (March and April).
But, if you wait until spring to seed fescue, you are seeding at the second-best time and there is an enormous chasm between the establishment of fescue now (the best time) and next spring (the second-best time).
Spring seeded fescue will come up great, but it rarely establishes enough root system to make it through the summer heat (fescue’s off season). As a younger, weaker plant, spring seeded fescue is also more susceptible to brown patch disease.
With abundant moisture during June and early July when nighttime temperatures were warm, brown patch was prevalent in our climate. The most susceptible fescue lawns were the ones with spring seeded fescue.
Fall seeded fescue has all fall, winter, and spring to establish a root system before enduring the heat of July and August.
Don’t fail at establishing fescue – seed now, not next spring.
Failure #1 – Seeding fescue in the spring.
Fall seeded fescue is better prepared to withstand the heat of July and August.

Fescue is the best turf grass for areas of your lawn that receive dappled sun. Bermuda needs at least 6 hours per day of direct sun light.
Failure to Create Good Seed to Soil Contact
Good seed to soil contact is important. If you sow seed over the existing soil without some preparation, the chance of a successful seeding is greatly reduced. Research shows the percentage of germination decreases dramatically when seed is just sewn on top of the ground.
You will have success if you start by cutting the existing turf short to remove excess grass. Then loosen the soil to create good seed to soil contact.
Aeration is the best method to loosen the soil and gain good seed to soil contact. Aerating also gives you the extra benefit of improving the soil structure, increasing water absorption, and developing deeper roots.
Give more attention to bare areas and the edges. Rough up the areas with a rake. Rototilling isn’t necessary but breaking the surface of the soil in bare areas is needed.
Heavy aeration is one of the best ways to create good seed to soil contact when seeding. You also get the added benefit of improved soil conditions from aeration.
In areas that are completely bare, spread a thin layer of peat moss over the surface after seeding to increase the seed to soil contact.
If overseeding an existing fescue area with a good stand of grass, spread seed at a rate of 5-8 pounds per 1,000 square feet.
If establishing a new fescue lawn, spread seed at a rate of 10-12 pounds per 1,000 square feet.
Failure #2 – Just spreading the seed over the top of the ground.

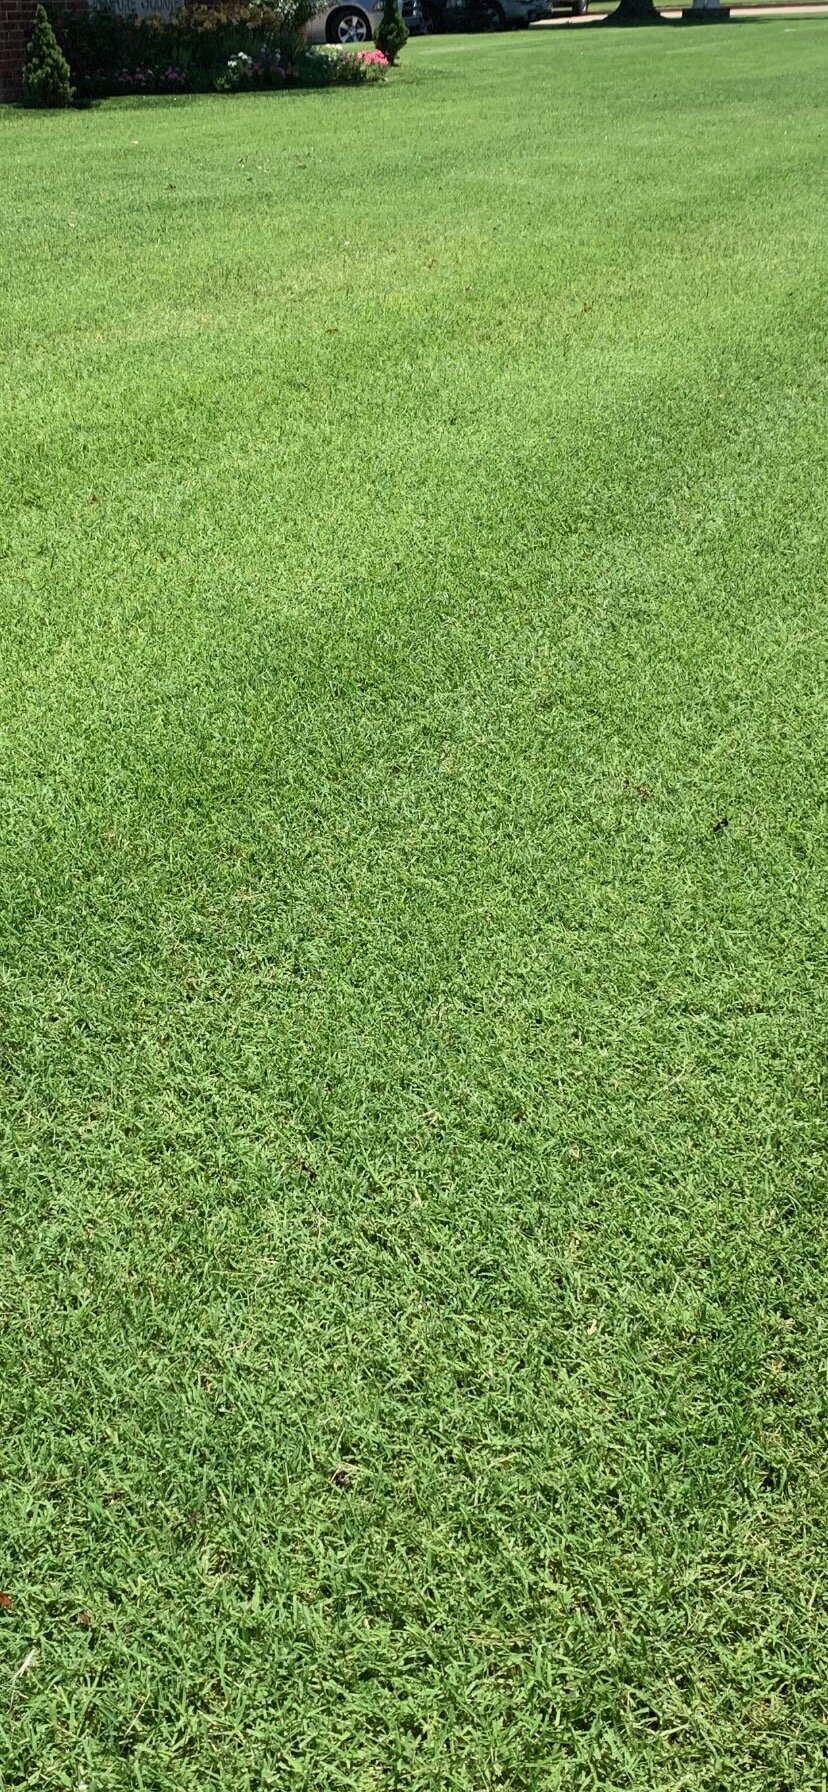
The lawn was being maintained at 3”.
This bermuda lawn is being cut short in preparation of overseeding it with fescue for the first time.

Cutting it to 2” will improve the seed to soil contact and increase the success of the first time overseed.
Failure to Buy a Good Fescue Blend
Fescue was first introduced in the US from Europe in the 1800s as pasture grass. Kentucky-31 Tall Fescue was developed in the 1940s as an improved pasture grass and introduced to the home turf market in the 1960s by Pennington Seed.

All seed grown in Oregon is certified. Buy it when possible.

Look for a fescue blend with at least 3 varieties. Blends contain the best varieties and give you more protection against disease and are more heat and drought tolerant.

What is the point of the seed history lesson?
If you are buying Kentucky-31 Tall Fescue, you are buying an 80-year-old product when there are over 300 improved fescue varieties that offer darker green color, narrower blades, and improved tolerance to heat, cold, drought and disease. Kentucky-31 is marginally acceptable as a lawn grass that tends to become thin and clumpy.

Improved fescue varieties are very heat and drought tolerant and can successfully be grown in full sun.
No matter the name on the bag of the seed, any improved variety will outperform Kentucky-31.
We believe using a blend is best when seeding fescue. Blends are a combination of two or more varieties within the same species, such as two or more fescues in one mix. Blends are a combination of the best species, tested over time, for the best shade tolerance and disease resistance. The number one problem with fescue is brown patch disease. The best blends use fescue varieties that show strong resistance to brown patch. Also, some blends will contain bluegrass and, or rye for even more vibrant spring color.
Failure #3 – Buying cheap seed. You will get what you are pay for… a low-quality turf for years to come.
Failure to Keep the Area Tacky Moist Until Seed Germinates
The first three are very important, but the 4th one is critical for success.
Nothing will hand you a losing hand quicker than not keeping the seed moist. You can get the first three correct and have complete failure if the seeded area is not kept moist until new grass is visible in the entire area.

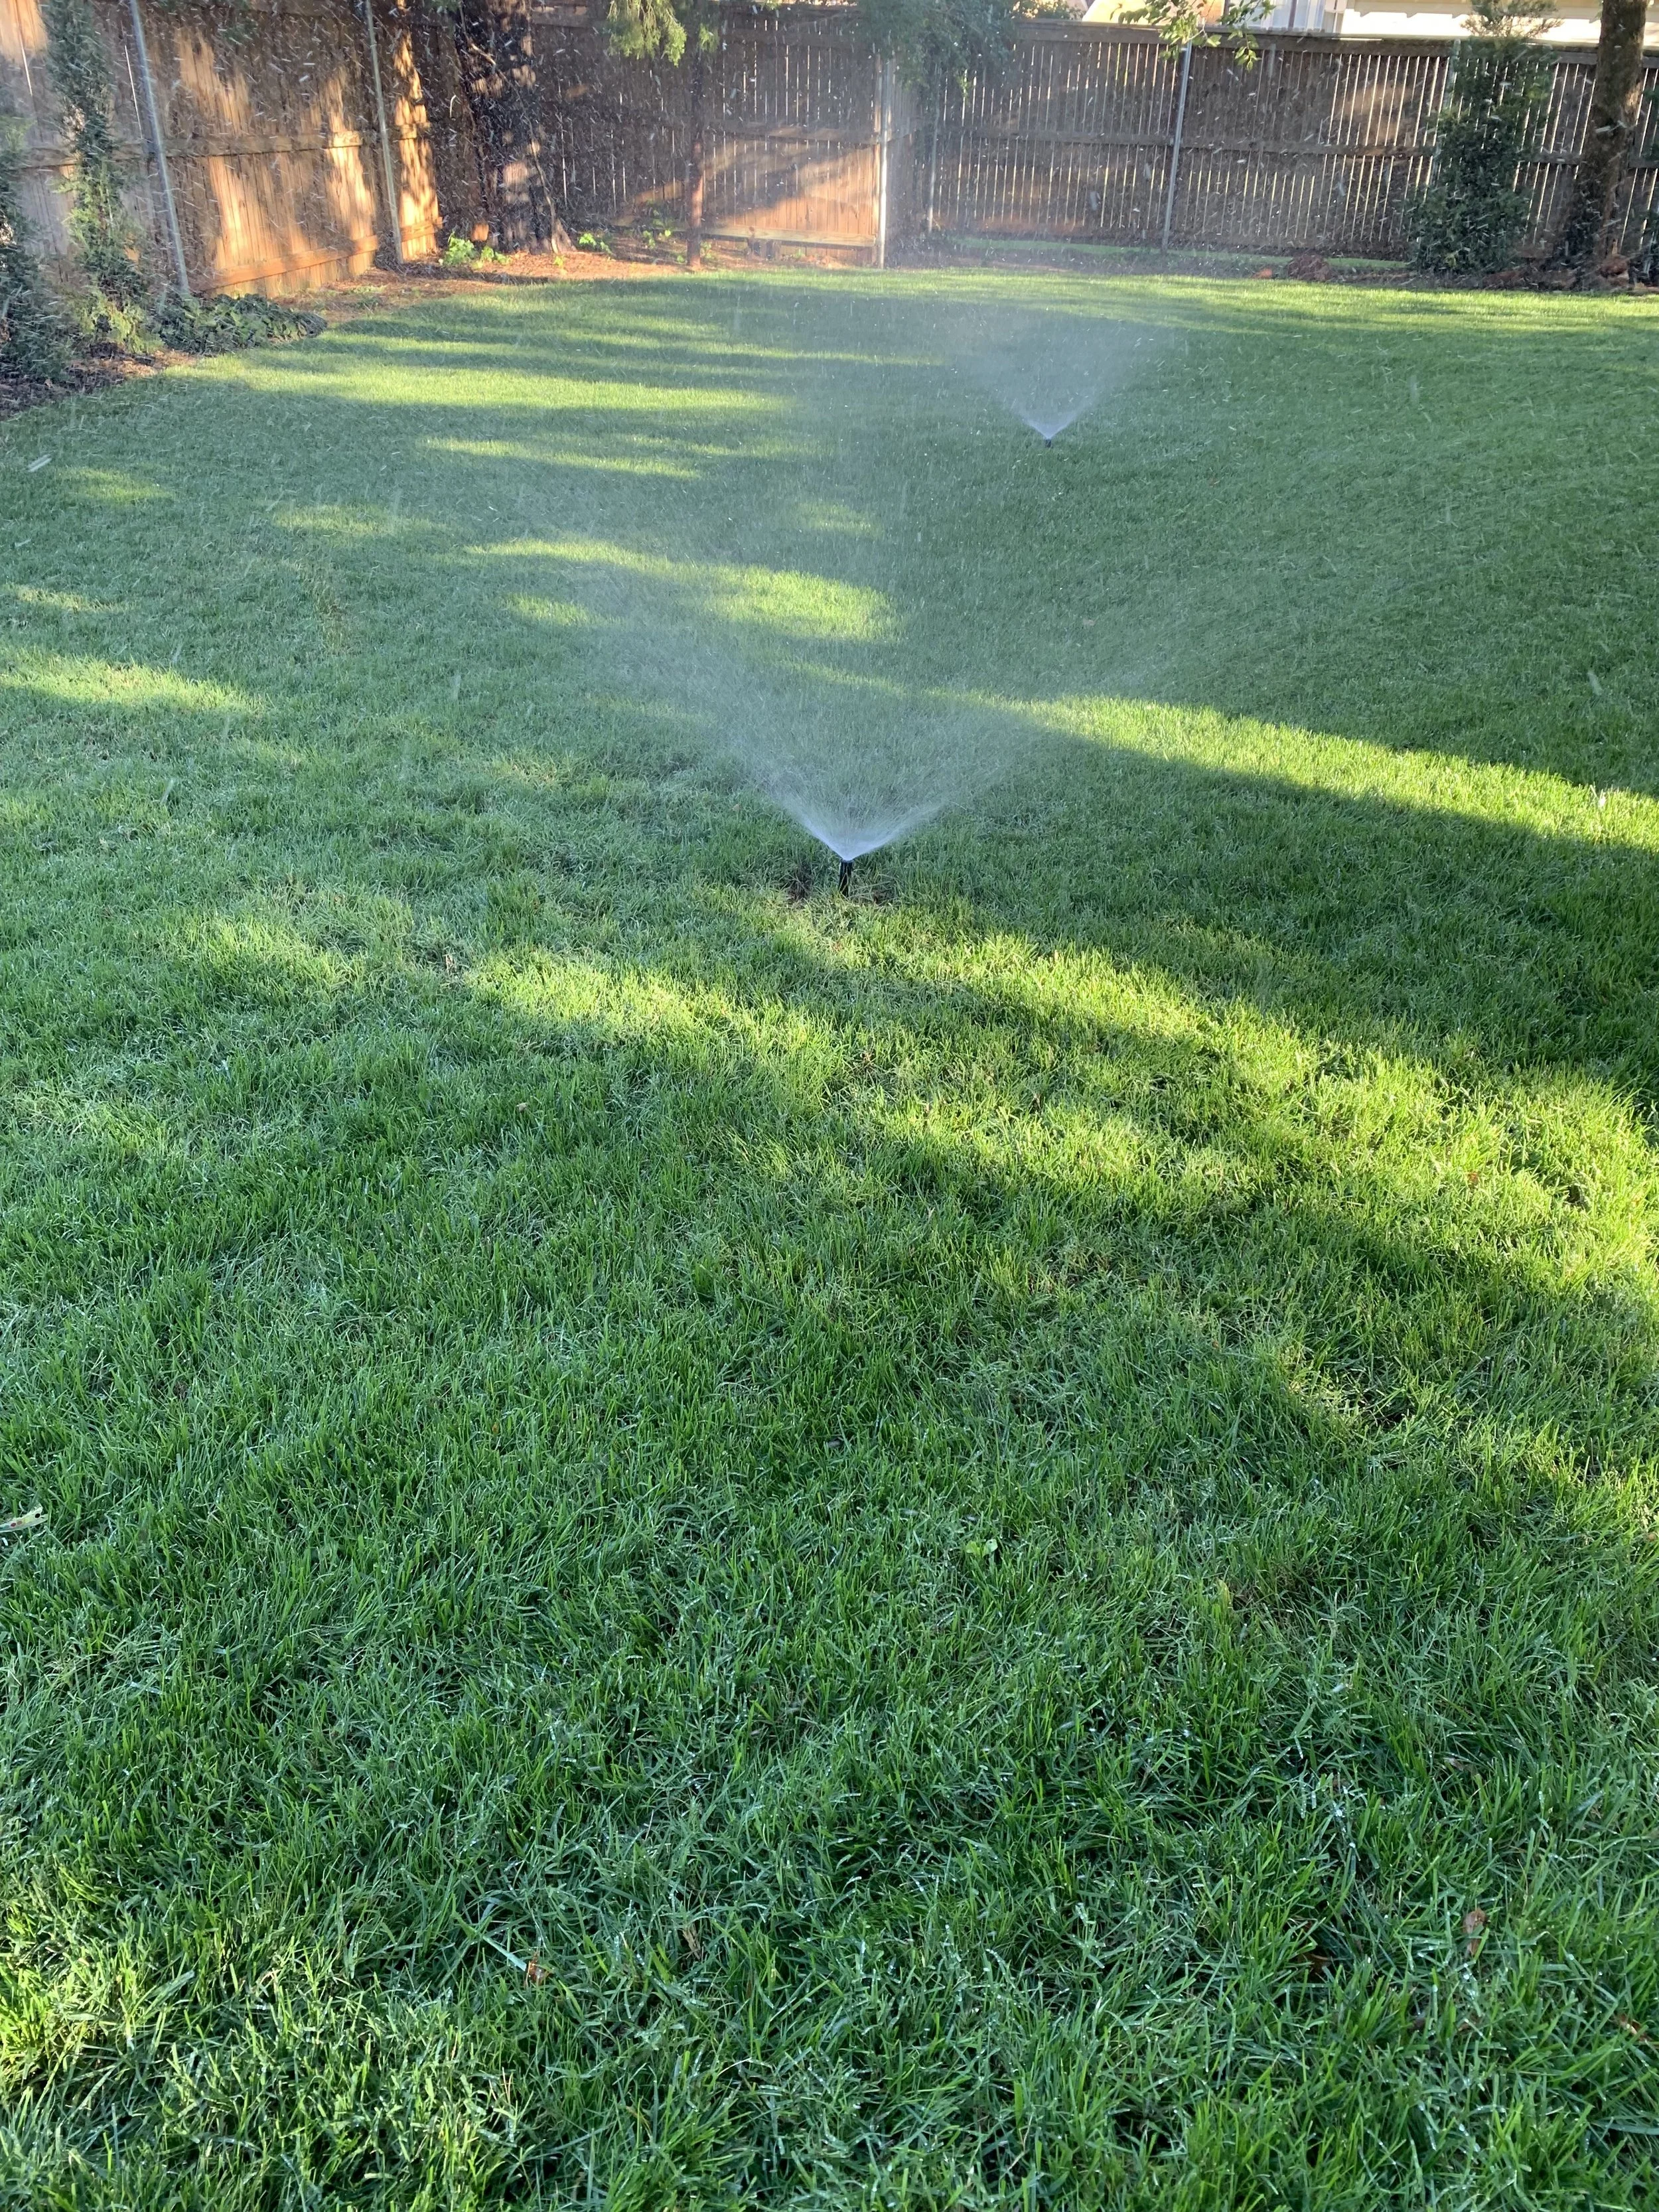
Even water distribution is important in keeping the seed tacky moist until it comes up. Check your system. Look for areas where there isn’t complete head to head coverage. The result will be poor germinate around the sprinkler head.

This picture 14 days after seeding demonstrates how critical moisture is to seed germination. The seed in the area where the irrigation does not reach has not germinated at all while the moist areas are nearly fully germinated.
The worst thing you can do is water the seeded area, allow it to dry completely, water again, allow it to dry completely, repeat, repeat, repeat… After a few times of drying out completely, the seed will no longer be viable.
For the best success, set your irrigation to run 3 short cycles per day. Set spray type zones to run 3-5 minutes each time. Set rotor type zones to run 7-10 minutes each time. If possible, set the system to run before dawn (4:00 AM), late morning (10:00 AM), and mid-afternoon (4:00 PM).
You don’t have to have an irrigation system to establish fescue. You only need to be diligent at watering every morning and every evening.
Failure #4 – Not keeping the seed tacky moist until it germinates.
Fescue can be grown successfully in Oklahoma. There are examples of great fescue lawns in every neighborhood, and there will be more and more as our environment becomes more and more shady.
Who should overseed this fall?
If you have areas of your lawn where the bermuda has thinned because of shade, you should seed this fall. Bermuda needs at least 6 hours of direct sunlight for the best performance. Less than 6 hours of direct sunlight and bermuda starts to thin.
If you have fescue areas that have become thin because of brown patch, drought, or insect damage, you should seed this fall.
If you just want to keep your fescue thick and healthy, you should seed this fall. Fescue doesn’t spread like bermuda with runners across the top of the soil. Fescue spreads through tillering through the soil and putting up new vertical shoots. Fescue spread is slow and often rare in the transition zone in which we live. To keep a fescue lawn at its best, adding more seed is common.
If you want to have a green lawn longer into the fall and earlier in the spring, you should seed this fall. Fescue is a cool season grass and stays green and active into early December and recovers from the winter in early March. With a fescue lawn, it is common to have a green lawn 10 out of 12 months.
Myth: It is difficult to grow fescue. But, really it isn’t. Growing fescue does require a different approach to your lawn, but it isn’t difficult when you avoid some of the most common mistakes in establishing fescue.
Successful fescue lawns are the result of best seeding practices, best cool season turf maintenance practices, and persistence. But, more importantly, they are a result of different thinking.
Bonus Reason Why Fescue Seeding Fails
Applying a fall pre-emergent before seeding in the area. The same pre-emergent herbicide that prevents weeds will prevent fescue from germinating. Wait until the new fescue turf has been mowed 2-3 times before putting a pre-emergent on the lawn.
Special Note: DO NOT use pre-emergent herbicides now in areas that are going to be seeded this fall.
If you need assistance in establishing a fescue lawn or have questions about fescue, give us a call – (405) 367-3873.
Lorne Hall
Hall | Stewart Lawn + Landscape

(405)367-3873
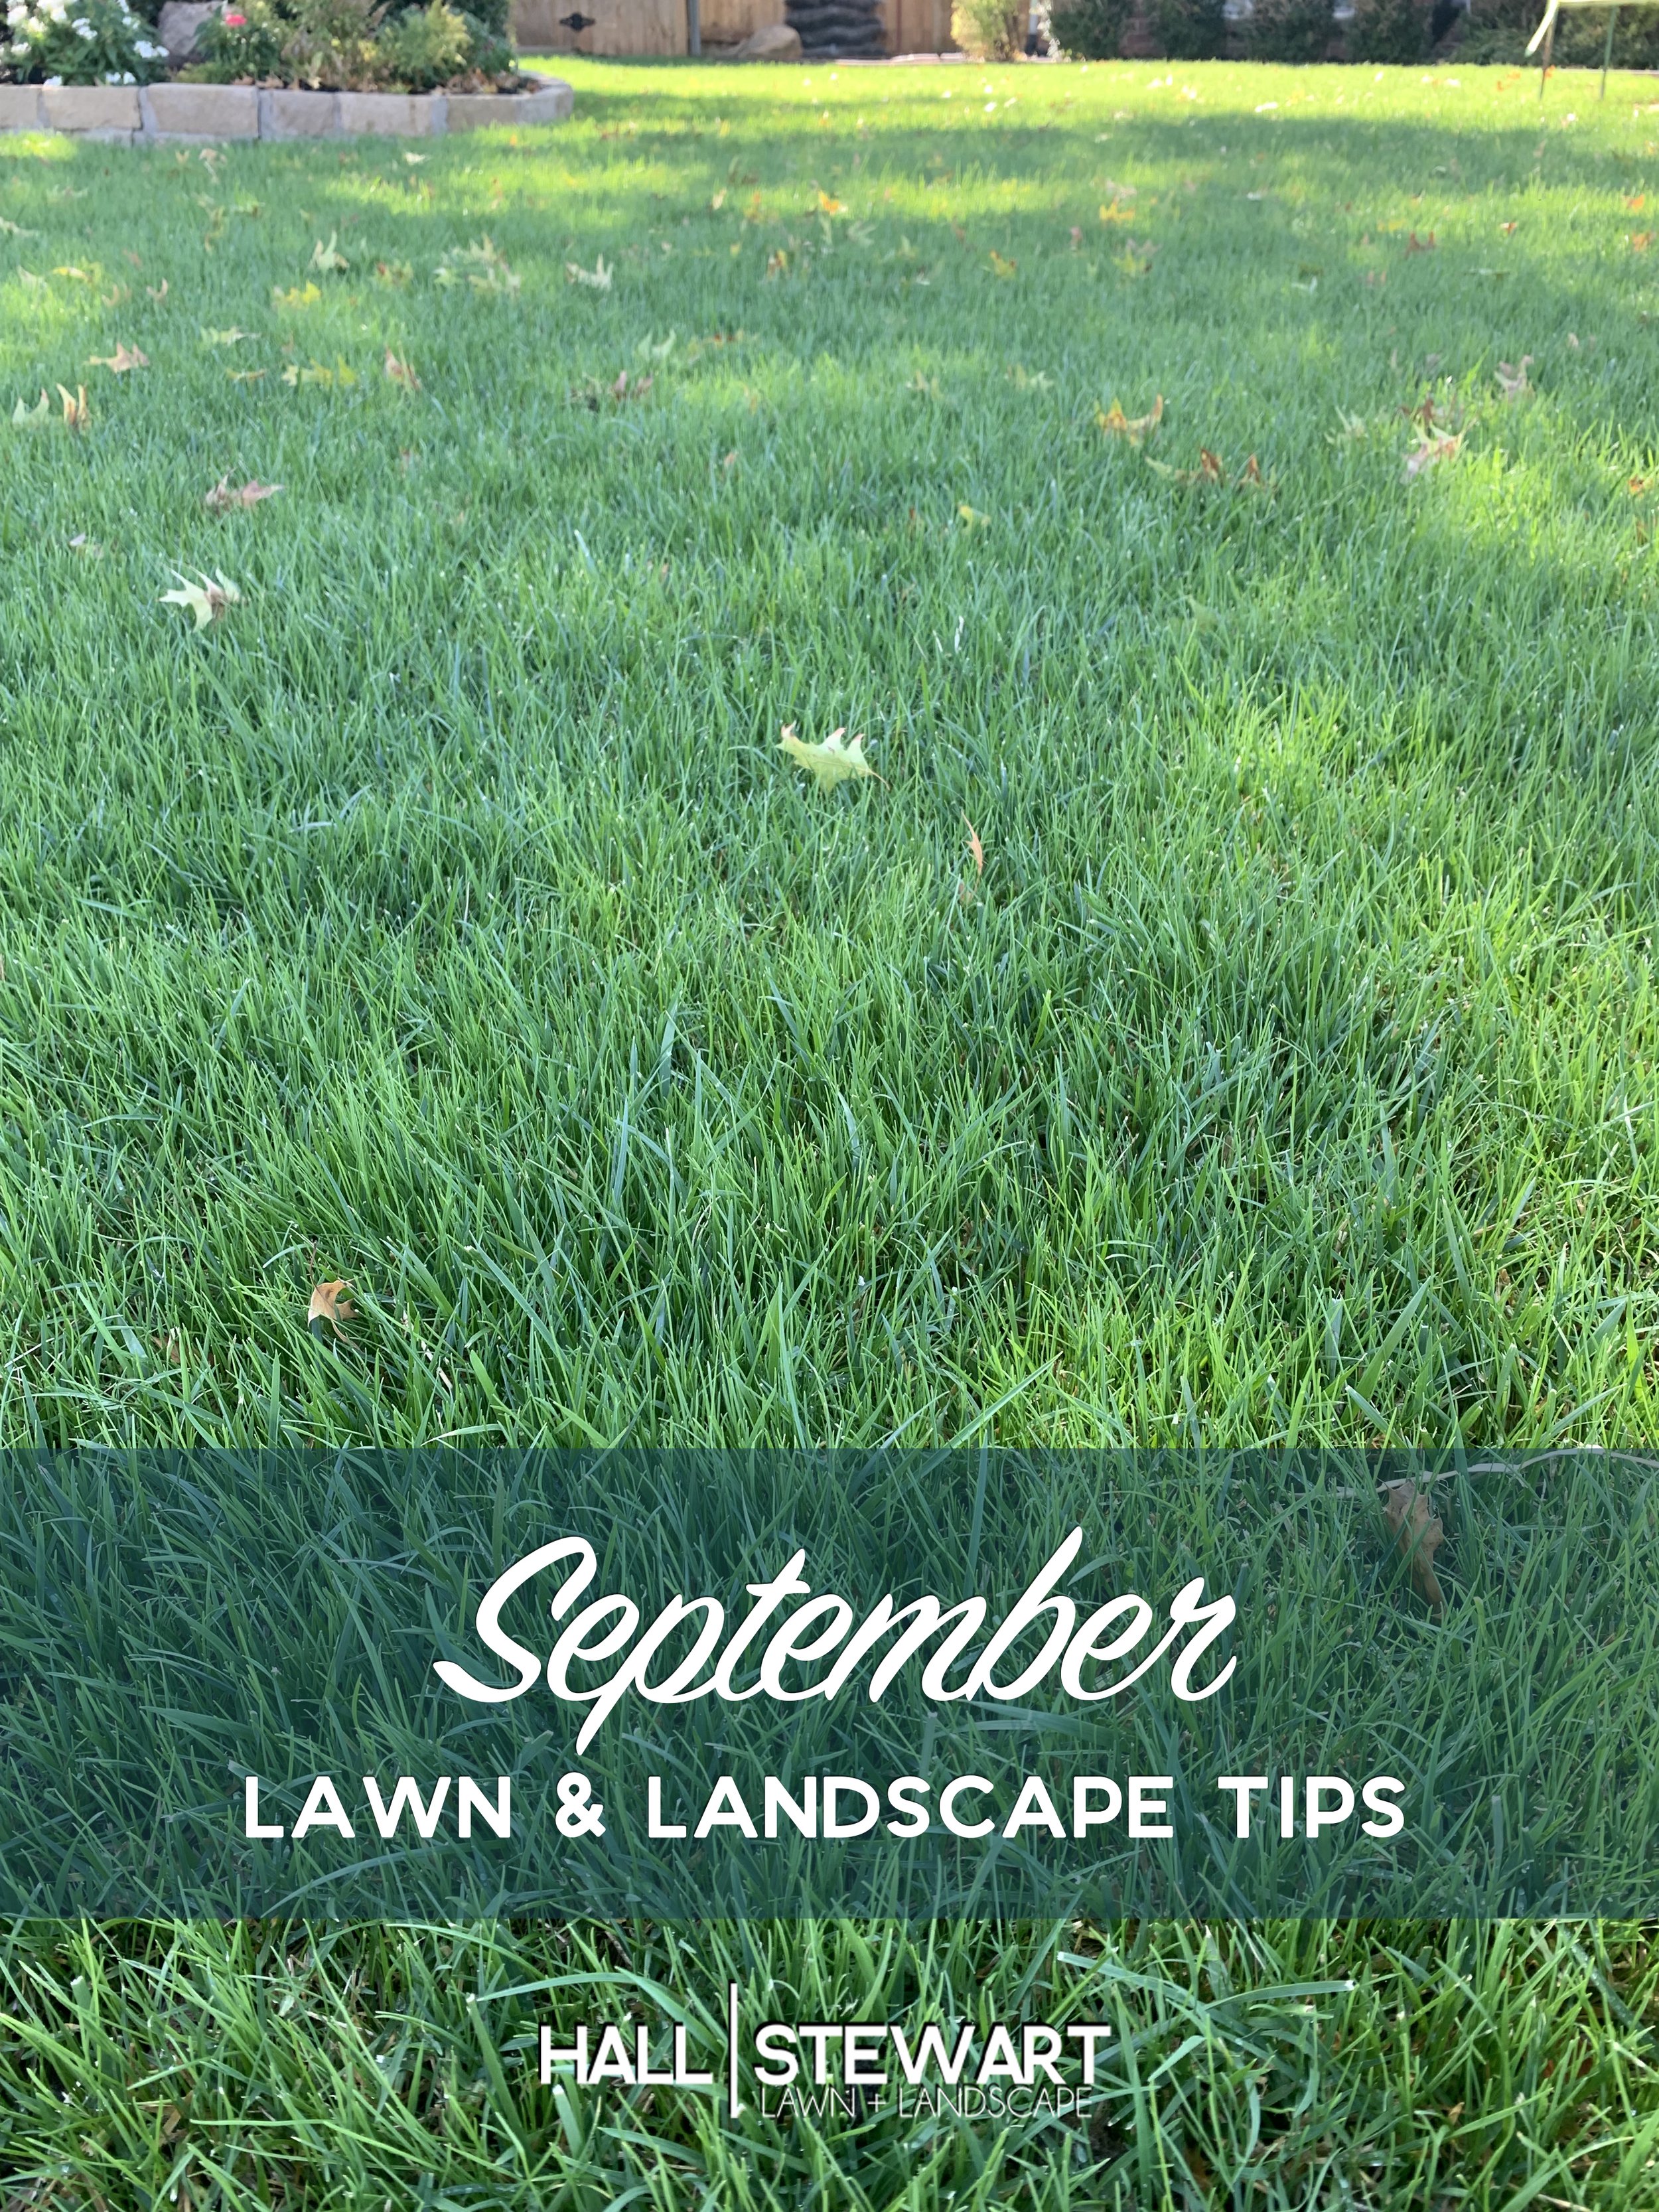
September Lawn & Landscape Tips
September, the transition month from summer to fall!
Last year August went out hot and dry. Not this year. With a week full of 70-degree days and over 3” of rain, it feels like we are on the fast track toward fall this year!
You have heard me say it before, I’m sure you it won’t be the last time either, but no two seasons are the same in Oklahoma. When it comes to weather, there is not a chance you are going to get bored around here.
Weather, environmental conditions, are one of the three legs of the stool when it comes to having a great lawn and landscape.
What are the three legs? 1. Environmental conditions (weather). 2. Mechanical issues (mowing, aerating, etc.). 3. Applications (fertilizer, weed control, insect and disease control).
When the legs of a stool are off, it is hard to sit on. This summer the environmental leg was always a little off. Warm season lawns were a little slow to get going but finished strong. Fescue lawns struggled with too much rain when temperatures were warm in late June and early July resulting in more disease pressure followed by a six-week hot and dry spell that fescue lawns were not ready well prepared to handle.
Simply put, it was an ok summer for warm season turf (bermuda) and a less-than-ideal summer for cool season lawns (fescue).
Now that summer is fading away, it is time to turn our focus toward the lawn and landscape activities of fall.
September lawn and landscape activities will make a big difference in the success of your landscape not only this fall, but also next spring.
For your lawn and landscape, it is important to finish the year strong and get a head start on next year by checking off these lawn and landscape activities during September:
Overseed
If you have a cool season lawn (fescue), September through October is the time to add more seed (overseed). Fall is by far the most successful time to establish cool season turf. Fescue seeded this fall will have stronger roots next summer when the heat returns.
If you have not already, inspect your fescue in the next few days. If there are thin areas due to dense shade, brown patch damage, or areas damaged by a lack of moisture during the heat, plan on overseeding this fall.
Also, look for areas of the lawn that have become too shady for bermuda. Bermuda needs at least 6 hours of direct sunlight for the best performance. The key words are “direct sunlight.” Dappled sunlight is not “direct sunlight.” Anything less than 6 hours of full sunlight and bermuda will begin to thin.
Sooner or later, you will have to introduce fescue in your lawn if you have trees. Success is easier if you start the process before the bermuda has completely faded.
Fescue is also a good choice for the narrow side areas of houses where the turf only receives a few hours of direct sun each day.
What are the keys to successful seeding? Good seed soil contact, a quality fescue blend, and keeping the seeded area tacky moist until the seed germinates.
Need help evaluating shady areas of your lawn, schedule a lawn evaluation by responding to this email or call (405)367-3873.

If you are overseeding with fescue this fall, even water distribution is a critical step to success. If you have dry areas in your irrigation system, make repairs before seeding.

One of the keys to successfully seeding shady areas is a quality seed. We believe in using a fescue blend containing varieties that have a history of performing well in Oklahoma.
Did you know that with the right maintenance plan and lawn care applications tailored for cool seasons grasses, fescue will perform well in full sun?
Fall seeded fescue lawns result in the best cool season lawns next spring.

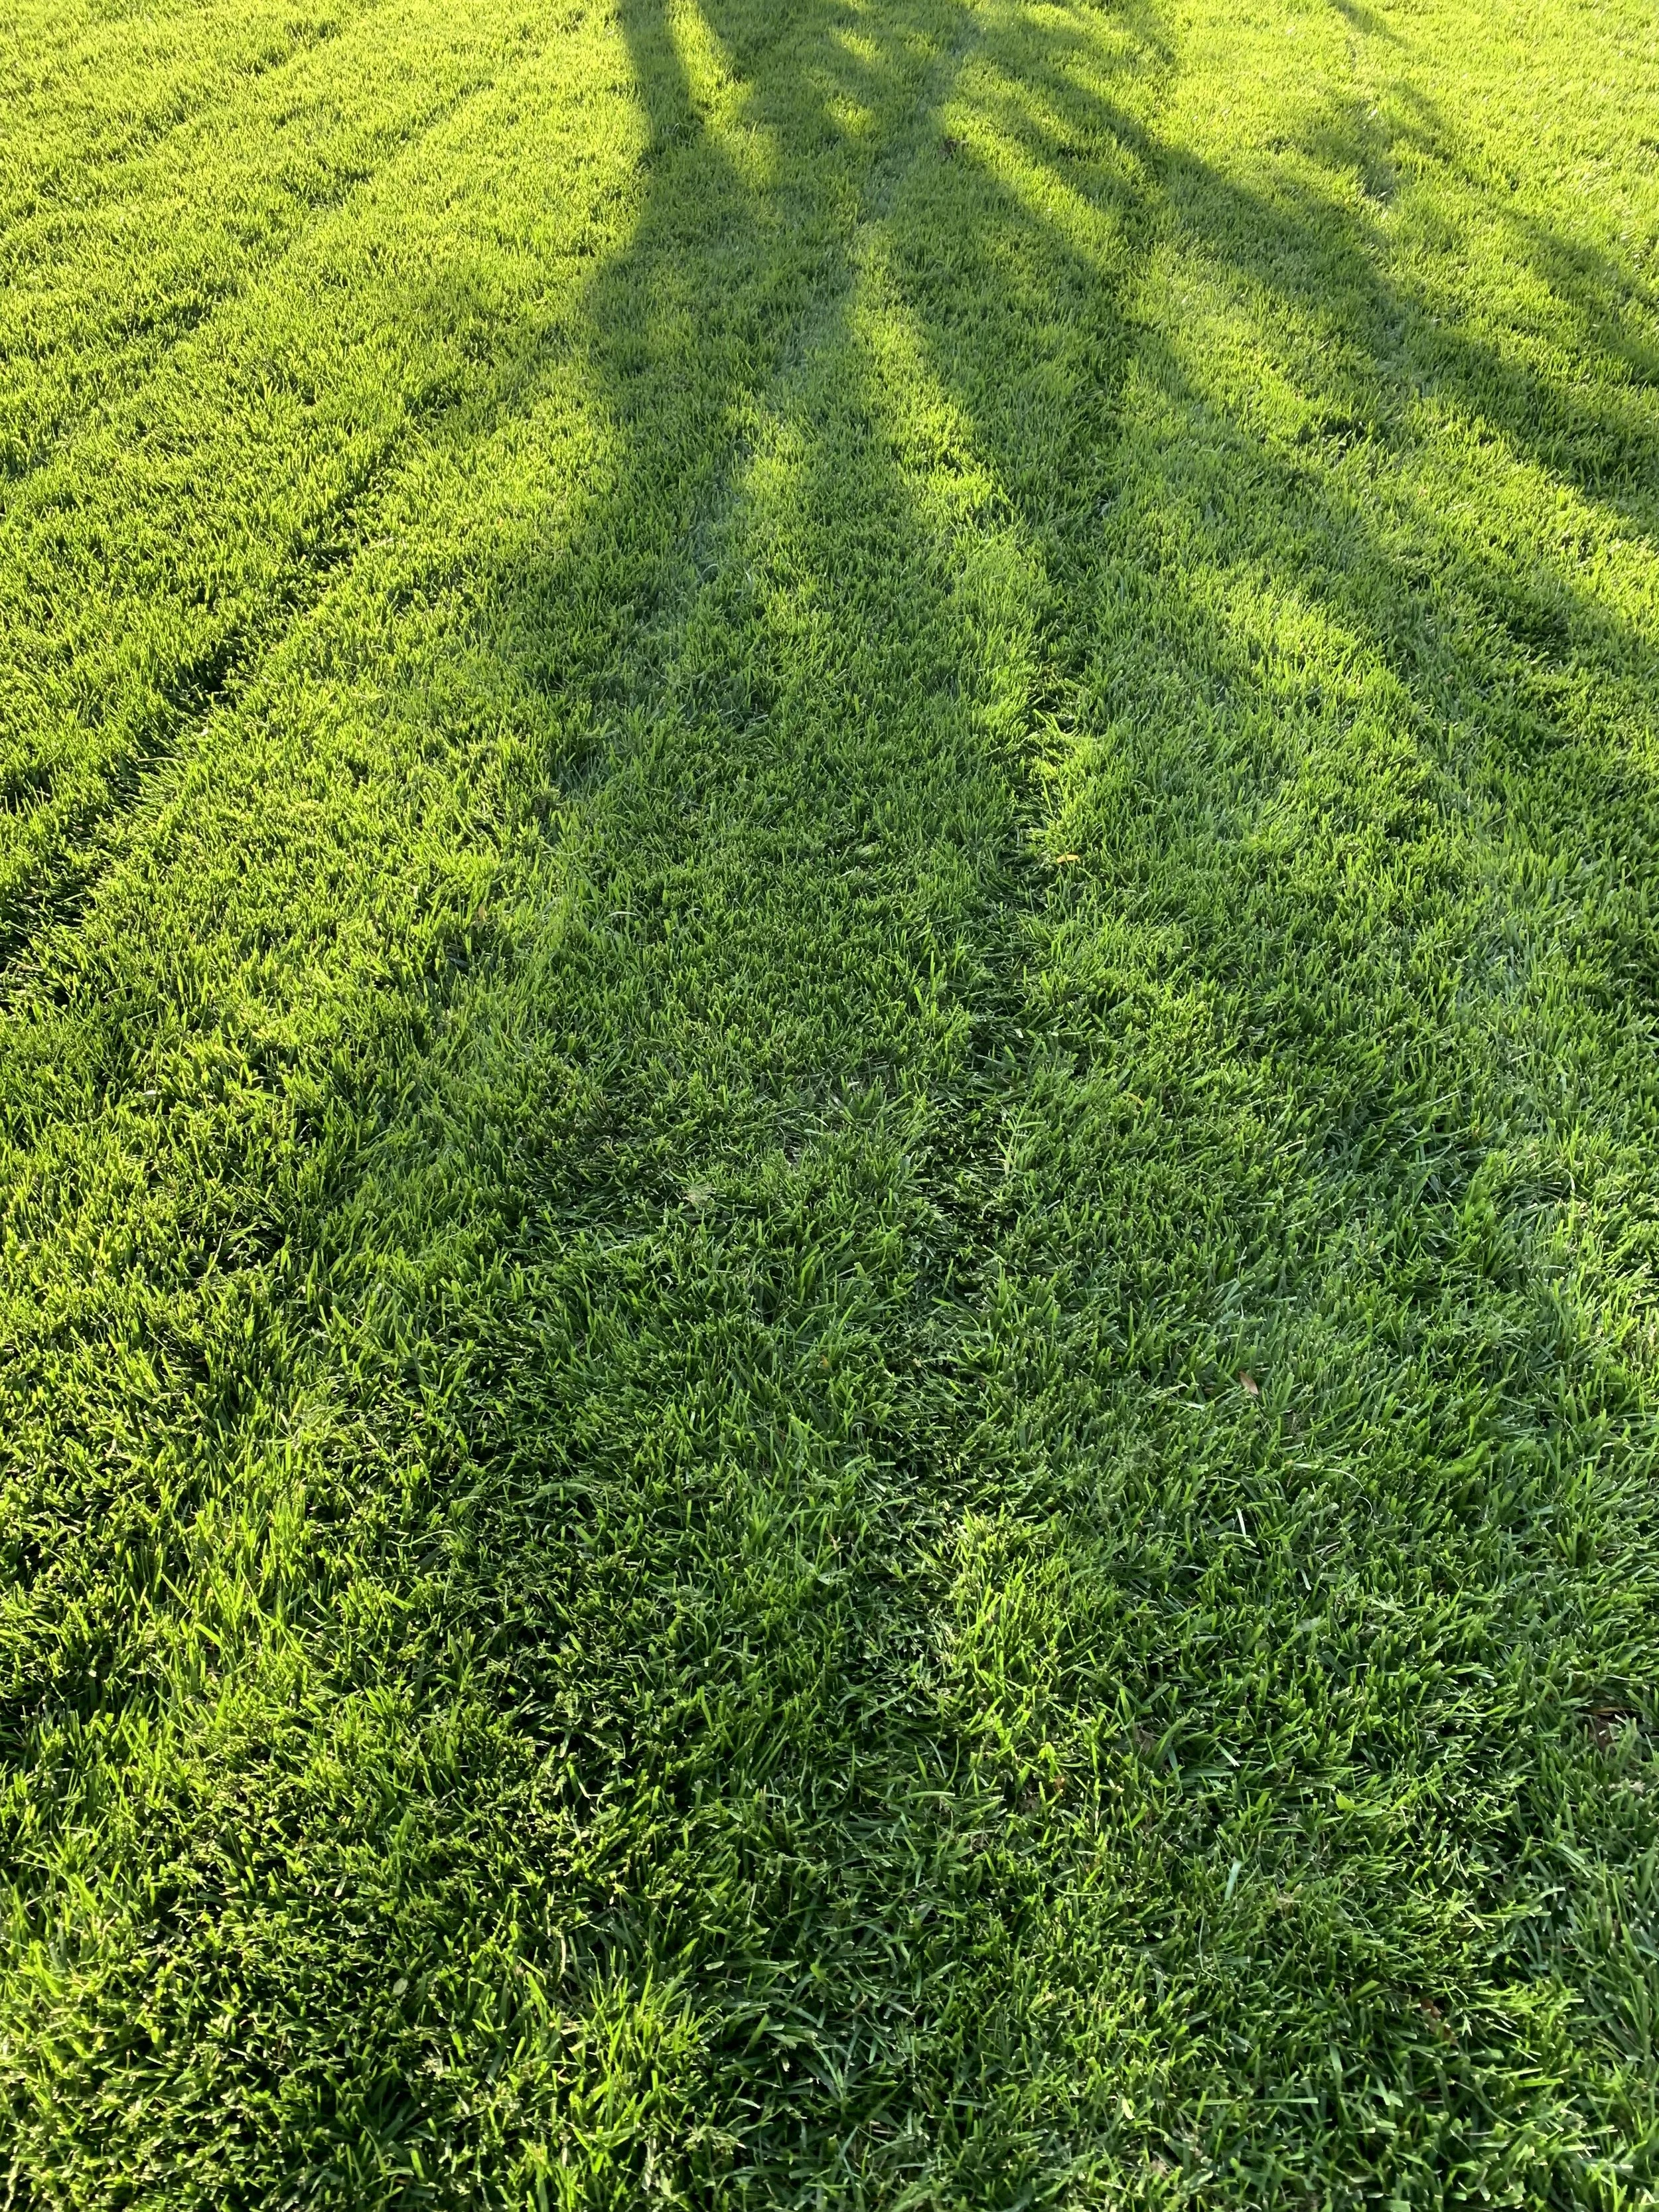
Overseeded fescue 14-21 days after seeding.

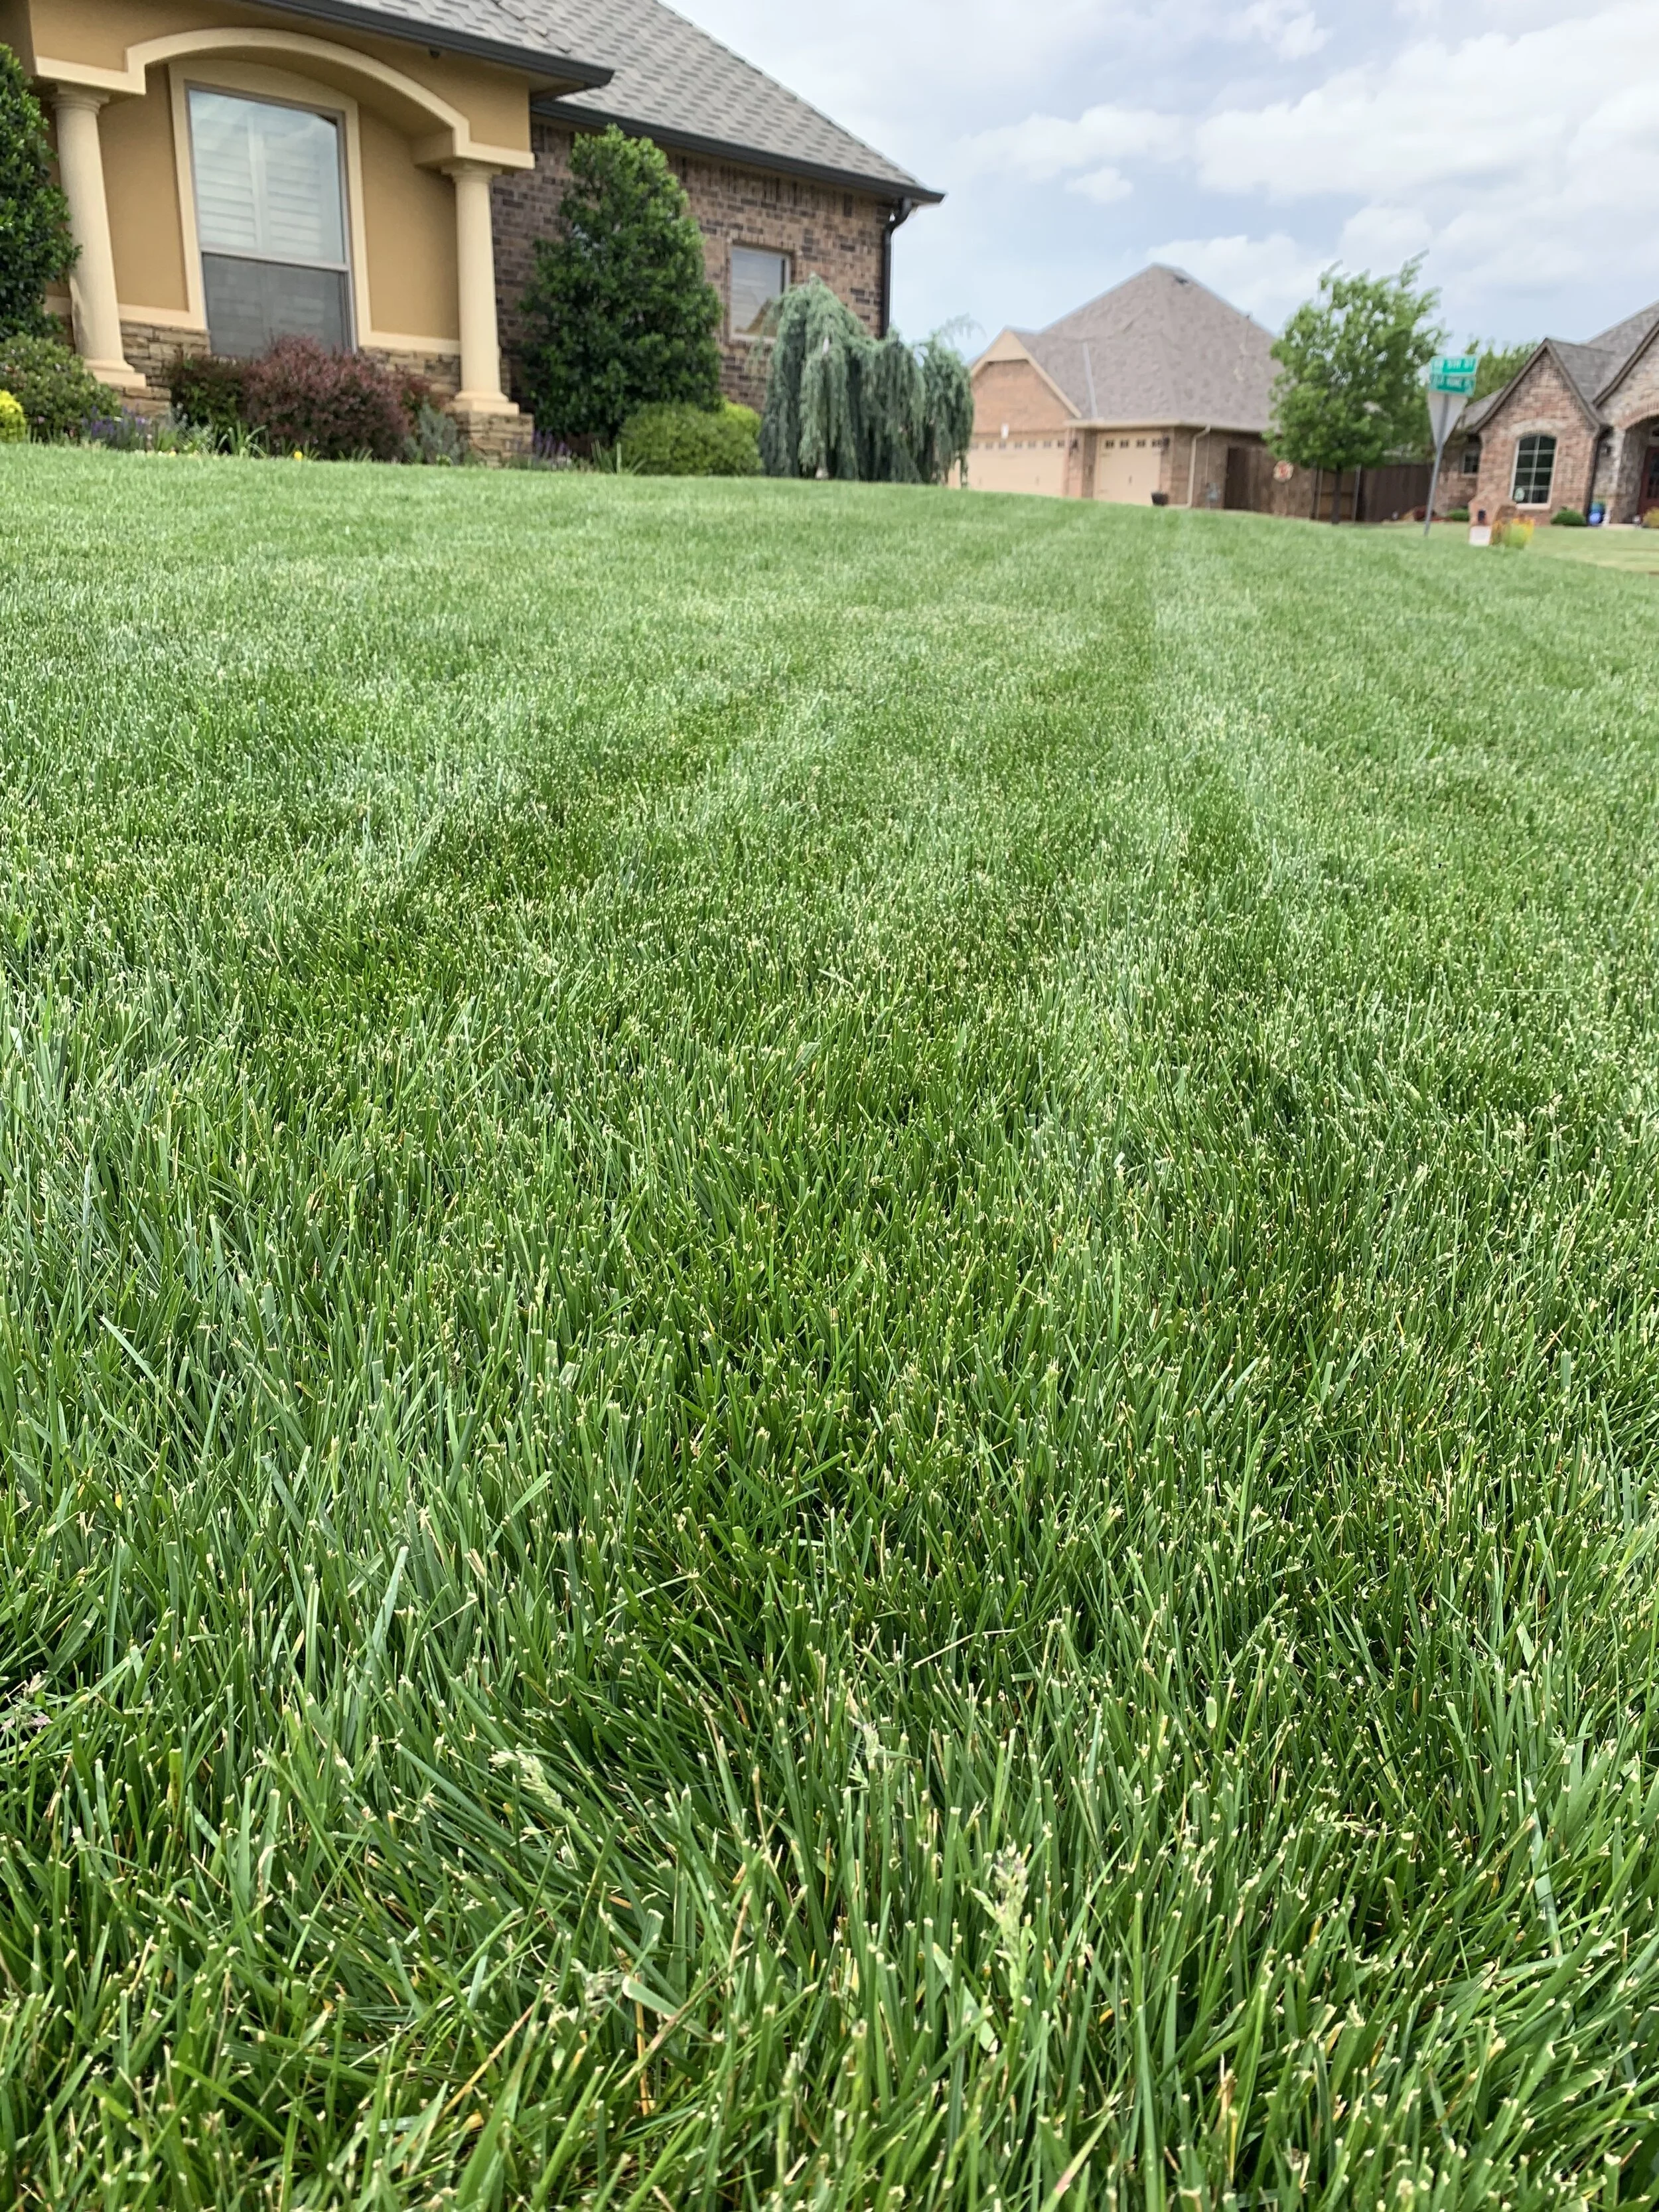
Fall is the best time to seed shady areas of your lawn with fescue.
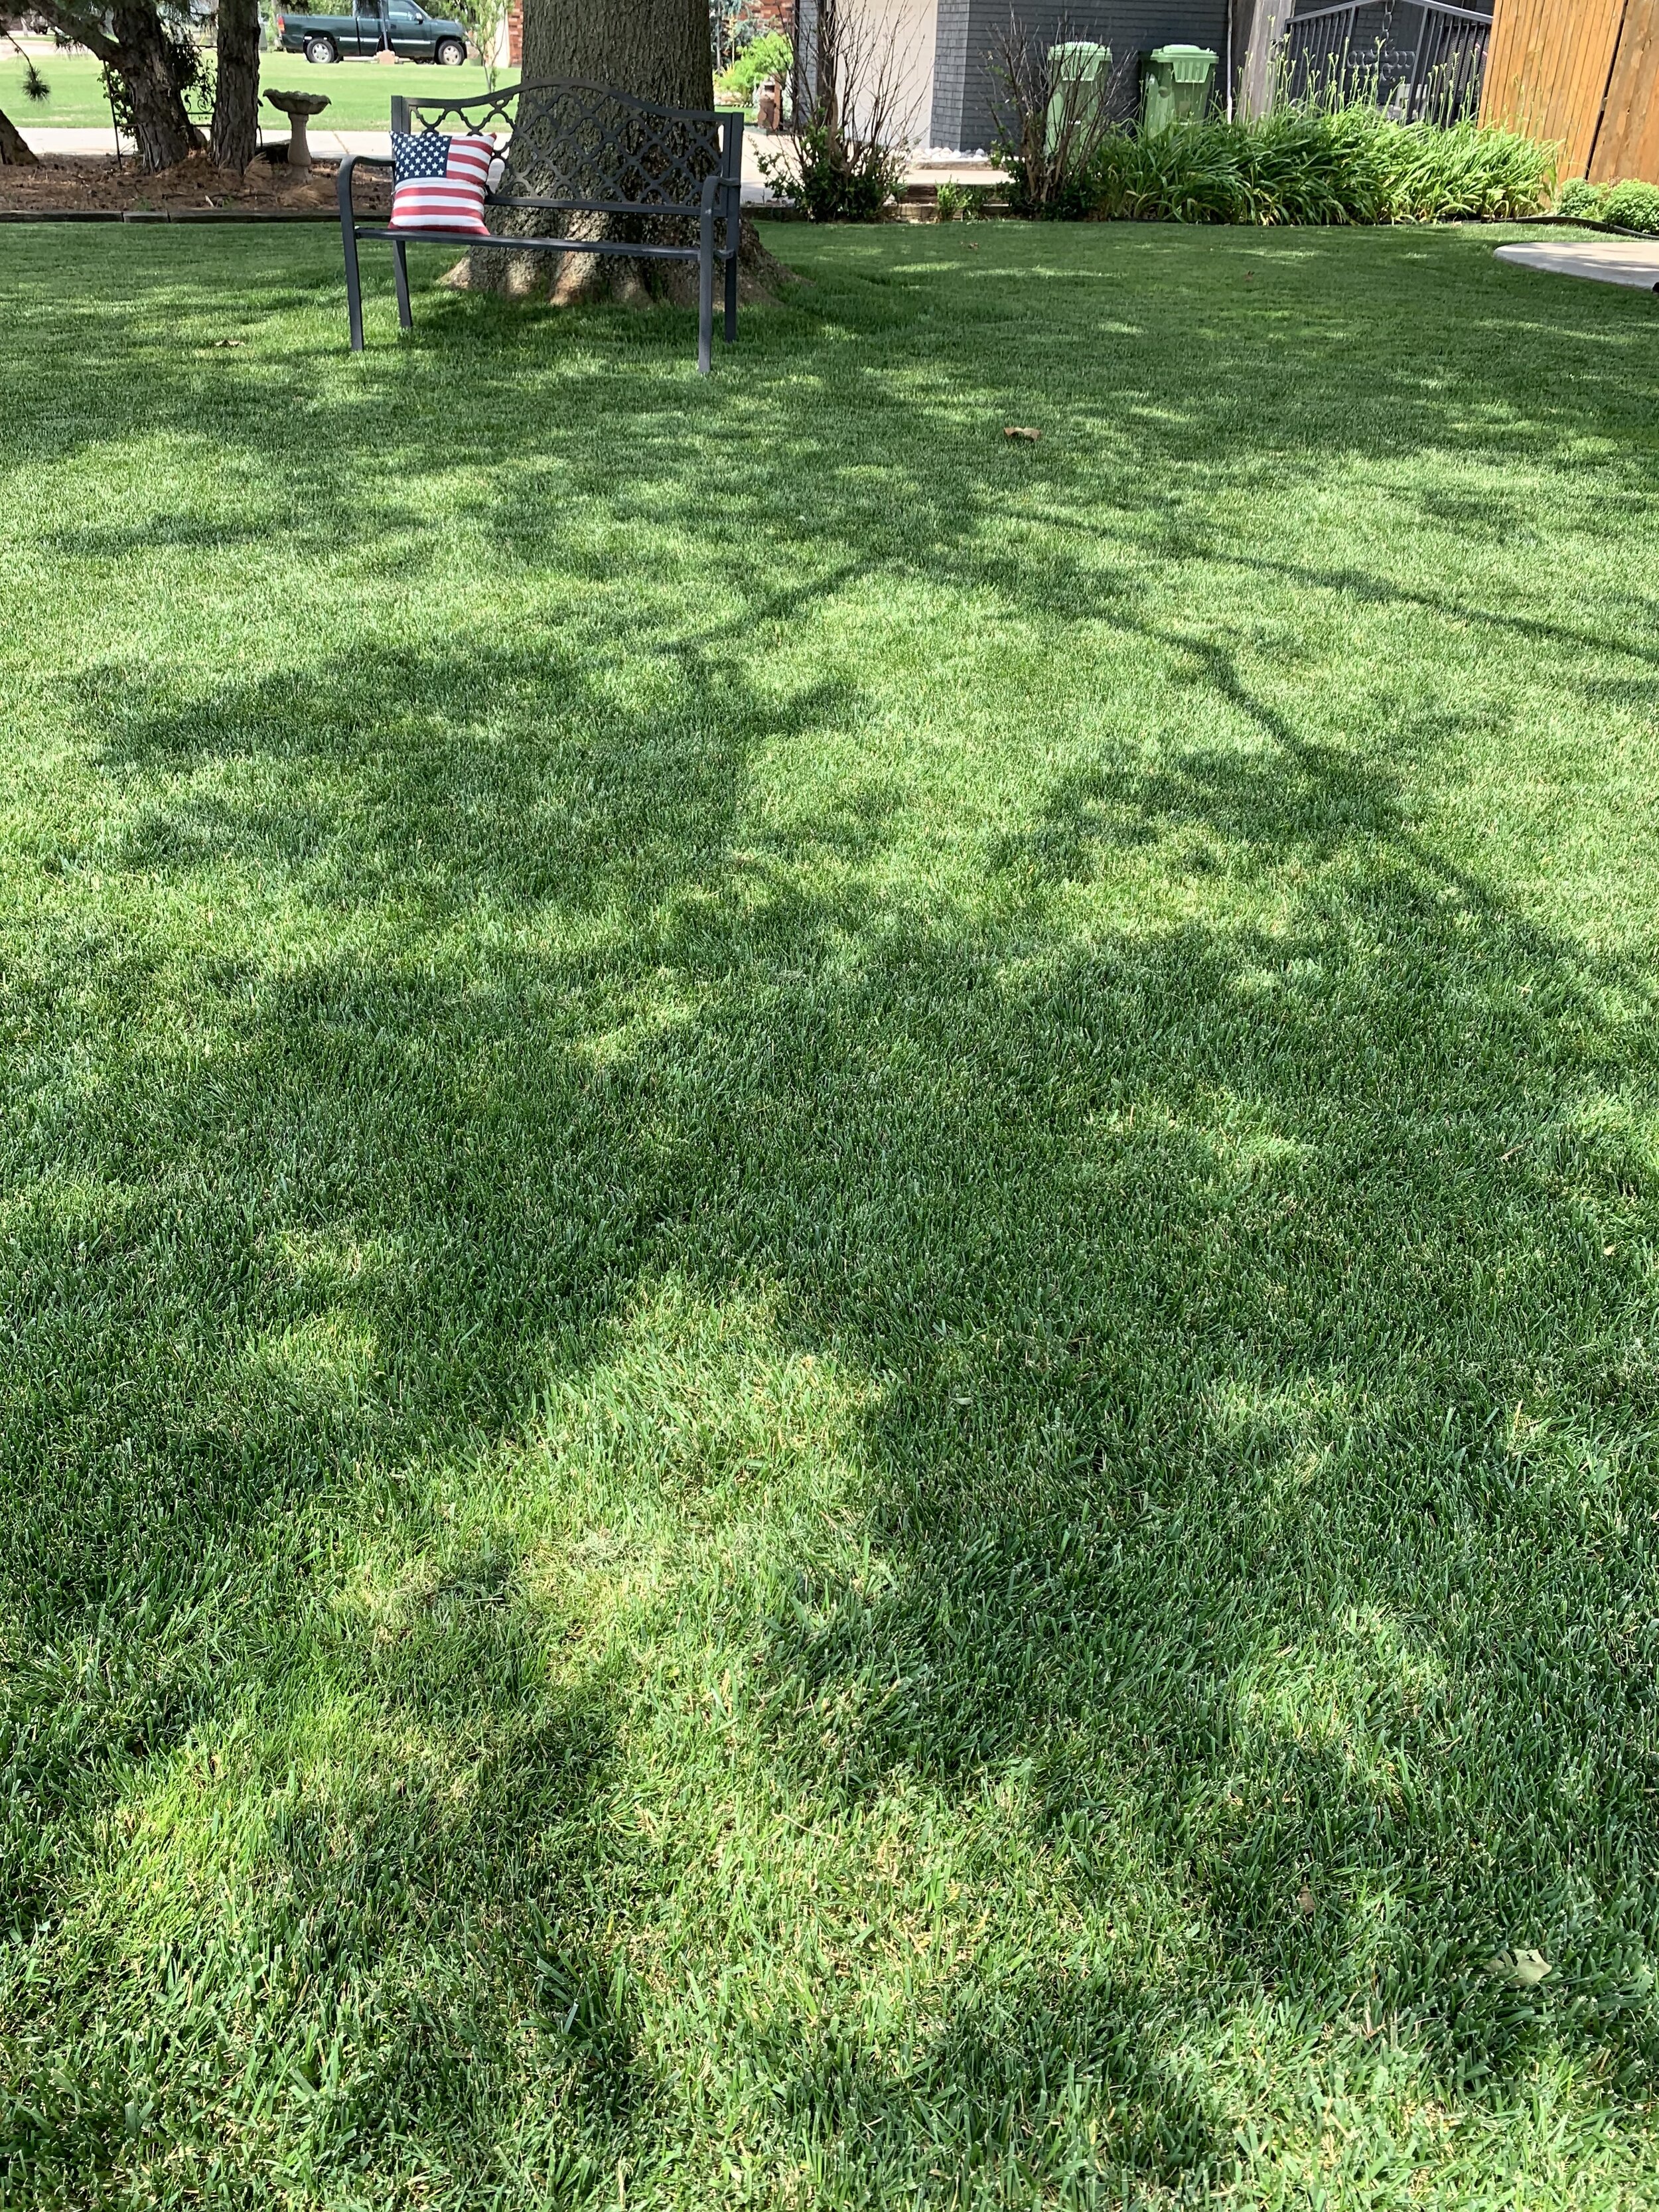
Fescue in late September last year after being overseeded in early September.

Newly seeded fescue two weeks after seeding.

If your fescue has areas that did not handle the heat and lack of rain from mid-July until this week, now is the time to overseed your fescue.
Fall Pre-emergent & Post-Emergent
Winter annual weeds germinate as temperatures cool. Poa annua, annual bluegrass, is the first to germinate, followed by henbit and chickweed. These are the weeds that will keep you from having a clean landscape next January through April. When you skip the fall pre-emergent applications, you will be forced to use harsher products next spring to clean up the turf when you should be focused on developing a lush green turf. For the best results, a fall pre-emergent should be applied to your lawn before the end of September. Also, many bi-annual weeds, such as dandelions, are easier to control in the fall.
Note: DO NOT use pre-emergent herbicides now in areas that are going to be seeded this fall.
The use of nitrogen fertilizer after September 15th, often in an attempt to keep Bermuda green longer in the fall, will enhance spring dead spot disease next year.
Lawn Fertilizer
When you fertilize and what you put on your warm season (bermuda and zoysia) lawns in September is critical to the health of your lawn. High nitrogen fertilizer should not be applied to warm season turf after mid-September. Applications of high nitrogen fertilizer 6 weeks before winter dormancy reduces winter hardiness and promotes spring dead spot disease. Typically, winter dormancy for bermuda in central Oklahoma begins in early November. Potassium is important for cold tolerance and disease control, but because potassium stays in the soil longer, a soil test is recommended before applying high amounts of potassium.
During September and October, we adjust the fertilizer to match weather forecast and soil conditions to insure bermuda lawns have strong root systems, are winter hardy and are positioned to start next year strong.
Fall is the best time to apply higher nitrogen fertilizer to fescue lawns. Plan on getting the first fall feeding on fescue this month. Because fescue is a cool season grass, it benefits from more nitrogen in the fall. Even if you will be overseeding your fescue this fall, it is important to get fertilizer on the existing fescue this month.
Mowing
Continue to mow often enough that you are removing no more than 1/3 of the blade of grass with each cutting. For warm season turf, maintain the height at or near 2 – 2 1/2” going into the fall. Avoid cutting short or scalping warm season lawns at this time. Anytime you cut below the leaf space and into the stems of the plant, you are causing stress. The plant will use nutrients stored in the root system to generate new leaves. At this time of the season, you don’t want to cause any stress that would require the lawn to use nutrients stored for the winter.
For cool season, it is best to cut the lawn shorter before seeding. This will increase seed to soil contact. After the new seed starts growing, gradually increase mowing height to 3”.
When you cut below the leaf blade into the stem your Bermuda lawn will have a scalped, brown appearance.

When you don’t mow your Bermuda too low in the fall, it will develop a stronger root system for the winter months.
Watering
With over 3” of rainfall in the past week, hopefully you turned your irrigation turned off or put it in a rain delay.
As nights and days begin to cool, and day length shortens, your landscape will need less water. Responsible watering is based on seasonal temperatures and moisture. Typically, during September, you can start reducing the number of days you water. It is always best to maintain deep soakings and reduce the frequency. At some point this month it may be best to water every 4 days rather than on the odd/even plan.
Continue to water trees planted in the last 12-18 months more than you water your lawn this month. Supplemental watering is critical for new additions to the landscape. Place a water hose at the base of the tree with the water flowing at a slow trickle for a couple of hours once per week. The goal is to get 10 gallons of water to the roots every week.

Maintain good soil moisture through September. The goal is to have moist soil 6-12” deep. If you have dry soil like the core in this picture you are allowing your lawn to go into the winter in a stressed condition.
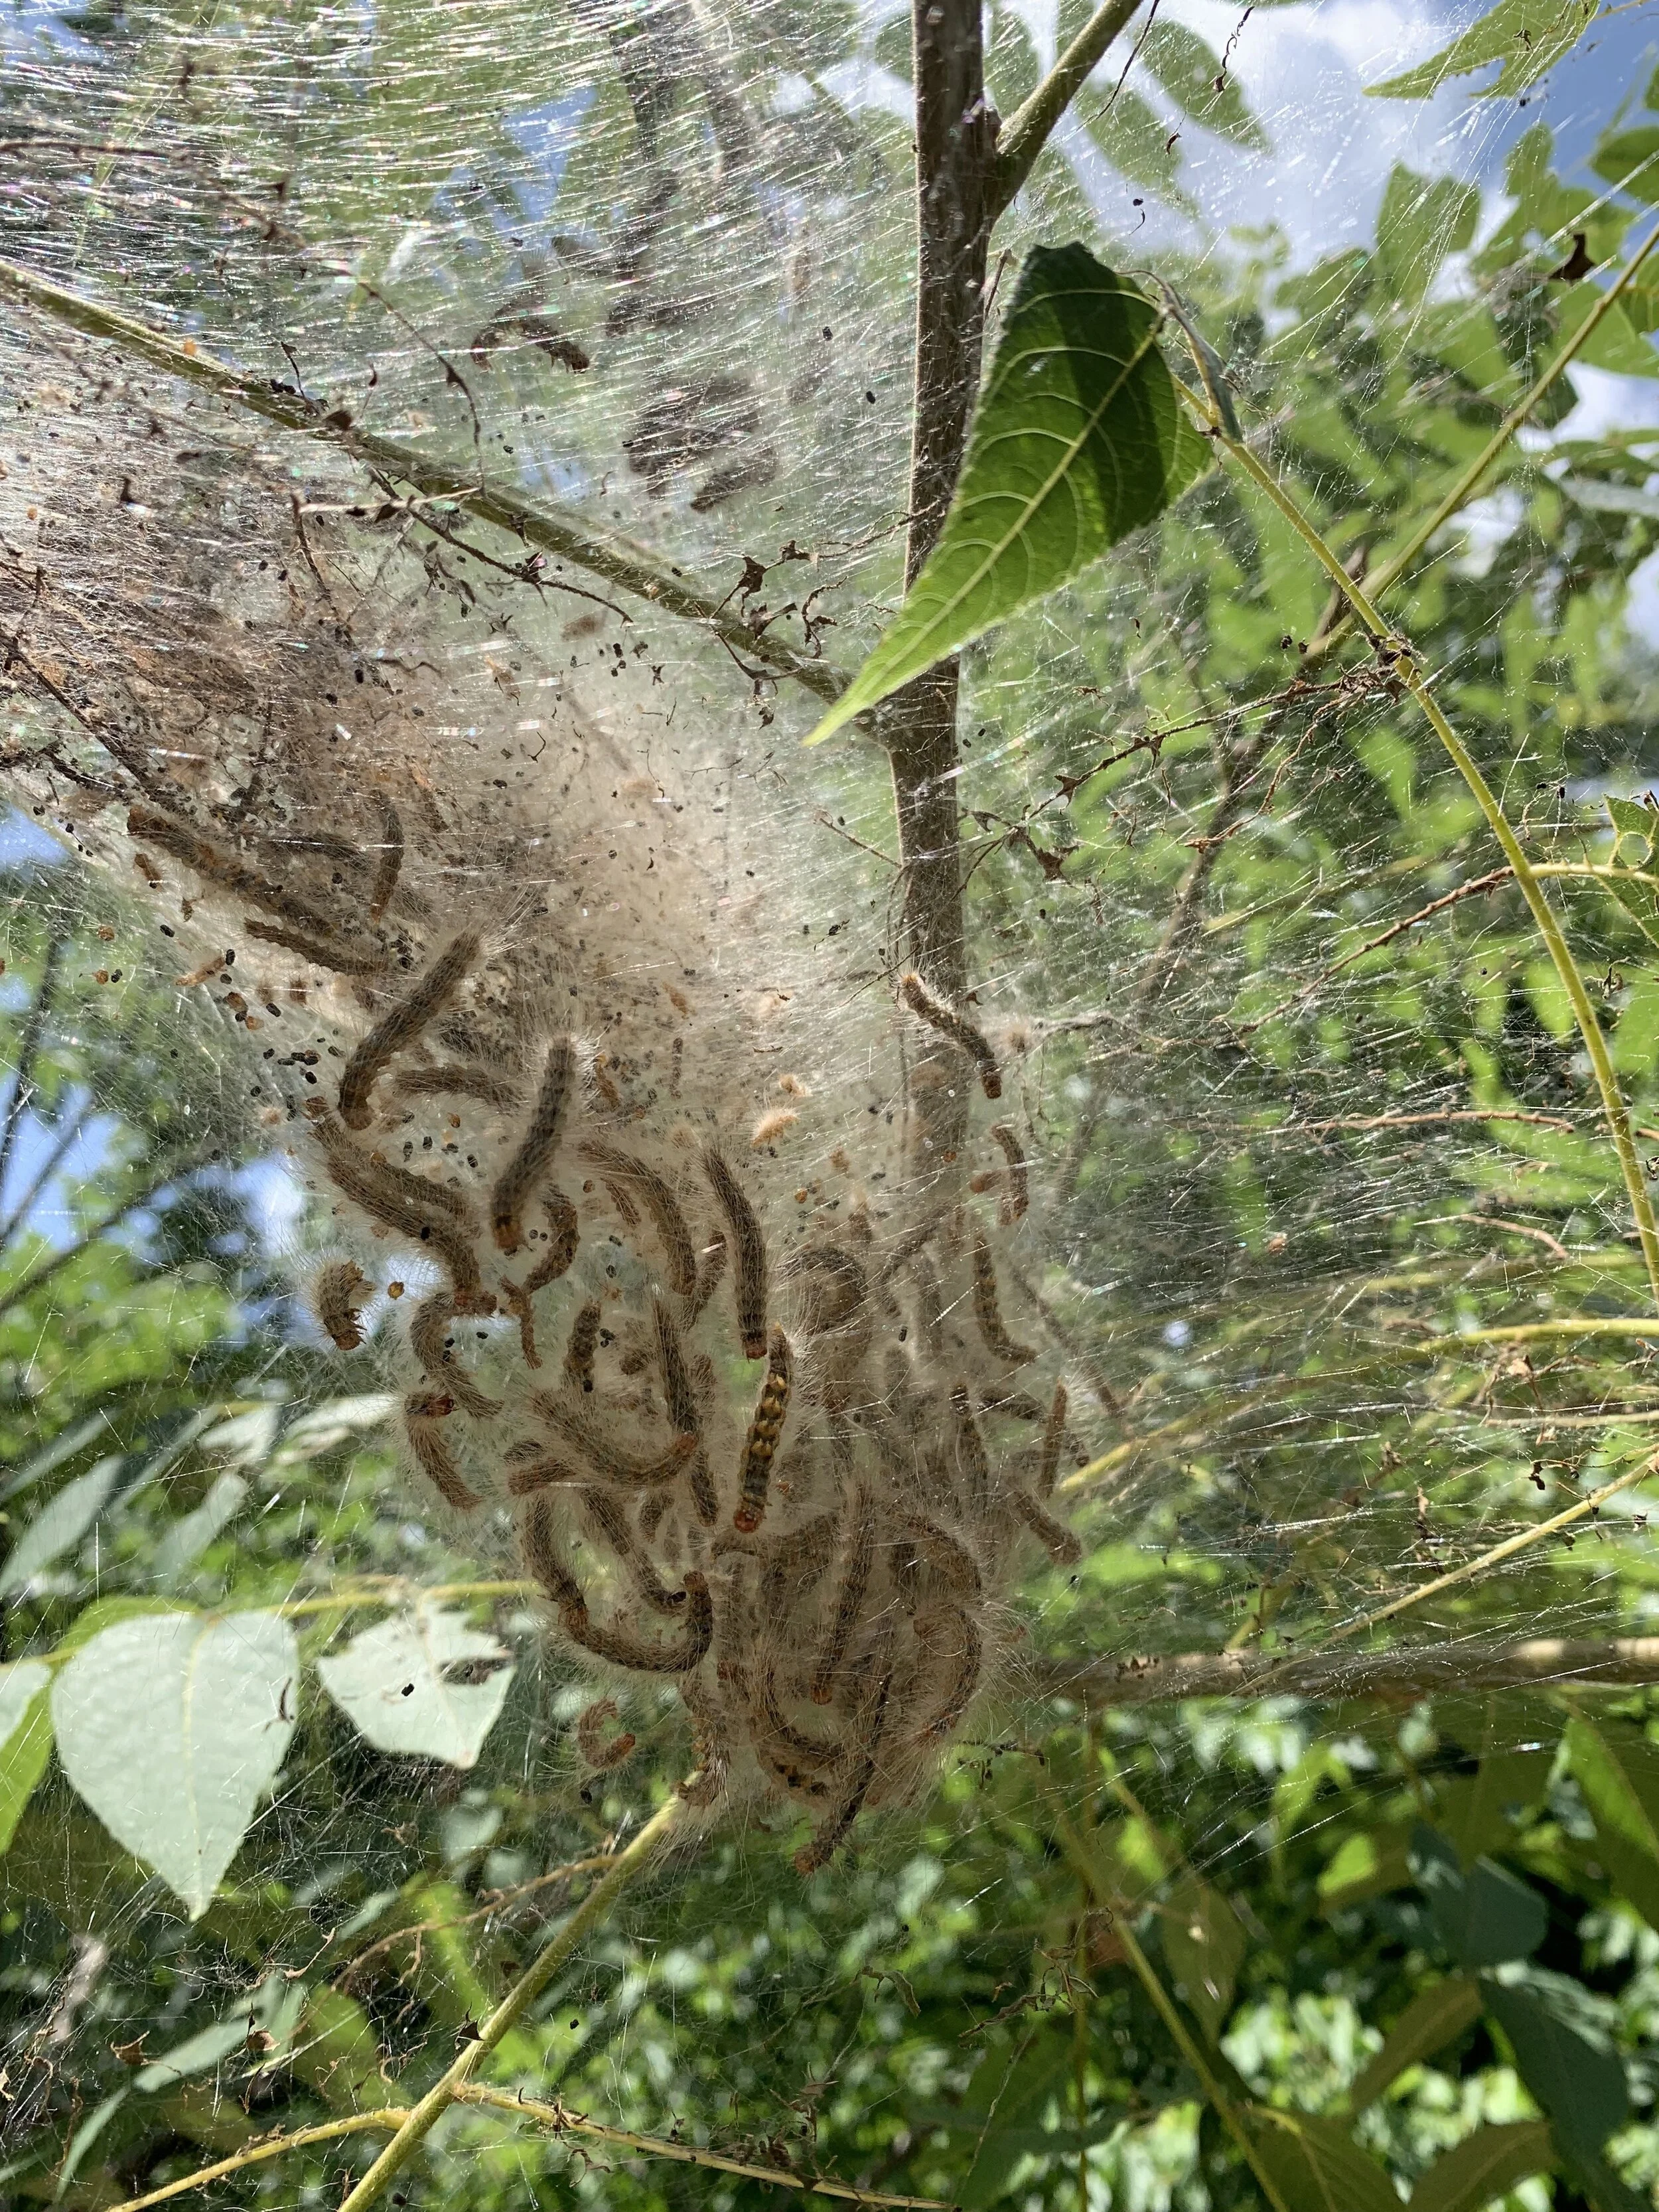
Fall webworm can cause damage. When possible, pruning out the infected area is the best method of control.
Webworm
Watch for fall webworm in your trees. Webworm create webbing on the ends of tree branches as the worm devours the leaves. Webworm can have more than one generation per season. The earlier generations do not cause lasting damage. But, the last generation can result in branch die back. To treat with an insecticide, you must penetrate the webbing. The most effective approach of control is to monitor trees and prune out the web areas while they are small. Place webbing in a plastic bag and dispose of it immediately. If you leave the branches on the ground, you will be amazed at how quickly the worms will be back in the tree.
Fall Color
As the hottest part of the summer transitions to more moderate conditions summer color typically gains vibrancy in September before it begins to fade later in the month.
If you haven’t already, create a summer landscape journal. Grab a few minutes and take pictures of your landscape while the color is still strong. Jot down a few notes about plants that did well, plants you liked, plants that were just so-so, and list a few you would like to add to your landscape next year.
Next spring you will be glad to have the information when you make summer landscape plans. Too often we get excited about a plant that looks great in May only to have it disappoint when the heat is on in July and August.
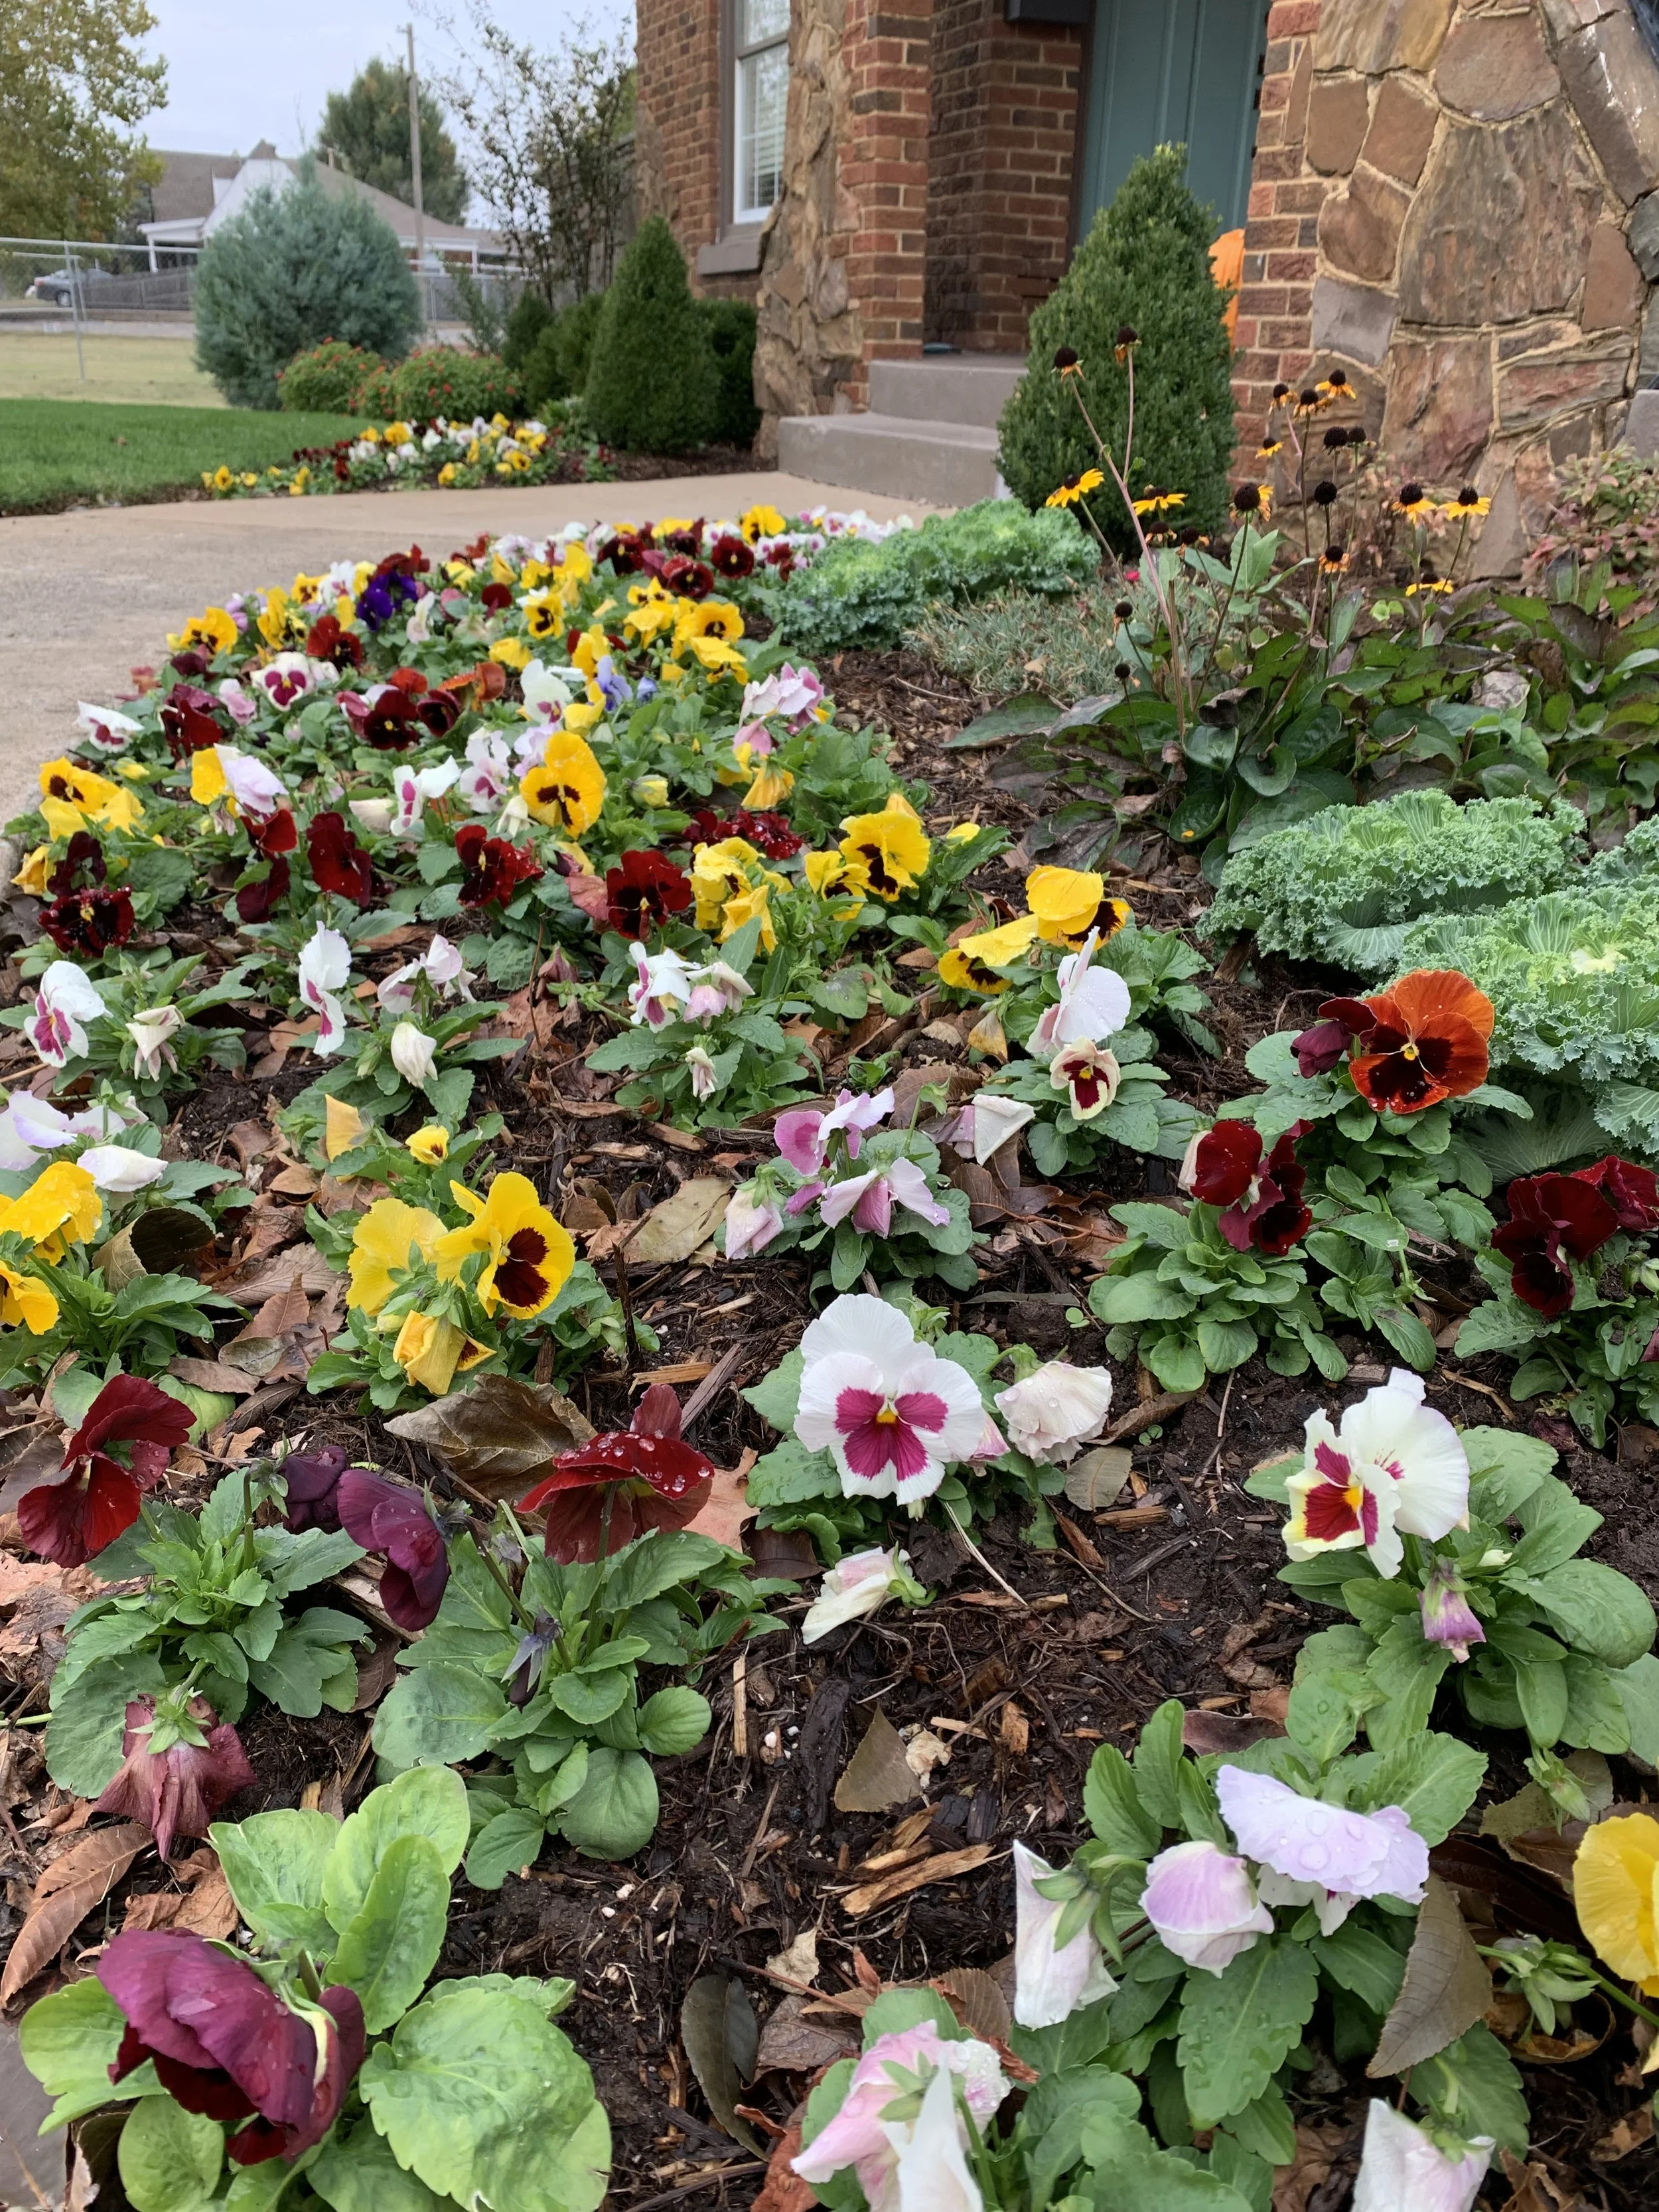
Toward the end of the month or early October, you will want to replace your summer annuals with cool season annuals. Pansies, mums, and kale are the dominate players. Use more pansies than mums and kale since pansies typically overwinter and flourish the following spring.
The Colors of September

Start making plans to replace your summer color with cold hardy annuals, such as pansies, later this month or early next month.

Hamelin Grass loads up with plums during September.
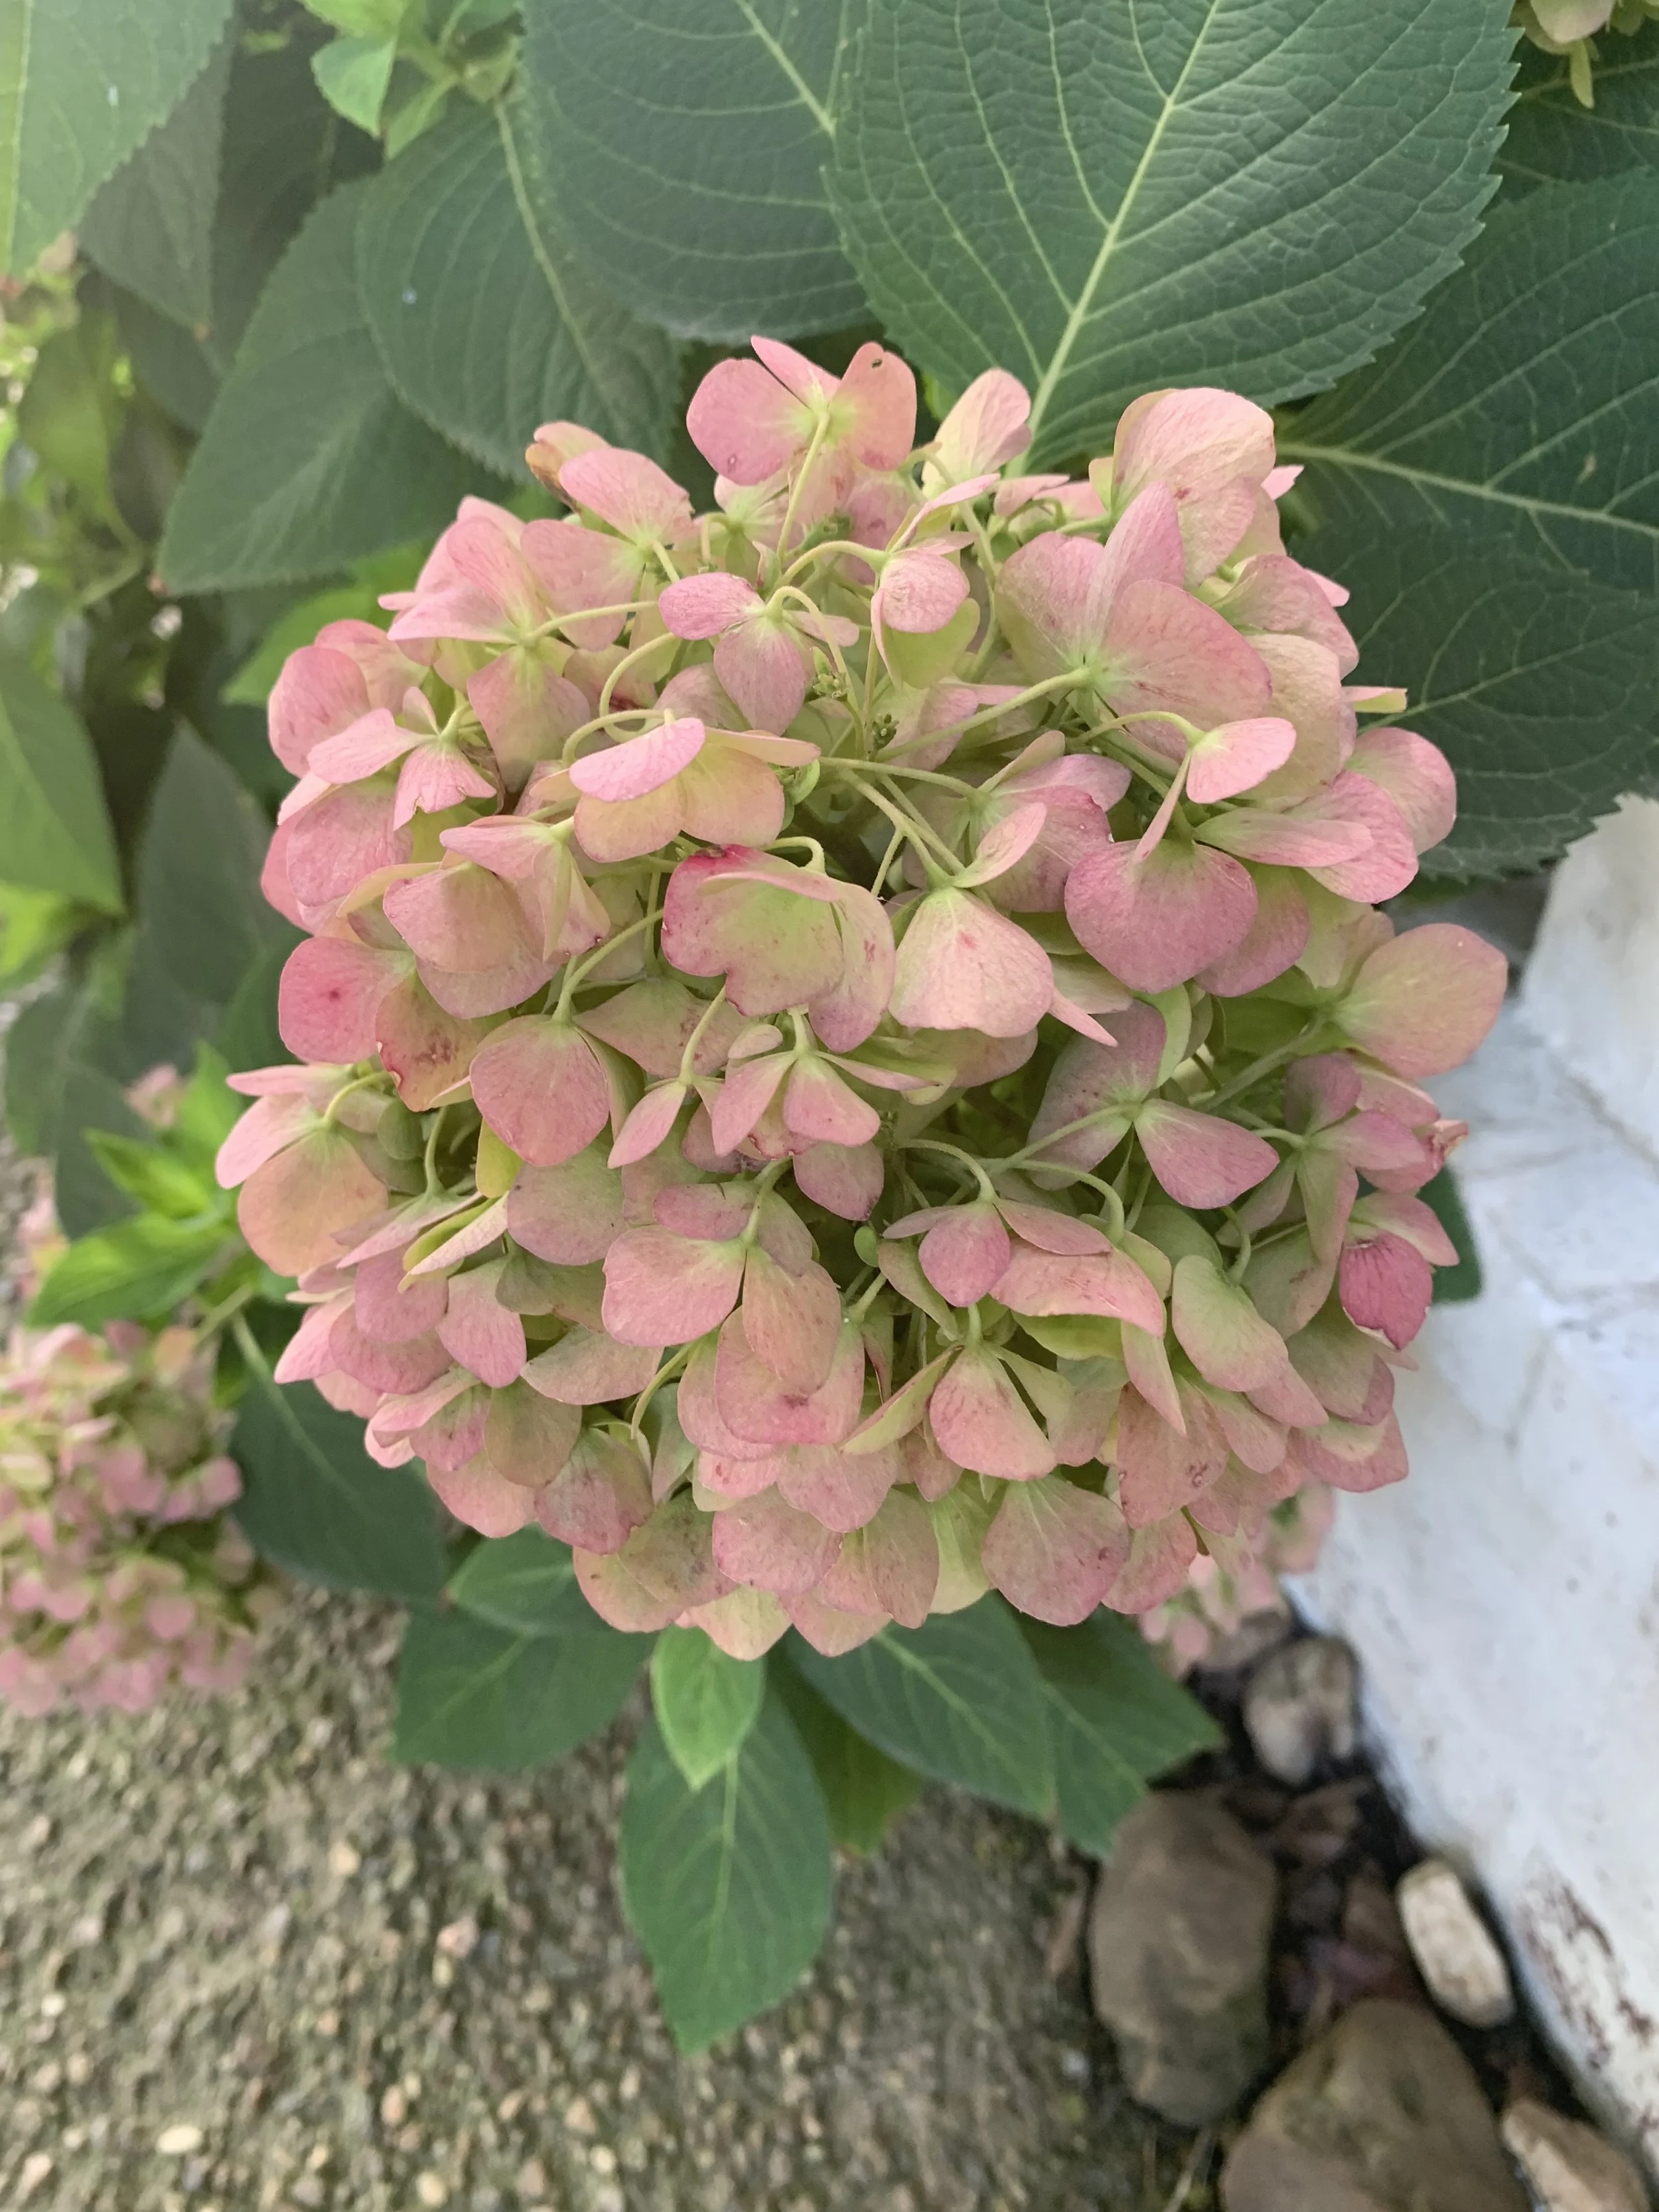
If you resisted the urge to prune what appeared spent blooms on your hydrangeas earlier in August, now you are getting to enjoy rosy pink shades late in the summer.

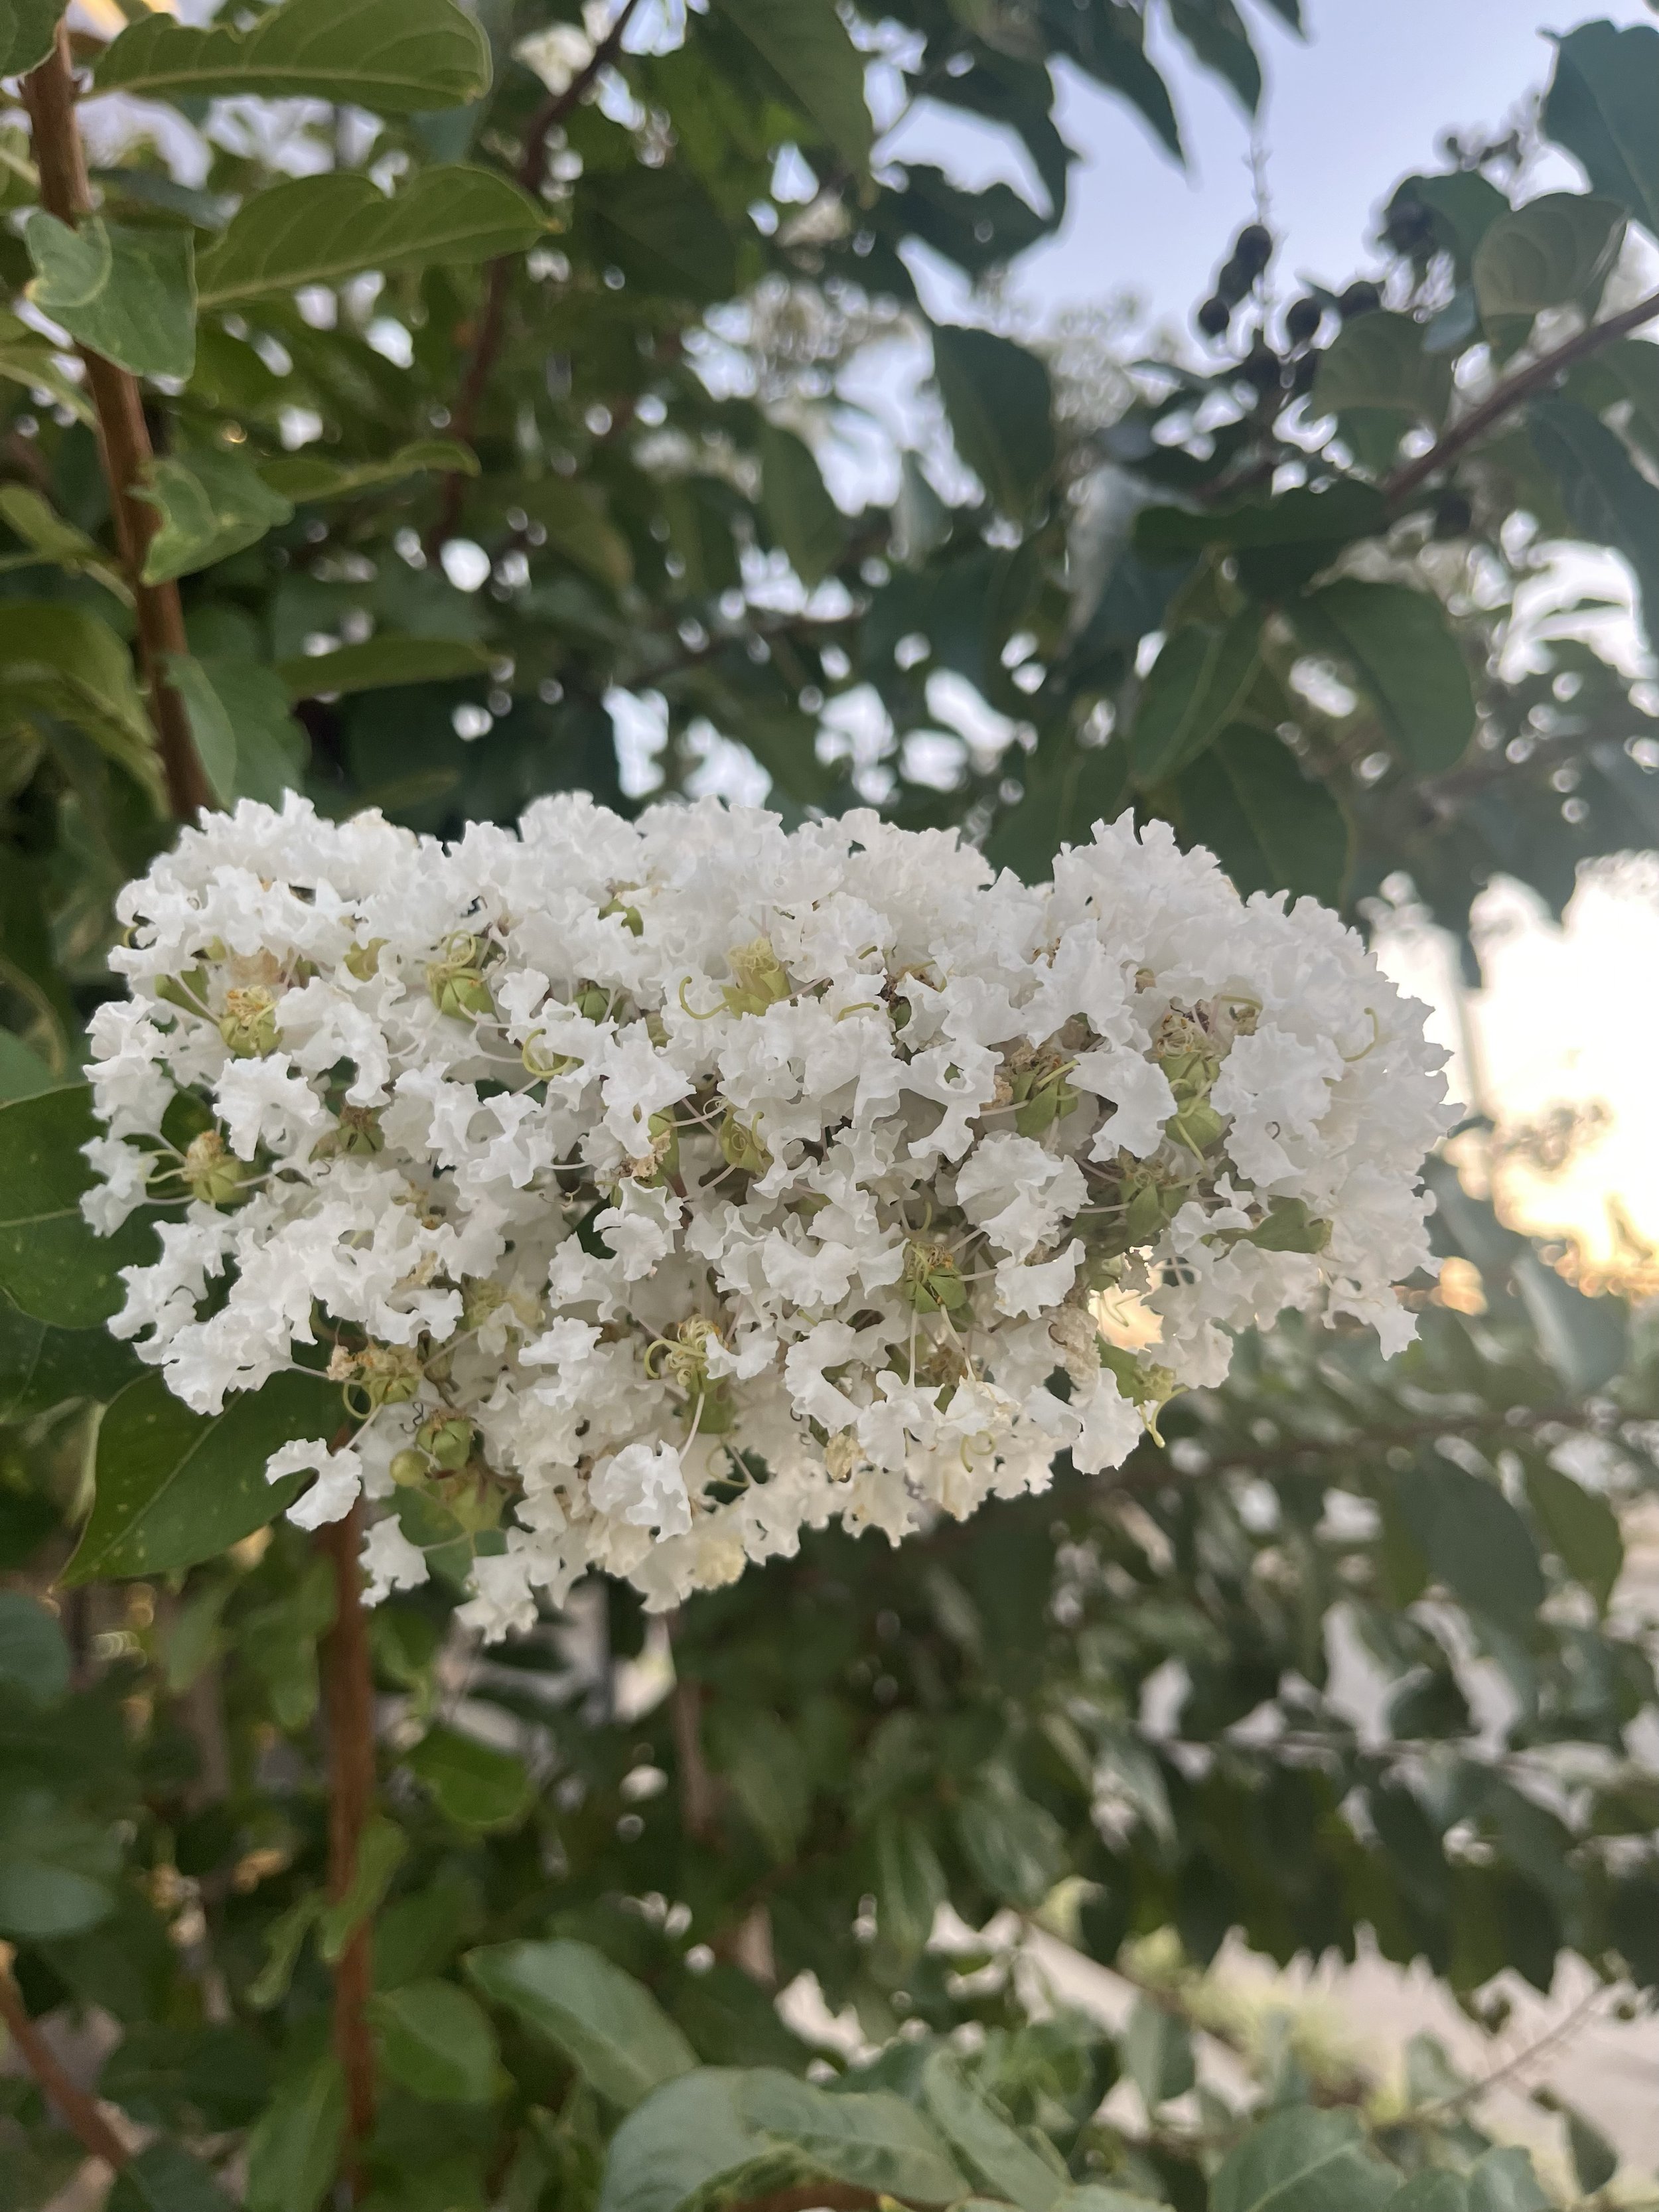
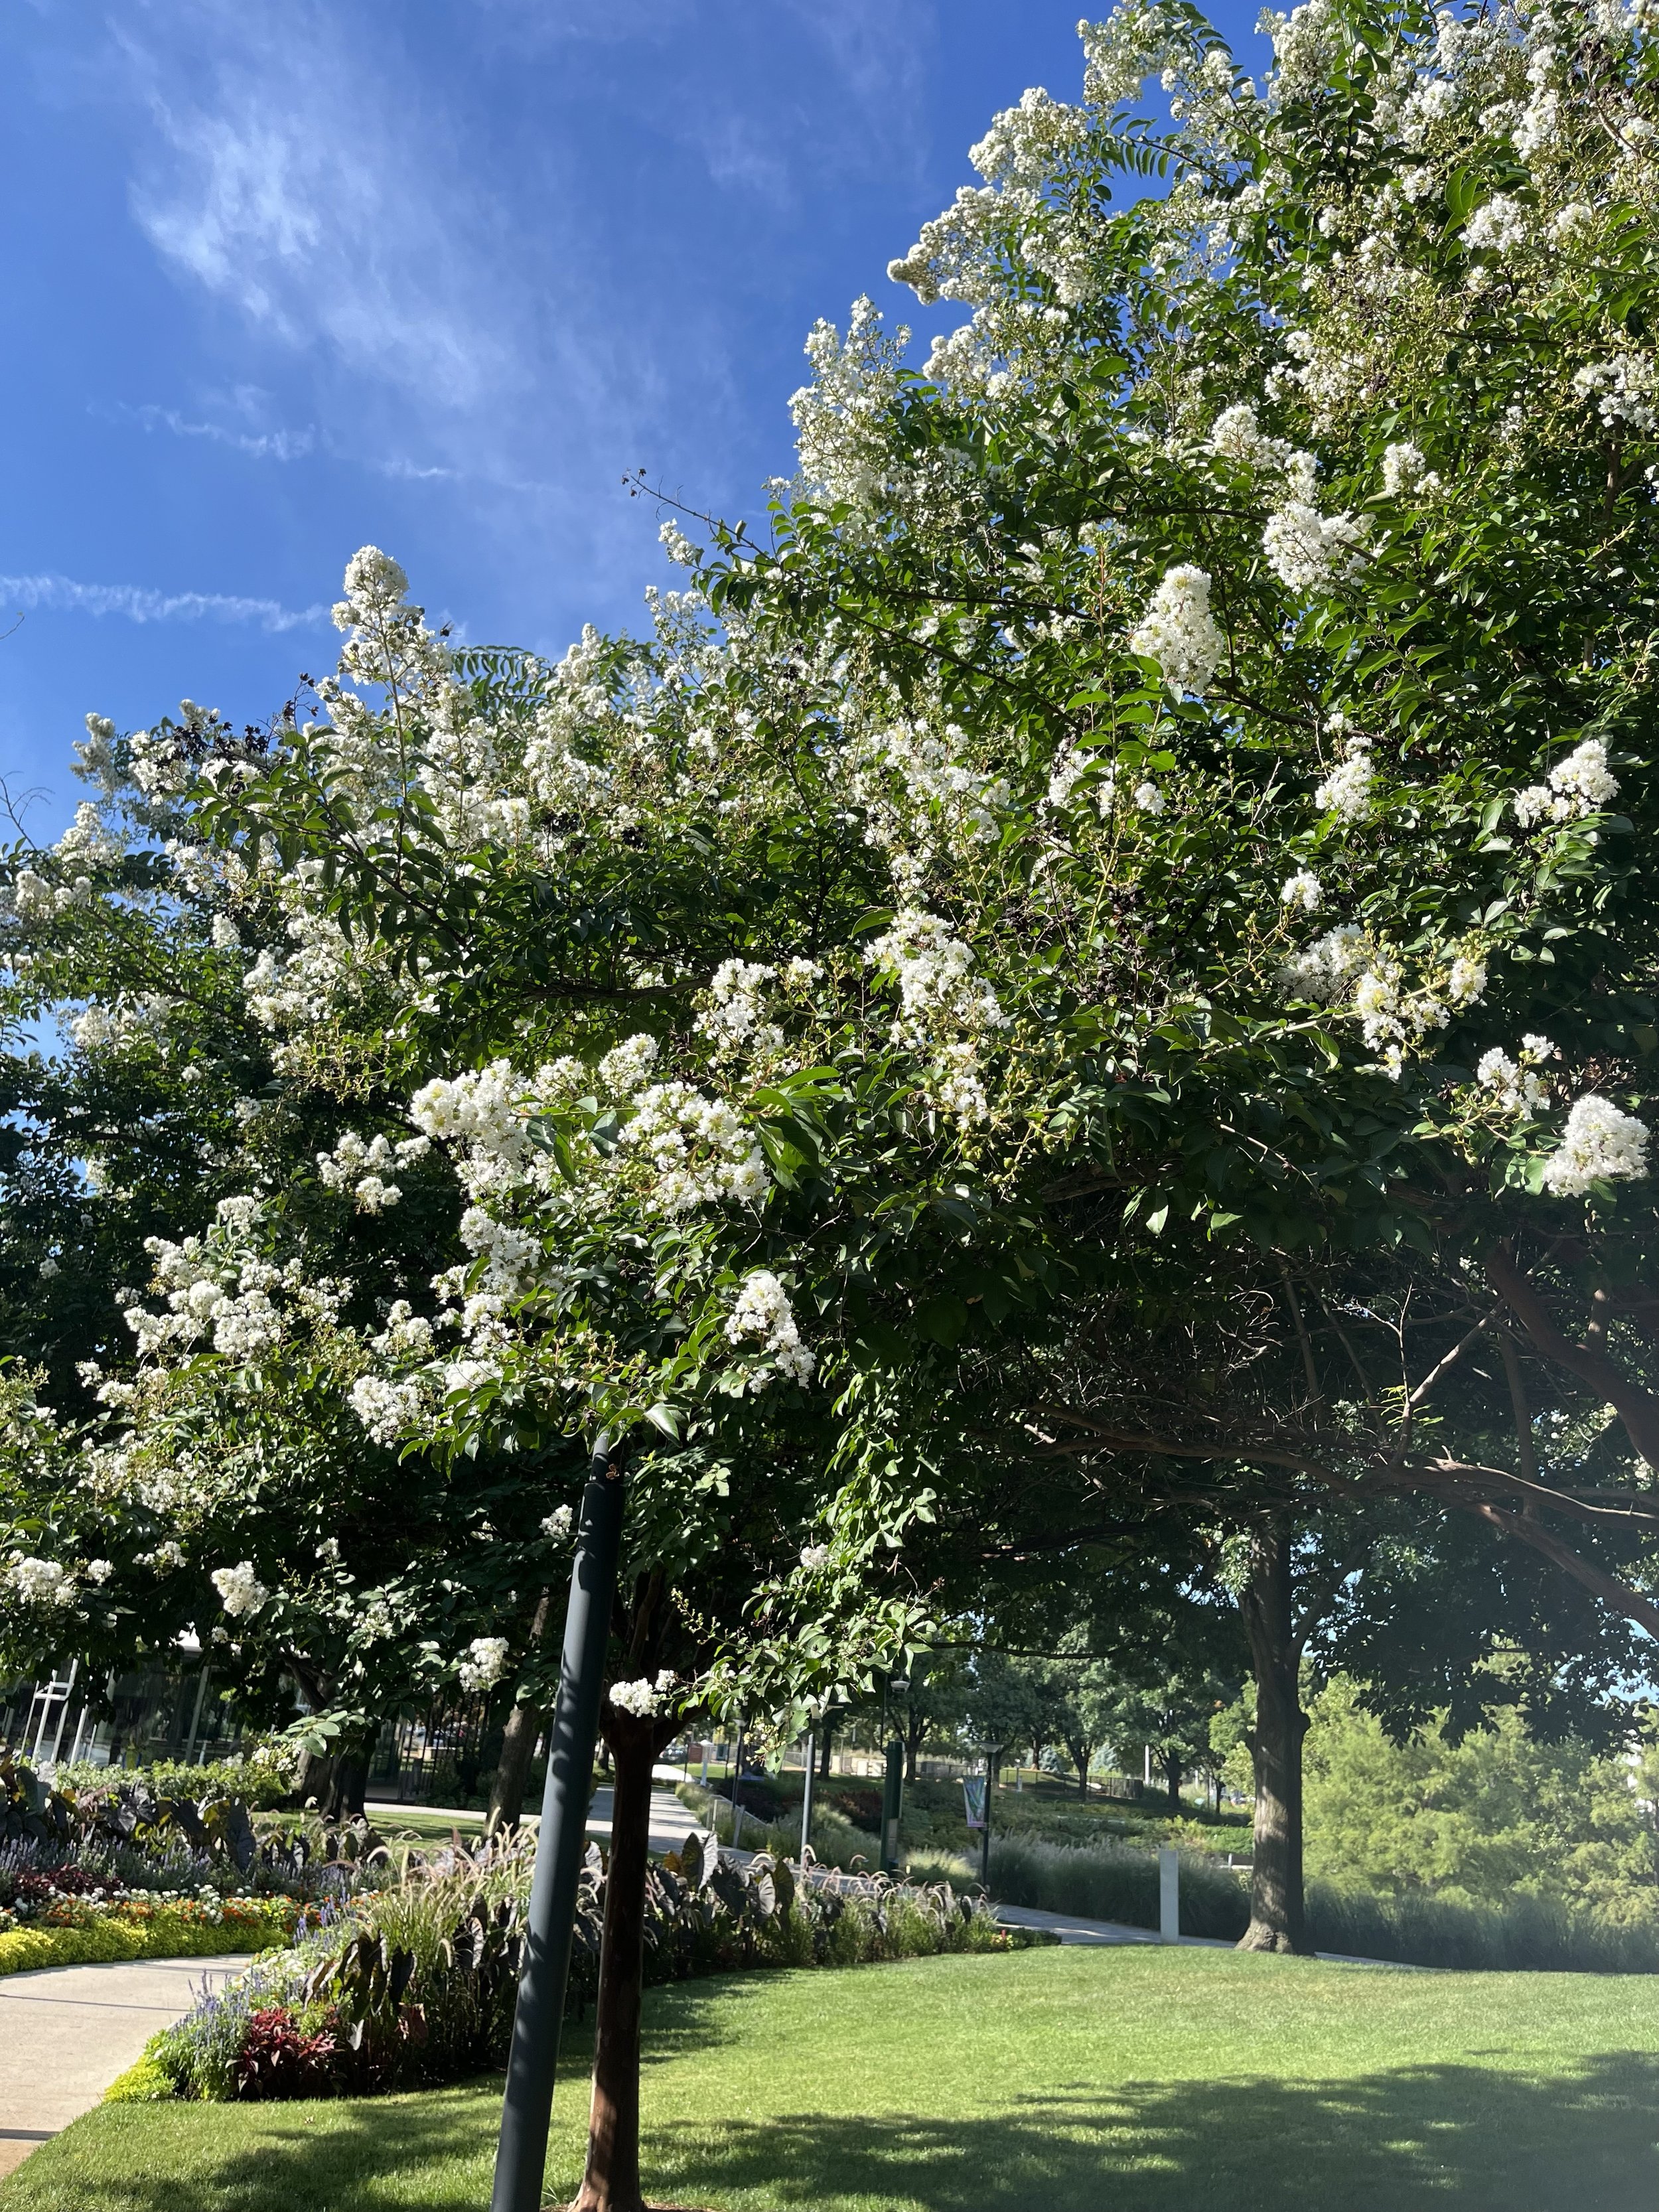
Crape Myrtle, our longest blooming plant, will continue to put on a show through September.

For as long as the weather stays warm, tropical hibiscus will continue to produce big bright blooms.
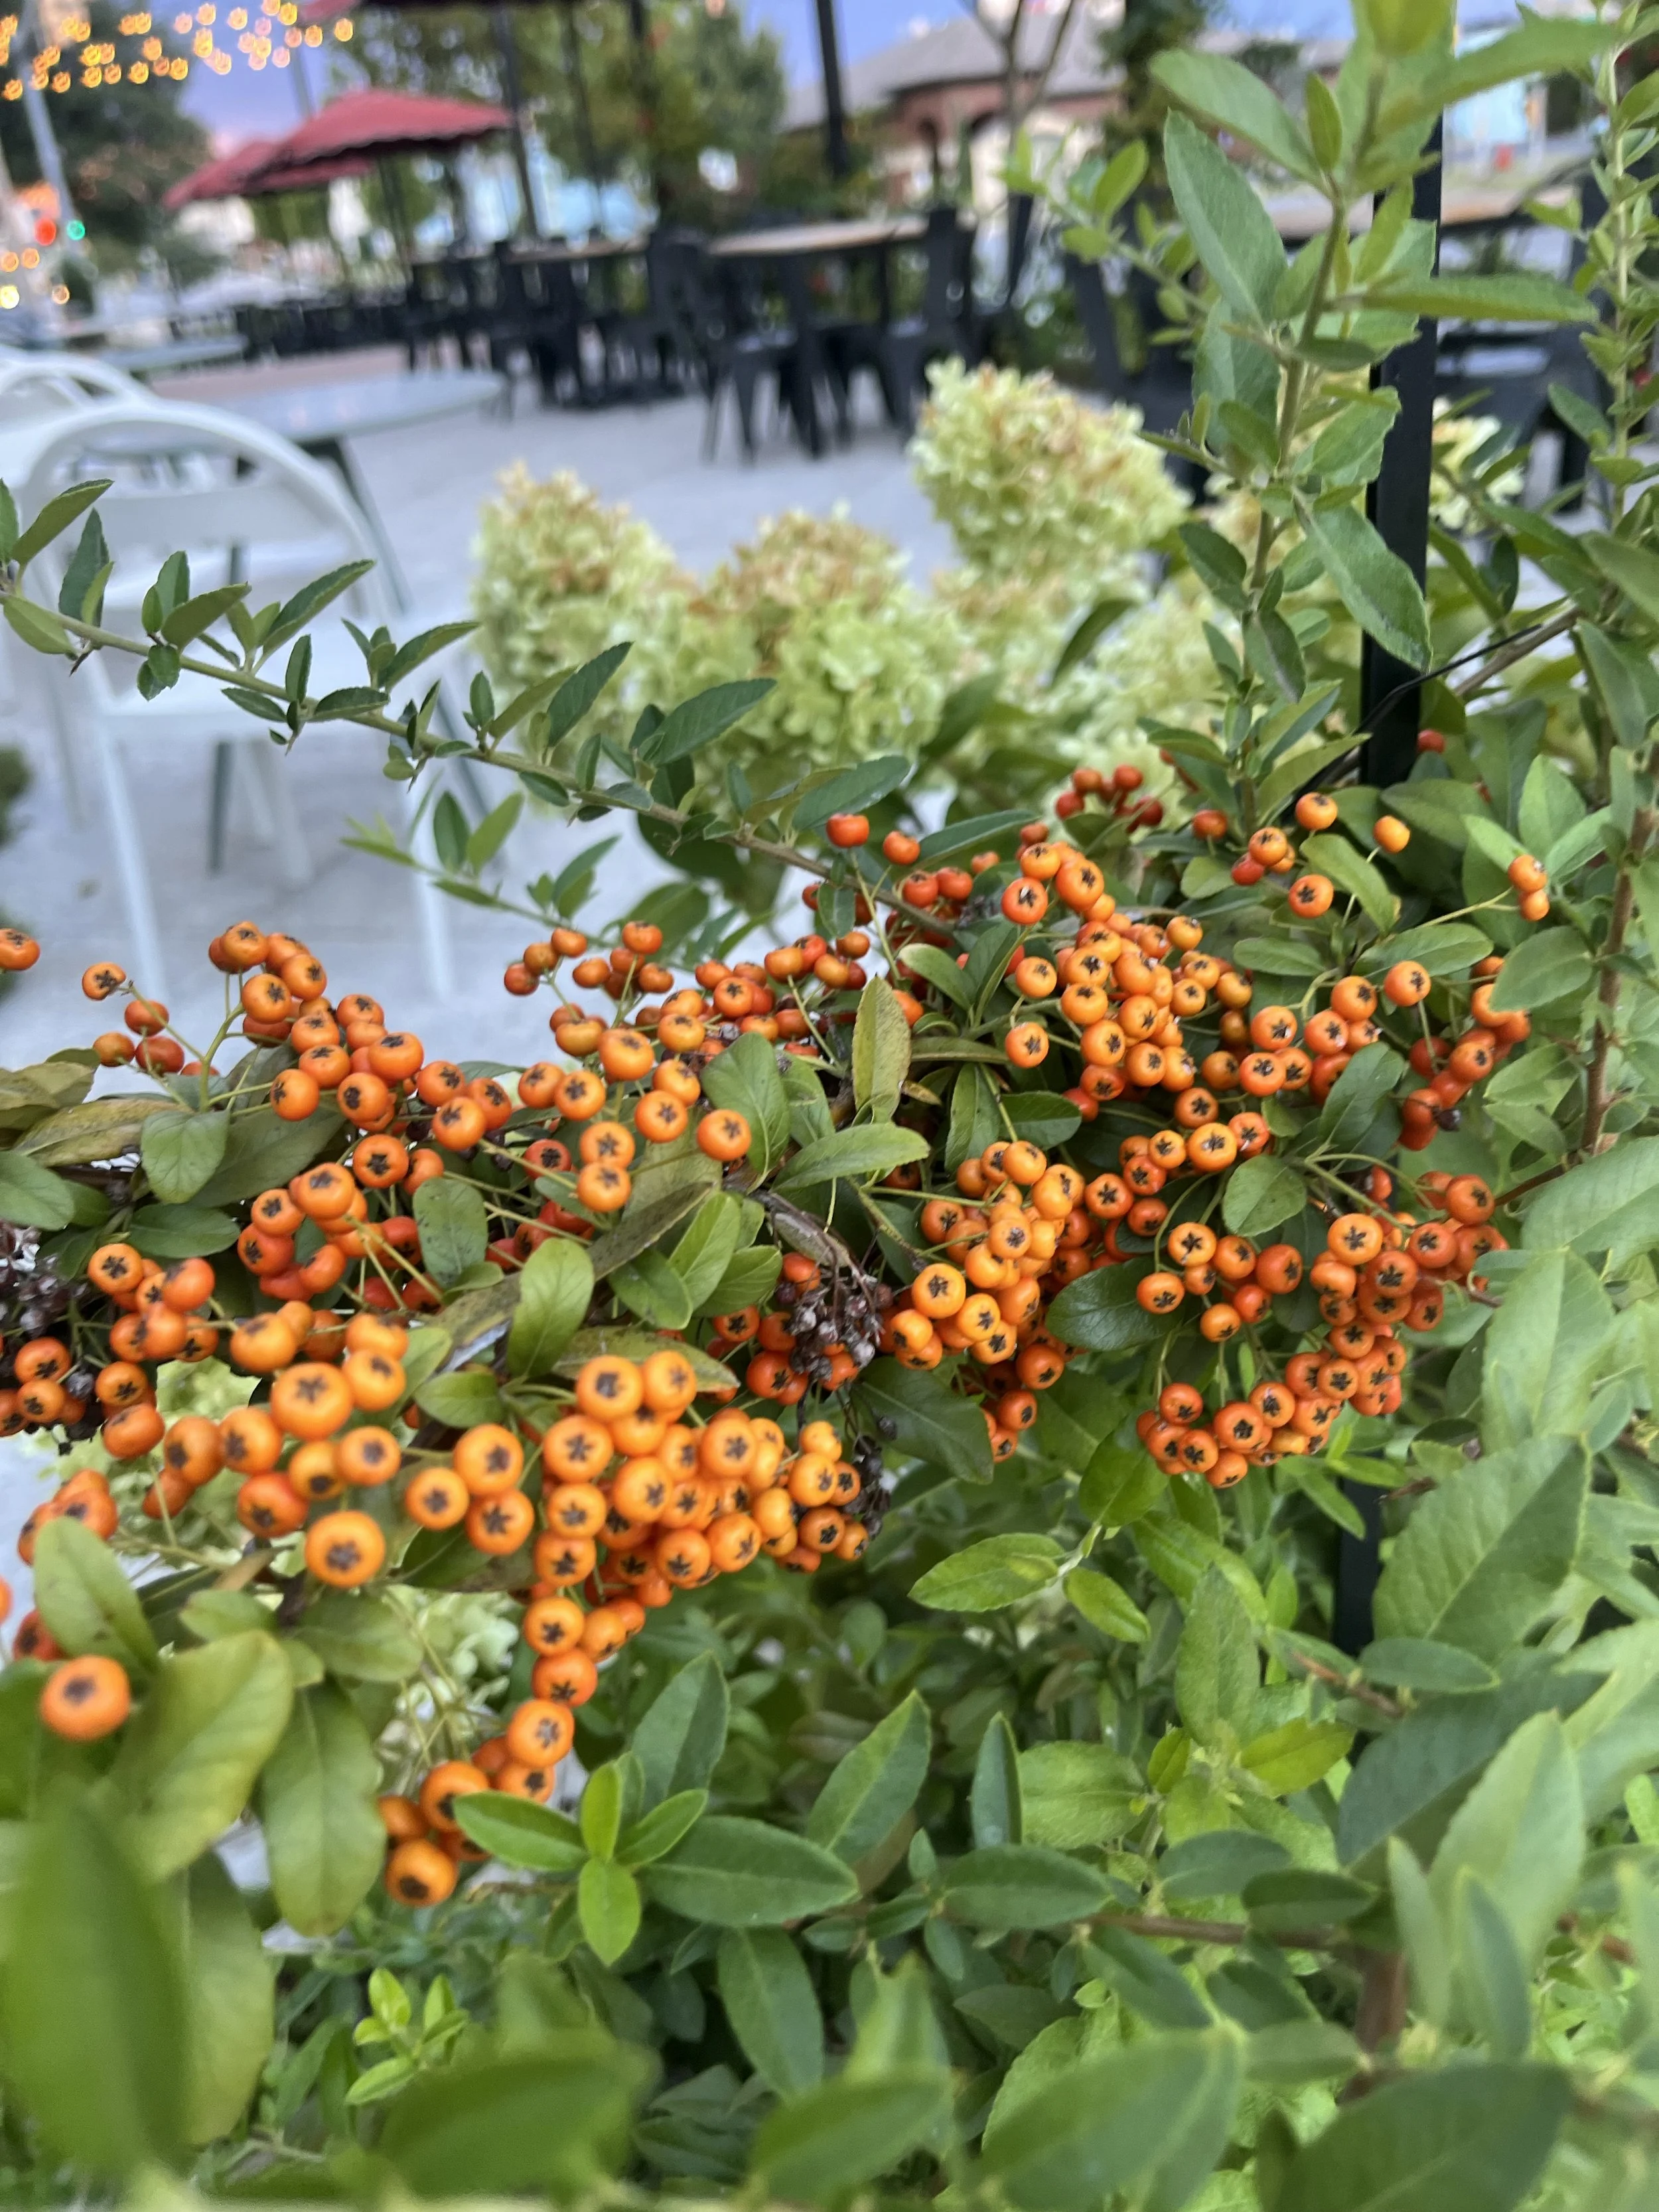
A favorite splash of color every September is the orange to red berries of pyracantha.

With recent rains and a break from the warm temperatures of August, summer color will become more vibrant in early September.

Liriope one of the easiest ground covers to grow puts on blue to purple flowers spikes in late summer.

A great late summer addition to the landscape are many of the warm season ornamental grasses.

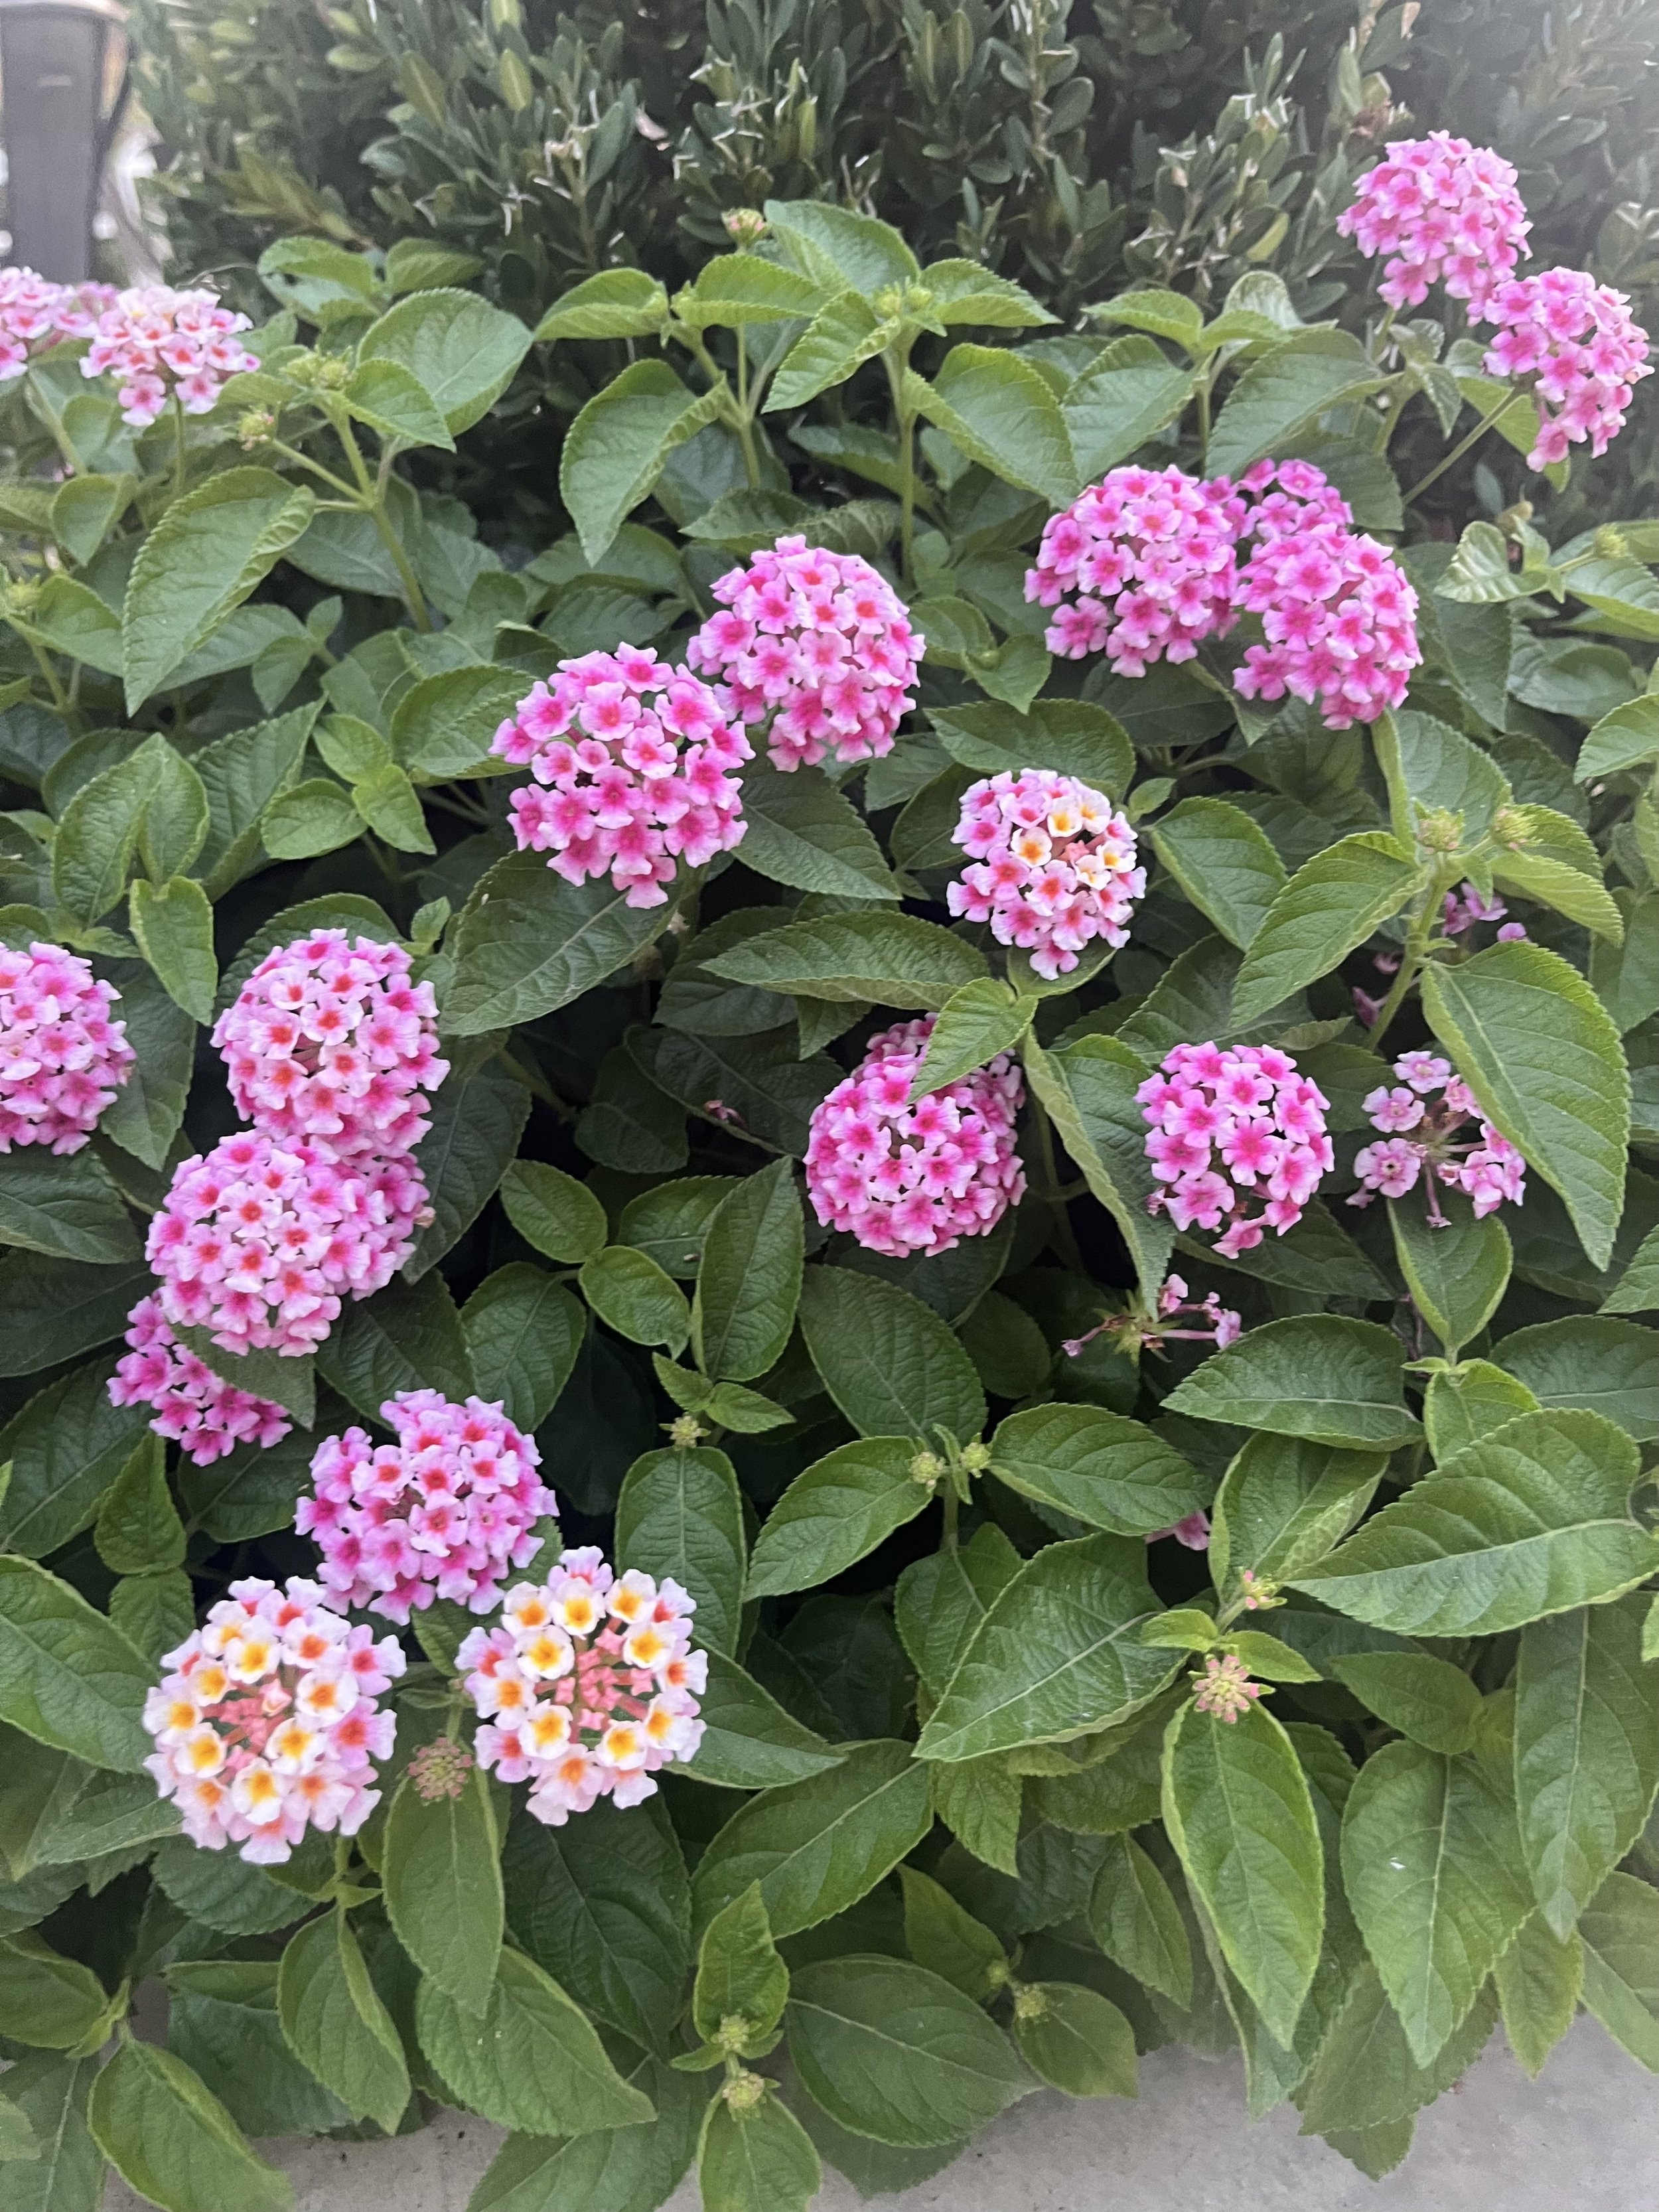
Summer loving lantana will continue to bloom through September.

Abelia is often graces the late summer with white flowers.

If you haven’t taken pictures and made notes of your best summer color this year, do so in the next couple of weeks.

A fun September blooming perennial is Autumn Sage
Don’t you just love September? Trees, shrubs and flowers appear more vibrant, and fescue lawns return to their grander. What a wonderful time of the year!
Our goal, as always, is to help you have your best lawn and landscape.
If you need assistance with any of the September lawn and landscape tasks, or have questions concerning your lawn and landscape, give us call… (405) 367-3873.
Oh, one more thing…
Do you know what the most exciting thing about a week of rain in late August?
Who said a lower water bill? That’s good, but that isn’t the best thing.
The best thing…is better fall color!
A major ingredient for vibrant fall color is abundant moisture late in the growing season.
This week’s rain could deliver us one of the best fall color seasons central Oklahoma has ever seen.
Lorne Hall
Hall |Stewart Lawn + Landscape
(405)367-3873
The Fall Pre-Emergent – The Application That Sets Your Lawn Up For Success Next Spring

A successful lawn care program is not just what you are doing for you lawn right now, but rather it is about setting up the next season for success.
Even though it is still August with more warm days yet to come, we are focused on fall and making sure you have your best lawn next spring.
We get it. It is hard to keep up the enthusiasm for your lawn and landscape late in the summer. The dog days of summer have taken all the enjoyment out of working on your lawn and landscape. Then add on the busyness of the start of the school year and it is often hard to keep up with the best lawn and landscape practices.
When it comes to having your best lawn, the worst thing you can do is give up now. Finishing the season strong is important.

An early fall pre-emergent before fall & winter annual weeds start to germinate as temperatures cool this fall is the key to having your best lawn next spring.
Why?
Because: Nothing sets up your lawn for success next spring more than what you do now!
The most critical lawn care applications are the ones that include pre-emergent herbicides.
Everyone knows the importance of the spring applications, but did you know that the fall applications are just as critical?
Remember – it is always easier to prevent weeds than it is to kill actively growing weeds.


Why are the fall pre-emergent applications so important?
Fall pre-emergent applications are the key to having a clean lawn next spring.
Fall pre-emergent applications prevent poa annua, rescuegrass, cheat, brome, chickweed, and henbit. These are the weeds that clutter your lawn in the spring.

Bermuda lawns that do not receive the early fall pre-emergent soon run the risk of being very weedy next March and April as the green up.

Henbit is a broadleaf winter annual weed with greenish to purplish square stems, green scallop edged leaves, and reddish purple flower in the spring. Seeds germinate in the fall but the weed often goes unnoticed until we have periods of warm winter weather when henbit grows best. Henbit is easily prevented with fall pre-emergent applications but can be difficult to control in late spring when it is mature, flowering and littering your lawn. As with most weeds, a dense turf is the best prevention against the development of henbit.

Henbit

How a Bermuda lawn looks in April when no fall pre-emergent applications were made.

Poa Annua is a winter annual grassy weed that will germinate this fall. Without a fall pre-emergent application there is a good chance your lawn will be full of poa annua next spring.

Poa Annua is a low growing winter annual weed that will have white seed heads next spring. A pre-emergent between now and the end of September is a critical step in not having a lawn full of weeds next spring.

Poa Annua germinates and thrives in thin areas of fescue during the fall, winter and spring. Poa Annua does not have a competitive advantage over fescue when it is thick, healthy and actively growing. Overseeding thin fescue in the fall is a great way to prevent poa annua.

Poa Annua is an annual grassy weed that invades lawns in the fall and winter. It is a lighter green clumping grass with small white flowers (seed heads) in the spring. Germination occurs in moist soil starting in the fall when night temperatures drop into the 60s and continues through the winter and spring. Poa Annua has a competitive advantage over bermuda in the winter when it is activity growing and the bermuda is dormant.

The goal with a warm season bermuda lawn is for it to be clean of winter weeds this winter and coming spring. Fall pre-emergent applications are the key.
Weeds are easier to prevent in the fall than they are to control in the spring.
Poa annua, also known as annual bluegrass, is the fall’s equivalent to spring’s crabgrass. Without a fall pre-emergent, your lawn will not be clean next spring. And, just like crabgrass, when it is mature, poa annua is hard to control without causing turf injury.
Next spring, we want your lawn to be focused on emerging from dormancy without the harmful effects of harsh post-emergent herbicide applications. Lawns that do not receive the early fall pre-emergent application will be filled with weeds next February through April. While lawns that receive fall applications, will start next year clean and healthy.
Nothing will make a bigger difference in the way your lawn looks next spring than applying both fall pre-emergent applications this year.
Timing of the fall pre-emergent applications is critical. As temperatures cool in the fall, cool season annual weeds will germinate.
The first application for the fall needs to be made sometime between now and the next 6 weeks.
A second application should be put on your lawn 6-10 weeks after the first fall application to ensure full control until the lawn emerges from dormancy next spring. Research shows that poa annua has developed resistance to pre-emergent applications. A second fall pre-emergent increases control of poa annua.
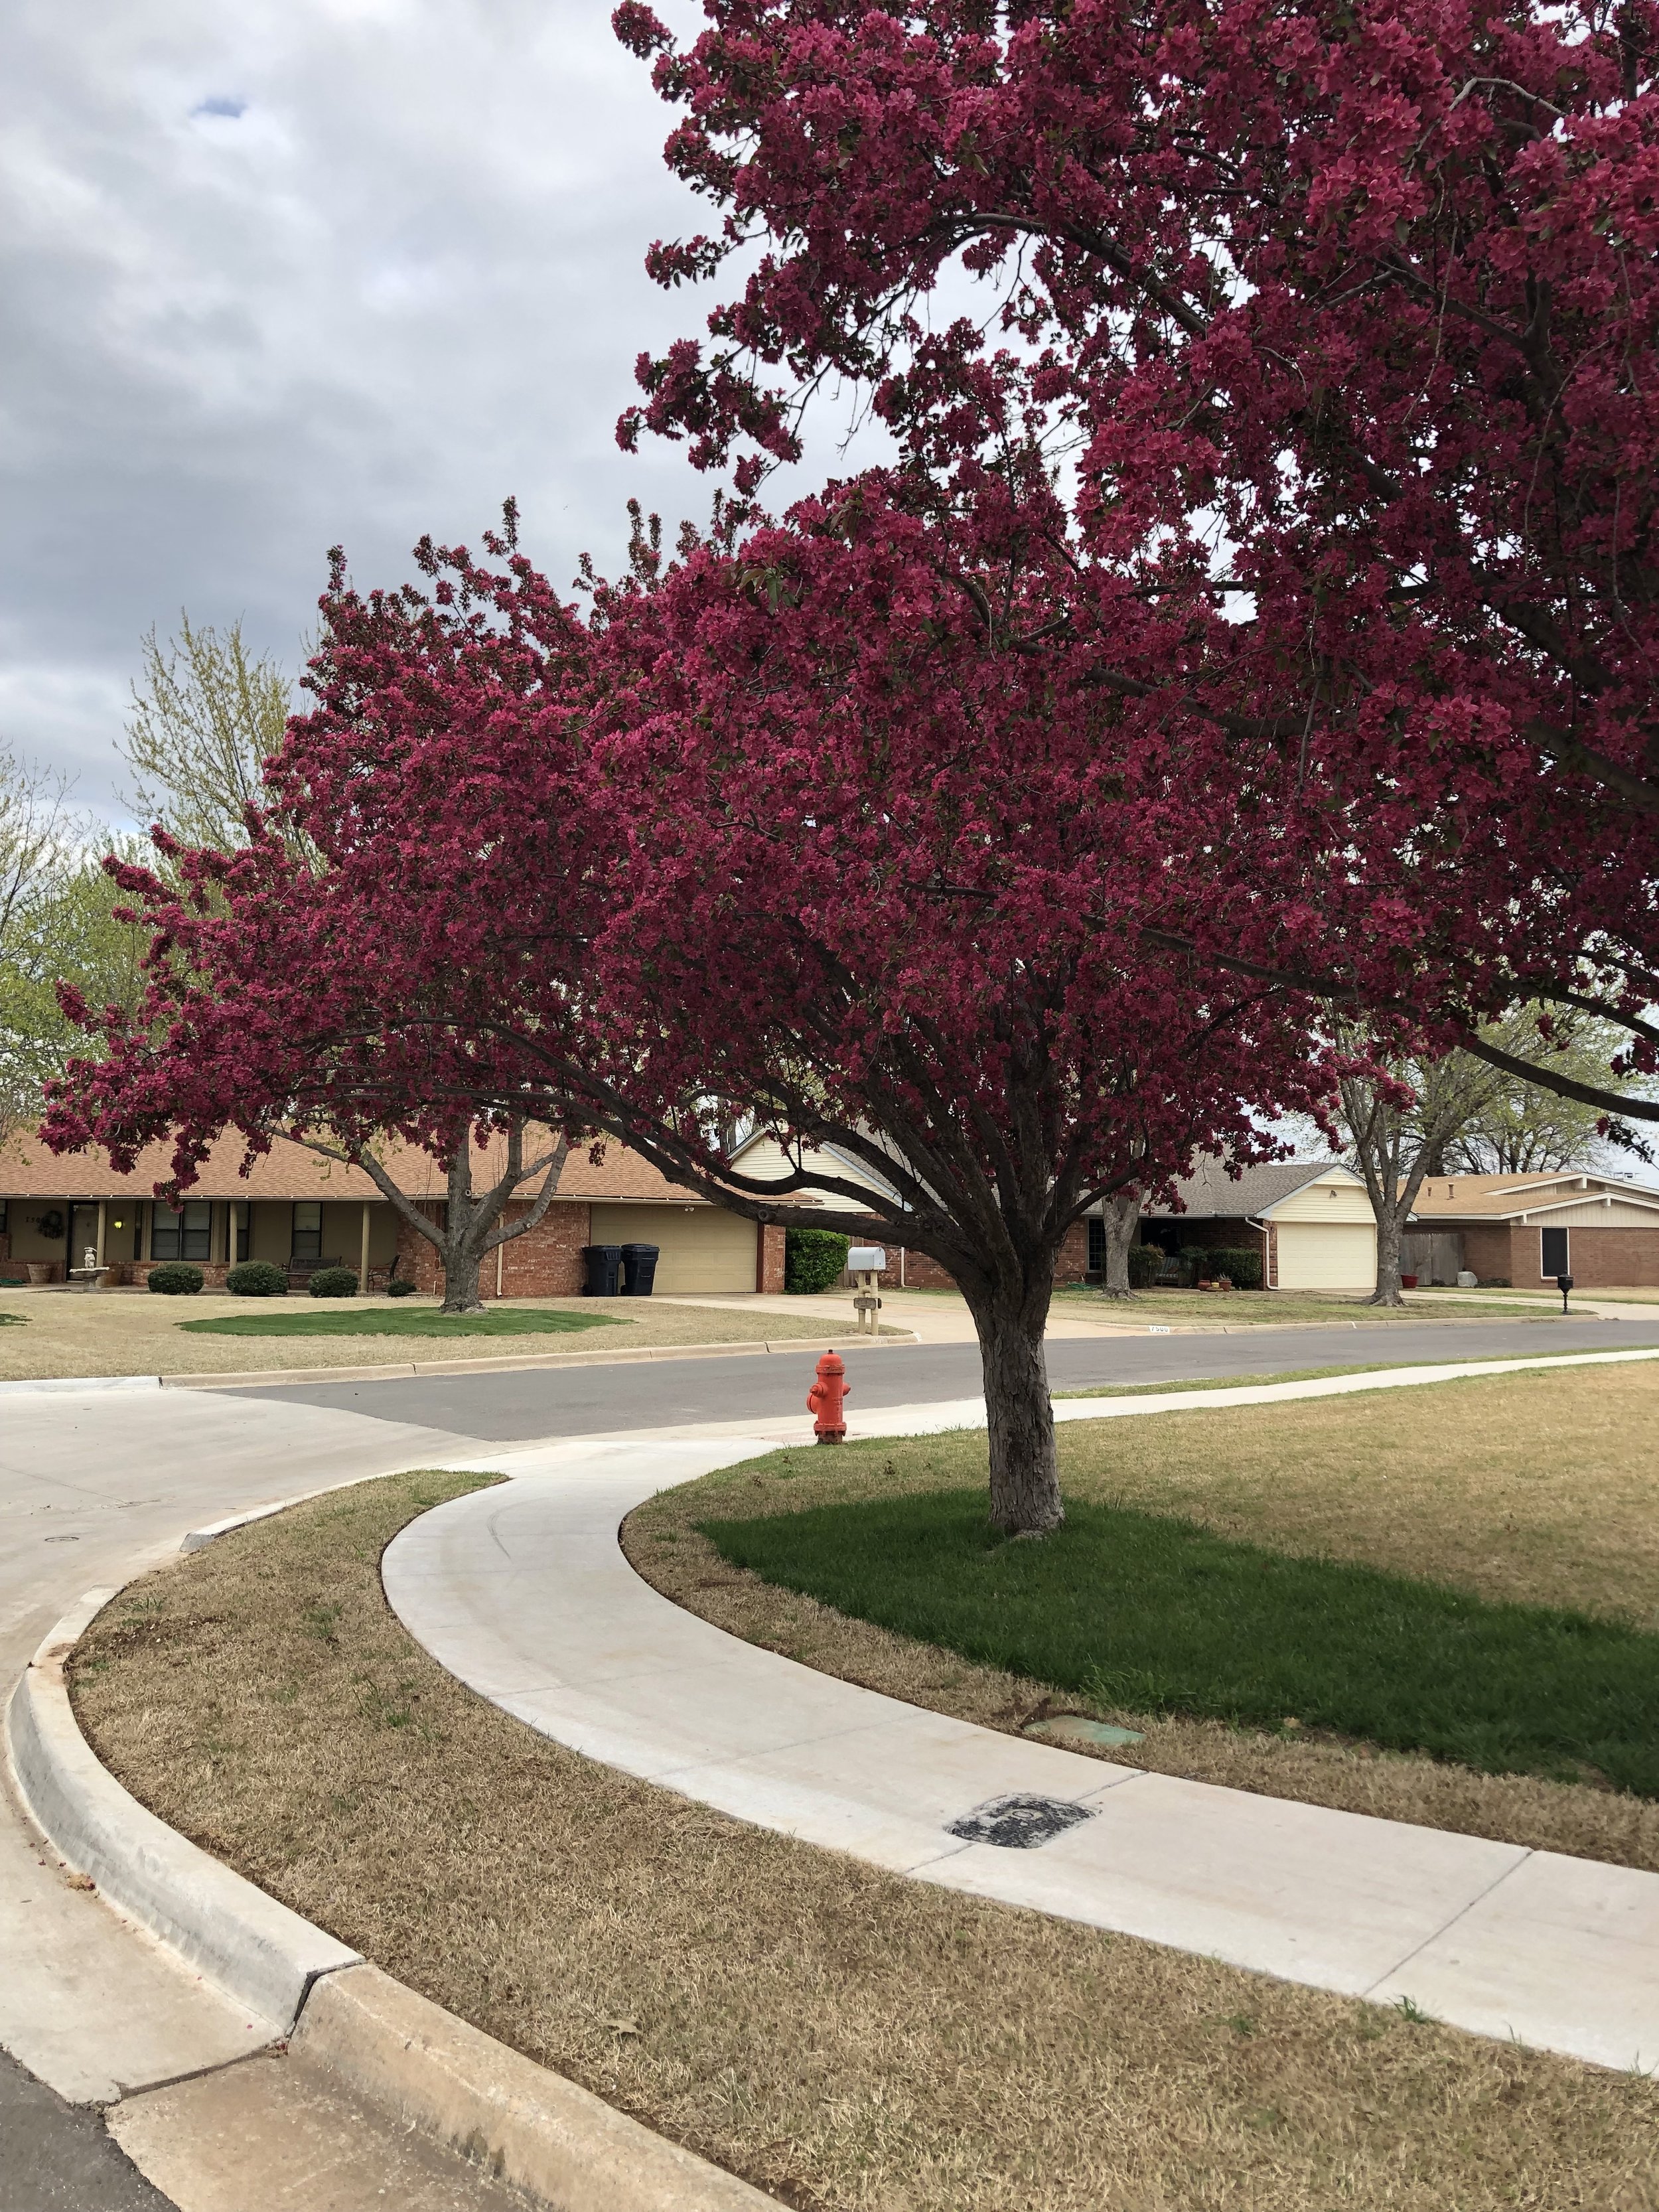
Next spring when the crabapples are in bloom and fescue is green, Bermuda lawns should be weed free. This is only possible if a fall pre-emergent is applied between late August and early October with a second application 4-6 weeks later.
There is only one reason to NOT put the first fall pre-emergent application on your lawn: SEEDING FESCUE.
The same pre-emergent herbicide that prevents annual weeds from germinating WILL PREVENT new grass seed from coming up. Because developing a thick turf is so critical to good weed control, and because September through October is by far the best time to establish a cool season lawn, not applying a pre-emergent herbicide to the areas you are seeding is the right thing to do. Once the new seed is up, actively growing, and has been mowed 3-4 times, you can apply a fall pre-emergent application.
Note: If you are only seeding a portion of your lawn, you should have a pre-emergent applied to the areas you are not seeding.
The only exception to the early fall pre-emergent being a must for your best lawn next spring is if you are overseeding with fescue this fall. If overseeding, skip the early pre-emergent, seed with fescue, then apply the late fall pre-emergent after the newly seeded area has been mowed a few times.
Important – If you are planning on seeding all or part of your lawn this fall, please let us know so we can adjust your applications accordingly.
Need help deciding if you need to overseed all or parts of your lawn with fescue this fall? Check out last week’s email: Bermuda vs Fescue. The Choice is Yours!

Dormant Bermuda will be weed free in February and March when both fall pre-emergent applications are on schedule.
If you are not overseeding all your lawn with fescue this fall, it is important to not skip the early fall pre-emergent. All the areas you are not seeding need the early application to look their best next spring.

Fall pre-emergent applications will ensure your lawn is not full of annual winter weeds next March.

DO NOT apply the early fall pre-emergent on your lawn if you are planning on seeding with fescue this fall.

Please contact us if you plan to overseed with fescue this fall so we can adjust our application plans for your lawn.
There are 4 types of lawn care customers:
Customers who subscribe to the Hall | Stewart 7-step program and enjoy having a clean, healthy and growing turf. If you are on the 7-step program, you will receive both fall pre-emergent applications.
Customers who want to make sure their lawn receives timely pre-emergent herbicides but enjoy applying their own fertilizer. If this defines you, you are receiving the Hall | Stewart 4-step weed control only program and will receive the 2 fall pre-emergent applications.
The occasional application customer who takes a few applications, often the early spring applications. If this defines you, please don’t skip the fall pre-emergent steps this year. You will not regret the fall applications next spring when your lawn starts the year weed free.
Customers who have “thrown in the towel” on this season and plan on starting again next spring. If this defines you, a great lawn next spring doesn’t start next spring. A great lawn next season starts this fall.
Remember – it is always easier to prevent weeds than it is to kill actively growing weeds.
Nothing will make a bigger difference in the way your lawn looks next spring than applying both fall pre-emergent applications this year.
If you have any questions about fall pre-emergent herbicides, please give us a call at (405)367-3873.
Lorne Hall
Hall | Stewart Lawn + Landscape
(405)367-3873
Bermuda vs Fescue – The Choice is Yours!

When it comes to turfgrass, Oklahoma is blessed to be in the transition zone.
What is the transition zone? It is an area across the middle of the US between where warm season turf grows in the south and cool season grasses grow in the north.
The Transition Zone is the area of the country you can choose to grow either warm season or cool season grasses.
Bermuda is the common warm season turfgrass in our region. The advantage of bermuda is that it loves the summer heat and as long as it receives some moisture, it will be at its best in July and August.
But, bermuda has limits. The biggest being it requires 6 hours of direct sunlight to be thick and healthy. Second, it goes dormant in November and doesn’t green up until April, leaving you with a lifeless, straw-brown lawn for months.

Bermuda will look its best when it receives at least 6 hours of full sun everyday.

Fescue is the best grass for lawns where is less than 6 hours of direct sunlight per day.
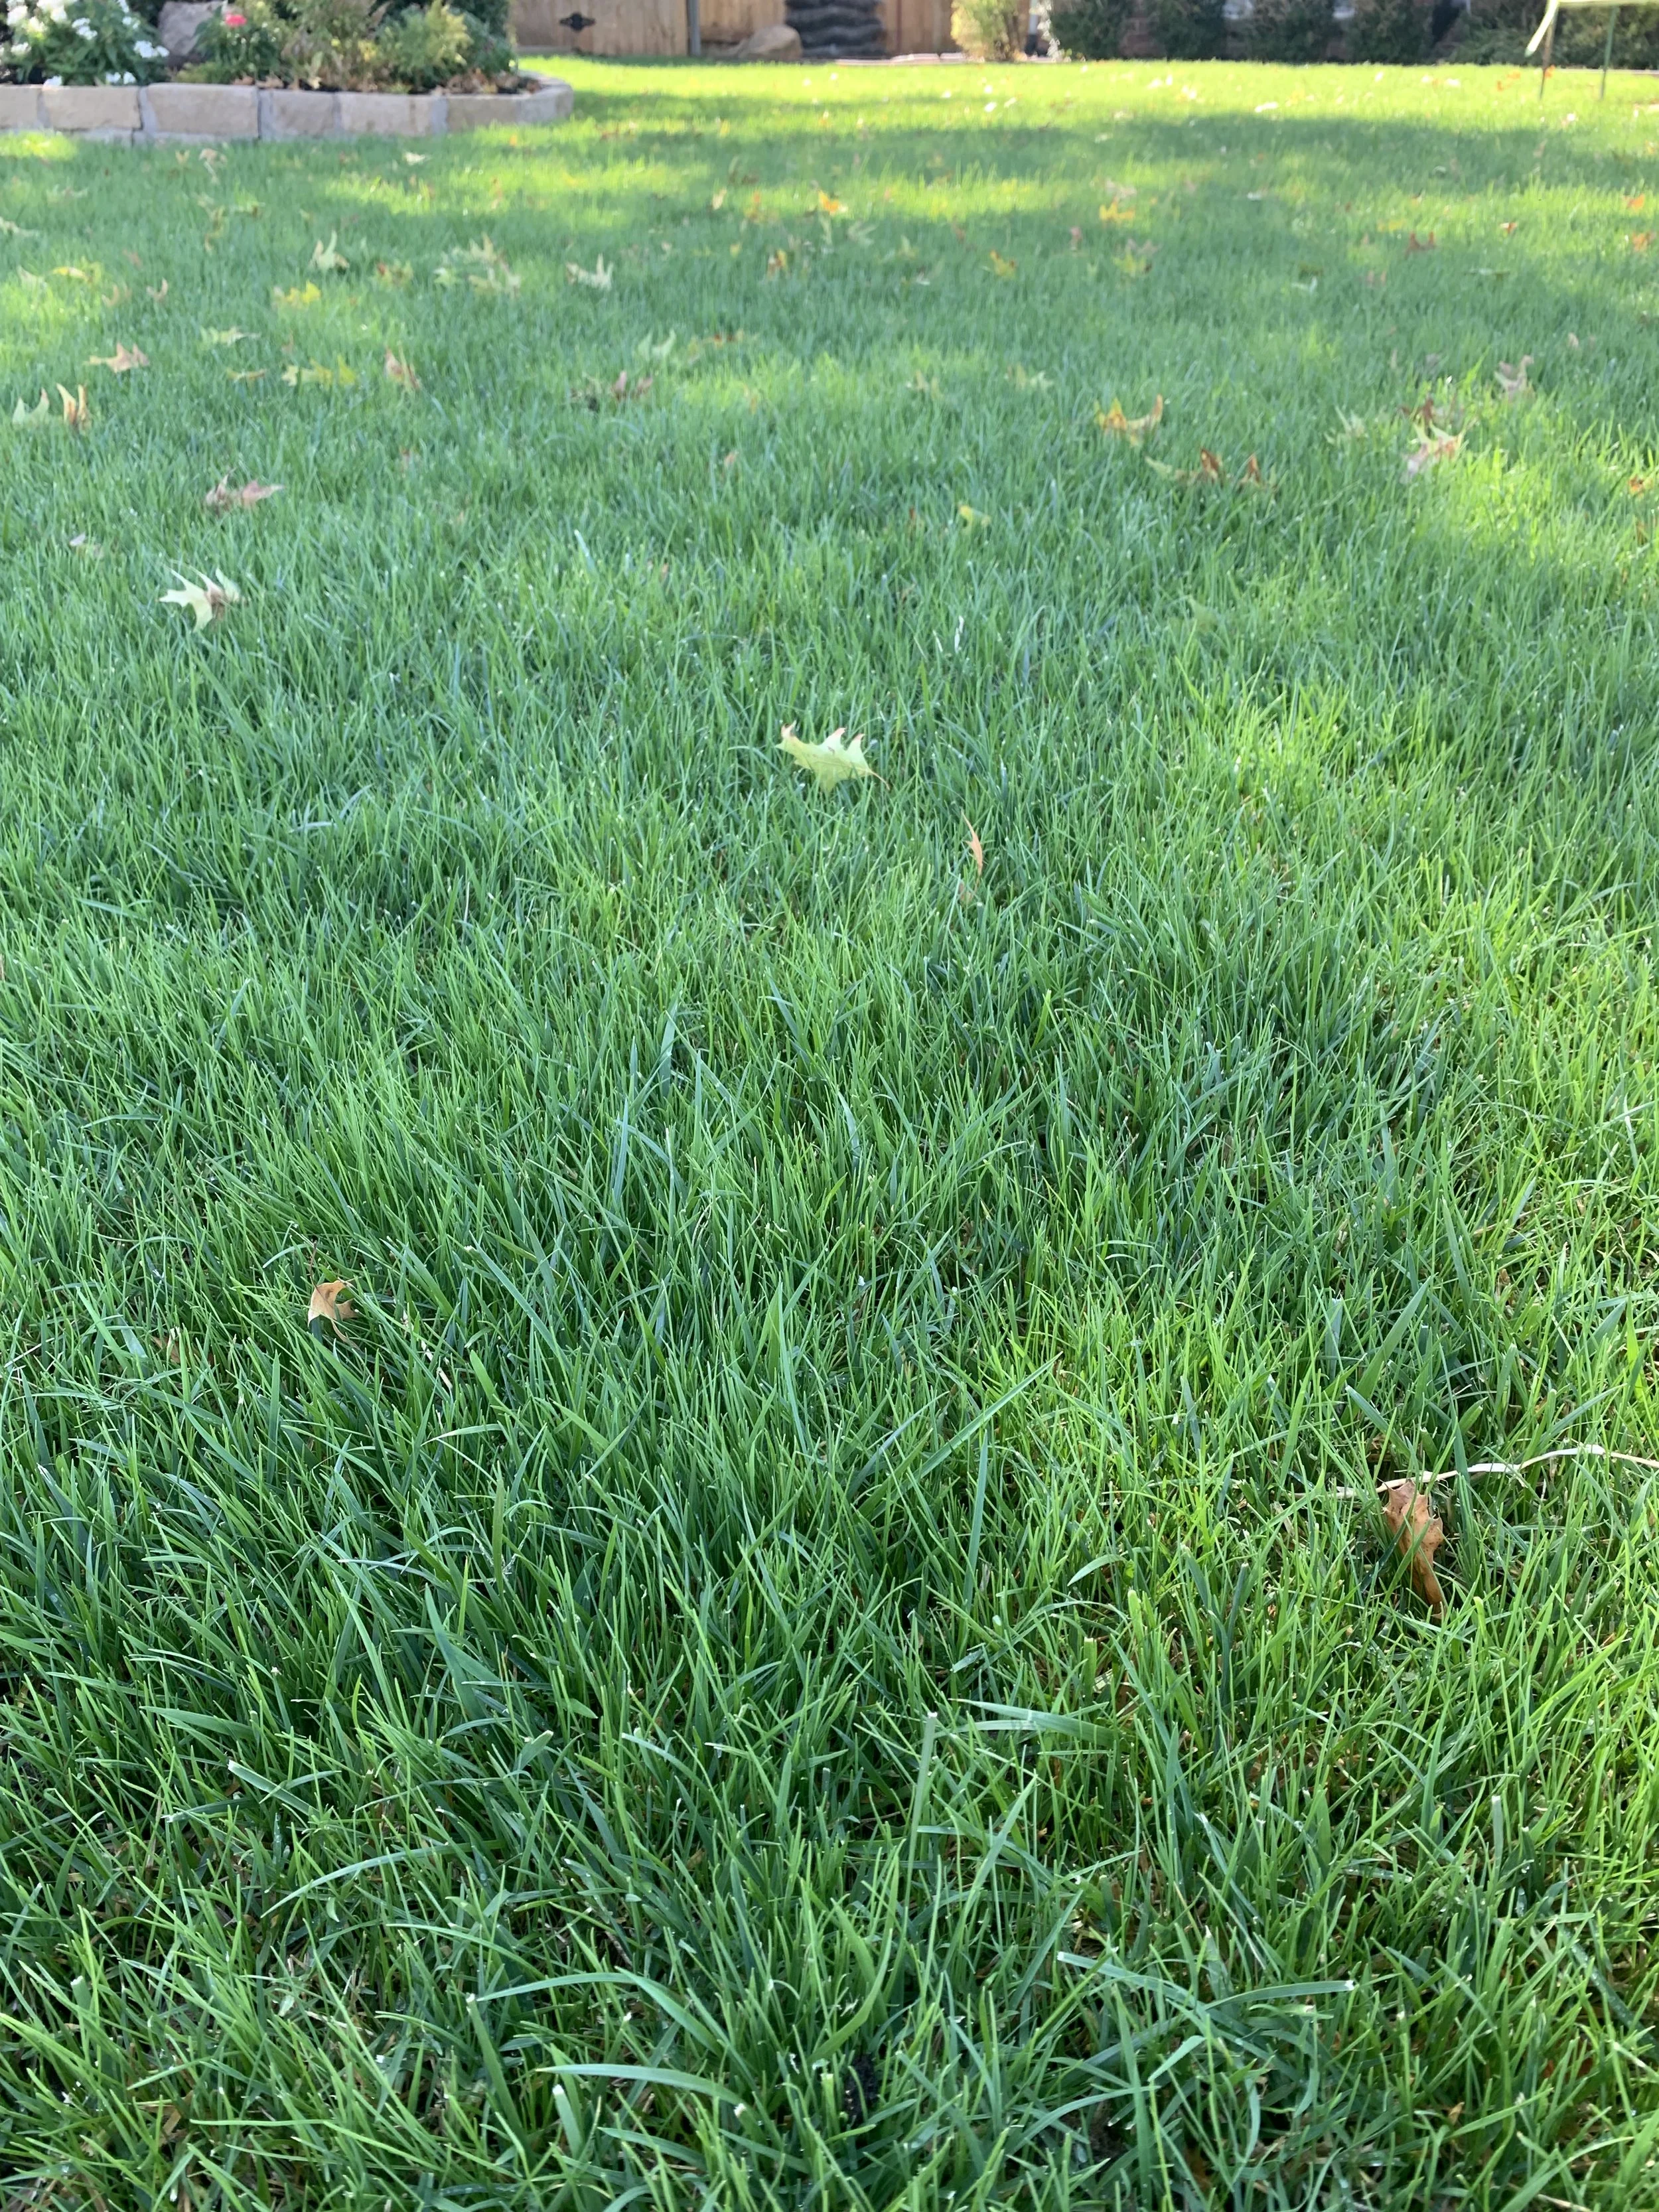
Fescue is the cool season alternative. Fescue tolerates more shade and stays green nearly year-round. You can’t beat the deep rich color in the spring and fall. The turf is so soft under your feet. Mowing patterns are sharp. Fescue stays green well into December, keeps some color through the winter, and as soon as the winter starts to break in early March, fescue bursts back to life.
But to be fair, fescue has limits as well. Fescue, because it is a cool season grass, goes through a summer off season. About the time bermuda lawns are looking their best, fescue goes through a slump in late July to early August when 95-100 temperatures are common. Growth slows, depth of color fades, and although improved varieties of fescue are more drought tolerant, fescue still needs water during the summer to stay green.
Want to know about fescue in the heat of year, read our article Fescue’s Summer Off Season from July 27th?
August is the perfect time to evaluate your lawn. If you have a bermuda lawn, are there areas that are not receiving sufficient light for a thick, healthy bermuda turf? If you have a fescue lawn, how has it faired this year with the drier than normal, warmer than normal June?
Fescue is best established during September and October. With cooler days and nights just around the corner, now is the best time to evaluate your lawn for the need to establish fescue or add more fescue.
VERY CRITICAL
Evaluation and decision to seed or not to seed this fall must be made before the first fall pre-emergent application is made in late August through September.
Let’s take a minute to explore ways to use fescue in your lawn…

Fescue in the Shady Areas Only
This is the most traditional approach.
Any place where your lawn doesn’t receive at least 6 hours of direct sunlight - under trees, on the north side of structures, and those narrow areas between houses and fences - are all prime areas for fescue.
Often homeowners put effort into trimming trees in an attempt to get enough light and allow bermuda to grow. But, in most cases, tree trimming or thinning rarely solves the problem.
The best solution is to overseed these areas with fescue in the fall.
The negative to “fescue only in the shady areas” approach is a lawn mixed with green and dormant colors during the fall, winter, and early spring.
Full Fescue Lawn
A common myth is fescue won’t grow in full sun.
Fescue performs best in dappled shade to partial sun, does very well in full sun when maintained properly, and struggles the most in dense, heavy shade.
A full fescue lawn is the best solution for the typical sized lawn with a few trees making caring for both cool season and warm season turf difficult.

A fescue lawn in dappled sunlight.

Fescue is relatively drought tolerant but needs water during the summer to stay green. This fescue lawn is in mostly full sun and during summer’s drought & heat has been receiving 1.5” of water.
Two Approaches To Managing A Full Fescue Lawn
Managing Fescue Over Bermuda
With this approach fertilizing, weed control, mowing, aerating, and overseeding focuses on promoting the fescue and suppressing the bermuda.
Fescue needs heavy fertilizer in the spring and fall, and none in the summer – the exact opposite of bermuda.
Weed control herbicides designed for fescue and not bermuda are used resulting in bermuda suppression.
Fescue responds well to being mowed taller, 3” to 3 ½”, while bermuda prefers a shorter height of 2” to 2 ½”.
Aeration occurs in the fall, not early summer.
And, overseeding with fescue in the fall keeps the fescue full and stresses the bermuda going into the winter.
The negative - You will still notice some bermuda in the lawn during July and August, but with deep, infrequent watering practices, the fescue will remain the dominate turf.

Fescue will loose color in 95+ degree temperatures if it doesn’t receive at least 1.5” of water per week.

2. Full Fescue Only
An aggressive approach to removing bermuda from the fescue is used.
Because bermuda is the dominate turfgrass in our region, it is difficult to have a completely bermuda free fescue lawn.
If this is your goal, aggressive herbicide treatments in August followed by overseeding in September is required.
The negative – Your lawn will look bad before it looks good. There will be a 4-to-6-week period between the first application and when the new fescue grows in. But, you will notice substantially less bermuda the next growing season. You can expect to repeat this process every 2 to 3 years to keep bermuda eradicated.
I have used this process on occasion with success, but it is not the preferred method due to the poor appearance of the lawn for several weeks until the new fescue grows in.
Fescue growing in full sun over Bermuda.

Fescue with bermuda in August before treatment to control bermuda.

Lawn 2 weeks after treatment to control bermuda.

Fescue 4 weeks after treatment to control bermuda just before overseeding in September.

A fescue lawn in July.

A fescue lawn in the fall.
A fescue lawn in the spring.
As our environment continues to have more and more trees, fescue will become more and more a part of our landscape environment.
Whether you desire to have a full fescue lawn or just need to address the shady areas of your lawn, September through October is the best time to establish fescue from seed. As a cool season grass, it is much easier for newly established grass to survive the winter.
Spring seeded fescue typically does not have enough root system to survive the summer and is more susceptible to brown patch disease. The best time to seed fescue is in the fall. The second-best time is in the spring, but the chasm between fall and spring is large.
If you need help evaluating your need for fescue and would like to discuss your options, please give us a call (405)367-3873.

New fescue 30 days after seeding.

Three keys to successful fall fescue seeding:
1. Quality Fescue Blend Seed
2. Aeration for good seed to soil contact.
3. Keeping the seeded area tacky moist until the new seed comes up.


A key to successful fescue seeding is keeping the seed moist until it germinates. Check your system now for even coverage to avoid seed failure in dry areas this fall.
VERY CRITICAL
Evaluation and decision to seed or not to seed this fall must be made before the first fall pre-emergent application is made in late August through September.
Lorne Hall
Hall | Stewart Lawn + Landscape
(405)367-3873
Bonus Tip - Newly seeded grass needs to be kept consistently moist for 2-3 weeks after seeding.
The inability to keep new seed moist is the number one reason new seed fails.
Now is the time to schedule an Irrigation Check to make sure your system is ready for fall overseeding.
Request an inspection today by responding to this email or calling (405)367-3873.

Time For A Summer Landscape Color Check

It’s hot! As, it should be. The last week of July and the first week of August are traditionally the hottest two weeks of the year in central Oklahoma. But, there is some good news…from here on out we should see daytime temperatures gradually decline!
So, how is your landscape doing in the heat?
Too often we get excited about a plant that looks great in April and May only to have it disappoint us when the heat is on in July and August.
Great landscapes should include plants that add color and interest in every season, even when temperatures are pushing triple digits.
A good activity for August is to create a summer landscape journal. Grab a few minutes and take pictures of your landscape while it is hot. Jot down a few notes about plants that are doing well and the ones that are struggling.
Next spring you will be glad to have the information when you are planning your summer landscape.
Here are a few things we have found to be tried and true when it comes to landscape plants that do well in the heat of July and August:
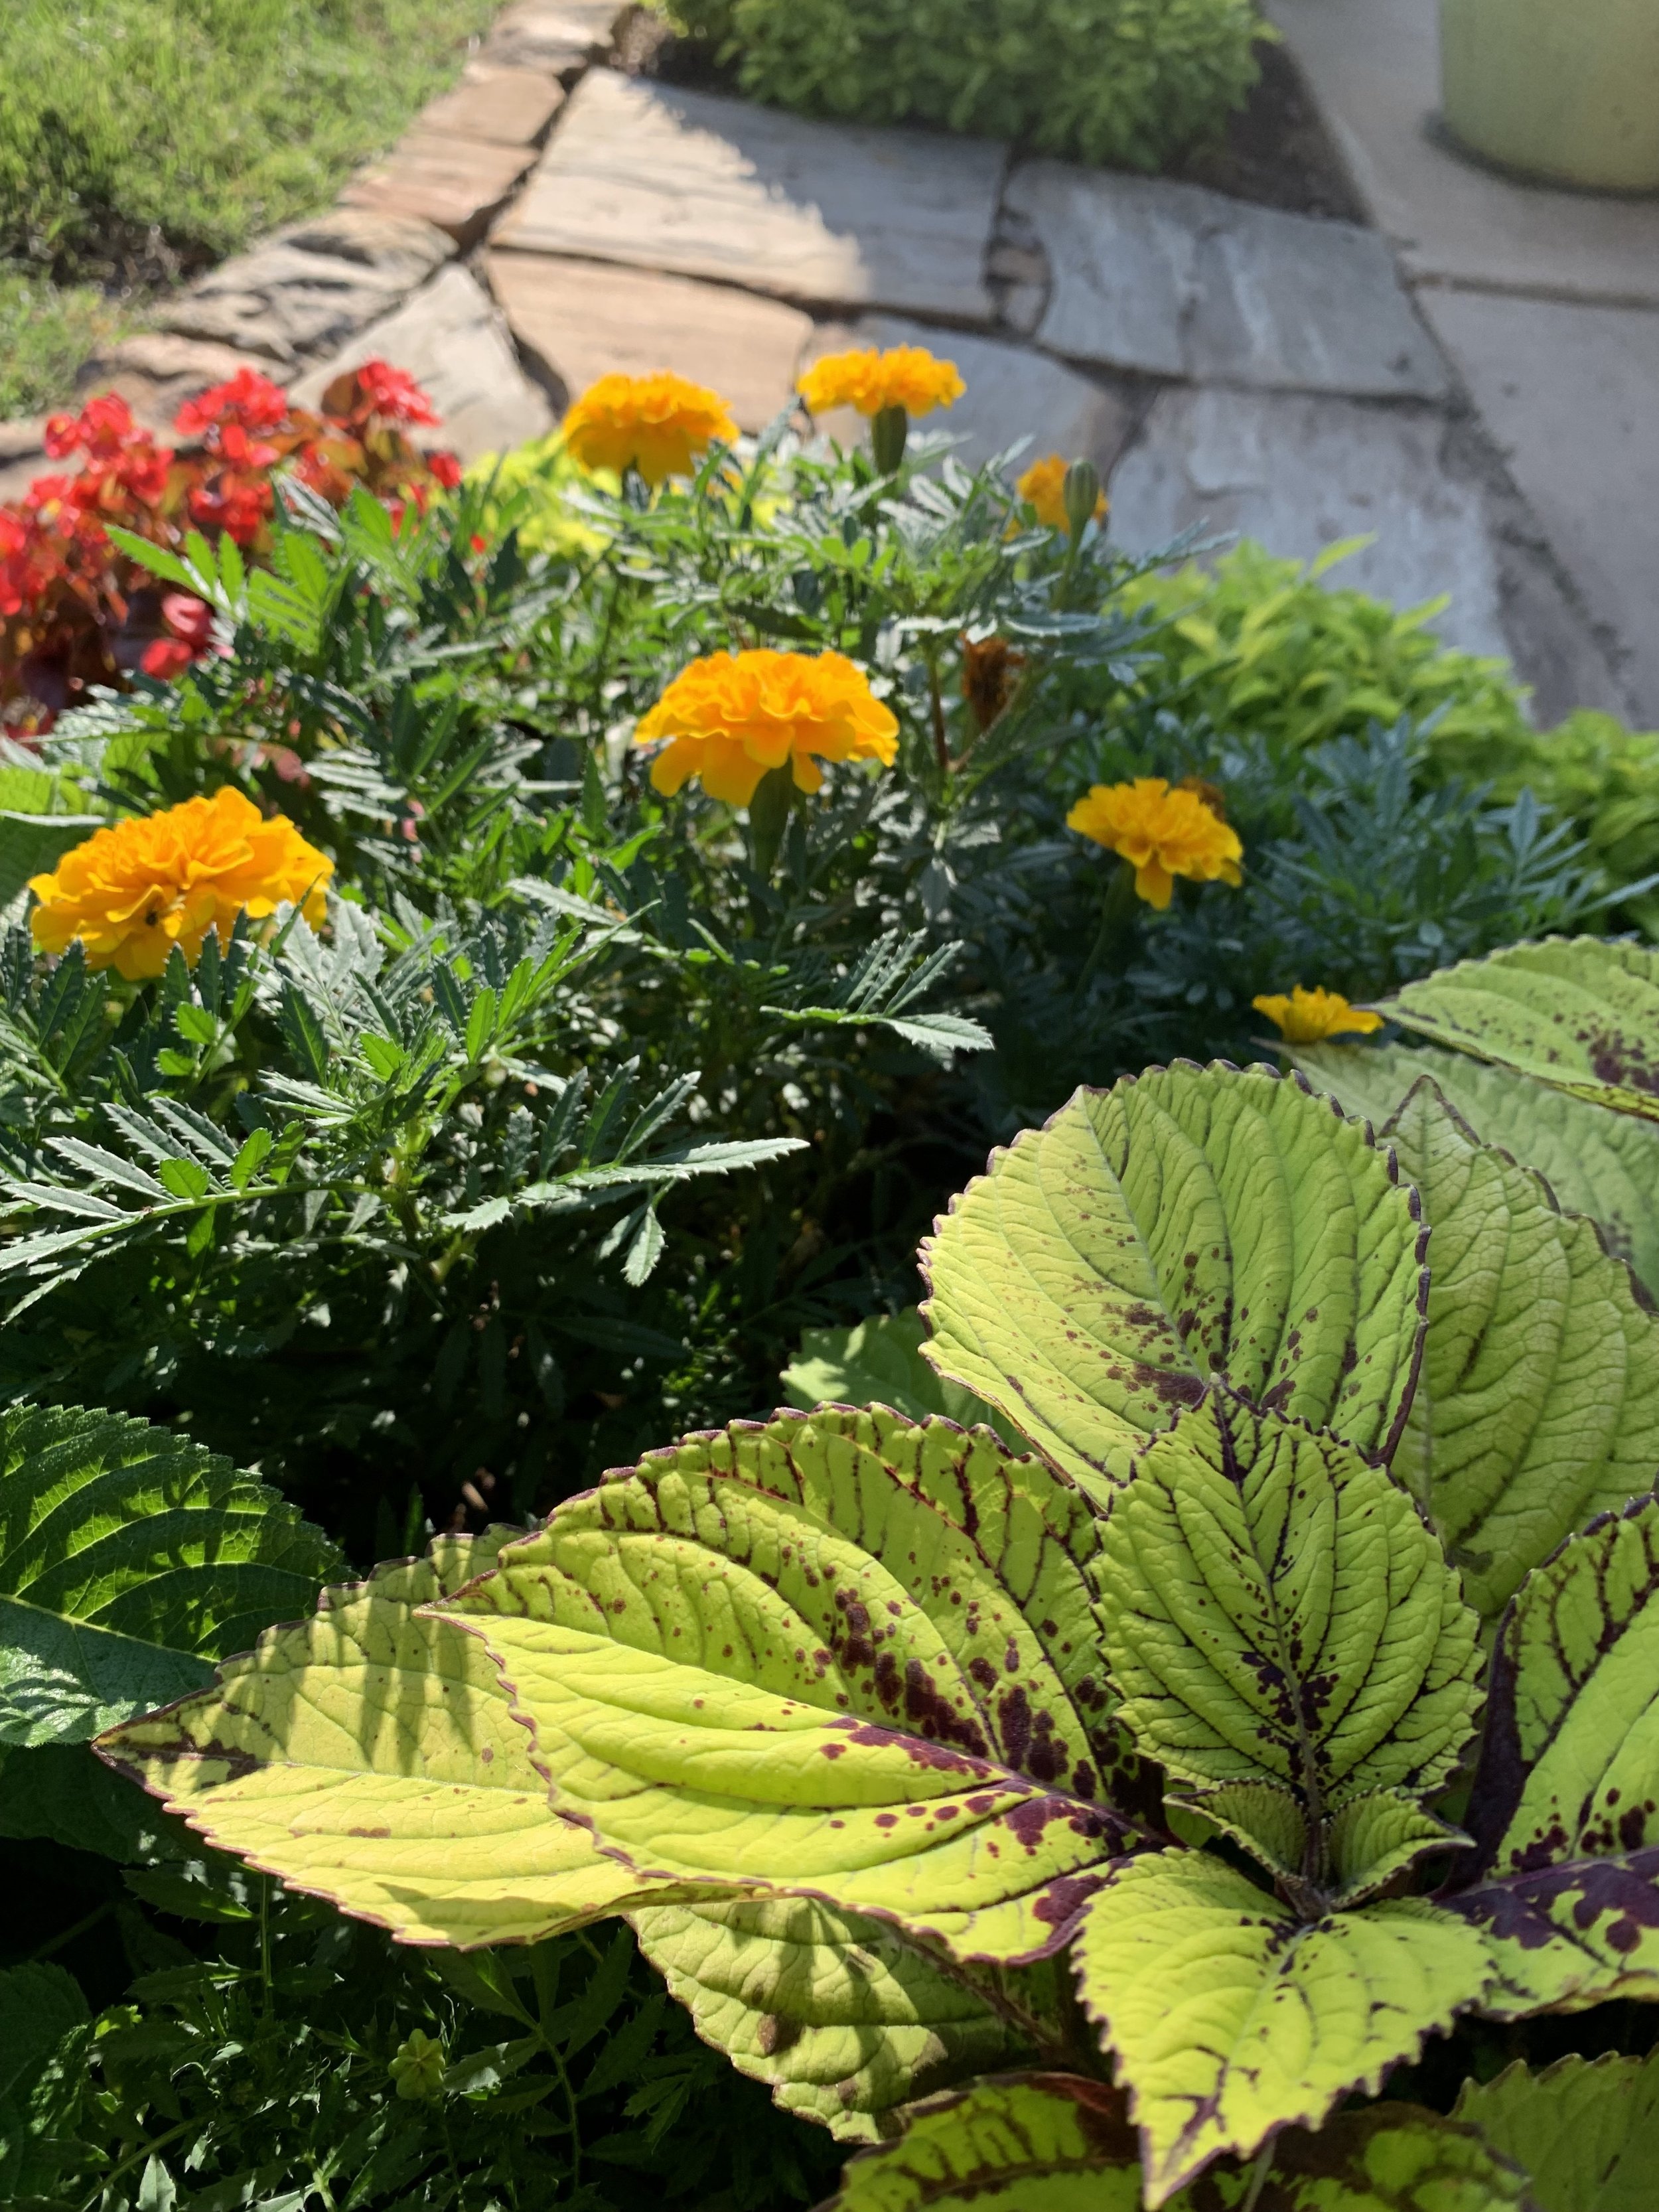
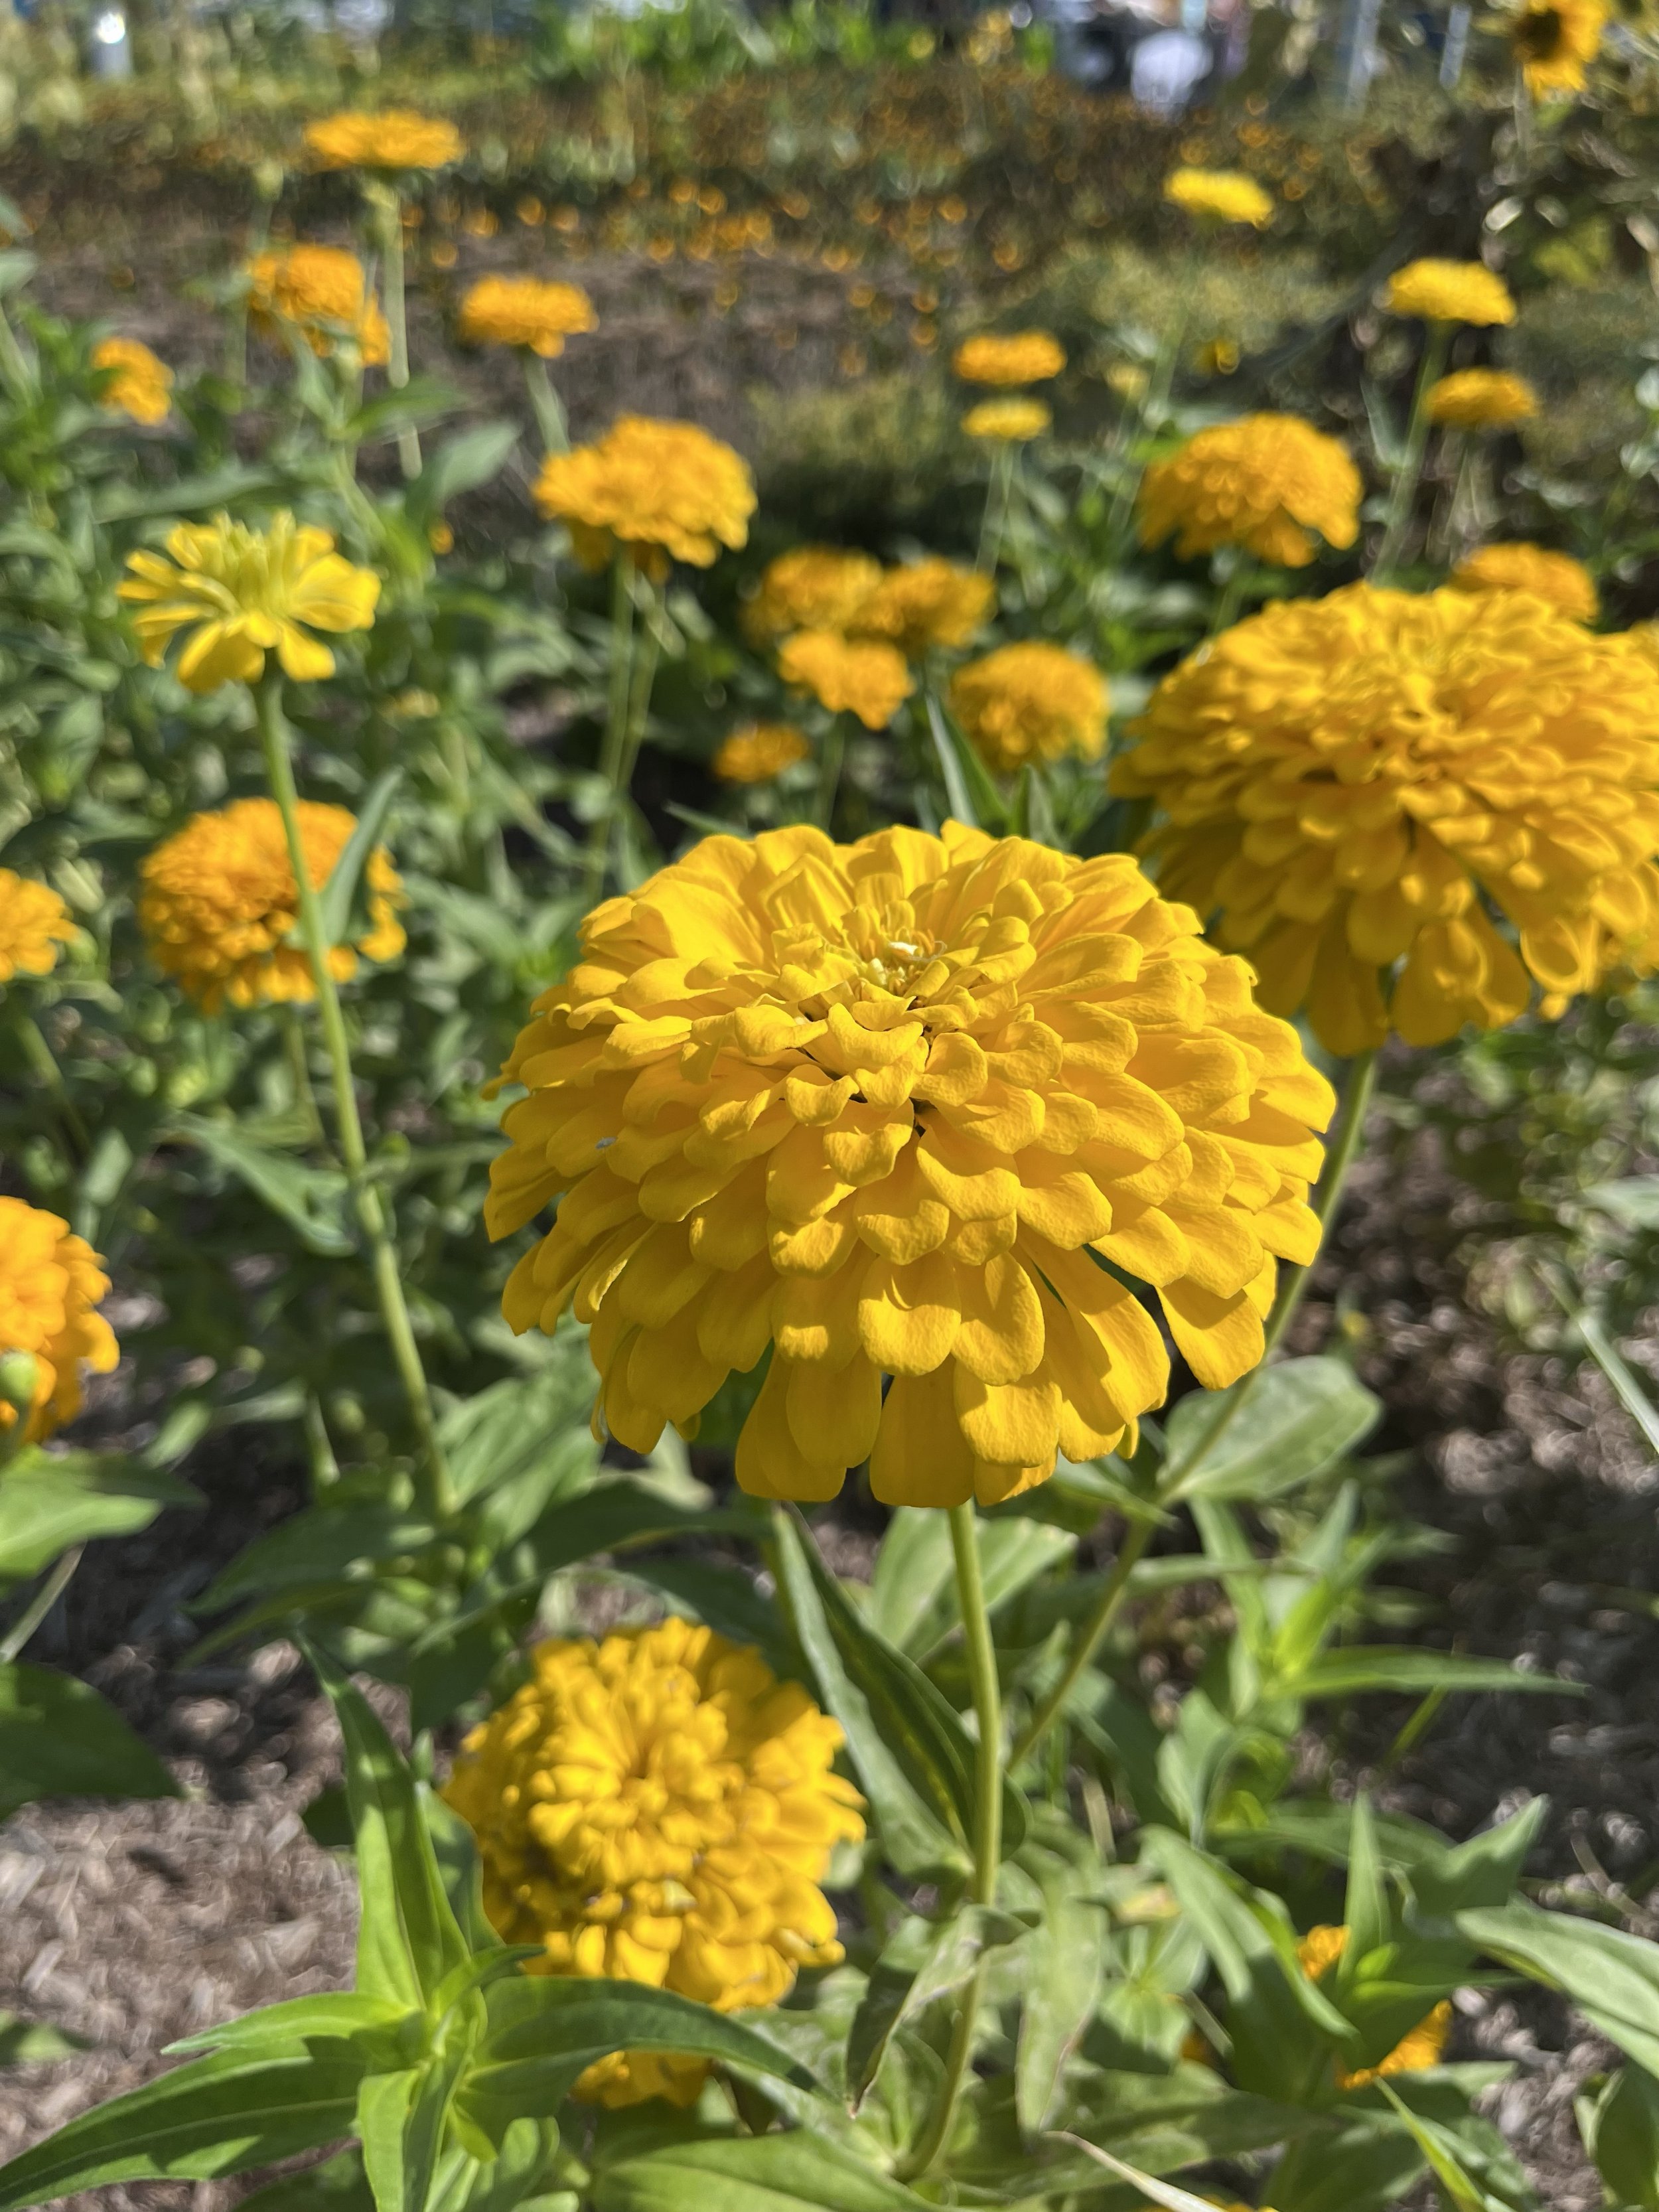
The limes and red speckled leaves of Coleus make a nice accent to the yellow flower of Marigolds.
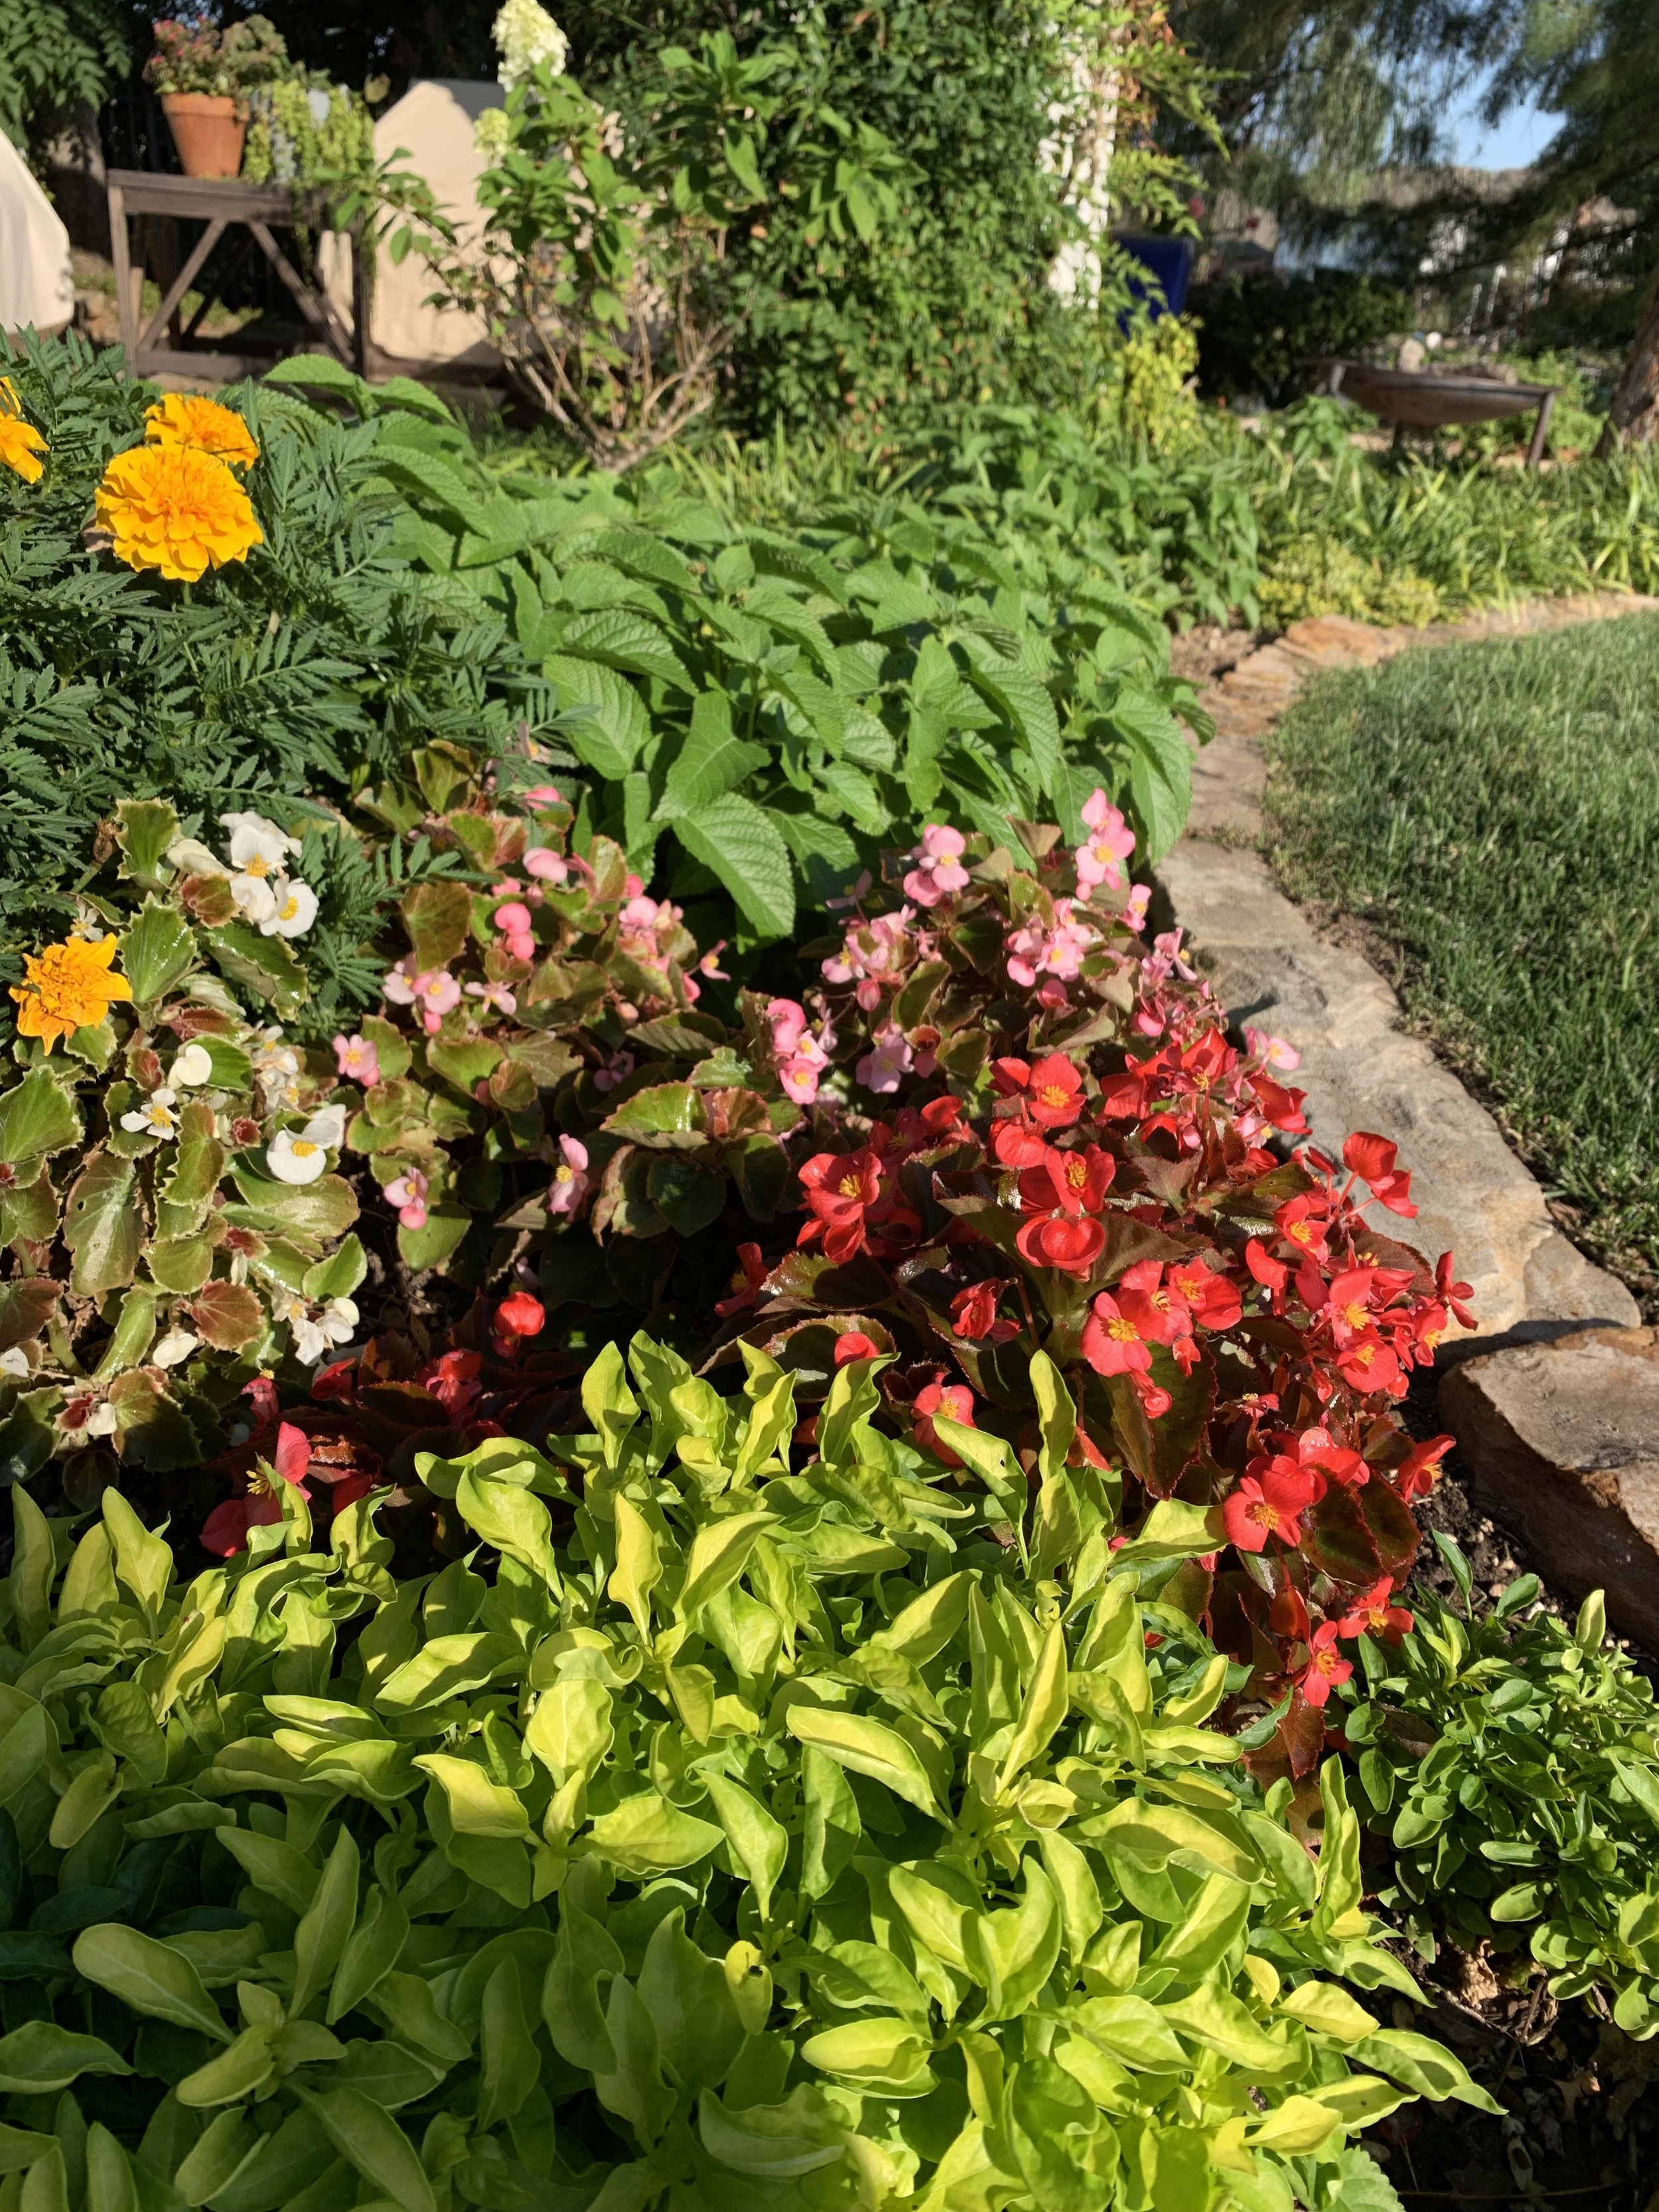
Joseph Coat is a great compliment for the reds of Bronze-Leaf Begonias.

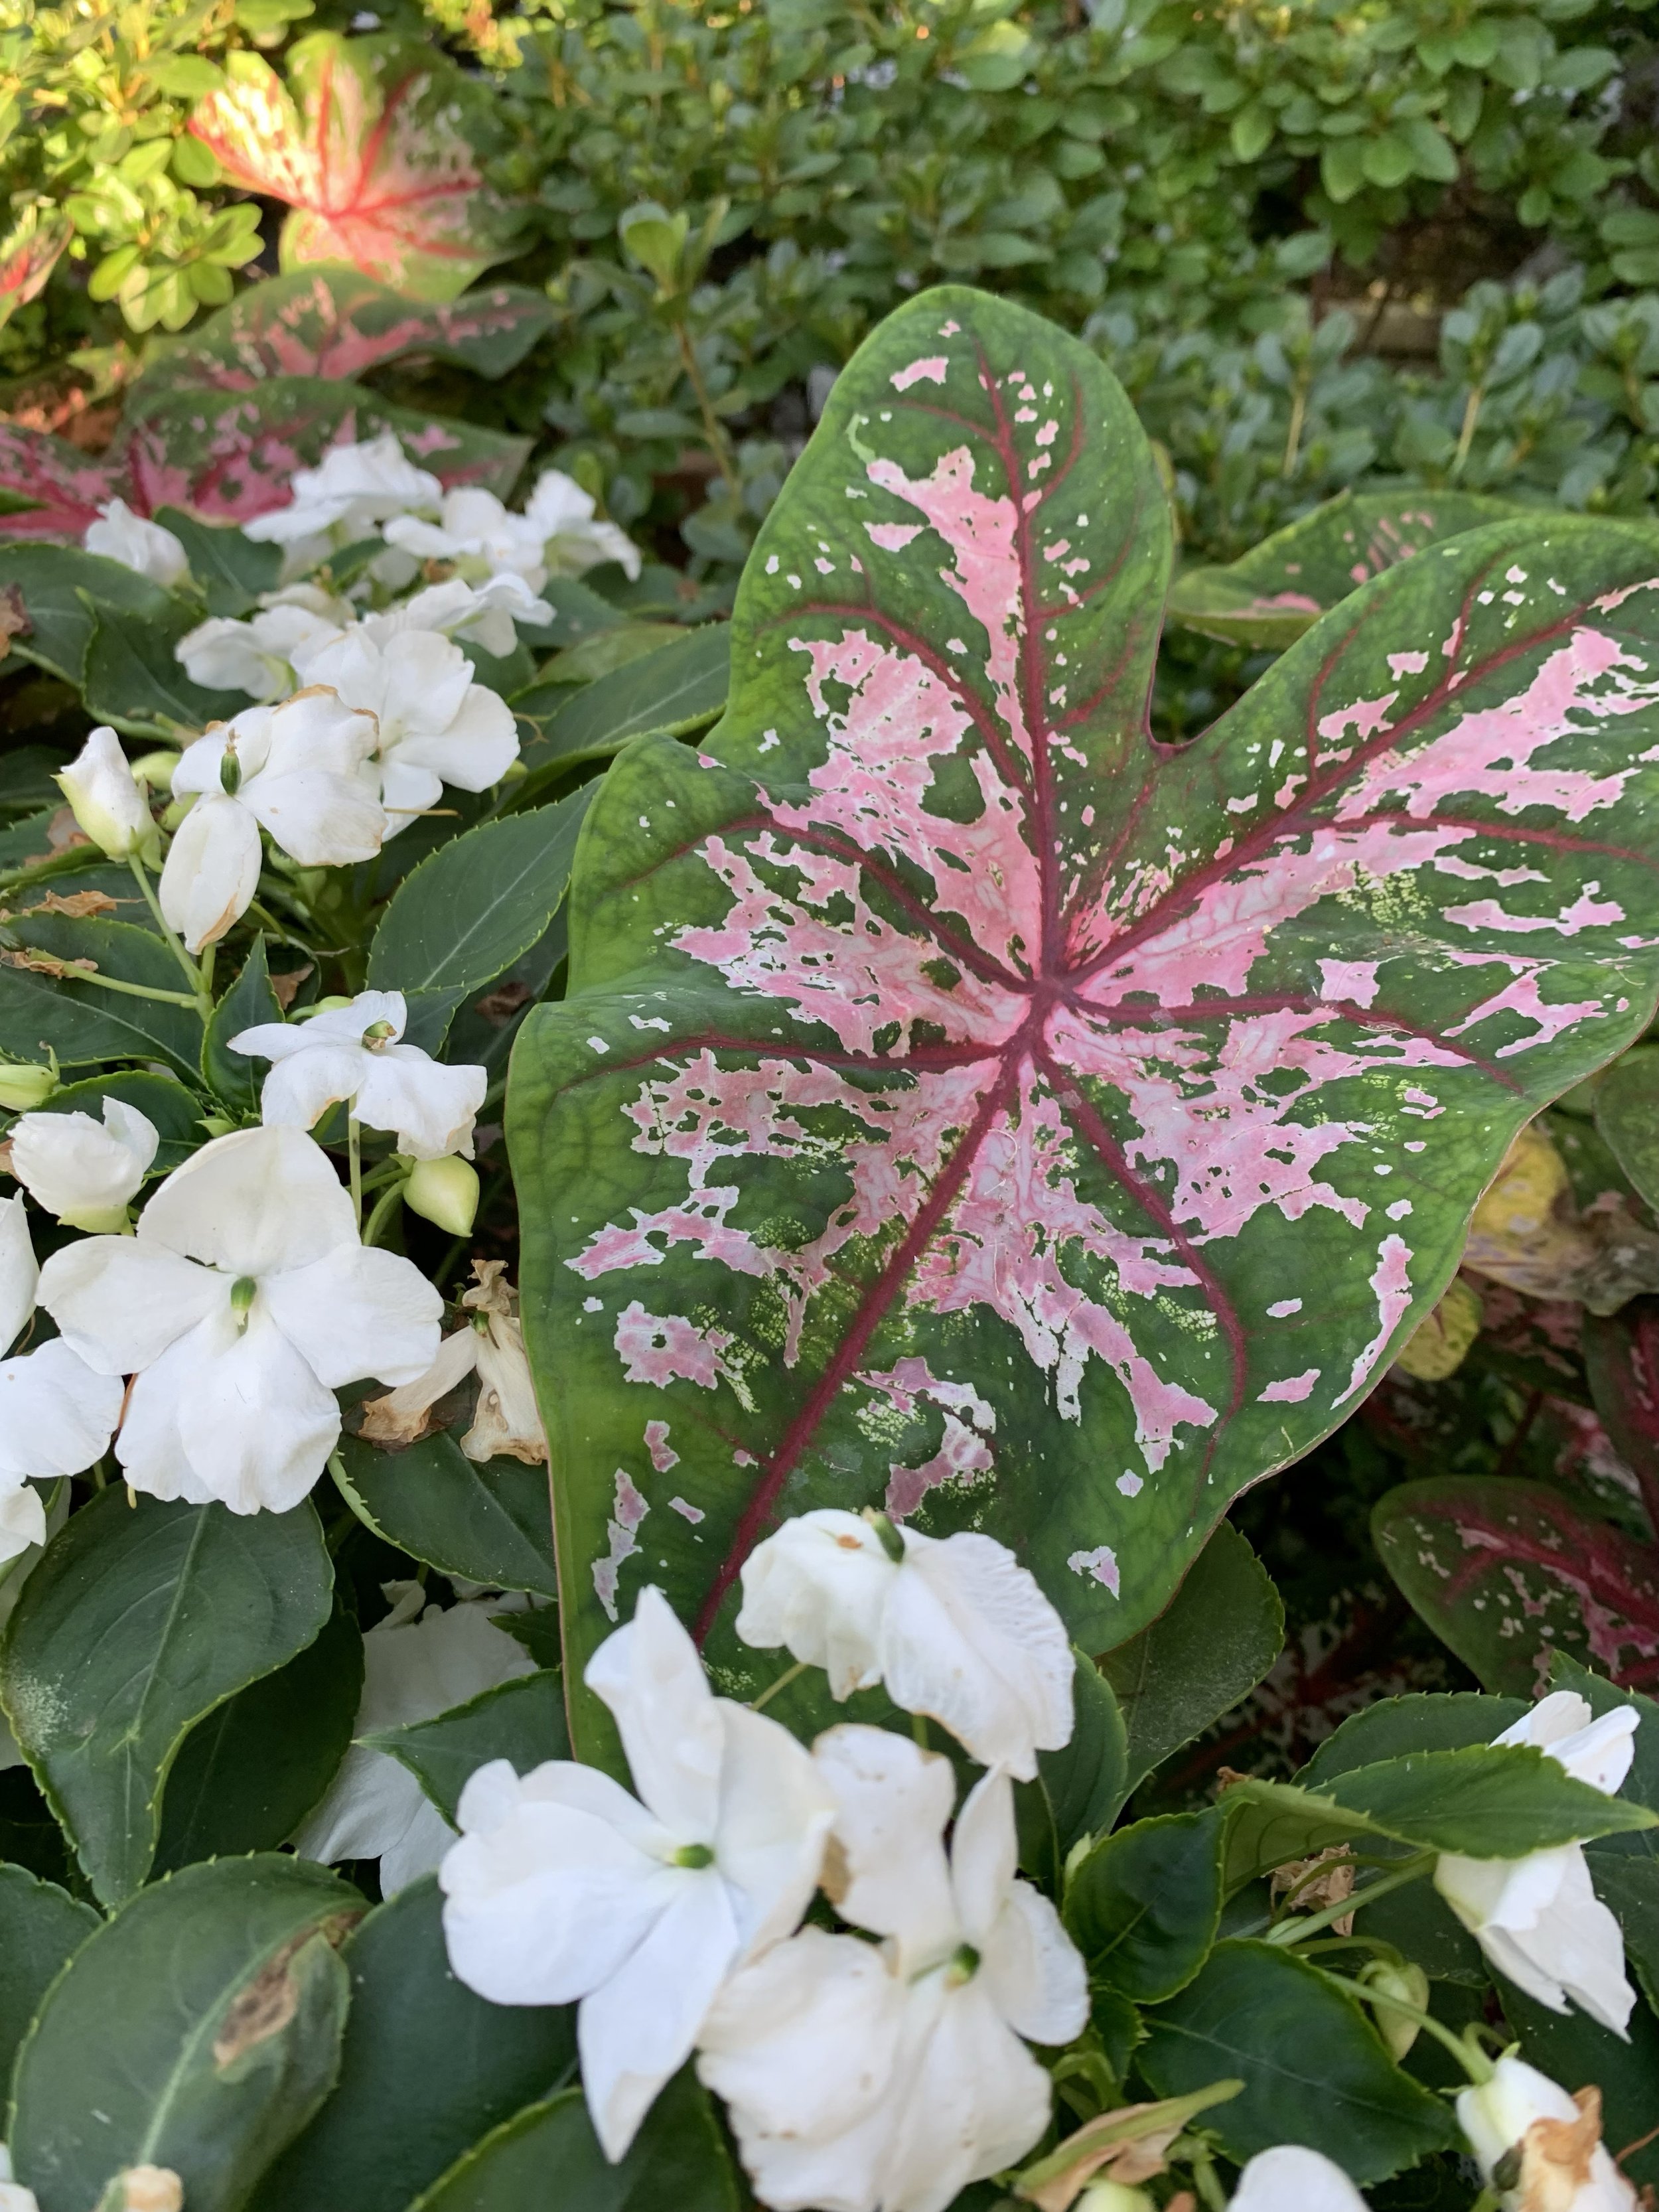
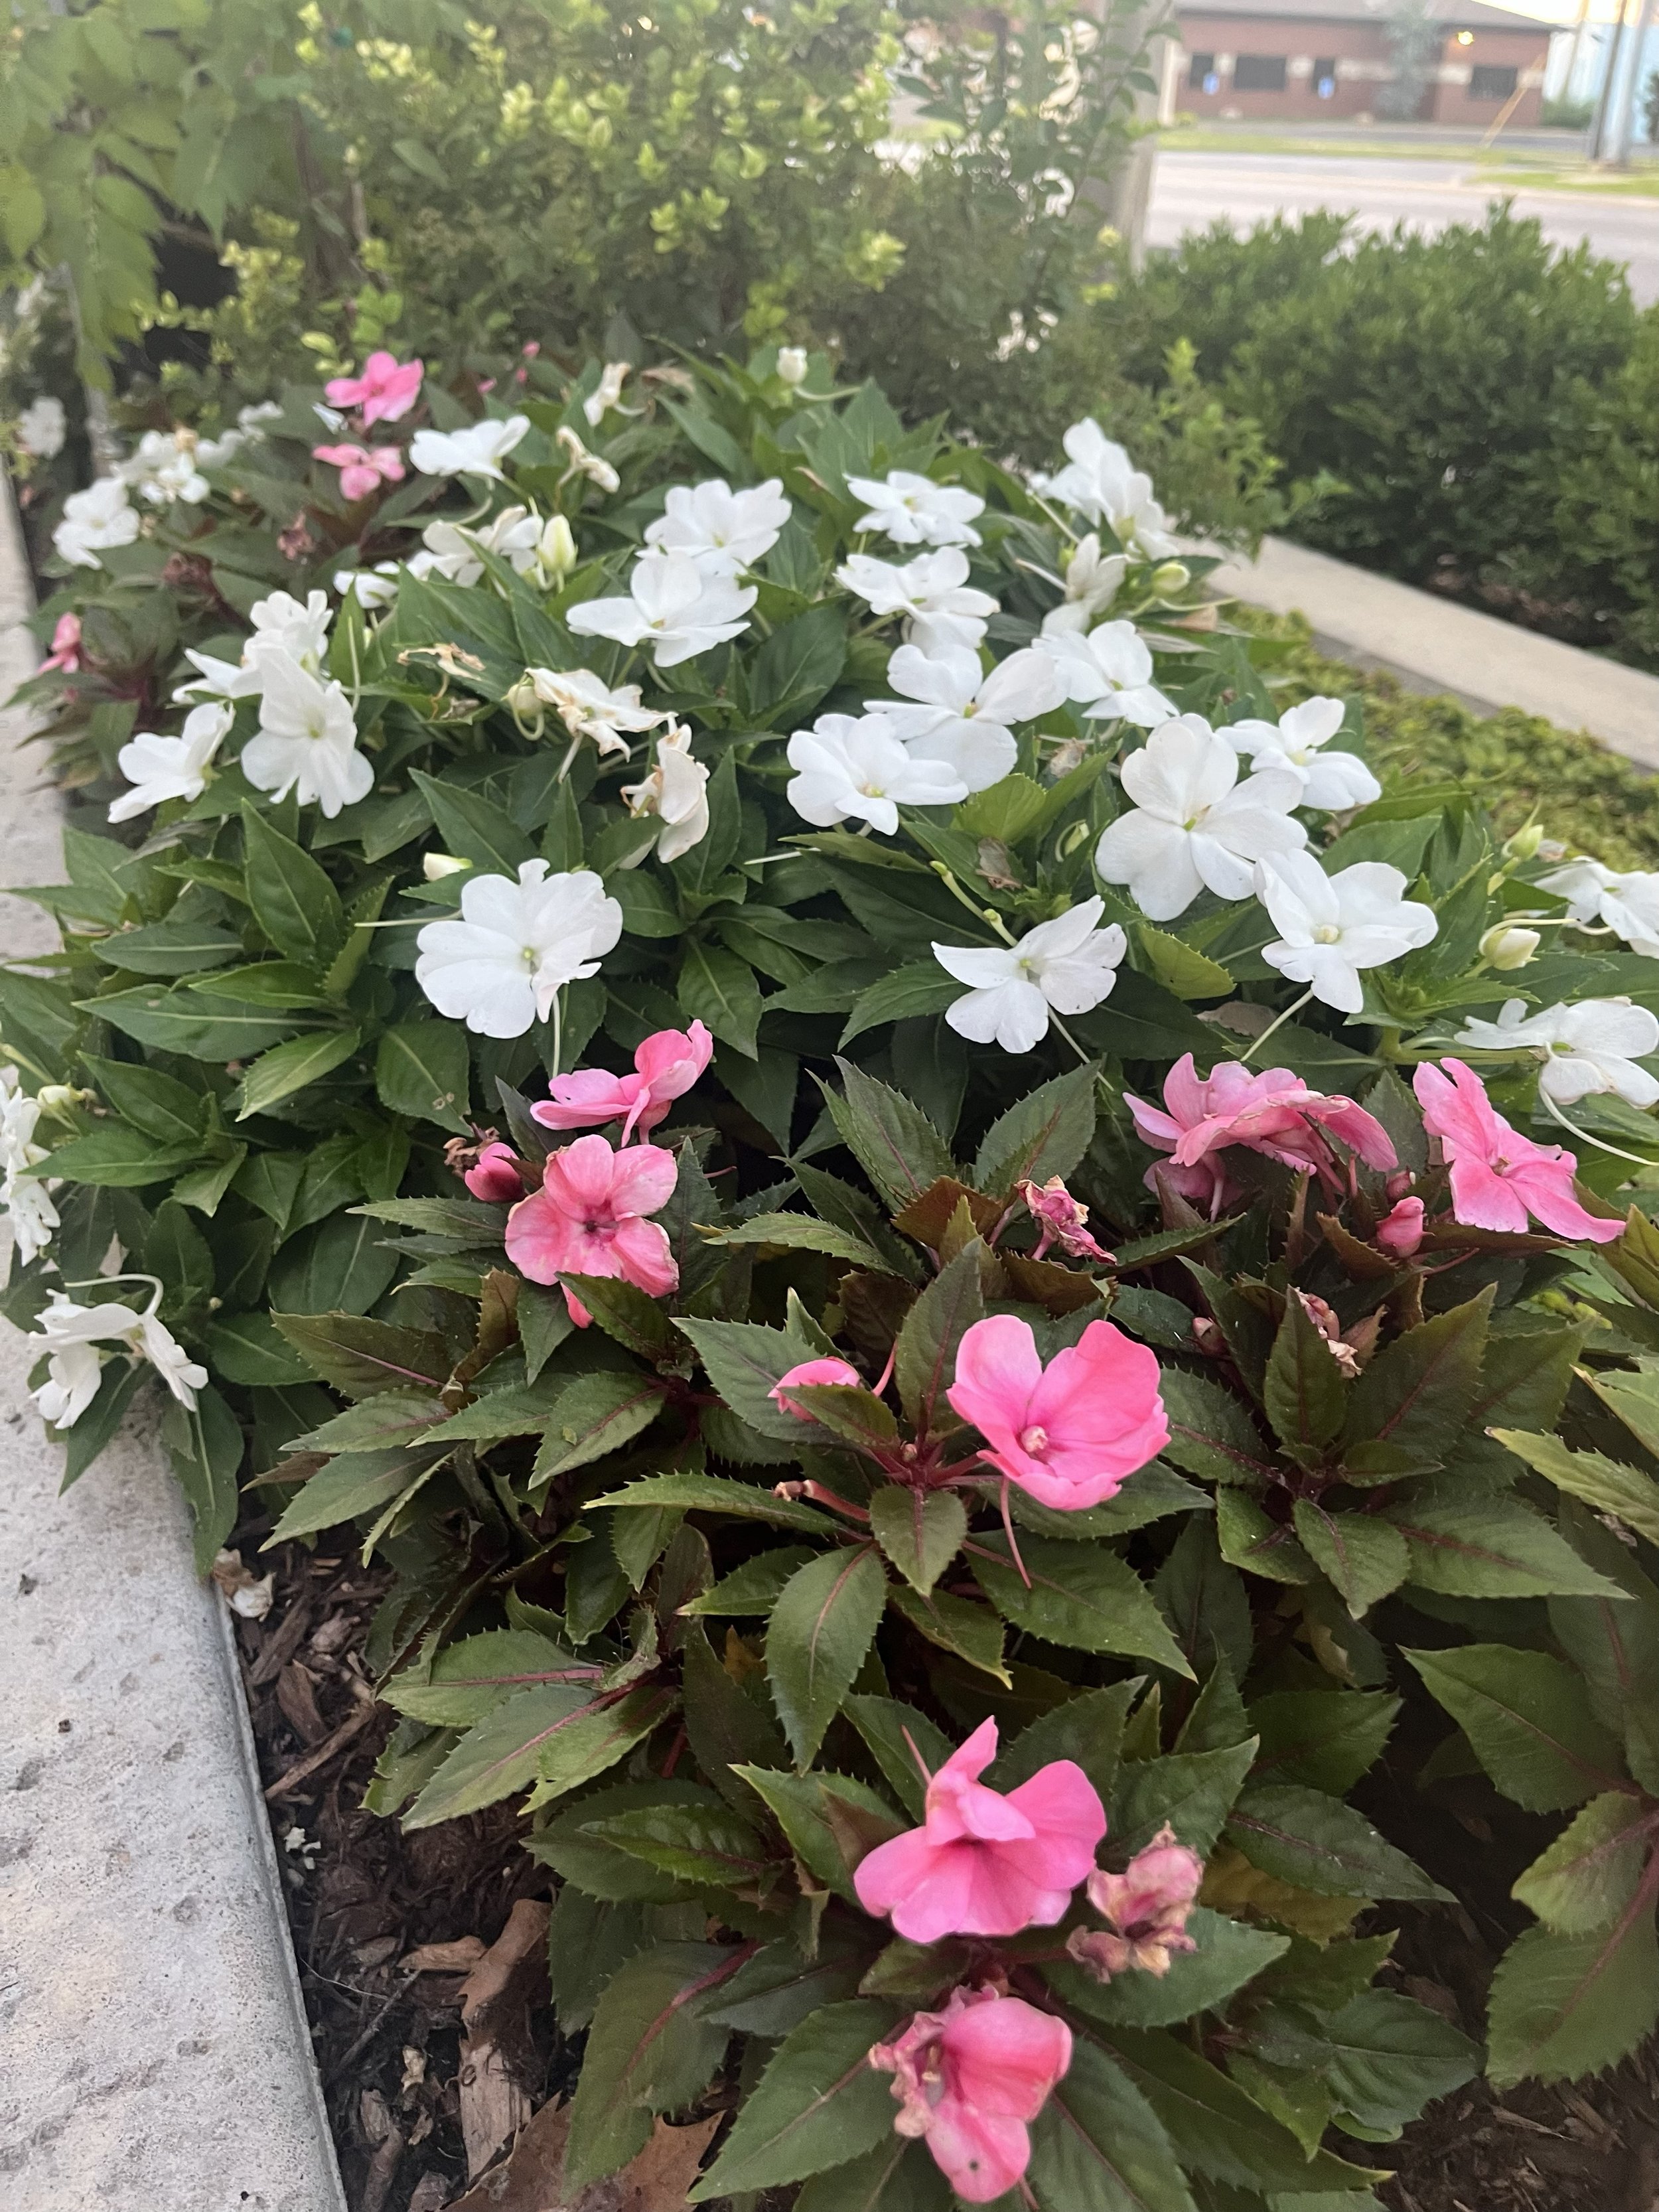
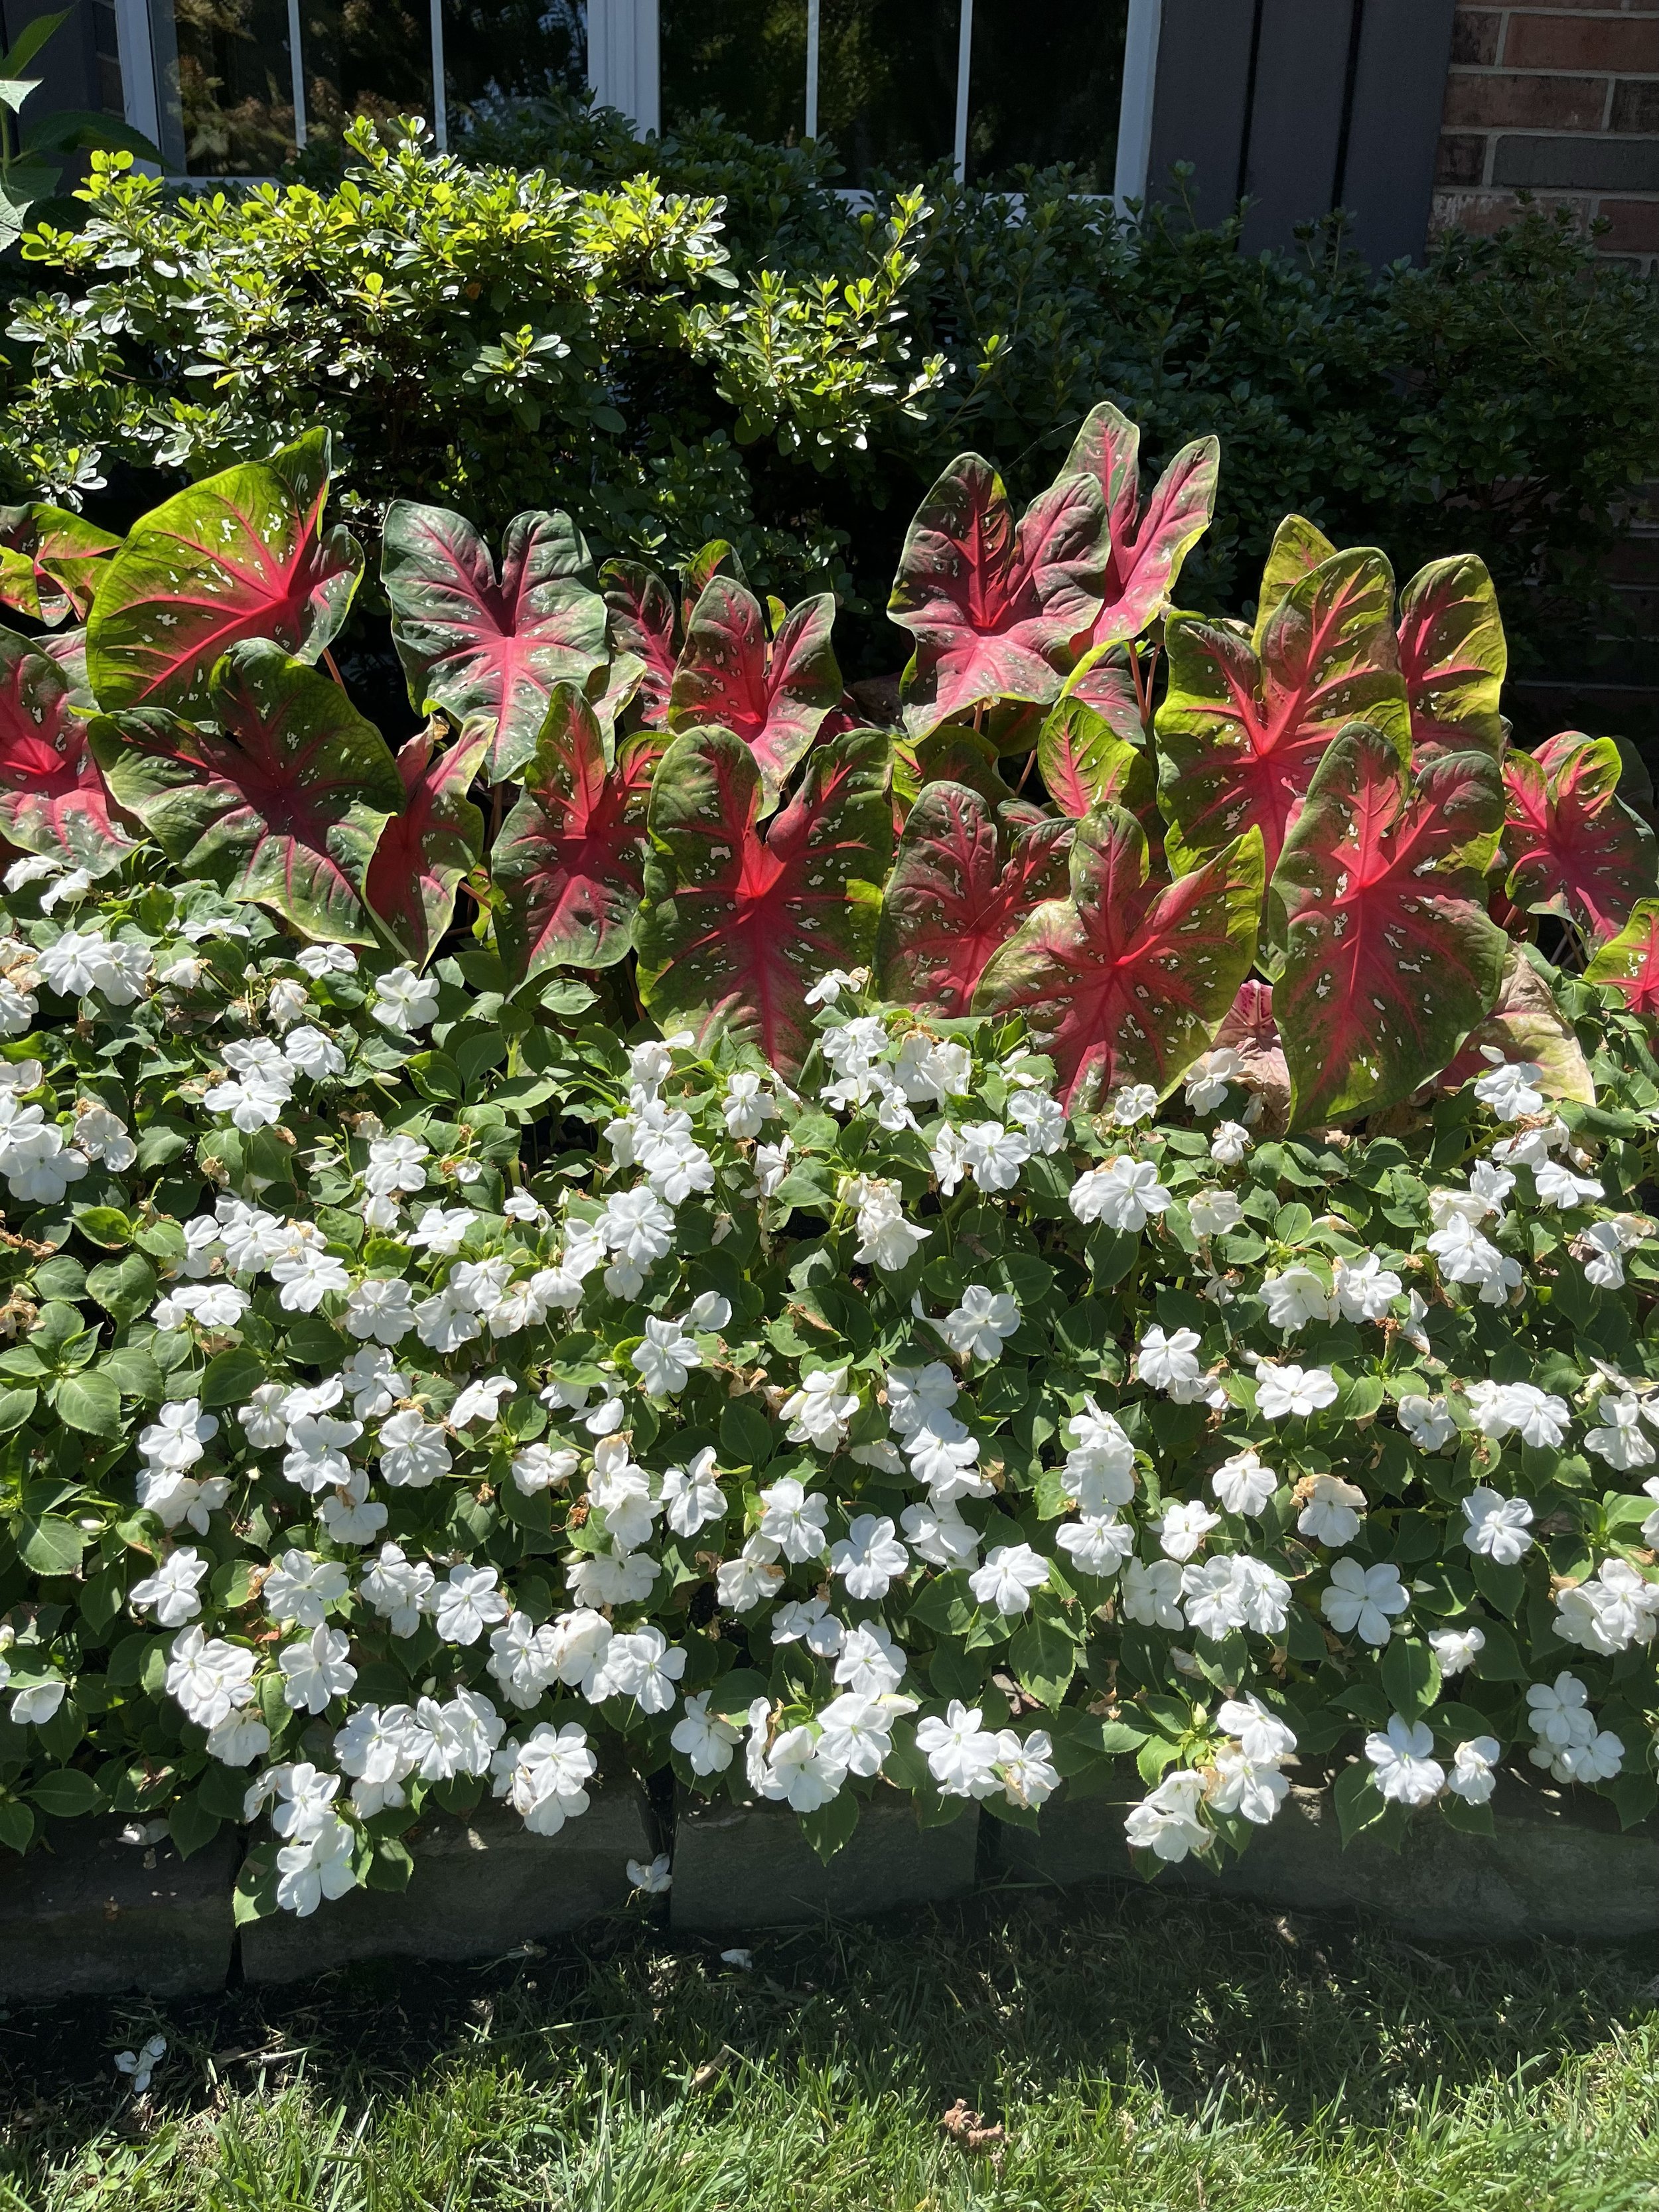
Caladiums behind Impatiens is the perfect combination for shady areas of your landscape.
Annual Summer Seasonal Color
Coleus – Planted for the colorful foliage, it is available in both shade and sun varieties and many colors. Colors range from limy yellow to red with many that have speckled leaves of yellow, green, and red.
Joseph Coat – This low growing, bright yellow-green annual is a great border in full to partial sun areas. It is also available in dark red but is not near as dramatic as the brightness of the lighter variety.
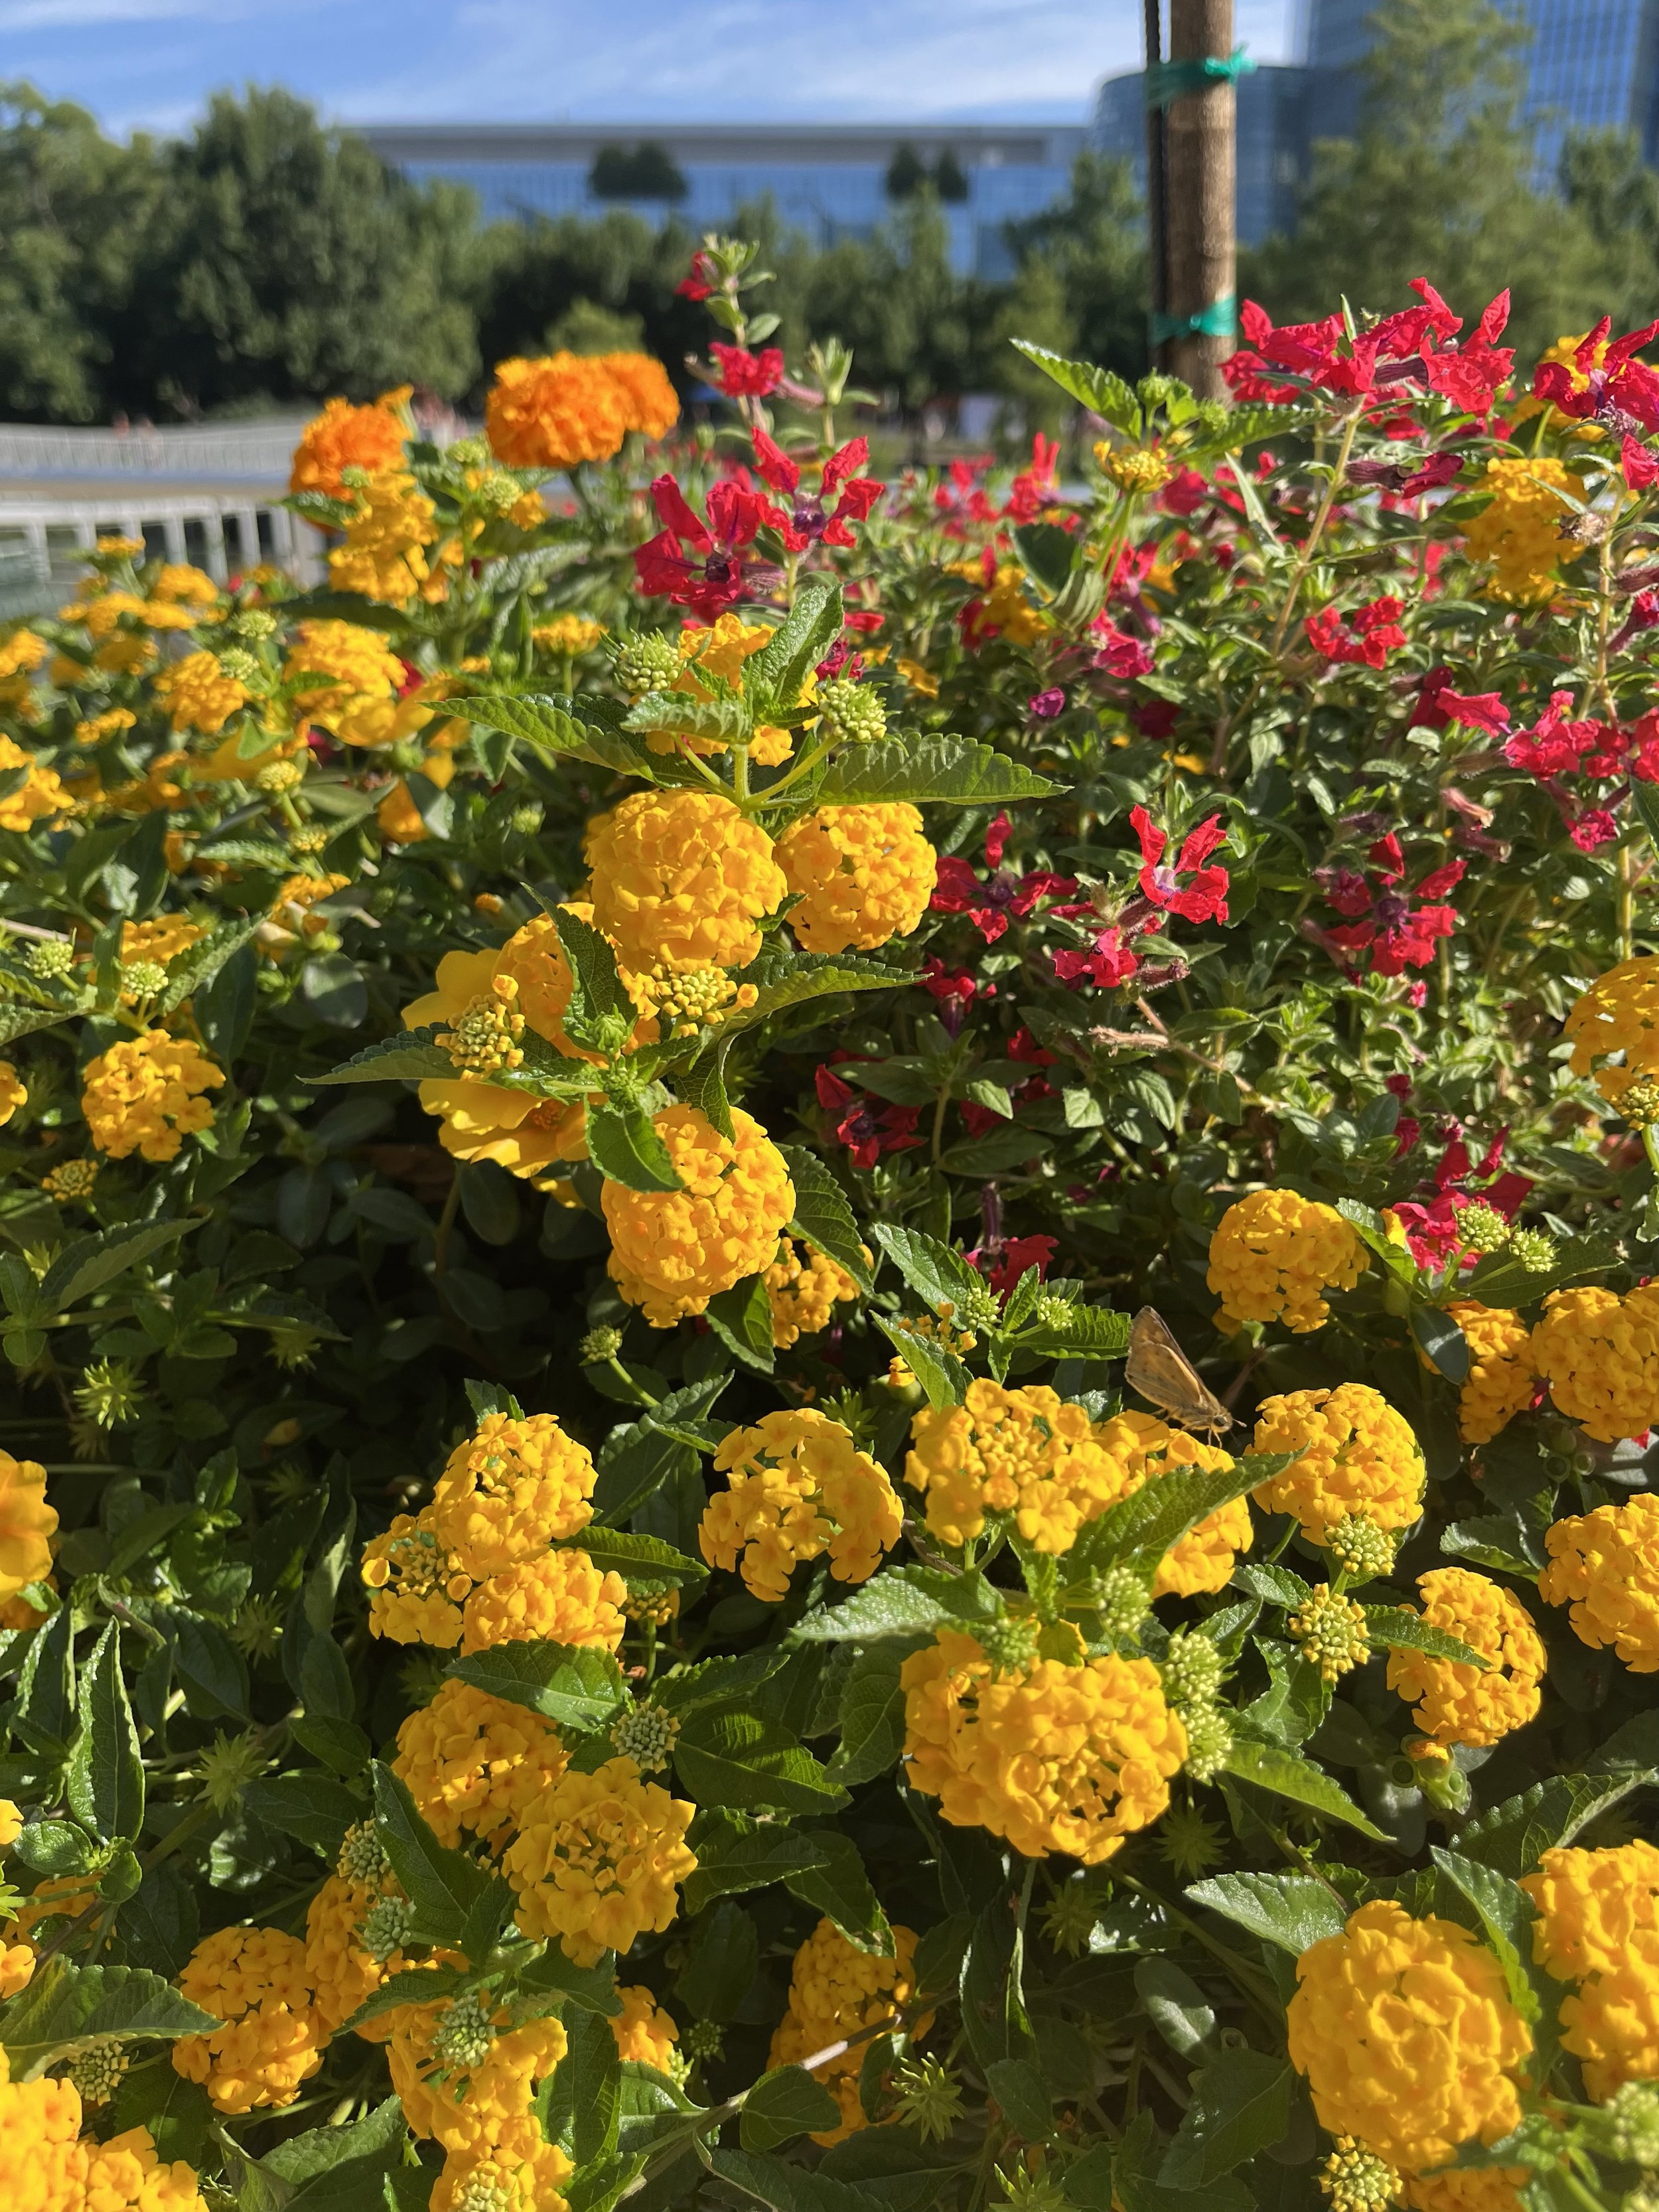
Lantana – You can’t beat lantana in the heat in full sun. Some of the more common varieties are New Gold, Dallas Red, and Confetti. Known for having a bushy growth habit, but there are varieties that are more compact and mounding.

Lantana, one of the best lovers of summer heat, comes in so many colors that there has to be one perfect for your summer landscape.

The dark reds and lime-red of these Coleus varieties make a great combination.
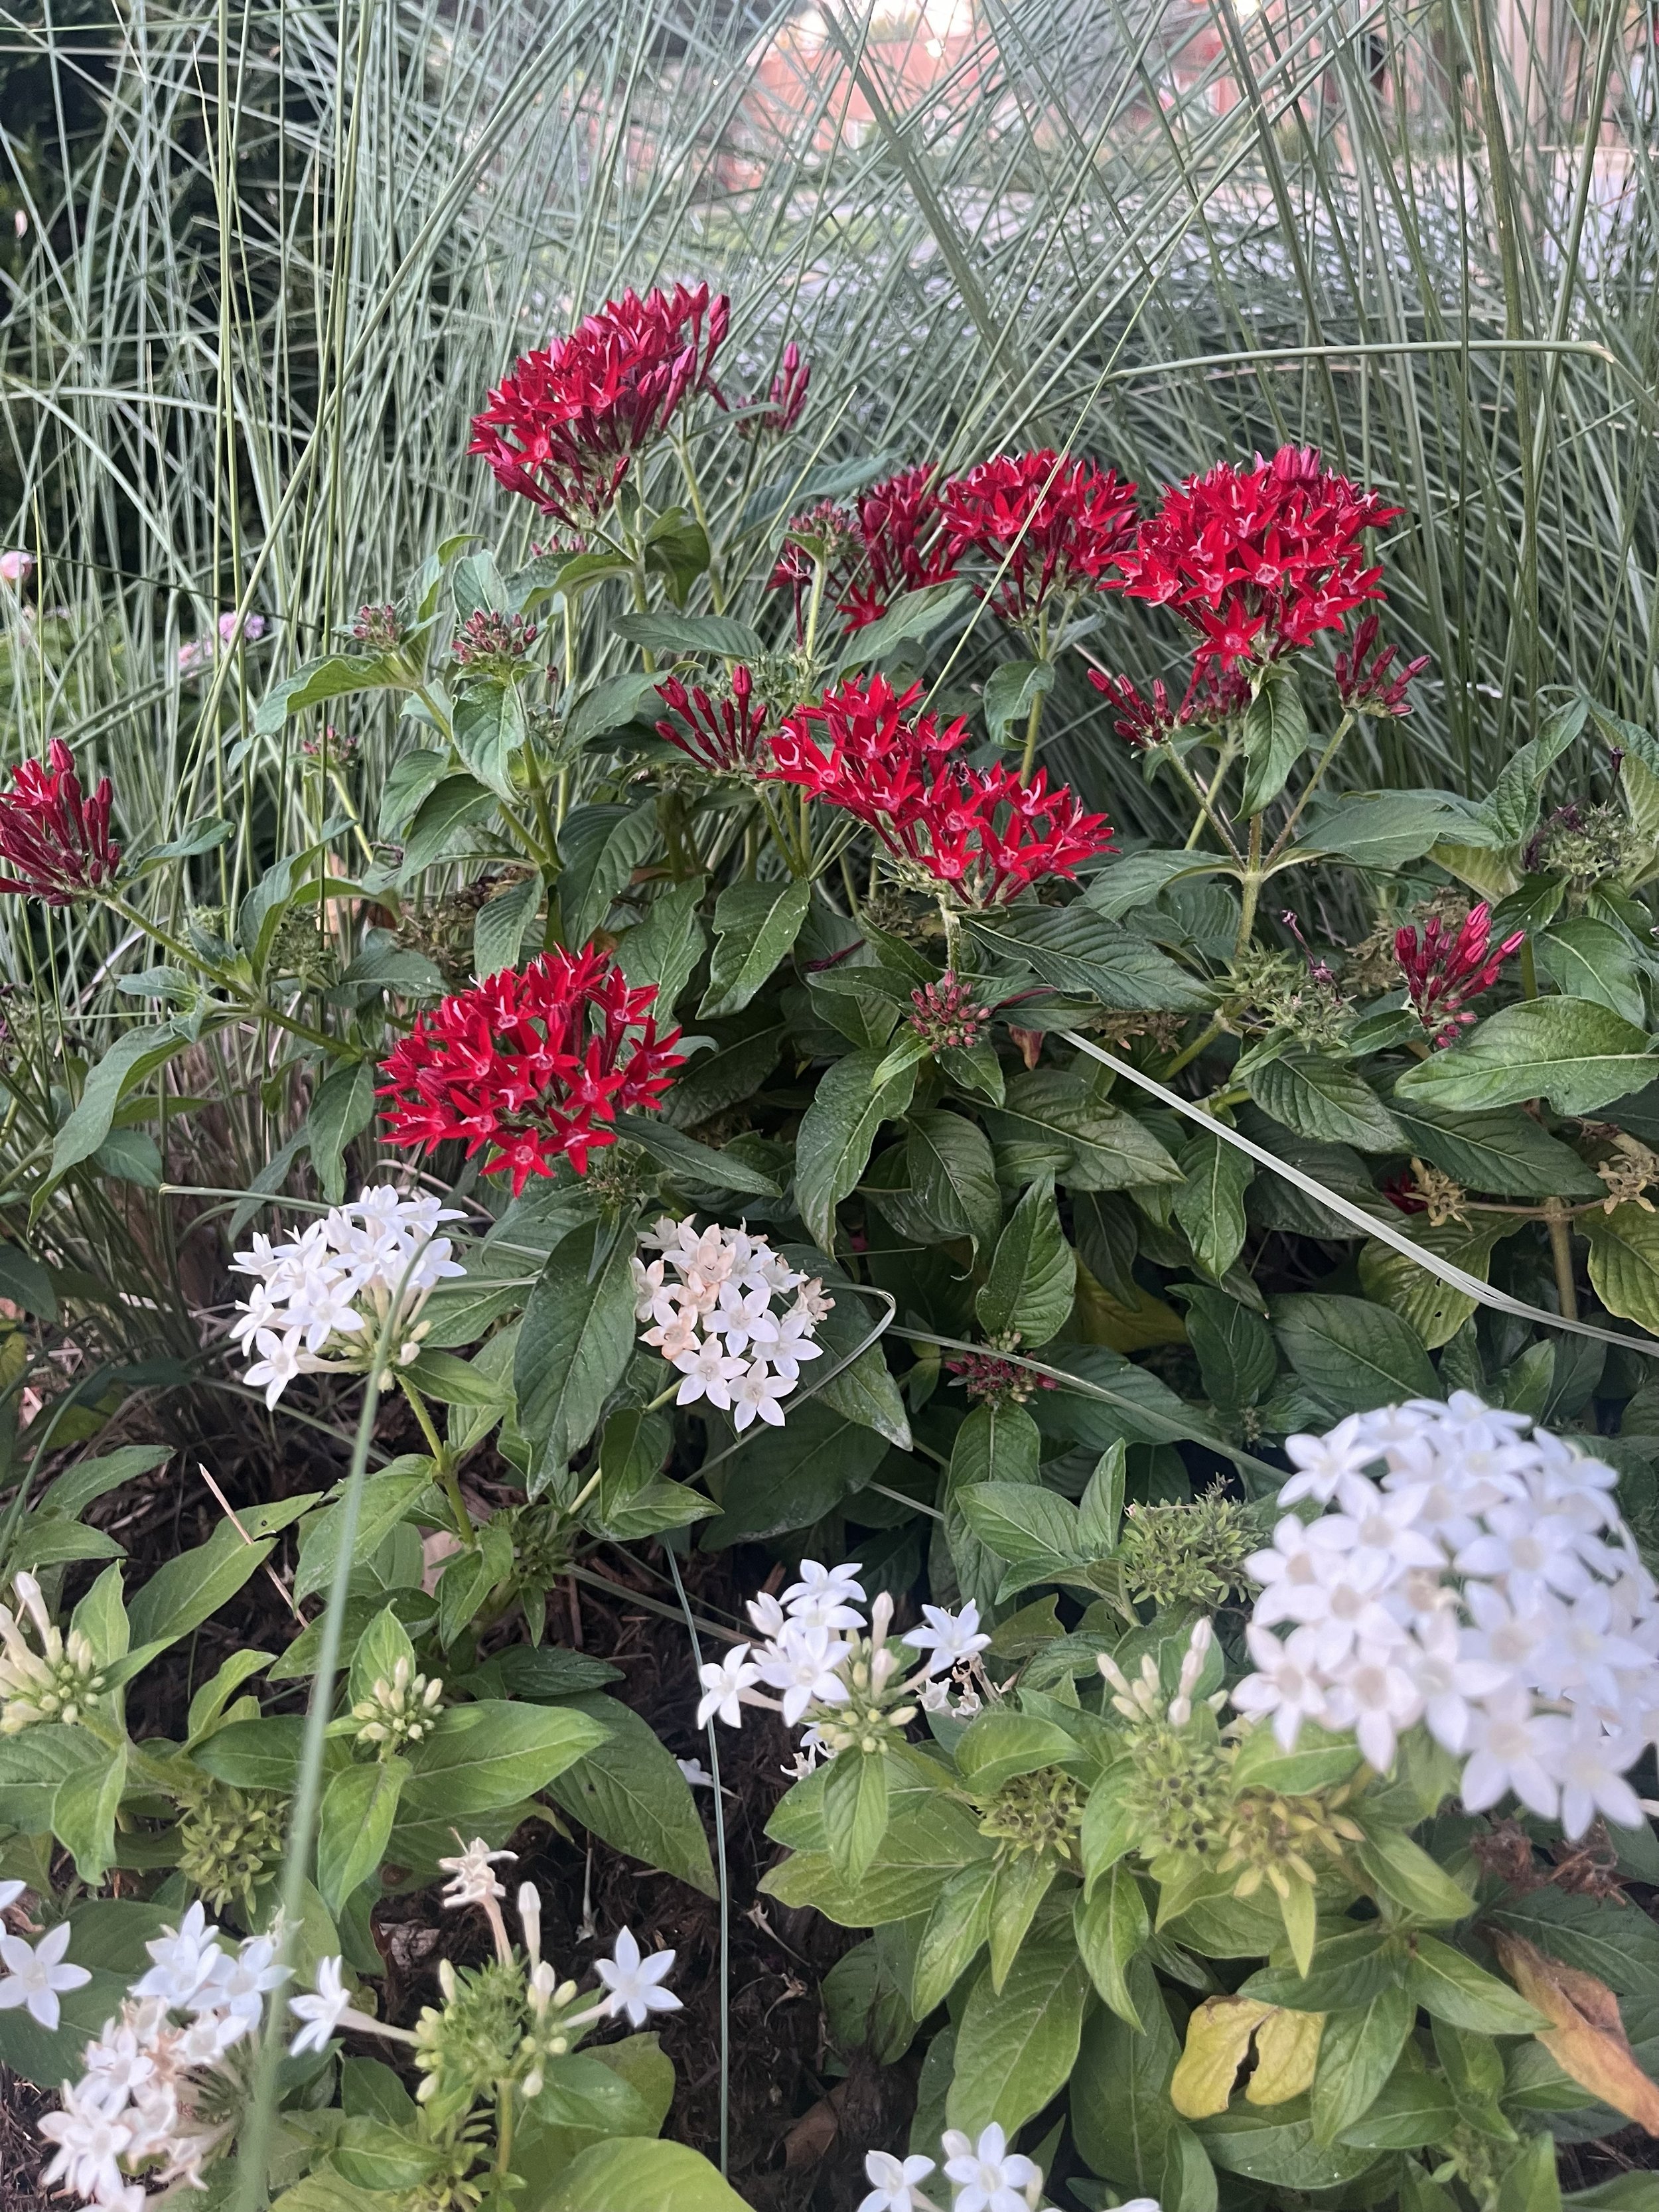
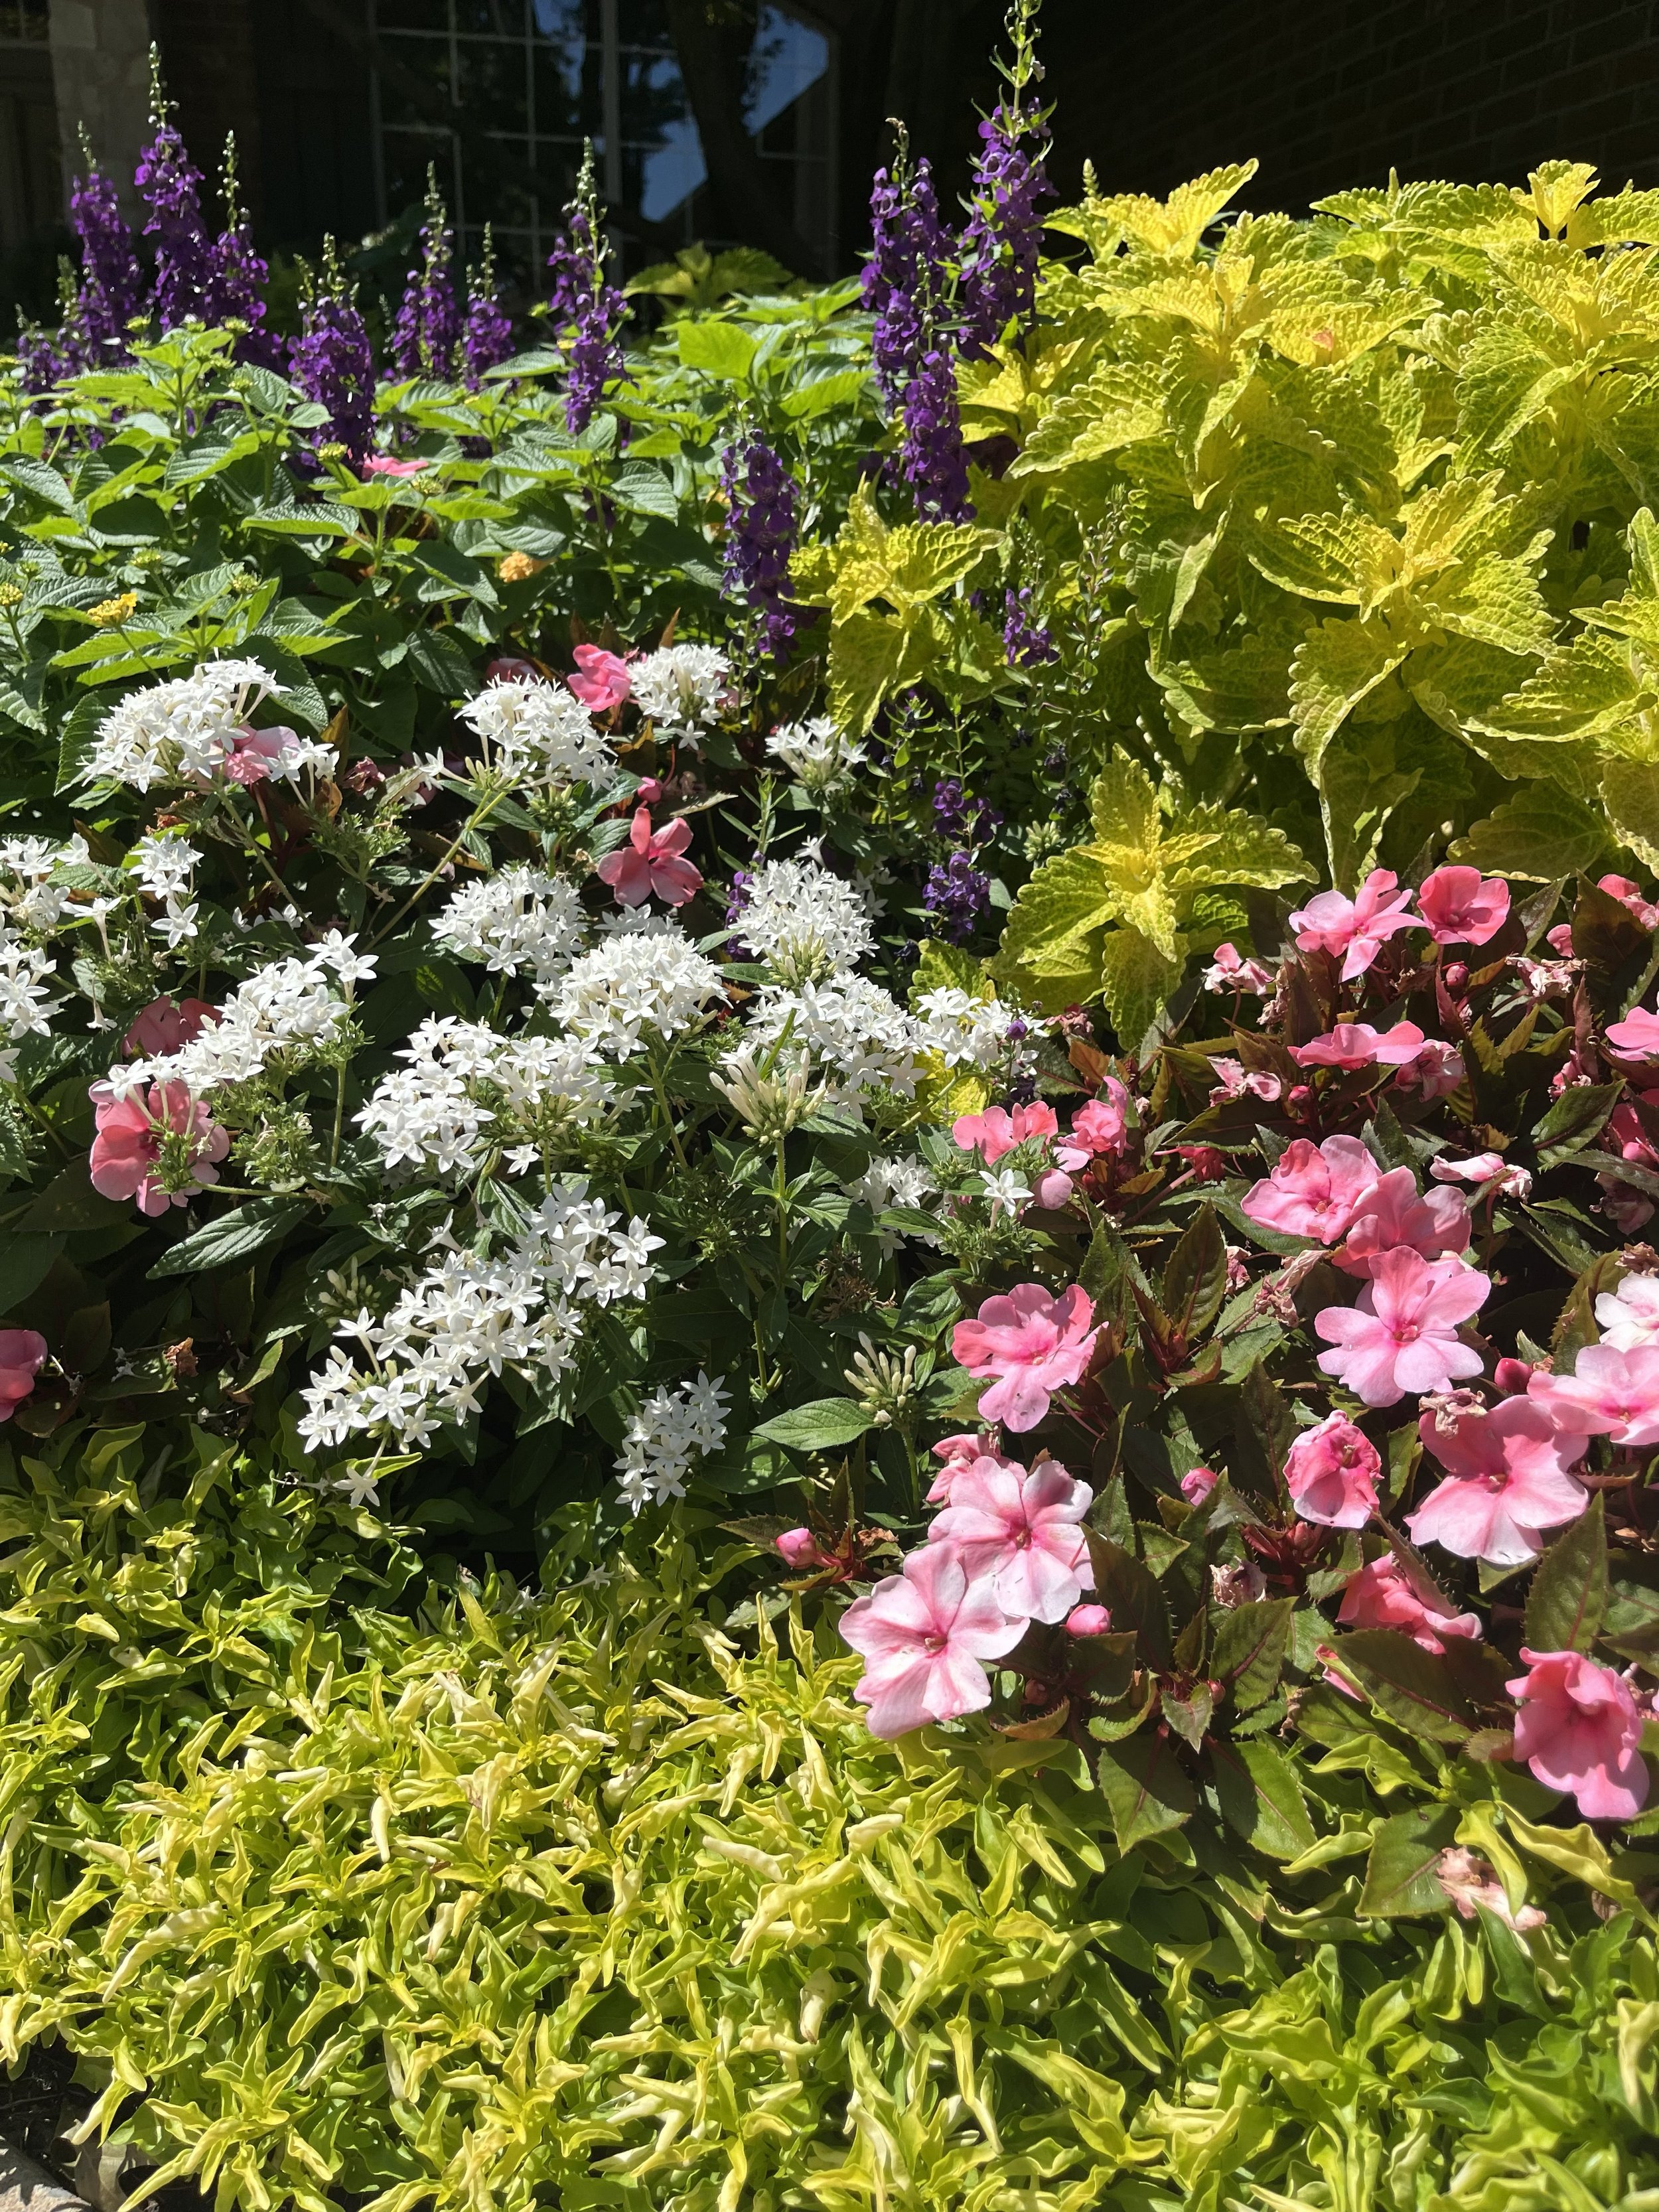
Penta – Another annual plant that thrives in full sun. Bright clusters of star-shaped flowers in red, pink, and white look great planted behind Joseph Coat.
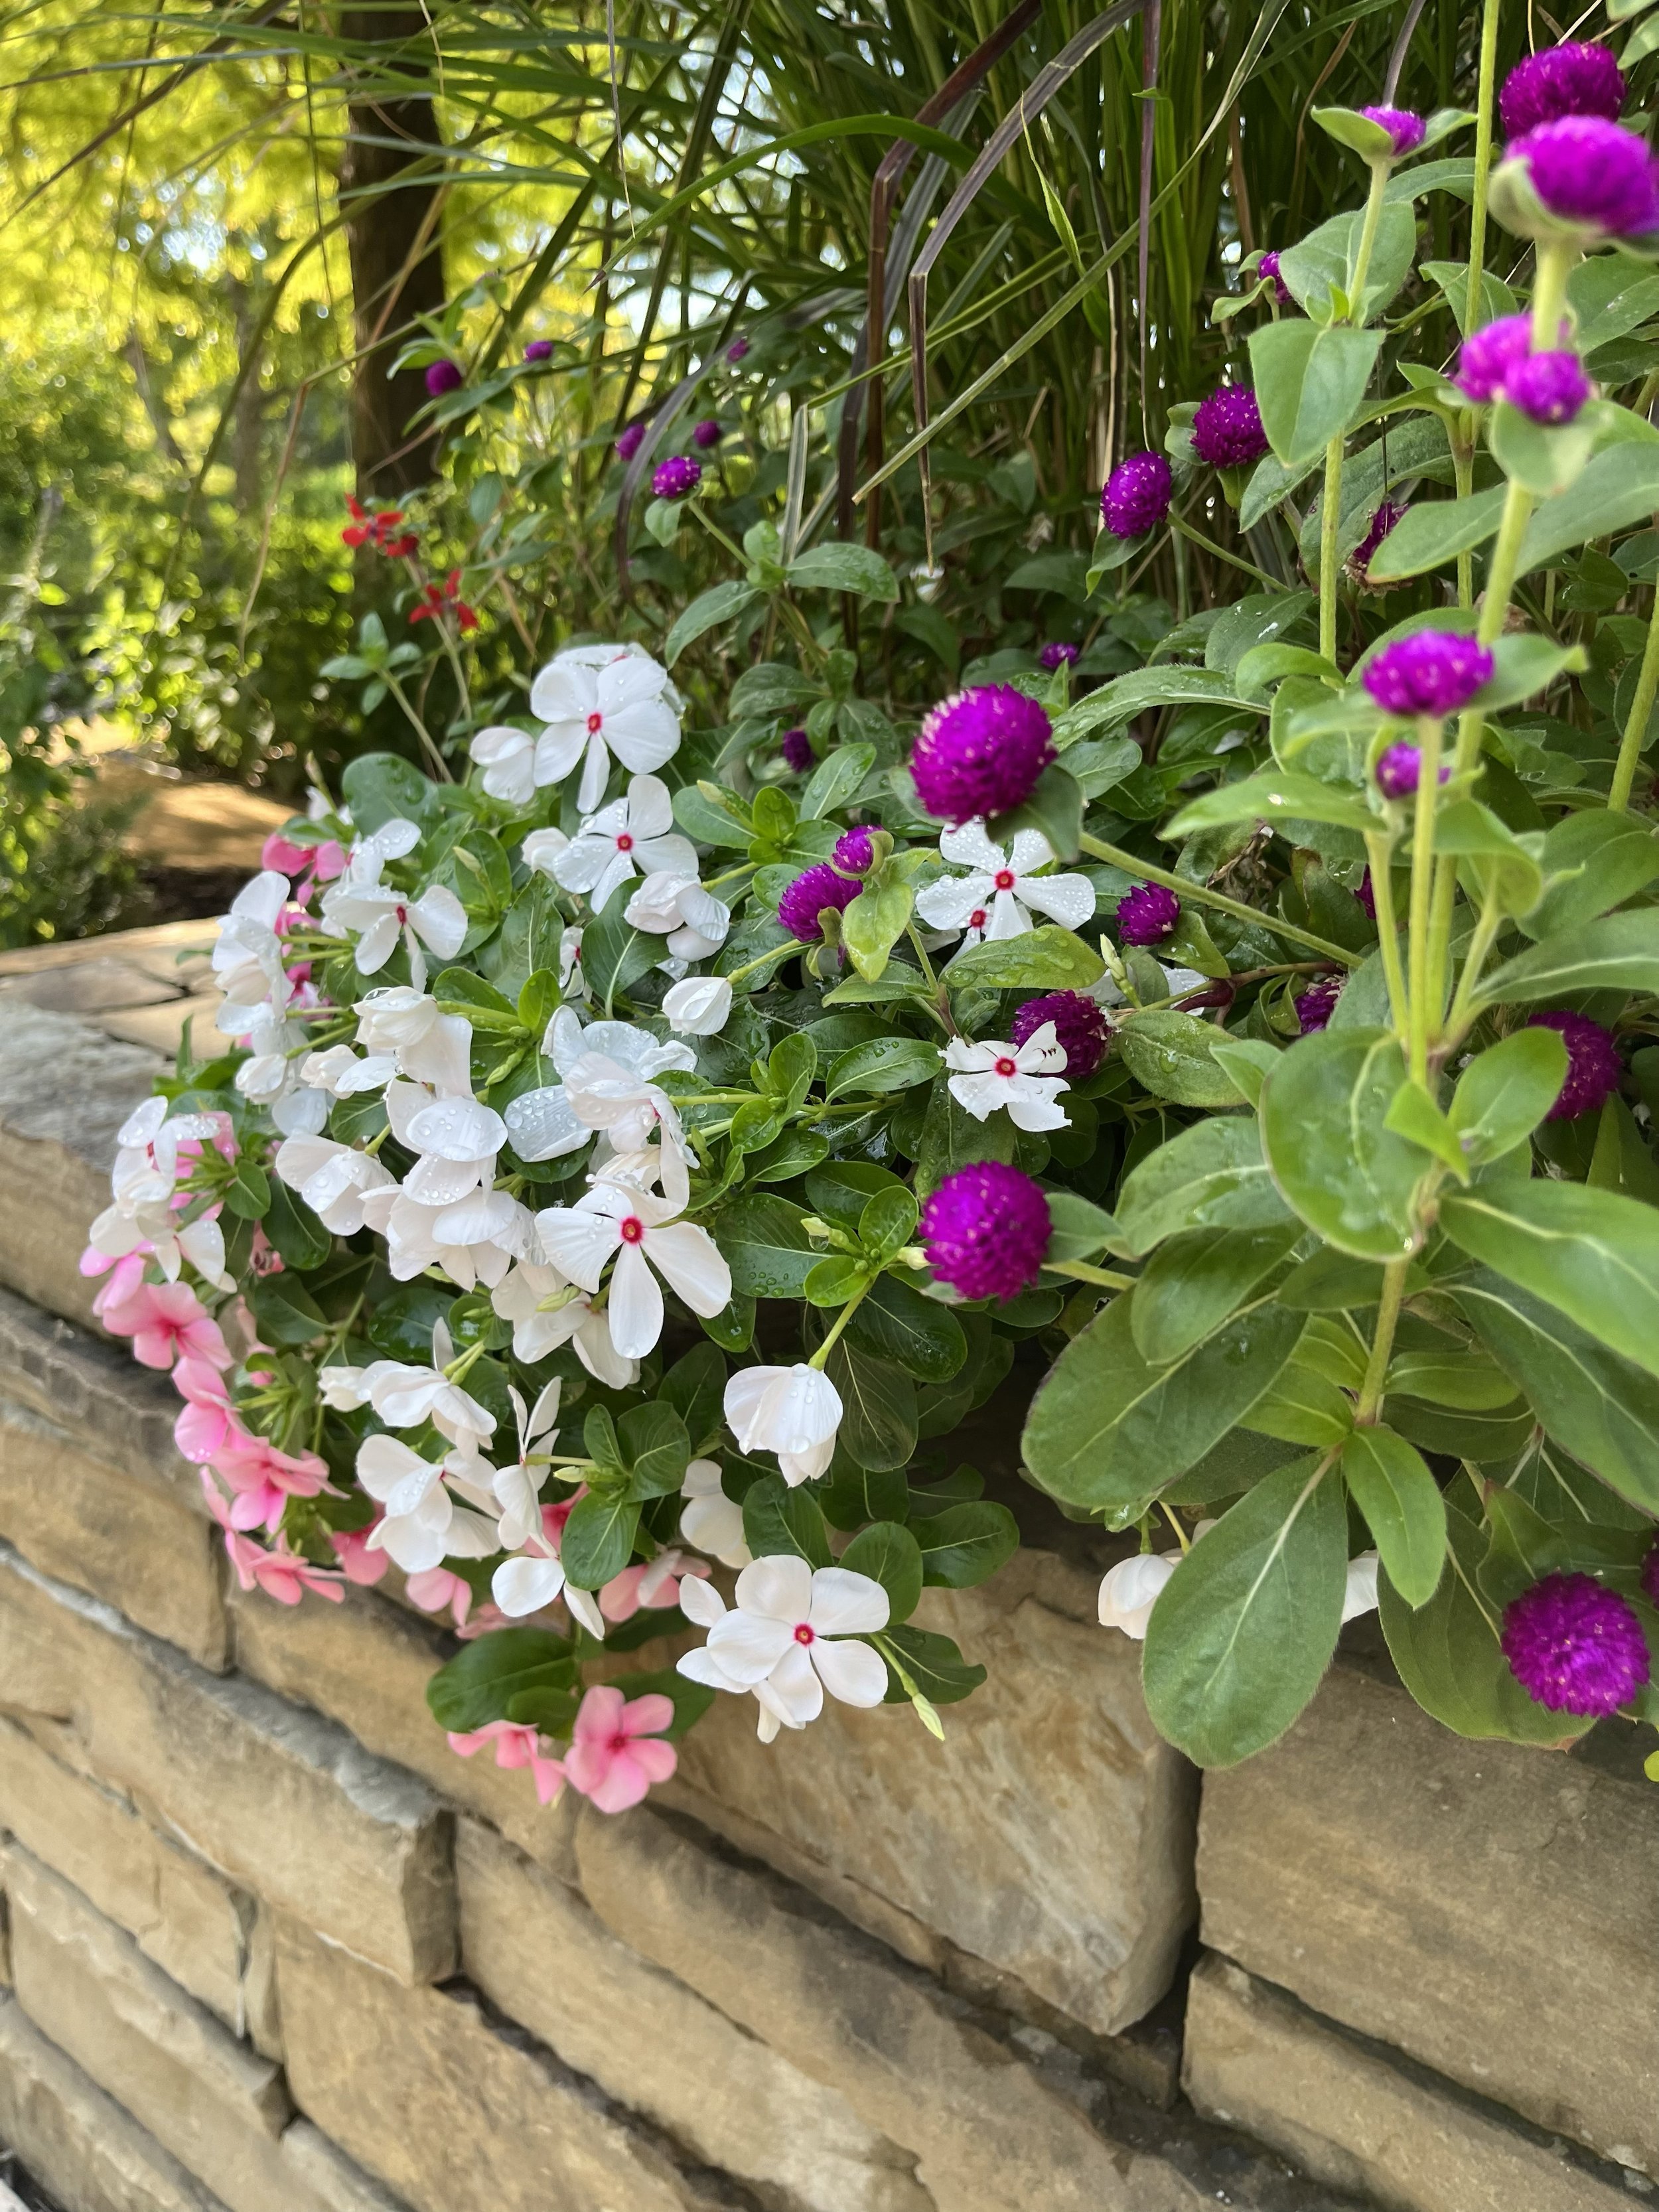
Periwinkle – An old traditional annual plant that just keeps performing. Periwinkle thrives in full sun. White with red center is most common, but it is also available in vibrant pinks, reds, and violets. A good look I have noticed the past two summers is to plant a mixture of periwinkles in varying shades of pinks and reds.

Strawberry Periwinkle, red Penta, Lemon Zest Lantana, Stain Glass Coleus in front of Black-eyed Susan make for a showy mid-summer landscape.

A great combination for shady areas in the heat of summer is Caladiums and Impatiens.

Periwinkle is a summer loving annual that brightens landscapes with vibrant pinks, reds and whites.

Strawberry Periwinkle with a compliment of Black-Eye Susan

Penta will continue to bloom in full sun to partial shade through the hottest days of summer.

The lime color of Joseph Coat is a great compliment to the rosy pink of Strawberry Periwinkle

Lantana, Angelonia, Penta, and Sunpatiens.
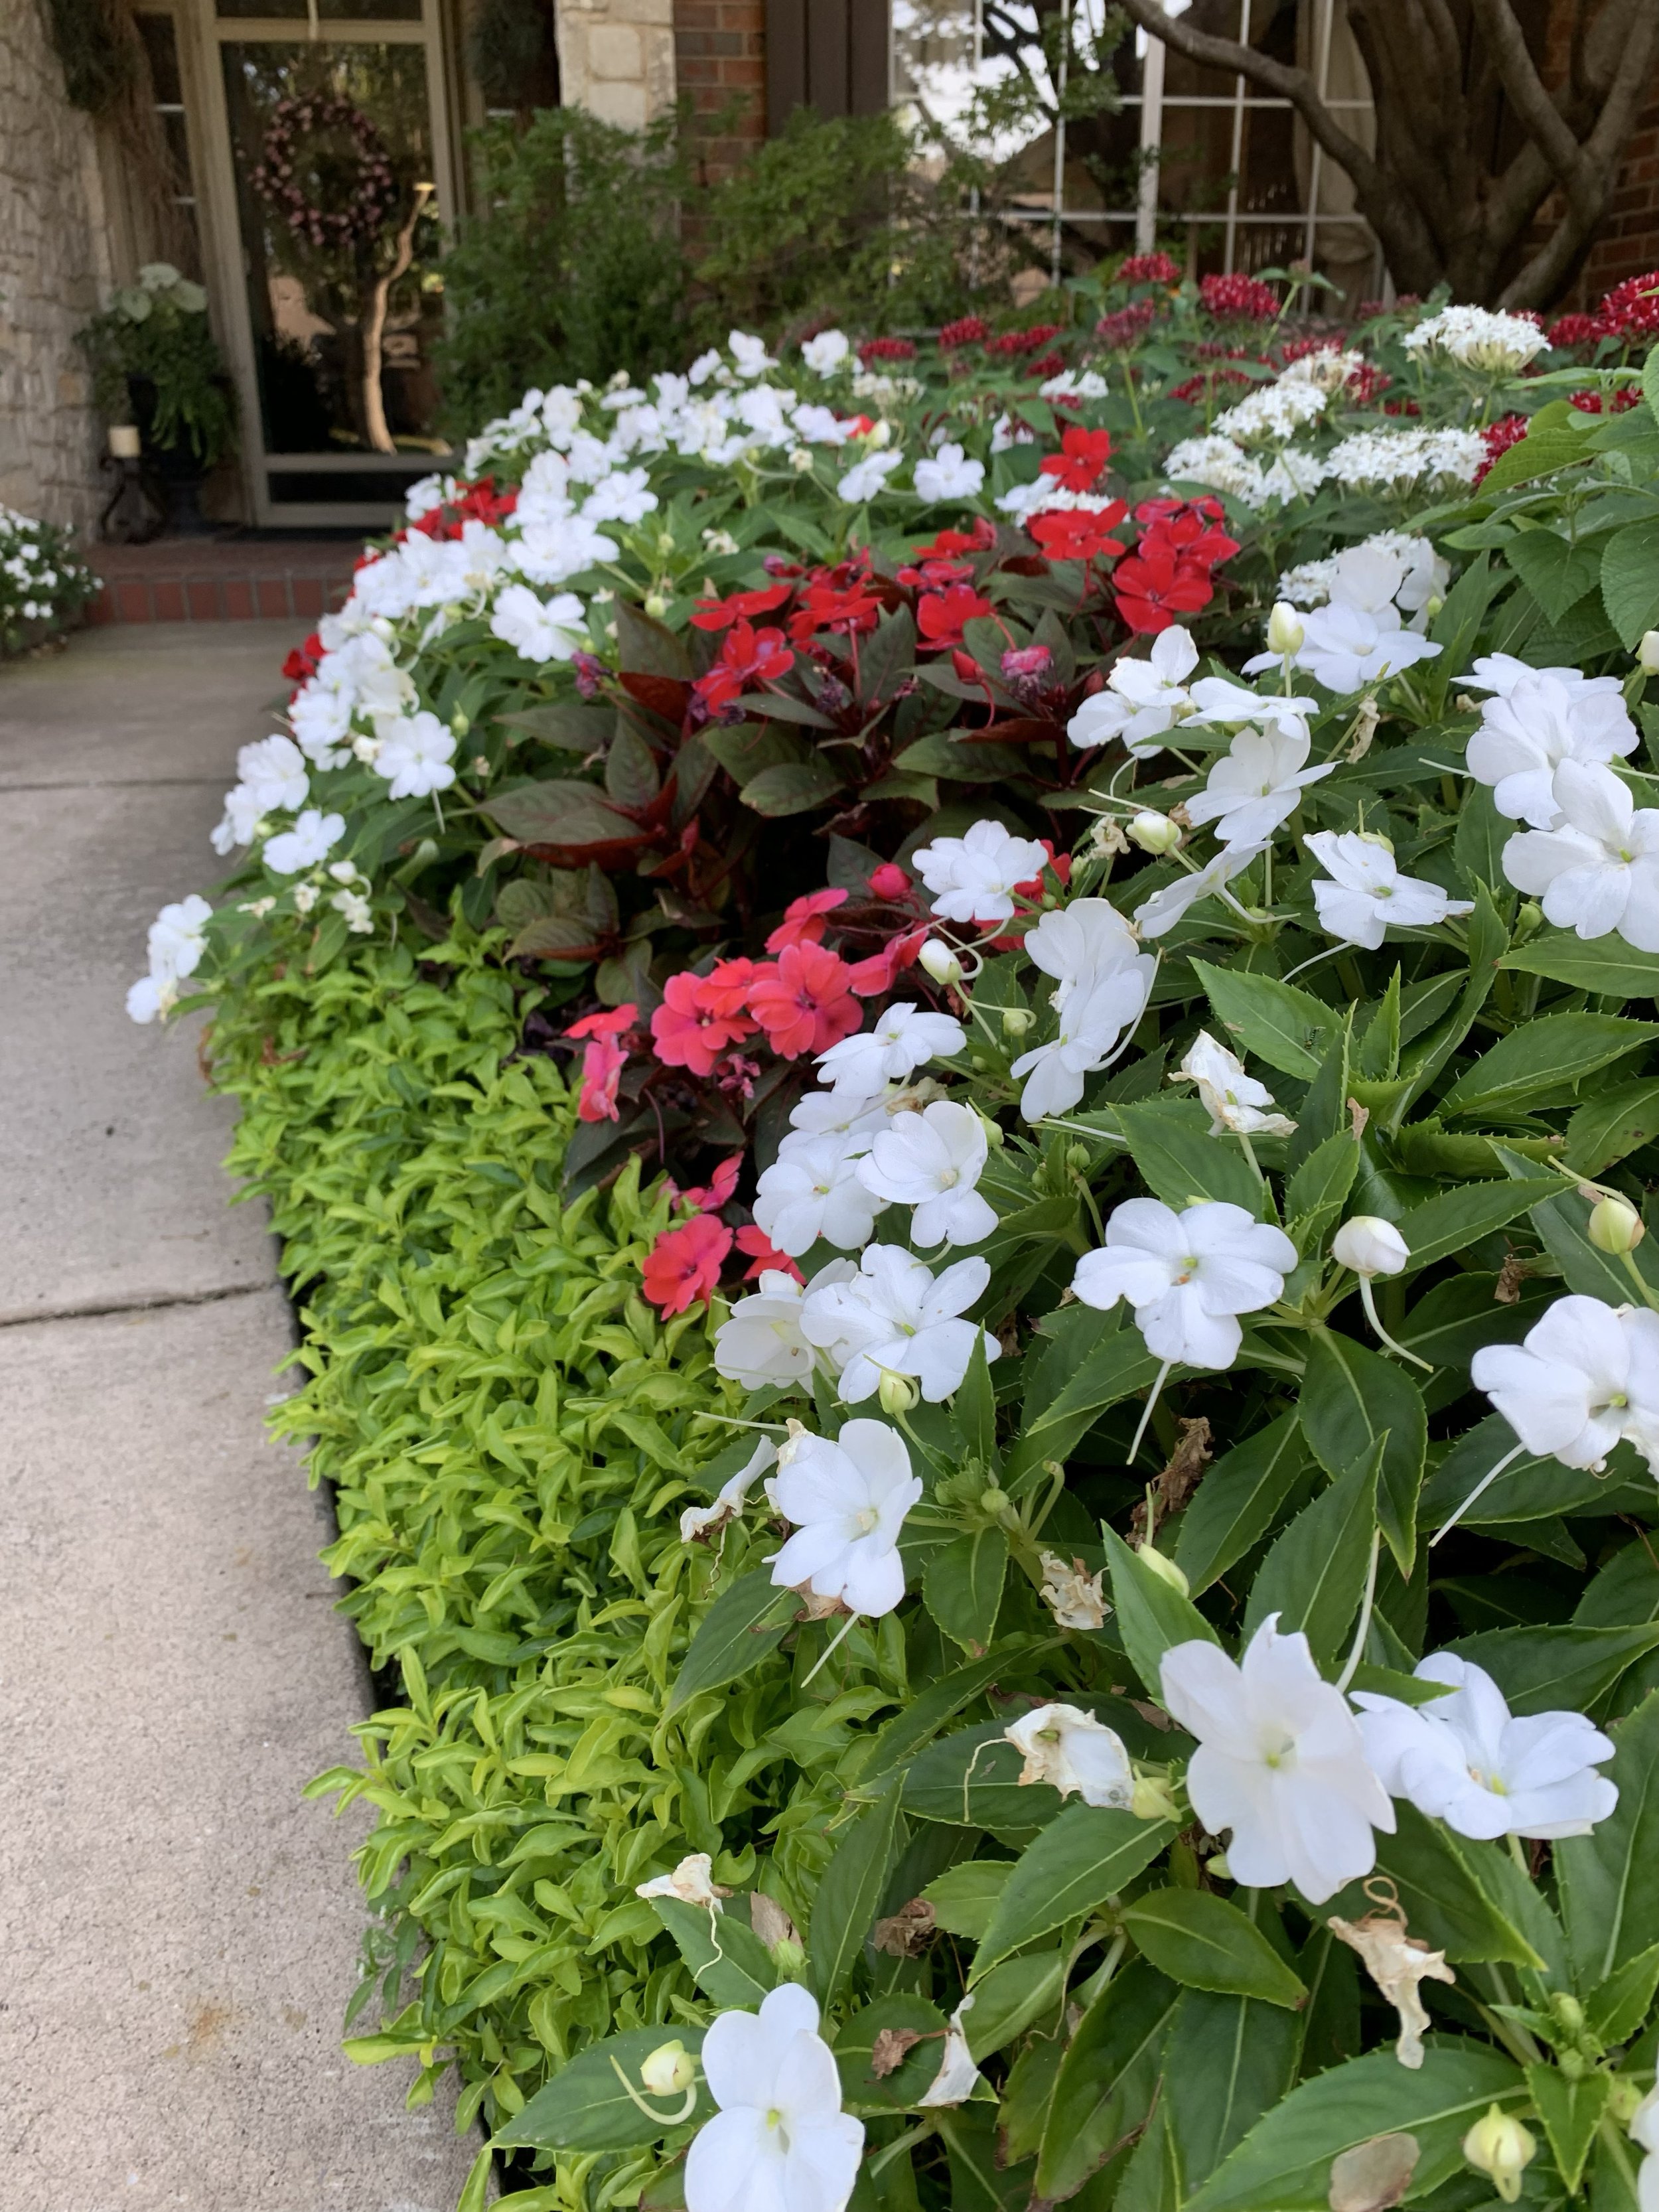
Sunpatiens – All the color burst you would expect from impatiens, but they love sun and heat. They come in a wide range of colors. One word of caution: When planted in areas of hot late afternoon sun they do need plenty of moisture to make it through July and August.
Angelonia – It is available in whites, pinks, purples, and blues and very often you will find it mixed. Plant in full to partial sun.

Sunpatiens and Lantana adding color in the summer sun.

Sunpatiens have become a staple for a splash of color in my summer landscape.

Orange Sunpatiens planted with Joseph Coat and yellow Marigolds.
Caladiums – The large colorful leaves make a great show in full or dappled shade. You will find them in red, white, and pink. Caladiums are great at adding a burst of color to shady areas of the landscape.
Impatiens – Another old favorite that is hard to beat in the full shade areas of your landscape. It is available in many colors.

Caladiums, a shade loving summer annual, thrives during the summer.

Lantana, Penta, Angelonia and Sunpatiens adding bright color in the heat of August.
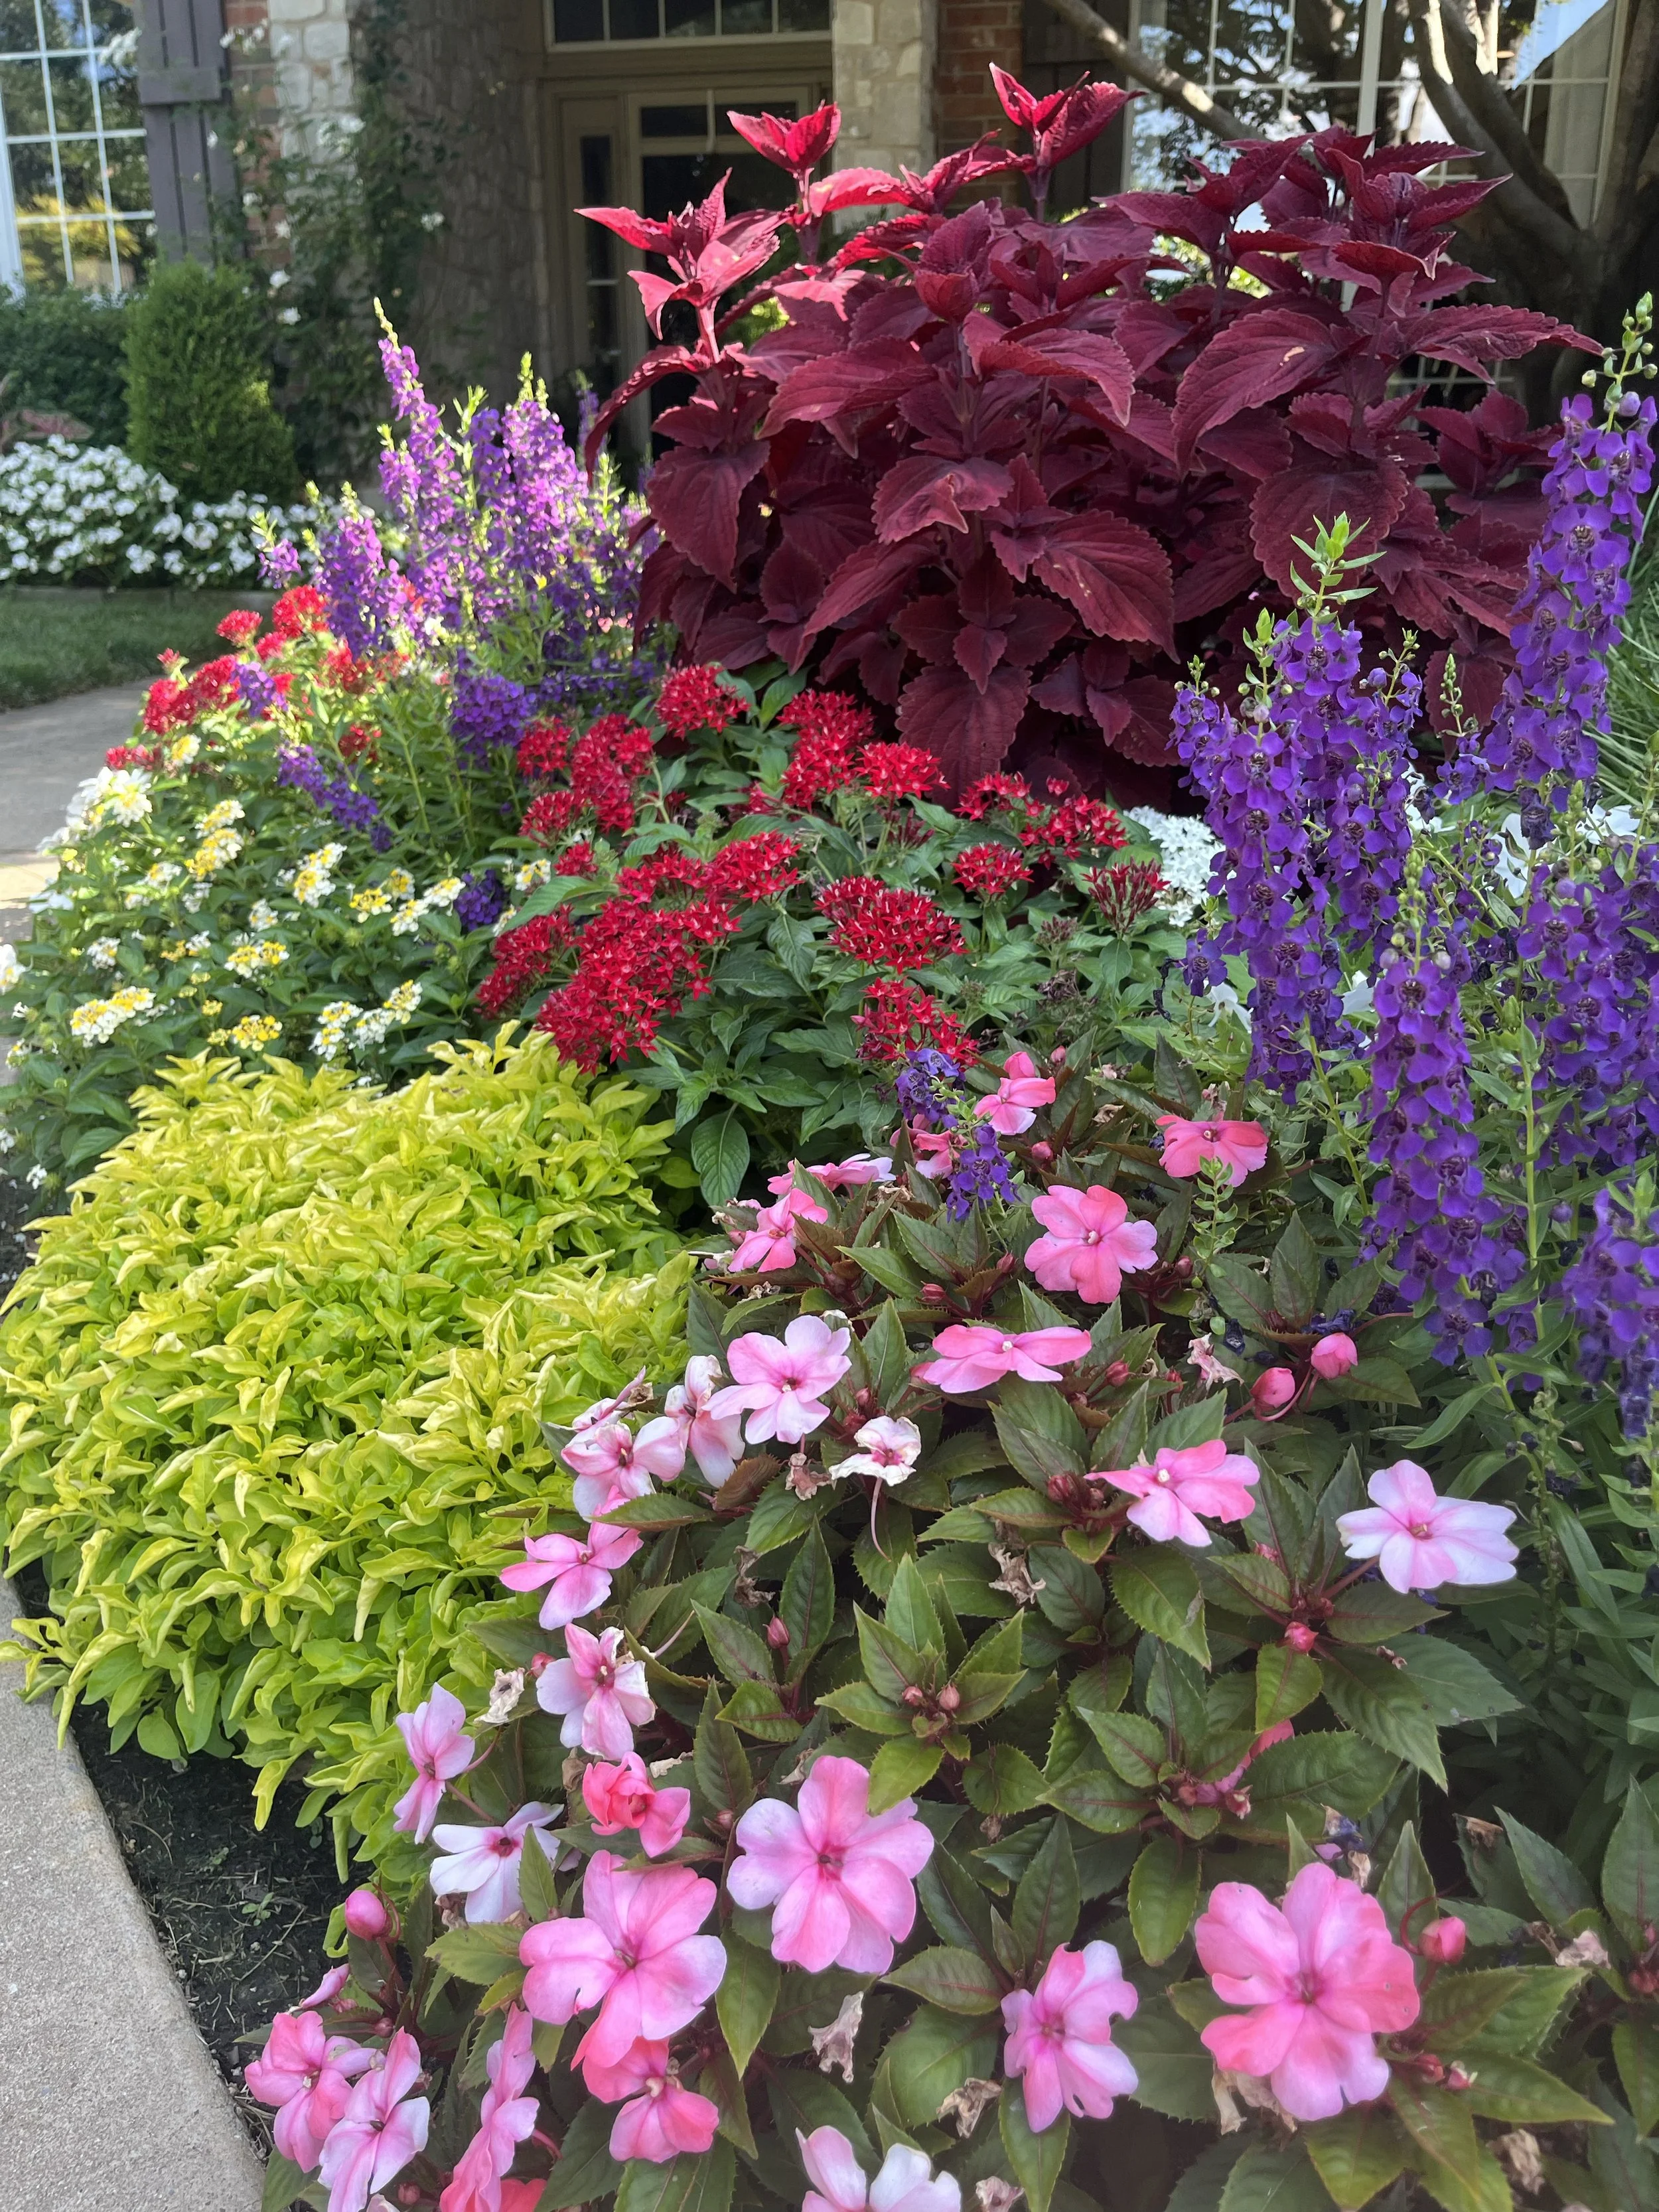
Sunpatiens, Joseph Coat, Angelonia, Penta, and Coleus brighten even the hottest of summer days.
Perennials
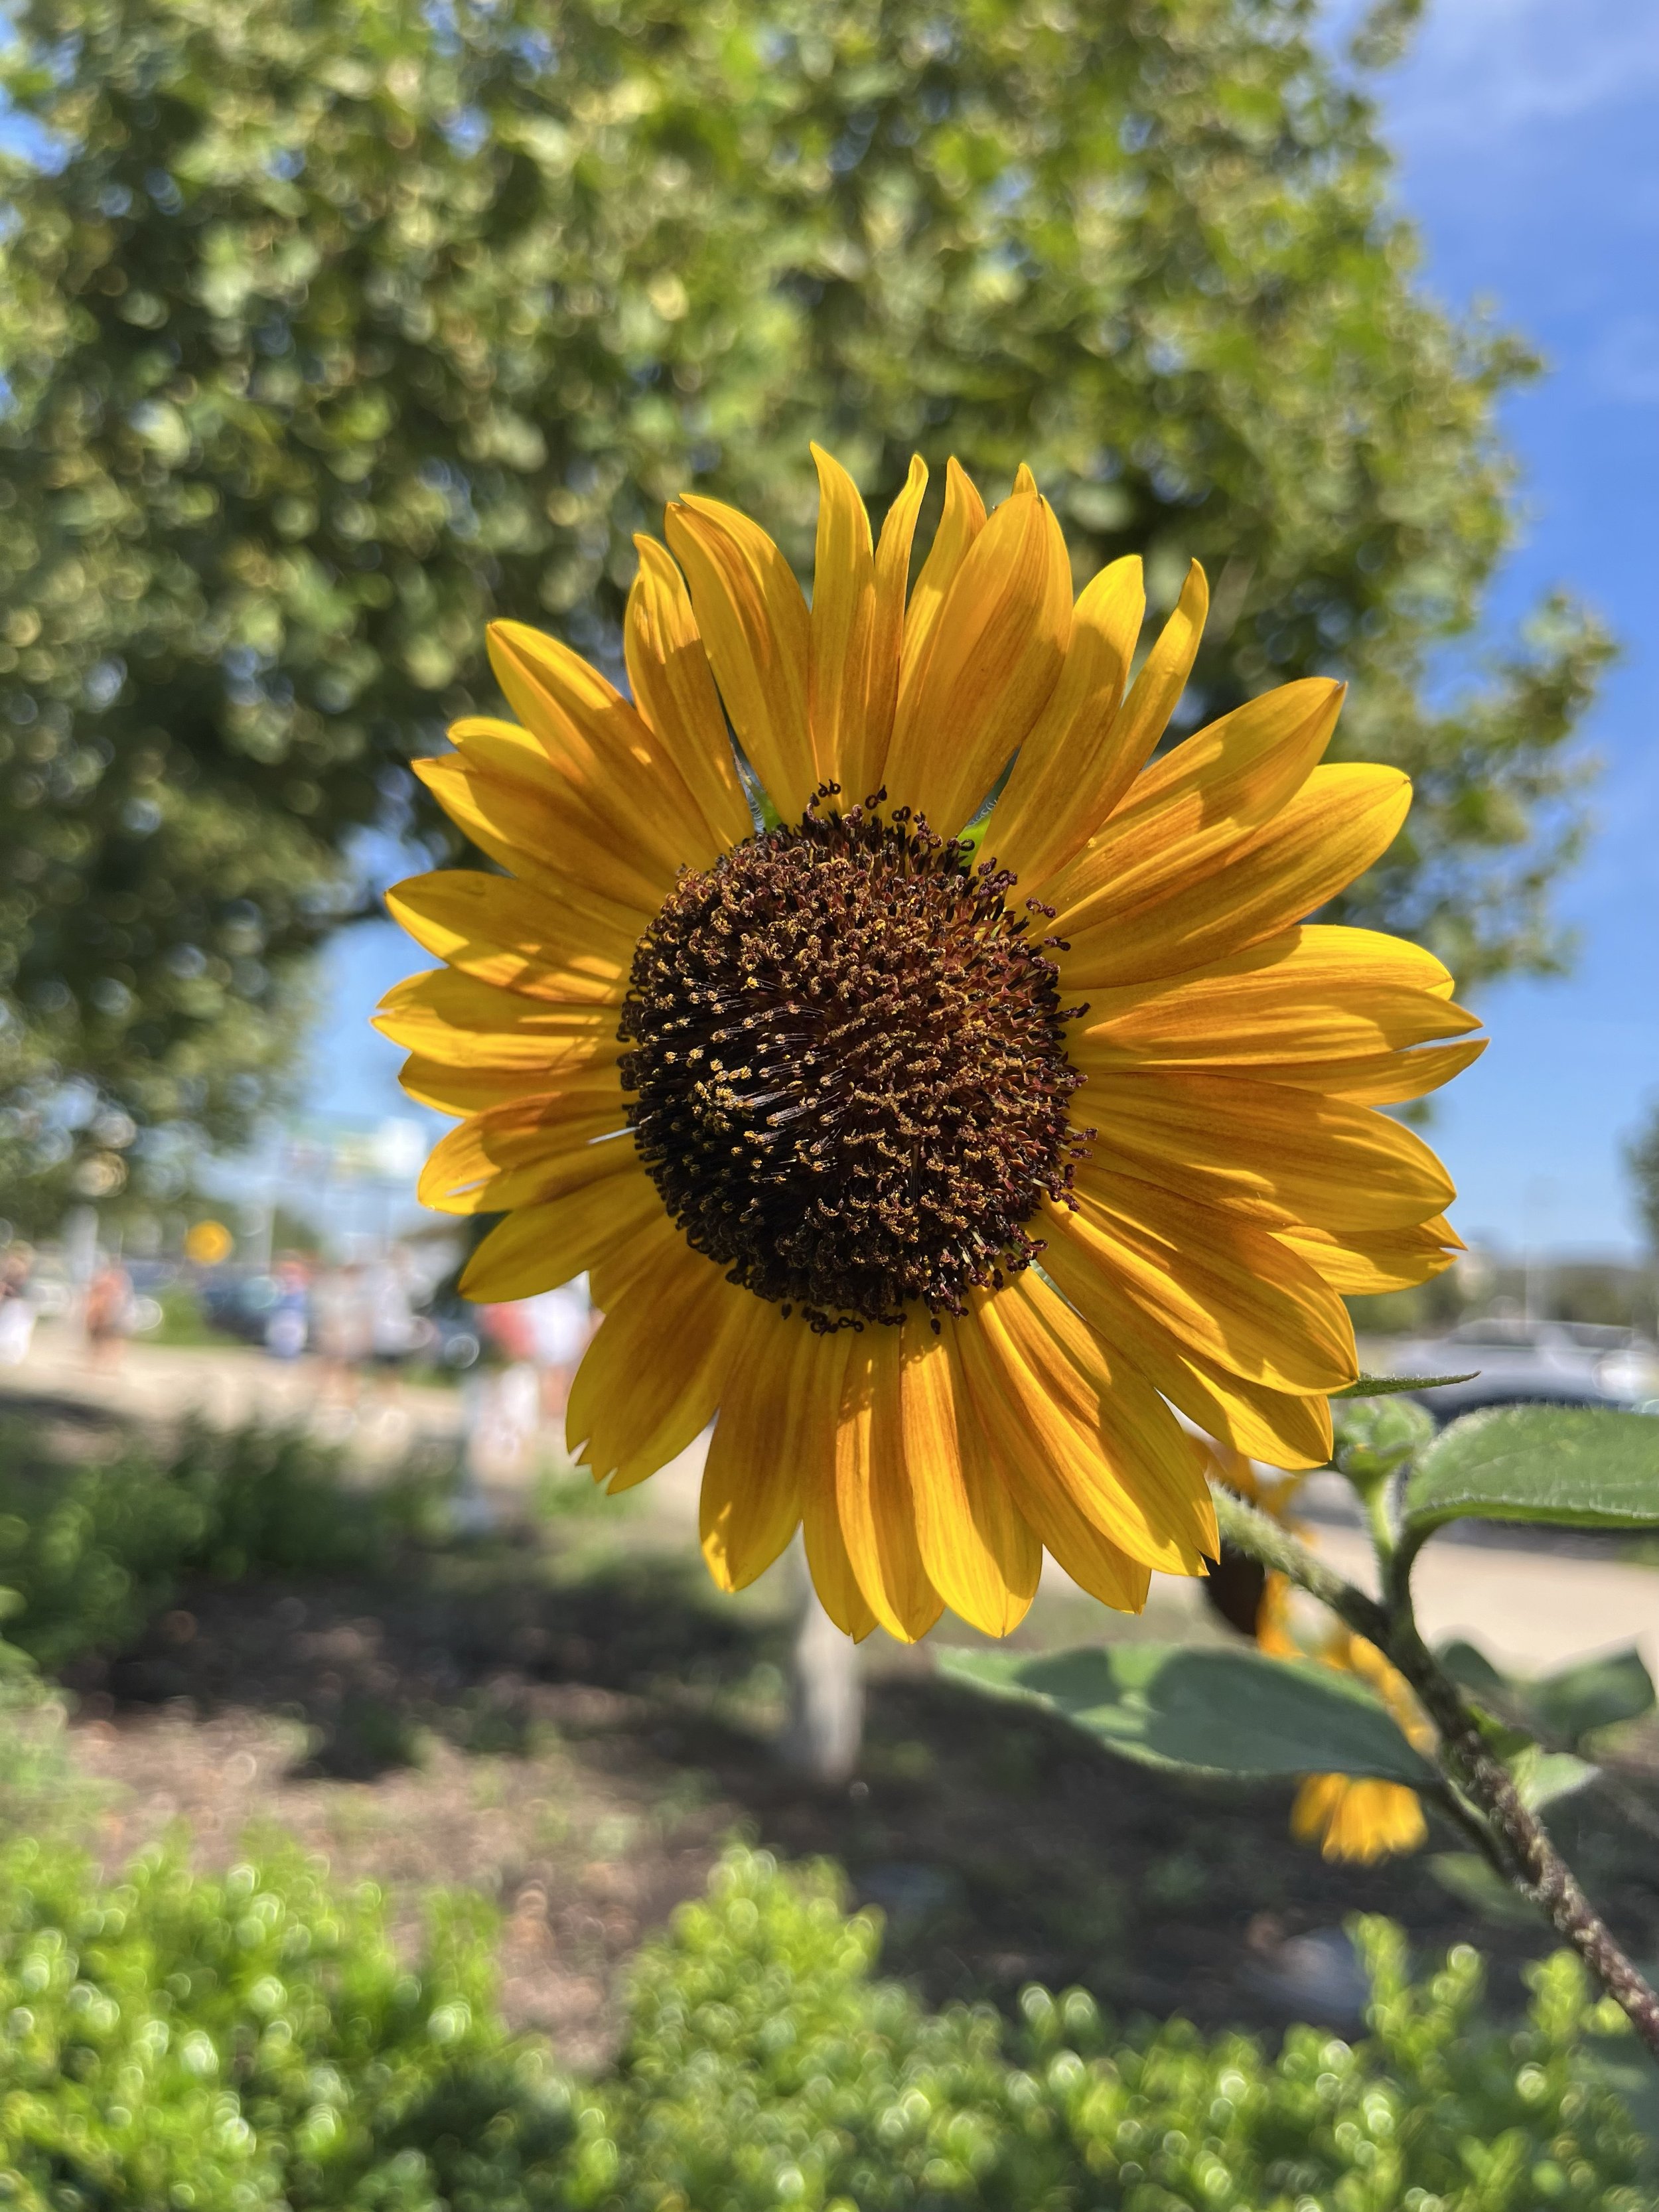
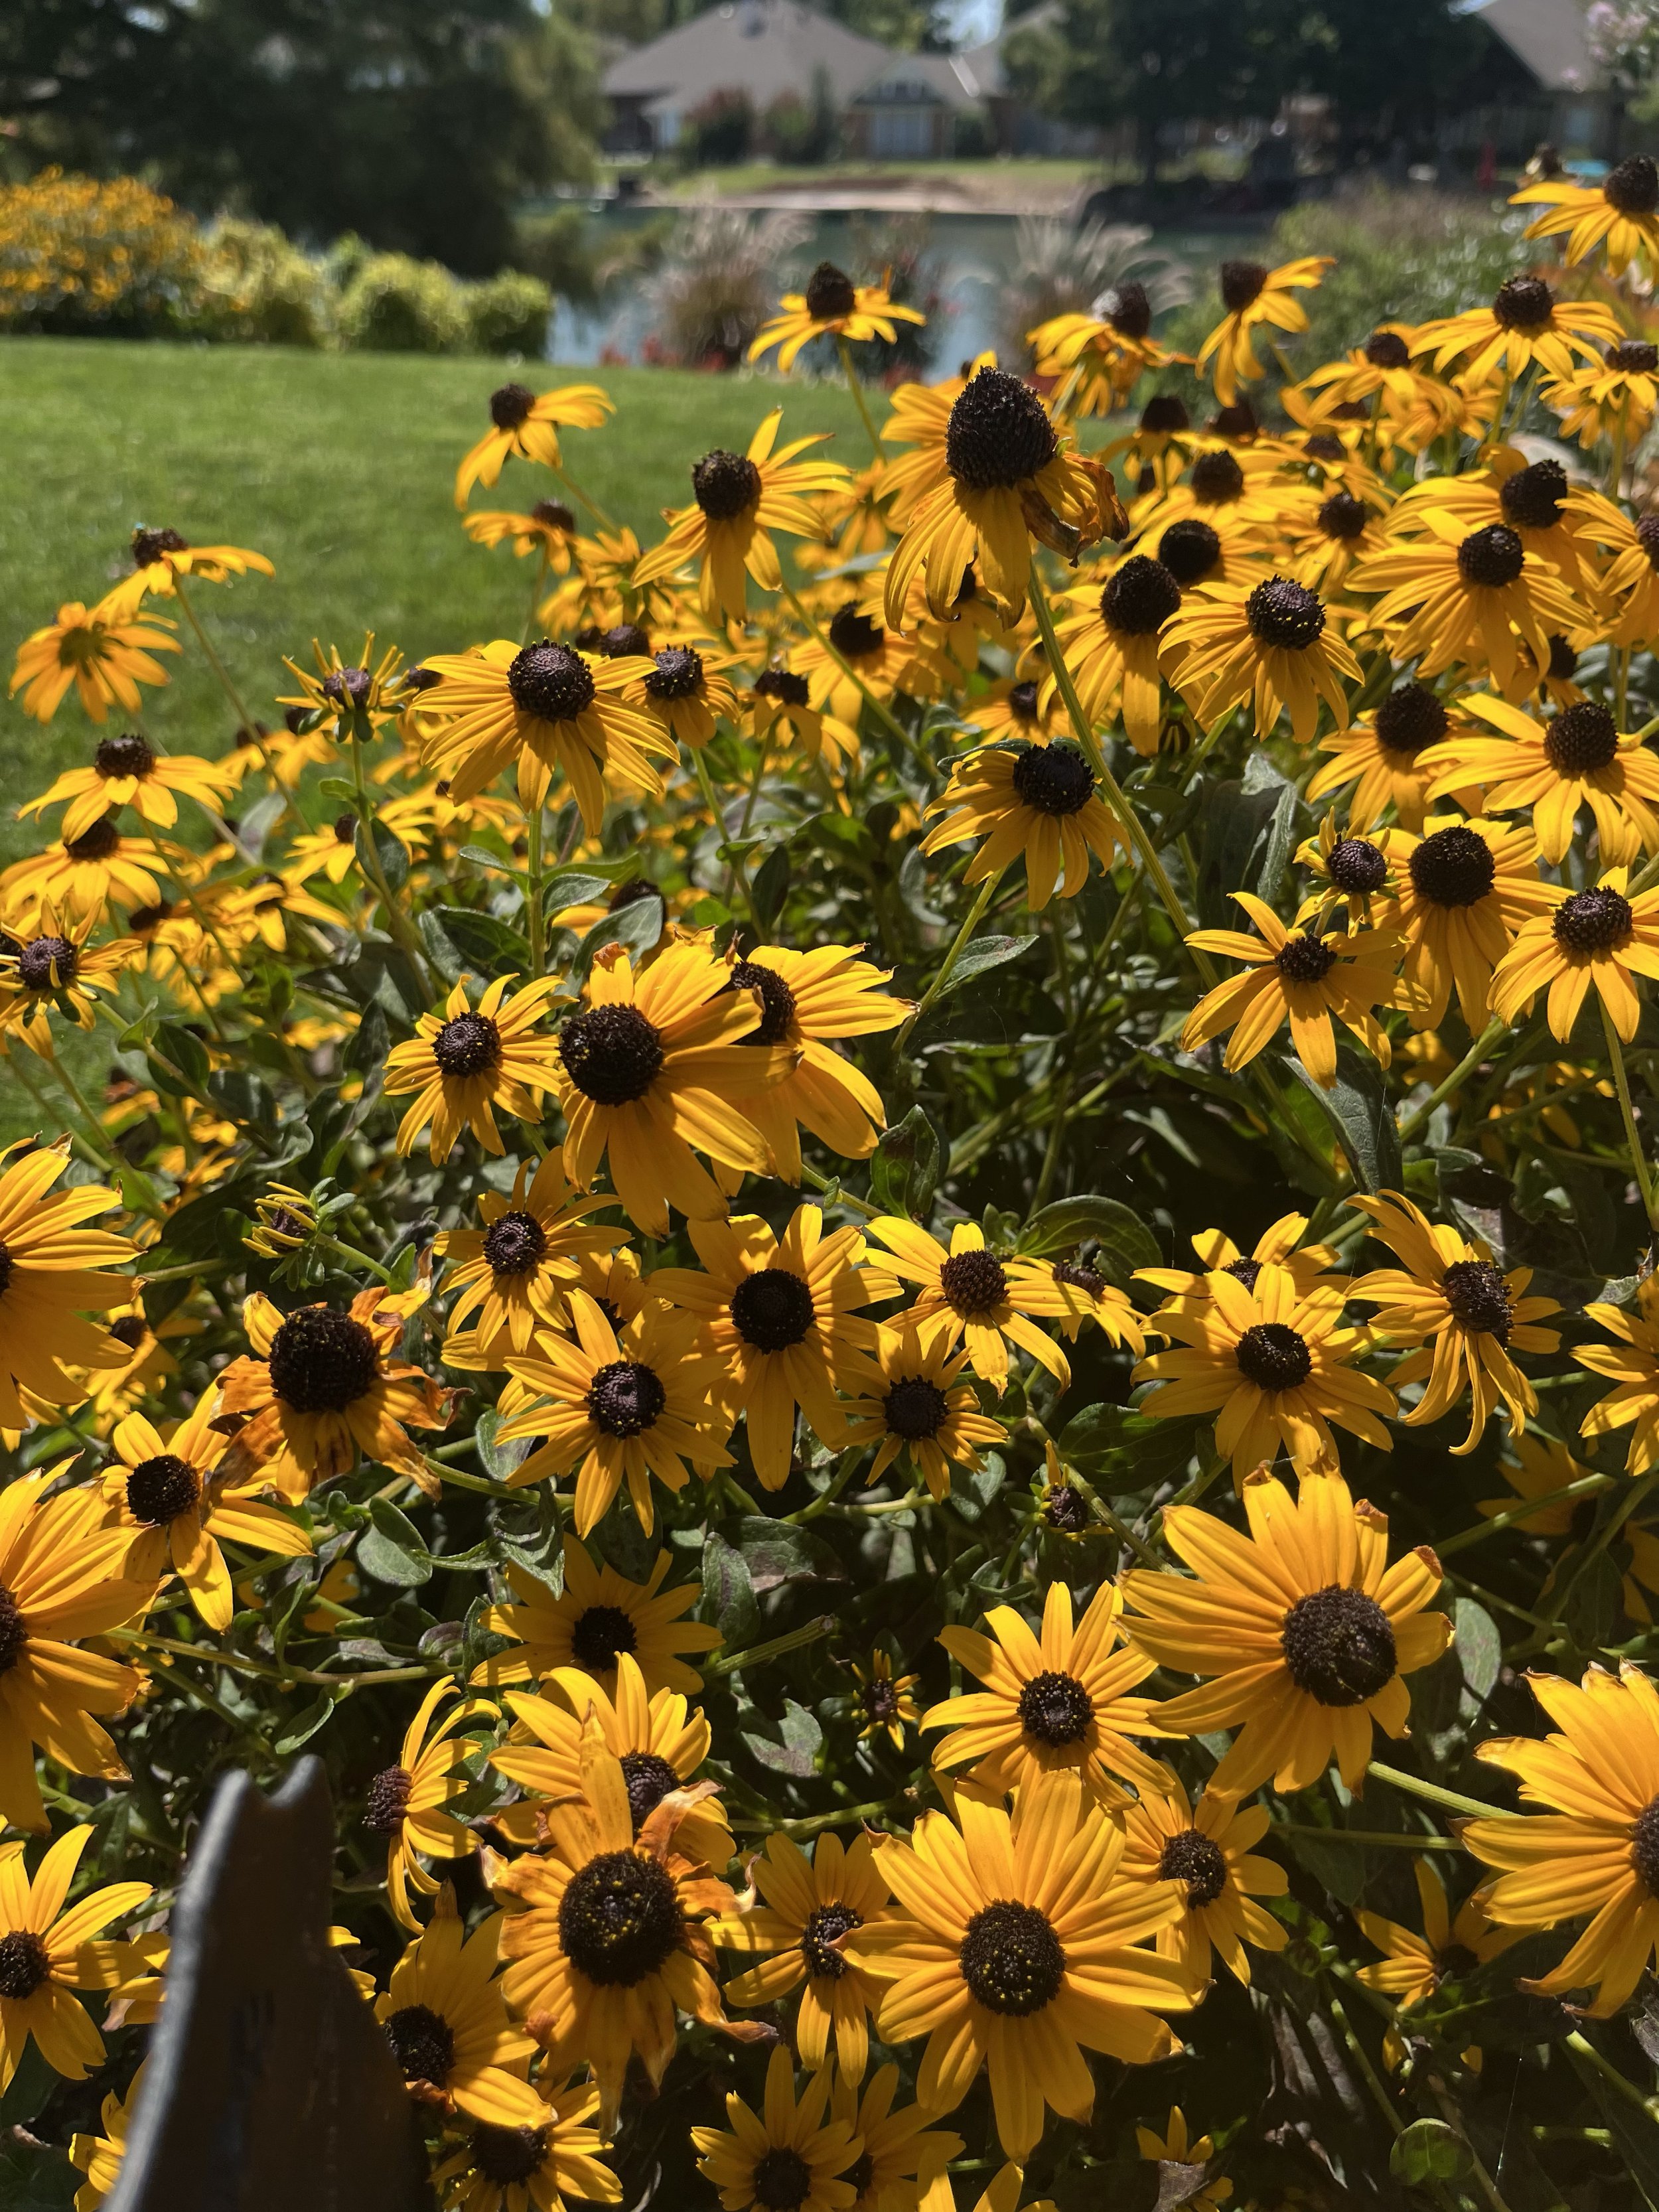
Black-eyed Susan – Grows 2-3’ tall with dark green foliage and vibrant golden-yellow daisy type flowers with a dark brown center. Blooming starts in late June and continues into August. Their show in the summer heat is second to no other perennial.
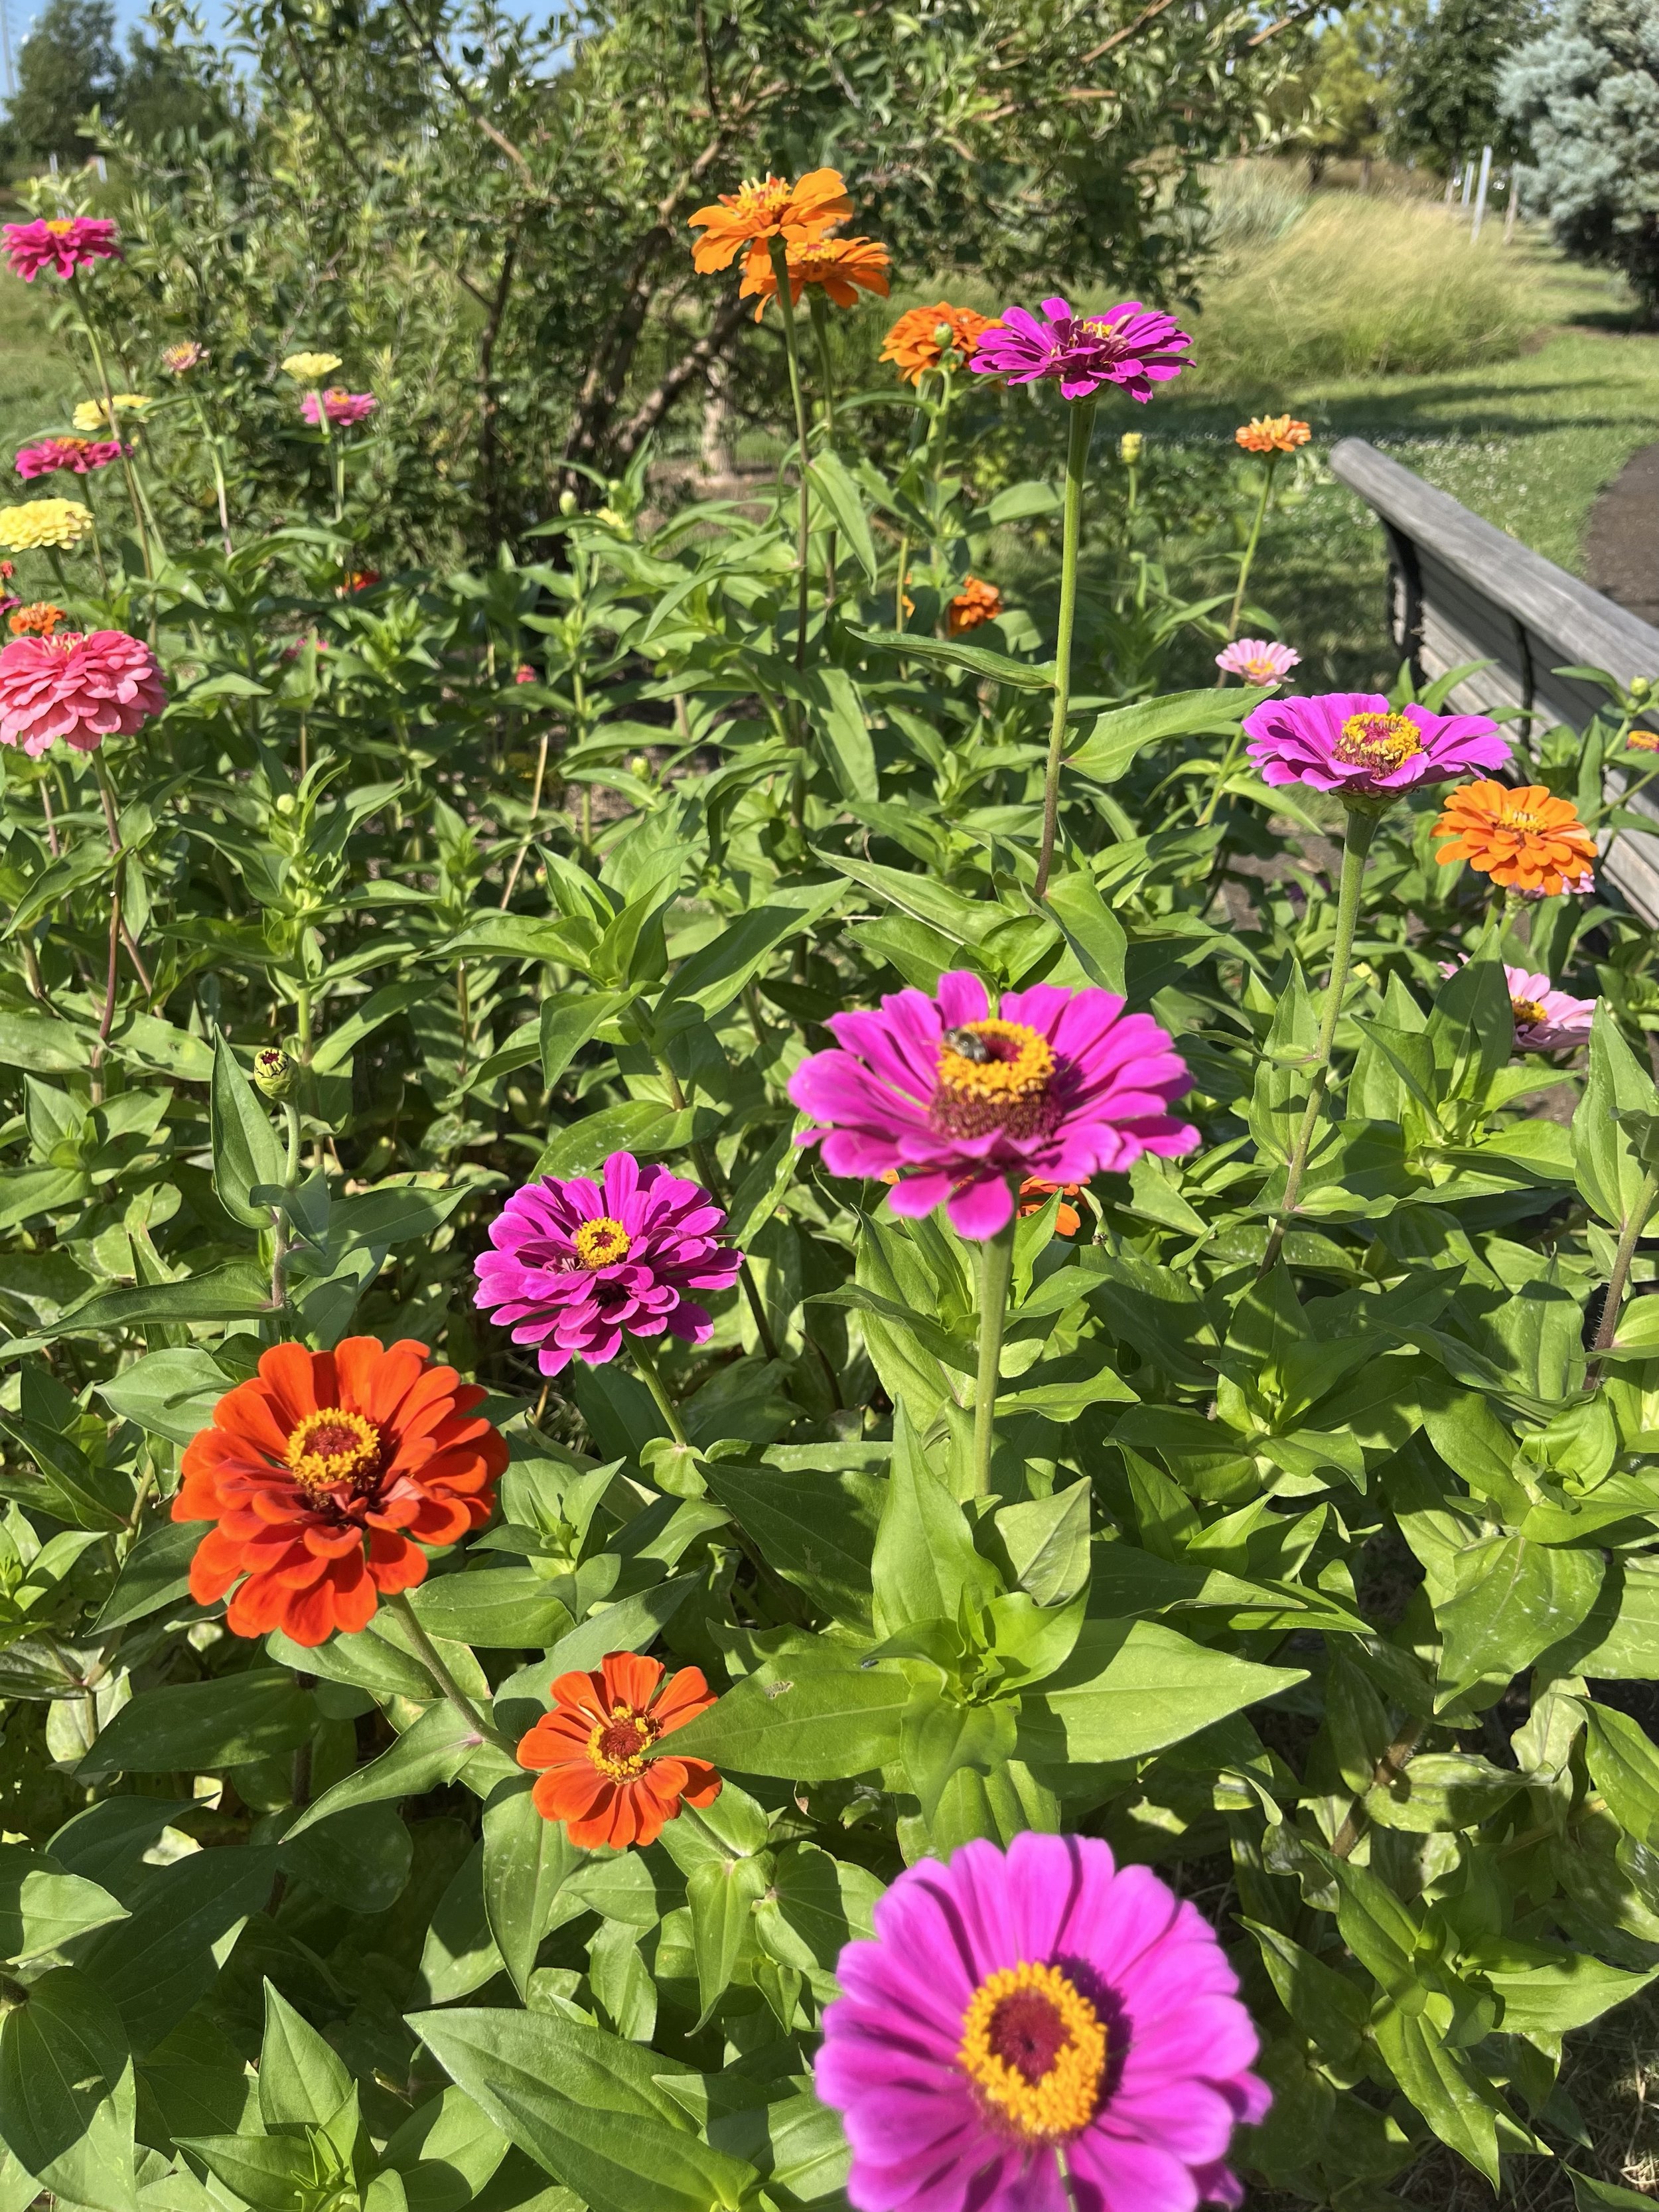
Coneflower – A native prairie plant that puts on a great show through the summer. Each plant will produce several clusters of 2-4” blooms. They are available in several colors, but the purple varieties are my favorite.
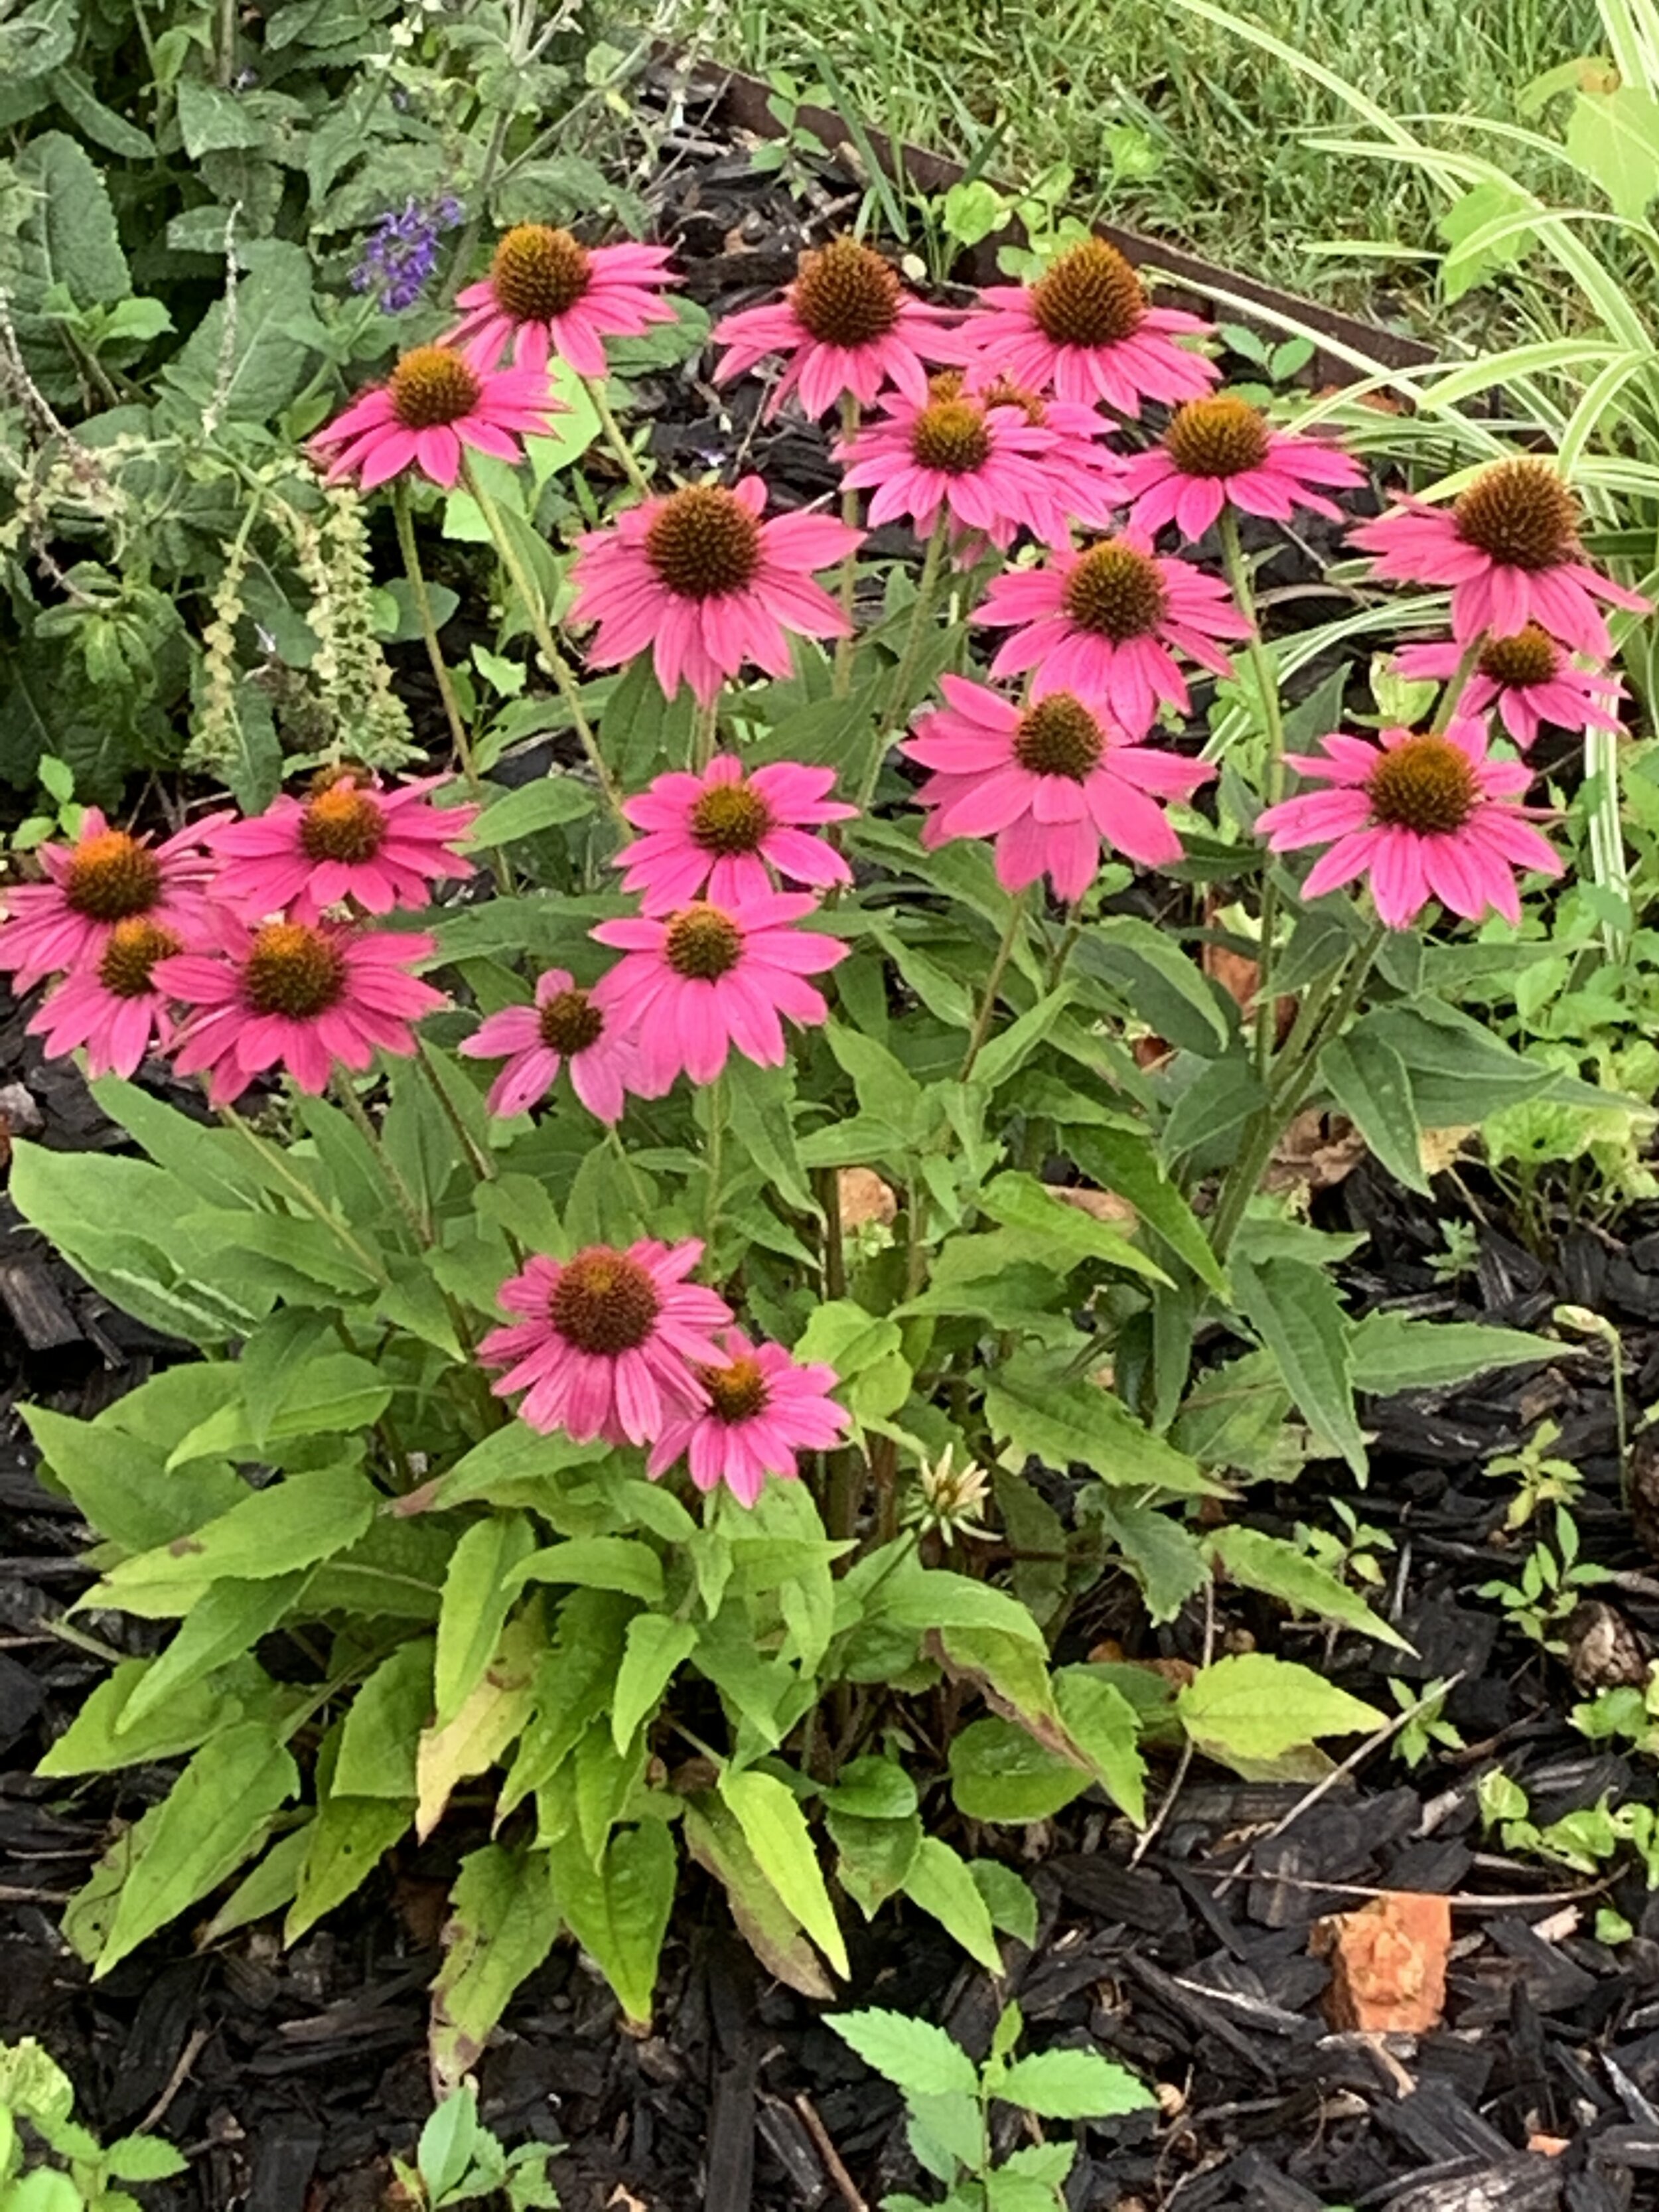
Coneflower add color to the landscape through the hottest times of the summer.

Using the perennial Black-eyed Susan in your landscape will add a splash of yellow through July and into August.
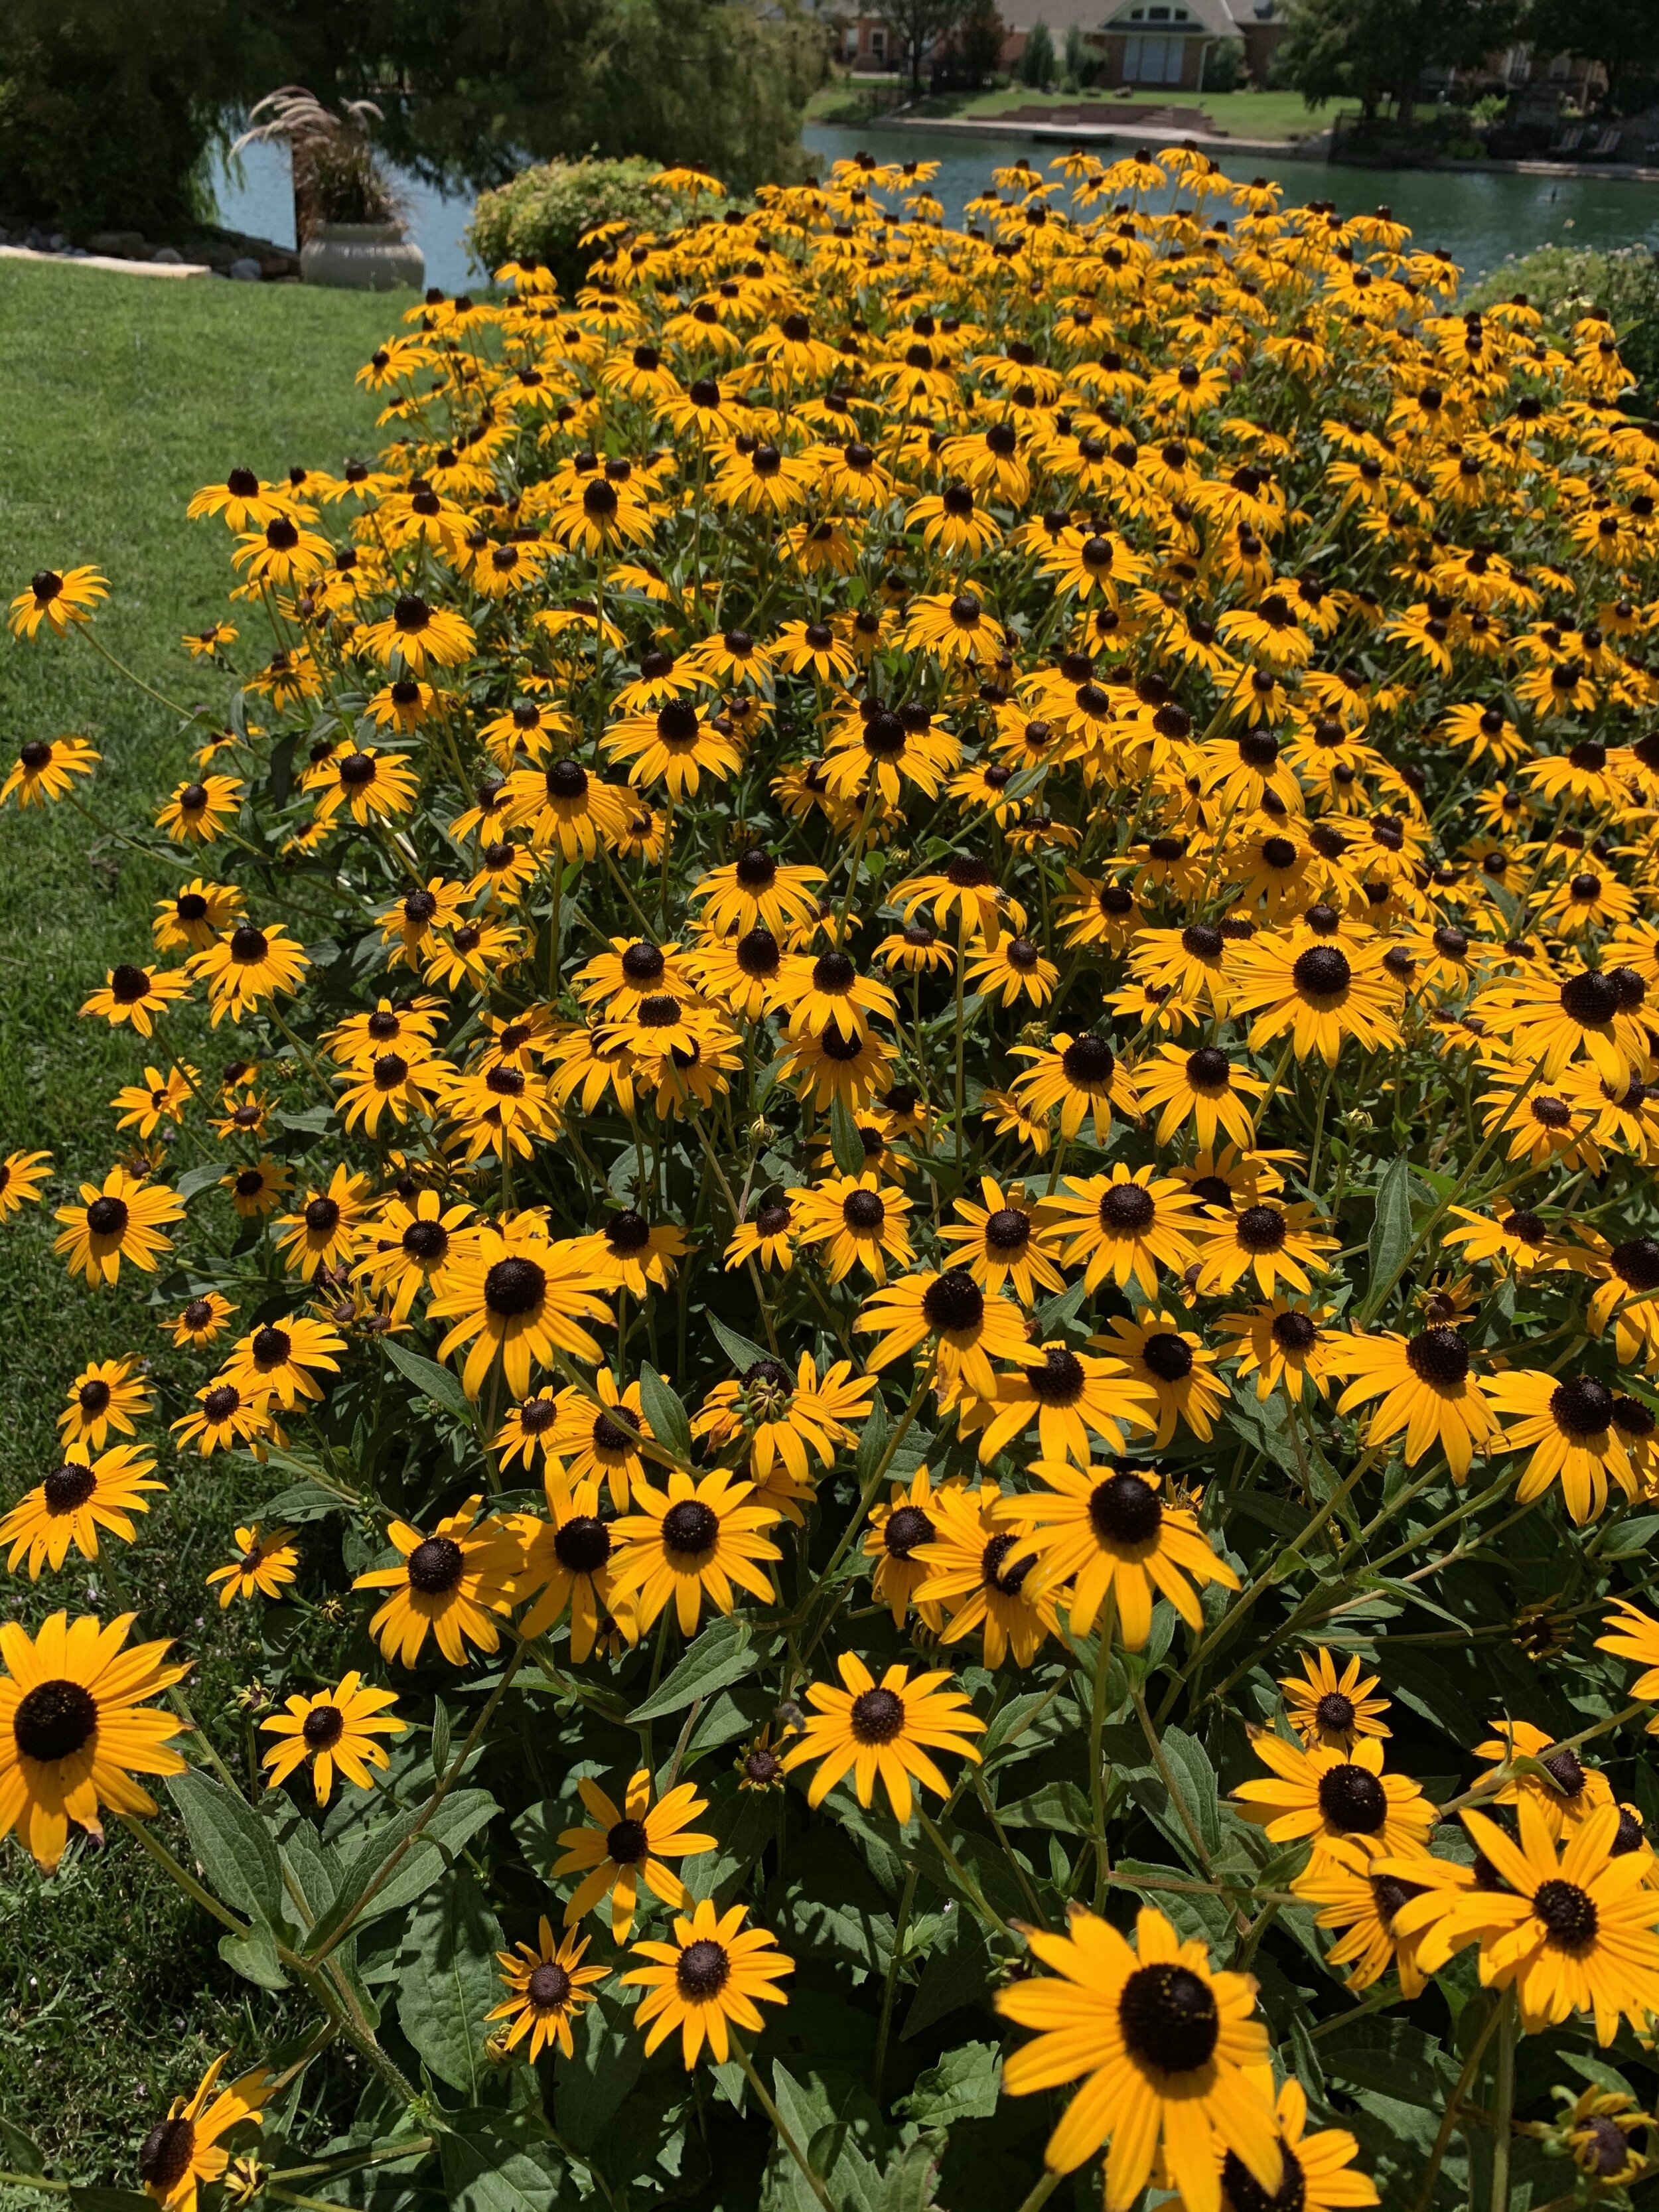
Black-eyed Susans add bold brilliant flowers in mid-summer to our landscapes.

Coneflower is a perennial that blooms in midsummer.

Crape Myrtle, the longest summer blooming plant become more brilliant as the summer gets hotter.

Maybe the hardiest Hydrangea, Limelight, blooms during the heat of midsummer and they do well in full sun. These are planted around a parking lot on the west side of a building.

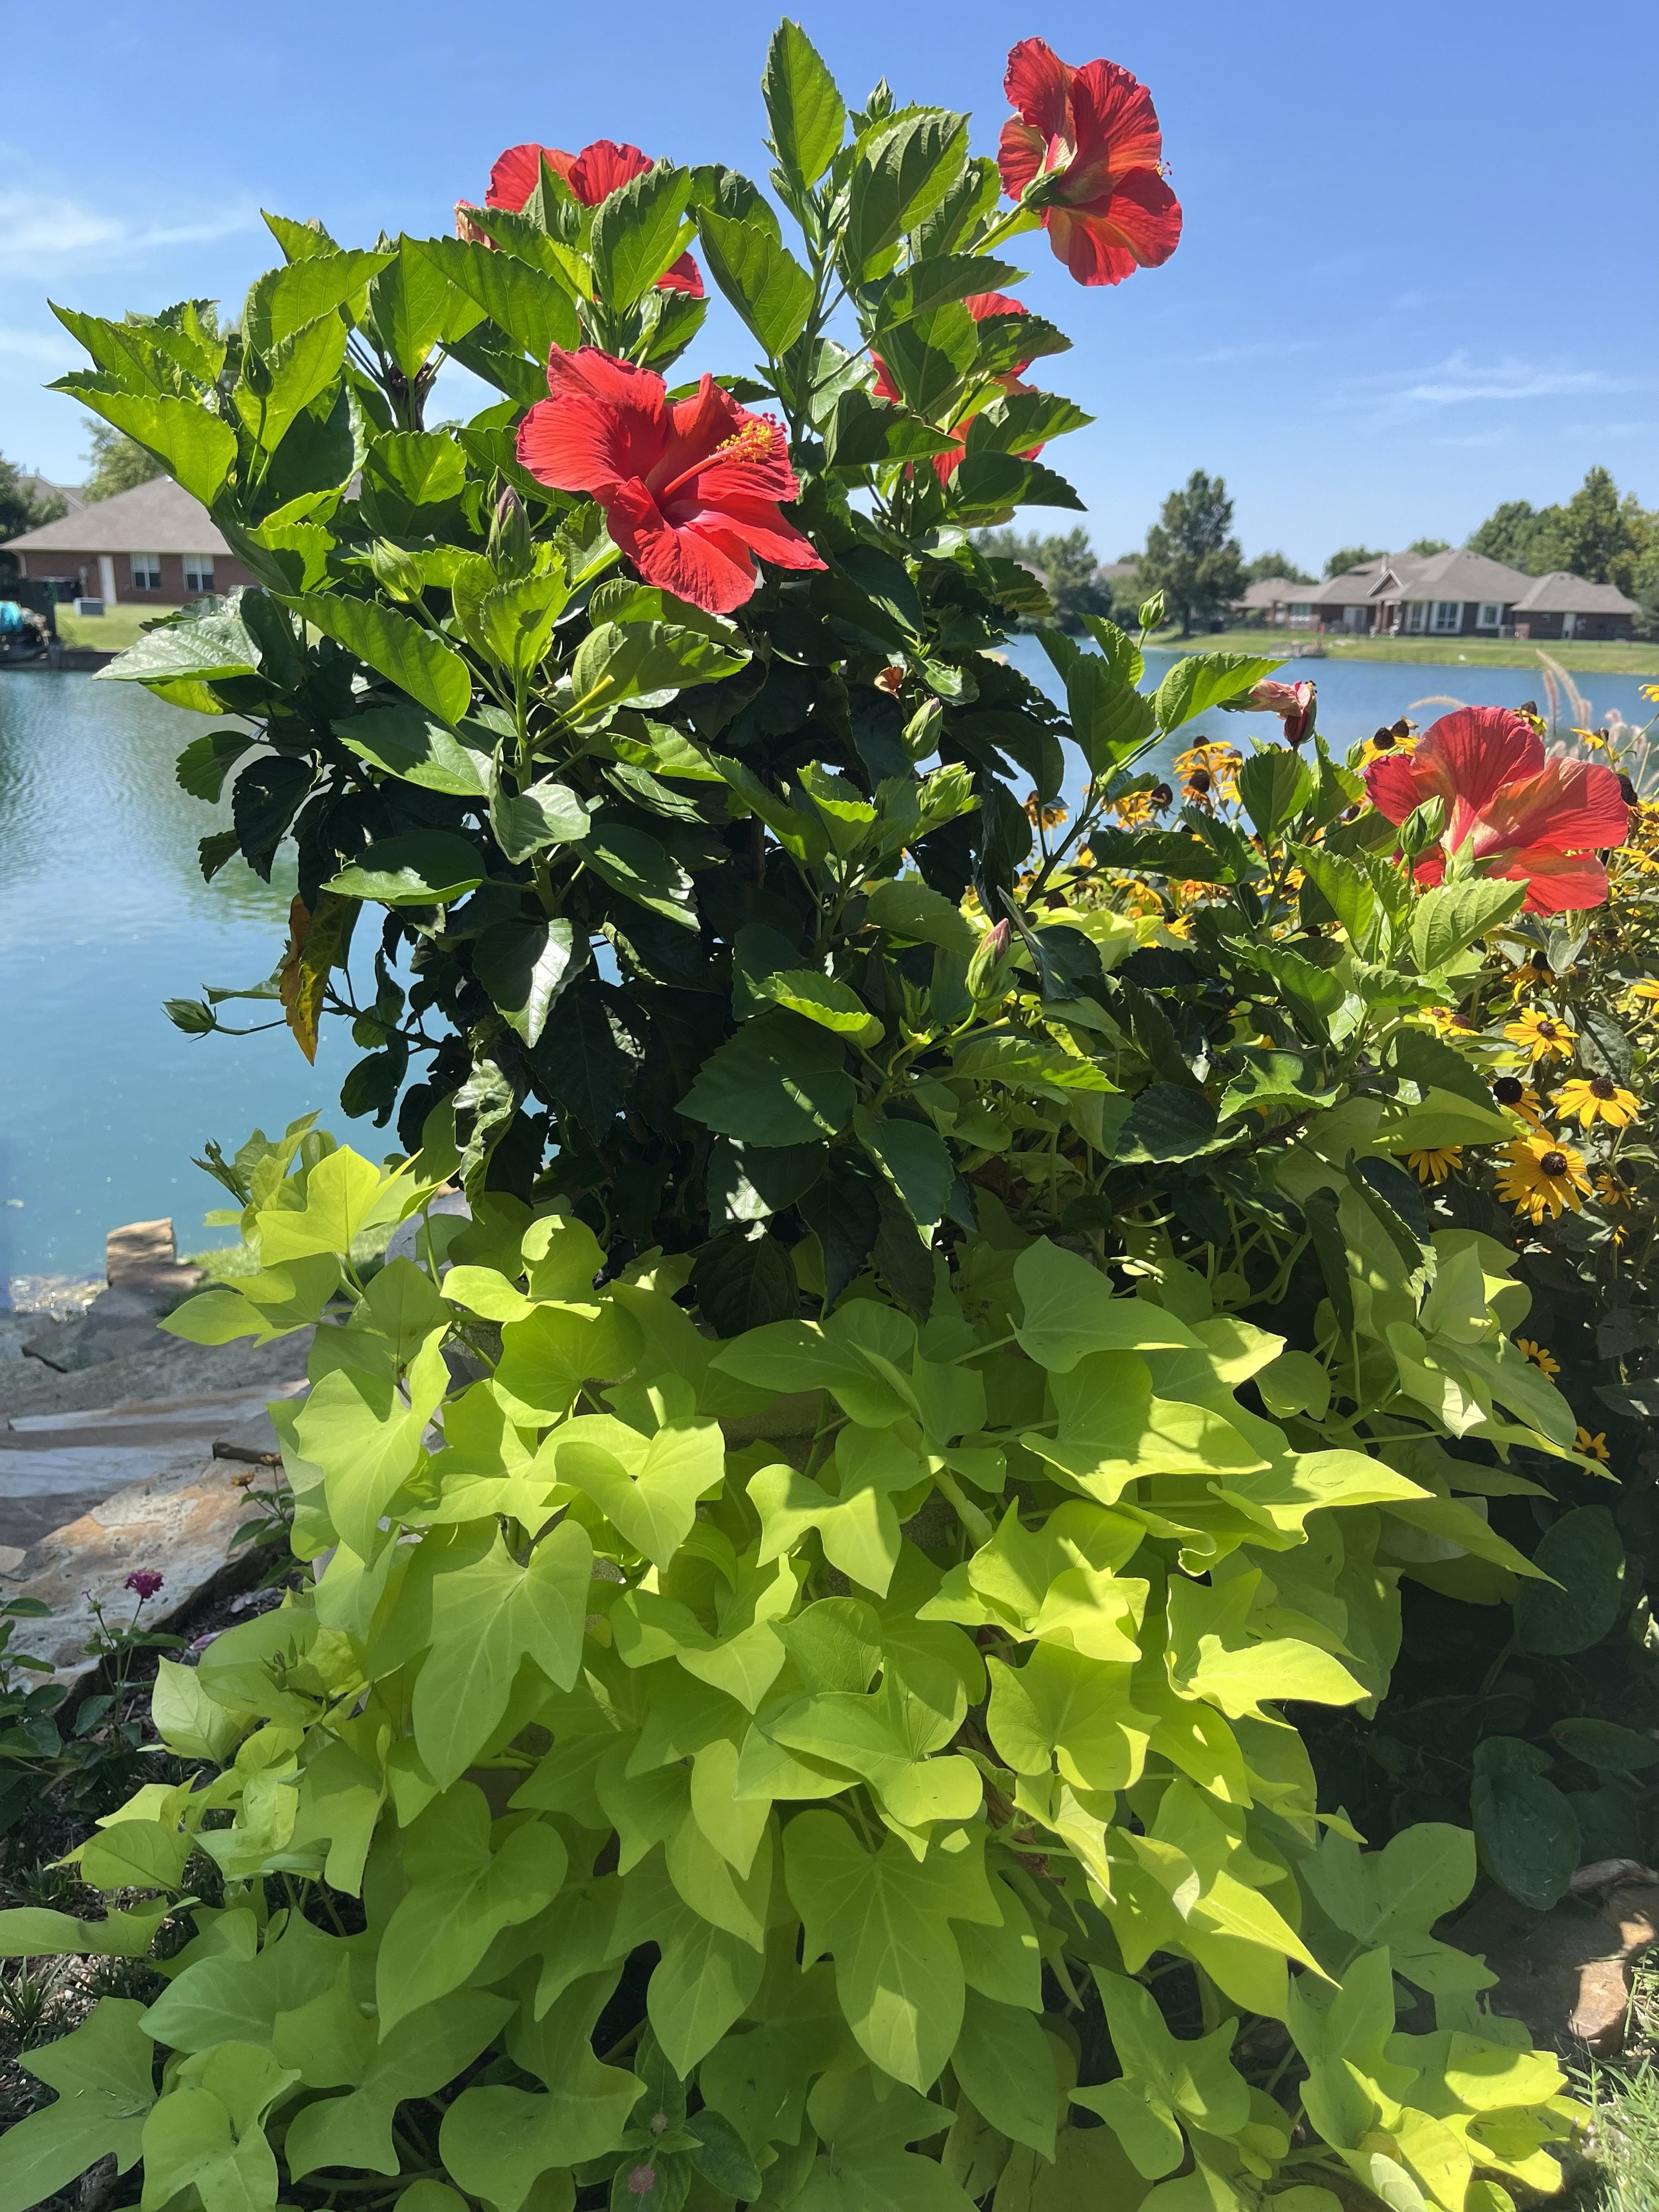
The large flowers of Hardy Hibiscus are an eye catcher throughout the summer.

Bobo Hydrangea is a dwarf hydrangea that is known for having stronger stems so the blooms don’t flop over as much as typical panicle hydrangea.
Shrubs
Crape Myrtle – I have a tendency to mention them often, but as our longest blooming summer shrub and/or tree they are a must have for your landscape. Varieties come in dwarf (2-4’), semi-dwarf (up to 8’), and standard (up to 25’). Colors range from white, pink, purple and red. It seems that the hotter the summer, the more brilliantly they bloom.
Limelight Hydrangea – A very hardy hydrangea with unique mid-summer white blooms and a slight hint of green. They look great planted in mass, as a hedge or as a single specimen. Also, they do well planted in full sun.
Hardy Hibiscus – A spectacular summer bloomer that will quickly make a dramatic impact to any landscape. Look for newer varieties as they have larger flowers. For most flowers, they need full sun. They are a great addition in a perennial garden or in front of an evergreen hedge.
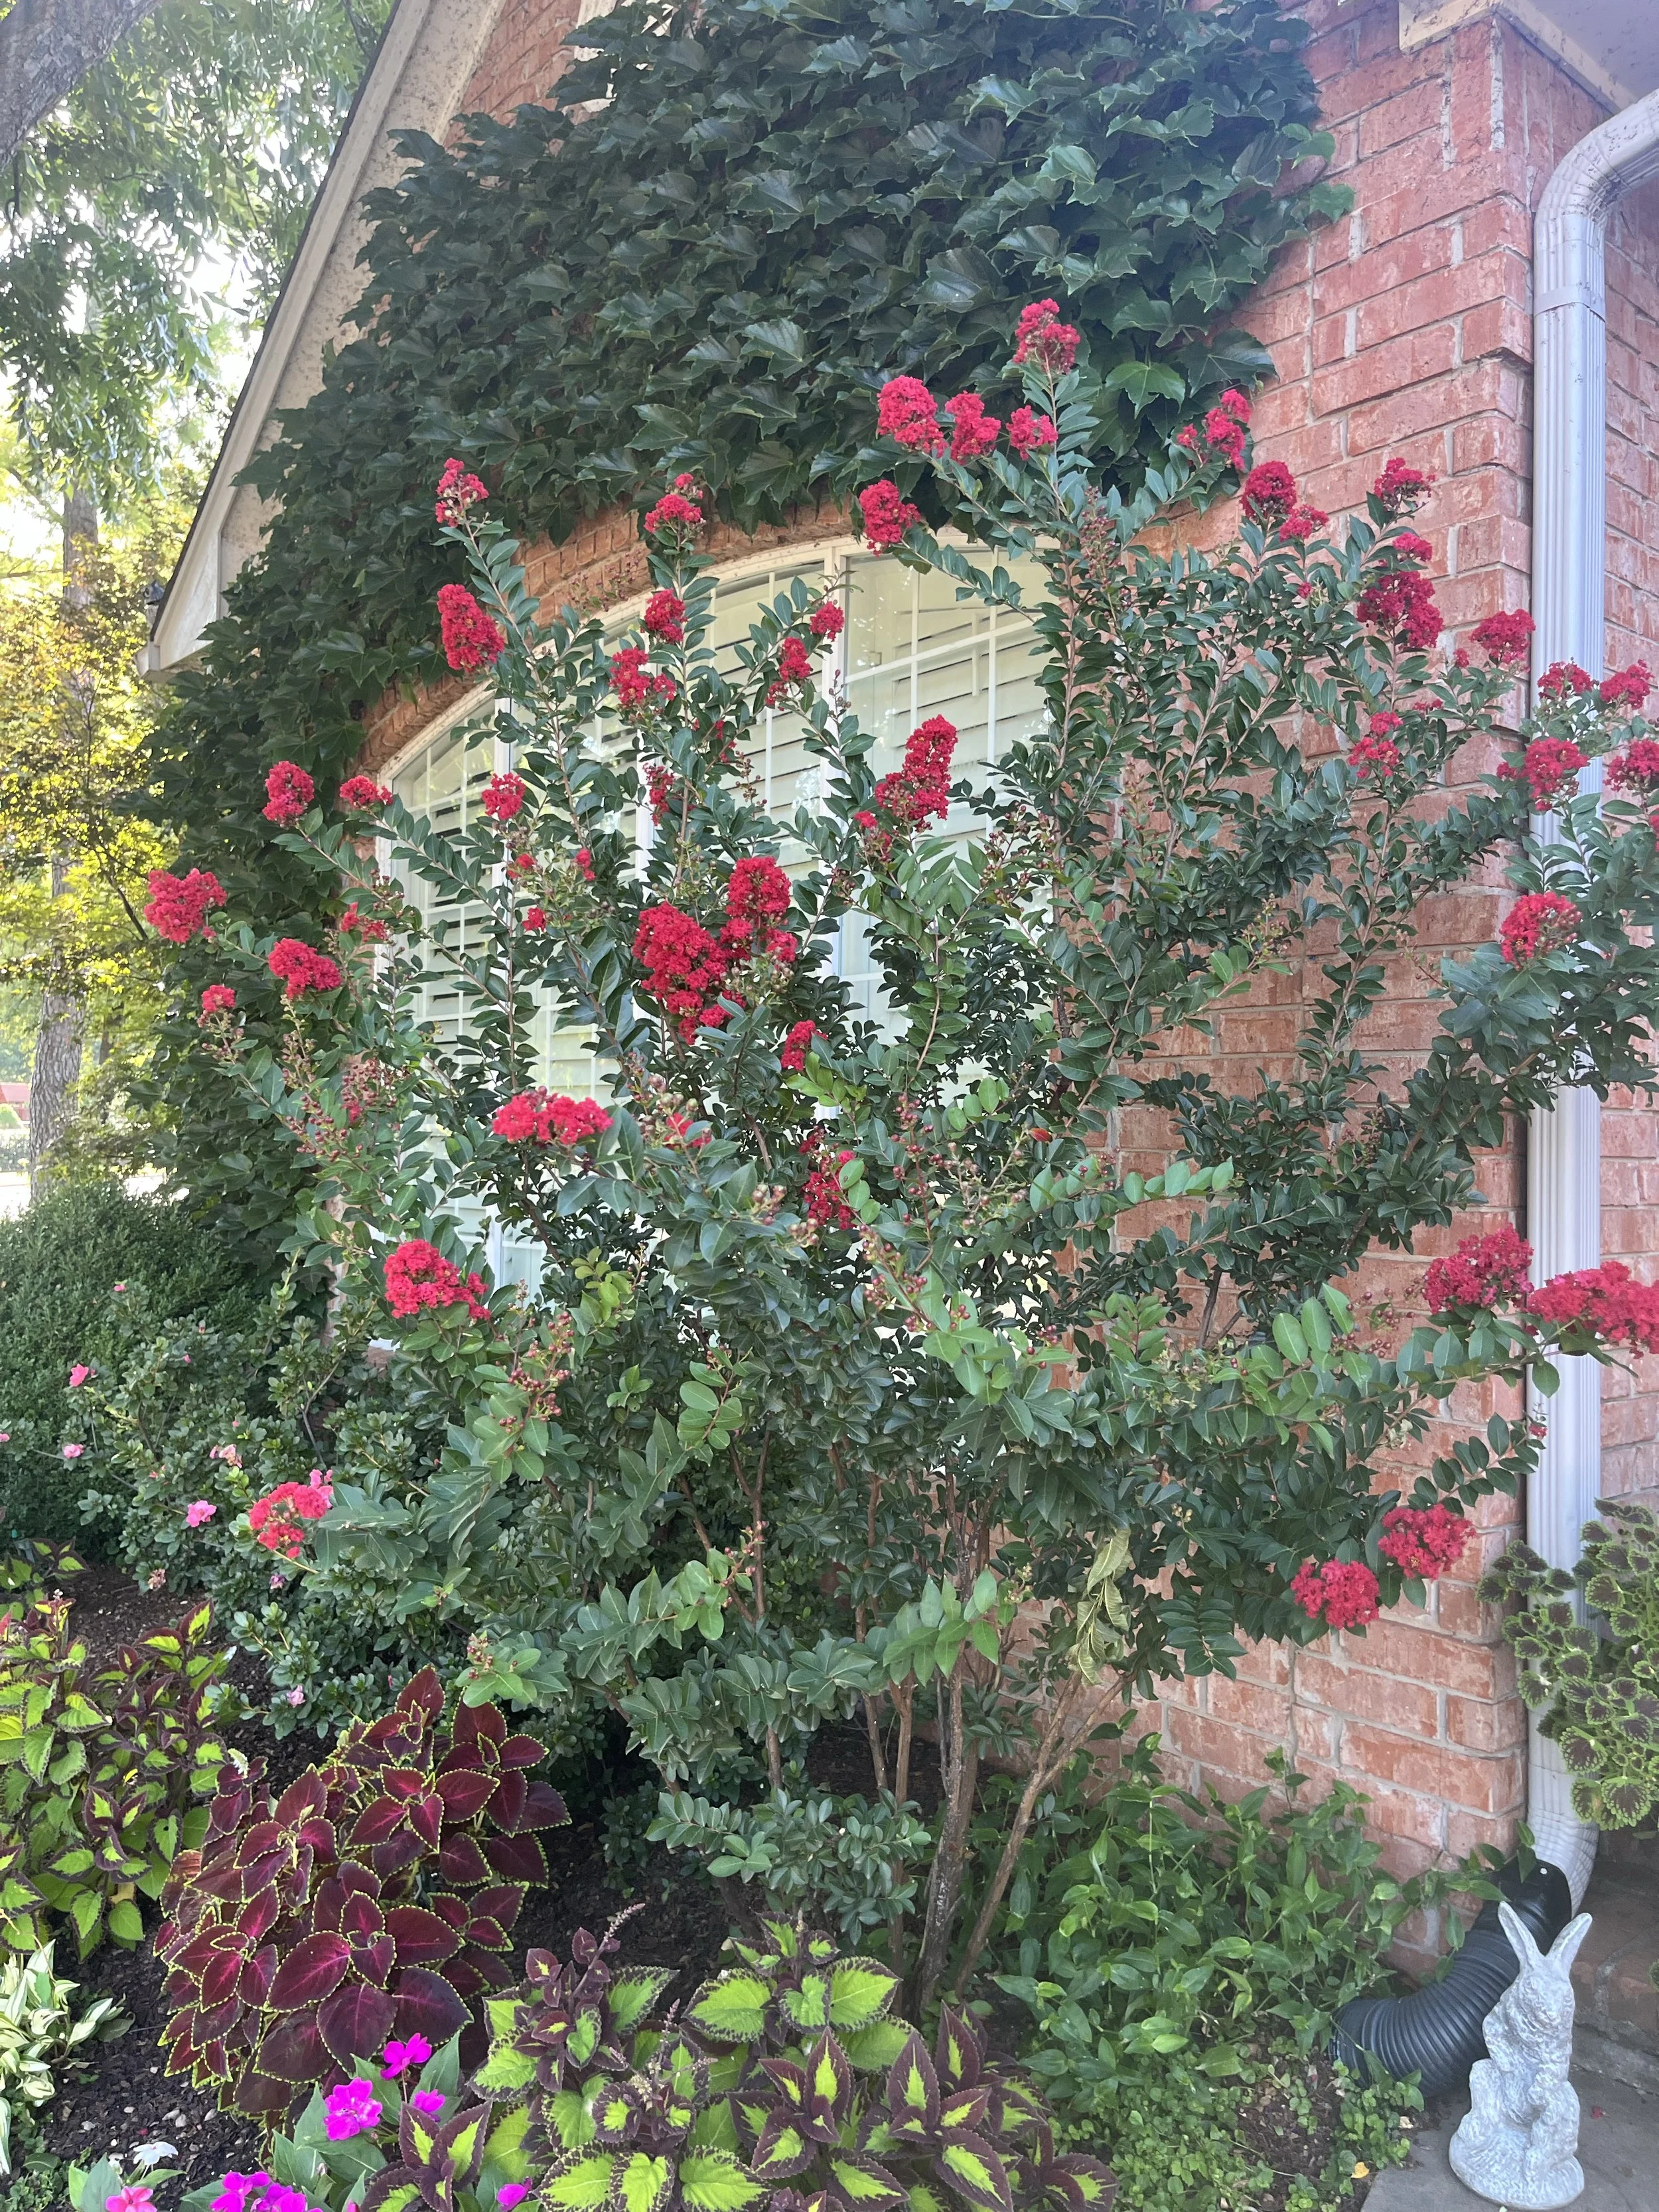
We think of Crape Myrtles as full sun plants, but when planted in dappled sun they add splashes of bright color to shady areas.

Bobo Hydrangeas and Black-eyed Susan both thrive in the summer heat.
Vines
Trumpet Vine – A favorite is the ‘Madame Galen’ variety. Trumpet shaped salmon-red flowers throughout the summer for an extra-long blooming season. Great for covering up fences and climbing arbors.

Madame Galen Trumpet Vine have an extra long summer blooming season.
These are just a few that we have found consistently do well through the hottest summer heat. The fun thing is there are many, many more.
Visit public gardens during the hottest times of the summer to see what is doing great in their landscapes for fresh ideas. The Myriad Gardens, Will Rogers Horticulture Gardens, and OSU’s Botanical Garden are just a few in the area. A favorite of mine is to make an annual visit to the Dallas Arboretum and Botanical Garden to see what is doing well in the heat of north Texas.
Don’t be shy. Stop at that house with the best summer color in your neighborhood and ask what they are growing!
Experiment. Try something new and different. Who knows, maybe you will stumble onto something that is just perfect for your landscape.
Share what is doing the best in your landscape. We want to know what is putting on a show this summer in your landscape. And, I’m sure everyone else wants to know too.
Lorne Hall
Hall | Stewart Lawn + Landscape LLC
(405)367-3873
August Lawn & Landscape Tips

We have arrived at the hottest, driest point of the season…the last 10 days of July and the first 10 days of August when Oklahoma City’s average daily temperature reaches its peak.
The key to surviving the hottest period of the season is best practices. It's not just during times of high stress that these habits matter, but rather it's best practices all the time that make the real difference.
After getting way ahead on rainfall from mid-April through early July, the rainy pattern shut off three weeks ago. Hopefully, the chance of a good rainfall today will materialize and break the 21-day streak of no rainfall we currently have going.
Lack of moisture is the current biggest issue we are seeing. This week alone, we visited a lot of lawns and landscapes that were desperately needing moisture, with irrigation controllers still set as if we were getting occasional rainfall.
To finish the summer strong and keep your lawn healthy, here are a few best practices to focus on, the first being watering:
Watering
The abundant soil moisture from the early summer quickly disappeared the past two weeks. The best-looking lawns and landscapes are those that are receiving 1 ½” of water per week.
To learn how long and how often you need to water for your landscape to receive 1 ½” of moisture, place your Hall | Stewart Rain Gauge or cans around your lawn. Water using your normal cycle and then check the cups. Adjust watering times and frequency accordingly to insure 1 ½” is applied each week. Remember your landscape prefers deep soaking, infrequent watering over shallow, frequent watering. Even in the heat, lawns and landscapes are at their best when they are watered deeply as needed and not every day.
Healthy lawns have deep root systems. Roots will grow to the moisture. If your watering pattern is short, shallow, frequent watering resulting in moisture only in the top 1-2”, you will have a shallow rooted lawn dependent upon daily water. Deep soaking results in a root system with grass roots 6” to 2’ deep that is not dependent upon frequent watering and is drought resistant.
Remember, trees planted in the last two years need supplemental watering during the summer heat and extended dry periods. A good rule of thumb is to give them 10 gallons of water every week.
Best Watering Practice for August – Know how long you need to water to get 1 ½” water on your lawn each week. Practice deep soaking, infrequent watering.
If you are unsure about your watering practices, let us help. We can schedule an Irrigation Audit/Check to make sure your system is operating at its peak efficiency during the summer heat.
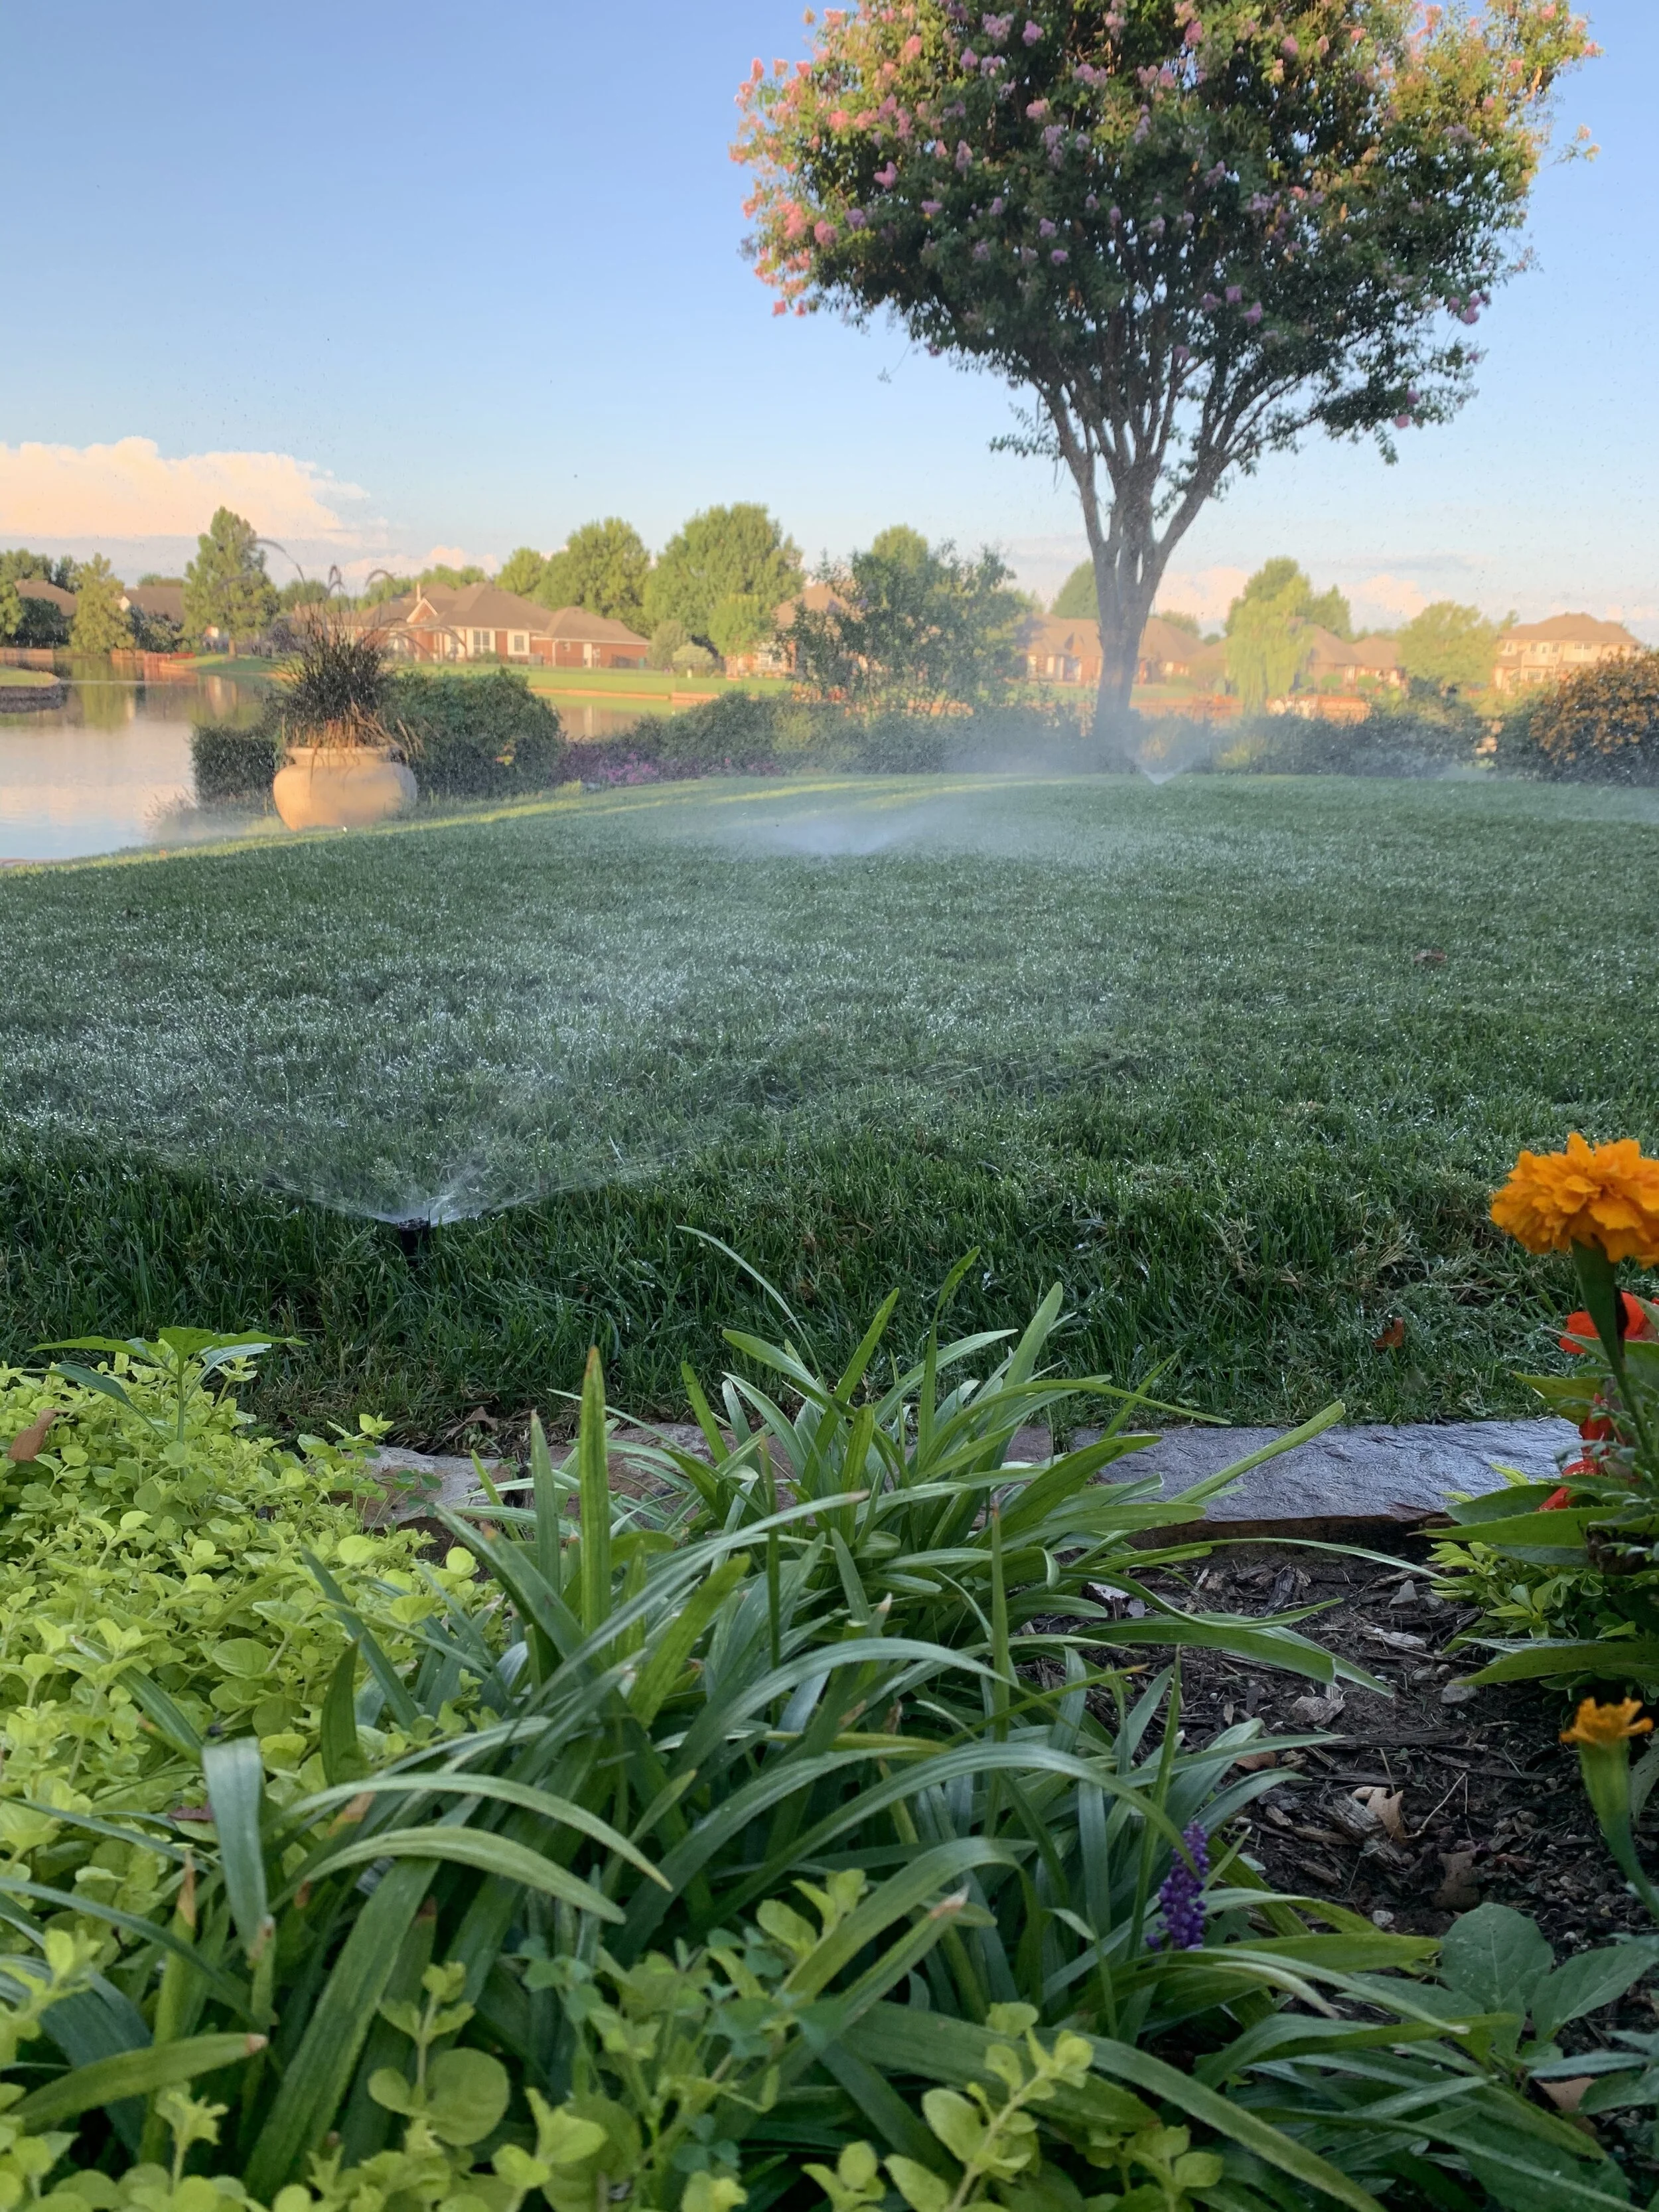

Take time to check your irrigation and fine tune it. A leaning head often is the culprit for dry spots in the lawn.

I am currently mowing my fescue lawn at 3 1/2". More leaf space results in better heat and drought tolerance.
Mowing
Both warm season turf (Bermuda and Zoyia) and cool season turf (Fescue) should be mowed at the highest level this month, warm season 2-2.5” and cool season up to 3-3.5”. At the higher level the lawn will have more leaf space resulting in better heat and drought tolerance. Continue to mow often enough that you are removing only 1/3 of the grass each time you cut. If you are cutting frequently enough to pass the 1/3 test, don’t catch the clippings. Allowing the clippings to decompose on the lawn will return moisture and nitrogen to the soil. Give no bagging a try. You will be surprised at how much more color your lawn will retain even in the heat. When you bag your clippings, you are tossing out nitrogen and moisture your lawn could really use this month.
Best Mowing Practice for August – Mow high, mow often, and don’t bag your clippings.
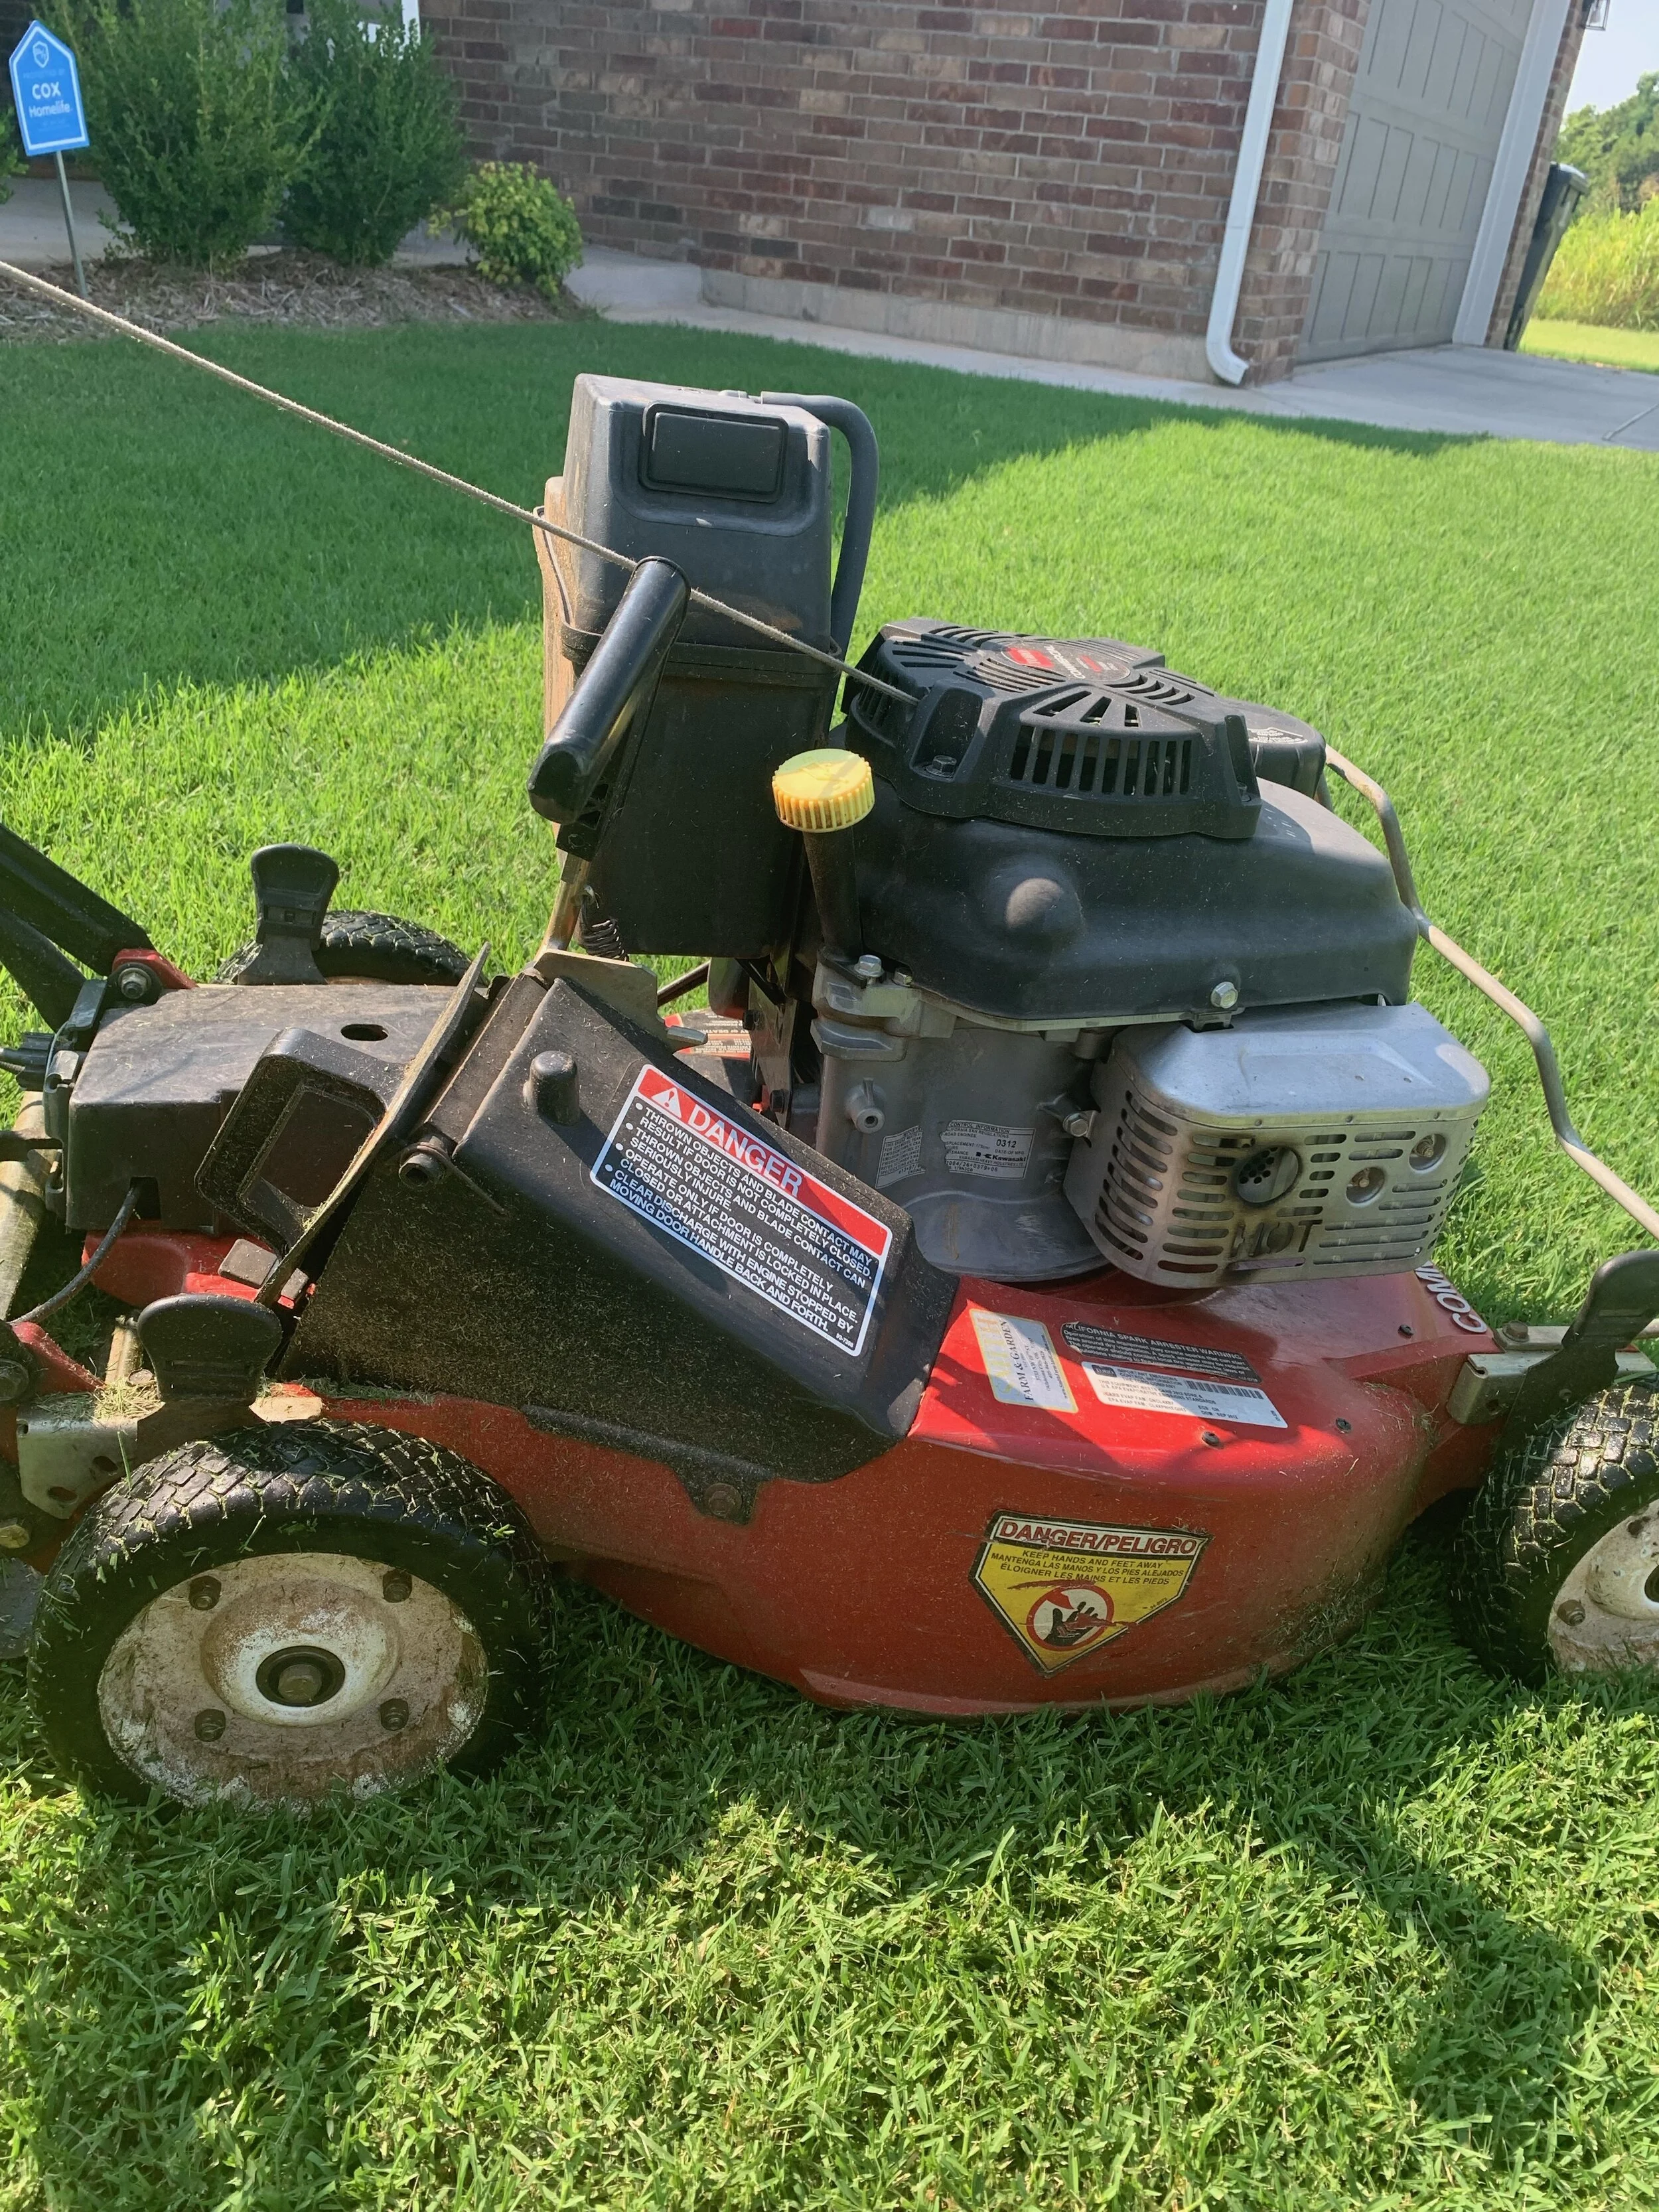
Bermuda lawns perform their best in the heat. Mow often and don’t bag the clippings. Grass clippings are mostly nitrogen and moisture. Your lawn will thank you for giving them back.

After mulch mowing, use your blower to distribute any noticeable clippings.

Well maintained Bermuda lawns can’t be beat in August. This Bermuda lawn is the result of best practices this summer: well timed lawn care applications, aeration in June, deep infrequent watering, and mulch mowing.
Fertilizer
Apply fertilizer to warm season turf this month. This time of the year, Bermuda and Zoysia benefit from a high nitrogen fertilizer that is low in phosphorus and potassium.
DO NOT fertilize cool season lawns until we reach the cooler temperatures of September.
Warm and cool season turfs require different fertilizer schedules. Don’t make the mistake of trying to treat them the same when it comes to fertilizing.
Best Fertilizer Practice for August – Fertilize bermudagrass, don’t fertilize fescue. Important - Follow watering instructions after fertilizer is applied.

August is the month to be less aggressive on weed control. Because a thick turf is the most important part of good weed control, you want to avoid weakening the turf going into the fall.
Weed Control
Spring pre-emergent herbicides are reaching the end of their effectiveness in your soils. Should an occasional weed show up in your turf this month, it is best to go easy on weed control. We have reached the time of the year that damaged turf may not have a chance to fully recover before fall. Great weed control is at least 75% the result of thick turf. August is the month to focus on turf development going into the fall.
Later this month is the best time to start applying the first fall pre-emergent herbicide application. The first fall weed to germinate is poa annua (annual bluegrass). Poa annua has become more and more of a problem to control in lawns worldwide as it has developed resistance to current herbicide chemistry. For the best prevention, it is important to put a pre-emergent on your lawn between late August and the end of September followed by a second pre-emergent, using a different herbicide, in October or November.
Best Weed Control Practice for August – Don’t cause turf damage by overtreating weeds. Better to go into the fall with a thick turf than one with herbicide damaged thin areas.
Bermuda vs Fescue in August
Bermuda (warm season turf) loves the summer heat. Fescue (cool season turf) prefers nights below 70 and days below 90. Healthy bermuda lawns look their best in the heat of the summer. Healthy fescue will retain color, although not as much as in early summer, and growth will slow.
Fescue where there is plenty of air circulation and dabbled sunlight typically looks best in the warm weather. Fescue lawns with heavy shade and little air circulation tend to thin from brown patch disease. Brown patch occurs in fescue lawns anytime the grass stays wet for 5 hours or more at a time and nighttime temperatures are in the 70s. During the hottest and driest time of the season, brown patch is often self-inflicted by watering your fescue in the morning and evening, a common incorrect watering habit on fescue lawns in July and August.

Brown Patch develops in fescue lawns that have an area of low air circulation or heavy shade during the summer if the area stays wet for more than 5 hours at a time. Don't create Brown Patch with your watering practices. Allow your fescue time to dry between waterings.

Inspect Shady Lawn Areas
September through October is the best time of the year to establish fescue. Now is the time to assess the areas of the lawn where bermuda has become thin due to increasing shade (Bermuda needs at least 6 hours of direct sunlight to be thick), areas of the lawn where fescue did not perform well because of very dense shade (Fescue needs at least some dappled sun), and areas of fescue that have been damaged by brown patch this summer. Because fescue does not spread, you should plan on adding some seed every fall.
Best Fescue Lawn Practice for August – Inspect and evaluate your turf. Check shade patterns and make a plan for overseeding low light areas with fescue this fall.
Need Help Evaluating Your Shady Areas?
We would be happy to evaluate your shade and make a recommendation.
Just give us a call at (405)367-3873 or respond to this email.
Insect Watch
If Grubs have been a problem in your lawn, August is the time to apply an insecticide. Remember, the insecticide will kill desirable insects also. Only treat for grubs if there is evidence of a problem.
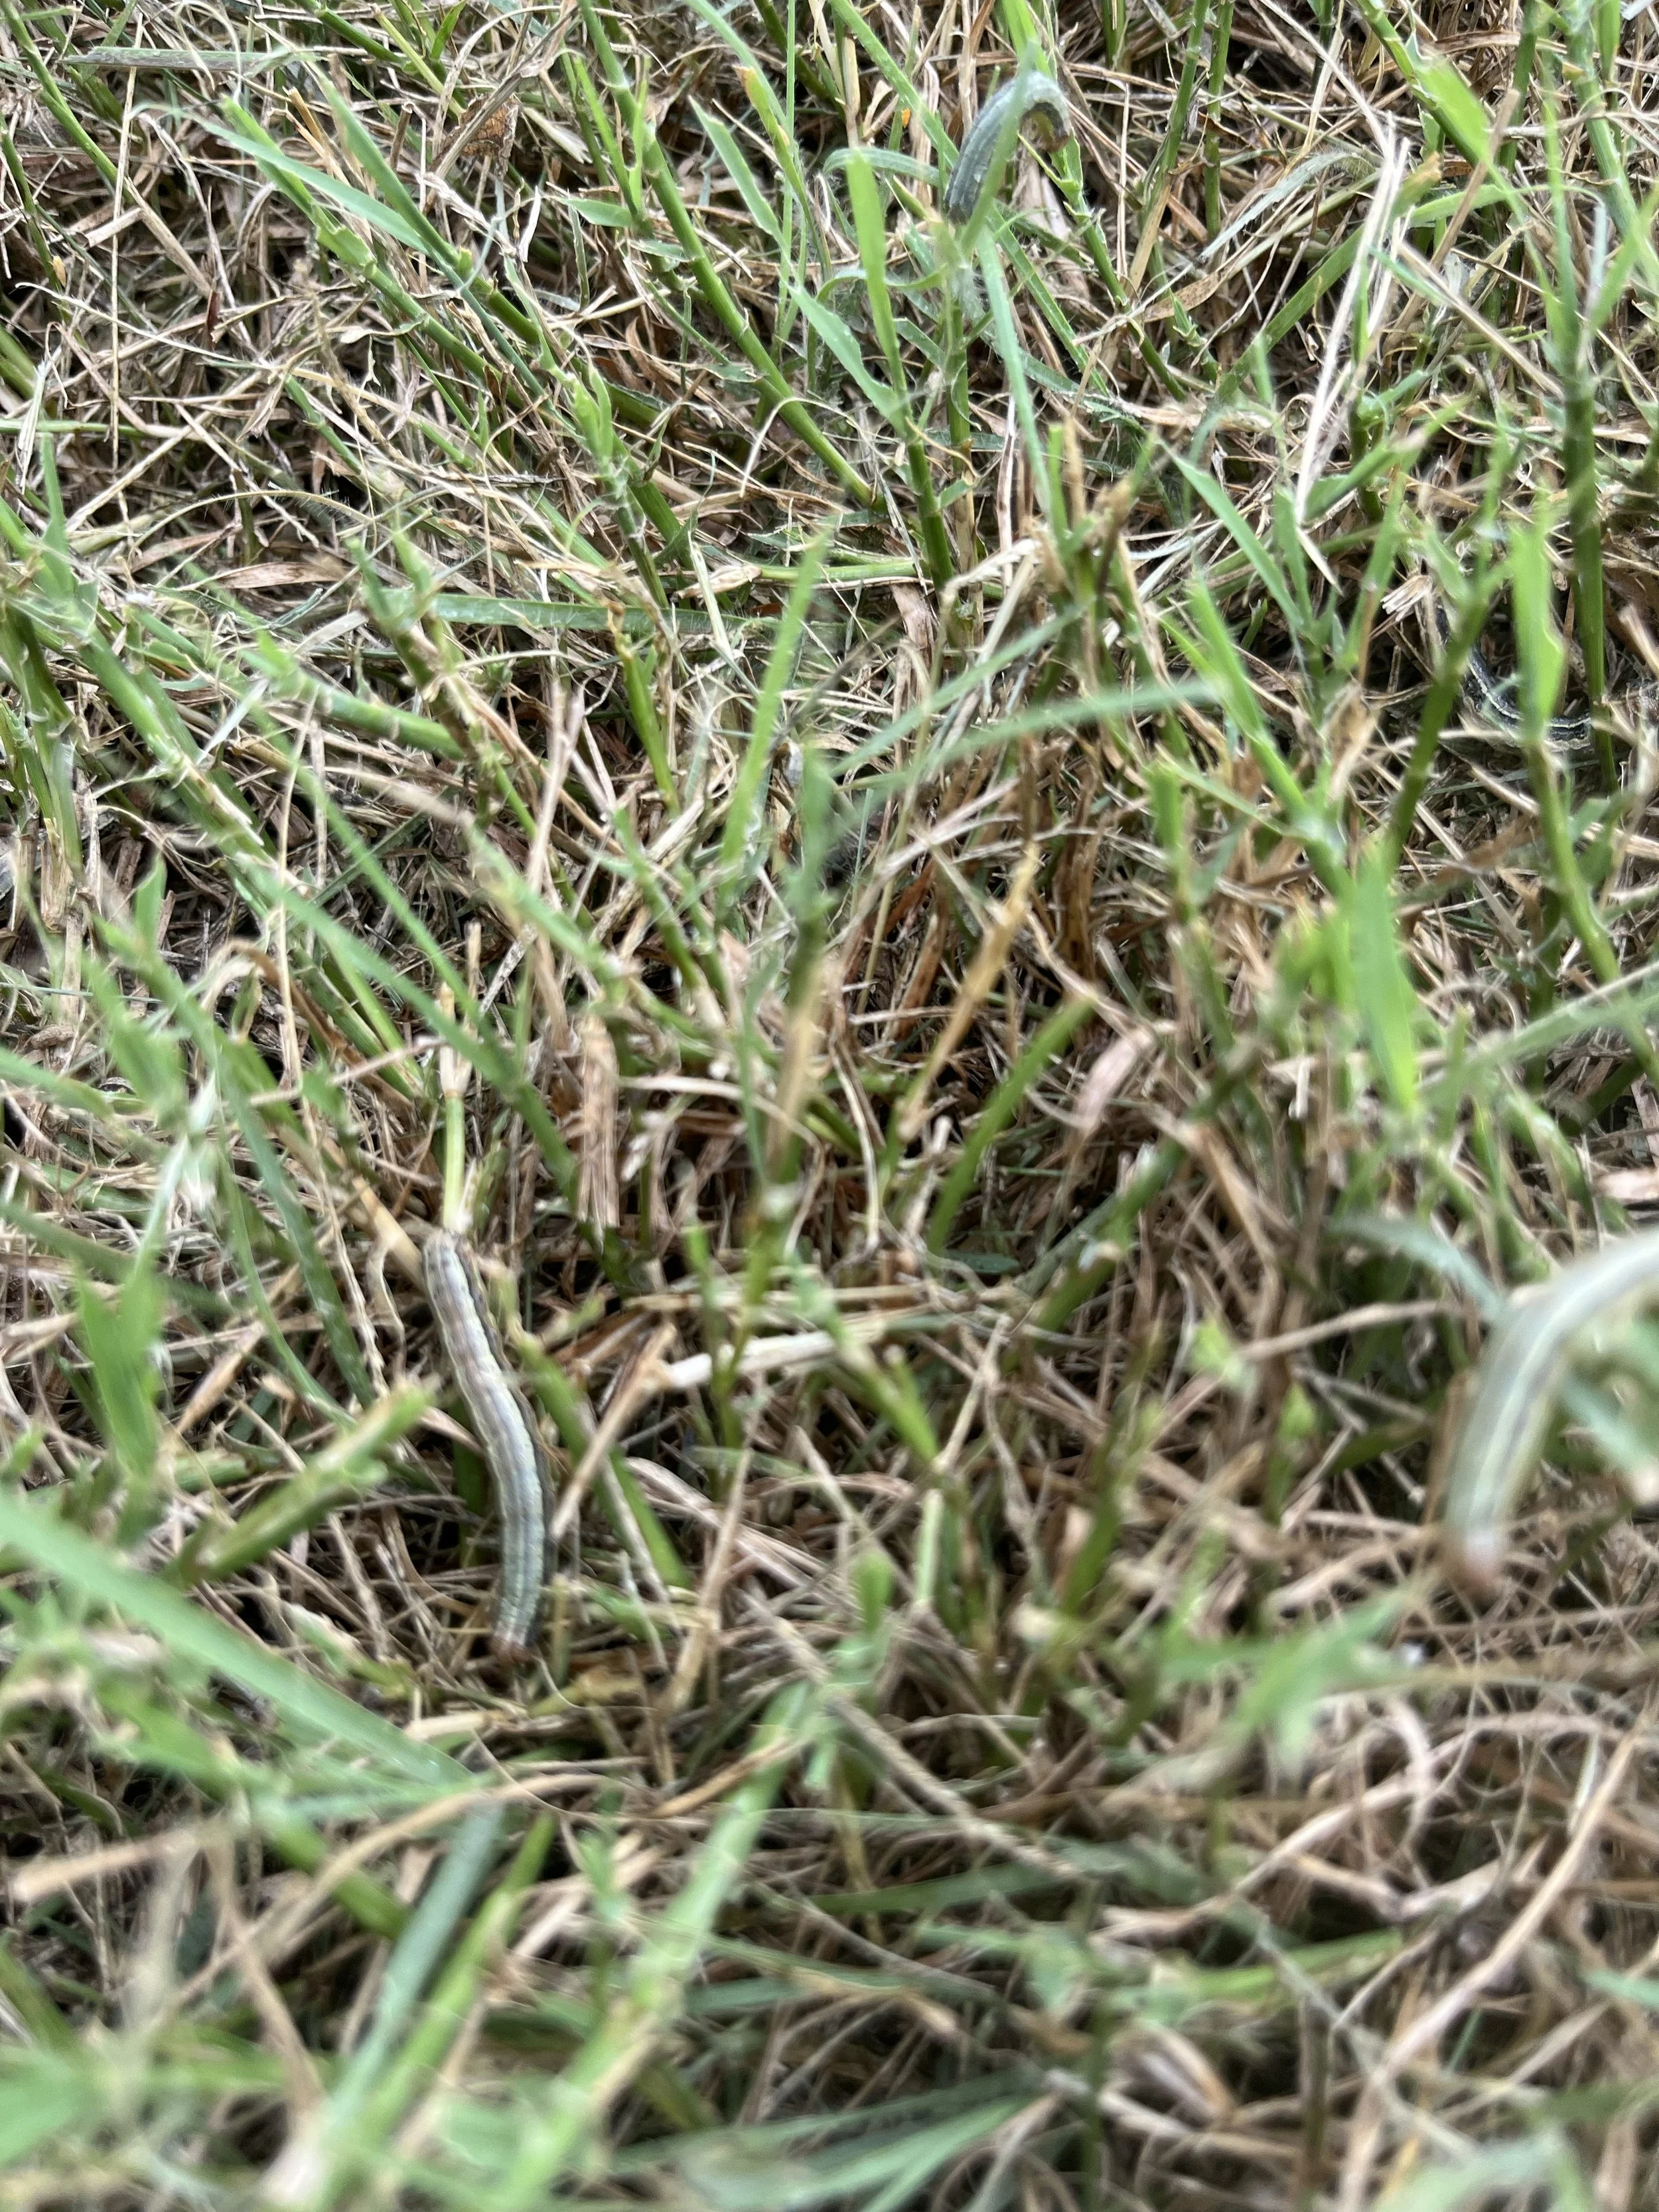
Keep on the lookout for Army Worms. We continue to find active army worms causing damage in isolated areas of the metro. There are 4 to 5 generations between July and November with each generation increasing in numbers, so early control is best. Early caterpillars are green and very small. As they grow to 1 to 1 ½” they turn browner with reddish brown stripes on each side of the body and small back spots on the top. Their distinctive mark is an inverted “Y” on the front of the head. Army worms will feed on any leafy, soft plant with plenty of moisture in the leaf. Typically, in August they will feed mostly on bermuda because of an abundance of healthy leaf blades and less on fescue because it is not flourishing as much in August. Watch for areas of the lawn that appear to have drought stress should not be. Test the area with a soap flush. Mix 1 teaspoon of dish soap with 1 gallon of water and pour over the surface. If you have army worms, they will come to the surface. Treatment with a systemic insecticide when the worms are small before they become heavy feeders is best. Need more information on Army Worms, check out our article from July 13th.
Continue to inspect shrubs for Aphids and treat as needed. A common host plant is the Crape Myrtle.
Inspect your trees and shrubs for active Bagworms. If you need help controlling bagworms, give us a call. When possible, remove and throw away bagworms. Don’t toss them on the ground because they will crawl back onto your plants.
Watch for Webworms in your trees this month. The later generations of webworm are the ones that cause damage. If noticed early when the webbing is small, simply cutting the branch out is the best control. If spraying is required, you must penetrate the webbing to gain control.
Best Insect Control Practice for August – Spend a few minutes inspecting your lawn and landscape for insect activity. Treat as needed.

A common problem on Hackberry trees in the summer is nipple gall. Unfortunately little can be done to control gall-making insects.

When you remove bagworms please dispose of them. This little guy is slowly climbing back up a tree to do more destruction.


Summer annual color mixture of Joseph Coat, Sunpatien, Angelonia, Penta, Coleus, and Lantana.

This summer’s Crape Myrtle colors have been brilliant.
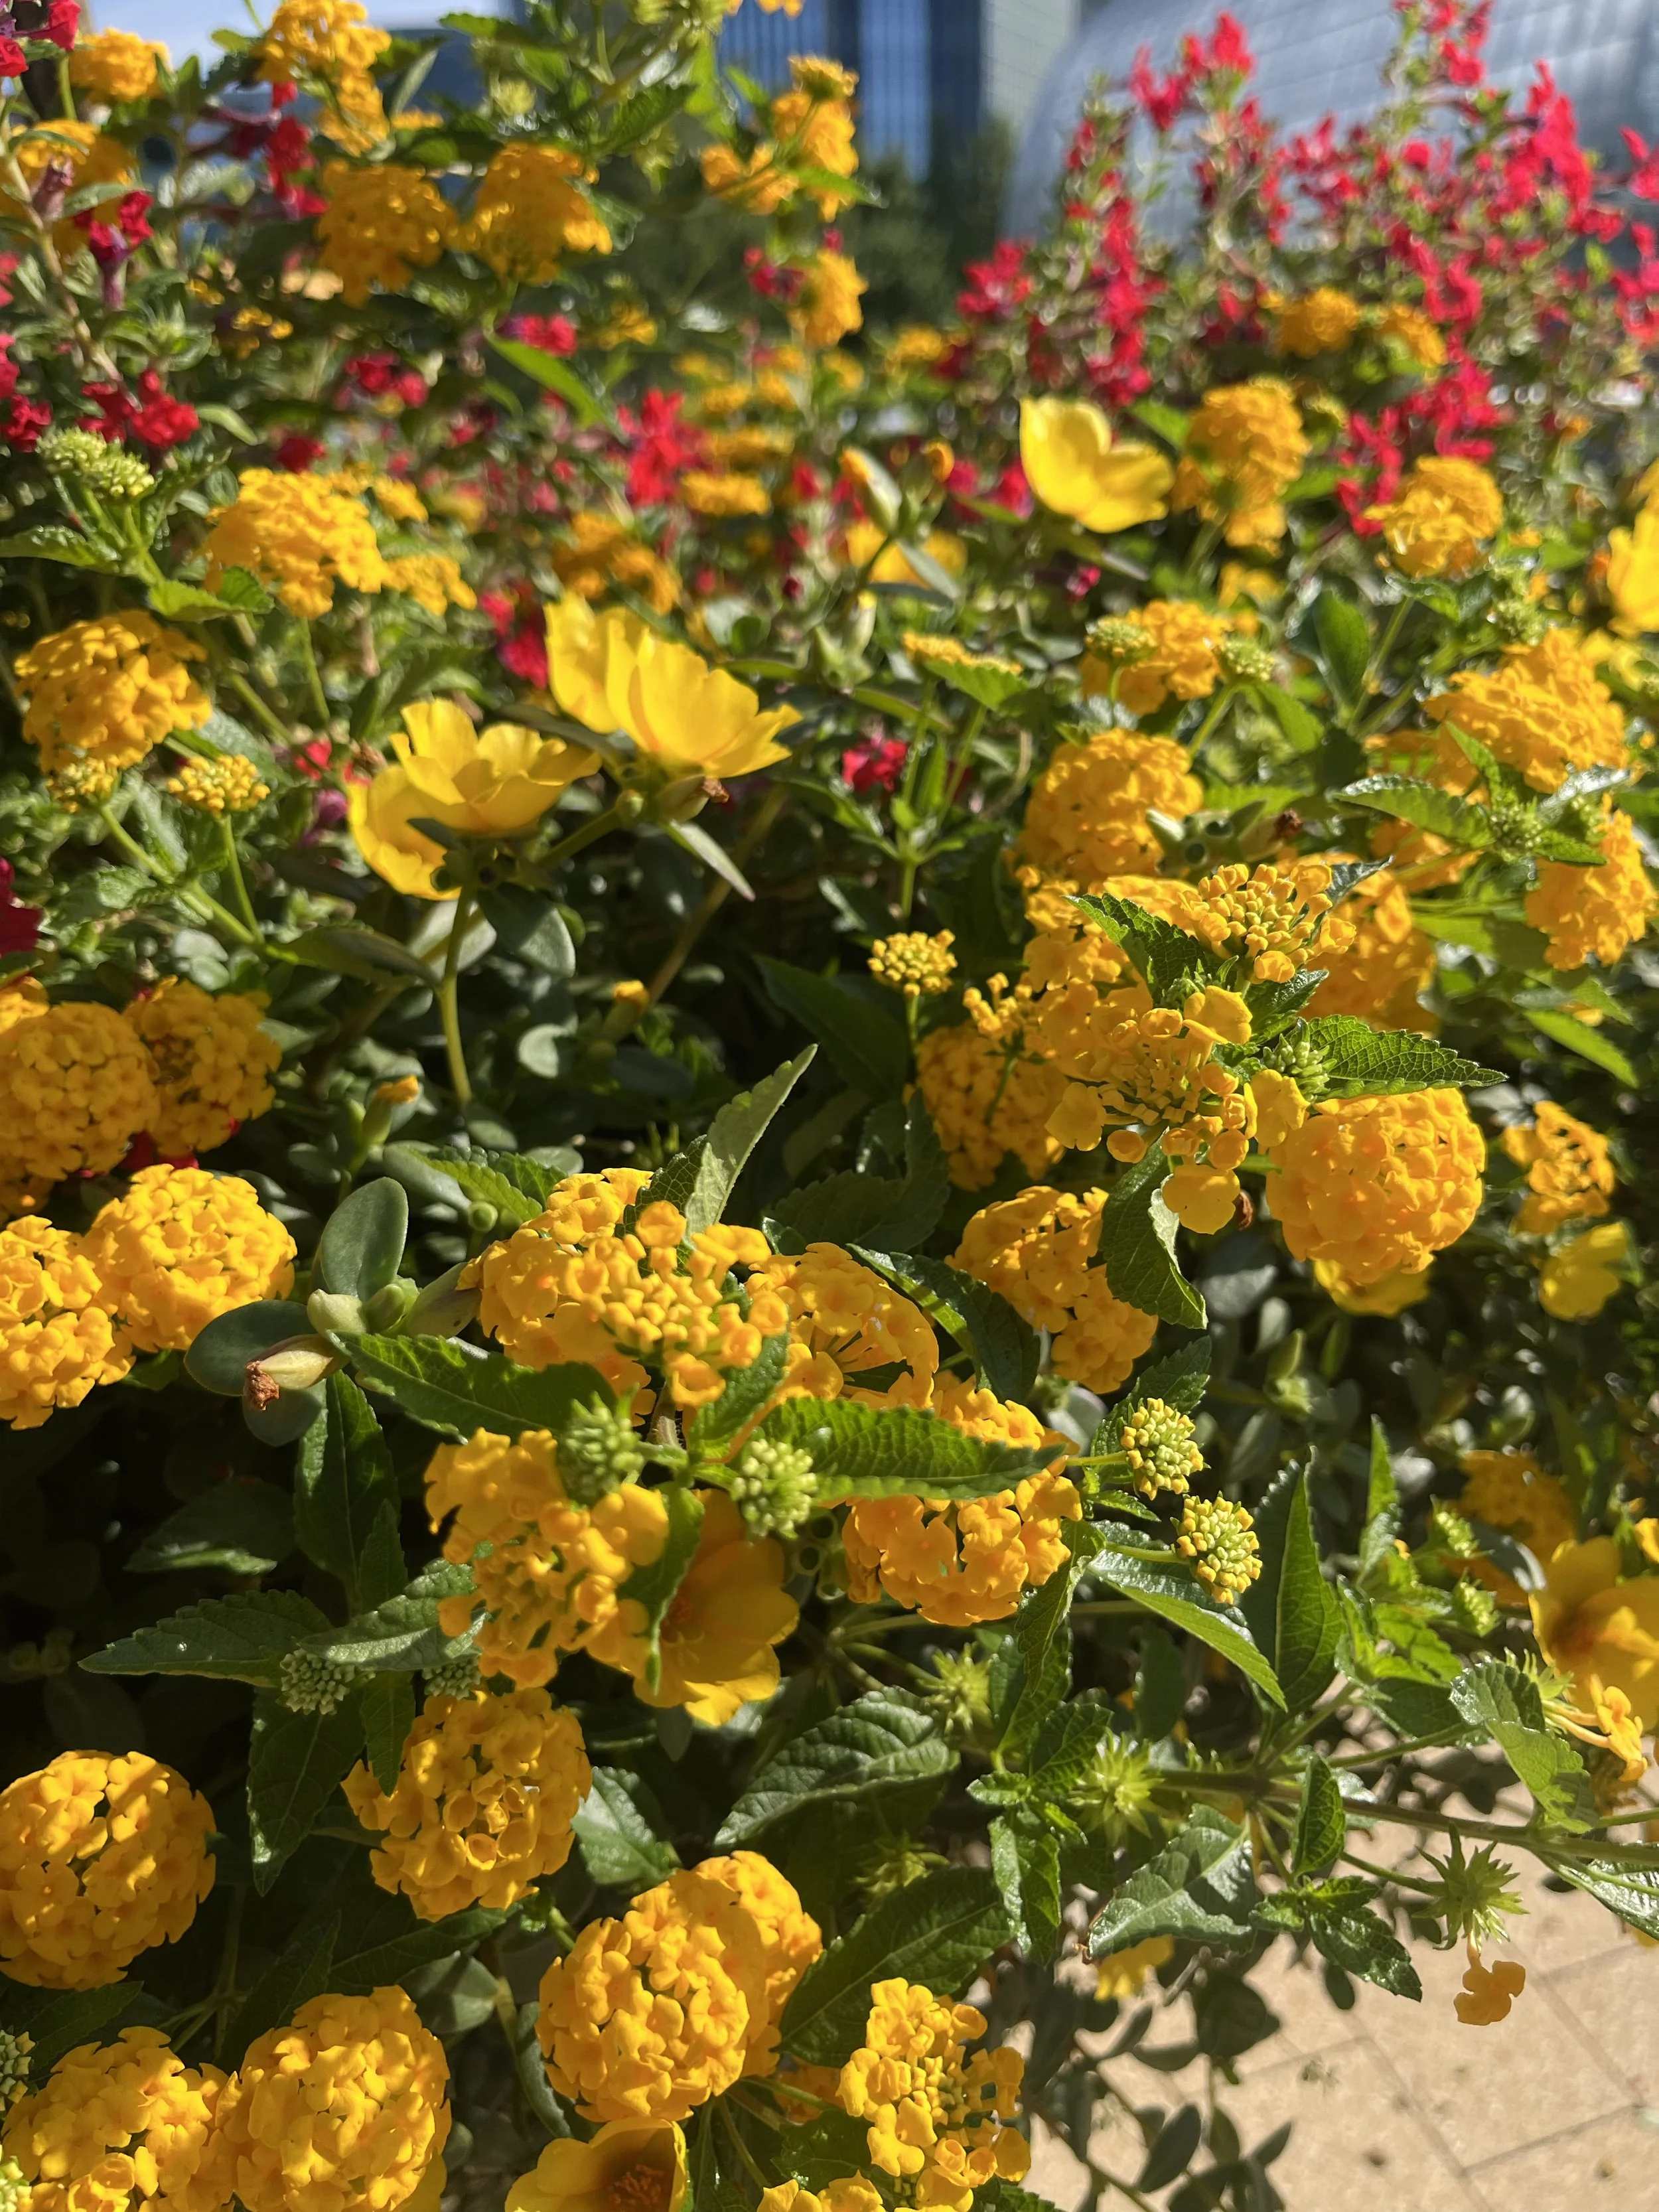
Lantana
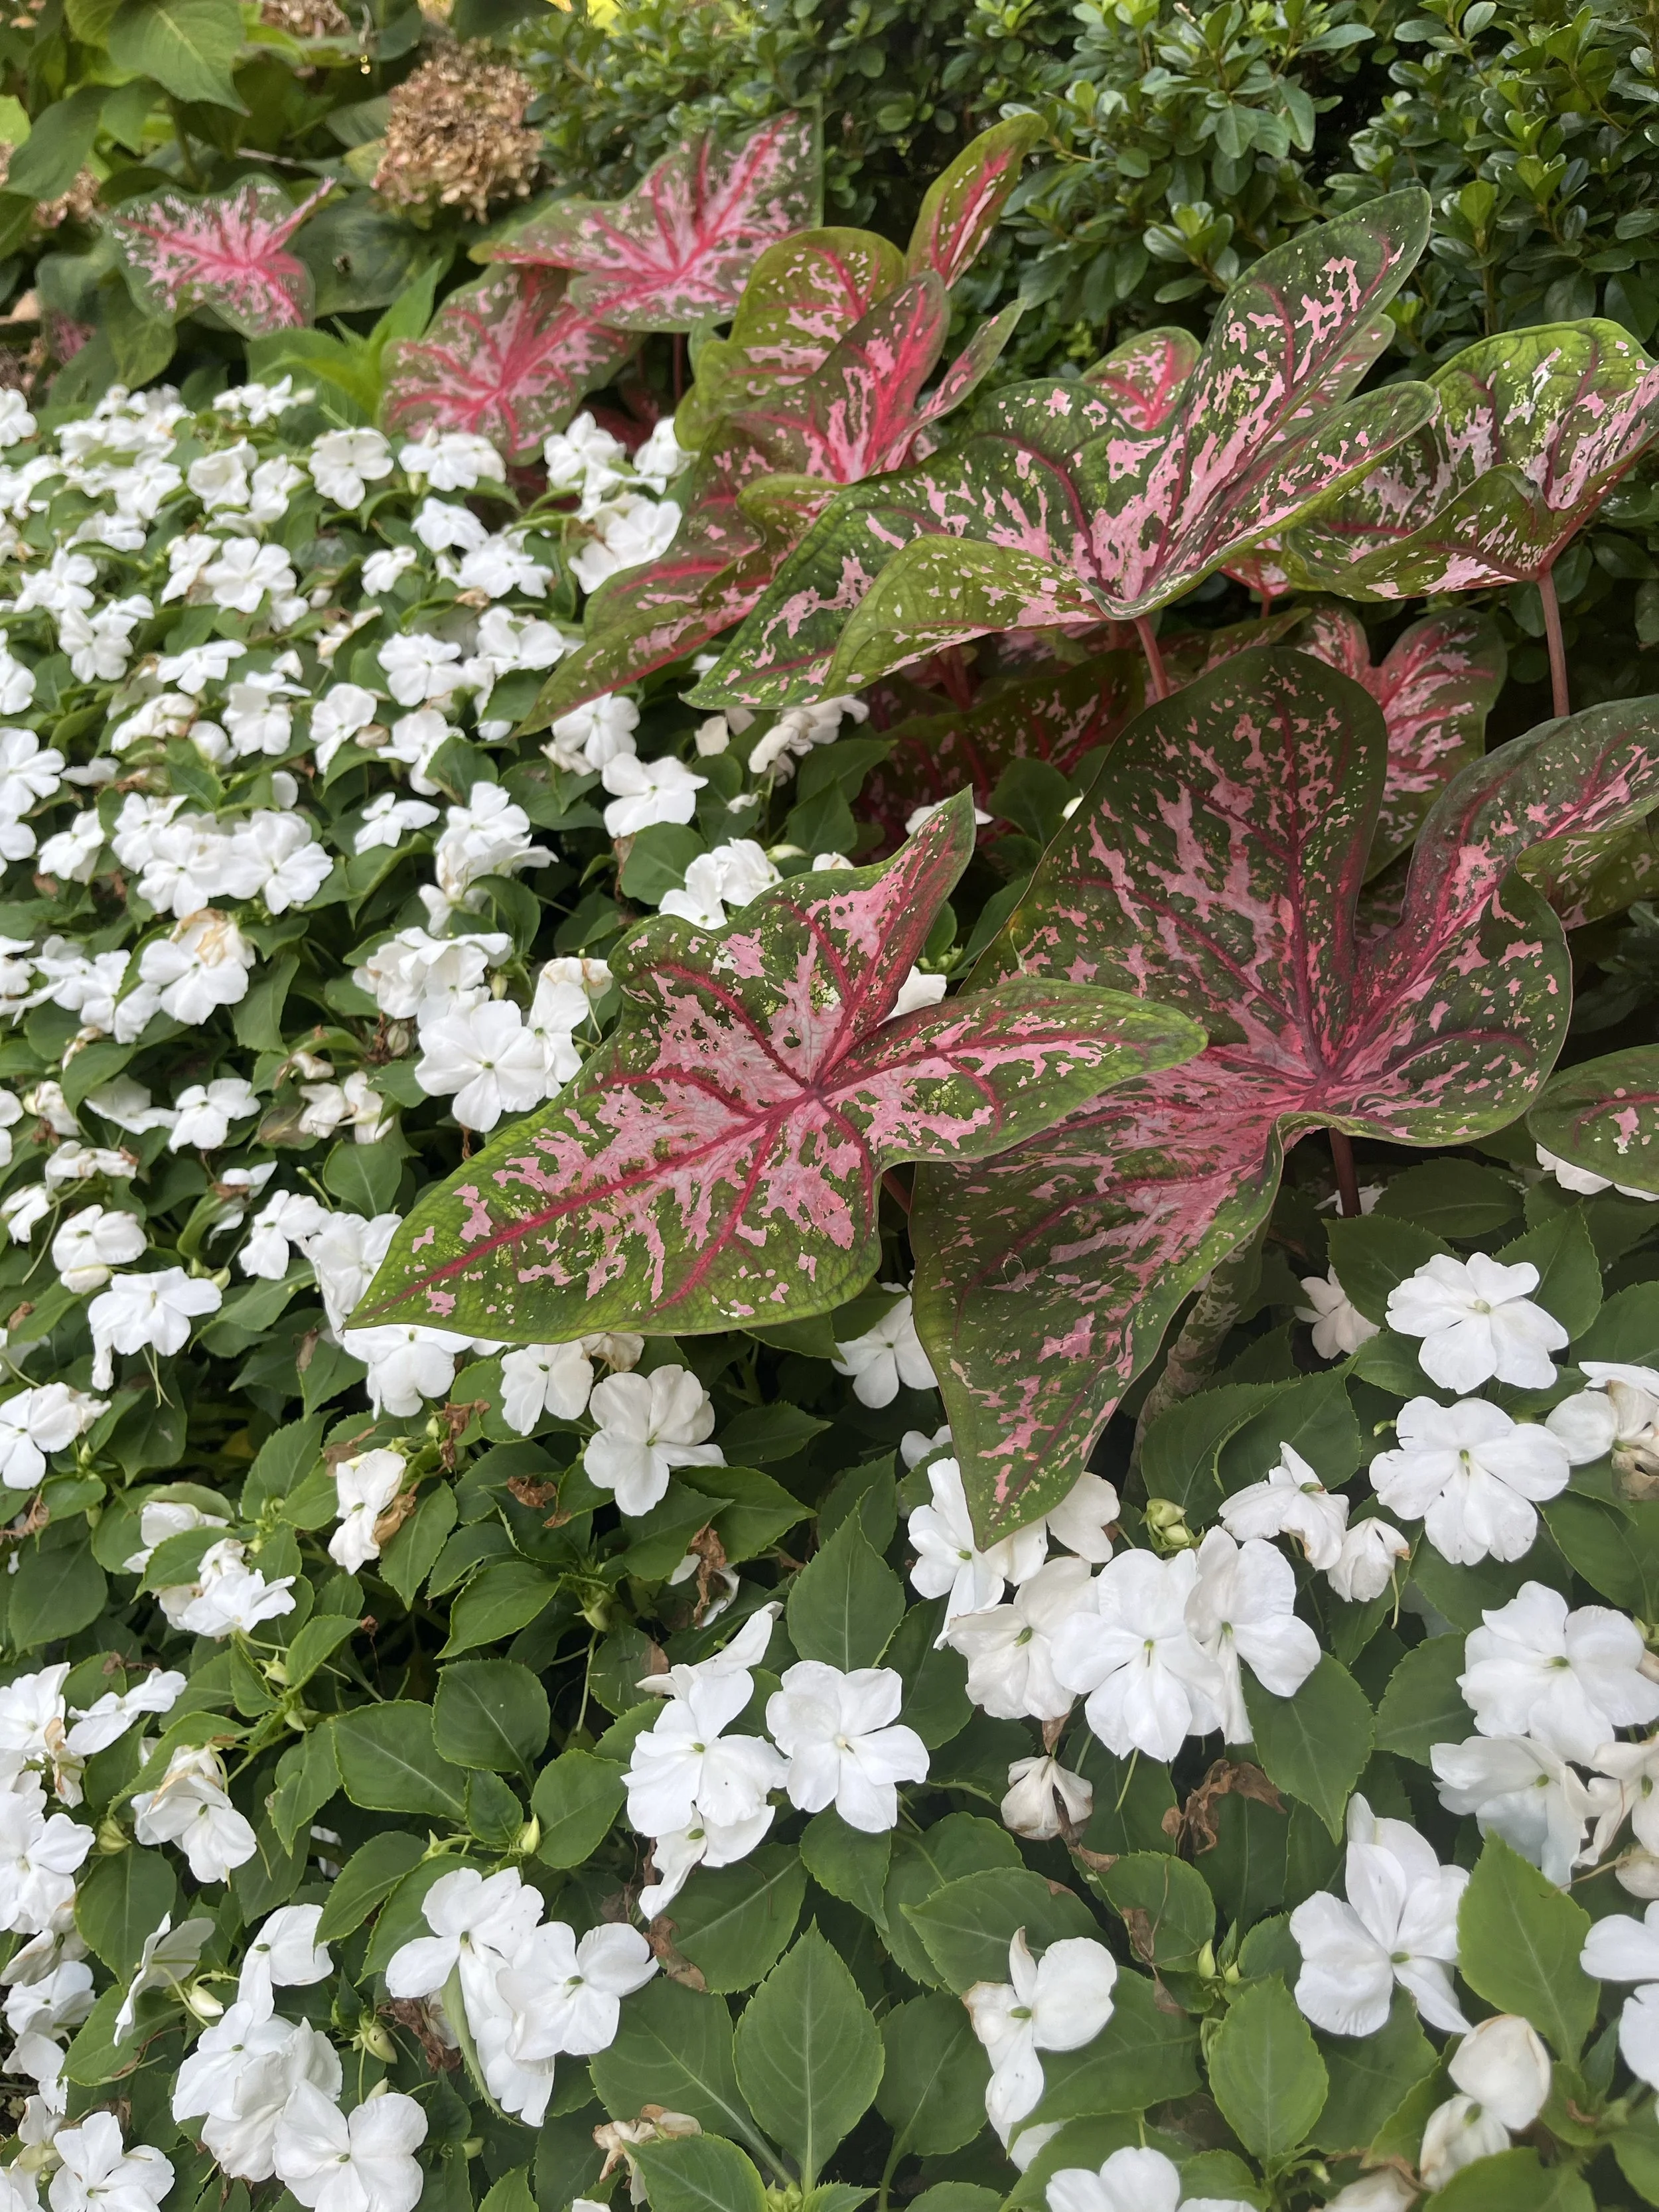
Shady summer annual color mixture of Impatiens and Caladium.

Limelight Hydrangeas can’t be beat for colorful summer shrub. This is a ‘Little Lime’ and is great for smaller areas.
Landscape Color
How has the color been in your landscape this season? Sometime this month take pictures and make notes of the plants that are doing the best in your landscape.
Black-eyed Susan’s are the perfect perennial to add color to the landscape during July and August.
Crape Myrtles are loving the warm days and rewarding us with abundant summer color this year.
Limelight Hydrangeas continue to brighten the landscape even on the hottest of days.
Lantana, Penta, and Periwinkle are just a few summer annuals that are at their best now.
What is adding great color to your landscape right now? We want to know. Send pictures please.

Lantana is one of the best heat-loving annuals and with so many varieties, there is a right one for every landscape.

Angelonia is becoming a favorite summer annual. It has profile spikes of color and is available in white and shades of pinks and purples.

Crape Myrtle and Black-eyed Susan’s are a great color combination for late summer color.

Limelight Hydrangeas continue to add large white blossoms to the summer landscape.

Coleus is a great summer annual with big colorful leaves that at interest to the summer landscape.

Black-eyed Susan’s add a splash of bright color to the hot summer landscape.

Lantana is one of the best annual color plants for a summer filled with above average temperatures.

Brake Light Yucca are a fun addition to the summer landscape.

Shasta Daisies are nearing the end of their summer color show.

The best perennial plantings are the ones that have something blooming spring to fall. I challenge you to find another perennial that puts on a better color show in August than Black-eyed Susans.

Periwinkle is a lover of the summer heat.

Keep faded blooms pruned off and you will extend their bloom time a few more weeks.

August is a great time to evaluate your summer annual color and make notes on what worked and what didn’t. This planting of Sunpatien, Begonia, Penta, Joseph Coat, and Melampodium started the summer looking great. But over the last few weeks the Melampodium has over powered the rest of the color. Note: “If using Melampodium plant it in the back.”

Endless Summer Hydrangeas will add more blooms this month.


Having a great lawn and landscape through the heat of the summer is a result of good maintenance practices year after year.
A great lawn and landscape are not the result of one season, or even a full year of focus.
A great environment is the result of discovering and developing great practices and then repeating them season after season, year after year.
If you need assistance in developing great practices or have questions concerning your lawn and landscape, give us a call.
Lorne Hall
Hall | Stewart Lawn + Landscape
(405) 367-3873
Fescue’s Summer Off Season

Question: What is one of the best things about living in Oklahoma?
Did anyone say: Living in the transition zone?
I’m guessing that was no one’s answer.
What is the transition zone? It is the area across the middle of the US between where warm season turf grows in the south and cool season grasses grow in the north.
The Transition Zone is the area of the country you can choose to grow either warm season or cool season grasses.
Bermuda is the common warm season turfgrass in our region. The advantage bermuda has is it loves the summer heat and as long as it receives moisture, it will be at its best in July and August.
Fescue is the cool season option. Fescue tolerates more shade and stays green nearly year-round. You can’t beat the deep rich color in the spring and fall. Fescue stays green well into December, often keeps some color through the winter, and as soon as the winter starts to break in early March, fescue bursts back to life.
Both have their off seasons.
Bermuda’s off season starts in November and continues until April. During this time, it goes fully dormant and turns straw-brown for months.
When is fescue’s off season?
Yes, fescue loses its green color in the winter and stops growing. So, yes, fescue has an off season in the winter, but much shorter than bermuda. Fescue goes through another slump in July through August when temperatures above 95 degrees are common. During fescue’s summer off season, growth slows and the color isn’t as intense. But, when a fescue lawn is healthy and growing under the best conditions, the summer off season is barely noticeable.
In April, customers with bermuda lawns often ask why their lawn isn’t as green as the fescue lawns on their block.
And, right now with 10 consecutive 90+ degree days, customers with fescue lawns are asking questions about why their fescue isn’t looking as good as it did in June.

Fescue lawn with dappled sunshine.
July through August is fescue’s second off season while bermuda is at peak season!
Bermuda will always have more color than fescue in July and August, but March through June and again October into December, fescue will always win the color battle.

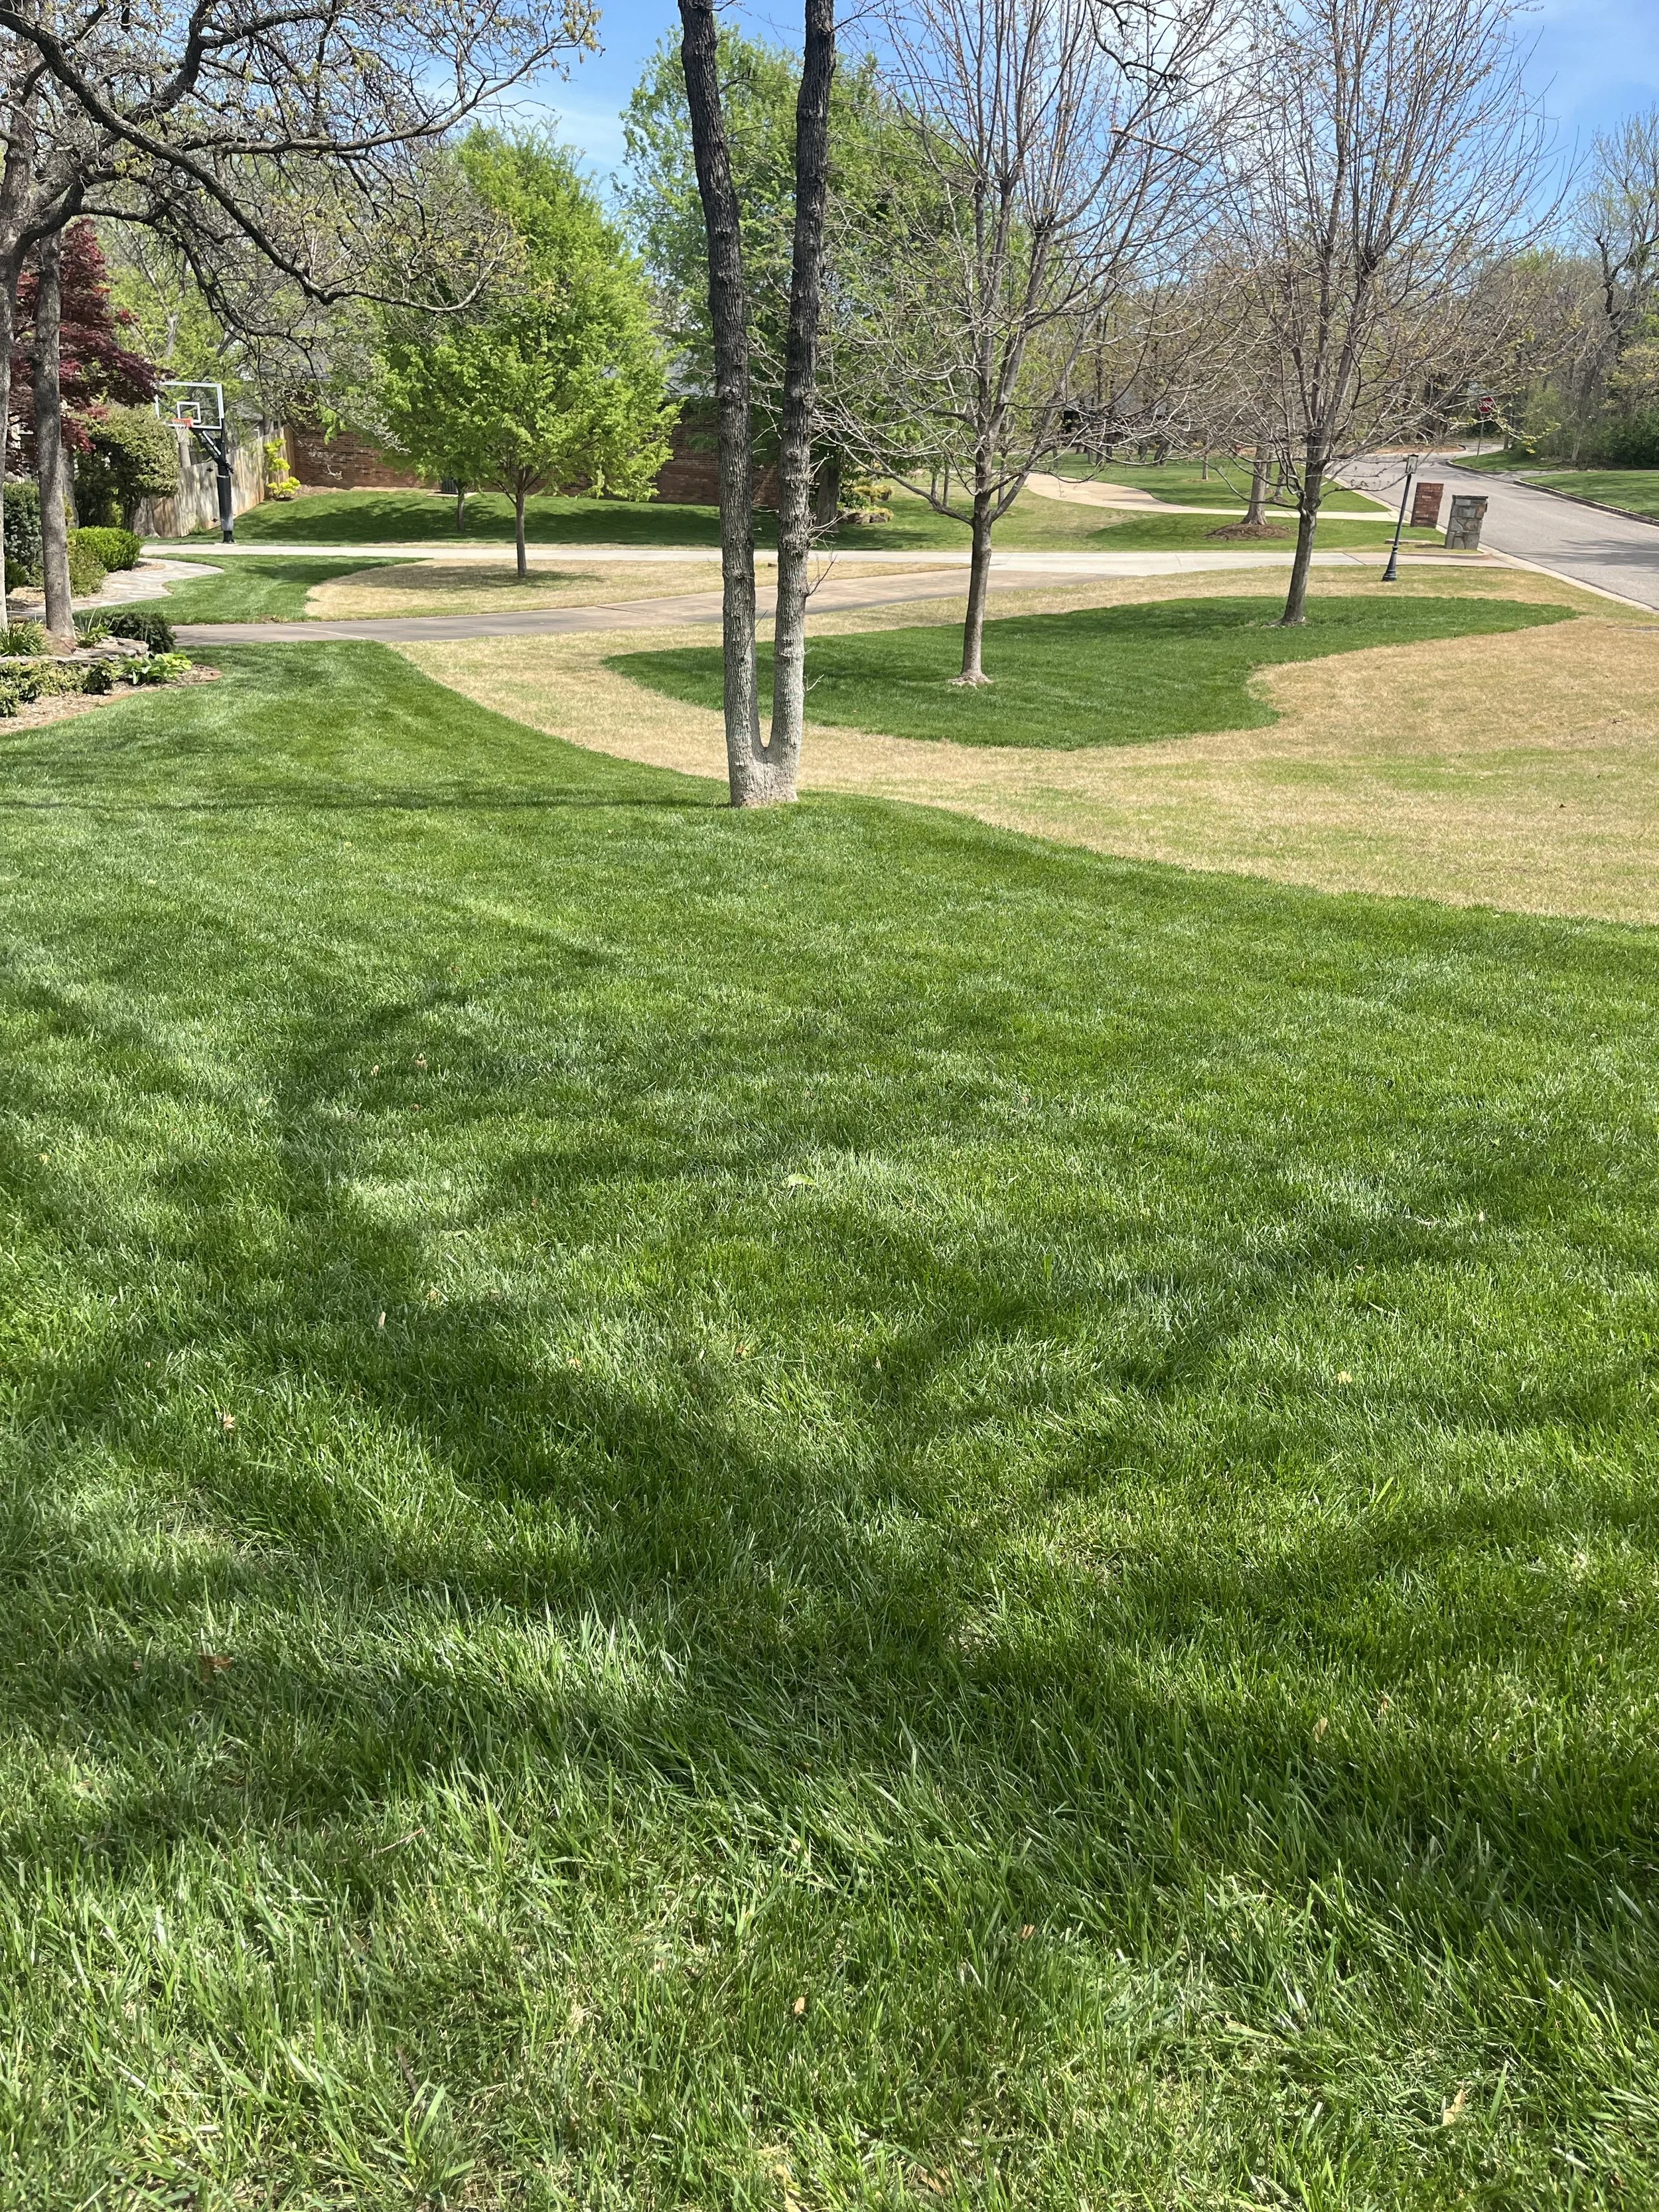
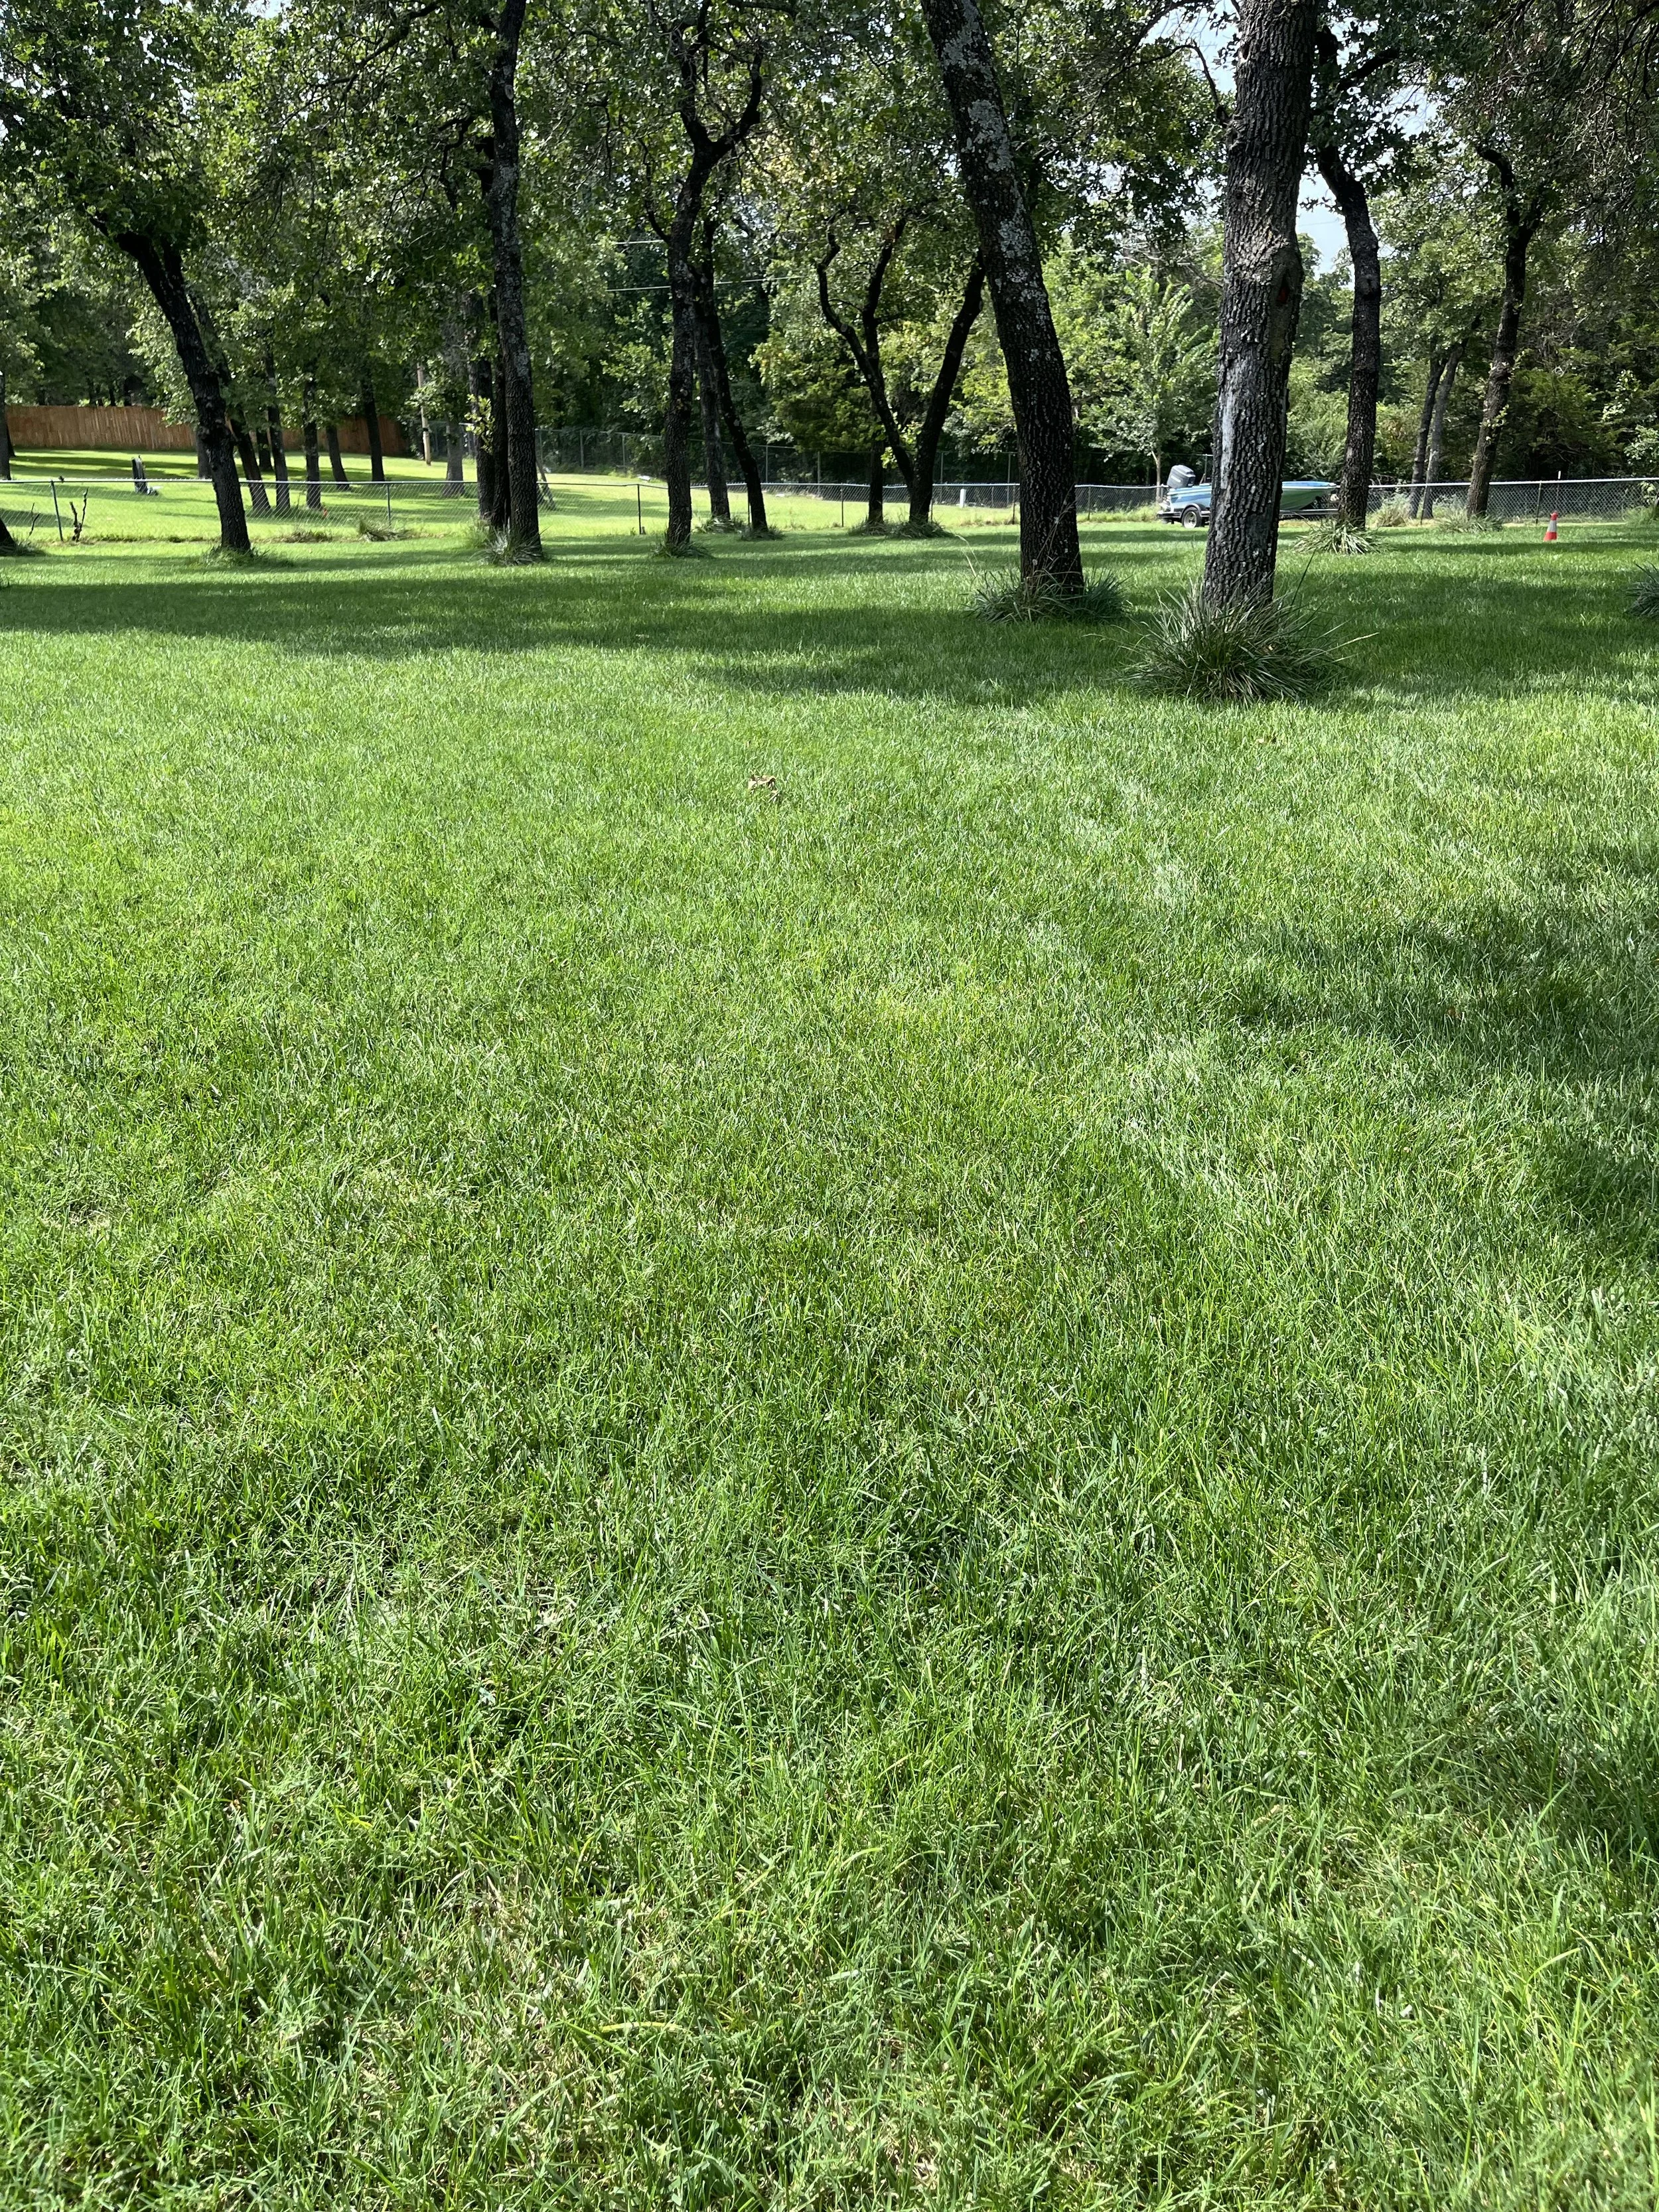
Fescue when watered and mowed properly in full sun in the heat of the summer.
How do you keep a fescue lawn looking its best in the summer heat?
Let’s run through a list of best and worst practices for fescue during its summer off season.
Best practices for keeping fescue looking good during July and August:
Mow fescue at 3” – 3 ½”. The more leaf space the better color and the more drought tolerant the lawn will be.
Water deep. Water infrequent. Water in the early morning. Fescue lawns that are receiving 1 ½” of moisture per week, on an every other day schedule, only in the morning, look the best in the heat of summer.
Fescue lawns that receive at least some dappled sunlight and are in areas of good air circulation look the best during the summer heat.
Fescue lawns that are aerated in the fall have stronger root systems and can better withstand hot, dry days.
A properly watered and mowed fescue lawn last year during the first week of August.
Worst practices for fescue during the summer heat:
Don’t over water. Short, frequent watering does far more harm than good. It is a myth that fescue needs watered daily during the heat of July and August. When temperatures are hot and fescue stays wet for more than 6 hours at a time, brown patch will damage the turf. When brown patch starts spreading in a fescue lawn, it looks like the lawn needs more water. The natural response is to water more which makes the problem worse. It is common when making site visits where customers are concerned about their fescue to discover brown patch is the problem. Often the homeowner has increased watering to two times per day, morning and evening, every day trying to keep the fescue alive, all the while making it worse.


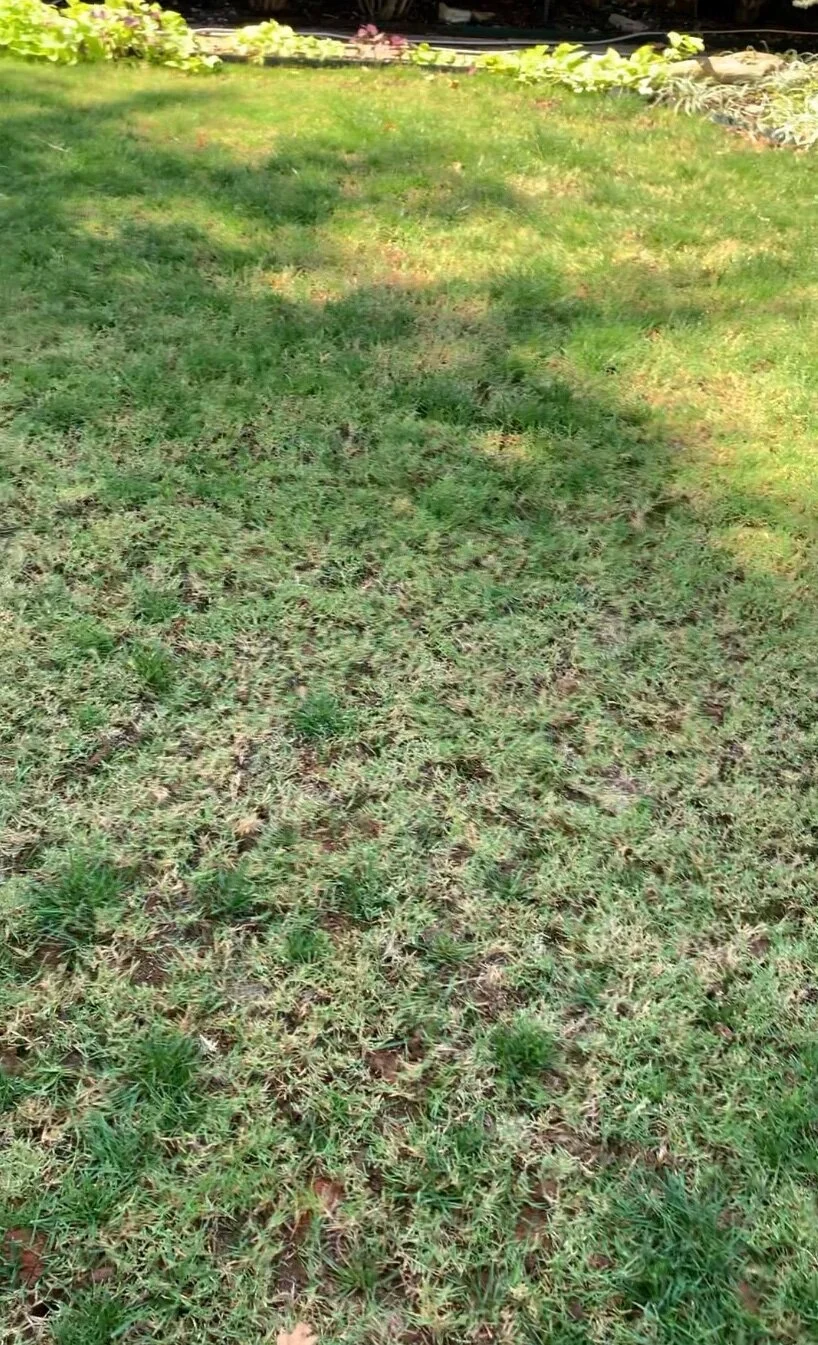
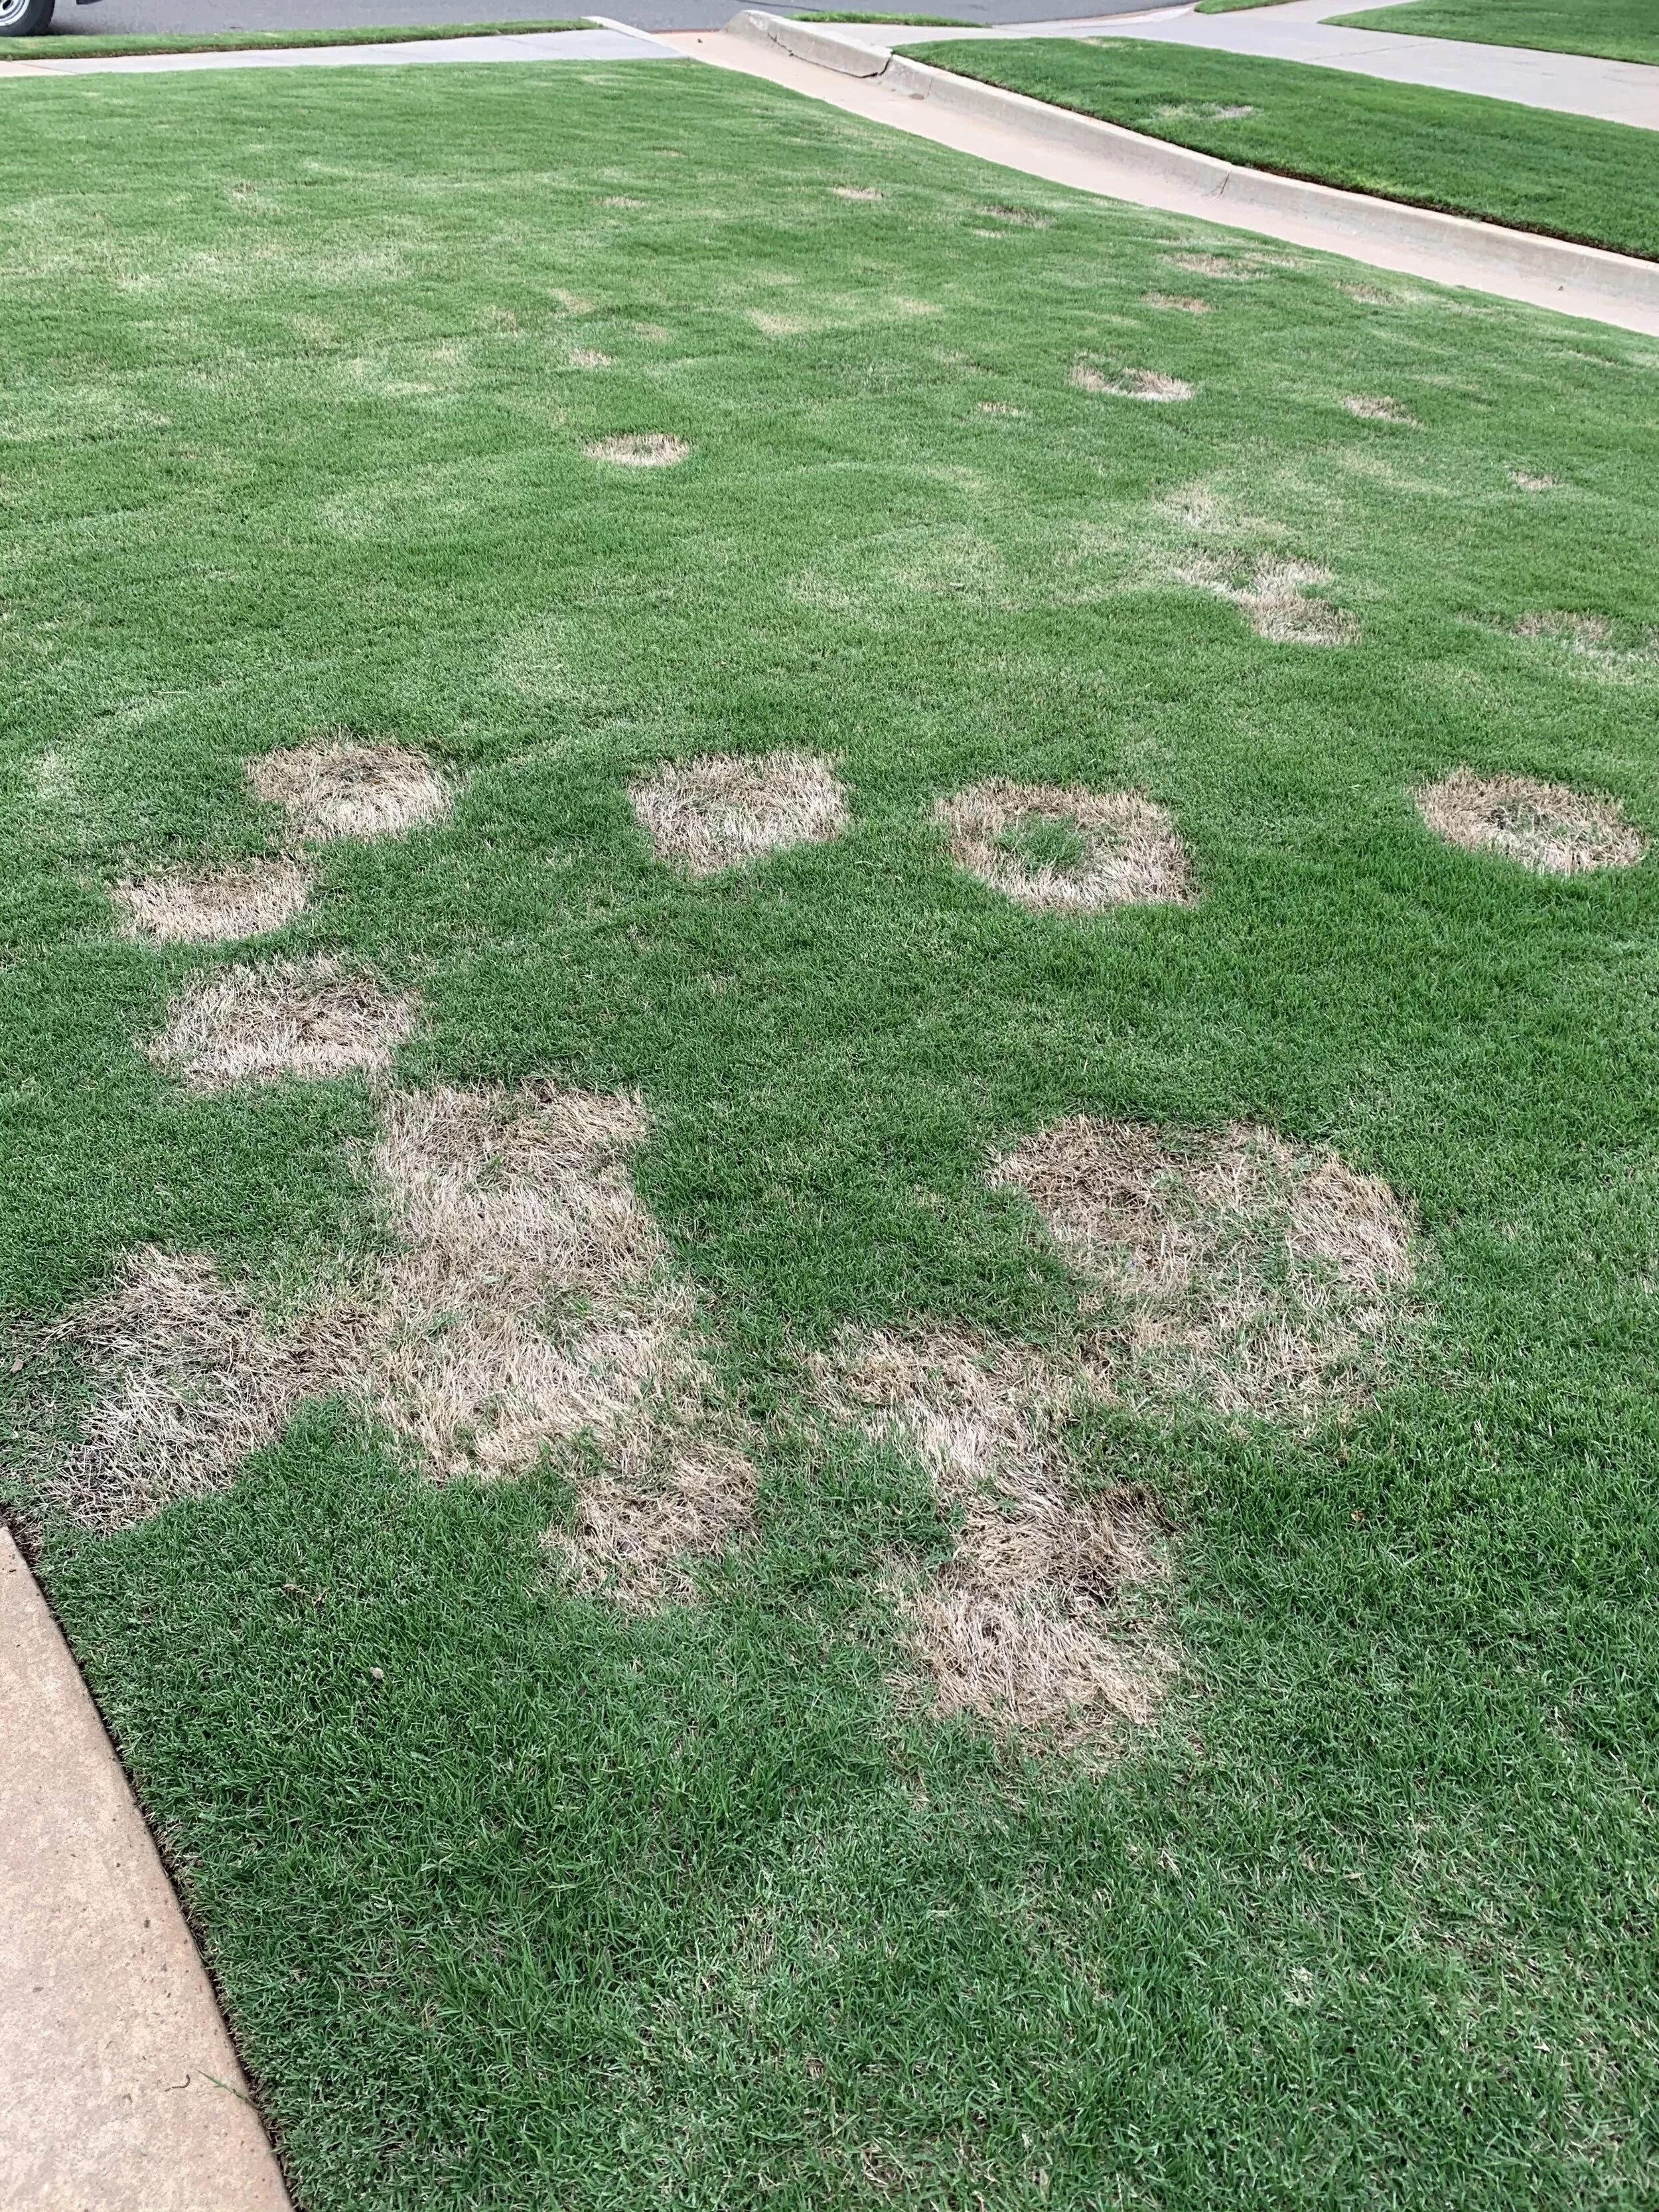
Brown patch in fescue.

Fescue with a mild case of brown patch.
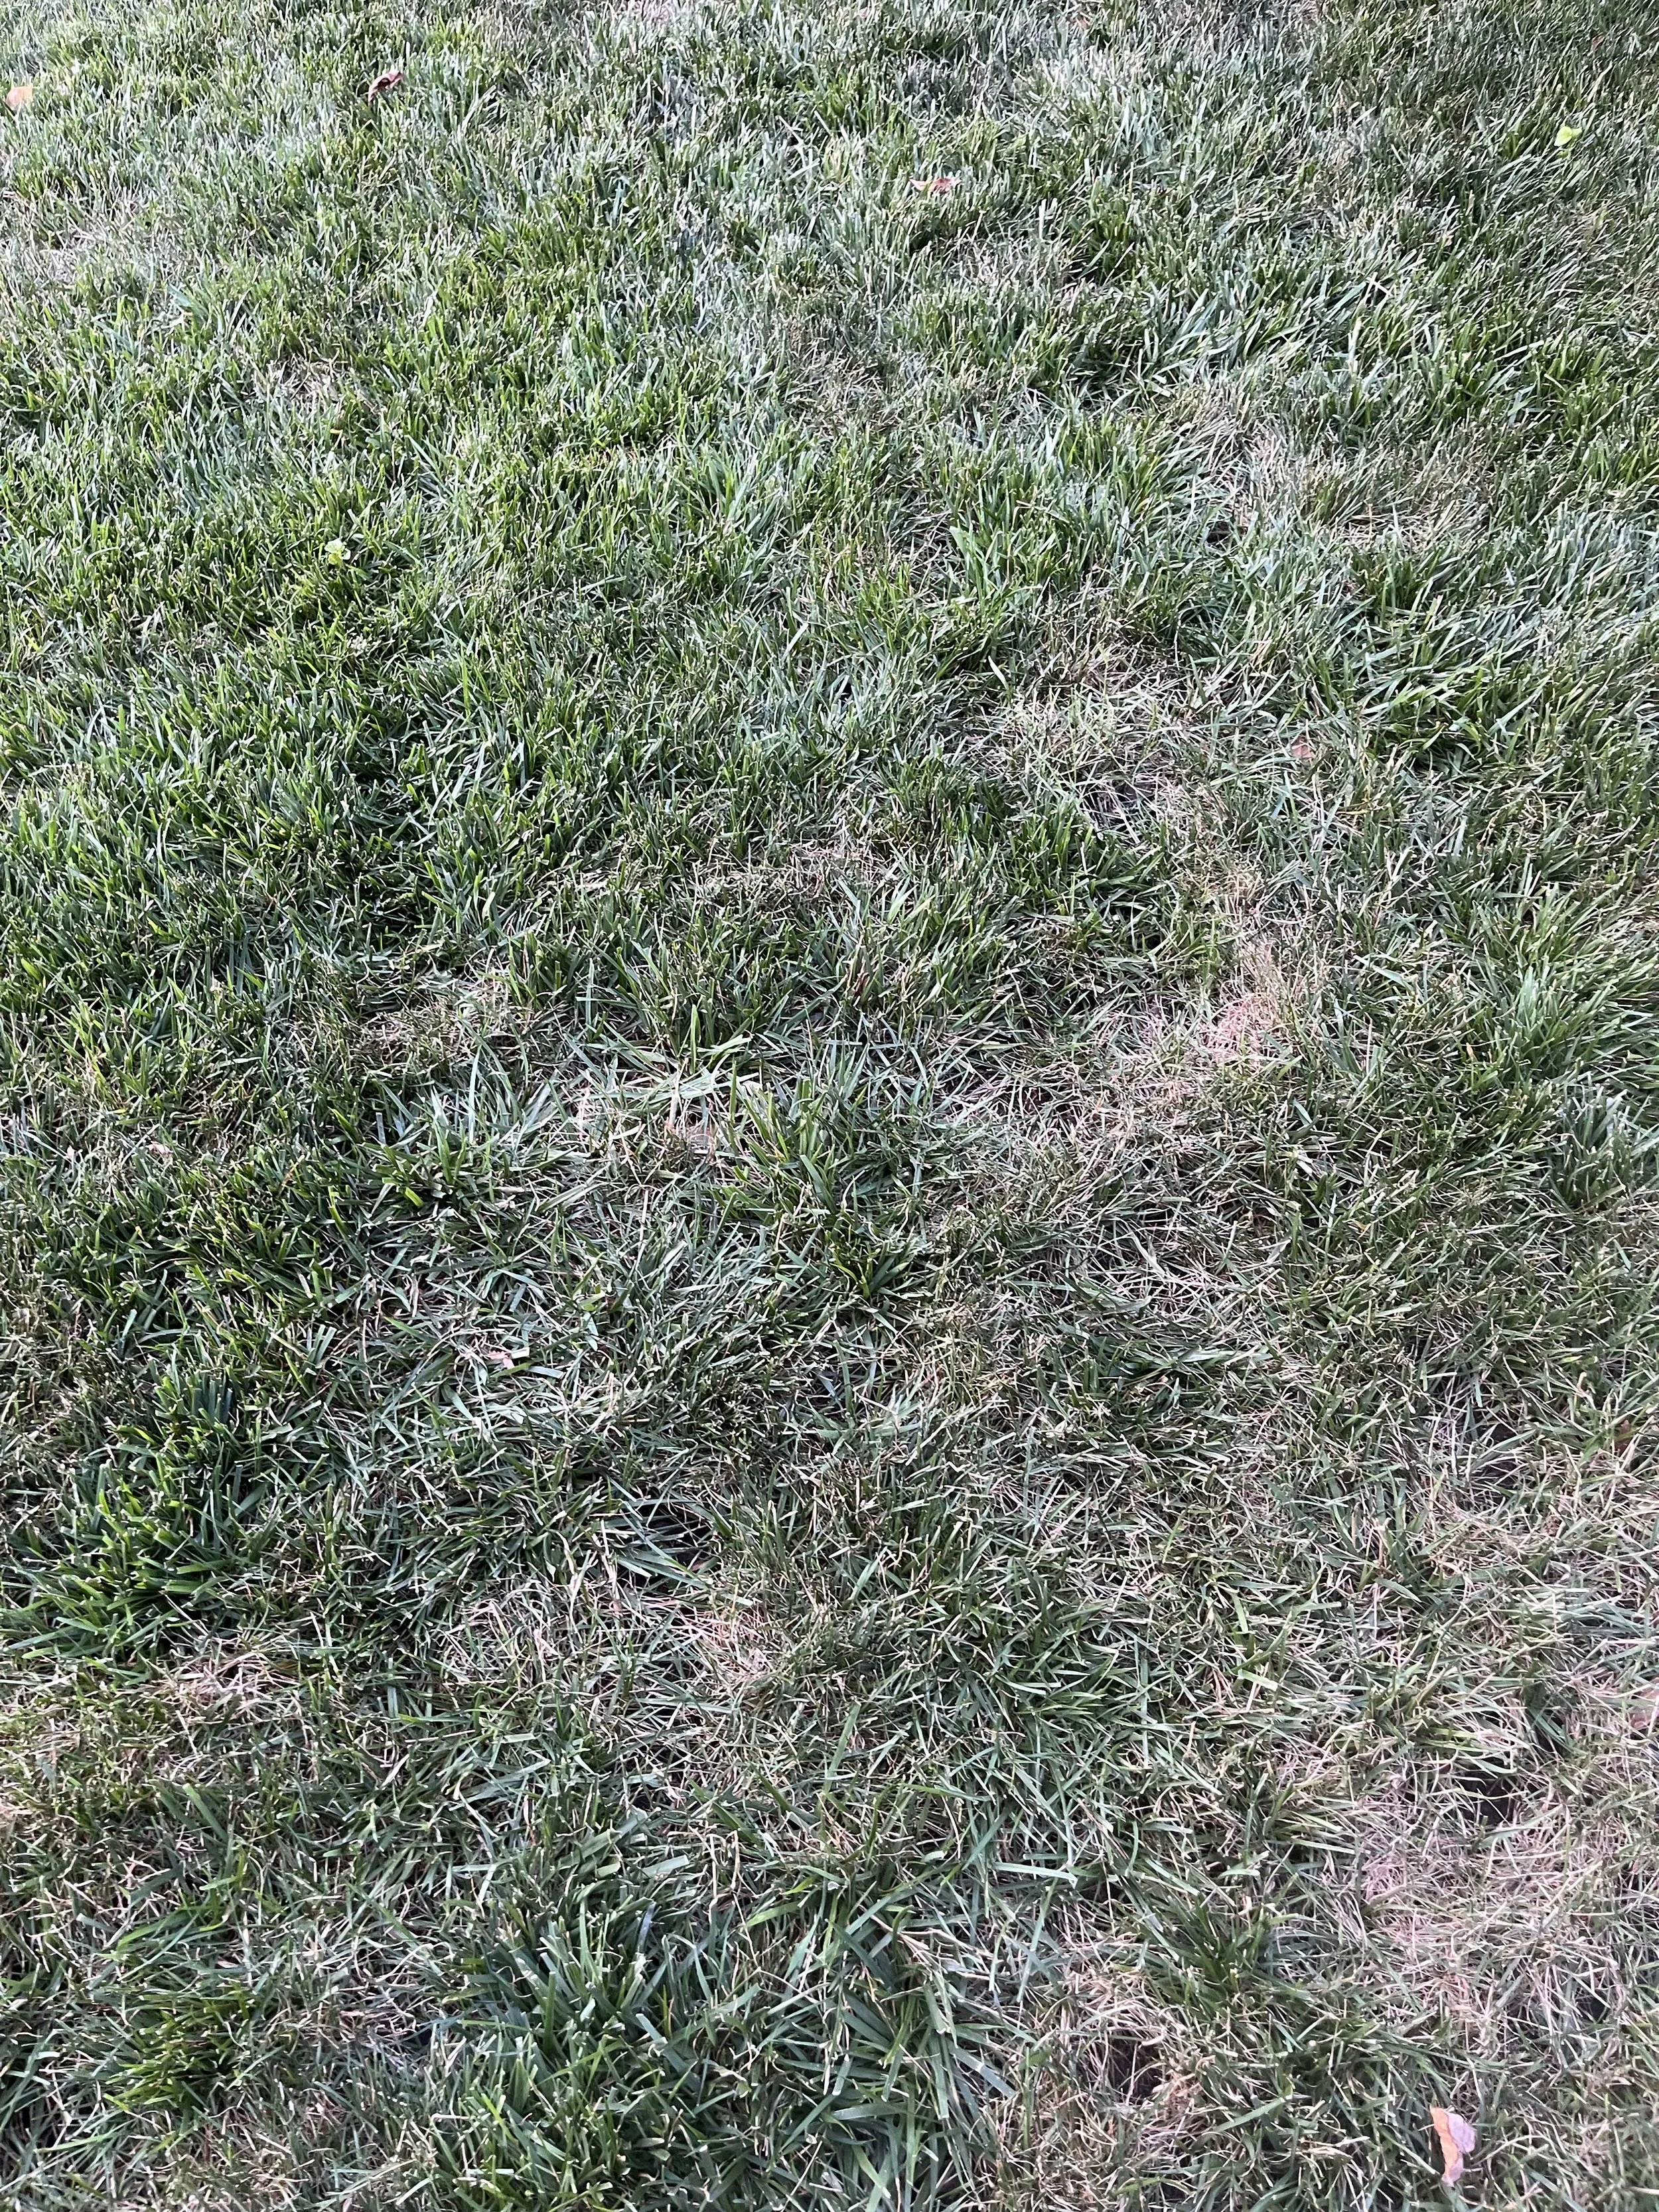
Brown Patch is a result of fescue staying too wet when temperatures are warm. This year has been a perfect season for brown patch to flourish. Now that we have received two weeks of 95+ degree weather, areas weakened by brown patch in June are starting to show stress.
Heavy shade and low air circulation. Fescue performs best if it receives some sunlight every day. Fescue will tolerate more sun than most realize and does well in full sun when it is watered and mowed properly. Air circulation plays the important role of drying the leaf blades between watering cycles. Small backyards, privacy fences, and heavy shade are the hardest on fescue in July and August. This week Hall | Stewart Lawn Care Specialists have visited several fescue lawns with good air flow and dappled sun resulting in healthy fescue with good summer color while in the same lawn there is thinning/fading fescue in areas with low air circulation and deep shade.
Fescue cut too short. Remember leaf blades store moisture the plant needs to withstand the summer heat. Fescue survives through July and August best when it is cut at 3” to 3 1/2”. Every fescue lawn I have seen this week that is being maintained below 3” is struggling. If your fescue is less than 3” tall, don’t mow again until it reaches 4”, then remove only ½” to 1”.
Tight clay soil that has never been aerated resulting in shallow rooted fescue that will struggle in the heat.

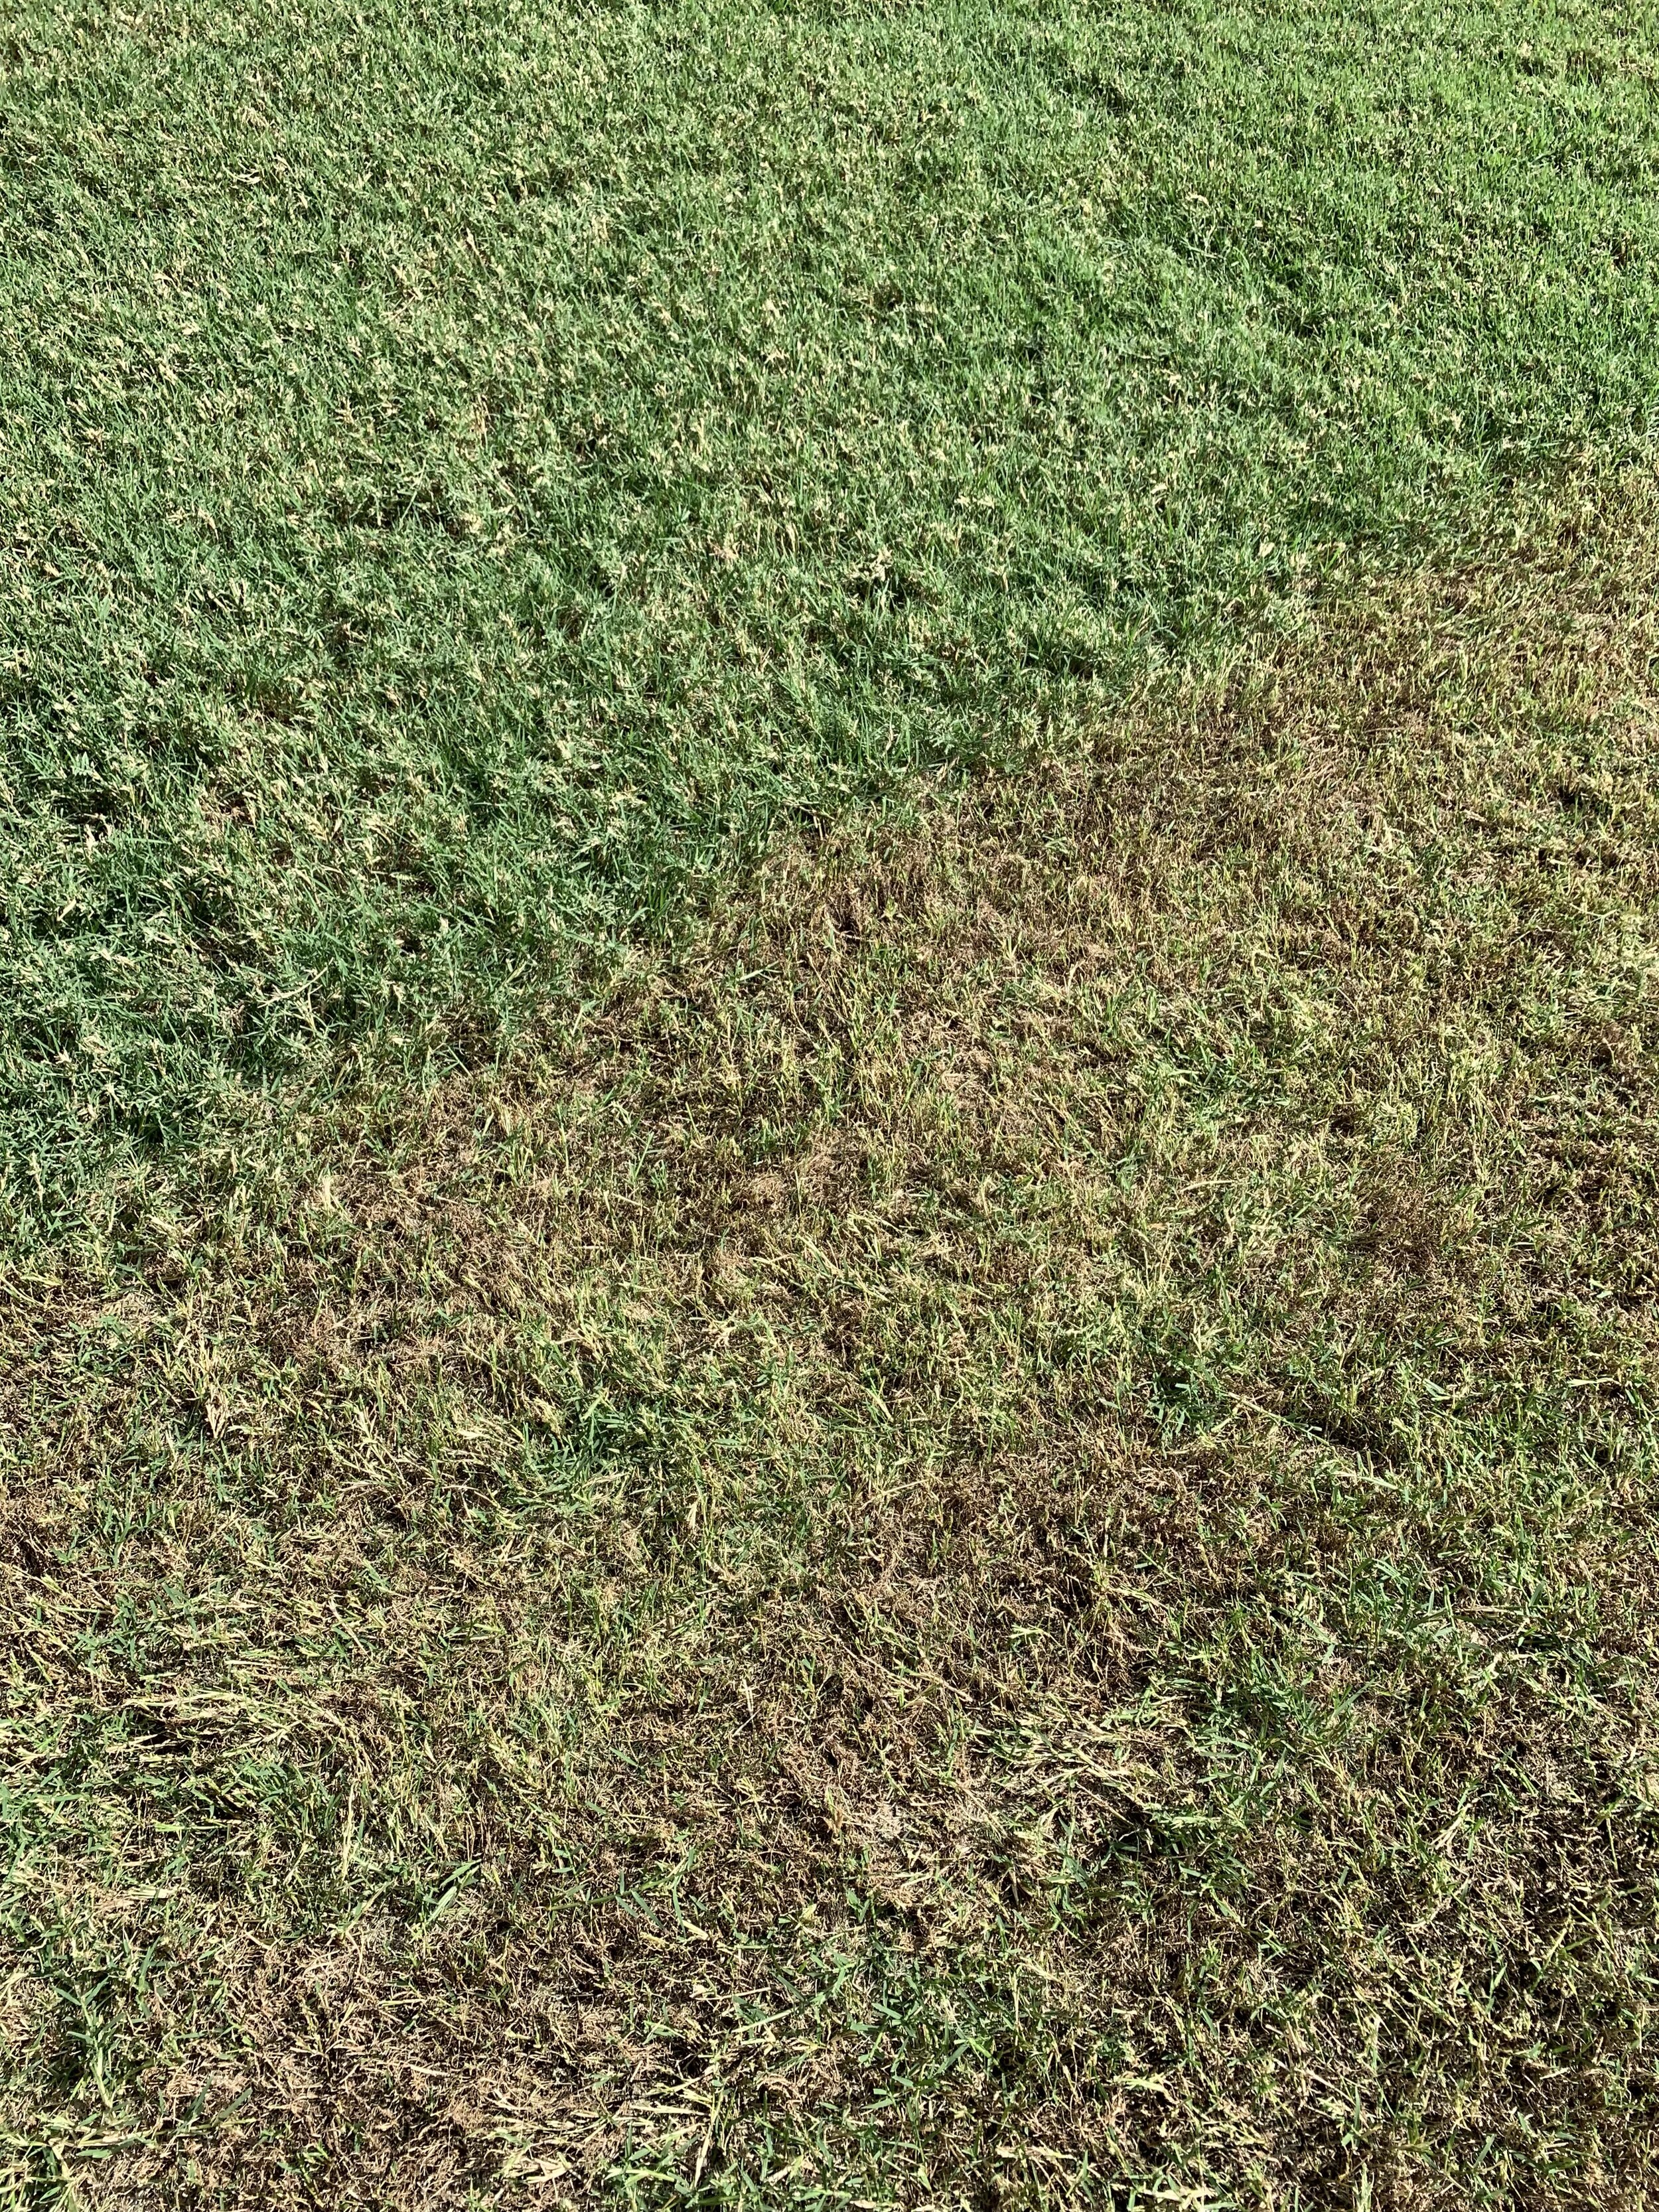
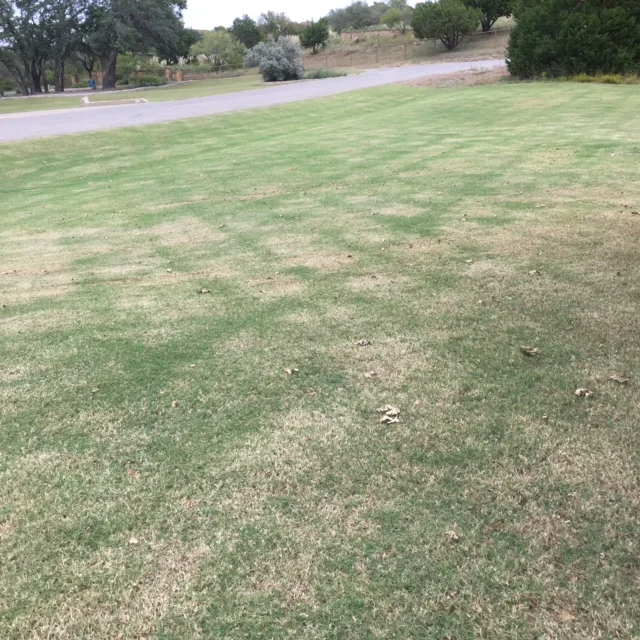
Drought stressed fescue.

If your fescue is losing a lot of color check the soil. If it is dry, increase water by deep soaking in the morning every other day. If the soil is moist, then the problem is brown patch.

Fescue seeded over Bermuda in full sun in the heat of the year.

Fescue in full to dappled sun in July.
During fescue’s offseason, take a stroll around your lawn and start planning for the fall. The cooler days of September will be here soon.
Do you need to make some changes to how you are mowing and watering your fescue?
Are you trying to grow fescue in full shade, in a location where there is little wind movement?
If so, can you improve the conditions, or should you consider transitioning to a shade tolerant ground cover?
Or, are you OK with knowing the area needs to be overseeded with fescue every fall, will look wonderful for 9-10 months, fade for a couple of months, and then repeat the cycle again after fall overseeding?
If your fescue didn’t perform well due to the excessive moisture and high humidity of the early summer, or if it has struggled with brown patch in the heat, start making plans to overseed this fall.
Do you have areas of the lawn that are becoming too shady for bermuda? Bermuda starts to thin anywhere it does not get at least 6 hours of direct sunlight every day. Is this the fall to start establishing fescue in those areas?
Whether you have a full fescue lawn, or just some fescue in shady areas, don’t fret, fescue’s best season is just a few weeks away!
Lorne Hall
Hall | Stewart Lawn + Landscape
(405)367-3873
Good Mowing Practices Make a Big Difference!

Great lawns are the result of well-timed lawn care applications, perfect weather conditions, and proper maintenance practices.
As we approach the midpoint of the summer growing season, mowing practices are often the determining factor on the difference between a good lawn and a great lawn.
Unfortunately, as the summer routines wear on, good mowing practices are often overlooked as we slip into a routine of just getting it done.
When it comes to a great lawn, mowing practices are more important than the fertilizer you use, the weed control applications that are made, and the amount of water used.
Getting mowing right comes down to three critical practices: mowing height, mowing frequency, and managing the clippings.

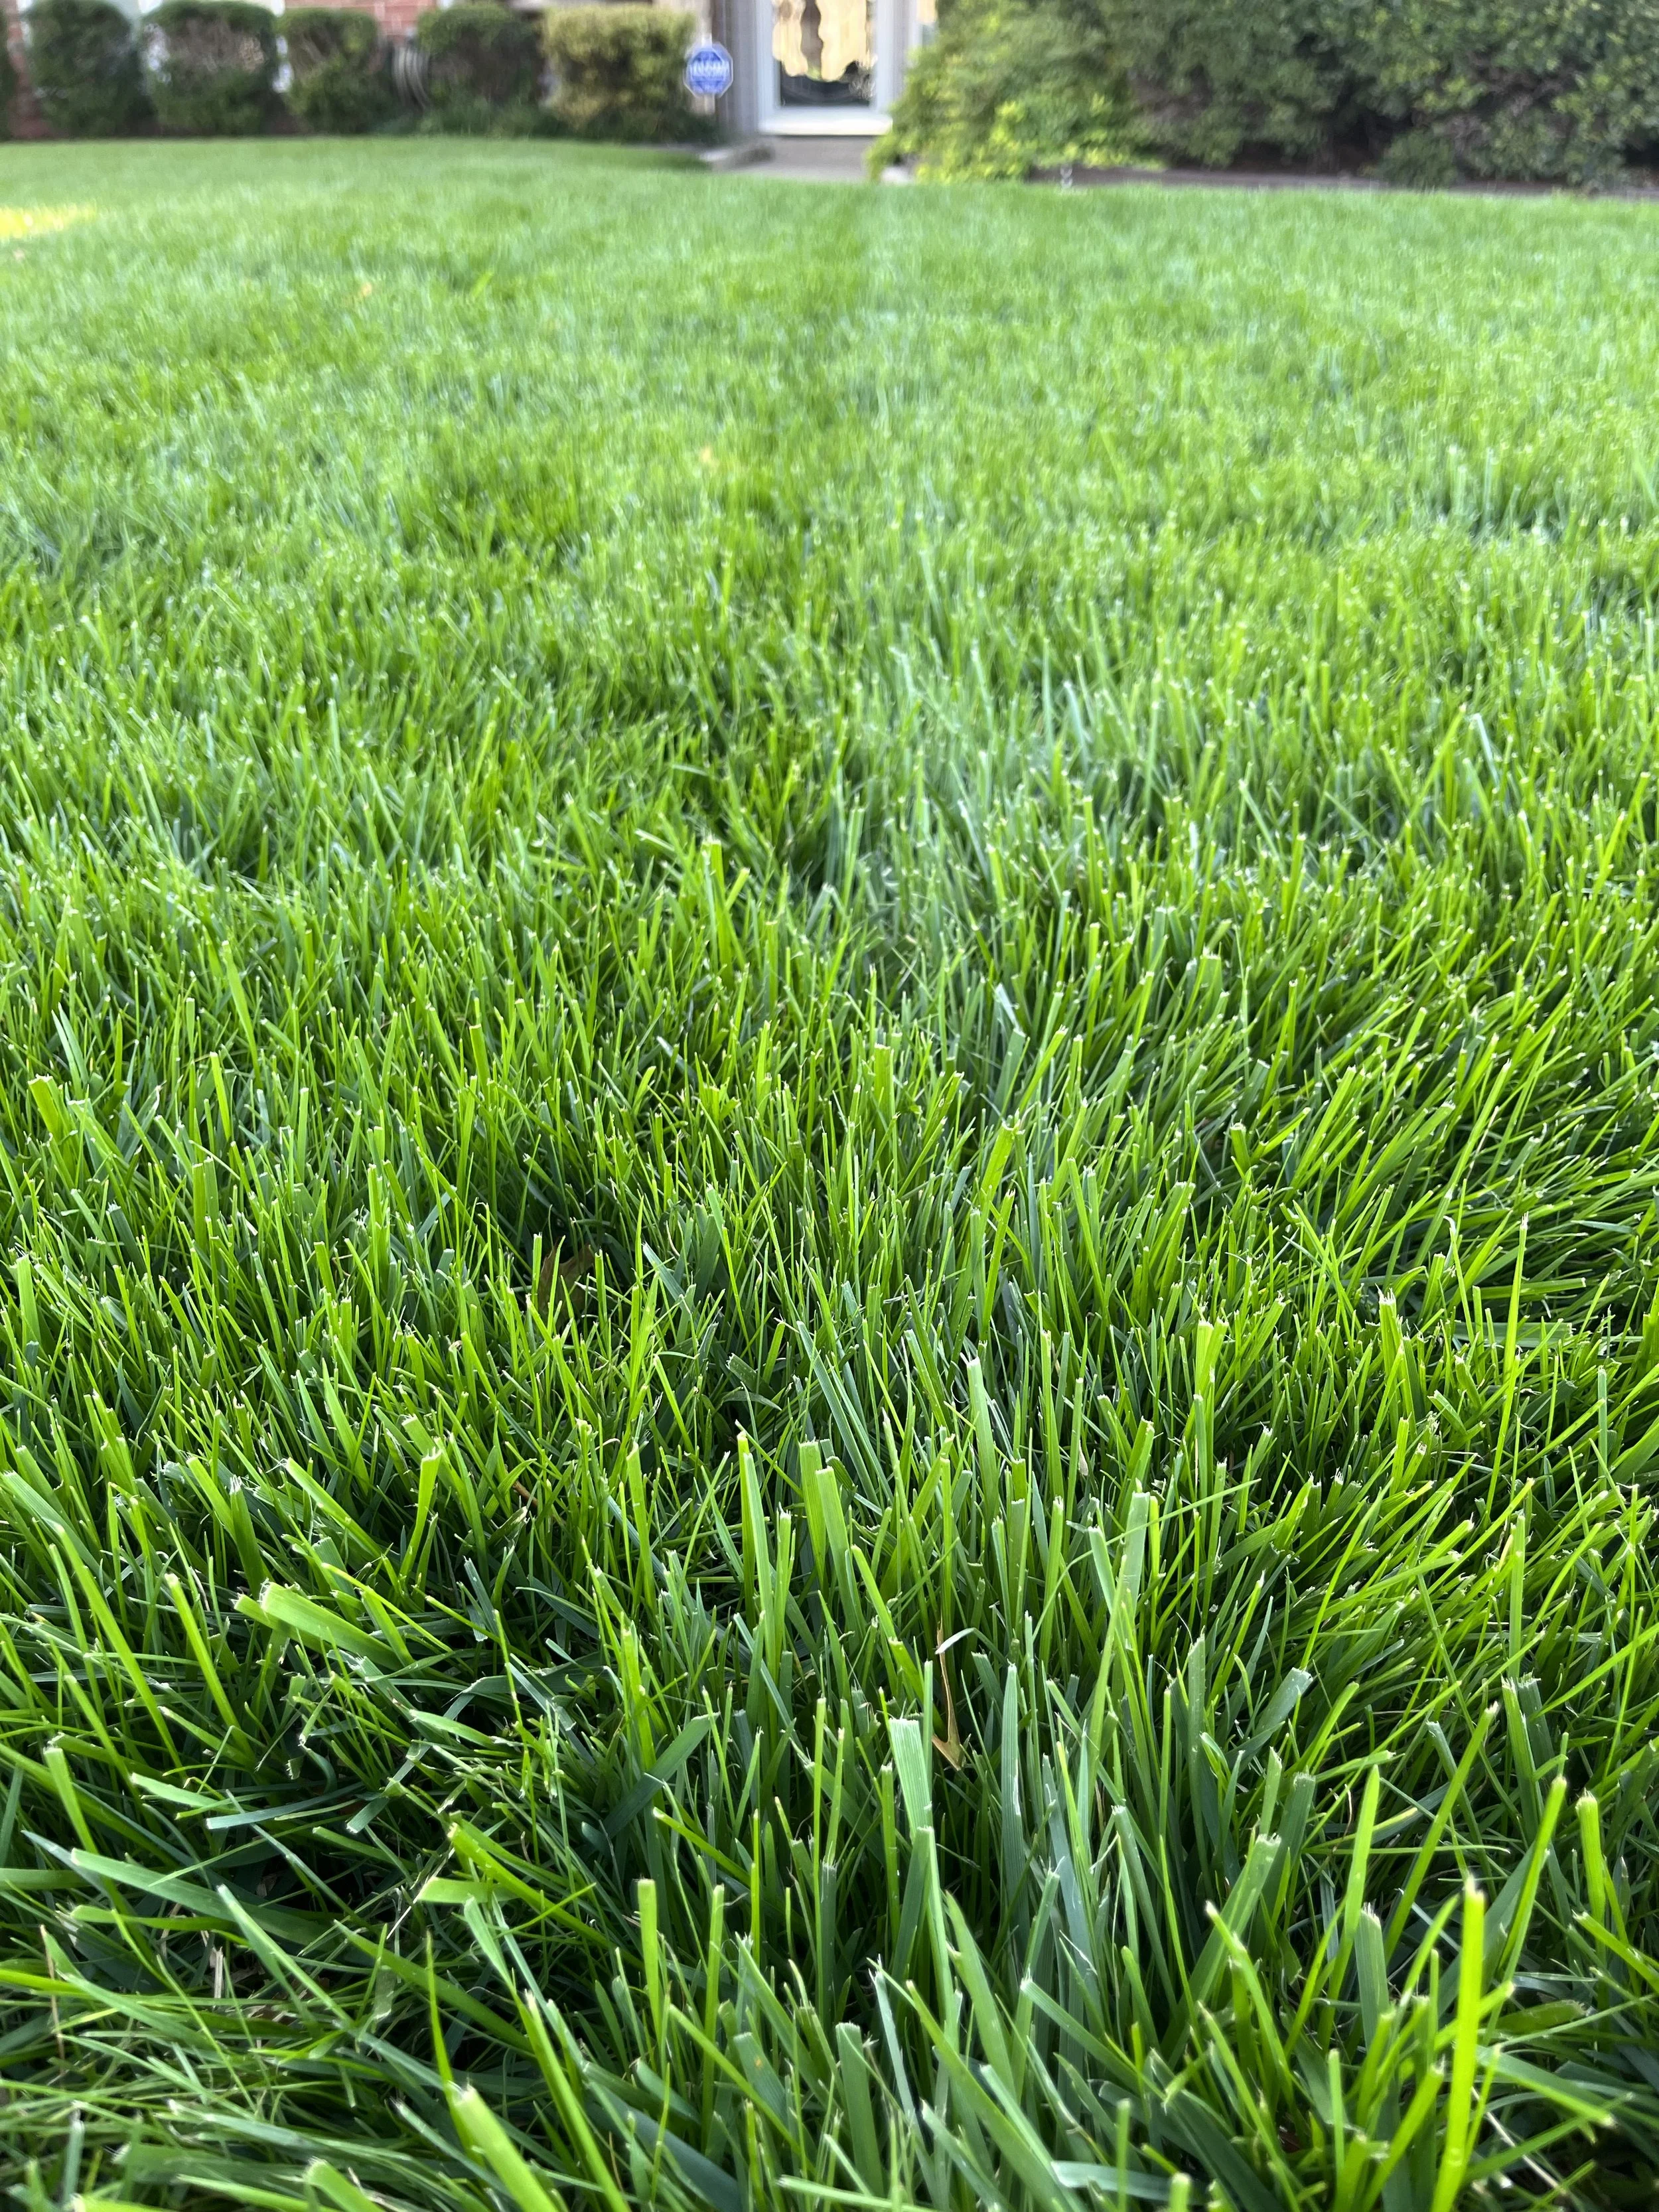
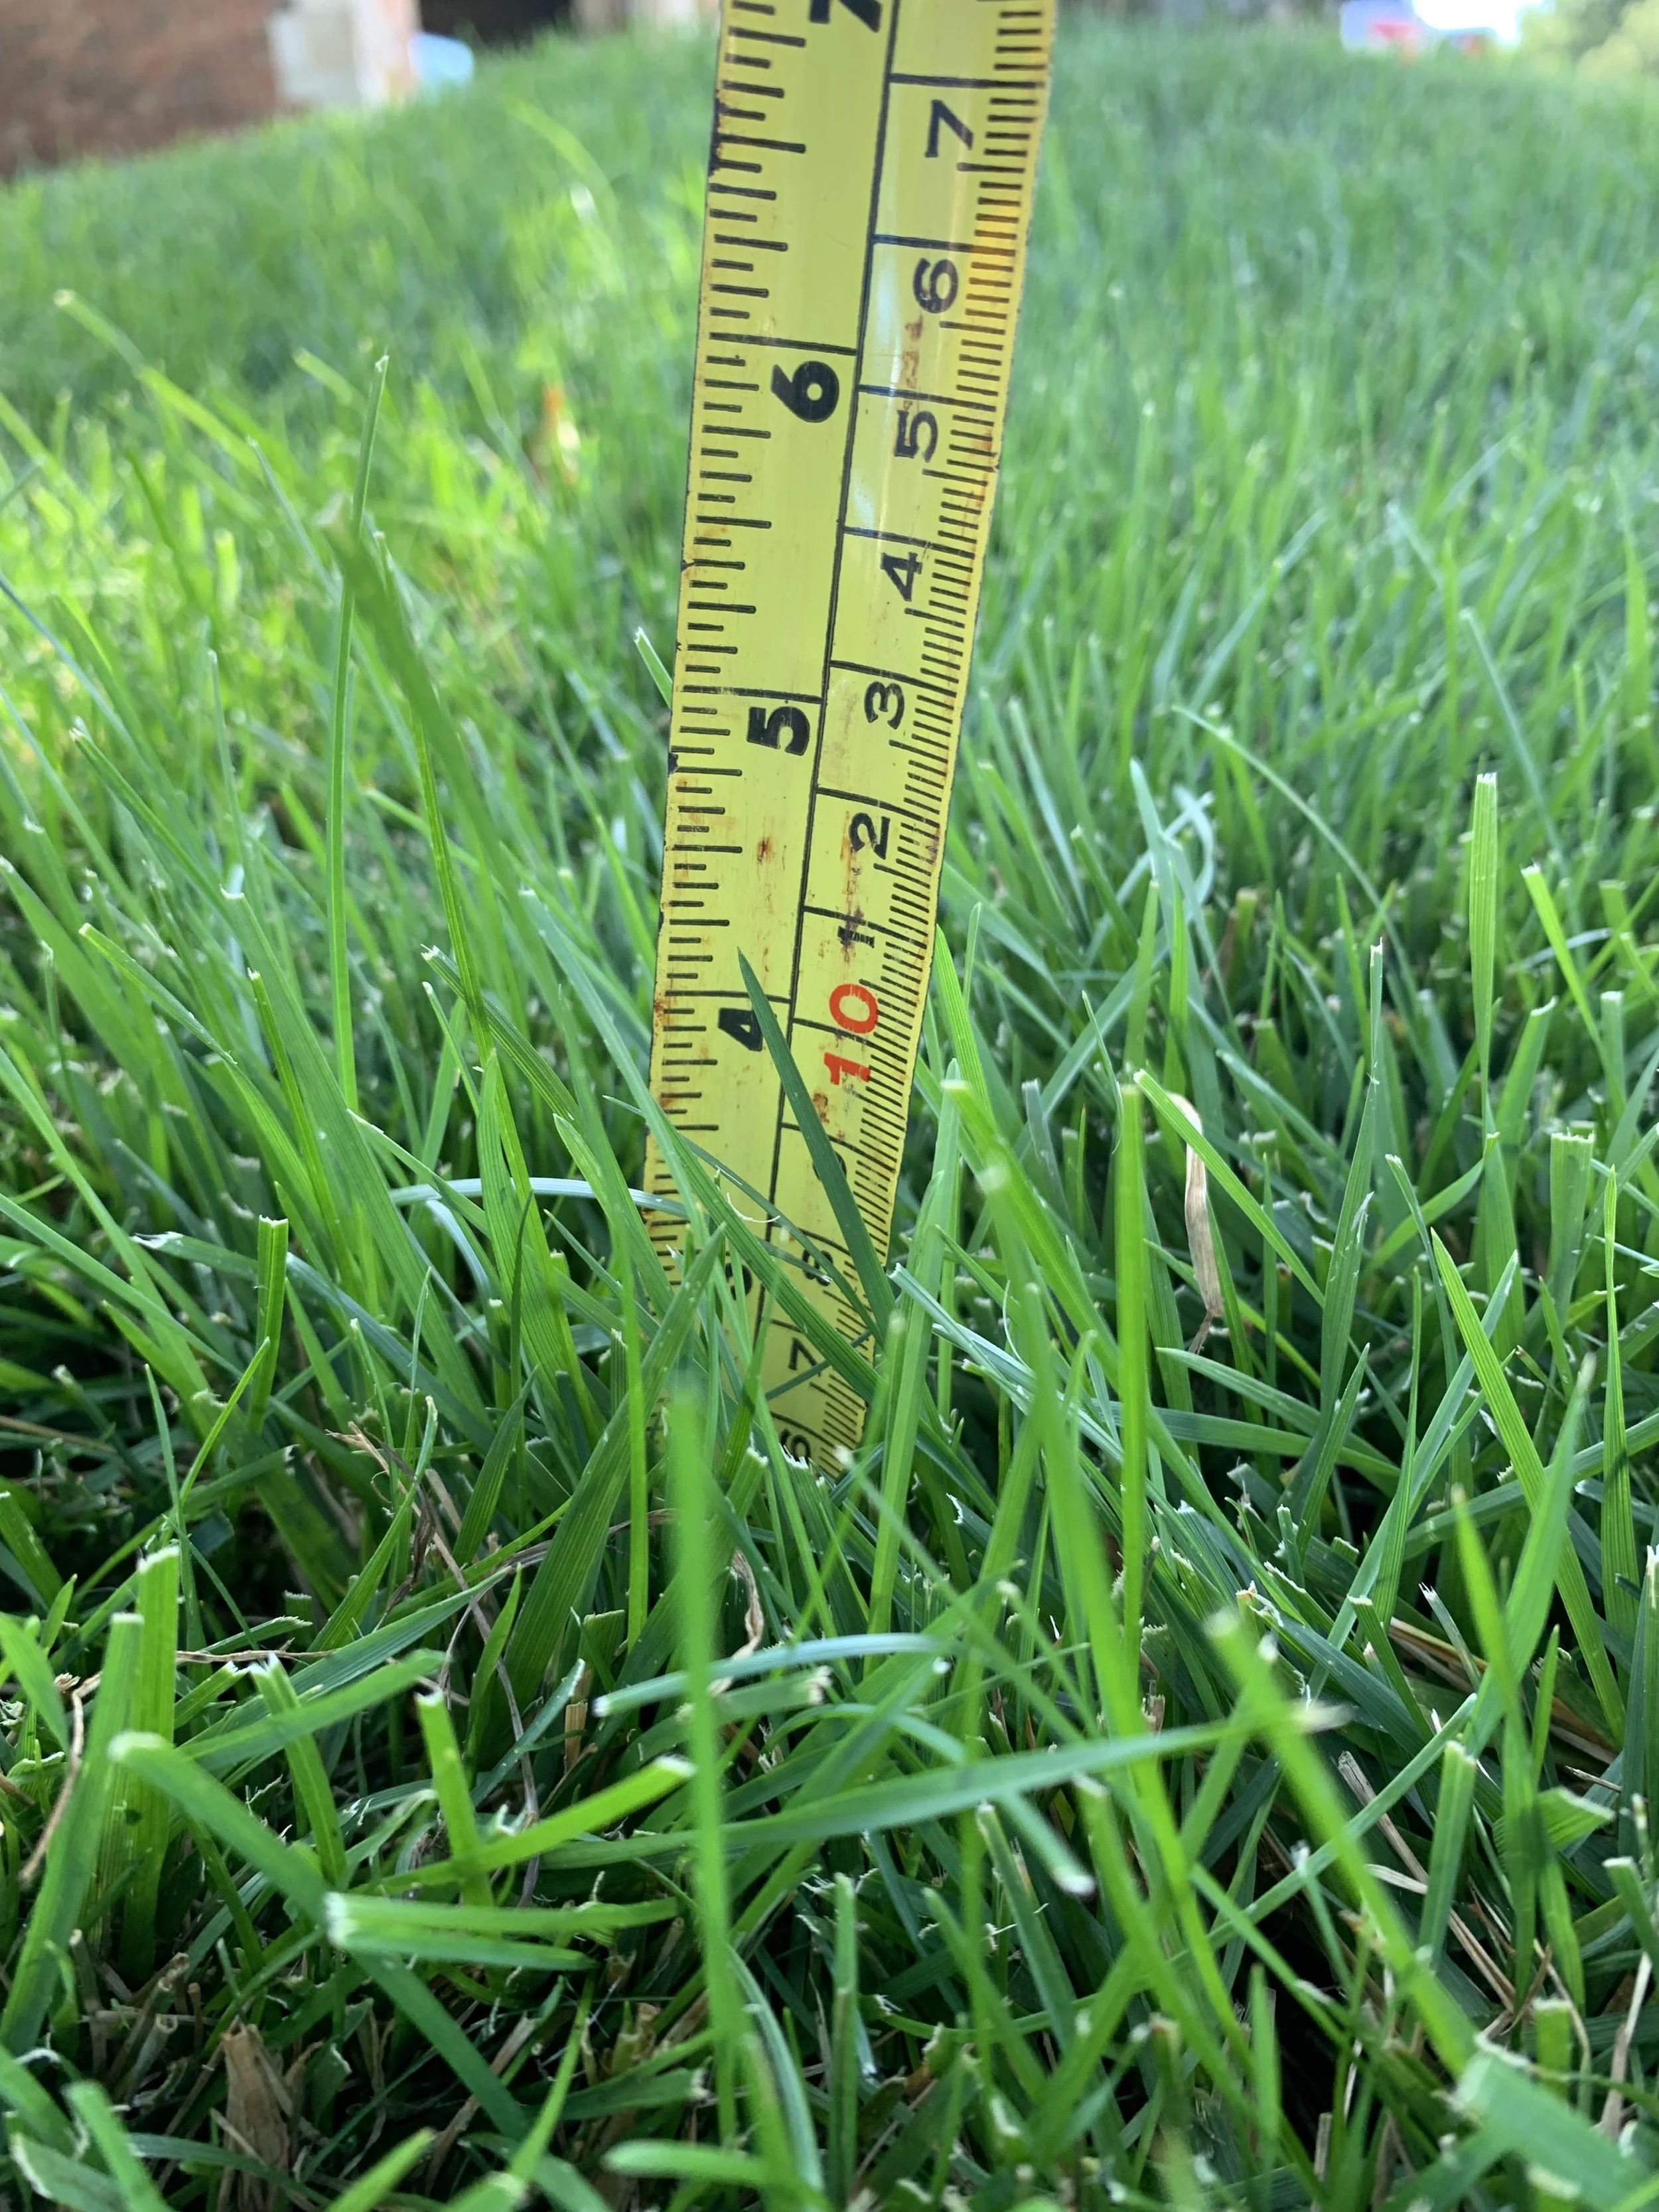
Fescue is at its best when it is cut between 2.5” to 3.5”.
Mowing Height
Grasses adapt well to various mowing heights, but there is a direct relationship between mowing height and a healthy turf. As the height of the grass is increased, the root system increases. As the height is lowered, the root system decreases. A taller turf yields a healthier root system and a lawn that will withstand more stress. And, as the height and density increase there is less room available for weeds to germinate and grow.
Optimal cutting heights vary based on the type of grass and the time of year. All turf grass should start the season low and gradually increase in height over the course of the summer. The goal is to have your lawn at its thickest and tallest height during the heat of summer.
Fescue is at its best when it is cut between 2.5” to 3.5”.
Bermuda is best maintained between 1.5” to 2.5”, but Tiff Type Bermuda should be maintained shorter, .5” to 1.5”.
Areas of shade need to be mowed at the maximum height. The increase in leaf space will allow the plant the best possible chance to survive in the lower light.
A best lawn maintenance practice is to not remove more than 1/3 of the leaf blade when mowing.
Currently I’m trying to maintain my fescue lawn at 3”.
Yesterday with the fescue reaching over 4” it was time to cut it back to 3”.

Bermuda is best maintained between 1.5” to 2.5”.

Mowing Frequency
Probably the biggest hindrance to having a great lawn is mowing on a schedule, not on need. Most people mow their lawns once a week during the growing season. We all understand why. We are busy and our only opportunity to mow is on our day off. Or, you may have a landscape management company that mows the lawn once per week.
But, for the absolute best lawn, mow based on the 1/3 rule rather than a set schedule. For example: If you desire to maintain your fescue at 3”, you should never let your lawn grow over 4.5”. If you want to keep your Bermuda lawn at 2”, then you need to mow before it exceeds 3”, not just because it’s Saturday and you always mow on Saturday.
Whenever you remove more than 1/3 of the grass in a single mowing, you are cutting below the plant leaf and into the stem. If you see yellow or brown areas after you mow, you are cutting more than 1/3.
Turf grass research shows when you cut into the stems the plant responds by using nutrients stored in the root system to regenerate leaves. This reduces the strength, health and density of the root system and results in a weaker turf.
What should you do when your lawn becomes too tall, and you need to cut off 50% or more to get back to the desired height? Cut 1/3 off, wait a couple of days and then cut another 1/3 off. Repeat until you reclaim the height you desire.
There is no doubt that frequent mowing at a uniform height, whether short or tall, is one of the most important aspects of having a great lawn.

Mowing with a mulching mower will return valuable clippings to the lawn. Grass clippings are mostly water and nitrogen.
Managing the Clippings
When you are able to mow frequently using the 1/3 rule, I recommend not catching the clippings. Turf grass leaves are 80-90% water and nitrogen. Grass clippings decompose very quickly and add nutrients back to the turf.
Not bagging your clippings is a major step in improving your lawn’s quality.
When you bag your clippings, you throw a little of your fertilizer away every time you cut the lawn.
Most years, I bag my fescue lawn a couple of times per year, the first time each spring and September when I cut the lawn short in preparation of overseeding. So far this season I have managed to dodge the rain interruptions, stay on my typical 4-to-5-day mowing habit and my mower’s grass bag has remained in the garage since the first cut of the season.
A common belief is that when you don’t bag your clippings you are increasing thatch buildup. As long as you are only cutting the leaves and not the stems, thatch will not become a problem.


Mulch mowing will not only return nutrients to your lawn, it will also return moisture. This picture was taken during a heat wave and drought. At this point the lawn was being watered deeply every 4 days, cut at 3”, and mulch mowed.

Two Important Bonus Practices:
1. Mower blades should always be kept sharp. Dull blades bruise the leaf resulting in frayed leaves and a duller lawn appearance.
2. Vary your mowing pattern throughout the season to reduce soil compaction. Changing your mowing pattern will also improve turf appearance. I recommend rotating through at least three different mowing patterns. For example: mow parallel to the street, the next time mow at a 45-degree angle, followed by mowing perpendicular to the street or at the opposite 45-degree angle.
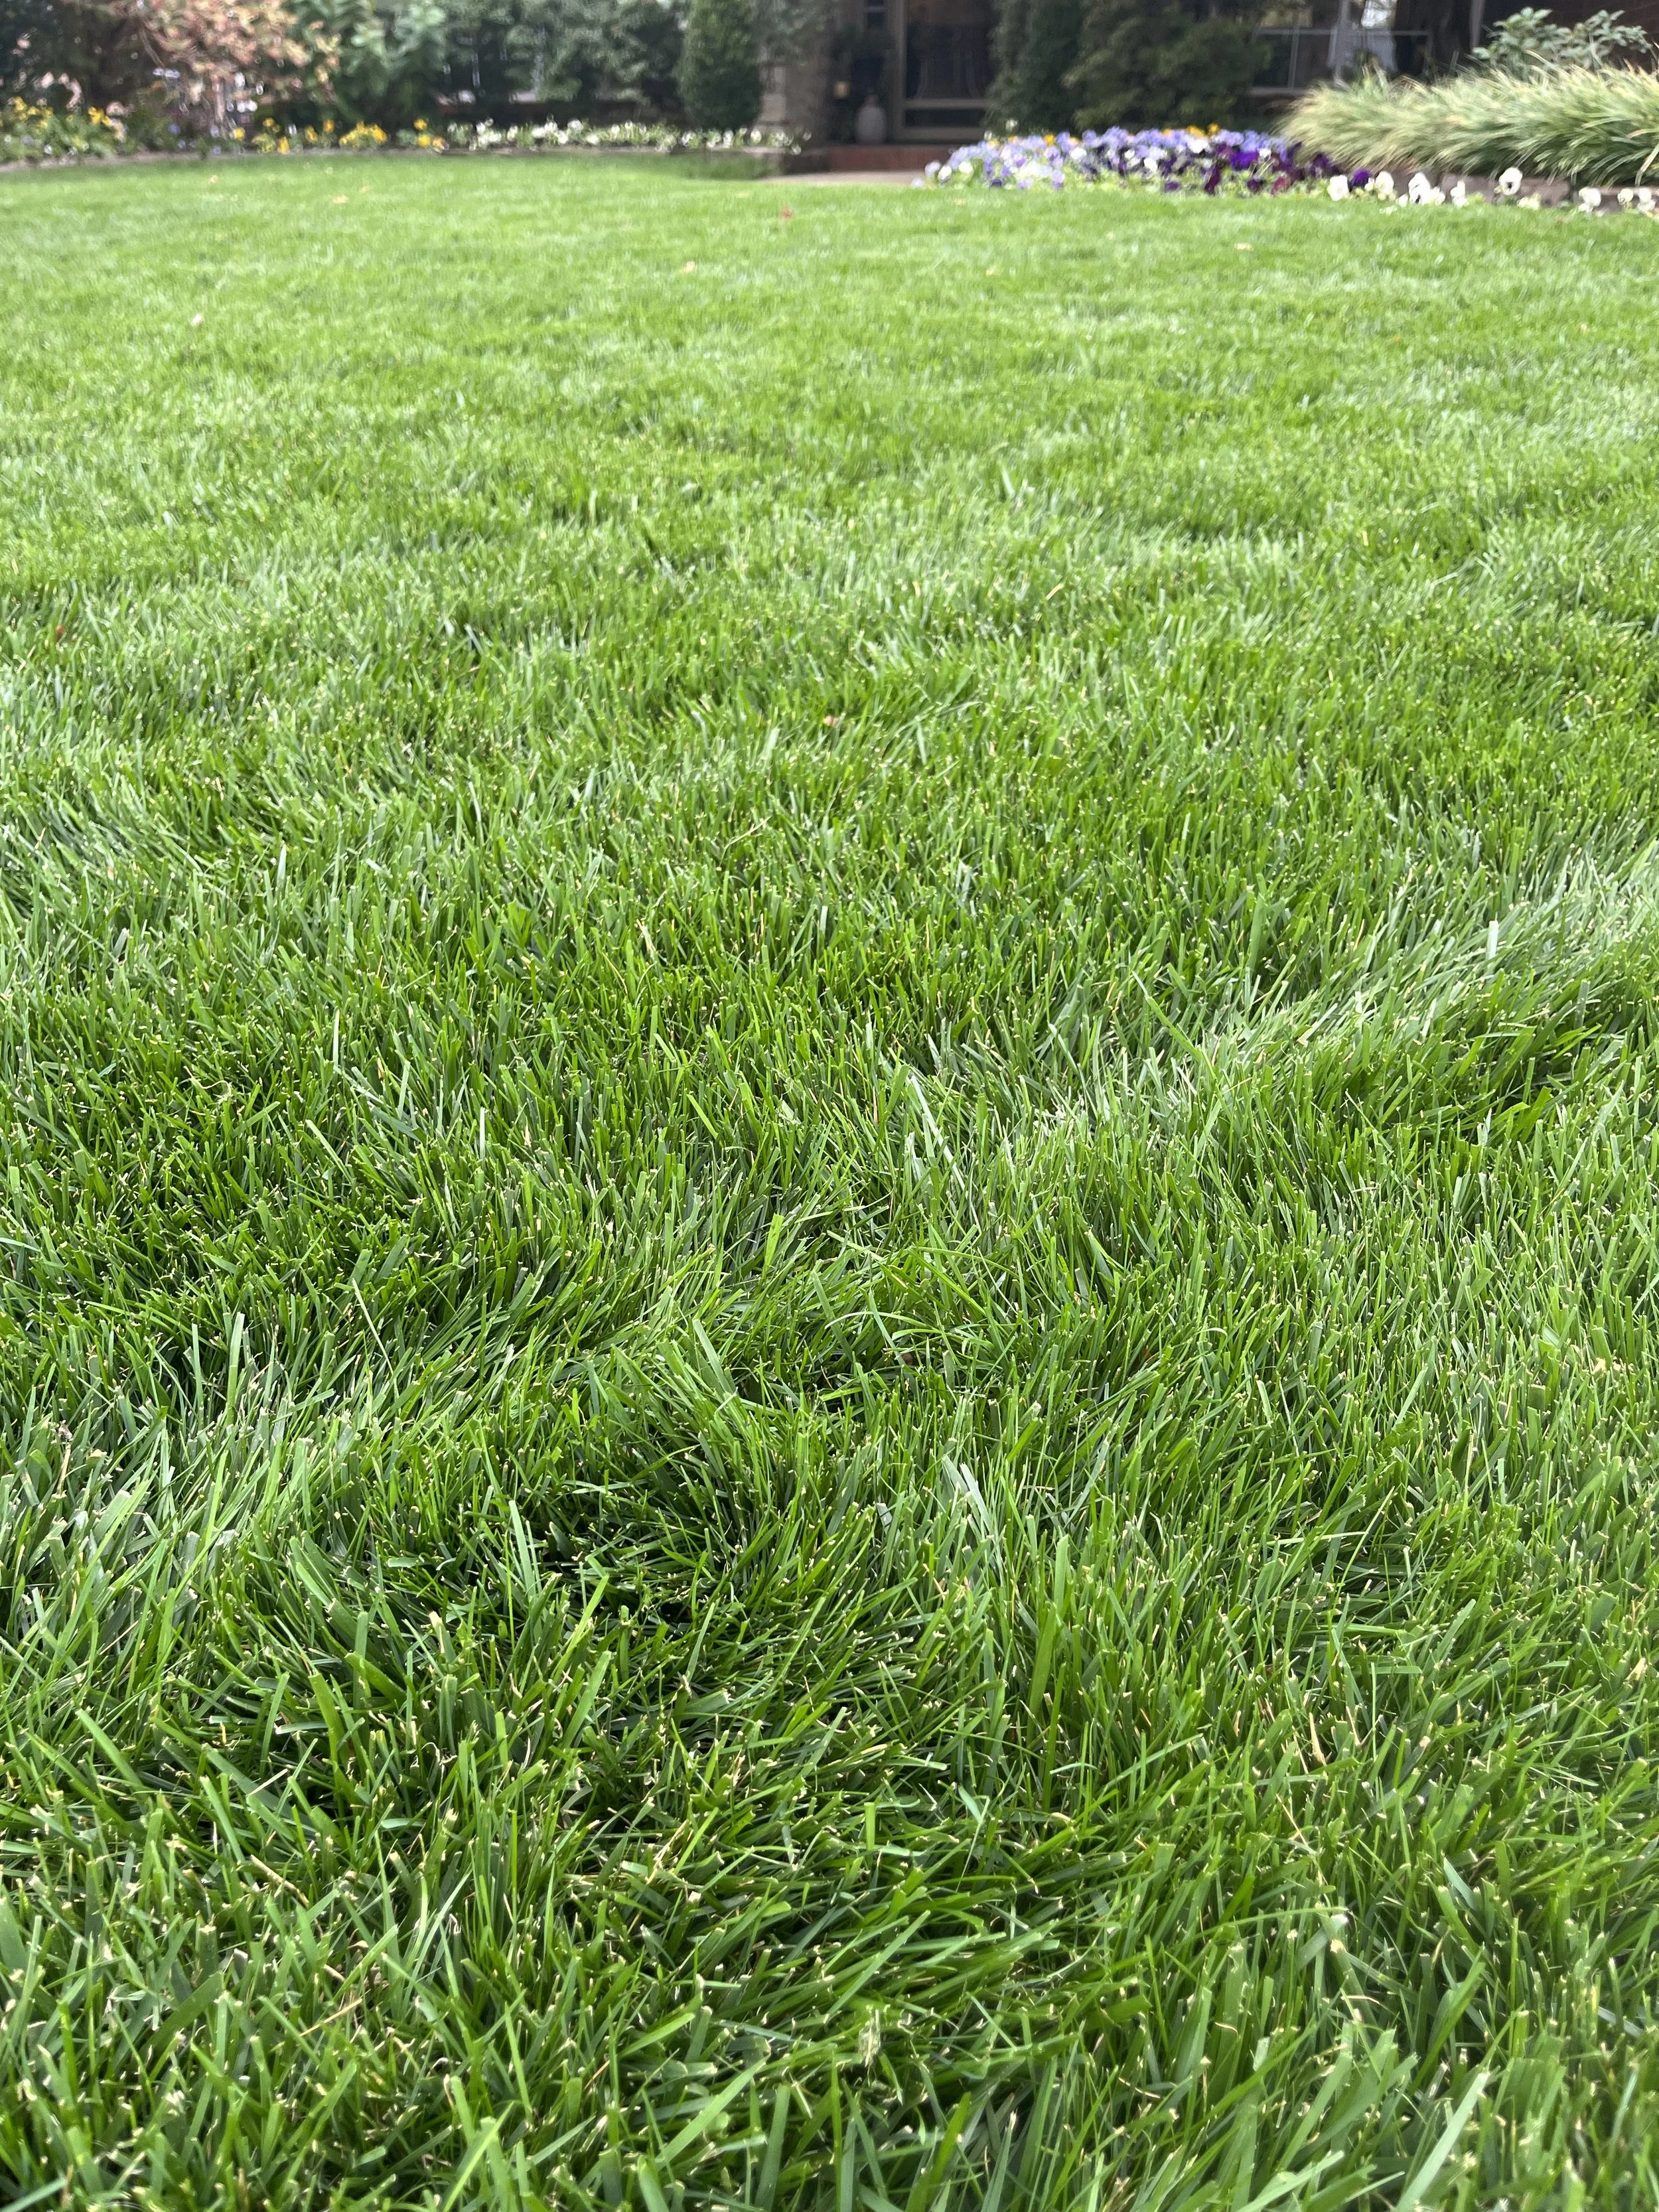

Changing the mowing pattern will reduce soil compaction and improve turf appearance.
Lawn mowing is the most time-consuming landscape practice.
It has to be performed more frequently than fertilizing, weed control, bed weeding, shrub trimming, and flower planting.
It is easy to allow mowing to become just another task that has to be done. But, a properly maintained lawn is well worth the time and effort.
Nothing adds more curb appeal to a property than a well-groomed lawn.
Lorne Hall
Hall | Stewart Lawn + Landscape
(405)367-3873
The Return of the March of the Army Worms

This week has us feeling as though we are living in a sequel of 2021’s March of the Army Worms.
We mentioned army worms last week in our post “What’s Bugging Your Landscape”, as a turf damaging insect you should always be on the lookout for this time of the year.
You can always find a few army worms in the summer and fall. And like most insects, when populations are at normal levels, they are not a problem, and you may never notice them. But, when conditions are just right, you can see an explosion to turf damaging levels in a matter of days.
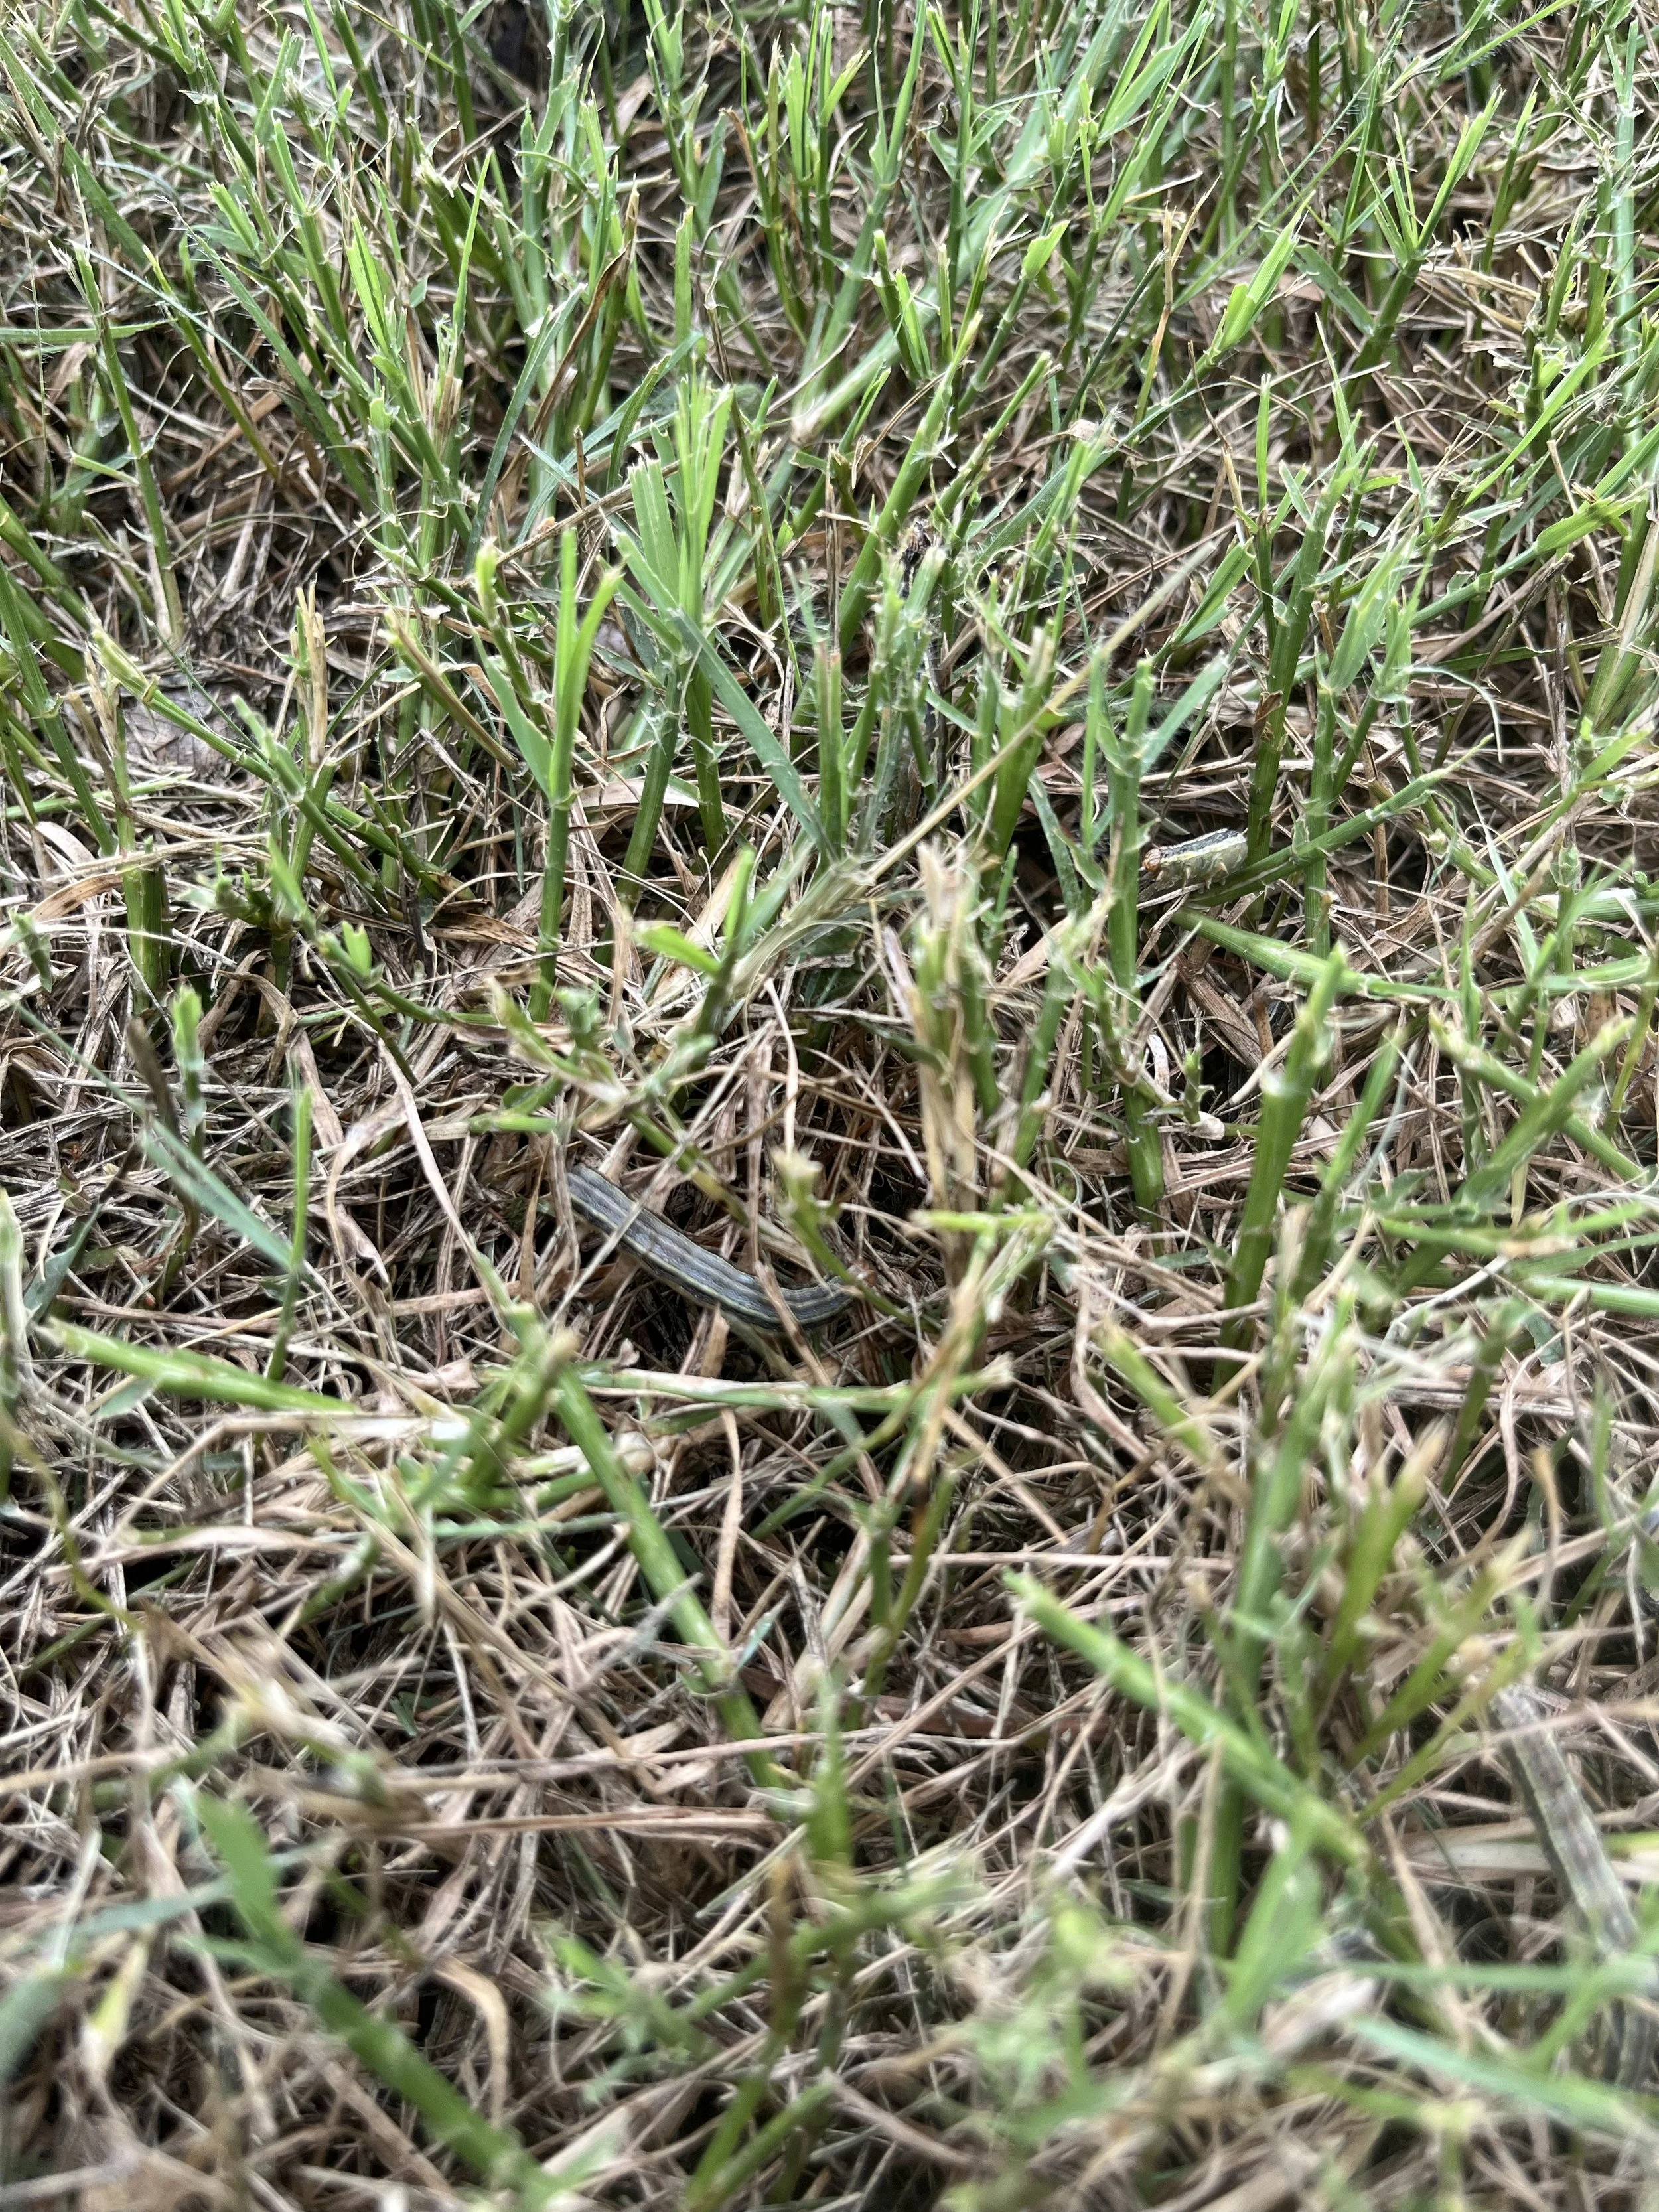
An army worm discovered Saturday feeding on a rural Edmond lawn.
What are the conditions that make us feel as though we are living in 2021 again?
Army worm eggs and worms have a higher survival rate when there is abundant moisture. Over the last 30 days, we have received 7” of rain. In 2021, during the same period, we also received an abundance of rainfall.
The first sightings of damaging army worm populations in 2021 were on the perimeters of the metro. With each generation of army worms in the summer of 2021, populations increased and lawn damage increased deeper into urban areas. This week, army worm activity was heavy around the perimeter of the metro area.

The mature Army Worm is 1 1/2” long, green to brown in color, with stripes down each side.
What is an army worm?
The adult form of an army worm is a light gray-white moth with mottled wings with a 1 ½” wingspan. Because army worms do not overwinter in our climate, the moths migrate from the Gulf Coast and Mexico each year arriving in our area in late June.
Each moth can lay over 1,000 eggs.
By early July the first generation of eggs have hatched, and the caterpillars go on a feeding frenzy that lasts 2-3 weeks.
Early caterpillars are green and very small and don’t cause any damage until they reach 1”. Quickly, they grow into a brown, almost black, 1 ½” long caterpillar with black and reddish-brown stripes on each side of the body and small black spots on the top. Their distinctive mark is an inverted “Y” on the front of the head.
At the end of the 2-3 week feeding period, the worm burrows 1” into the soil and enter the pupal stage. 7-10 days later they emerge from the soil as a moth and the life cycle starts all over.
The average entire life cycle lasts about 28 days. There can be 4 to 5 overlapping generations from July through early November, or until we have our first hard freeze.
Again, army worms are always present in our summer lawns and landscapes. When populations are normal, you may never know they are there. But, with the right conditions we can see an explosion to turf damaging levels in a matter of days.

How many Army Worms can you see in this picture? Their green to brown color makes them hard to spot.

While standing in this area while Army Worms were actively feasting, I had the sensation that the lawn was moving moving.
What is the typical host plant?
The army worm feeds on a wide variety of plants. They prefer any leafy, soft plant with plenty of moisture in the leaf. They love alfalfa and bermuda hay fields and all turf grass varieties.
For home lawns in our area, typically by the time we get to July, bermuda lawns are looking their best and fescue lawns are starting to enter their summer off season. So, it is common for army worms to prefer bermuda lawns over fescue lawns. In 2021, fescue lawns were thriving in July due to the abundance of moisture and cooler than normal temperatures. At the same time bermuda lawns were lagging behind. The result was lawns where army worms wiped out the fescue and skipped the bermuda completely in favor of moving to another lawn with fescue. So far this summer with both bermuda and fescue both doing well, army worms are feeding on both types of turf.
If you have a healthy, growing, green turf of any variety, your lawn may be a host location for army worms.
Will army worms kill a lawn?
Army worms are primarily surface feeders. Small to moderate infestations will consume the leaves of the plant and the lawn will recover over time with sufficient moisture and fertilizer. In large numbers, the worms will consume the crown of the plant and are capable of killing a lawn.
How do you know if you have army worms?
Because of how widespread and large the current population is, daily or at least every other day, inspection of the lawn is important. Early detection is the best control.
When army worm population are high, you may only have to look at your sidewalks to see them marching to the next blade of grass.
Early signs of army worm damage will appear as drought stress. Don’t dismiss areas that you think may just not be getting enough water.
Stand in the area that looks stressed. If the population is heavy enough, you will have the sensation that the grass is moving.
Still not sure? Get down on your knees and inspect the area. Because of their green to brown color, the worms can be hard to spot while standing.
Still don’t see any worms? Test the area with a soap flush. Mix 1 teaspoon of a lemon scented dish soap in 1 gallon of water. Pour over the area. If you have army worms, they will come to the surface. 2 to 3 worms per square foot, you need to treat.
Army worms feed heaviest in the evening, night, and early morning. They often are hard to find in the middle of the day.
Another clue you may have an army worm problem - Have you noticed an abundance of moths while walking across your lawn?

Take a stroll around your lawn today. If you see an abundance of moths you need to treat your lawn for army worms.

Check leaf blades in areas where the turf is browning. If your blades look like this one with jagged edges, you have Army Worms.

How important is frequent inspection? I mowed my lawn on Thursday. This area of the lawn always struggles with brown patch in the heat of the year because of low air circulation. Yesterday afternoon I walked the lawn checking for declining areas When I got to this area it looked a little worse than it did two days ago. Then I saw something move. Being late afternoon I couldn’t find any army worms even on my hands and knees.

I decided to do a soil drench with soapy water. I mixed a teaspoon of scented dish soap in one gallon of water.

I slowly poured the water in a one to two square foot area.

If there are army worms in the area, they will begin to move after the soapy water solution is poured over the area.
How do you control army worms?
A quick response is important. Army worms can wipe out a football sized lawn in 2 days.
Treatment when worms are small before they become heavy feeders is best. The army worm consumes 80% of their total consumption in the last two days of their worm stage.
Any insecticide labeled for caterpillar control in turf will be effective.
When making any application remember, the label is the law. Always read and follow all label instructions.
After treatment, keep up regular inspections. With a 4-week life cycle and overlapping generations, they continue to be proactive in watching for increasing populations of army worms.
Army Worms are fast movers.

This spot in a bermuda lawn appeared to be lack of water, but while inspecting the area I discovered army worms.

This bermuda lawn had a similar browning area as the last lawn. But after not finding any worms, I checked the irrigation and discover a head that was not working and the discoloration was a watering issue.
Will your lawn recover?
If the worms only eat the leaves, the lawn will recover. If they destroyed the crown, there is a possibility the lawn will not recover.
If you have a bermuda lawn, continue normal watering and fertilizing. There is still time for the lawn to return to a healthy condition before the end of the growing season.
For fescue lawns, recovery will be slower and will be delayed until we see cooler temperatures. This is already the most stressful time of the year for fescue. The best time to reseed fescue is September through October. If you experience army worm damage on your fescue lawn, plan on overseeding this fall.
Inspect your lawn today!
If you see any signs of army worms or turf damage, call (405)367-3873 or respond to this email.
Lorne Hall
Hall | Stewart Lawn + Landscape
(405)367-3873
What’s bugging your landscape?
In last week’s July Lawn & Landscape Tips, we touched briefly on common insect issues at this time of the summer. This week lets dive in a little deeper.
Healthy landscapes are a result of an Integrated Pest Management program.
The first step of an IPM approach is maintaining healthy plant material with proper watering, feeding and pruning. Insect activity increases on plant material that is already stressed.
The second step is simply monitoring your plants. Weekly observation is critically important. Does the overall plant color look healthy? How do the leaves look?
Our landscapes represent large investments in both time and money. They add curb appeal and provide enormous benefits to the environment.
It is important that we do all we can to keep them healthy and growing.
Here are a few of the problems that we are either currently seeing in landscapes, or we have on our watch list:

Be on the lookout for any plants that don’t look their best. Notice the slight color difference between these two Taylor Junipers? After close inspection, bagworms were found feeding on the one on the left.
Bagworms
Timing - Eggs hatch in May and they remain active through September.
½-2” long spindle shaped bag wrapped in the foliage of the host plant. Young bagworms are very hard to spot.
Favorite host plants are juniper, arborvitae, spruce, pine and cedar. But they can attach themselves to deciduous shrubs and trees and we are seeing a lot of bagworms on deciduous trees this year!
Females lay eggs in bags left on plants over the winter. One female bagworm will lay as many as 500 eggs. The eggs hatch in the late spring and tiny larva crawl out and start feeding. As they feed, they use silk and plant materials to protect and camouflage themselves. Bagworms can strip a plant of foliage.
Heavy infestations, particularly on the same plant year after year, can completely defoliate a plant. Defoliation of needle evergreens, such as junipers and cedars, usually results in plant death. Broadleaf evergreens and deciduous plants typically are not killed but a weakened and more susceptible to other insect and disease problems.
When there are only a few, control is best by hand picking. If you have a large population an insecticide treatment should be made as soon as they are noticed. Try to remove any bags left on plant material in the fall. Bags left on the plant will serve as cocoons for females to lay more eggs. When removing bags, destroy them. Do not pick and toss on the ground as the worm will crawl back to a plant.

Bagworms produce silk threads to move locations.

Bagworms use the leaves of the host plant to protect themselves while they feed. This bagworm came off an elm tree, not a typical host plant for the caterpillar.


Bagworms can strip a mature Bald Cypress of its leaves quicker than you would expect.

Although not as common bagworms will feed on deciduous trees. If you notice skeletonized leaves, look close, most likely there are bagworms attacking the tree.

Young bagworms are small and can be hard to see. They wrap themselves in the plant needles making them hard to notice.
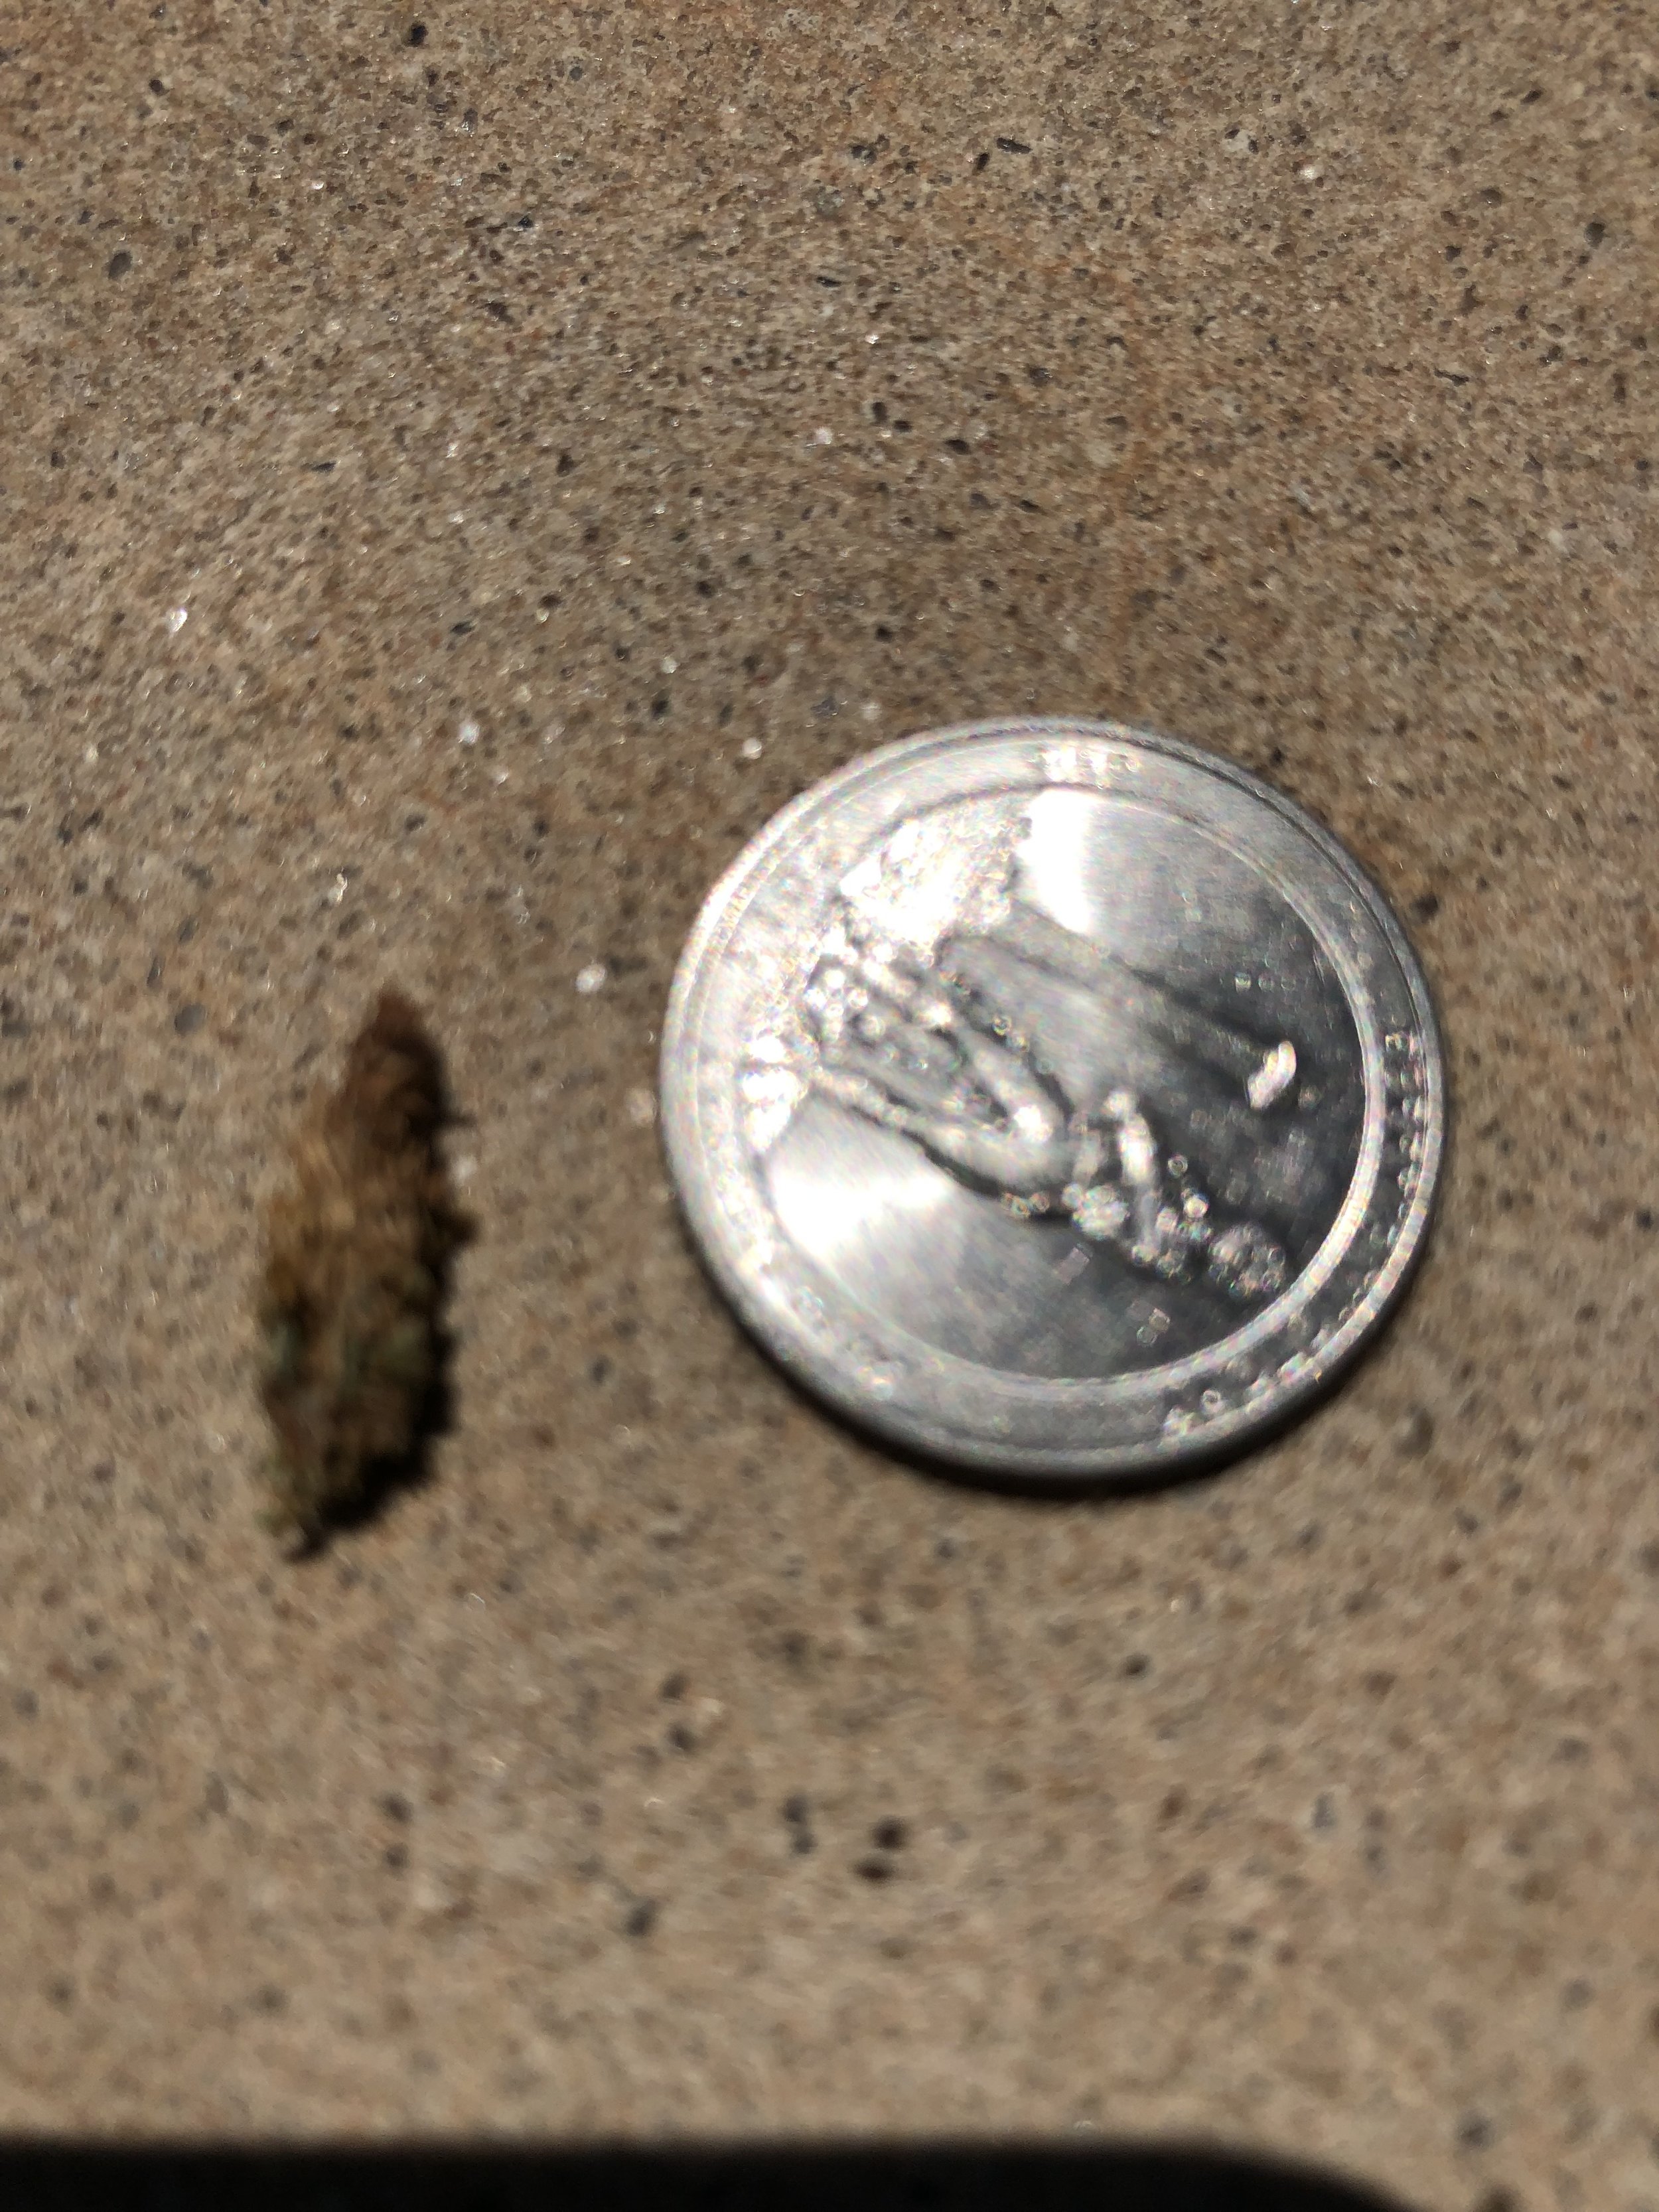
If you notice a juniper or cedar starting to loose color, inspect for bagworms.

Left untreated, large, heavy infestations of bagworms will kill mature trees and shrubs.


If there are not too many, the best way to control bagworms is to simply pull them off and throw them away. Don’t throw them on the ground, if you do they will crawl back onto the tree.
APHIDS
Timing – Species start producing in April and increase rapidly as temperatures increase.
A small, soft-bodied insect that is nearly invisible to the naked eye. The honeydew, sticky substance they excrete is the easiest way to know aphids are active. Colonies develop on the underside of the leaf and often are not noticed until the sticky substance starts to show.
They feed on the leaves, stems and buds of a wide variety of plants throughout the growing season. Usually, they attack the succulent new growth.
Aphids generally do not cause serious harm to mature plants, although they can be harmful to young plants. Heavy populations can cause wilt and yellowing of leaves as the sap is removed. Blooming trees and shrubs will see a reduction in flowers. Aphids can promote sooty mold, a fungal disease, and spread viruses.
Early detection is the key. Aphids mature in 7-10 days and can produce 40-60 offspring resulting in population explosions in the thousands within a few weeks.
When populations are small, a high-pressure blast of water can be used to wash the insects off the leaves. Wiping the leaves with a soapy solution is also effective with early detection. In most cases, once you notice the honeydew, it is best to treat with an insecticide. A dormant oil application in the winter is helpful in reducing populations the following season. Lady bugs can be used as a beneficial insect control when populations are small.

Aphids are small and often go unnoticed but the sticky substance they leave behind is easy to spot.

Aphids feed on the underside of the leaf and become noticeable as the leaf becomes covered with the sticky substance they excrete.

SPIDER MITES
Timing – They are active from early summer through fall. The hotter and drier the weather, the more severe the problem will become.
Very small (1/60 of an inch) that live on the underside of leaves and survive by sucking on the cell content of the leaves. First shows up as stippling of light dots on the leaves. Leaves then turn from bronze, to yellow, and then fall off.
They get their name from the small silk protective webs they create.
Because spider mite damage can look like many other plant problems, the best way to determine if it is spider mite is to shake the plant leaves over a white sheet of paper. Spider mites will look like tiny moving black dots on the paper.
Spider mites reproduce rapidly when conditions are perfect. Spider mites can hatch in as little as 3 days and become mature within 5 days. One female can lay up to 20 eggs per day during their 2-4 week life span.
The best control results from making two applications 7-10 days apart.
Adequate plant moisture during the hottest time of the year helps prevent population explosions.

Early signs of spider mites.

To know if you have spider mites shake leaves over a white sheet of paper.
Spider mites will look like tiny moving black dots.

Silk protective webbing formed by the spider mite.
CRAPE MYRTLE SCALE
Timing – Females lay eggs from May through September. Crawlers emerge within a day or two and spread to new areas of the plant.
The scale is white to gray and exudes a pink blood-like liquid when crushed. Initially you will notice a black sooty mold on the twigs and trunks of crape myrtles.
Bark scale is difficult to control without the use of a systemic insecticide to kill the sucking pests.
Inspect new plants for scale before purchasing.
Scrubbing the bark with a soft brush and mild solution of dishwashing soap and water will remove many of the females and eggs as well as remove the black sooty mold.
A dormant oil application in the late winter to early spring is an effective way to reduce scale populations.

This 25 year old Crape Myrtle was suffering from Crape Myrtle Scale last year. One year after trunk injections of a systemic insecticide and the mature tree is once again healthy and insect free.

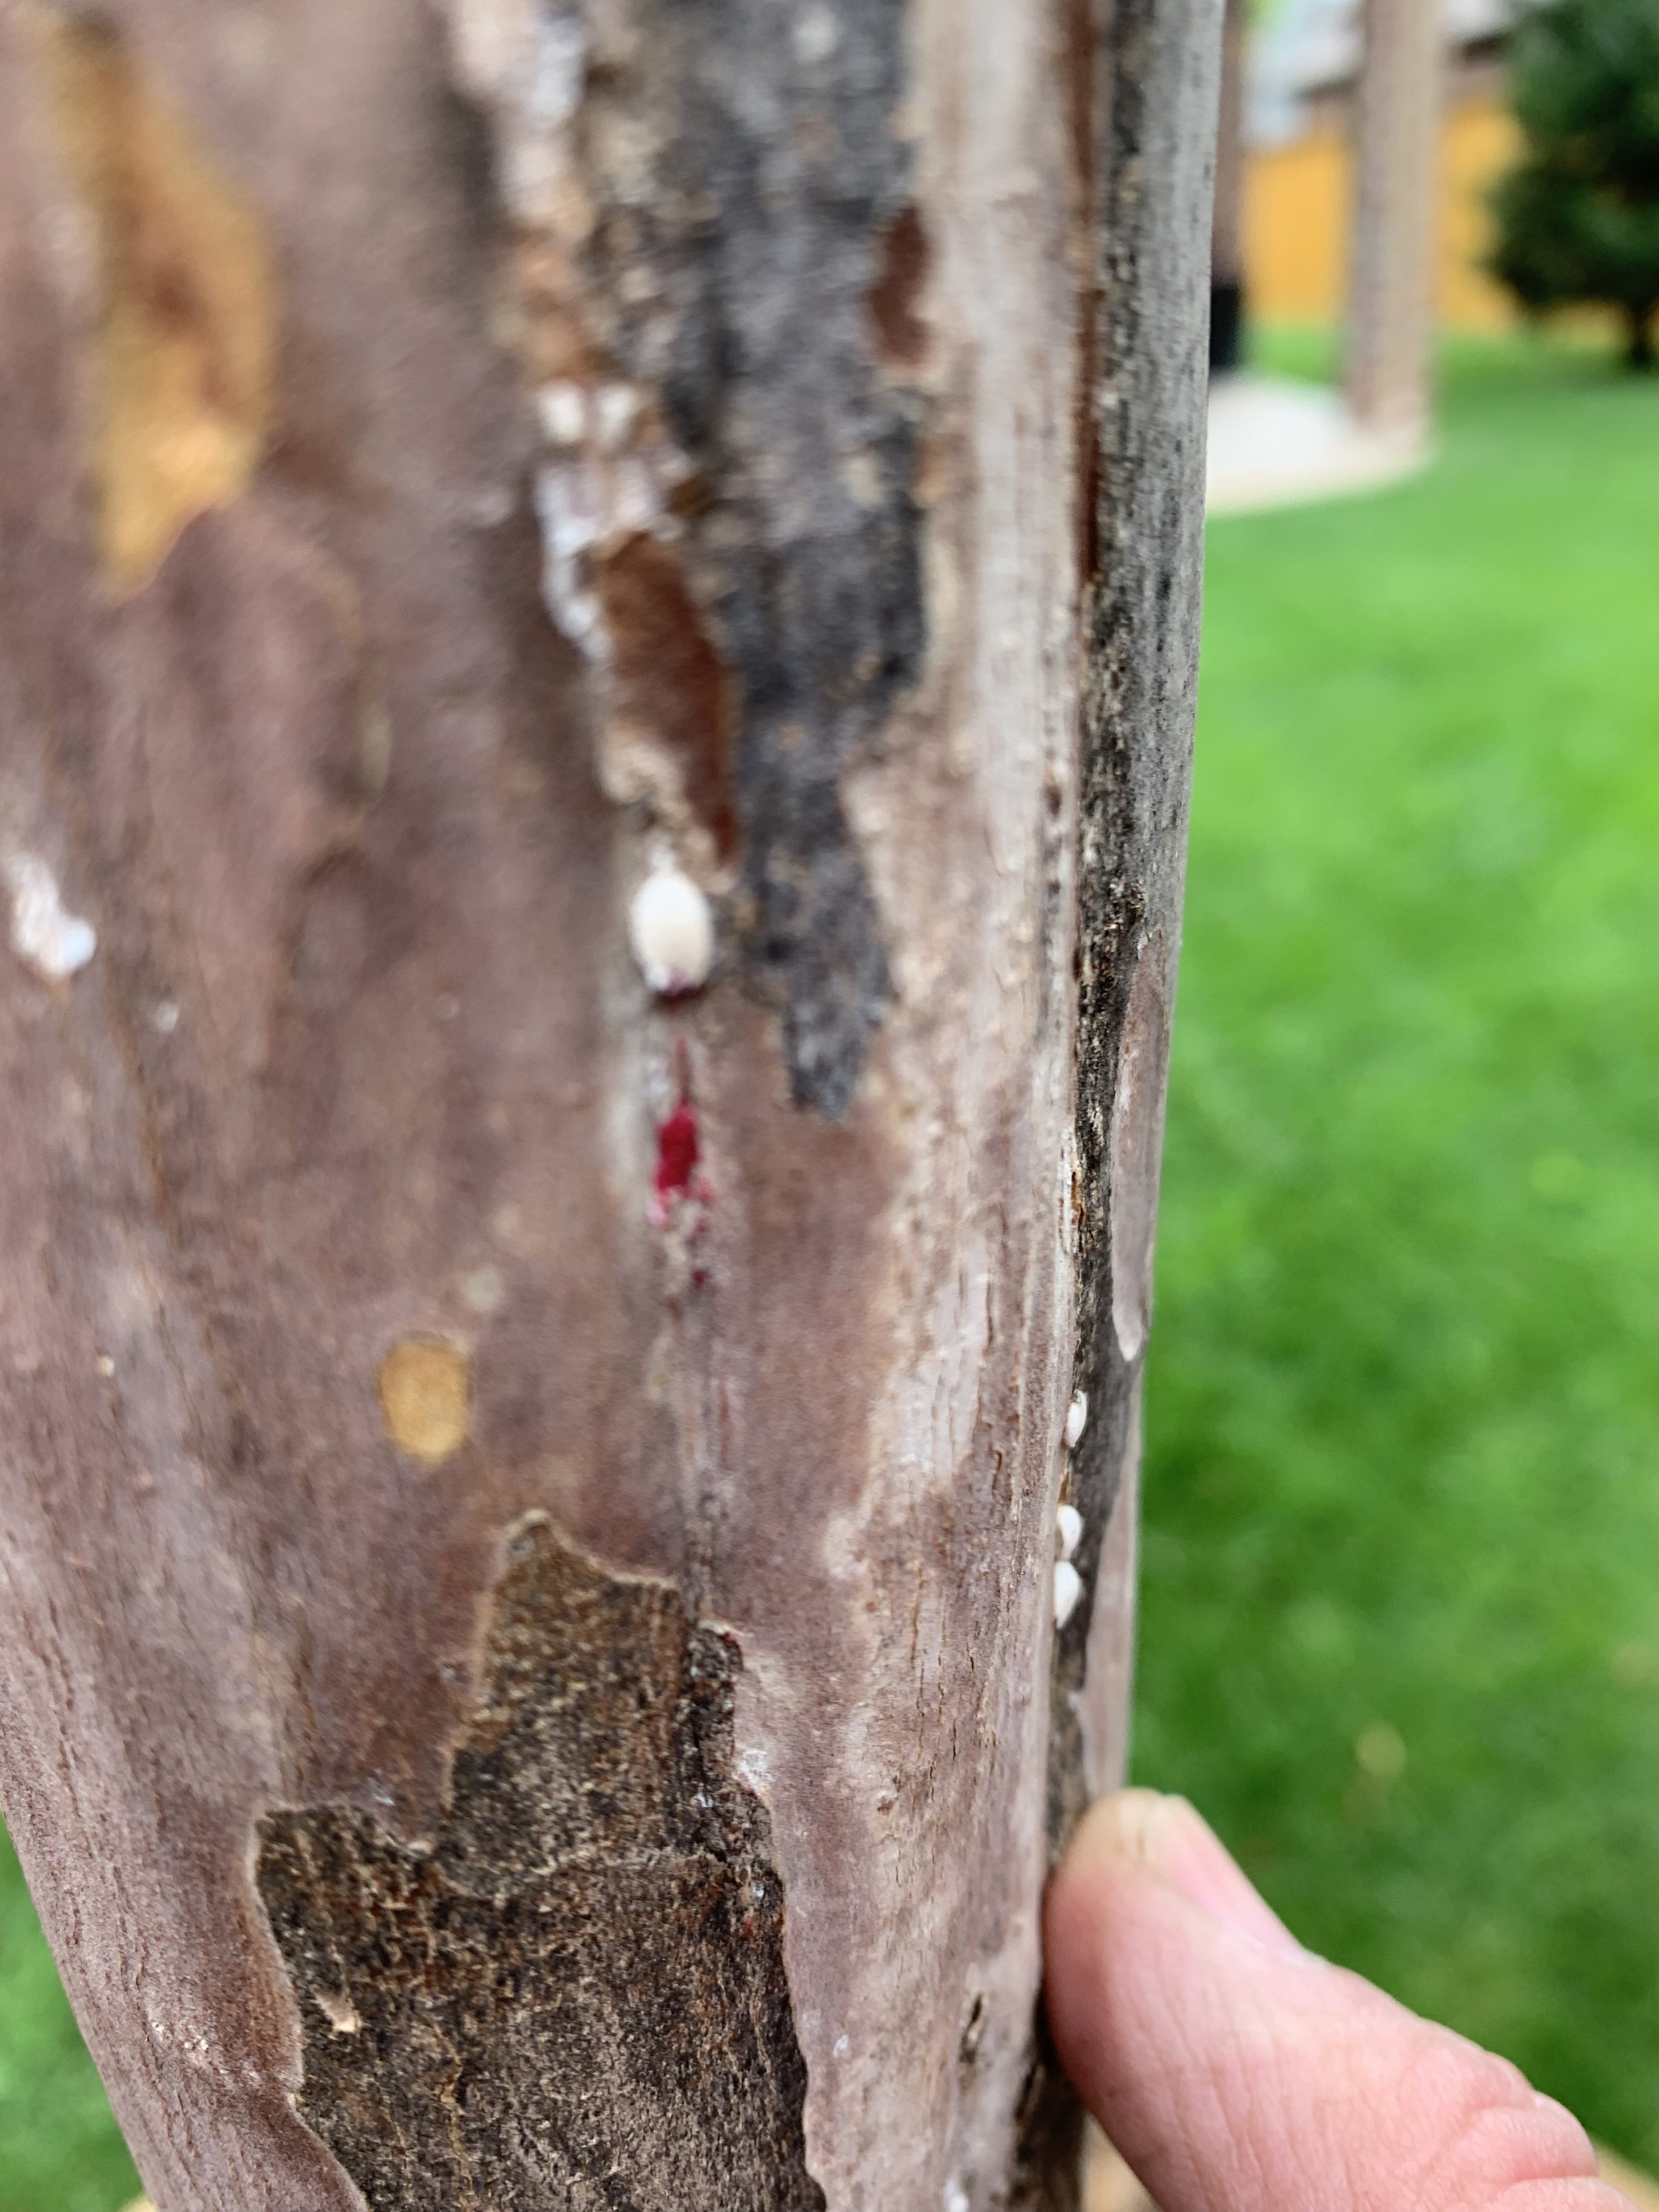
White scale attacks Crape Myrtles leaving a black sooty substance on the bark.
SOFT OAK SCALE
Timing – One generation per year. Crawlers emerge in June, feeding and spreading on the branches.
They are convex in shape resembling a helmet, brown and ¼” in size. Crawlers are small and pale in color.
Scale feeds on the fluids in the vascular system.
They produce honeydew which is a source for attracting ants and other insects.
They rarely kill the tree but open up wounds that provide entry for other damaging pathogens.
When populations are allowed to increase canopy damage may occur along with discoloration of the leaves.
Application of an insecticide via spraying needs to occur in June when the crawlers are active. Annual spray applications in June are required until the populations are under control.
An alternative treatment is trunk injections of a systemic insecticide. Trunk injections allow the insecticide to be readily distributed throughout the plant’s vascular system to the fluids the scales feed on.

Soft Scale are small brown convex shaped insects on oak tree branches.
WEBWORM
Timing – The first-generation spin webs in July and later generations create webs in September to October.
Caterpillars weave a loose web around tree branches while they are munching on the leaves.
Favorite trees include hickory, mulberry, oak, pecan, popular, redbud, sweetgum, and willow. But you can find them on most ornamental shade trees when populations are heavy.
Early generations won’t cause long-lasting damage. They are just unsightly. The last generation can cause damage when the branch tries to rebud just before a killing frost. When this occurs, you can expect the affected branch to die.
The best control is to cut out any affected branches in the early generations when the webbing is small. Completely dispose of the branch as the worms will exit the webbing and return to a tree. If the web is too high or if the population has increased to the point that pruning is not possible, an insecticide application will be needed. The spray must penetrate the webbing to gain control of the caterpillars. Dormant oil applications are a good idea as worms overwinter in tree bark.
Even though early populations do not cause damage, early control is important. When left untreated, typically later generations’ populations increase.


Webworm caterpillars loosely weave webbing around branches to protect them while stripping a branch of leaves. When spraying, you mush have enough pressure to penetrate the webbing to gain control.

The webworm caterpillar weaves a loose web around tree branches to protect themselves while they are destroying your tree’s leaves.

The first generation of webworm started to show up in trees this week. Inspect your trees this weekend. The best control is to cut the branch out when they are small.
ARMY WORMS
Timing – Moths migrate from the Gulf Coast in June, lay eggs and the first-generation caterpillars start feeding in July. With a 28-day life cycle there can be 4 or 5 generations between July and November.
Army worms are always present in our summer lawns and landscapes. When populations are normal you may never know they are there. But, when conditions are right, as they were in 2021, we can see an explosion and experience turf damage.
Early caterpillars are green and very small. As they grow to 1 to 1 ½” they turn browner with reddish brown stripes on each side of the body and small back spots on the top. Their distinctive mark is an inverted “Y” on the front of the head.
Army worms will feed on any leafy, soft plant with plenty of moisture in the leaf. In 2021 they feasted primarily on fescue lawns because growing conditions were perfect for fescue. In previous outbreaks, army worms picked bermuda over fescue. If army worms are high in populations this summer, you can expect them to choose bermuda over fescue because the early summer heat has kept fescue from flourishing.
Watch for areas of the lawn that appear to have drought stress should not be. Test the area with a soap flush. Mix 1 teaspoon of dish soap with 1 gallon of water and pour over the surface. If you have army worms, they will come to the surface.
Treatment with a systemic insecticide when the worms are small before they become heavy feeders is best.

Can you count the number of army worms in this picture from August ‘21?

If you have areas in your lawn that are turning brown you can test for army worms by drenching the area with soapy water. If there are army worms present they will immediately come to the surface.

Army worms are present every year but in numbers that don’t usually cause turf damage. August ‘21 army worm populations were high enough they devastated areas of lawns in just a couple of days.
The best way you can protect your investment is to take a few minutes each week to inspect your lawn, shrubs, trees and flowers.
Hall | Stewart offers a Tree & Shrub Care Program based on an Integrated Pest Management approach focused on plant health. The program includes dormant oils to smother overwintering insects in the late winter, systemic insecticides in the early spring, inspection and treatment as needed in the summer, and fertilizer applications in both the spring and fall.
Complete control is much easier when insects are noticed early, and populations are small.
Please let us know if you have any questions or concerns about your lawn and landscape.
Lorne Hall
Hall | Stewart Lawn + Landscape
(405)367-3873
Summertime = water time!

Friday, June 20th marked the official start of summer. Known as summer solstice, it is the longest day of the year.
So, if it is officially summer, it means it is time to review best watering practices.
Wait a minute, didn’t a local weather person report this week that the past 60 was the 3rd wettest 60-day period in Oklahoma City? That is true. The metro area has received 23” of rain since mid-April. Another way to think of it… in the last 60 days we have received over 60% of our average annual rainfall or 36.5”.
Again, why are we talking about best watering practices?
Because, summer in Oklahoma means temperatures will rise and rainfall will decline.
Best watering practices start with being aware of current weather patterns and adjusting watering schedules.
Best watering practices need to be your number one focus in the landscape for the next few weeks.
Best watering practices will have the biggest impact on the health and appearance of your lawn and landscape for the rest of the summer.
Best Watering Practices:
Apply 1” to 1.5” of water per week.
Your lawn and landscape need 1” to 1.5” of moisture per week when temperatures are consistently 90 degrees or higher.
Which begs the question: “How long should I water?”
Every irrigation system is different – different head types, different size nozzles, different head spacing, different soils, different slopes, etc.
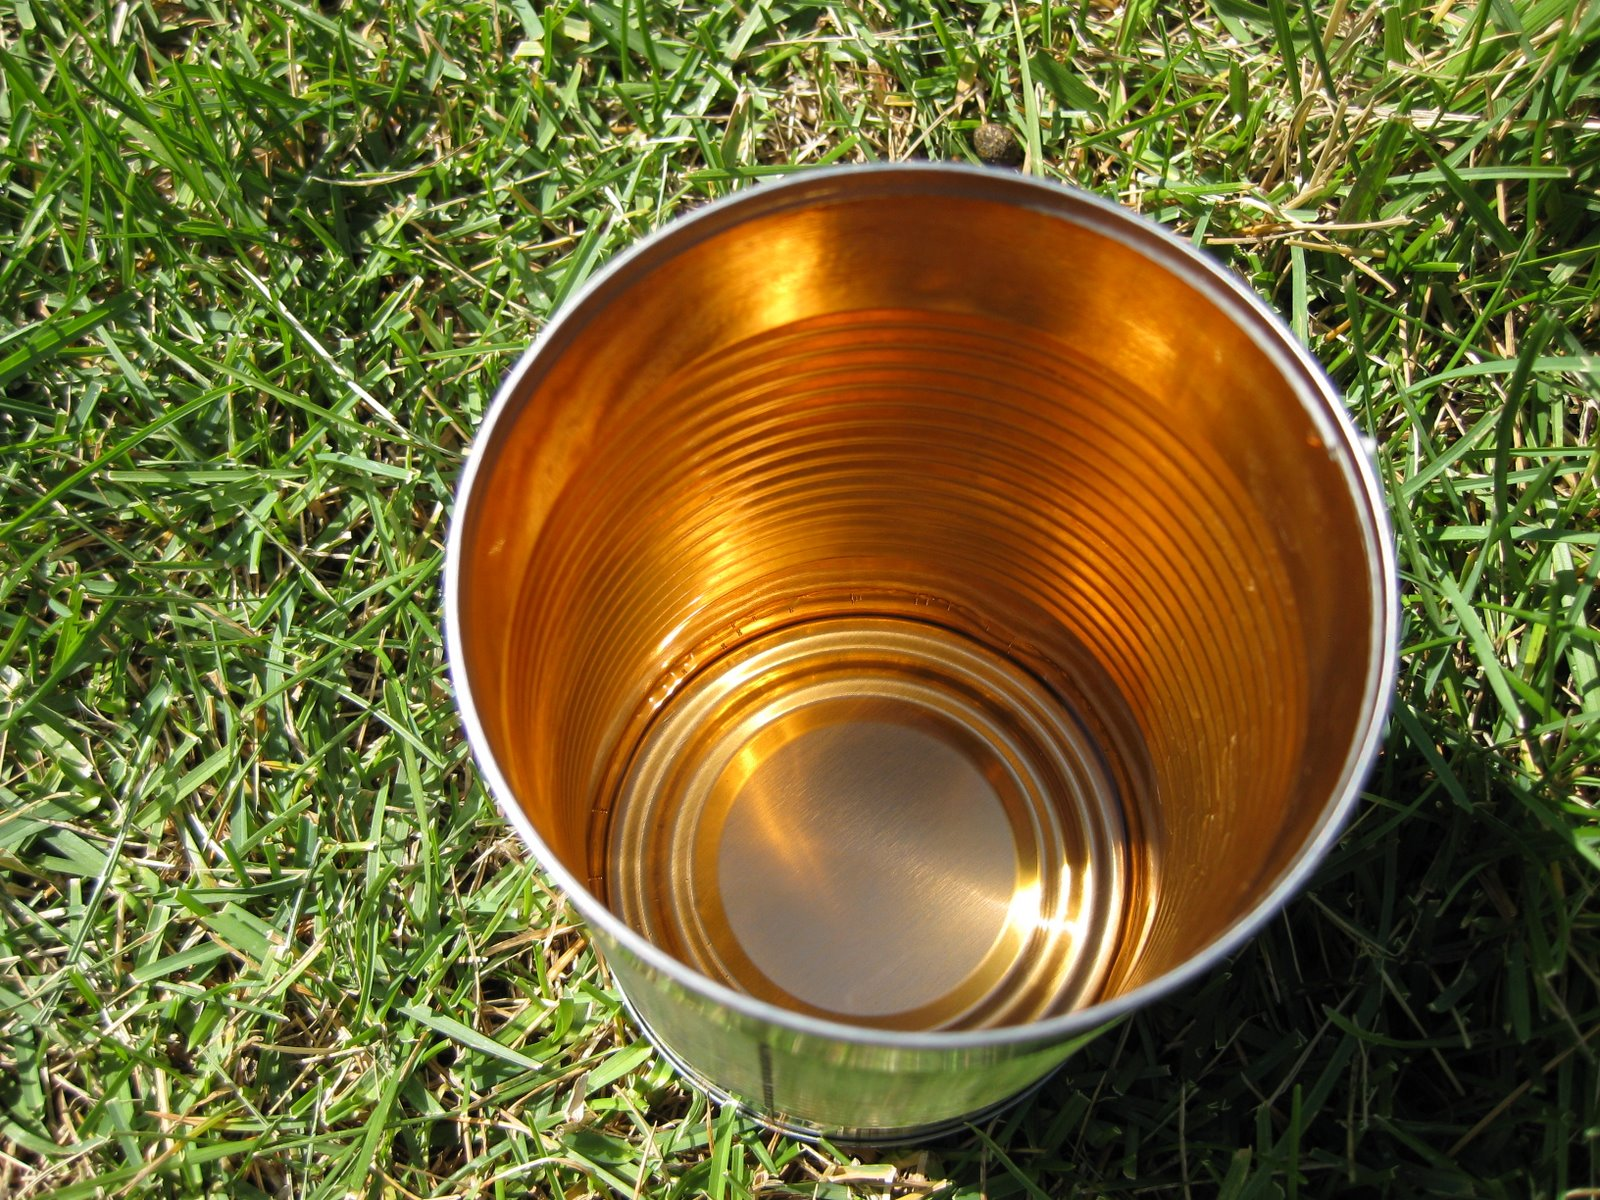
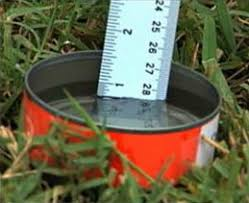
The best way to know how long you should water is to measure the amount of water your system puts out in each zone. Take a few cans and place them around your lawn in a random pattern. Run your sprinklers through a cycle and measure the amount of water in the cans. If the sprinklers ran for 15 minutes and you had .25” of water, that zone needs a total of 60 to 90 minutes of run time per week.
Next determine how long you can run your irrigation before there is excessive runoff. This will tell you how many times per week you need to water. If you can get away with watering every 4th day, you will have a healthier, stronger landscape.
If you don’t have the time to audit the amount of water your system puts out, start with these settings, monitor, and adjust:
Fixed spray pattern heads with 10-15’ spacings – 15 mins per time.
Larger rotor type heads on 20-30’ spacings – 30 mins per time.
My practice has been, using the best practices mentioned here, to water my fescue lawn every 4 days when temperatures are in the 90s and increase to every other day when the lawn shows signs of stress from lack of water.

Set your controller to water with back-to-back run times.
For most of our landscapes, if you run our sprinklers long enough to get the recommended amount of water, you end up with a lot of water running down the street. Splitting zone run time in half and setting the controller to run through the zones back-to-back will improve the amount of water that soaks in and reduce the amount of water that runs off.
Example: Set the controller to run at 4:00 AM and 5:00 AM. When the 4:00 cycle completes, even if it is past 5:00, the controller will start the second cycle.
I know from experience that moist soil will absorb more water than dry soil. Soil is just like the sponge in your sink. A dried-out sponge repels water before it starts absorbing water. Your lawn is the same. The first cycle moistens the soil and the second cycle soaks in.
Split, back-to-back, irrigation cycles are an old golf course trick. Large commercial irrigation controllers have had a run/soak cycle setting that waters a short time, delays, and then waters a longer time for years. Now, more and more smart controllers offer a run/soak cycle feature.
I started using split, back-to-back, irrigation cycles years ago on lawns with slopes.
After seeing great results, I started incorporating the concept on all lawns.
It makes a difference in watering efficiency.

Water in the early morning.
Evaporation is at the lowest point in the pre-dawn hours. Typically, wind is also at the lowest point of the day in the pre-dawn hours.
I prefer to set most irrigation controllers to start at 4:00 AM with the goal of having the cycle completed by 8:00 AM.
Avoid watering in the heat of the day when much of the water will be lost to evaporation. Also, avoid watering in the evening. Watering in the evening promotes many turf diseases because the lawn stays wet too long.
This is critical for fescue lawns. If fescue stays wet for more than 6 hours at a time and nighttime temperatures are in the 70’s, brown patch is unavoidable. Fescue performs best in the heat if it is watered deeply, and grass blades are dry by noon.
If you water your fescue lawn in both the morning and the evening during the summer because you “can’t seem to get enough water on it!”, your lawn isn’t struggling because it is too dry, your lawn is struggling because you have created the perfect conditions for brown patch, a fescue lawn’s worst enemy.

IMPORTANT: Don’t water fescue in the evening during the summer. When water remains in the leaf for more than 6 hours, brown patch disease will develop.

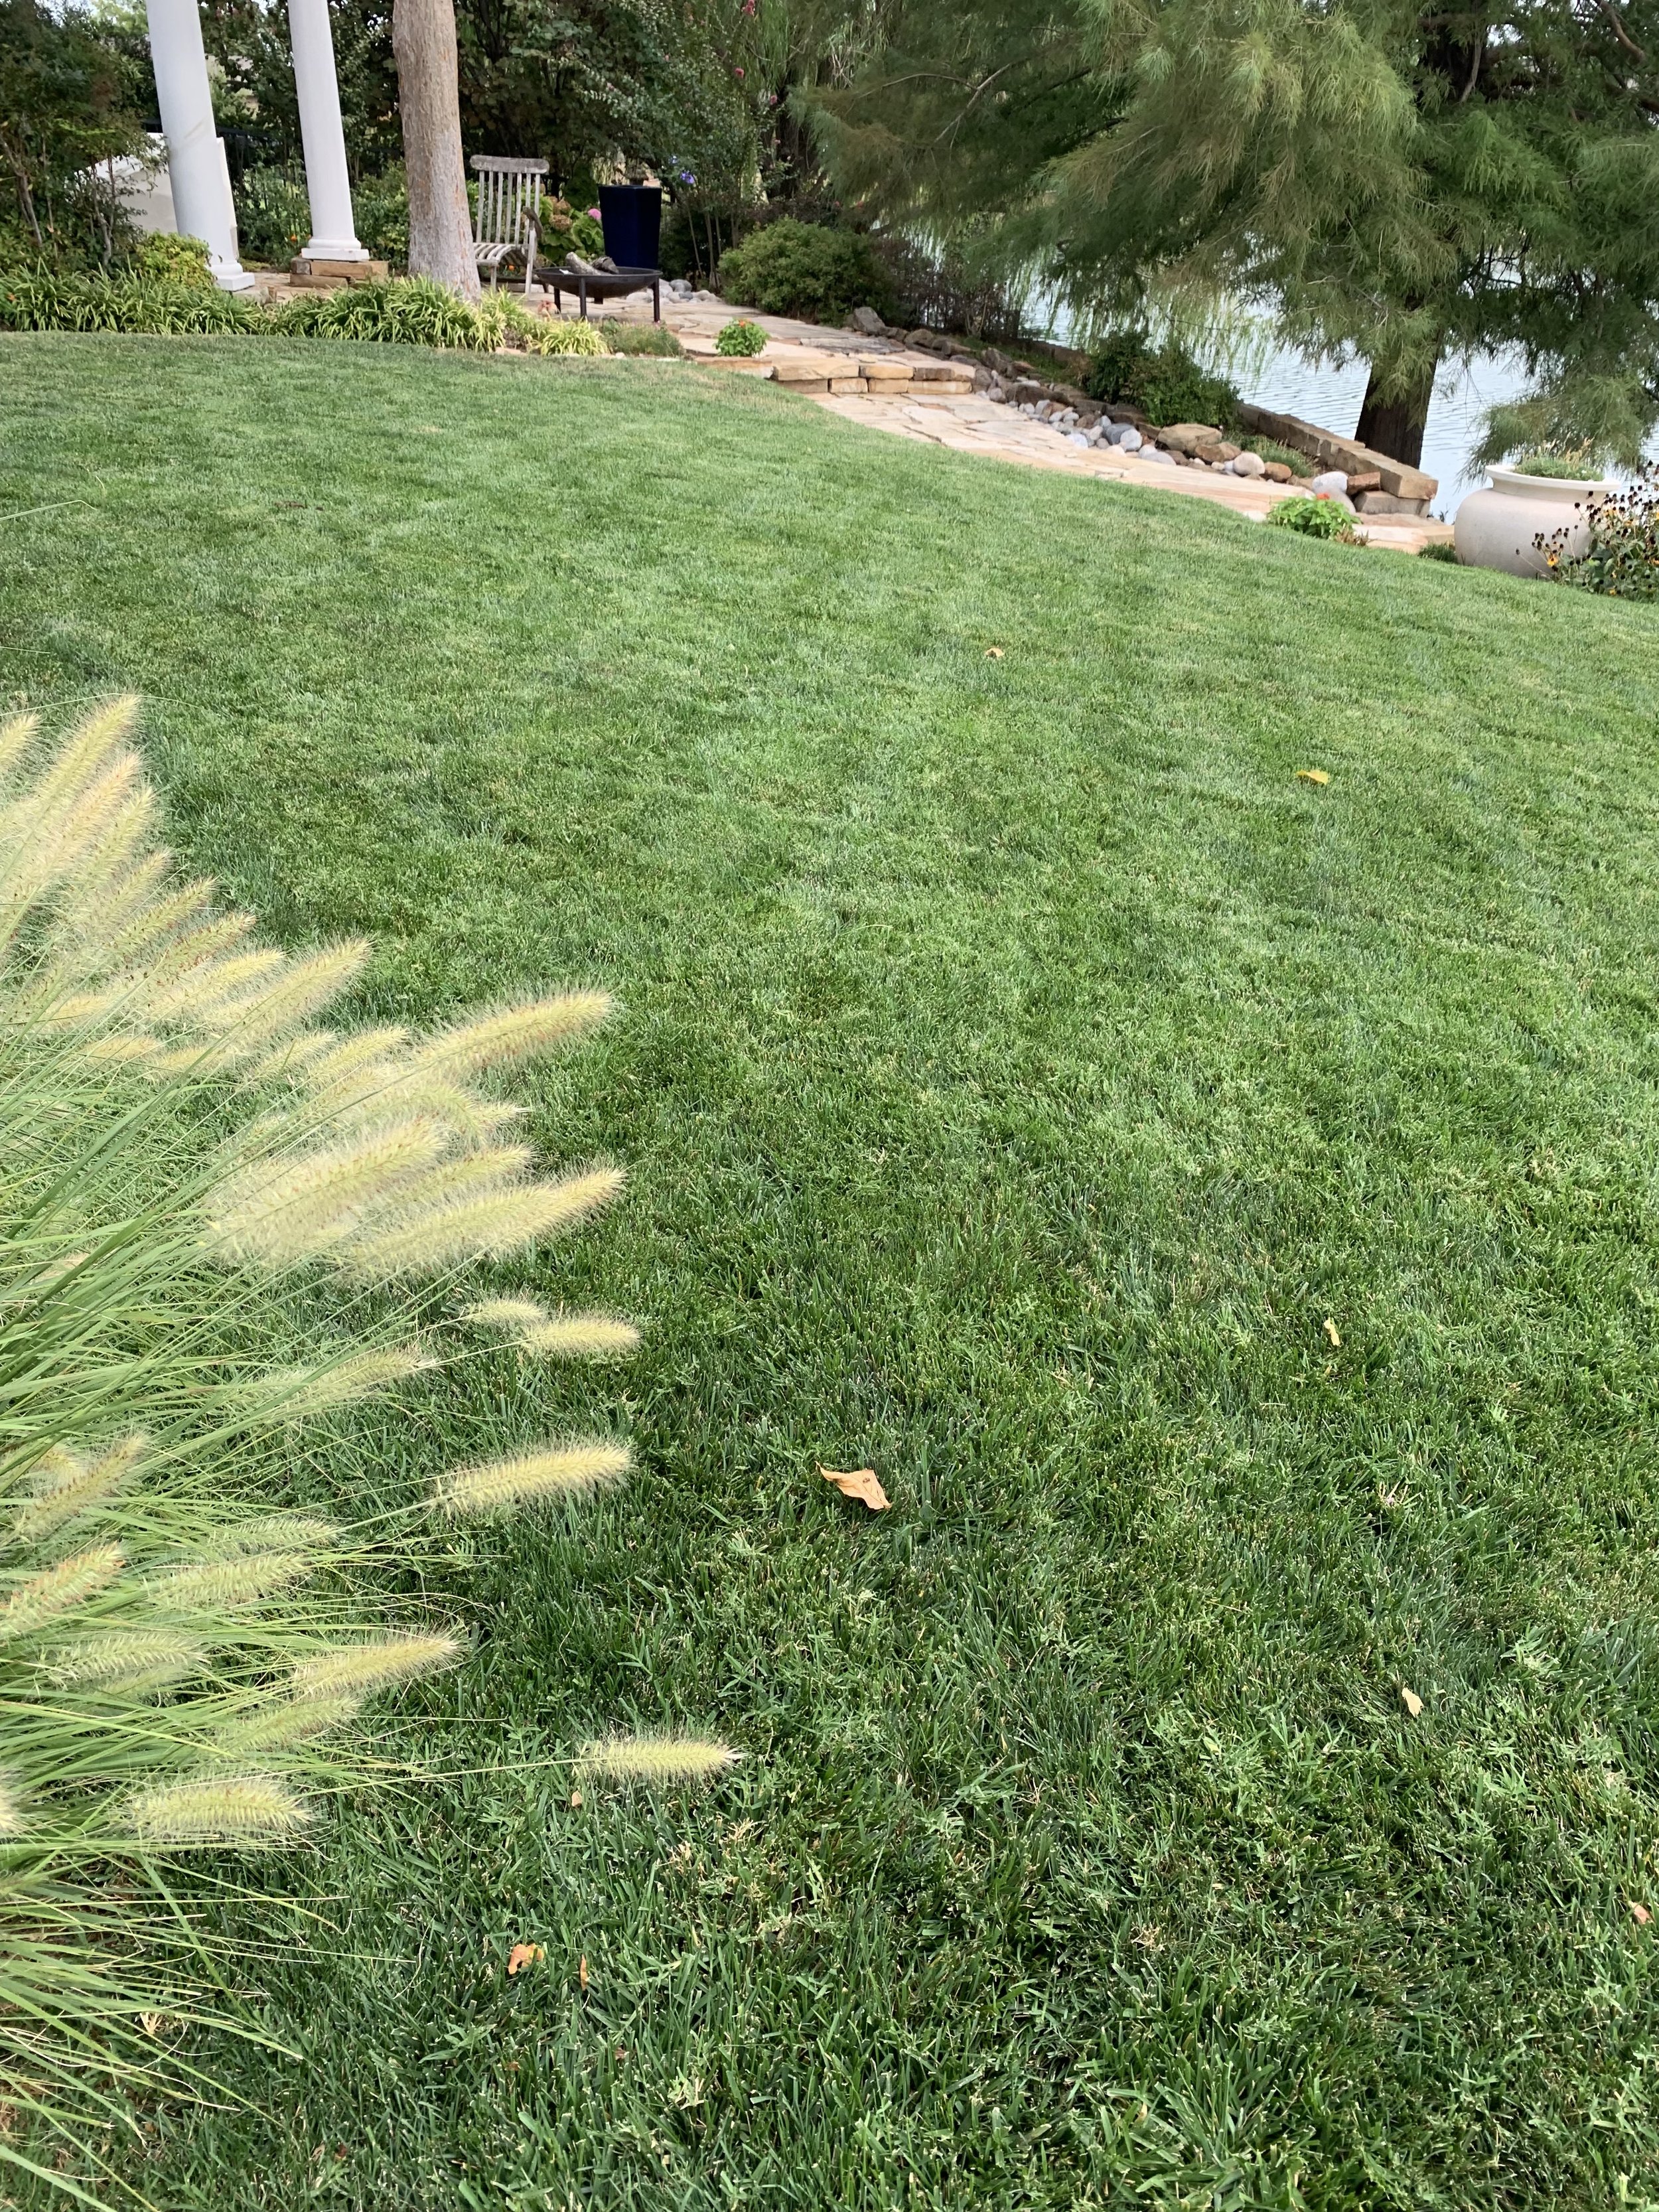
How much difference does infrequent, deep watering make when it comes to developing a drought tolerant lawn? This is a picture of a fescue lawn in full sun in August that is deep soaked every 4 days. The picture was taken in mid-August with less than a 1/4" rainfall in the previous 20 days.
Daily watering is not needed.
Unless you are trying to get newly planted seed to germinate or new sod to take root, there is not a good reason to water every day. Always water deep and infrequent. Daily, shallow watering creates a landscape that is shallow rooted and more dependent on constant moisture for survival.
Fescue will also benefit from deep soakings, every other day, through the summer months. Shallow, daily watering in the summer heat is very damaging to fescue. Again: Brown patch symptoms look very similar to drought stress. Typically, the more you water, the worse the fescue looks, so you add more water, and the cycle of decline continues.
A common myth I would love to dispel is that fescue requires a lot more water than bermuda. Yes, it does for a couple of weeks in the fall when you are trying to get newly seeded fescue to germinate, but mature fescue doesn’t require more moisture than bermuda.

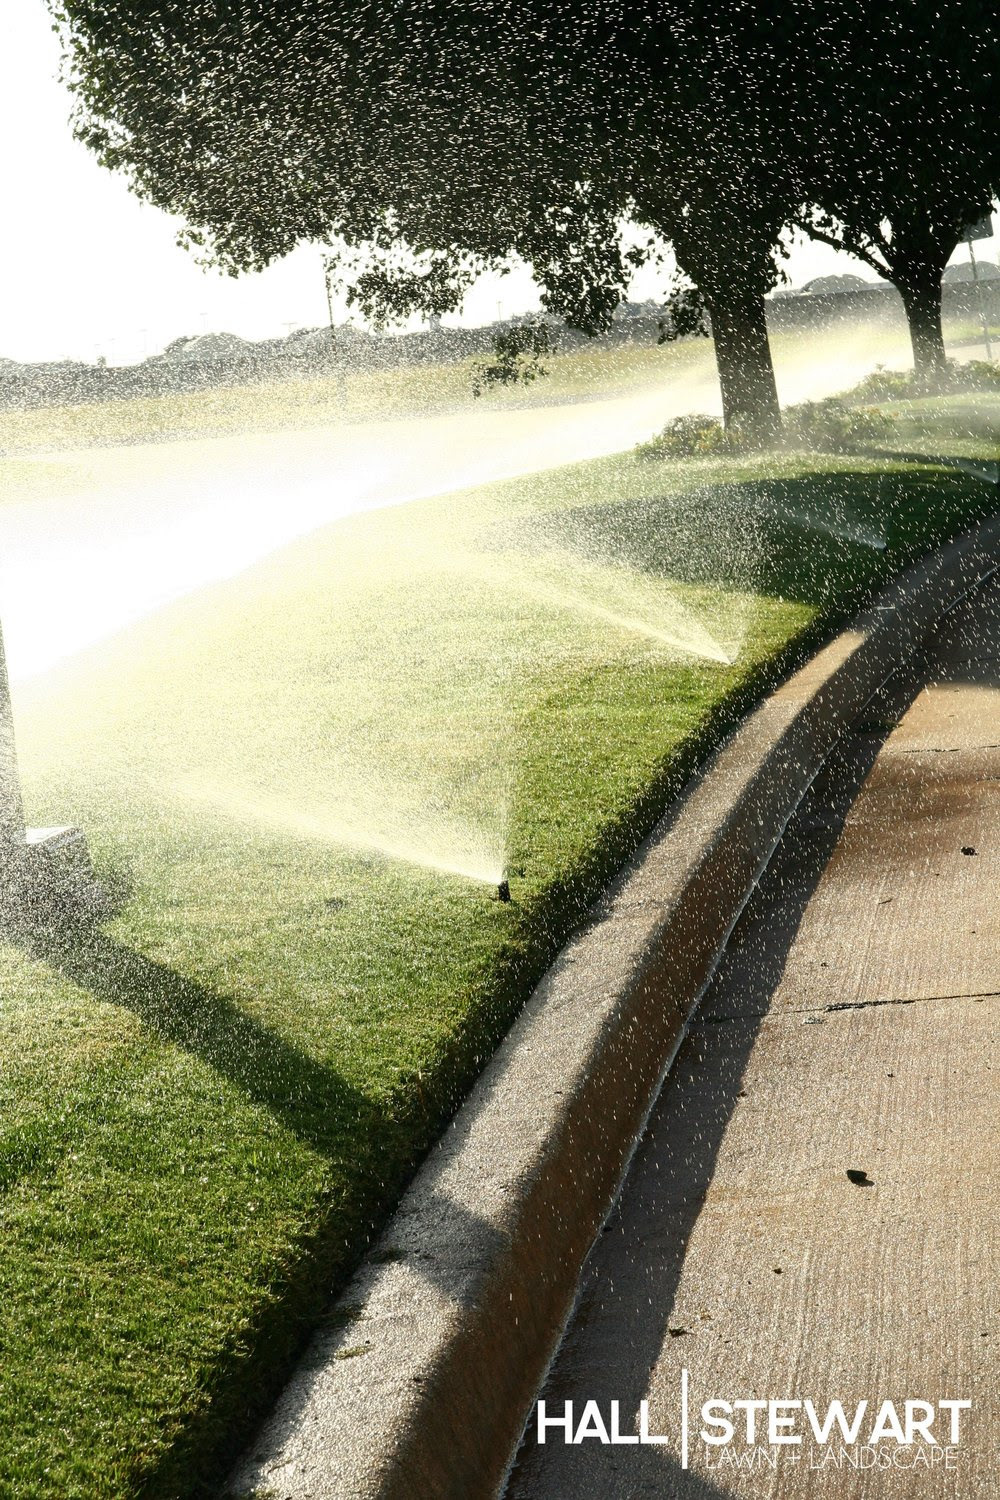
Aeration improves moisture absorption.
You can’t beat aeration for improving your soil structure. A key benefit of improved soil structure is better water absorption. Lawns that receive annual aeration (or at least every other year) do not experience as much runoff.

Head to head coverage is when the water from one sprinkler head reaches all the way to the next head. Without head to head coverage, dry areas can develop around heads.
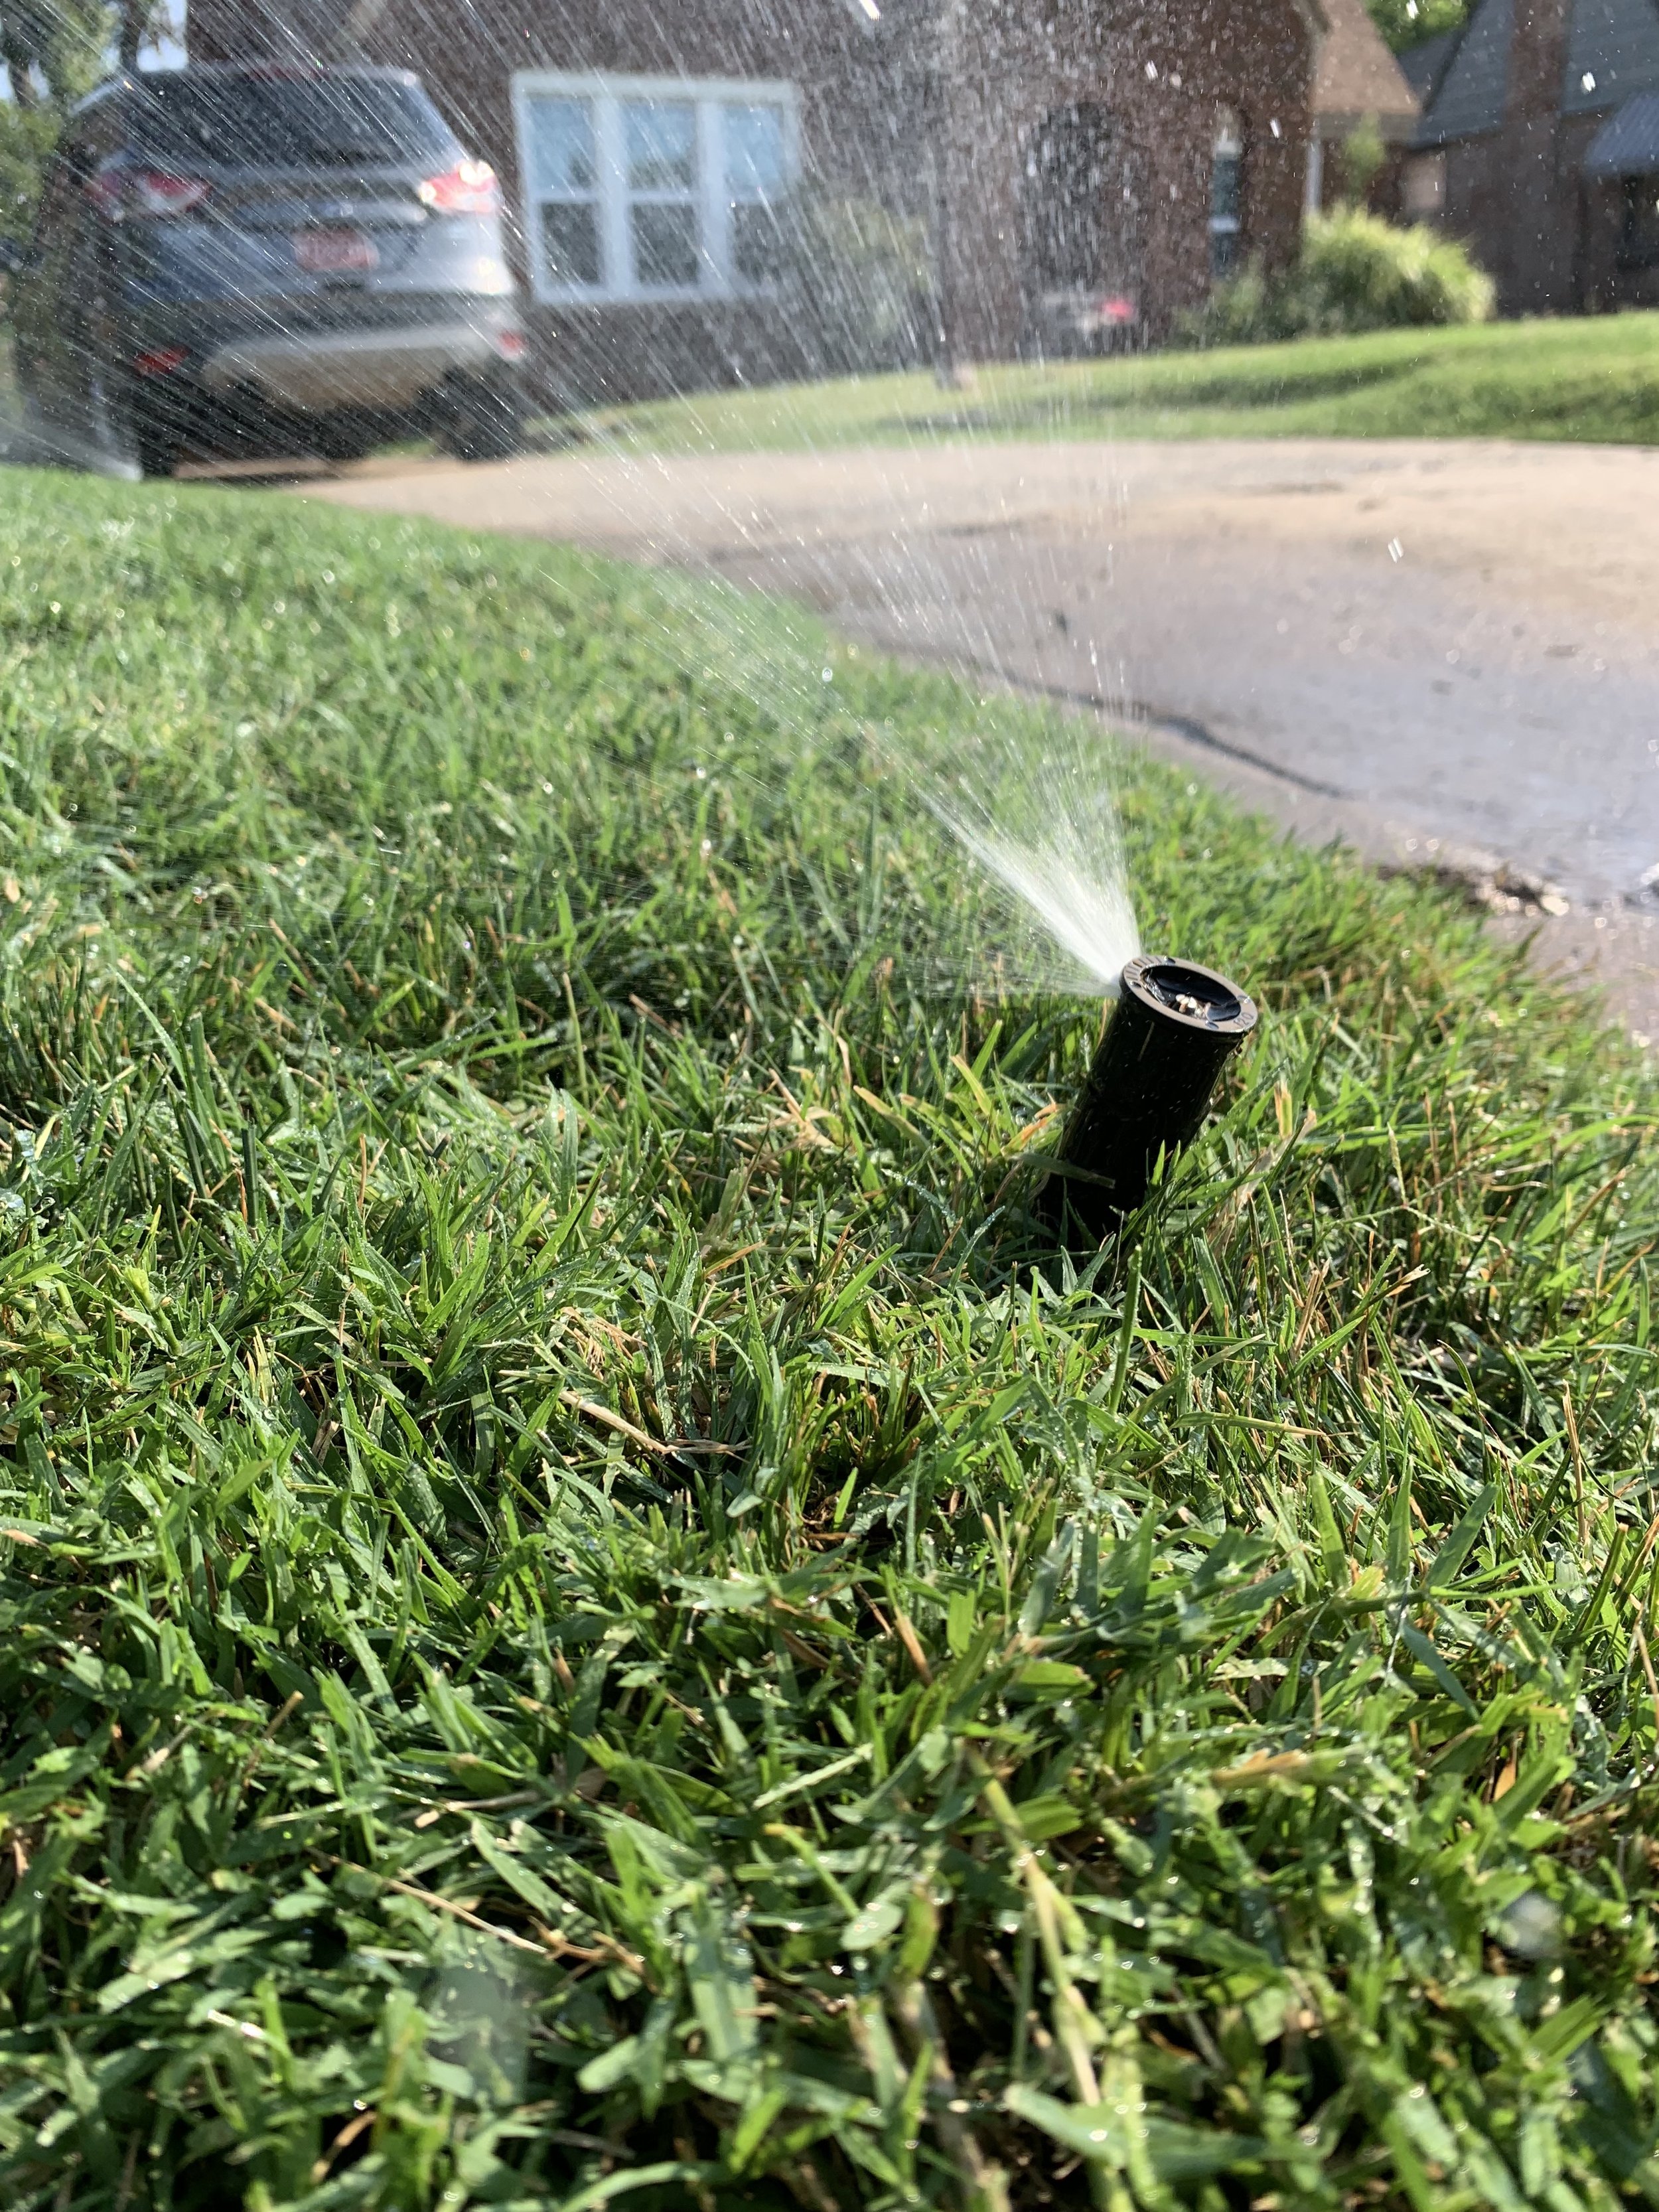
Fixing uneven water patterns in your lawn may be as simple as making sure heads are straight. A leaning head will result in uneven water distribution.

A clue to an uneven watering problem is an arc pattern matching the sweep of an irrigation head.
Always pay attention to water needs.
If we receive 1/2” of rain or more, turn your controller off for a few days. Install a rain sensor if you are not good at remembering. A rain sensor will pay for itself easily in one season.
Just because it is summer, don’t assume you can leave your controller in automatic and forget it.
Don’t stress if your lawn and landscape gets a little dry, it will rebound quickly once water is applied.
A good indicator that your lawn needs water is the footprint test. If the grass retains your footprints instead of quickly springing back, it is time to resume watering.
Watch for uneven water patterns.
If you notice areas where the lawn color is fading, you may have uneven moisture patterns. This could be the result of a broken head, clogged nozzle, or a head that is out of adjustment.
Even if you don’t have an irrigation system, the concepts of good watering apply.
It is important to learn how long you need to water when you are using a hose end sprinkler. Next time you water, set out a few cans. You will be surprised how long you need to water to get the proper amount of water on your lawn.
Invest in a digital hose water timer, such as the ones made by Orbit. It will make it easier for you to control the timing and frequency of watering.
If you need help in determining your lawn and landscape’s water needs, let us know.
We can schedule an irrigation audit for your lawn and landscape. We will inspect for uneven water distribution, absorb water rates, make recommended irrigation changes, and set the controller for optimal operation. Give us a call if we can help – (405)367-3873.

A healthy landscape is an important part of our environment.
A healthy turf helps clean the air, trap carbon dioxide, reduce erosion, improve groundwater quality, absorb noise, reduce temperatures, as well as adds cub appeal and value to your home.
A key component to a healthy landscape is correct water usage.

Lorne Hall
Hall | Stewart Lawn + Landscape
(405)367-3873
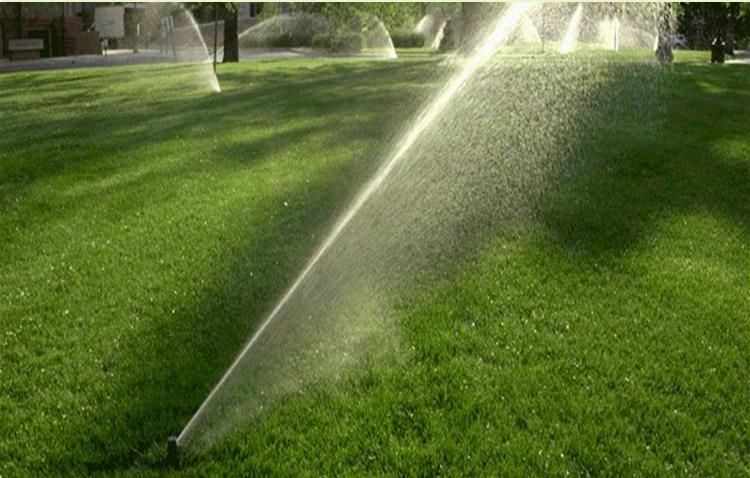

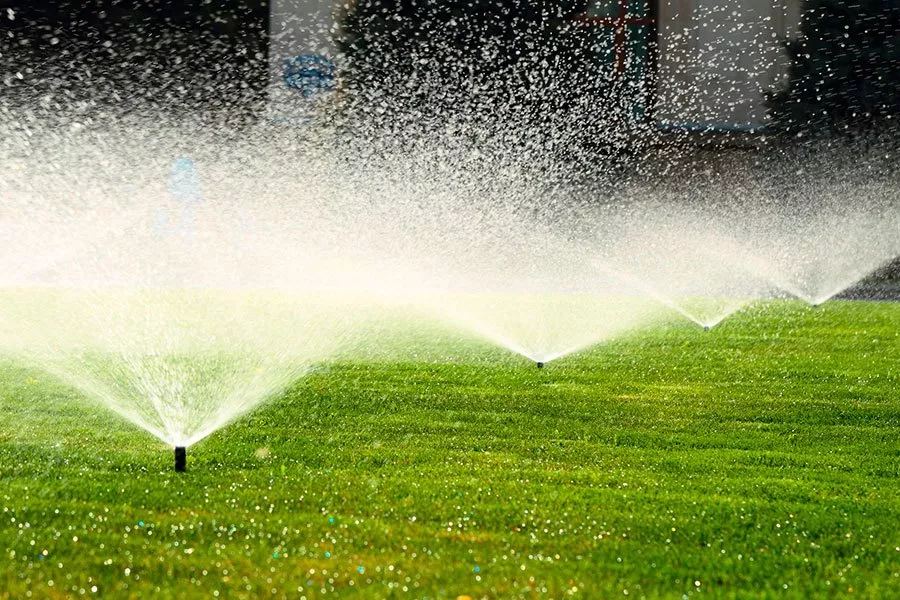
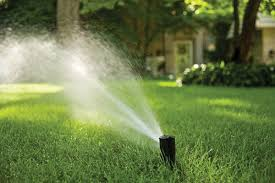
One Easy Way To Make A Big Difference In Your Lawn - Don’t Bag Your Clippings!

You may have heard me tell this story before, but it is worth telling again:
The Tale of Two Very Similar but Very Different Lawns
In the late 1980’s, the full-service landscape management company that I started while in college provided landscape maintenance for two homeowner associations located directly across the street from each other in NW Oklahoma City.
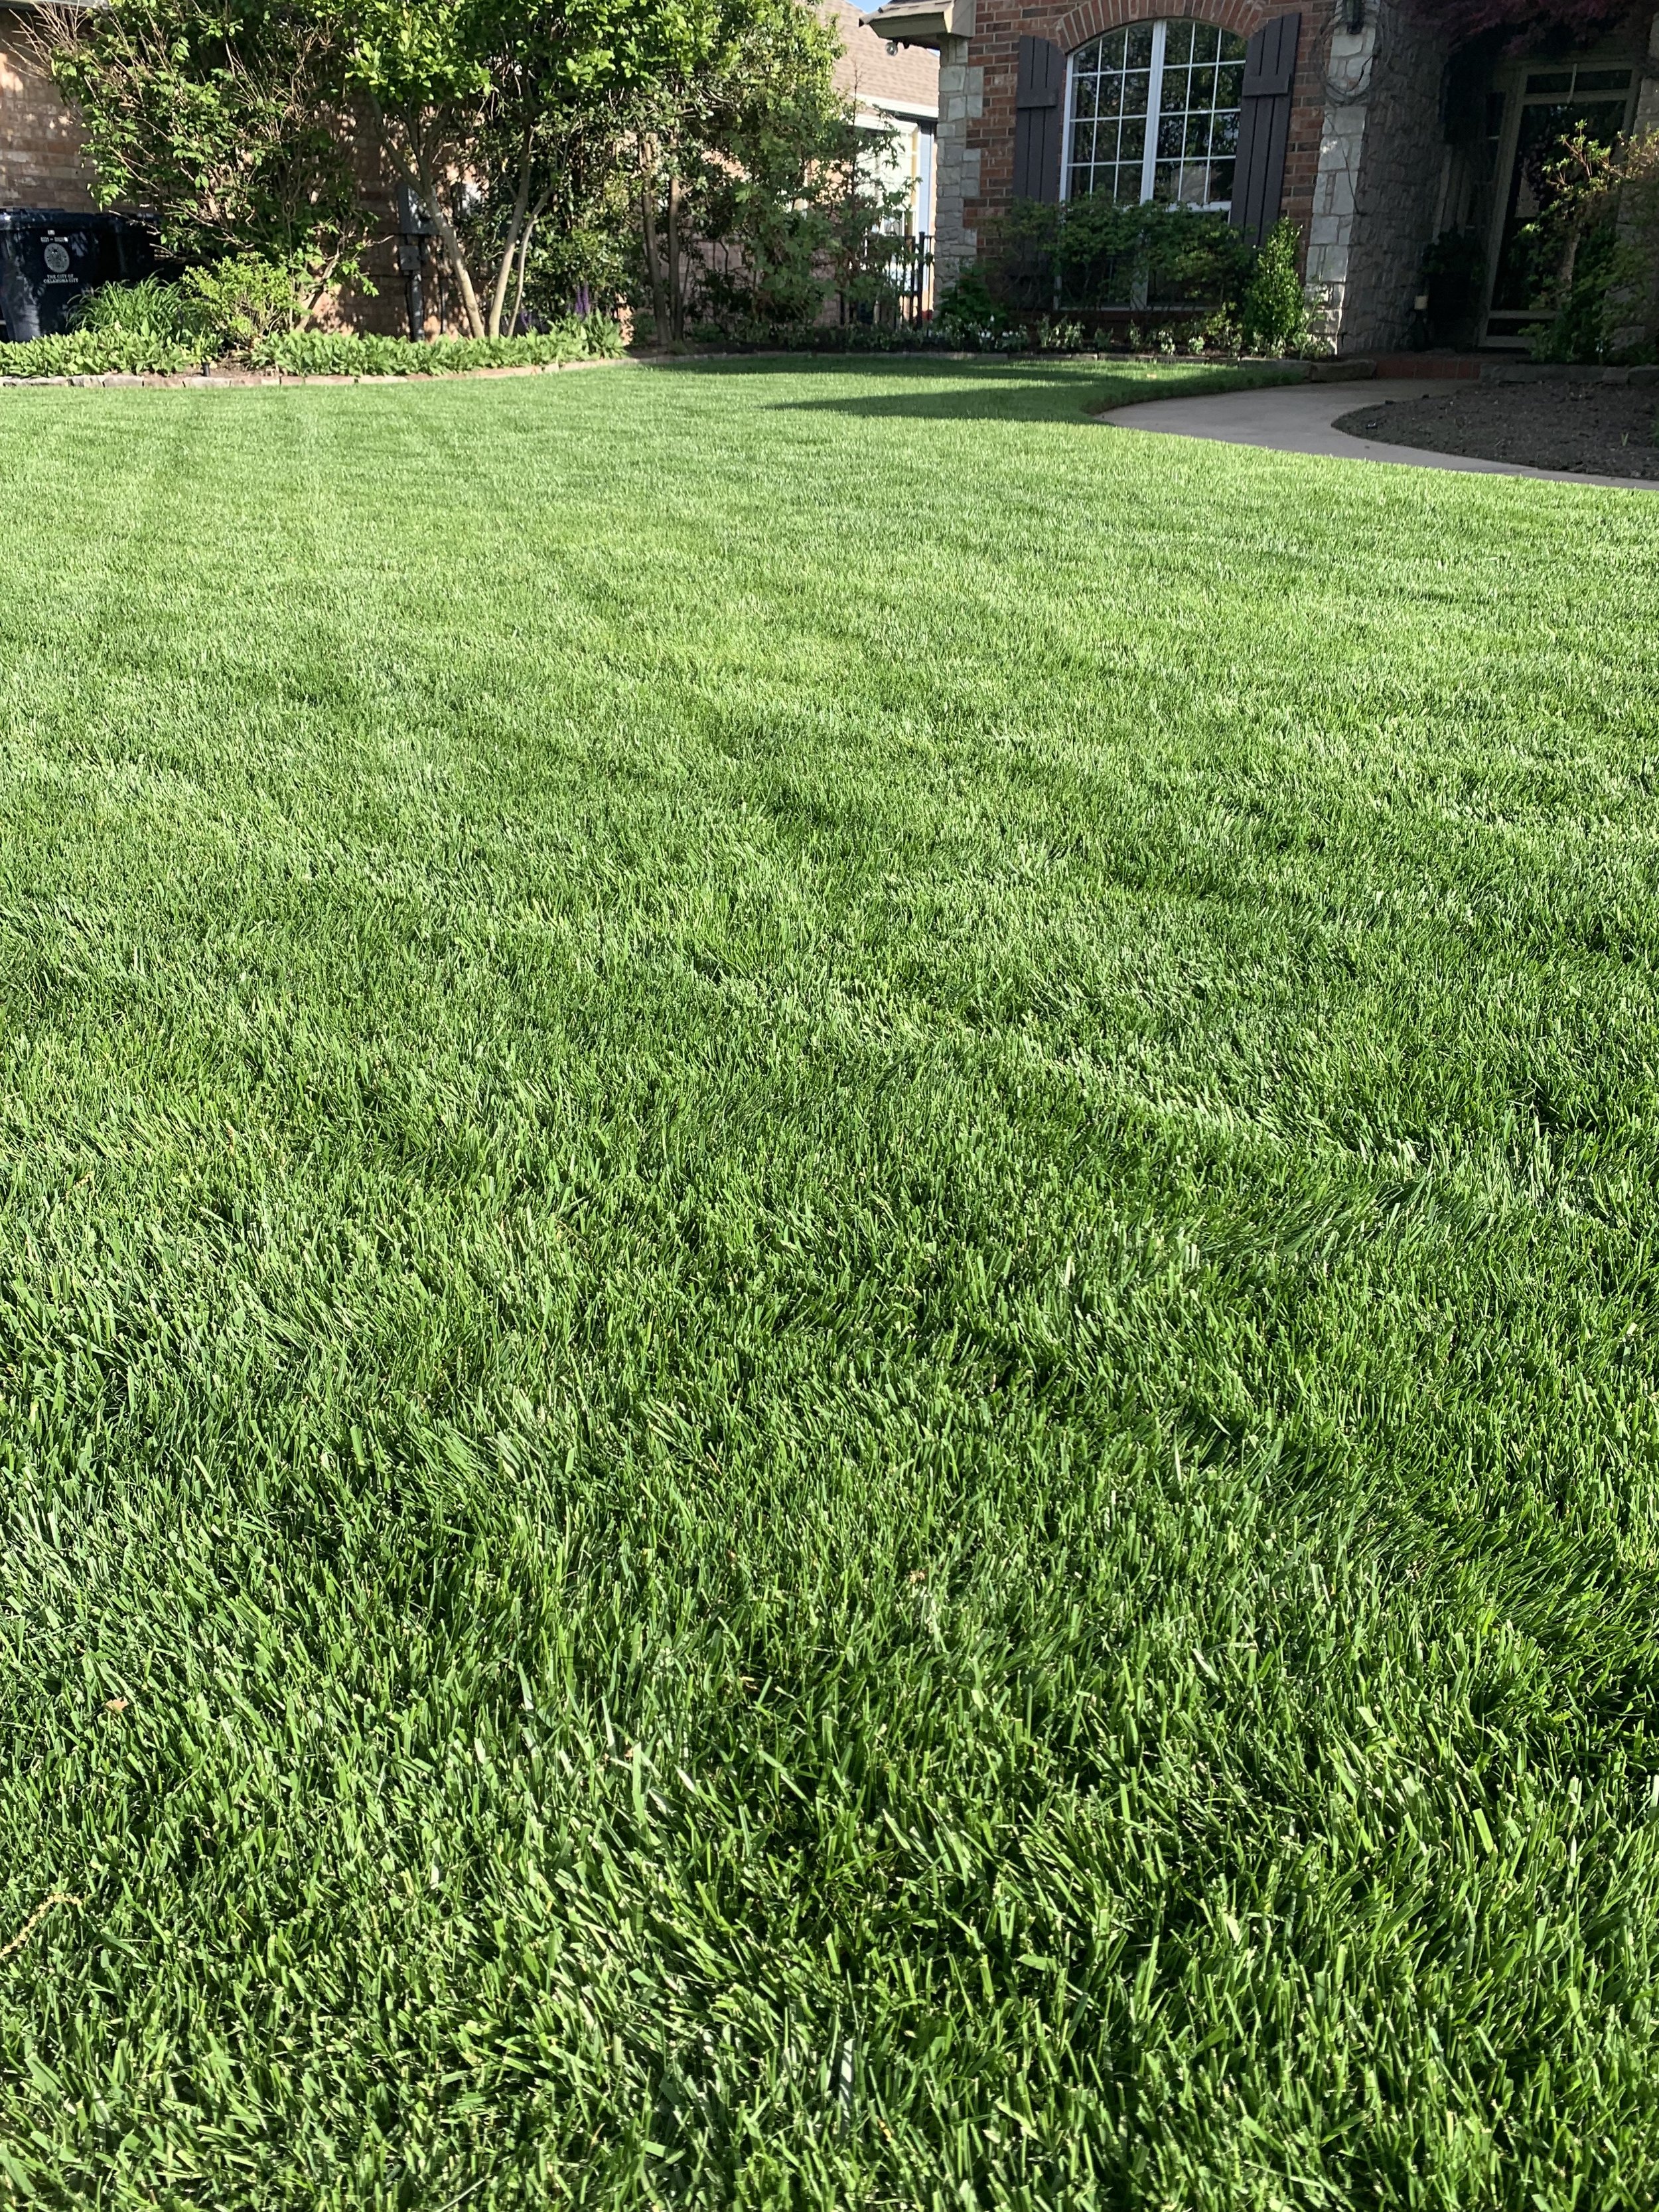
The economics of the two HOAs were very different — resulting in a big difference in services:
The HOA on the south side of the street had a contract with two less fertilizer applications than the one on the north side of the street.
The one on the northside also required us to bag and remove the lawn clippings. The southside HOA’s budget couldn’t afford the extra expense for bagging and waste disposal.
The HOA on the north side had an irrigation system with nearly perfect coverage that ran every other day while the one on the other side of the street had an old inadequate system that we struggled to keep operating during dry spells.
Which HOA do you think always had the greenest grass?
Not the one with more fertilizer applications and more water.
The one with the greenest grass was the one that couldn’t afford to have their grass clippings bagged and removed!

NW OKC Bermuda lawn that is mowed regularly without clippings being bagged & removed.
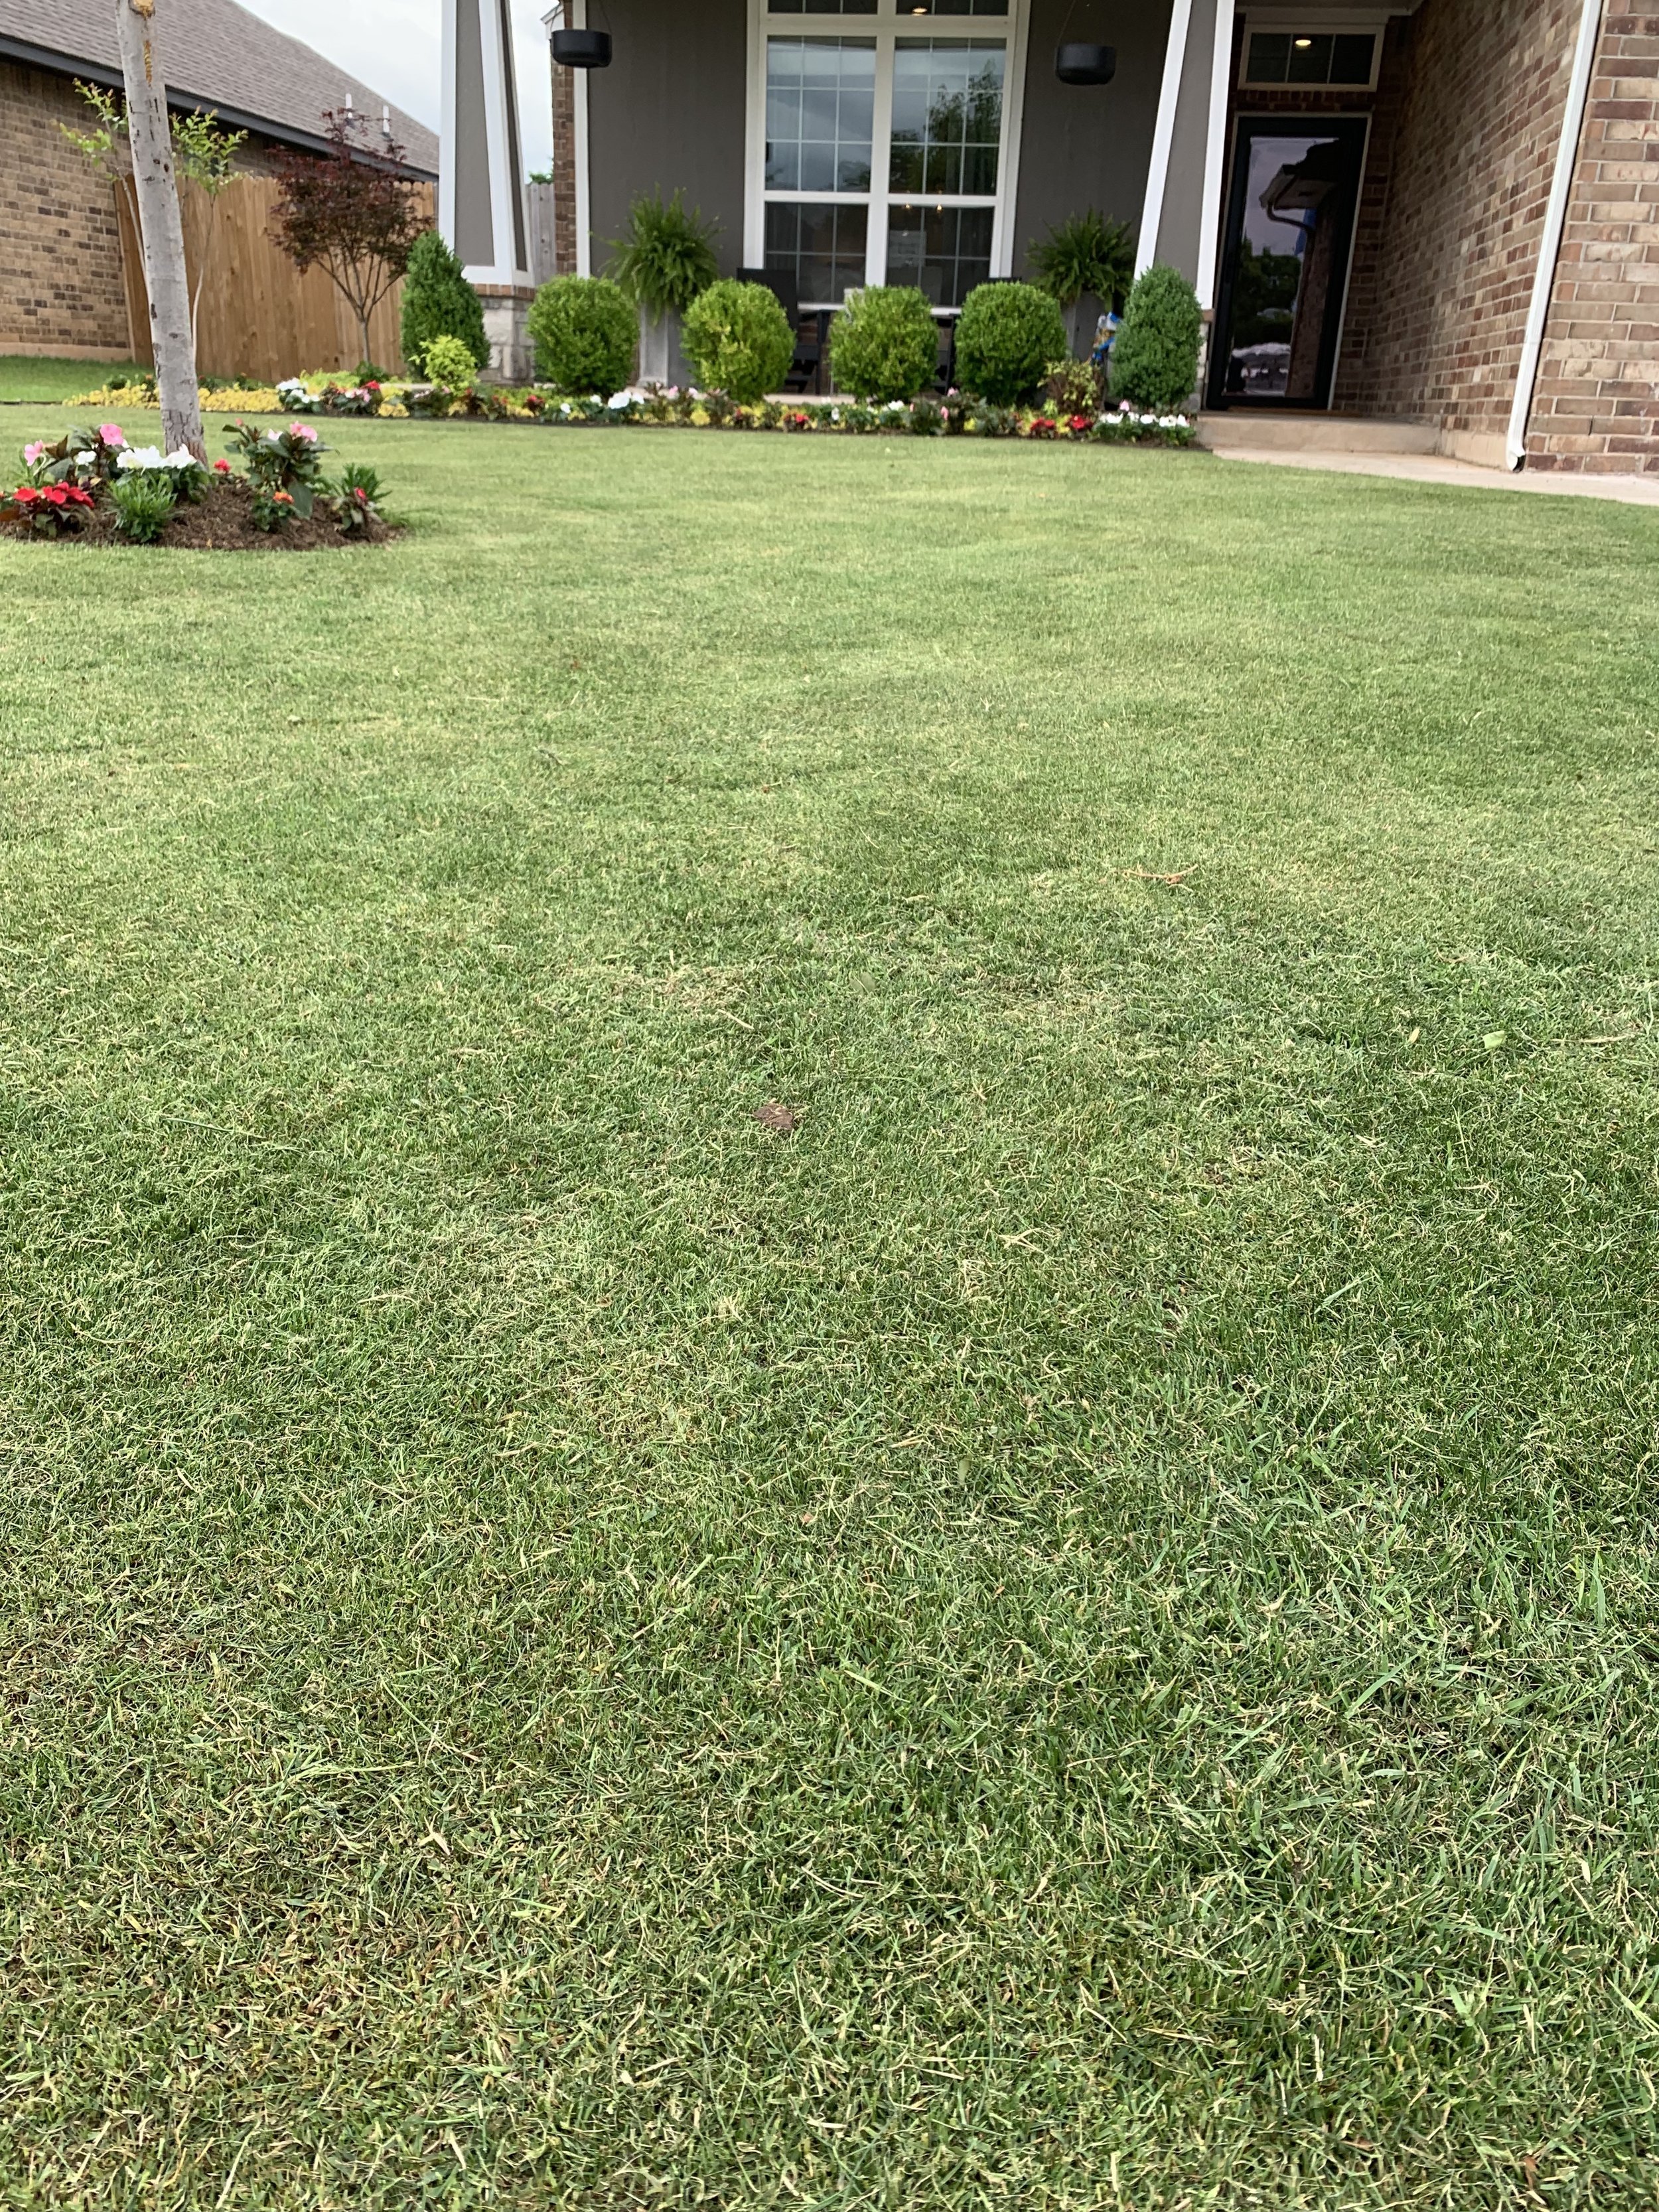
Freshly mowed Bermuda lawn cut tight with a reel. Clippings were not bagged but a blower was used to redistribute noticeable clippings.
Why Does Not Bagging Your Clippings Make Such a Big Difference?
Grass clippings are 80-90% water and nutrients, mostly nitrogen. Every time you throw away a bag of clippings you throw away moisture and valuable nutrients.
You can gain one pound of nitrogen per growing season by returning your clippings to the lawn each time you mow. This is a significant amount considering most turf grasses require 4 to 5 pounds of nitrogen for optimal growth, density and color. Research at the University of Missouri and Kansas State University confirms that 25% of your lawns needed annual nutrients are contained in your lawn clippings.

Fescue lawn immediately after the lawn was cut. 1" of growth was removed. Clippings were not bagged.
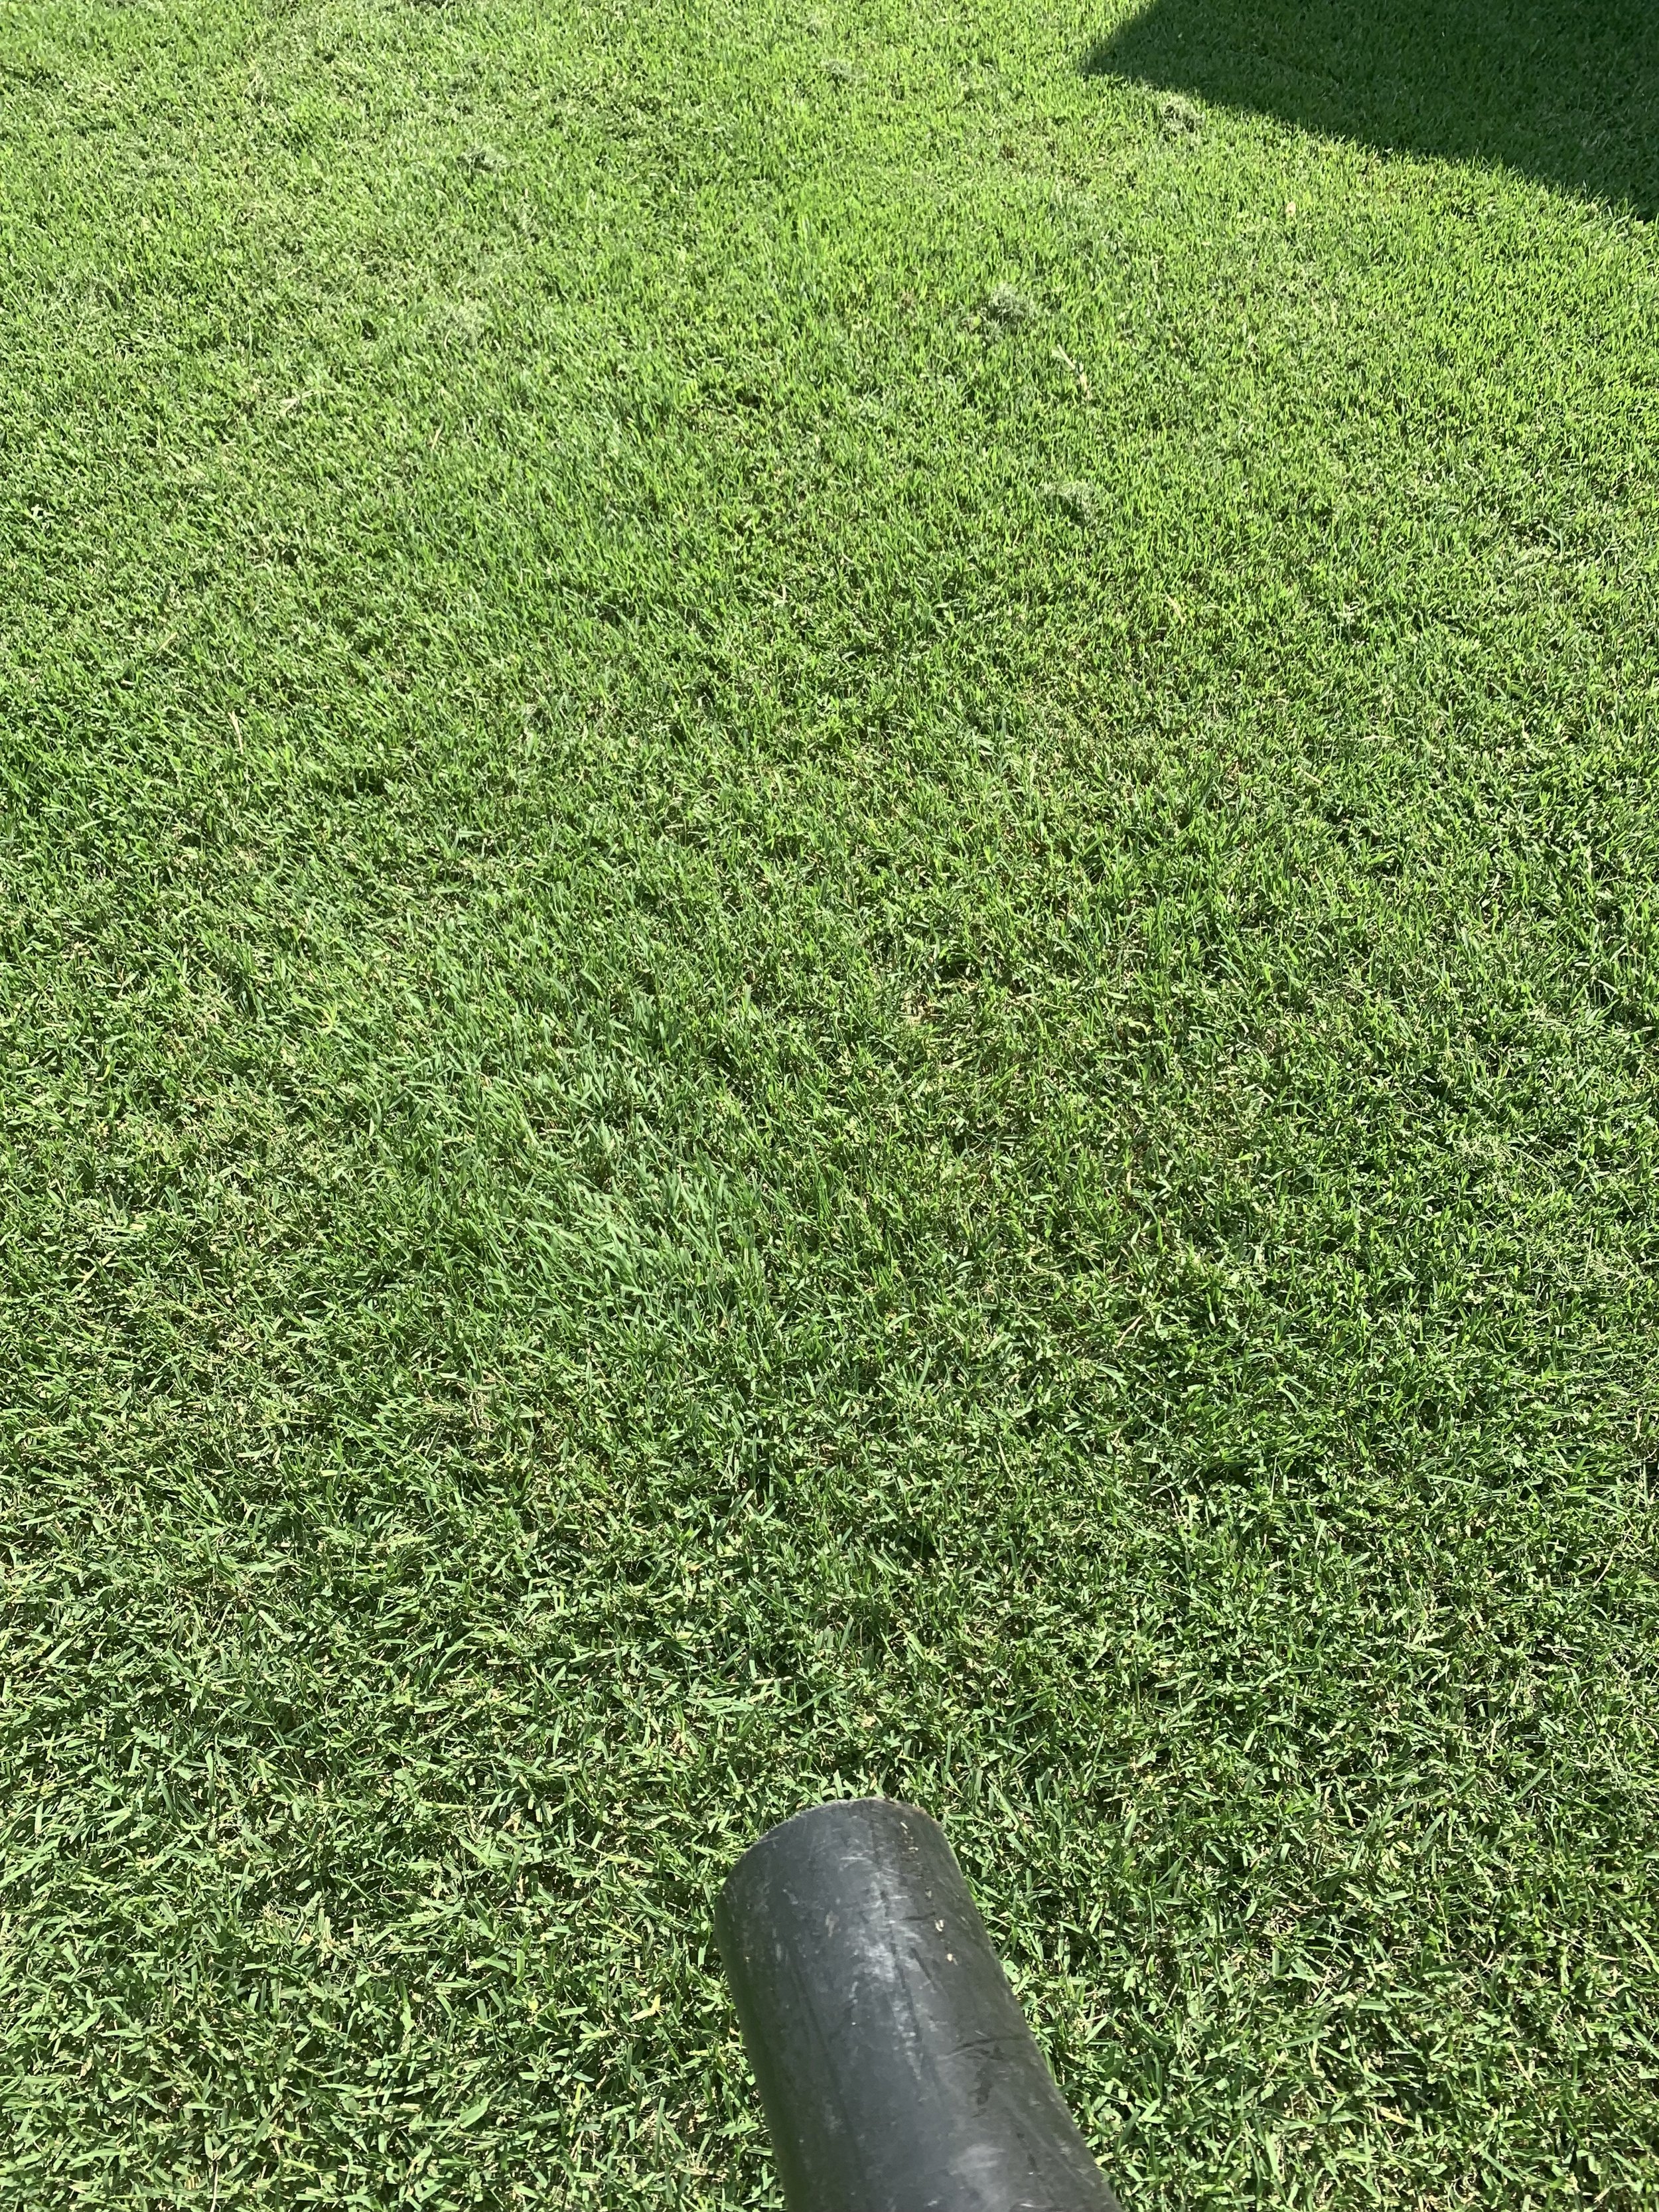
If there you have noticeable clippings after you mulch mow, simply use your blower to redistribute clippings.

Mulch mowing leaves in the fall is beneficial for your soil.
Bagging your lawn clippings is like someone offering to give you free fertilizer, and you saying, “No Thanks!”
Decaying clippings will increase organic material in the soil. As clippings break down, beneficial bacteria increases. Healthy soils contain at least 5% organic material. Most lawns contain 2-3% organic material and research shows that consistently allow your clippings to return to the soil will increase organic material by at least 1%.
Bagging your lawn clippings is like someone offering to top dress your lawn with compost for free, and you saying, “No thanks!”


Mulching mowers, also known as recyclers, will nourish the lawn by cutting the clippings into smaller clippings and return nitrogen, moisture, and organic material back to the lawn.
Keys to Successfully Mulch Mowing
Mow frequently enough that you only remove 1/3 of the grass per mowing. For example: If your goal is to maintain your lawn at 2”, mow before your lawn grows past 3”. This may require you to occasionally mow every 4-5 days instead of the traditional once per week. When only cutting 1/3 of the growth, you are only cutting off the leaves. Grass leaves break down very quickly and do not increase thatch on the soil surface.
If you get behind with your mowing, raise your mower up and gradually lower it back down over the next couple of cuttings. In the worst case, bag the clippings one time and then return to mulch mowing as you regain a more frequent mowing routine.
Don’t mulch mow when the grass is wet. Wet grass clippings clump and don’t breakdown quickly.
Mowers designed for mulch mowing work best since they cut the clippings multiple times. If you don’t have a mulching mower, most brands have mulching kits and/or mulching blades you can add to your mower. And there is nothing wrong with just mowing without the bag on with most mowers.
Keep your lawn mower blade sharp. A sharp blade will cut the clippings finer instead of tearing the grass leaf.
When you finish mowing, if there are any noticeable clippings on your lawn use your blower to clean them up or if not too many, just spread them out.
One last exception, if you have weeds with seed heads, it is best to bag your clippings and remove the weed seeds from your lawn.
If you haven’t figured it out, I’m a big believer in not catching your clippings. It will make a huge difference in the color of your turf and the health of your lawn. And, when done correctly, you won’t even notice clippings.
If you mow your own lawn, give it a try.
If you hire someone to mow your lawn, give them permission to not bag as long as they do not leave behind any noticeable clippings or debris.
I know you will like the difference it makes on your lawn.
Lorne Hall
Hall | Stewart Lawn + Landscape
(405)367-3873

Nutsedge – Possibly The World’s Worst Weed

I have called many weeds “the world’s worst weed”, but If I am asked what some of the weeds are that give all lawn enthusiast the most difficulty, there is a 100% chance I am going to respond without hesitation: “NUTSEDGE!”
Nutsedge is fast growing, has an upright growth habit and light green in color. Because it grows twice as fast as your turf and is lighter, it ruins the best maintained lawns within a couple days of mowing.
Why is it time to brush up on your nutsedge knowledge?
Because the best growing condition for nutsedge is moist soil and after the wettest April in Oklahoma City history, we have the perfect conditions for a nutsedge battle!
Like most weeds, early action is best. Procrastination only makes winning the battle more difficult. With conditions right for nutsedge to be a bigger problem this season, we want to make sure you have the information you need to get ahead of the problem.

What does nutsedge look like?
Commonly called nutgrass because it looks like grass, but it is a sedge with triangular ‘V’ shaped leaf blade arranged in groups of three at the base.
Nutsedge grows faster, has a more upright growth habit, is lighter in color and has a thicker, stiffer leaf blade than your turf grass.
What are the best growing conditions for nutsedge?
Nutsedge thrives in moist, tight soils. It is common to find it growing in areas of poor drainage, around irrigation leaks, and in lawns that are watered too frequently.
Although nutgrass starts in overwatered lawns or areas of poor drainage, once it is established it thrives with normal irrigation, in dry lawns and even through a drought leading many to believe nutgrass has more to do with the soil structure than moisture.
Nutsedge also prefers full sun and doesn’t grow well in shade and typically isn’t a problem in shady lawn areas.
Nutsedge first emerges in May and continues to thrive until the first frost.


Why is nutsedge so difficult to control?
Nutsedge is a perennial weed. Perennial weeds are always more difficult to control. But, nutsedge is one of the toughest because it spreads by underground tubers. Four to six weeks after the first blades emerge, typically in late June to early July, nutsedge begins forming new tubers (nutlets) and rhizomes (underground stems).
The tubers grow 6-12” deep and are referred to as nuts - thus the common name of nutgrass. Nutsedge spreads by growing rhizomes which produces more nuts. Weeds that propagate through tubers and rhizomes are very difficult to control because unless you get control of the rhizome and tuber, the plant will sprout new growth within a few days. Also, tubers can remain dormant in soil for up to three seasons.
Hall | Stewart’s 7-Step Lawn Care Program includes nutsedge control. One of the benefits of subscribing to our full program is we do not charge extra for nutsedge control. Because we know the presence of nutsedge can quickly tarnish a great looking lawn, we use the most advanced nutsedge control herbicides available to the industry.

In late June to early July, uncontrolled areas of nutsedge will begin to multiply and take over areas.
What is the best way to control nutsedge?
Be proactive. With the first sign of nutsedge, take action. Nutsedge is much harder to control once it has been allowed to spread and mature.
Weed killers labeled for use on nutsedge will be either a contact killer or a systemic. A contact herbicide will kill only the leaves, and the tubers and rhizomes will remain active if you make only a single application. Systemic products will translocate through the plant to the tubers and rhizomes.
Key Point - A single applications of most herbicides labeled for nutsedge will kill the plant leaves but leave the nut unaffected.
Because it is neither a grassy nor broadleaf weed, common herbicides have little to no control. For nutsedge control you must search out products specifically labeled for nutsedge.
A few herbicides available at most garden centers labeled for nutgrass include:
Basagran – A second application must be made 7-10 days after the first application.
Image Nutsedge Killer – Requires a second application 3-4 weeks later.
Sedge Hammer Plus – Must have a surfactant mixed with the herbicide to be effective and a second application will need to be made in 6 weeks.
Ortho Nutsedge Killer and Gordon’s Trimec Nutsedge Plus – Both require follow up treatments every 4 weeks.
Please read the label and follow it. You need to know your turf type. Read the label to make sure you can use the product on your lawn.

Is pulling nutsedge a good idea?
Pulling nutsedge is only recommended when the plant is very small before nuts start to develop on the rhizomes (Best if pulling only occurs in the month of May). Once nuts start to develop, you must remove the nut when pulling the weed, which is typically 6-12” below the surface.
If you pull the weed and leave the nut behind, new plants will emerge very quickly. If pulling, the best method is to dig at least 12” deep and 12” wide to get all the tubers.
Research suggests that anytime the tuber is stressed, by either pulling the top off or by killing the top without killing the tuber itself (the result of a single application of an herbicide), the tuber multiples. Therefore, many people experience more nutsedge after they have pulled or sprayed.
Cultivating nutgrass, such as in landscape beds, is ineffective. All you are doing is redistributing the tubers and rhizomes.
One of the worse infestations of nutsedge I have experienced was in a lawn where an elderly man spent hours every week, all summer long, pulling nutsedge in his lawn. He said, “Nutsedge first showed up in my lawn a few years ago and the more I pull it the more nutsedge there is. It feels like the harder I work at pulling it the more I have!” I immediately responded, “Stop pulling it! Every time you pull it, the nut in the soil is stressed and in an effort to preserve itself, the nut multiplies.”
What else can I do to be proactive in preventing nutsedge?
Aeration is a great way to reduce the chances of nutsedge starting and spreading. Aeration reduces soil compaction and reduces the best growing conditions for nutsedge.
Our experience is lawns which are aerated annually rarely have nutsedge problems.
Water only based on need and infrequently. Overwatering, keeping your lawn too wet, promotes the best growing conditions for nutsedge. Water deep. Allow the soil surface to become dry between waterings.
Correct water leaks in your sprinkler system promptly. Nutsedge will stake a claim to any areas that become waterlogged.
Along the same line of thinking, correct poor drainage areas. Often patches of nutsedge are an indicator of poor drainage.


If you find yourself struggling with nutsedge, give Hall | Stewart a call, (405) 367-3873. The good news…. the Hall | Stewart’s 7-Step Lawn Care Program includes nutsedge control.
Nutsedge is one of the more aggressive and persistent weeds you will encounter.
Control of nutsedge can be a long process.
It is a marathon, not a sprint.
Success involves both the best cultural practices (aerating, watering, and mowing) and timely use of quality herbicides labeled for the control of nutsedge.
Lorne Hall
Hall | Stewart Lawn + Landscape
(405)367-3873


Aeration… the "Then Some” of Lawn Care


A good lawn is the result of several key activities:
1. Correctly timed pre-emergent applications to prevent weeds before they germinate.
2. Applying the right amount of fertilizer to ensure you have a thick and healthy turf.
3. Regularly scheduled mowing that only removes the top 1/3 of the leaf blade each time.
4. Infrequent, deep watering based on seasonal need.
But, there is a 5th activity that too often is overlooked.
George Toma, the greatest groundskeeper in the history of sports, has a saying:
“Do the job and then some. It is the ‘then some’ that
distinguishes the mediocre from the great.”
George Toma played a part in preparing the playing field for every Super Bowl until he retired after Super Bowl LVII at the age of 95. Toma is known as “The Sodfather!”
George Toma, presenting the keynote address at a turf conference several years ago, started his talk by announcing he was going to discuss the three most important things to have a great turf.
His 1st point was Aeration.
His 2nd point was Aeration.
And, you guessed it, his 3rd point was Aeration.


What are the benefits of aeration?
Soil compaction is reduced.
Air movement into the soil is improved.
Fertilizer can quickly reach the root zone.
Water runoff and puddling is reduced.
Roots grow stronger and deeper.
Thatch is reduced.
Reduction in weeds that thrive in compacted soils.
For George Toma, the “then some” that distinguishes the mediocre lawn from a great lawn is aeration.
Aerification is a must!
If your goal is to have your best lawn possible, aeration is a required step in your lawn care program.
What is aeration?
Aeration is the process of mechanically removing 2”-3” cores of soil, 4”-6” apart, from your lawn.

Compact soils prevent grass from establishing a healthy root system and prevent air, water, and nutrients from reaching the root zone. Walking, playing, and mowing (in other words everything you do on your lawn) increases soil compaction.
As Oklahomans, we know about tight clay, compacted soils. Our clay soils make growing a great lawn a challenge.
Too often we accept soil compaction as just the way it is and settle for the status quo of an average lawn.
Stop accepting the norm!


You don’t have to struggle with the results of growing a lawn in tight, compacted soil.
Golf courses typically aerate their turf at least two times per season. No wonder the fairways look so much better than most home lawns.
Lawns with compacted soil also are more susceptible to weed development. Most weeds thrive in tight compacted soil.
Nutsedge, one of the most difficult to control summer weeds, thrives in tight soils. Our experience has shown that annually aerated lawns have far less problems with nutsedge.

Why do golf course fairways always look so good? Turf managers know the importance of aeration. The secret to a great lawn is a great root system. Annual aeration is the ticket to a great root system.


Should the cores be removed or left on the lawn?
Leave the cores on the lawn. As they breakdown and dissolve, they will refill the holes with loose soil resulting in improved soil structure. The cores will break up and settle back into the lawn within a few weeks.
When should you aerate?
Warm season lawns (Bermuda and zoysia) should be aerated any time after spring green-up and before the end of July.
Cool season lawns (fescue) should be aerated in the fall, September through October. Aeration in conjunction with overseeding will not only improve the soil structure, but it will also improve seed soil contact resulting in better seed germination.


Now through the first half of the summer growing season is the best time to aerated lawn Bermuda, a warm season turf.


Nothing will take your lawn from good to great more than an annual aeration!
One more Toma saying… “The most important part of grass is the soil and the root system.”
Aeration is the best way to improve the soil structure and develop a stronger root system.
Aeration, the most overlooked lawn practice, will give you a healthier, more vigorous, less weedy lawn.
To achieve your best lawn, annual aeration is a must.
Lorne Hall
Hall | Stewart Lawn + Landscape
(405)367-3873
The Joy of Spring

What a week in the landscape!
Last weekend didn’t feel like spring. But, with one final, late cold spell in our rear-view mirror, the landscape has exploded with color this week.
The much needed rainfall has delivered us greener turf, more trees adding leaves, colorful perennials, bulbs, shrubs and trees in every pocket of the Oklahoma City metro area.
Every spring feels a little different. The timing of blooms. The length of blooms. Every spring another plant is going to captivate our attention. Every spring there is another plant that just seems a little more dynamic than it has ever been.

What are your favorite spring blooming plants?
Are you like me? Your favorite is, “All of them!”
Let’s spend a few minutes reviewing some of the tried and true spring blooming plants you can count on adding beauty and joy to our world year after year.
PERENNIALS

Creeping Phlox
Creeping Phlox. The first to welcome spring each year. Creeping phlox produces a spring-like carpet in pastel hues of white, lavender, red and pink. Creeping phlox is a moderate grower that can spread up to 2’ but only reaches 4-6” in height. It requires full sun but will tolerate a couple hours of shade each day. Borders, walls, and around boulders are where it looks best. In my garden, you will find it cascading over a rock retaining wall. It tolerates most soil if it is well drained. The plant requires little maintenance. Mites are about the only insect problem it will have.
‘May Night’ Salvia. Sage type flower spikes of deep bluish-purple that will add color in April, May, and early June. The best flower show will be in full sun, but it will tolerate a little dappled shade each day. The plant grows 12-18” tall with flower spikes reaching 24”. The plant looks great in the middle of the garden planted behind creeping phlox or dianthus, and in front of Shasta daisy or Black-eyed Susan. The leaves often become tattered later in the summer and become dormant over the winter. Keep faded blooms removed to maximize bloom period and pruning the plants after blooming may result in a few fall blooms. In the early spring, before new growth emerges, remove the dormant foliage. Salvia tolerates clay soils but will struggle with root rot if the soil stays saturated.
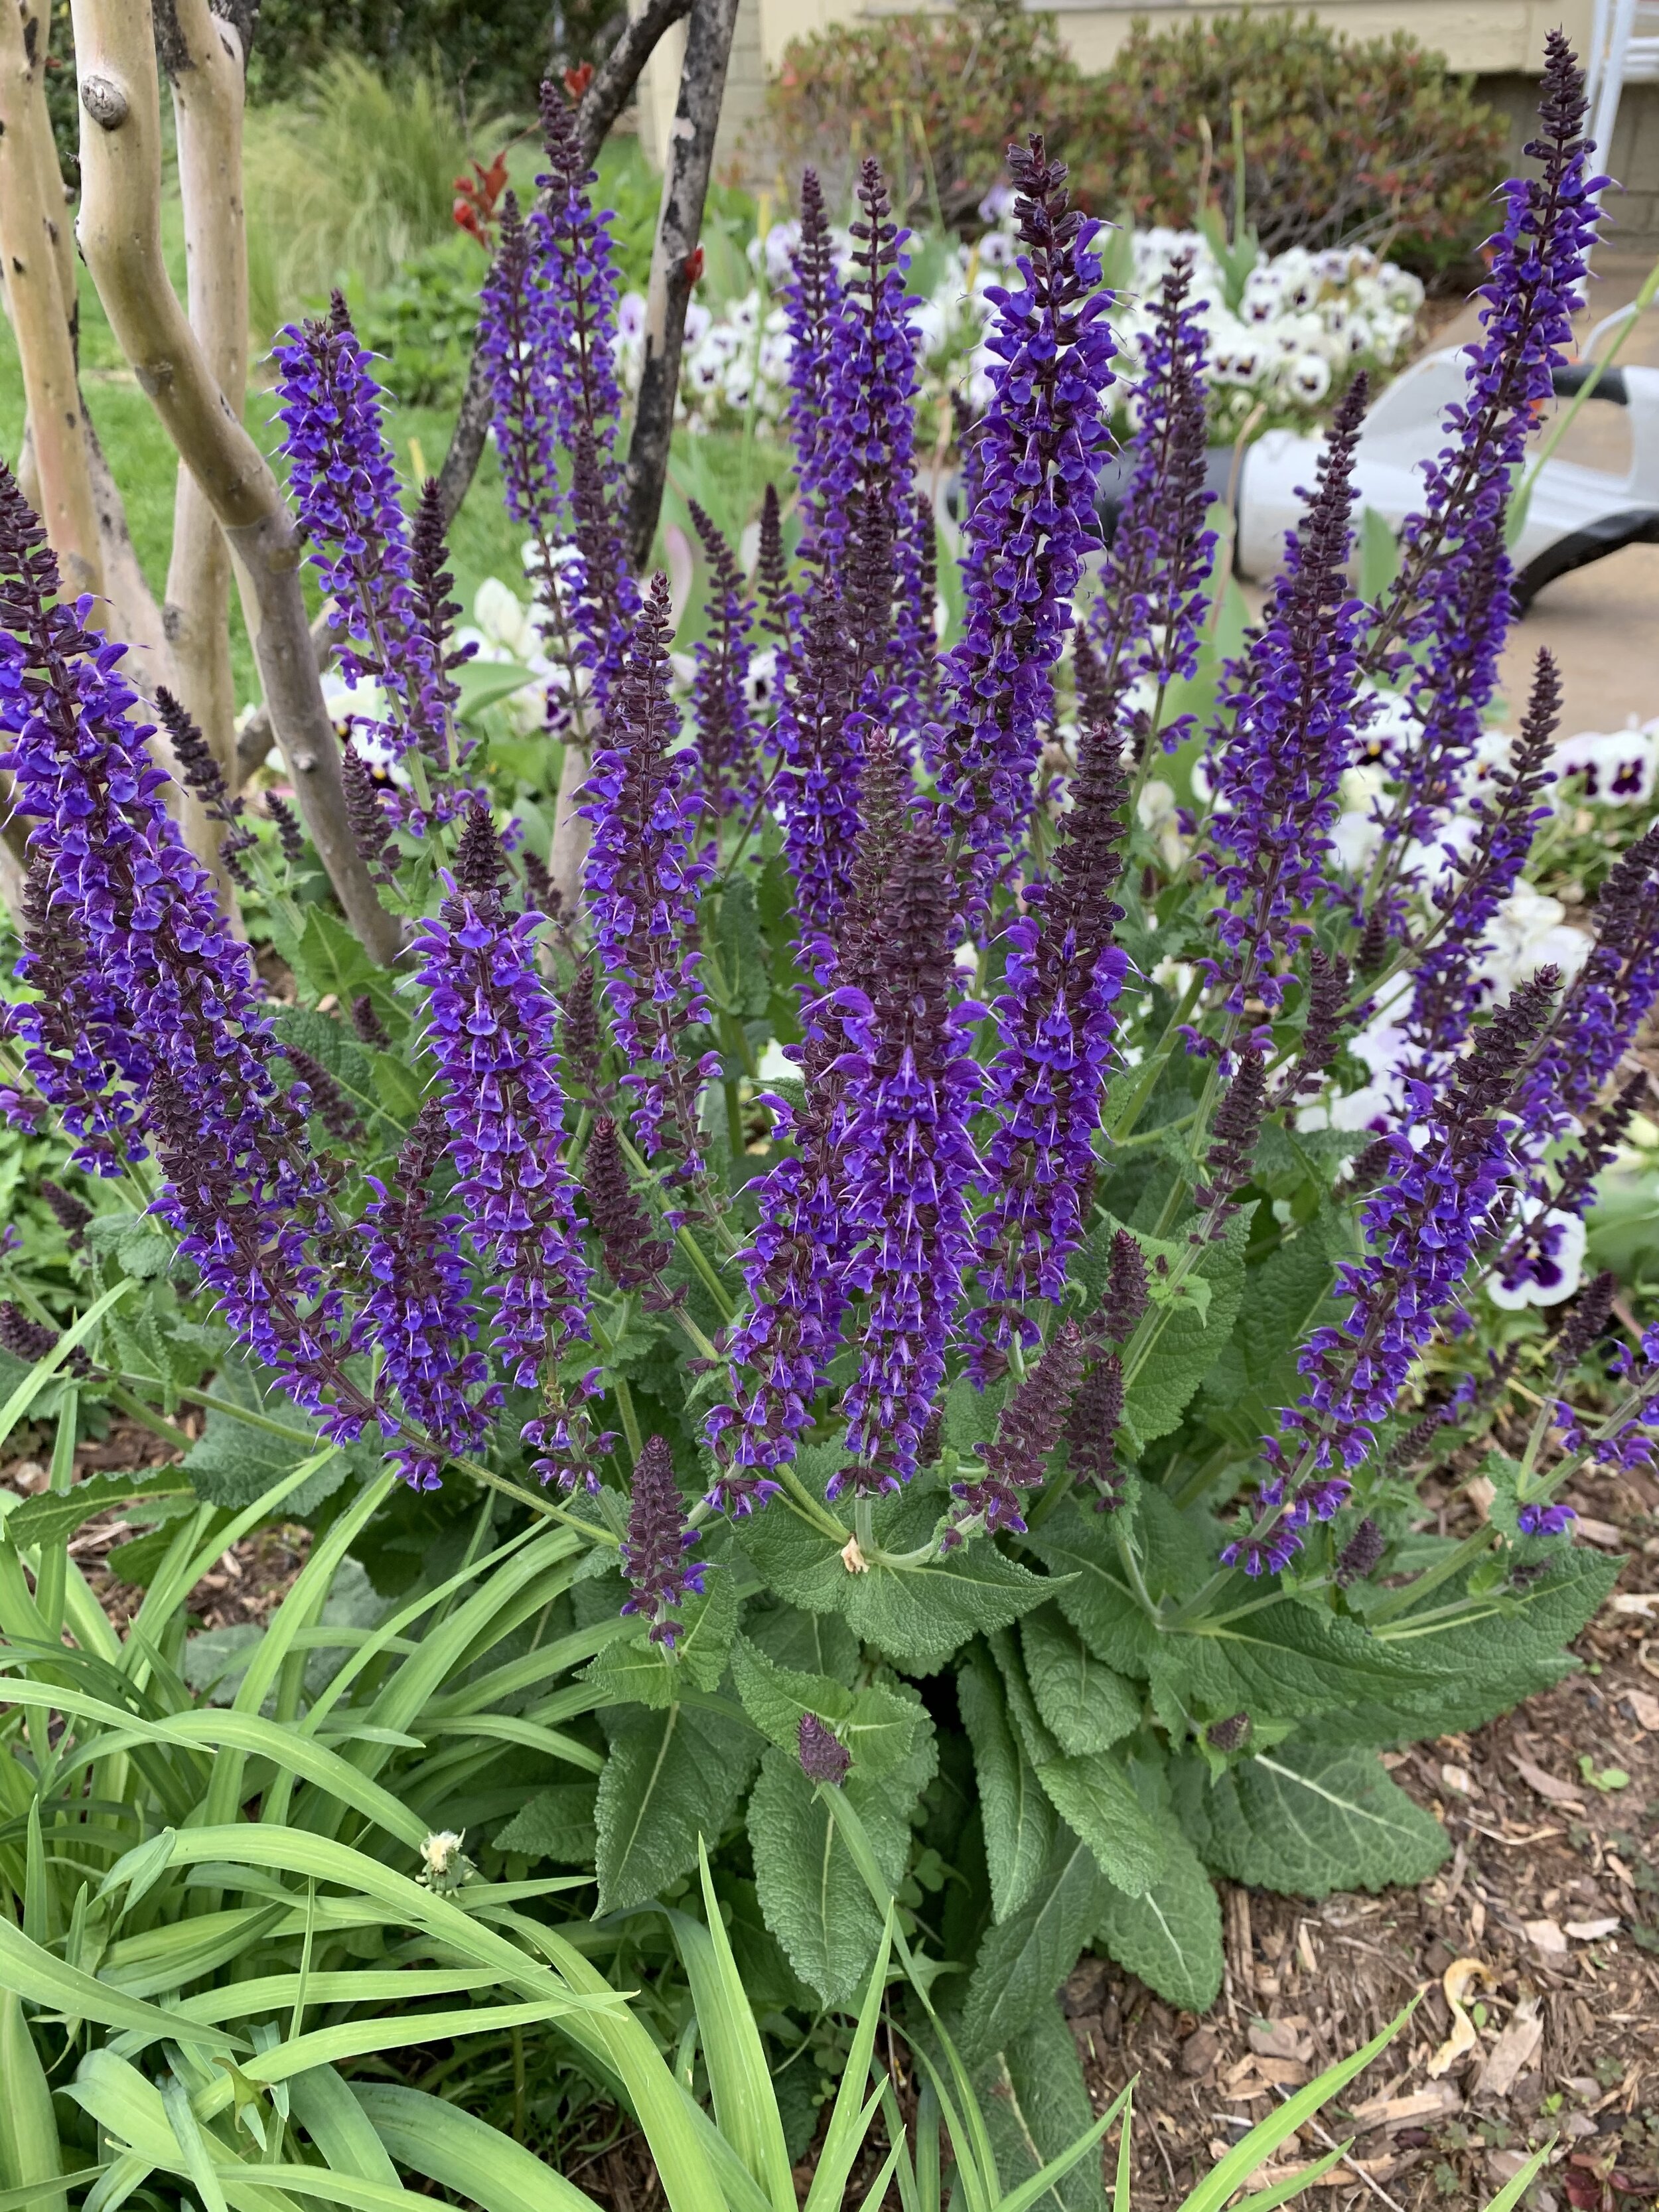
May Night Salvia
Dianthus. It works well as a border, in small groupings, around boulders or as a single plant reaching 10-15” tall with a spread of 12-24”. They bloom in late spring in rose, pink, white, and red. They like full sun but will take some dappled shade or afternoon shade. Just like creeping phlox, they are a cool season lover. They will grow in most soils, prefer alkaline soils, but waterlogged soil will cause crown and root rot. Heavy mulching near the crown of the plant can be detrimental. Late March through April and into May is the peak bloom time. Light feeding in the spring with a complete fertilizer of phosphorus, potassium and low nitrogen is recommended. Other than occasional aphid or powdery mildew issue, they do not have many problems. There are more than 300 varieties of dianthus to choose from. My all-time favorite is ‘Firewitch’. It has a silver-green foliage with a vibrant pink bloom.

Dianthus

Dianthus and May Night Salvia
SHRUBS

Forsythia.
Forsythia. Best grown as a specimen shrub where it can show off its naturally stunning shape. Forsythia’s brilliant yellow flowers are the first to welcome spring. It performs best planted in full sun and will grow in partial shade, only with less spring blooms. It is considered a fast grower. Forsythia adapts well to most soils but prefers well drained. It rarely has an insect or disease problem. Pruning should only occur after spring blooms fade. If you prune later in the year, you will reduce blooms the following spring. The best way to prune this shrub is to remove older wood all the way to the base of the shrub. Traditional forsythia will grow to 6-8’ with an 8’ spread and are well suited for large lawns. If you have a smaller yard, look for one of the newer varieties, such as Gold Tide (Forsythia ‘Courtasol’), a dwarf variety that only reaches 2’ high and spreads to 4’.
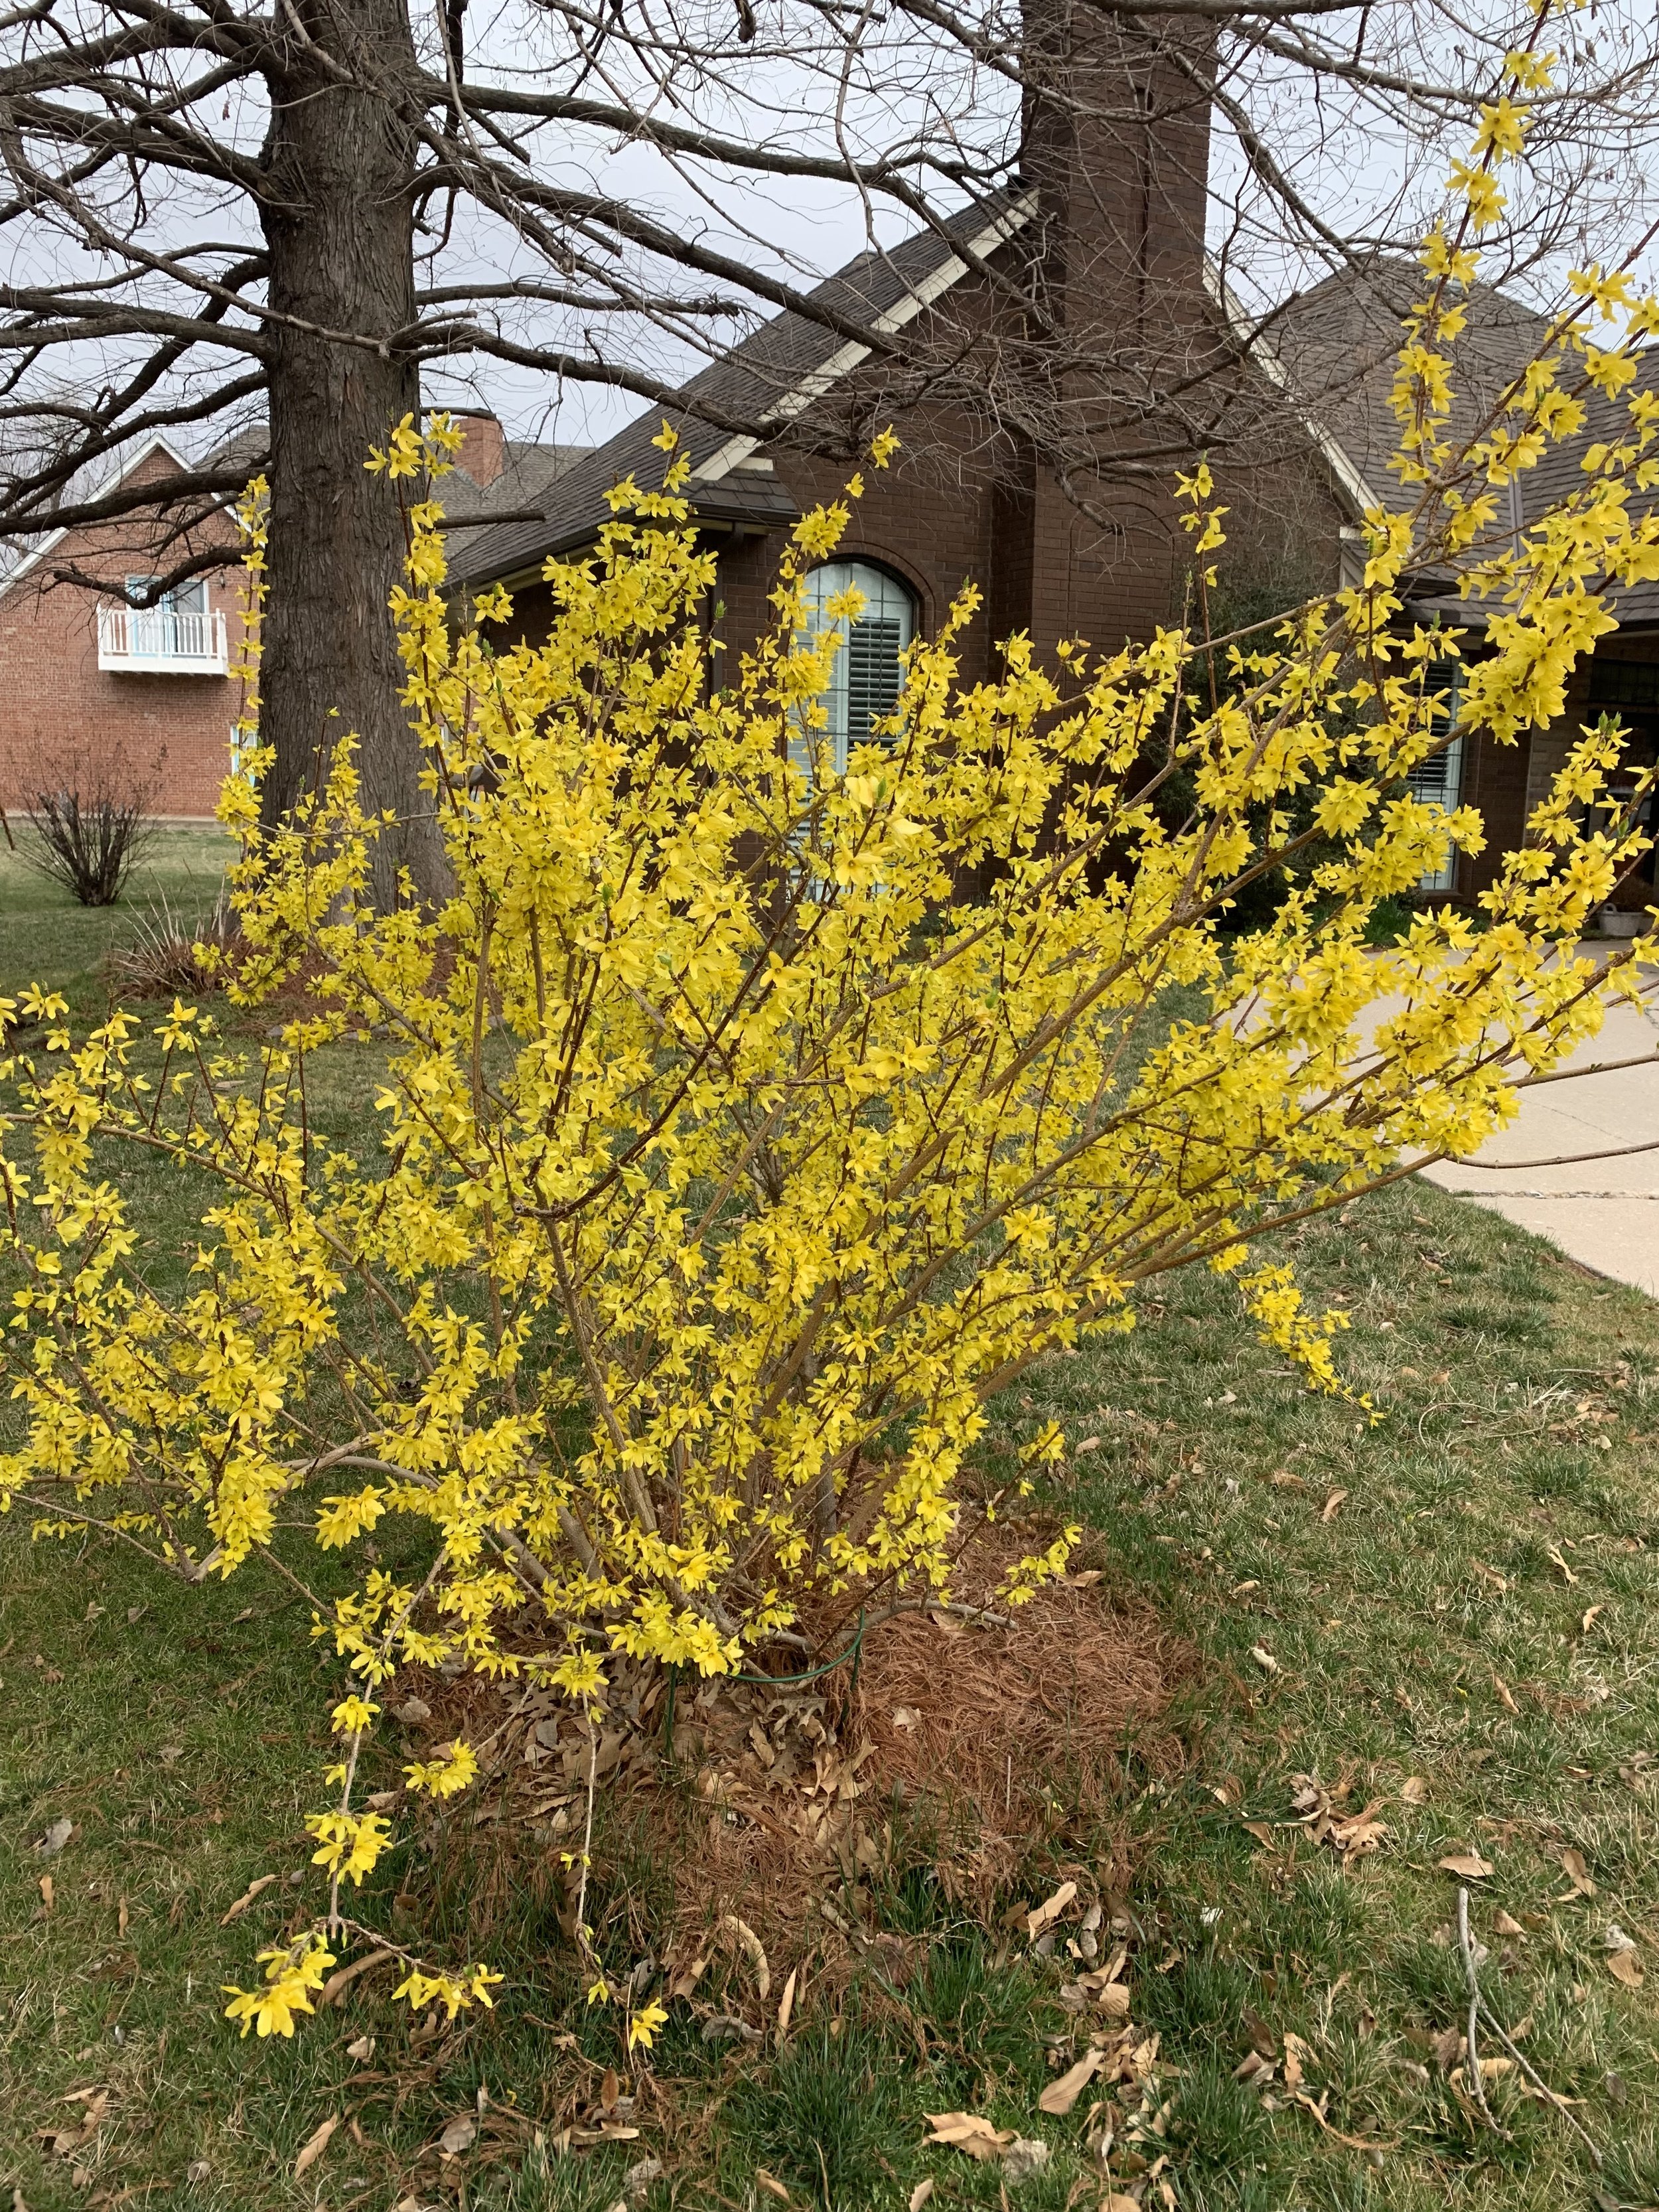
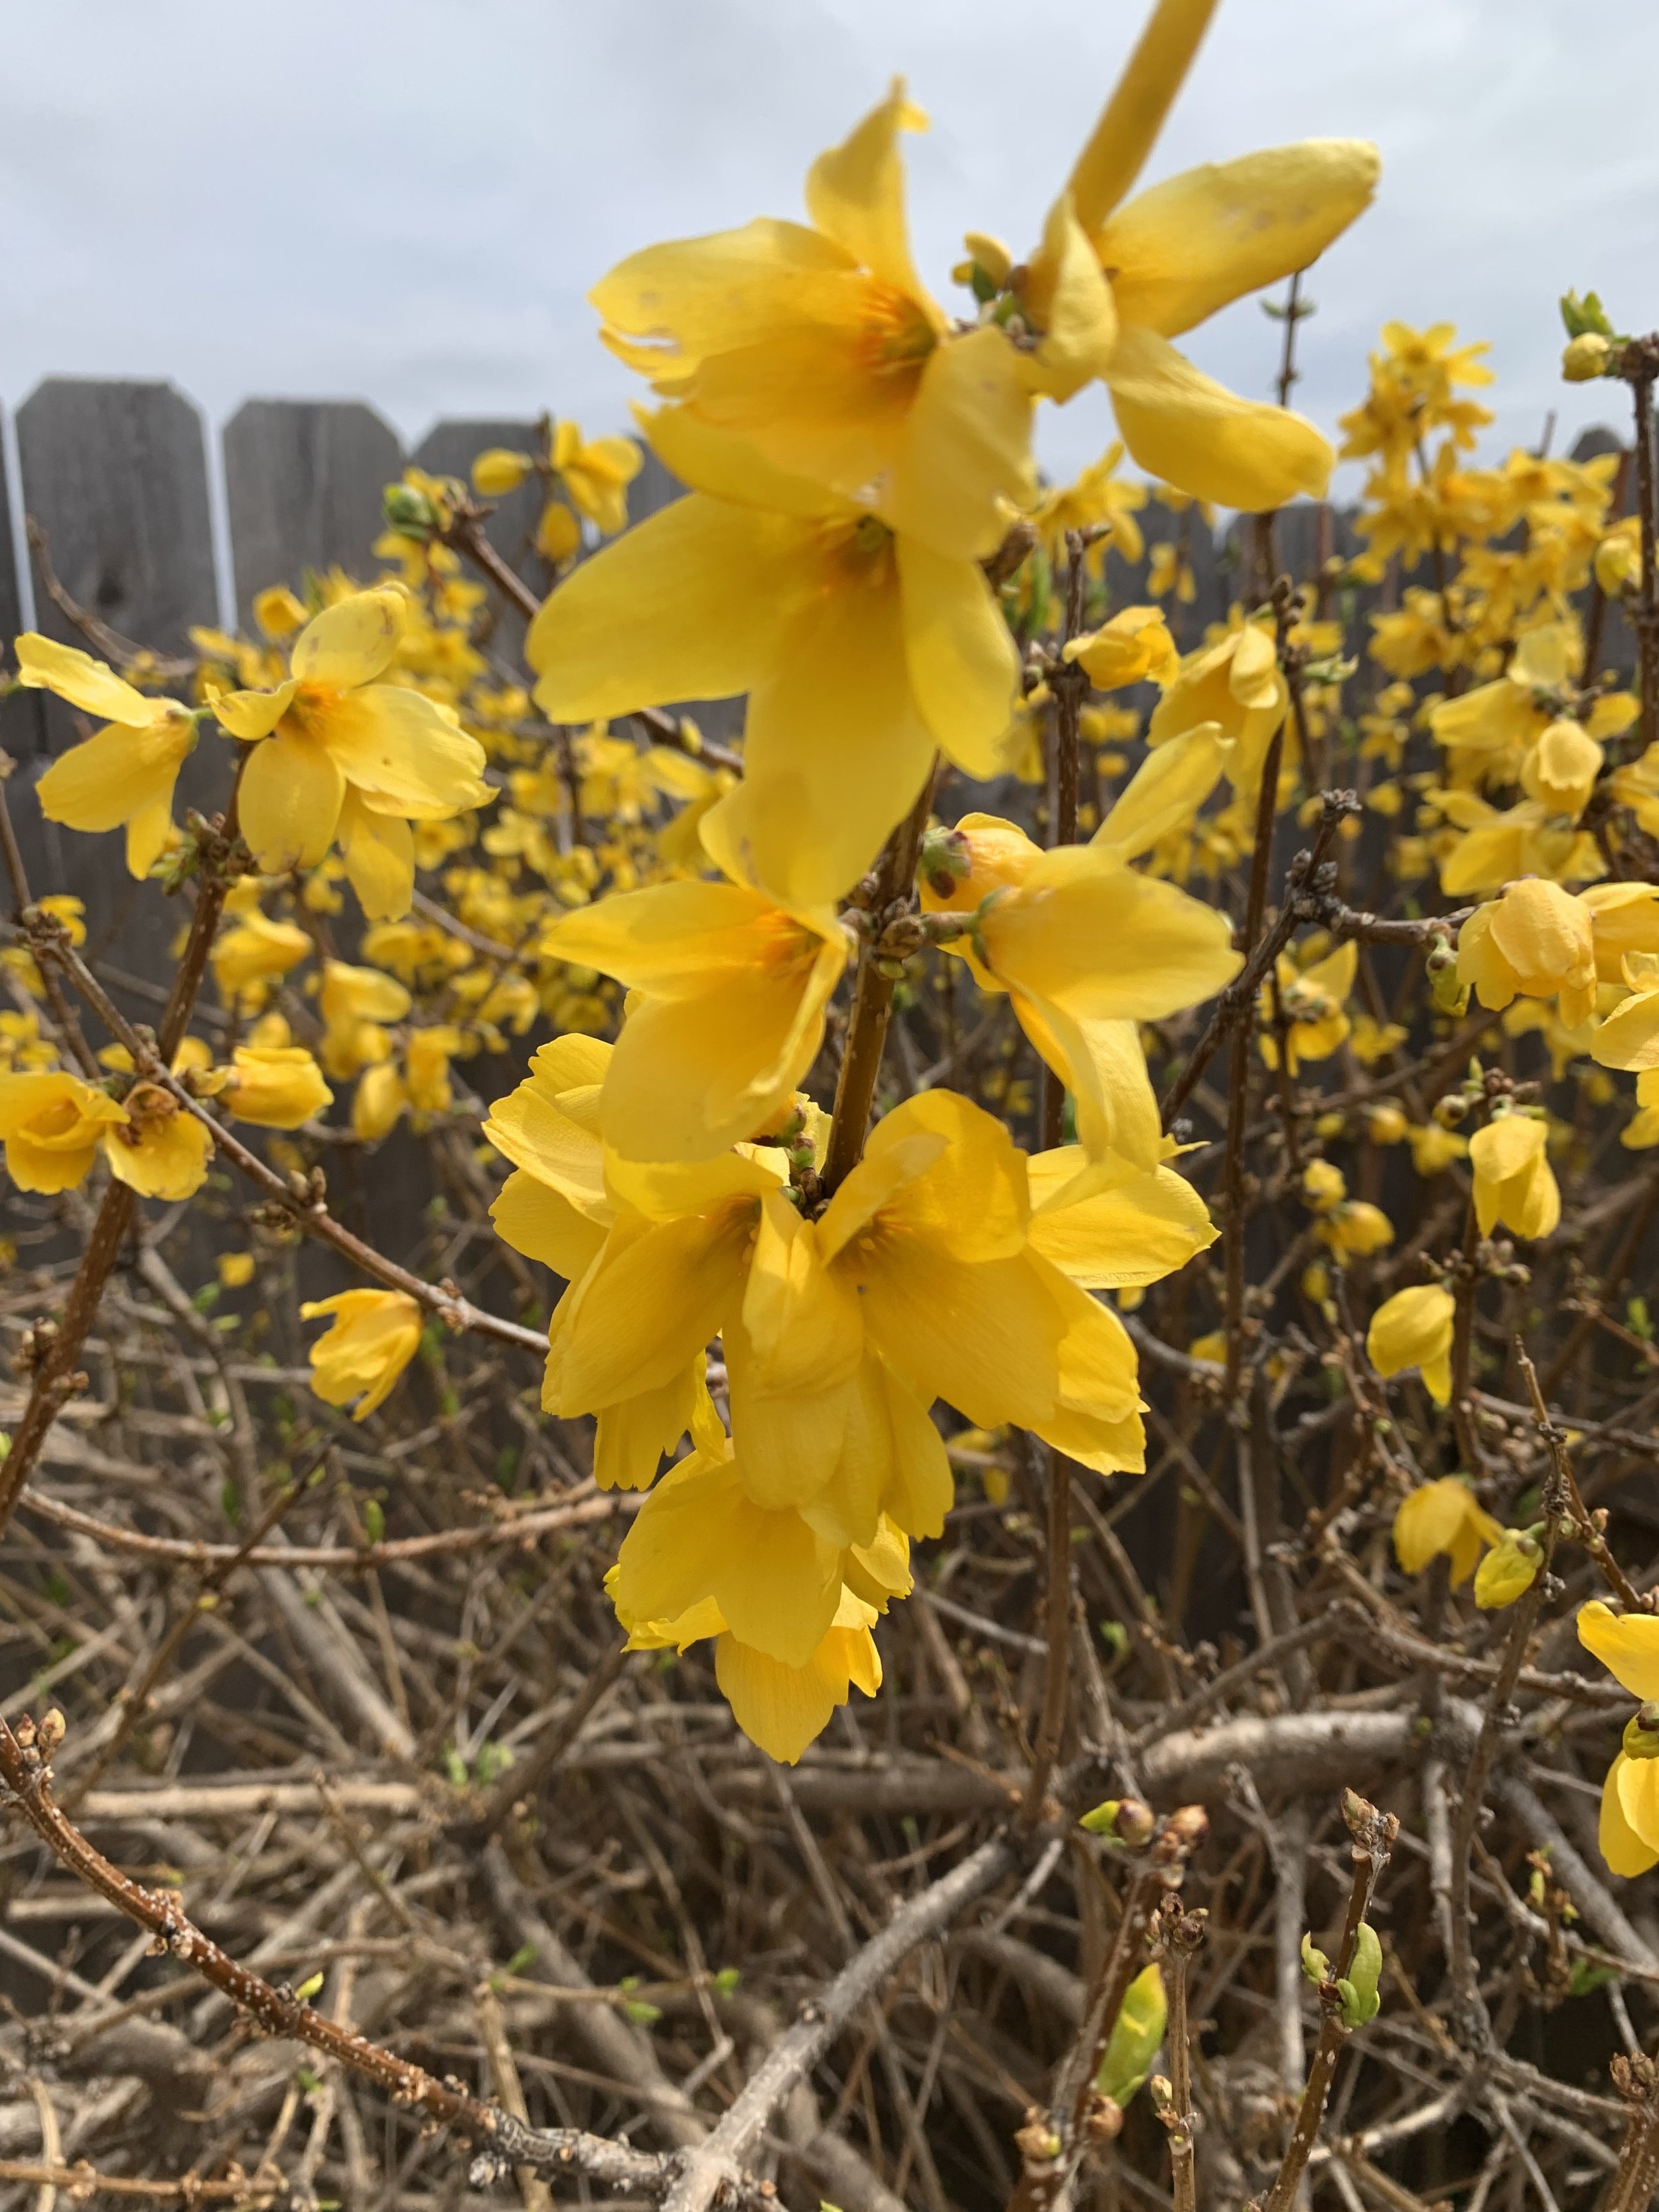
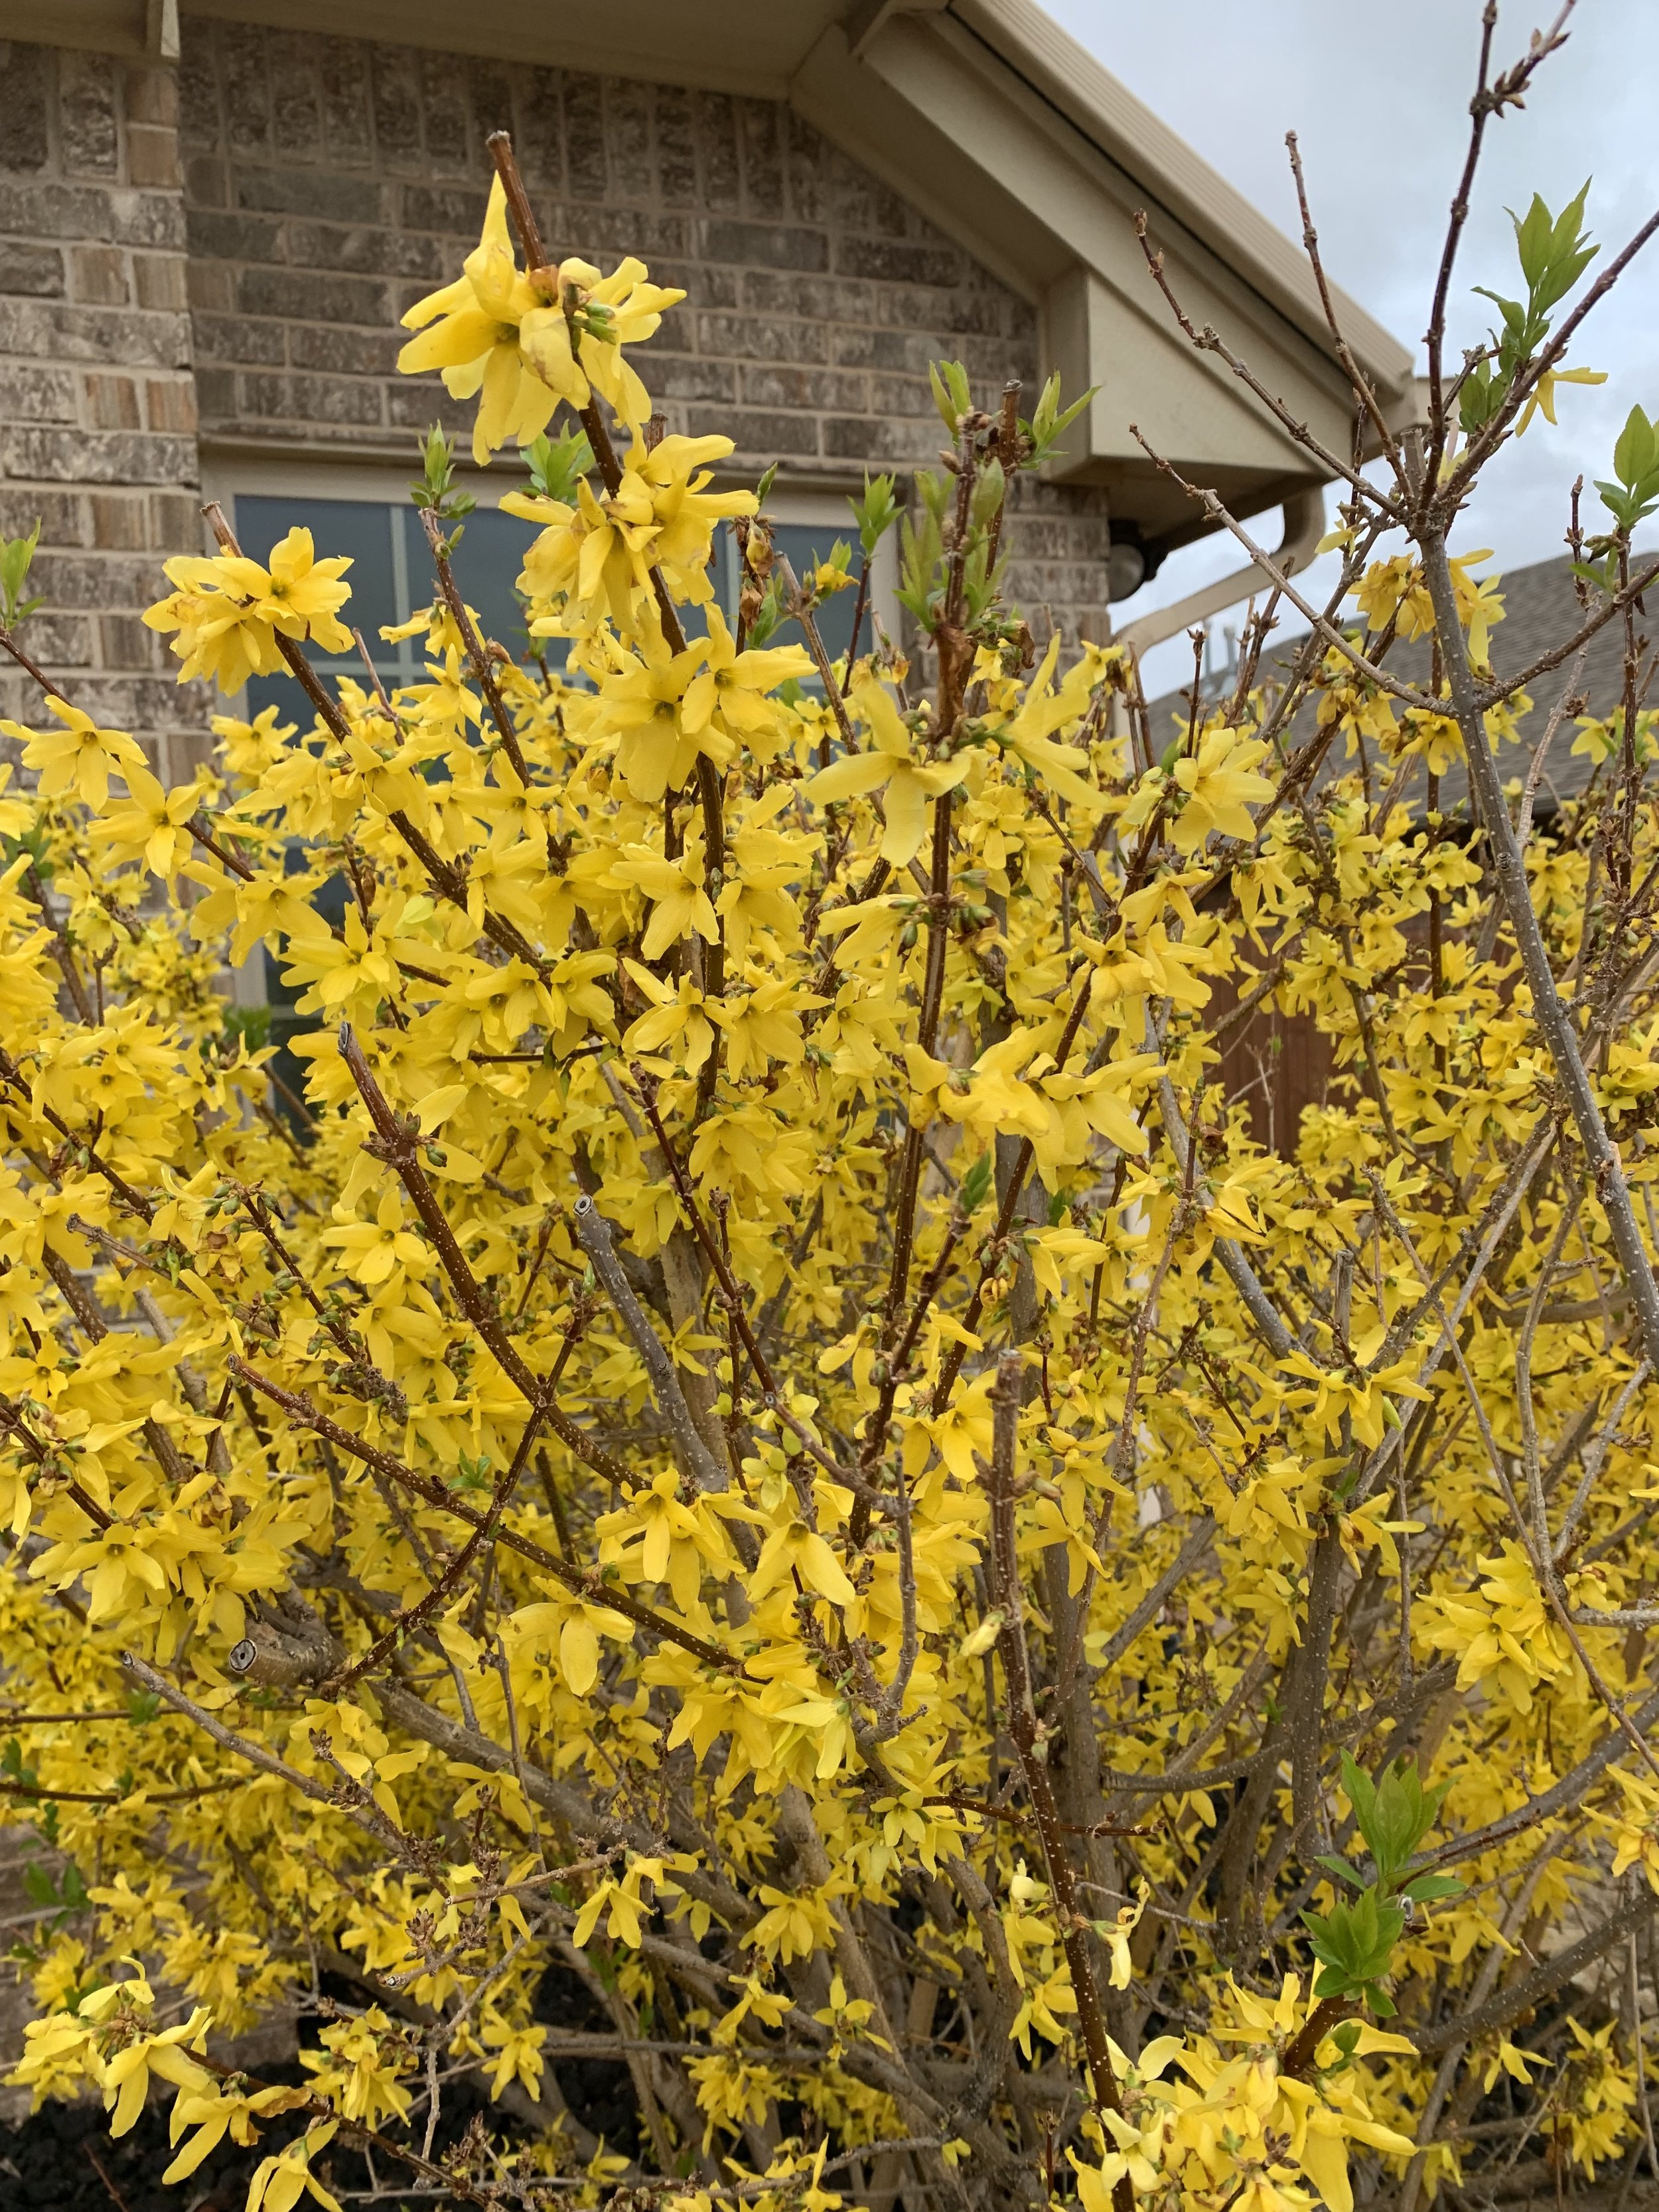
Bridal Wreath Spirea. A medium sized shrub with arching branches covered with an abundance of white cascading flowers in mid spring. It is a very hardy, heirloom shrub, with no specific pest issues that thrives in well drained soils. It attracts hummingbirds and butterflies. To preserve the natural arching shape avoid sheering but if pruning is needed, it is best done in the spring after blooms fade. It looks stunning planted in full sun to partial shade in front of darker structures or large hollies. Spiraea nipponica ‘Snow mound’ is another great variety.


Bridal Wreath Spirea.

Flowering Quince.
Flowering Quince. Another early bloomer known for adding splashes of red to the landscape. It also performs best in full sun and tolerates partial shade but with fewer blossoms. Considered a moderate grower and mid-sized shrub, most varieties reach 4-5’. It does best if planted where it can grow to its natural size and shape. If pruning is required, only prune in the spring after blooms have faded. Flowering Quince is loved by butterflies and hummingbirds. The plant is very drought tolerant once it is established and it will tolerate most soil, but like most plants would enjoy well drained areas. Another variety, Chaenomeles speciosa Double Take Series, has blooms that resemble camellias.
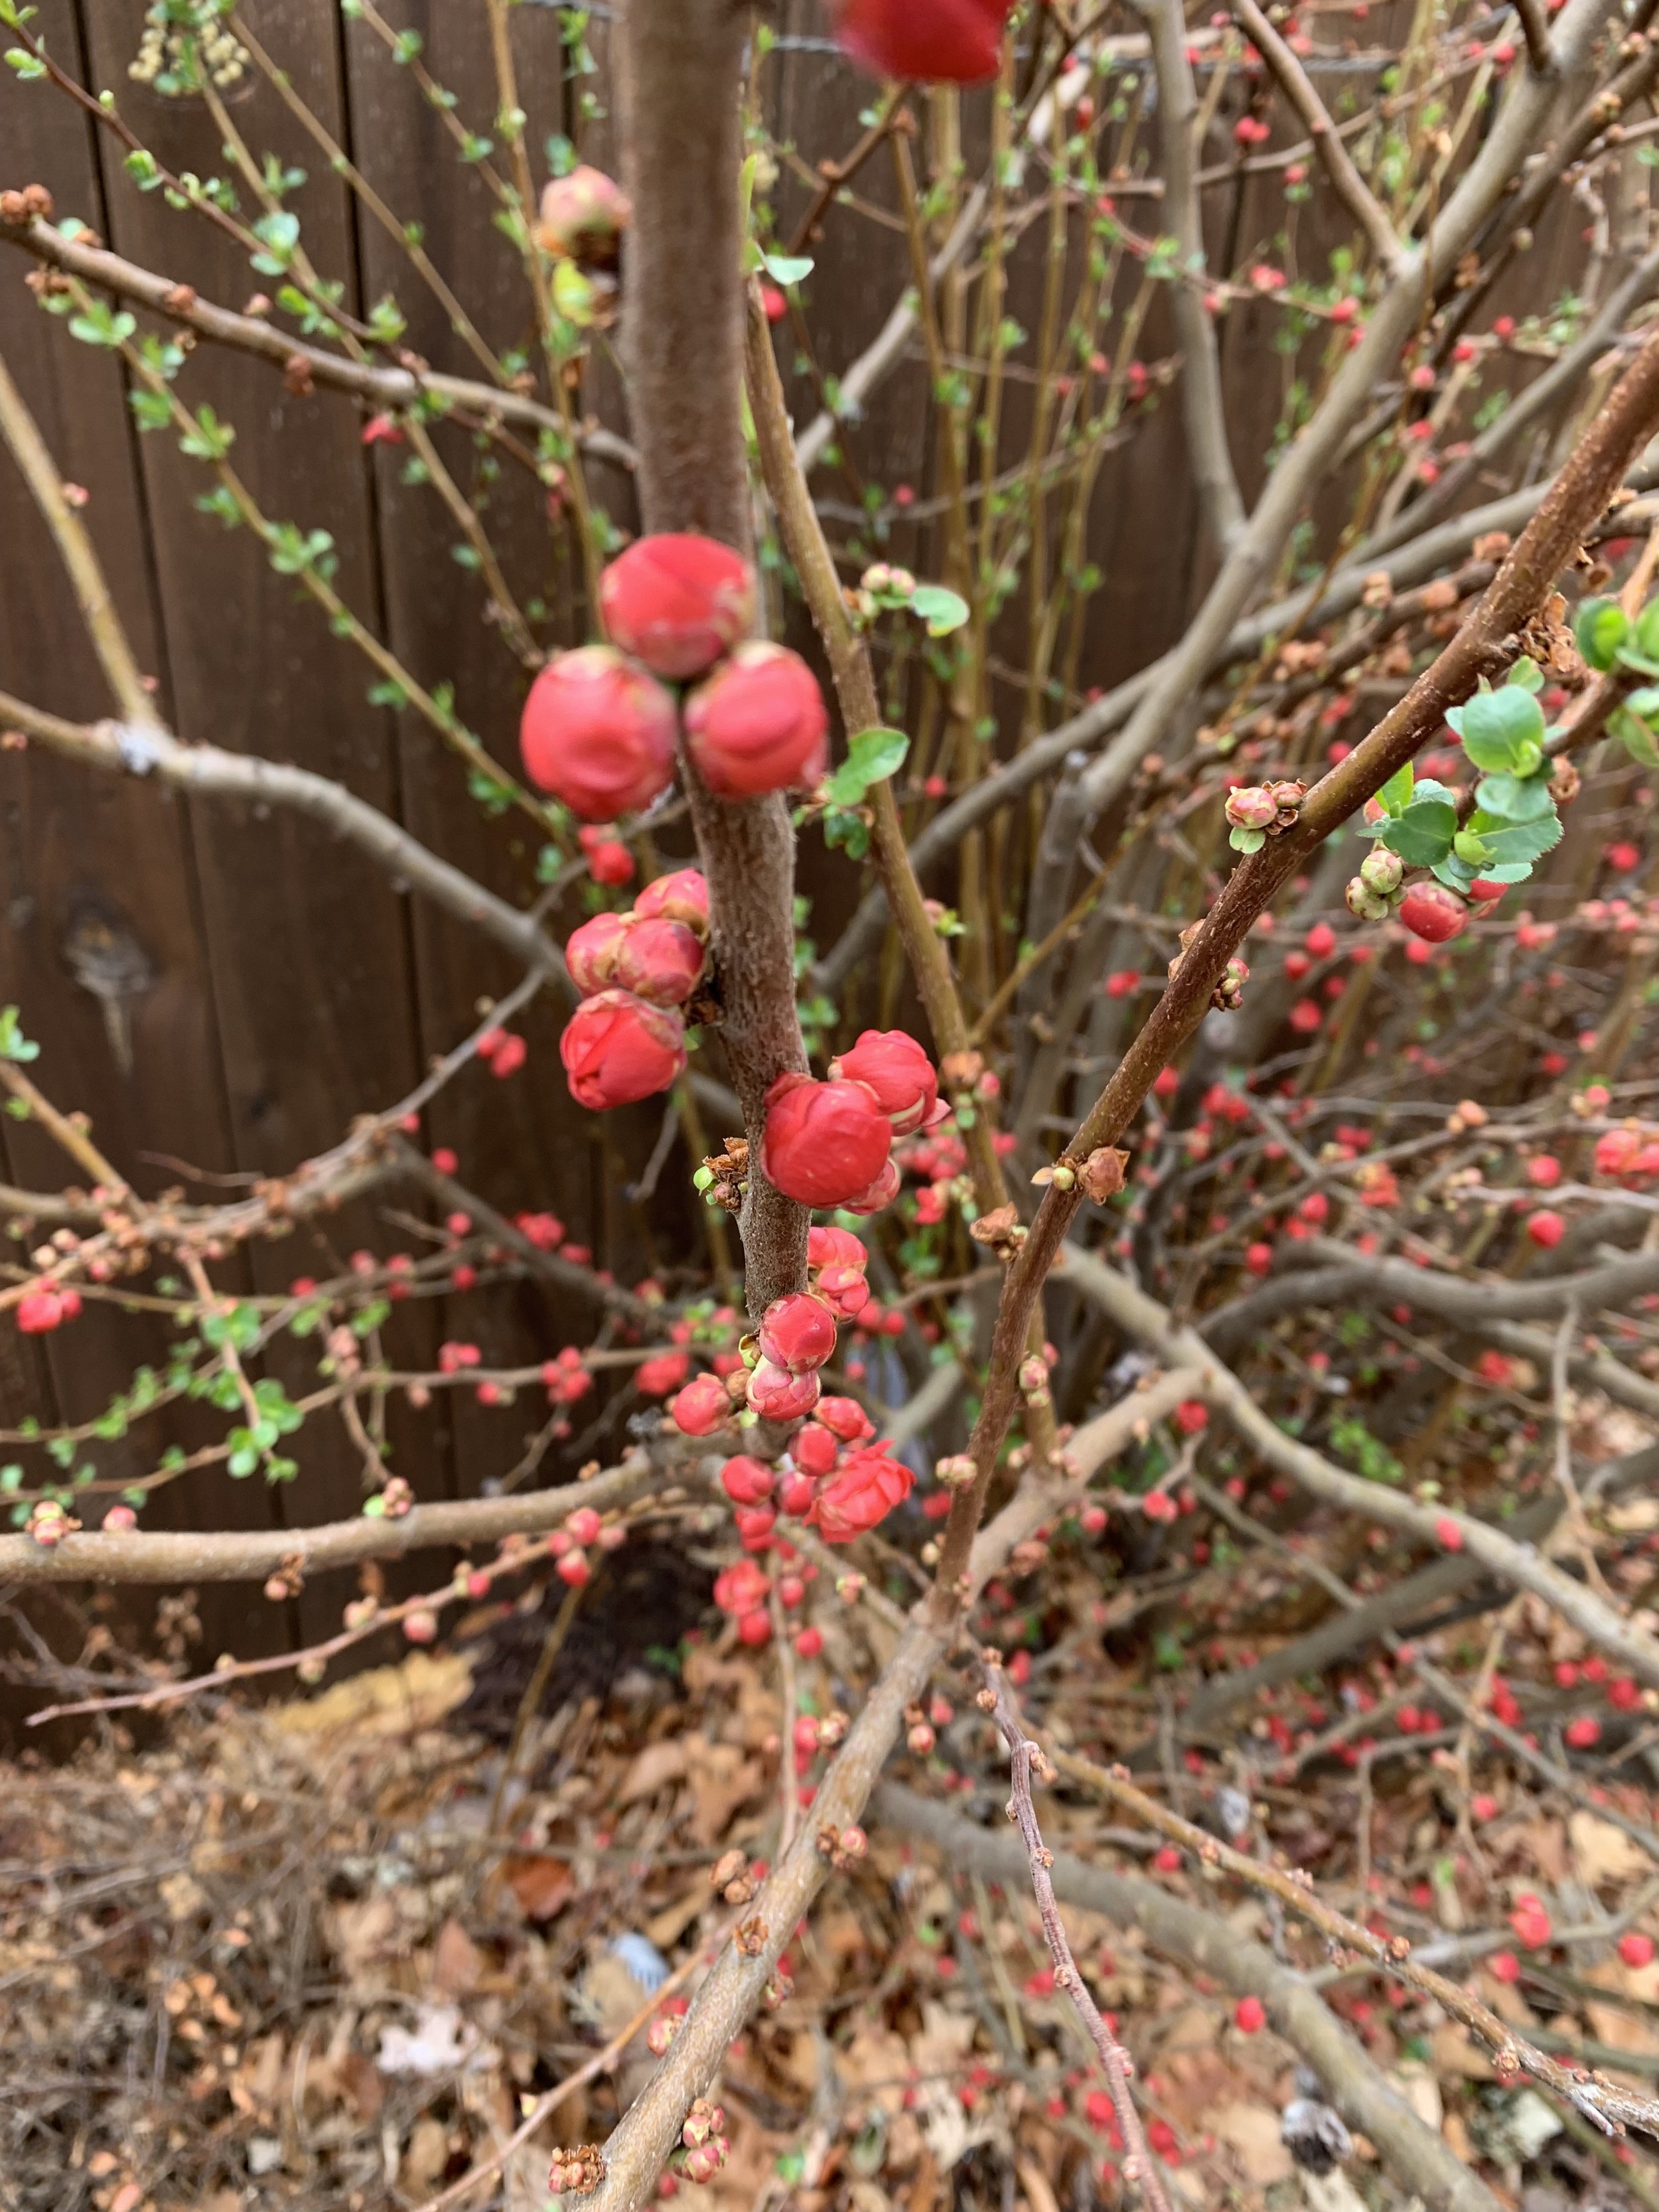
Flowering Quince buds are staring to pop.

Snowball Bush is another great spring show piece that is just starting to add interest to the landscape.
Snowball Viburnum. There are many varieties of viburnum, but the old fashion Snowball Viburnum with its masses of large, pure white, snowball sized blooms is still my favorite. Blooming from mid spring to early summer, if it wasn’t for the time of the year, it could easily be mistaken for a Limelight Hydrangea. A large shrub that can reach 10’ high and 10’ wide. Easy to care for. Tolerant of most soils but prefers well drained soils. Plant in full sun to partial shade. Oh, and it is perfect for cut flower arrangements.

Snowball Viburnum

Azaleas. There are too many varieties and nauseas to summaries in a single paragraph. But, right now, it is hard not to fall in love with azaleas. They are undeniably the most dynamic spring color plant for shady locations. And yes, you can grow them successfully in central Oklahoma, but they are not a no care, low maintenance plant. We often dedicate an entire article to growing azaleas in central Oklahoma this time of year. To learn more about azaleas, spend a few minutes reading our post from last April: https://www.hallstewart.com/hsblog/growing-azaleas-in-central-oklahoma


Shrubs such as Double Play Candy Corn Spirea add interest to the spring landscape as their new foliage emerges.
TREES

Oklahoma Redbud.
Redbud. My all-time favorite “Welcome to Spring” plant. (You can on us dedicating an entire article to Redbuds every spring.) Reddish purple blooms appear on branches before leaves appear. The ‘Oklahoma’ variety was discovered in the Arbuckle Mountains and known for its glossy, heart-shaped, green leaves in the summer. It grows to 15’-20’. Preferring full sun but does well as an understory tree in dabbled shade. For more Redbud love, visit our article from March: https://www.hallstewart.com/hsblog/the-redbud-oklahomas-state-tree

Redbud.

Oklahoma Redbud

Oklahoma Redbud
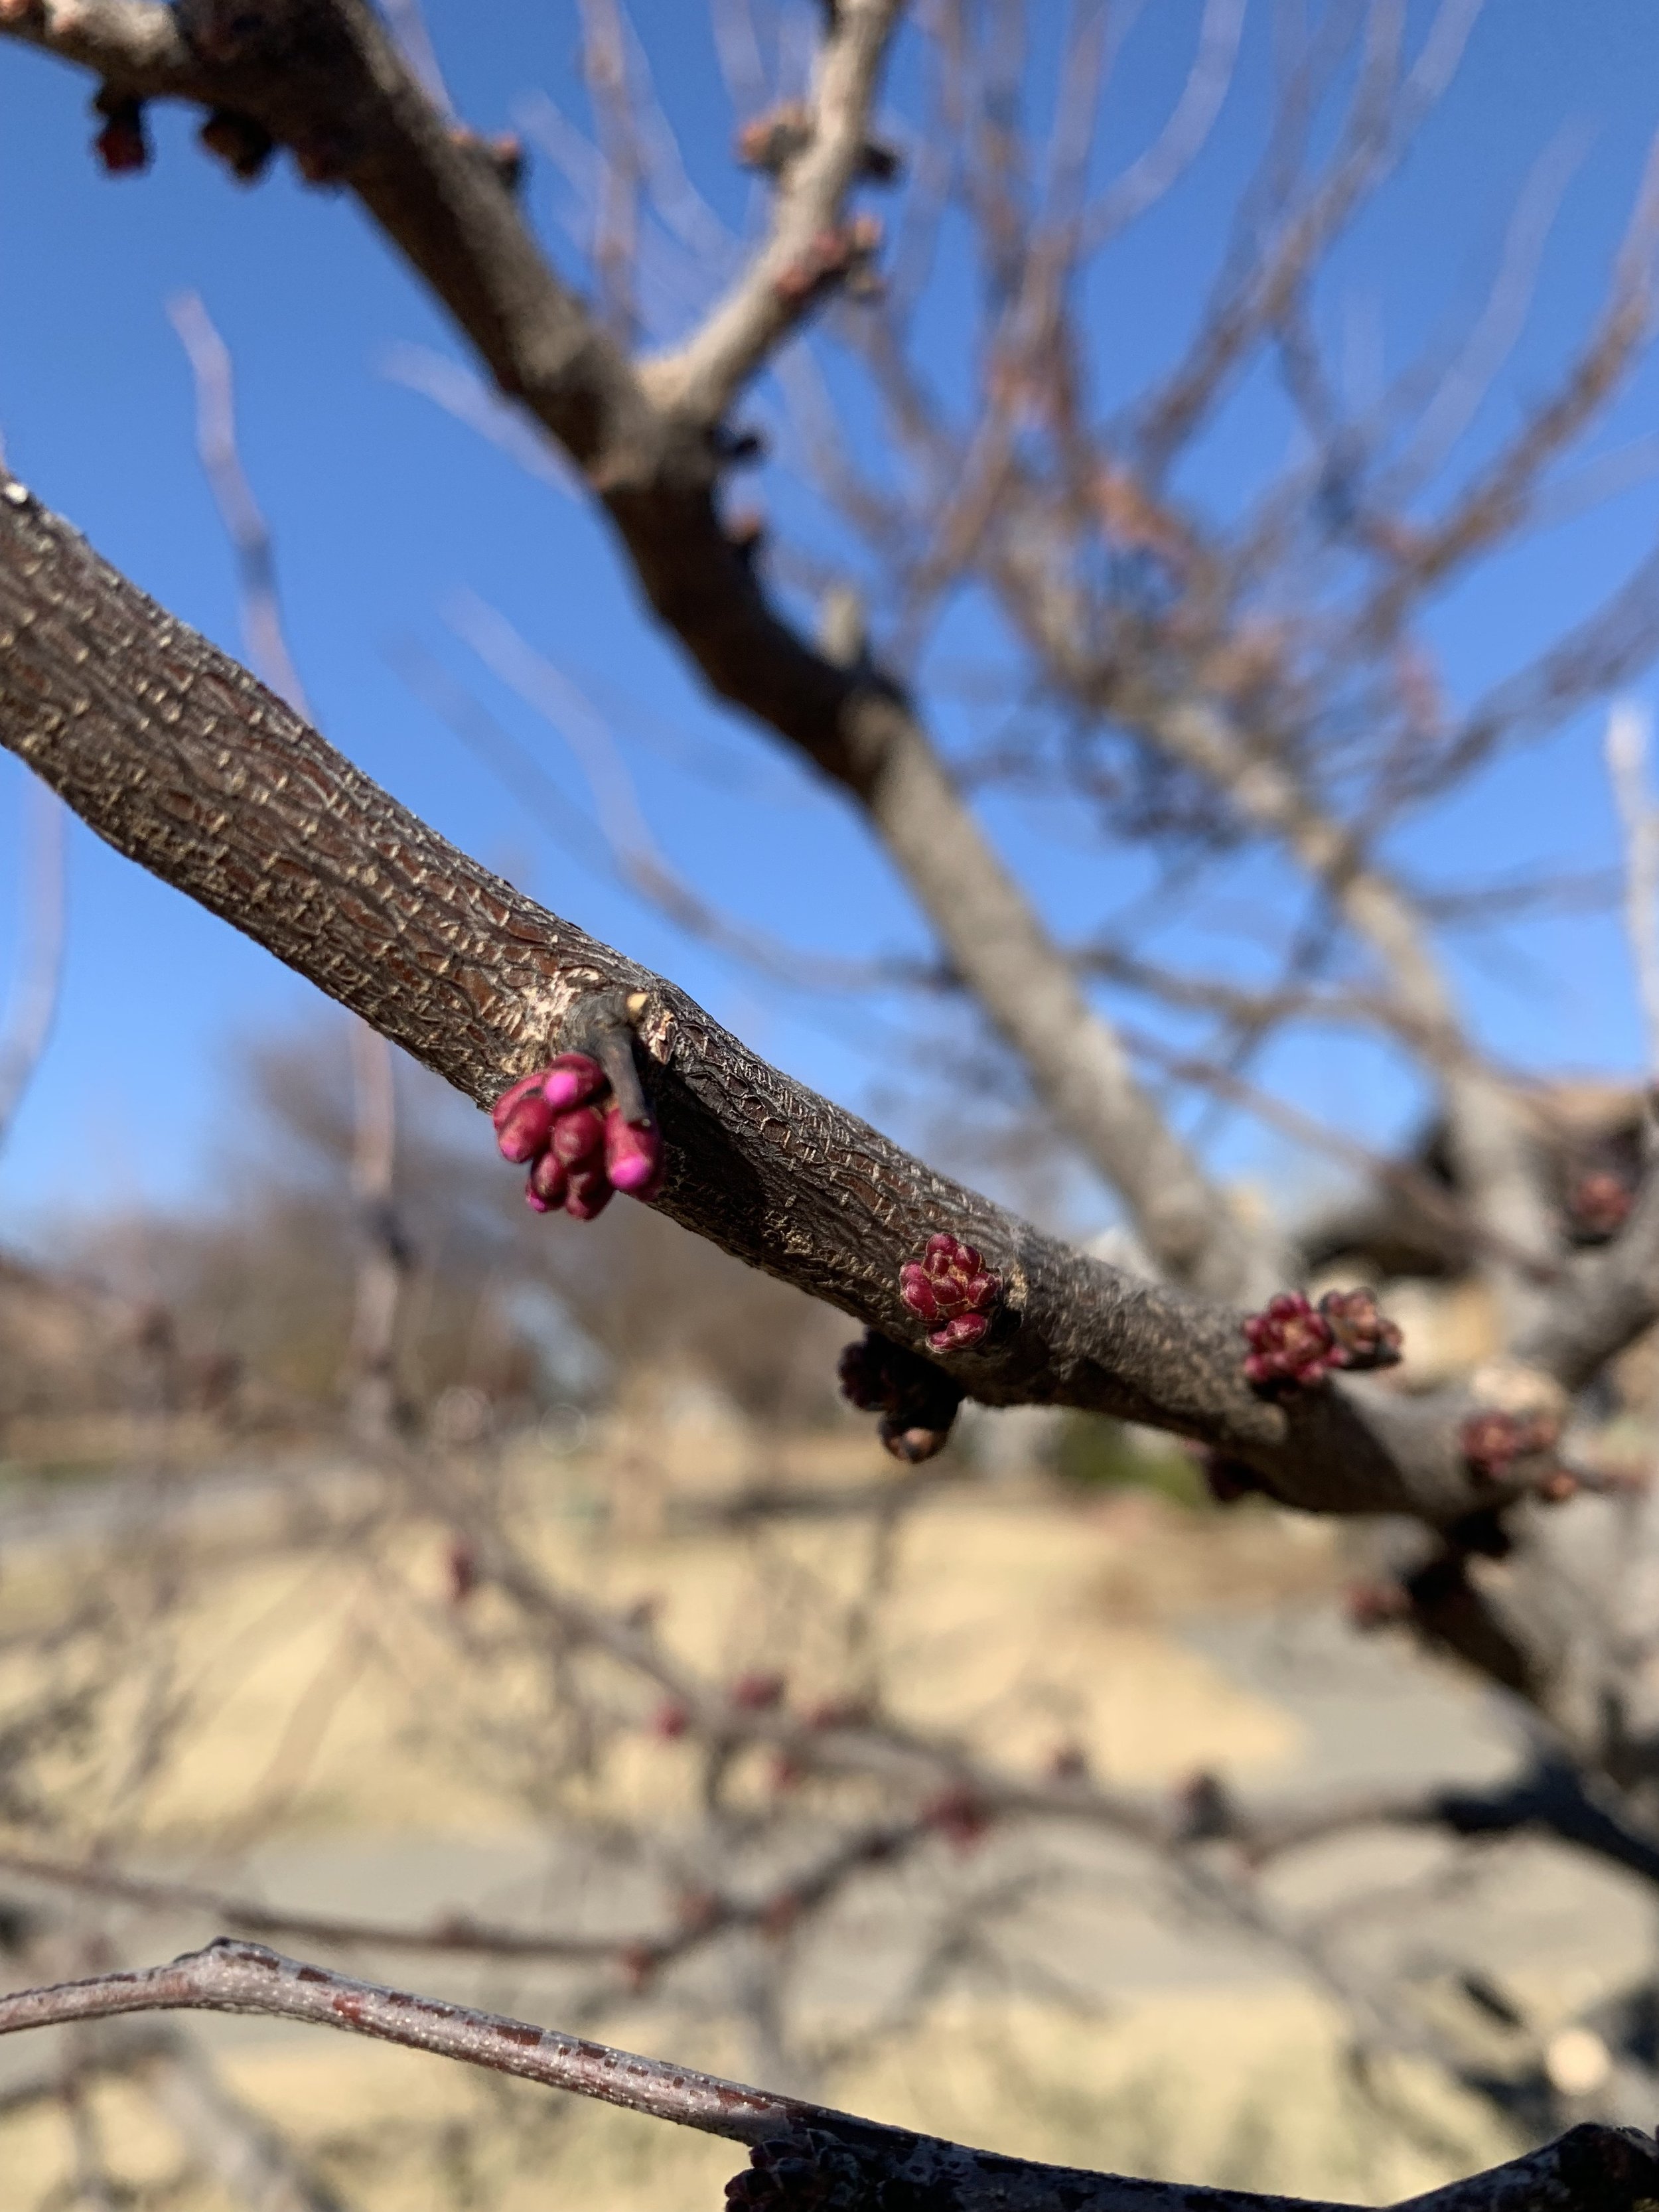
Redbud buds are swelling up!

Crabapple.
Crabapple. There are many varieties of crabapples, but ‘Prairifire’ is one of the best. It was the Oklahoma Proven tree of the year in 2007. It is disease resistant and not fazed by most of the problems with crabapples. Flowers of rose-pink cover the tree as soon as leaves emerge. Young leaves go from purple-red to dark green as they mature. Branches have red fruit in the winter. Mature, 20-25’, trees have a rounded top. Plant in full sun as a specimen tree or in a grouping. Water extra during periods of extreme heat or drought.

Saucer Magnolia.
Saucer Magnolia. A specimen type tree that reaches 15-20’. Large blooms put on a spectacular show on multi-trunk spreading branches. Blooms range from white to pink to purple. Best if planted in full sun. Plant away from radiant west or south heat where warm spring days may cause buds to develop too early only to be killed by a late freeze. They require regular deep watering in the summer months when leaves become tattered looking. It is best if their roots are protected with a layer of mulch to conserve water in the summer.

Red Baron Peach

Bonfire Patio Peach
Bonfire Patio Peach. With a mature height of 5-6’, its profuse early spring eye-level pink blooms are a real head turner. The dark red to burgundy summer foliage keeps the interest going all season long. The small tree performs best if it receives at least 6 hours of full sunlight per day.
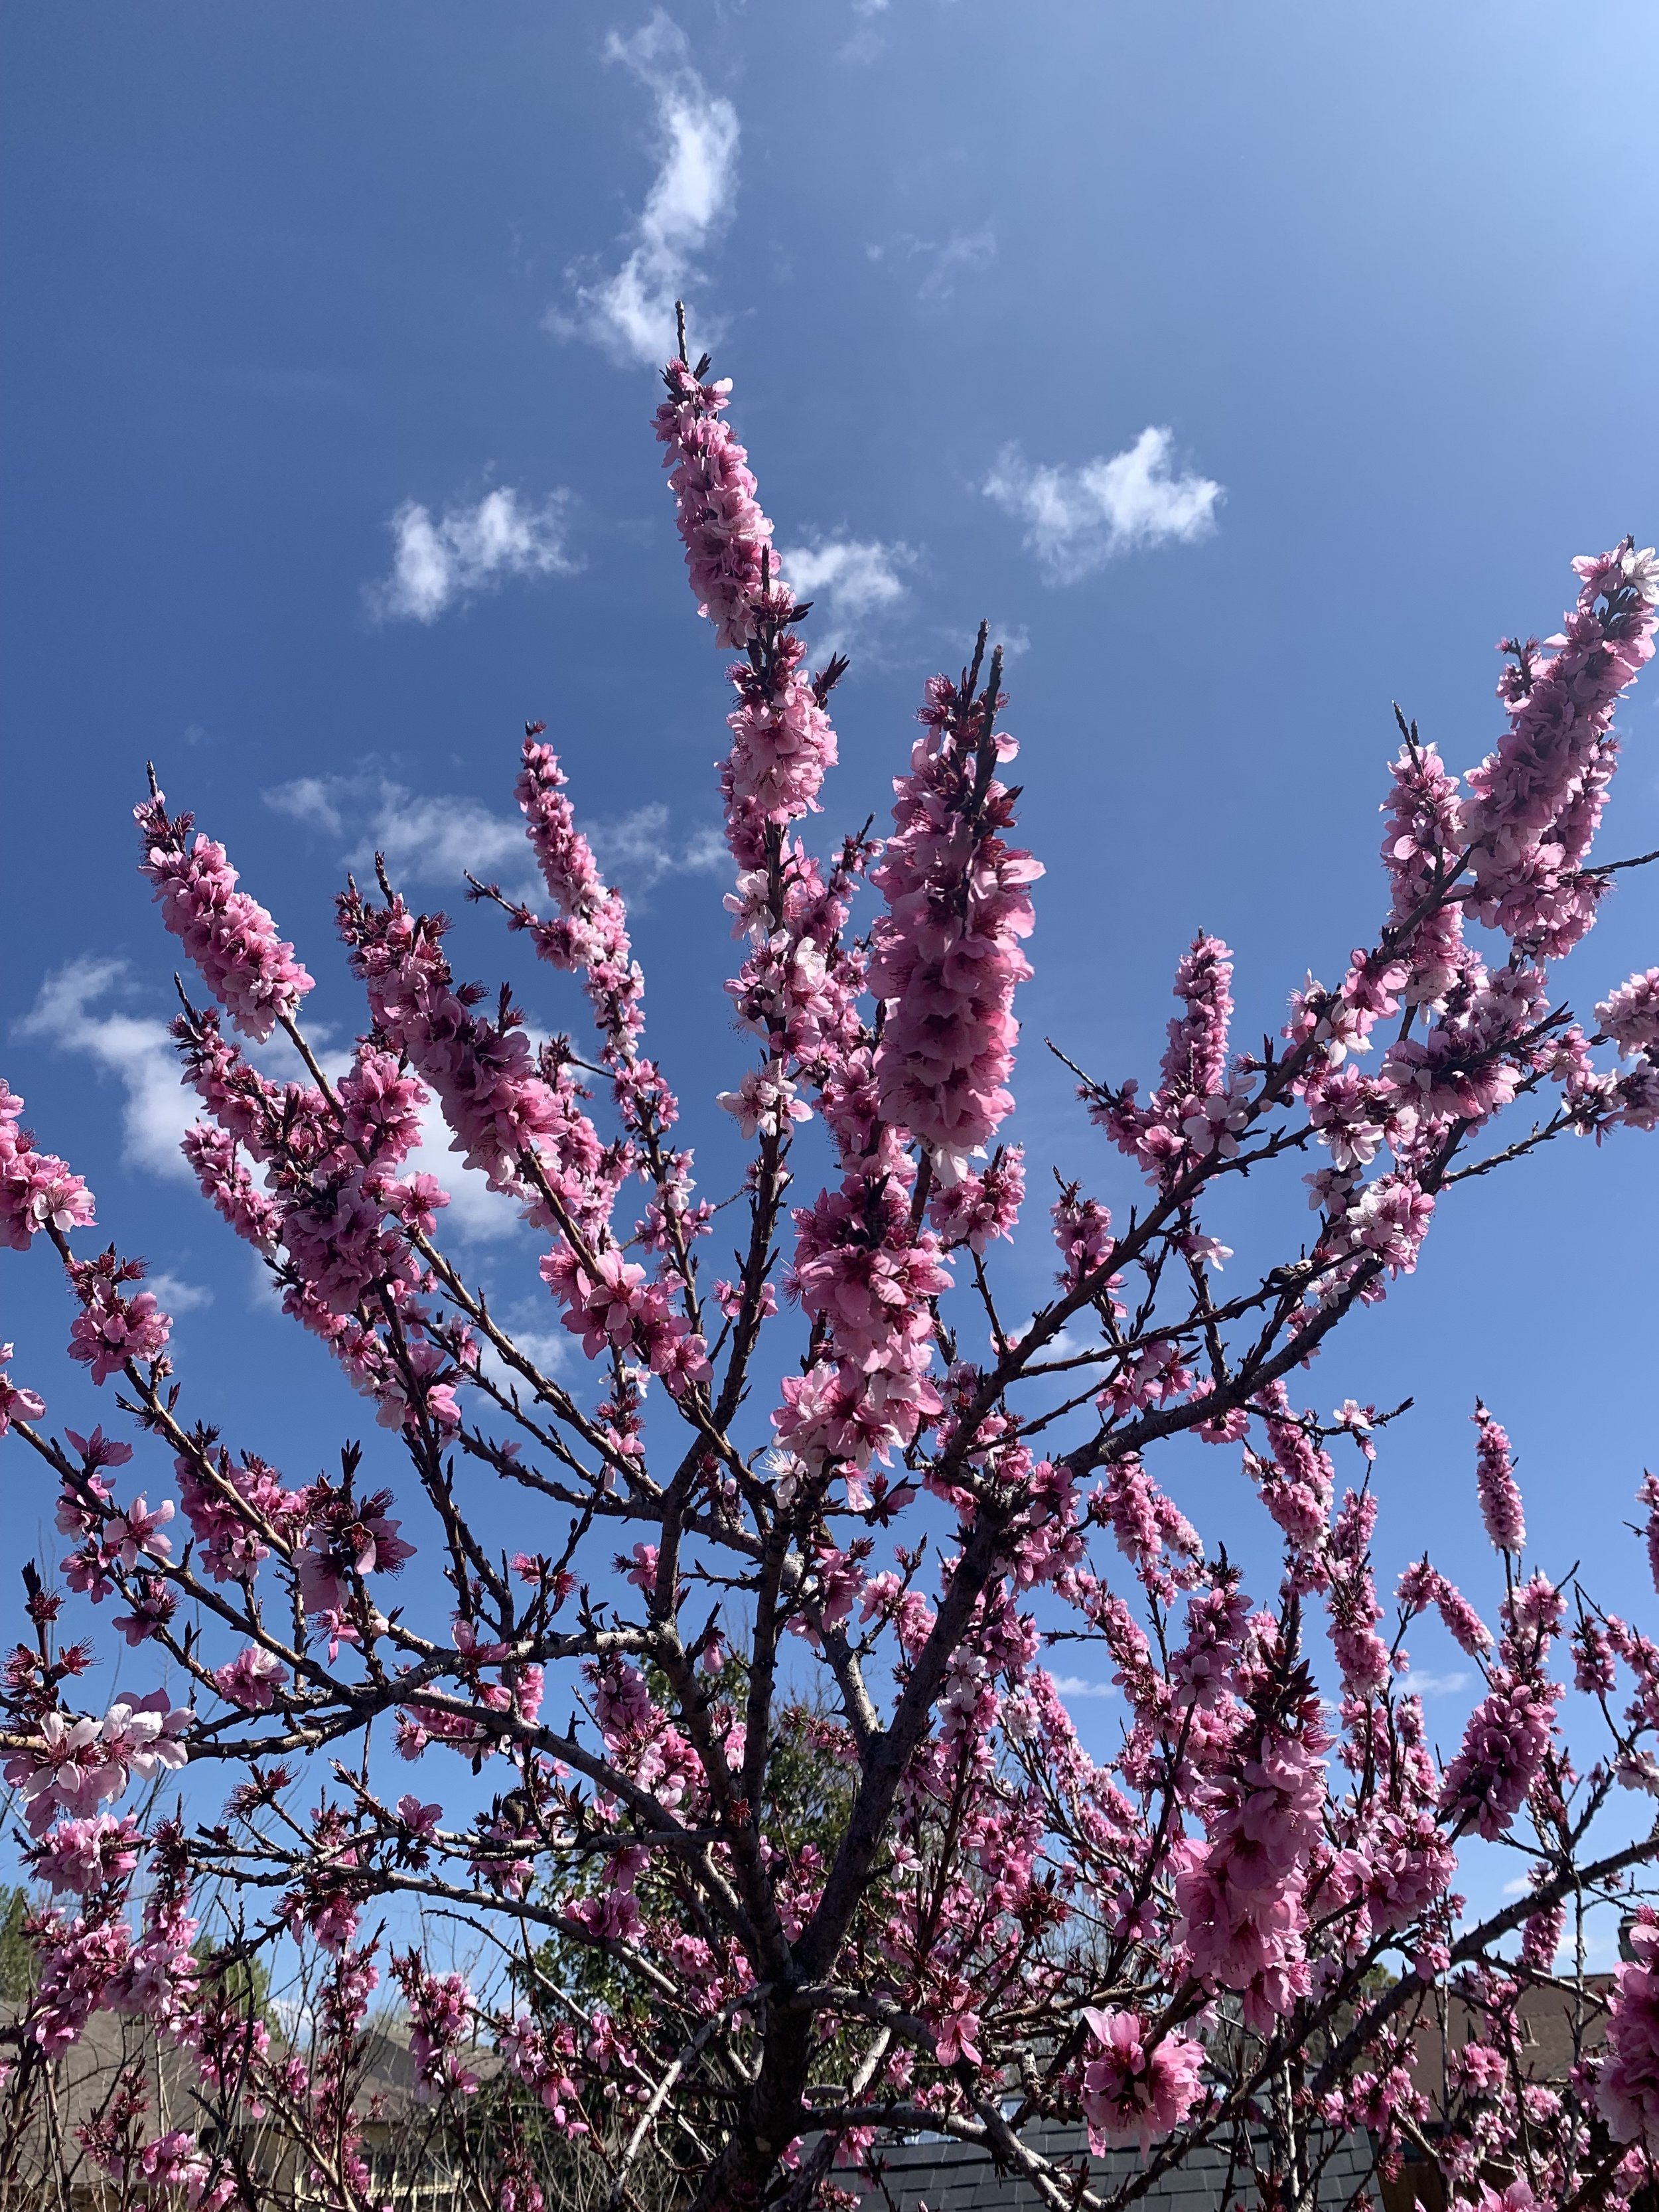
Ornamental Peach Trees add shades of pink to the March landscape.
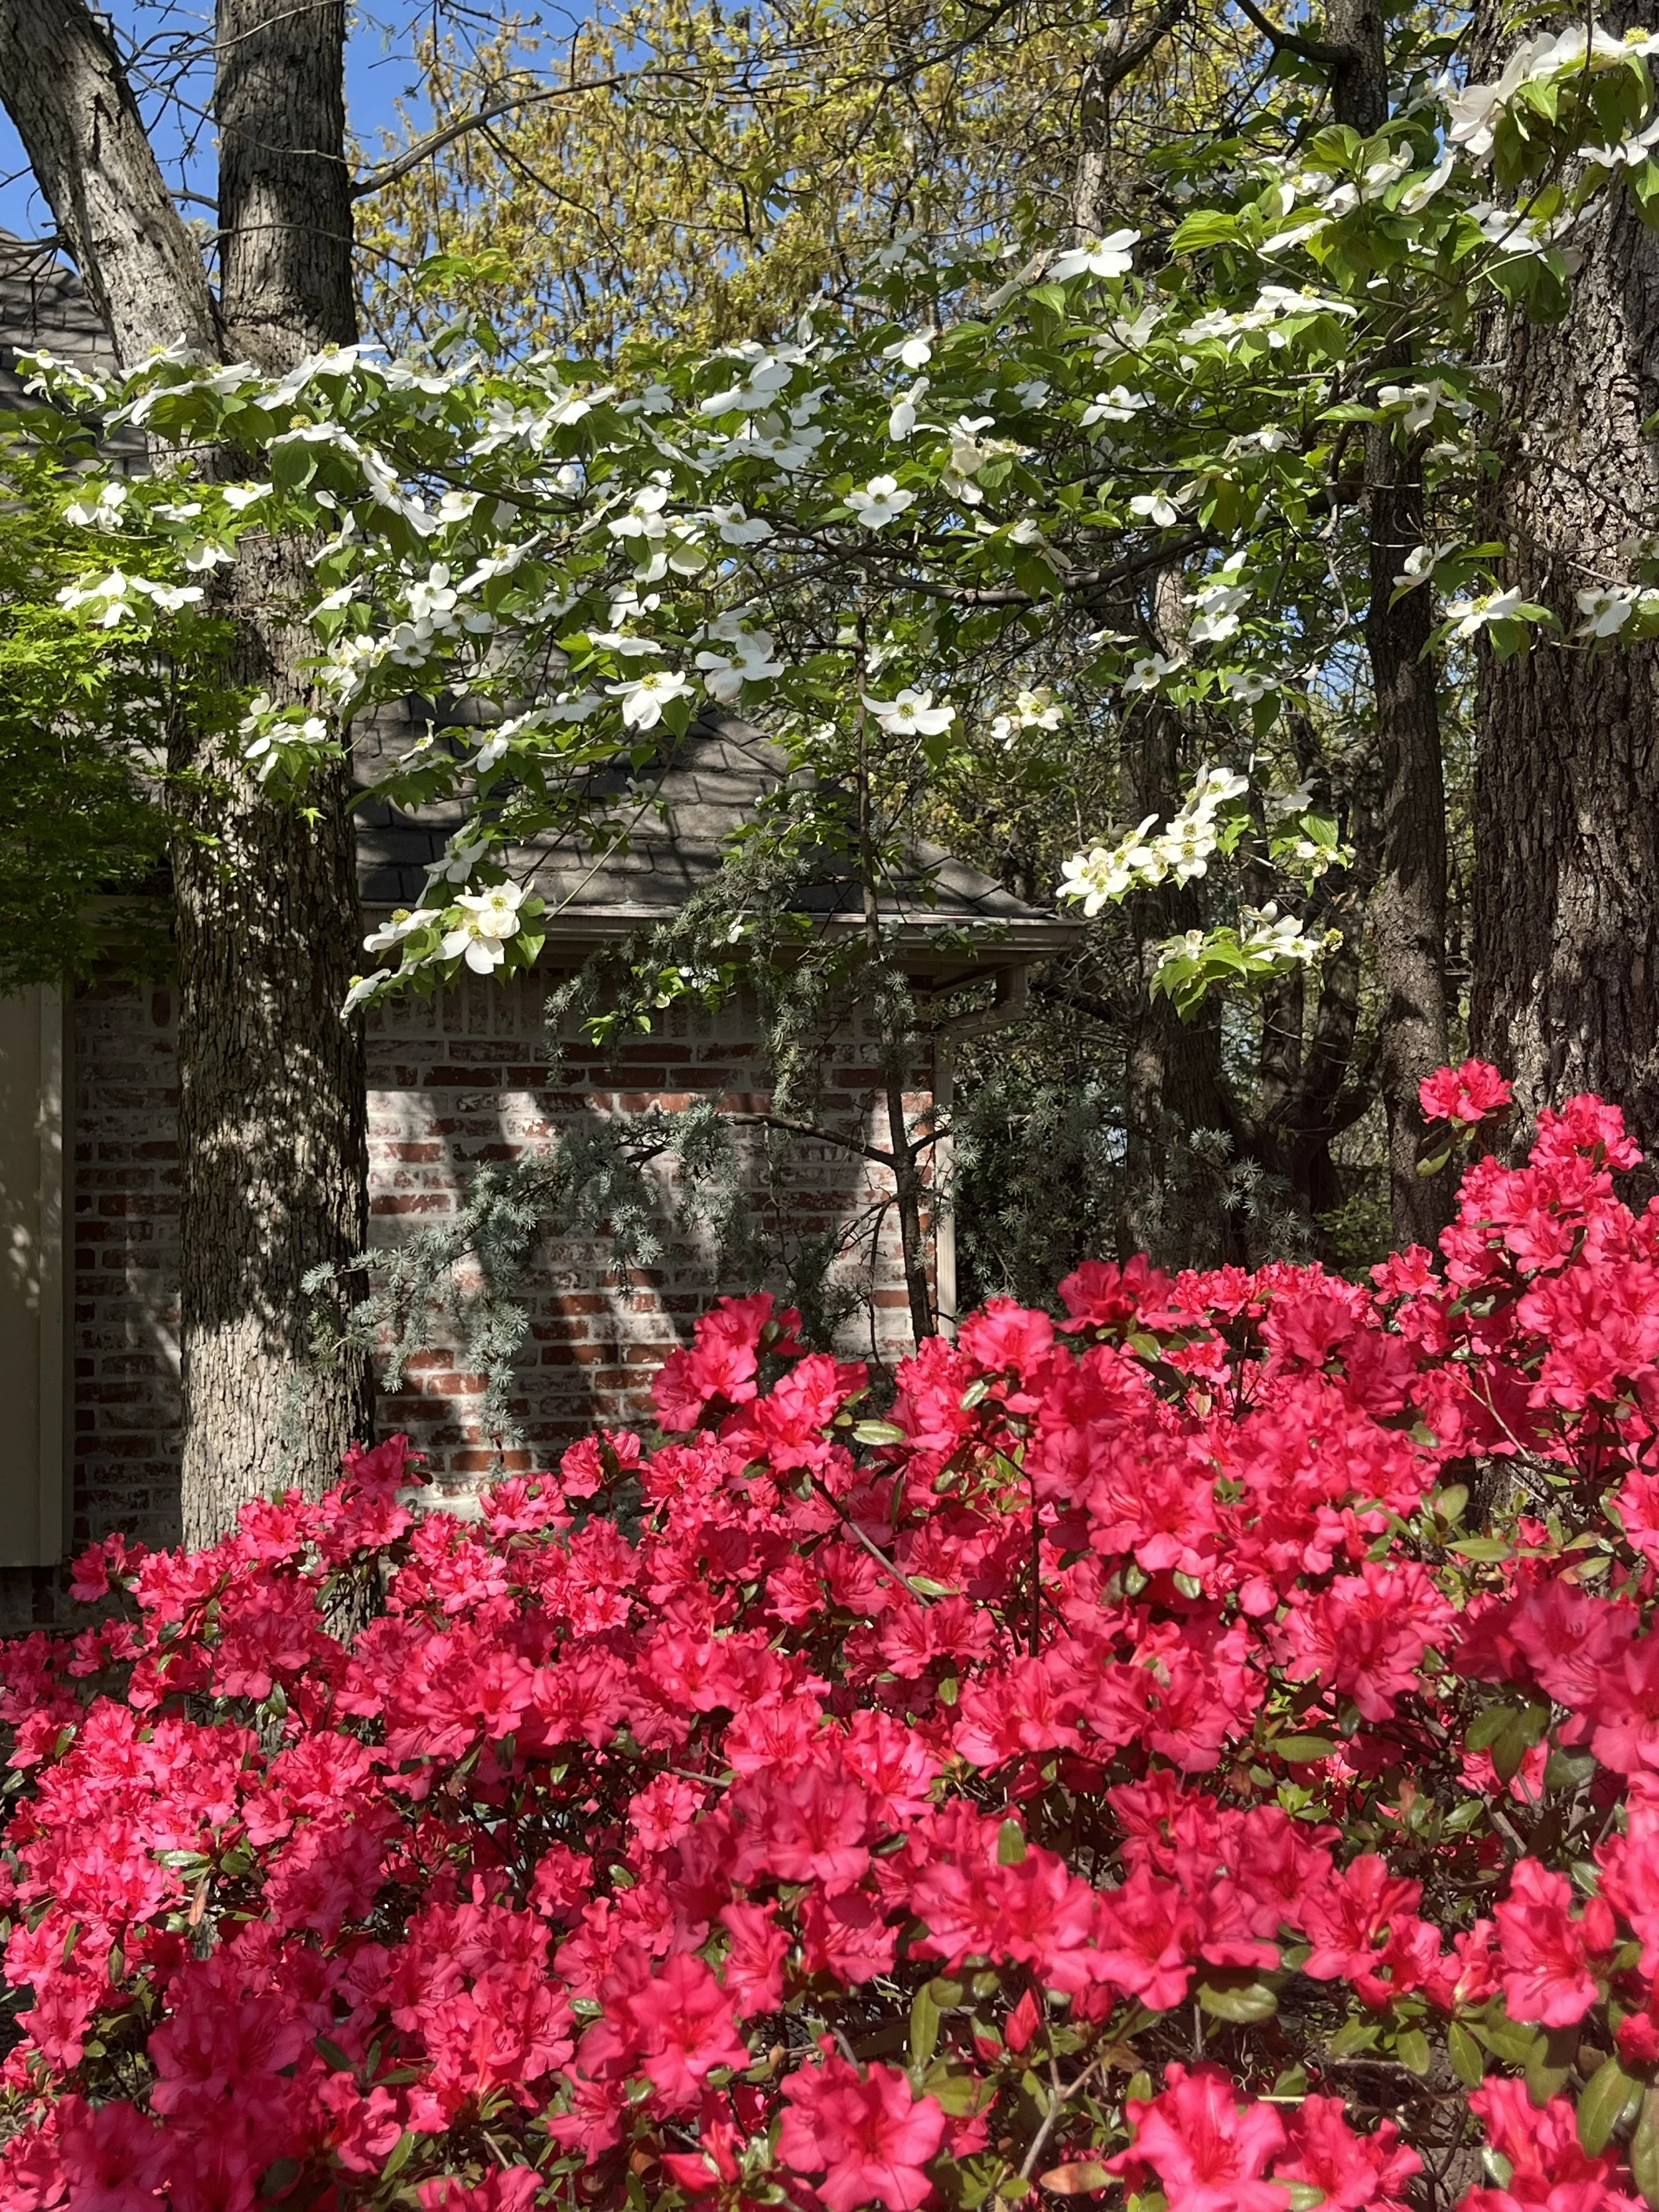
White Dogwood with Azaleas create a stunning color display in the spring in shady landscapes.
Dogwood. Great understory, slow growing, small to medium sized tree (15-20’) that is loaded with a four petaled flower in the spring. They grow well in shade to partial shade where they brighten the spring landscape with splashes of white, pink or red. Dogwoods need acidic, moist, well-drained soil, similar to azaleas.

A great understory tree, the Dogwood, adds color to shady landscapes in the spring.

The bright red spring leaves of Japanese Maples are sure to catch your attention.
Japanese Maples. Not a blooming tree, but with the bright color of their new spring leaves, it is easy to include them in a list of spring blooming trees. With so many shapes, sizes, and colors, there has to be a variety for nearly every landscape. Japanese Maples have been referred to as the “aristocratic” of the landscape. Several times we have dedicated an entire article just to the Japanese Maple. Click this link to learn more about them: https://www.hallstewart.com/hsblog/2020/4/19/japanese-maples-the-aristocrat-of-the-landscape

Japanese Blood Good Maple

Lace Leaf Weeping Japanese Maple
Spring Bulbs


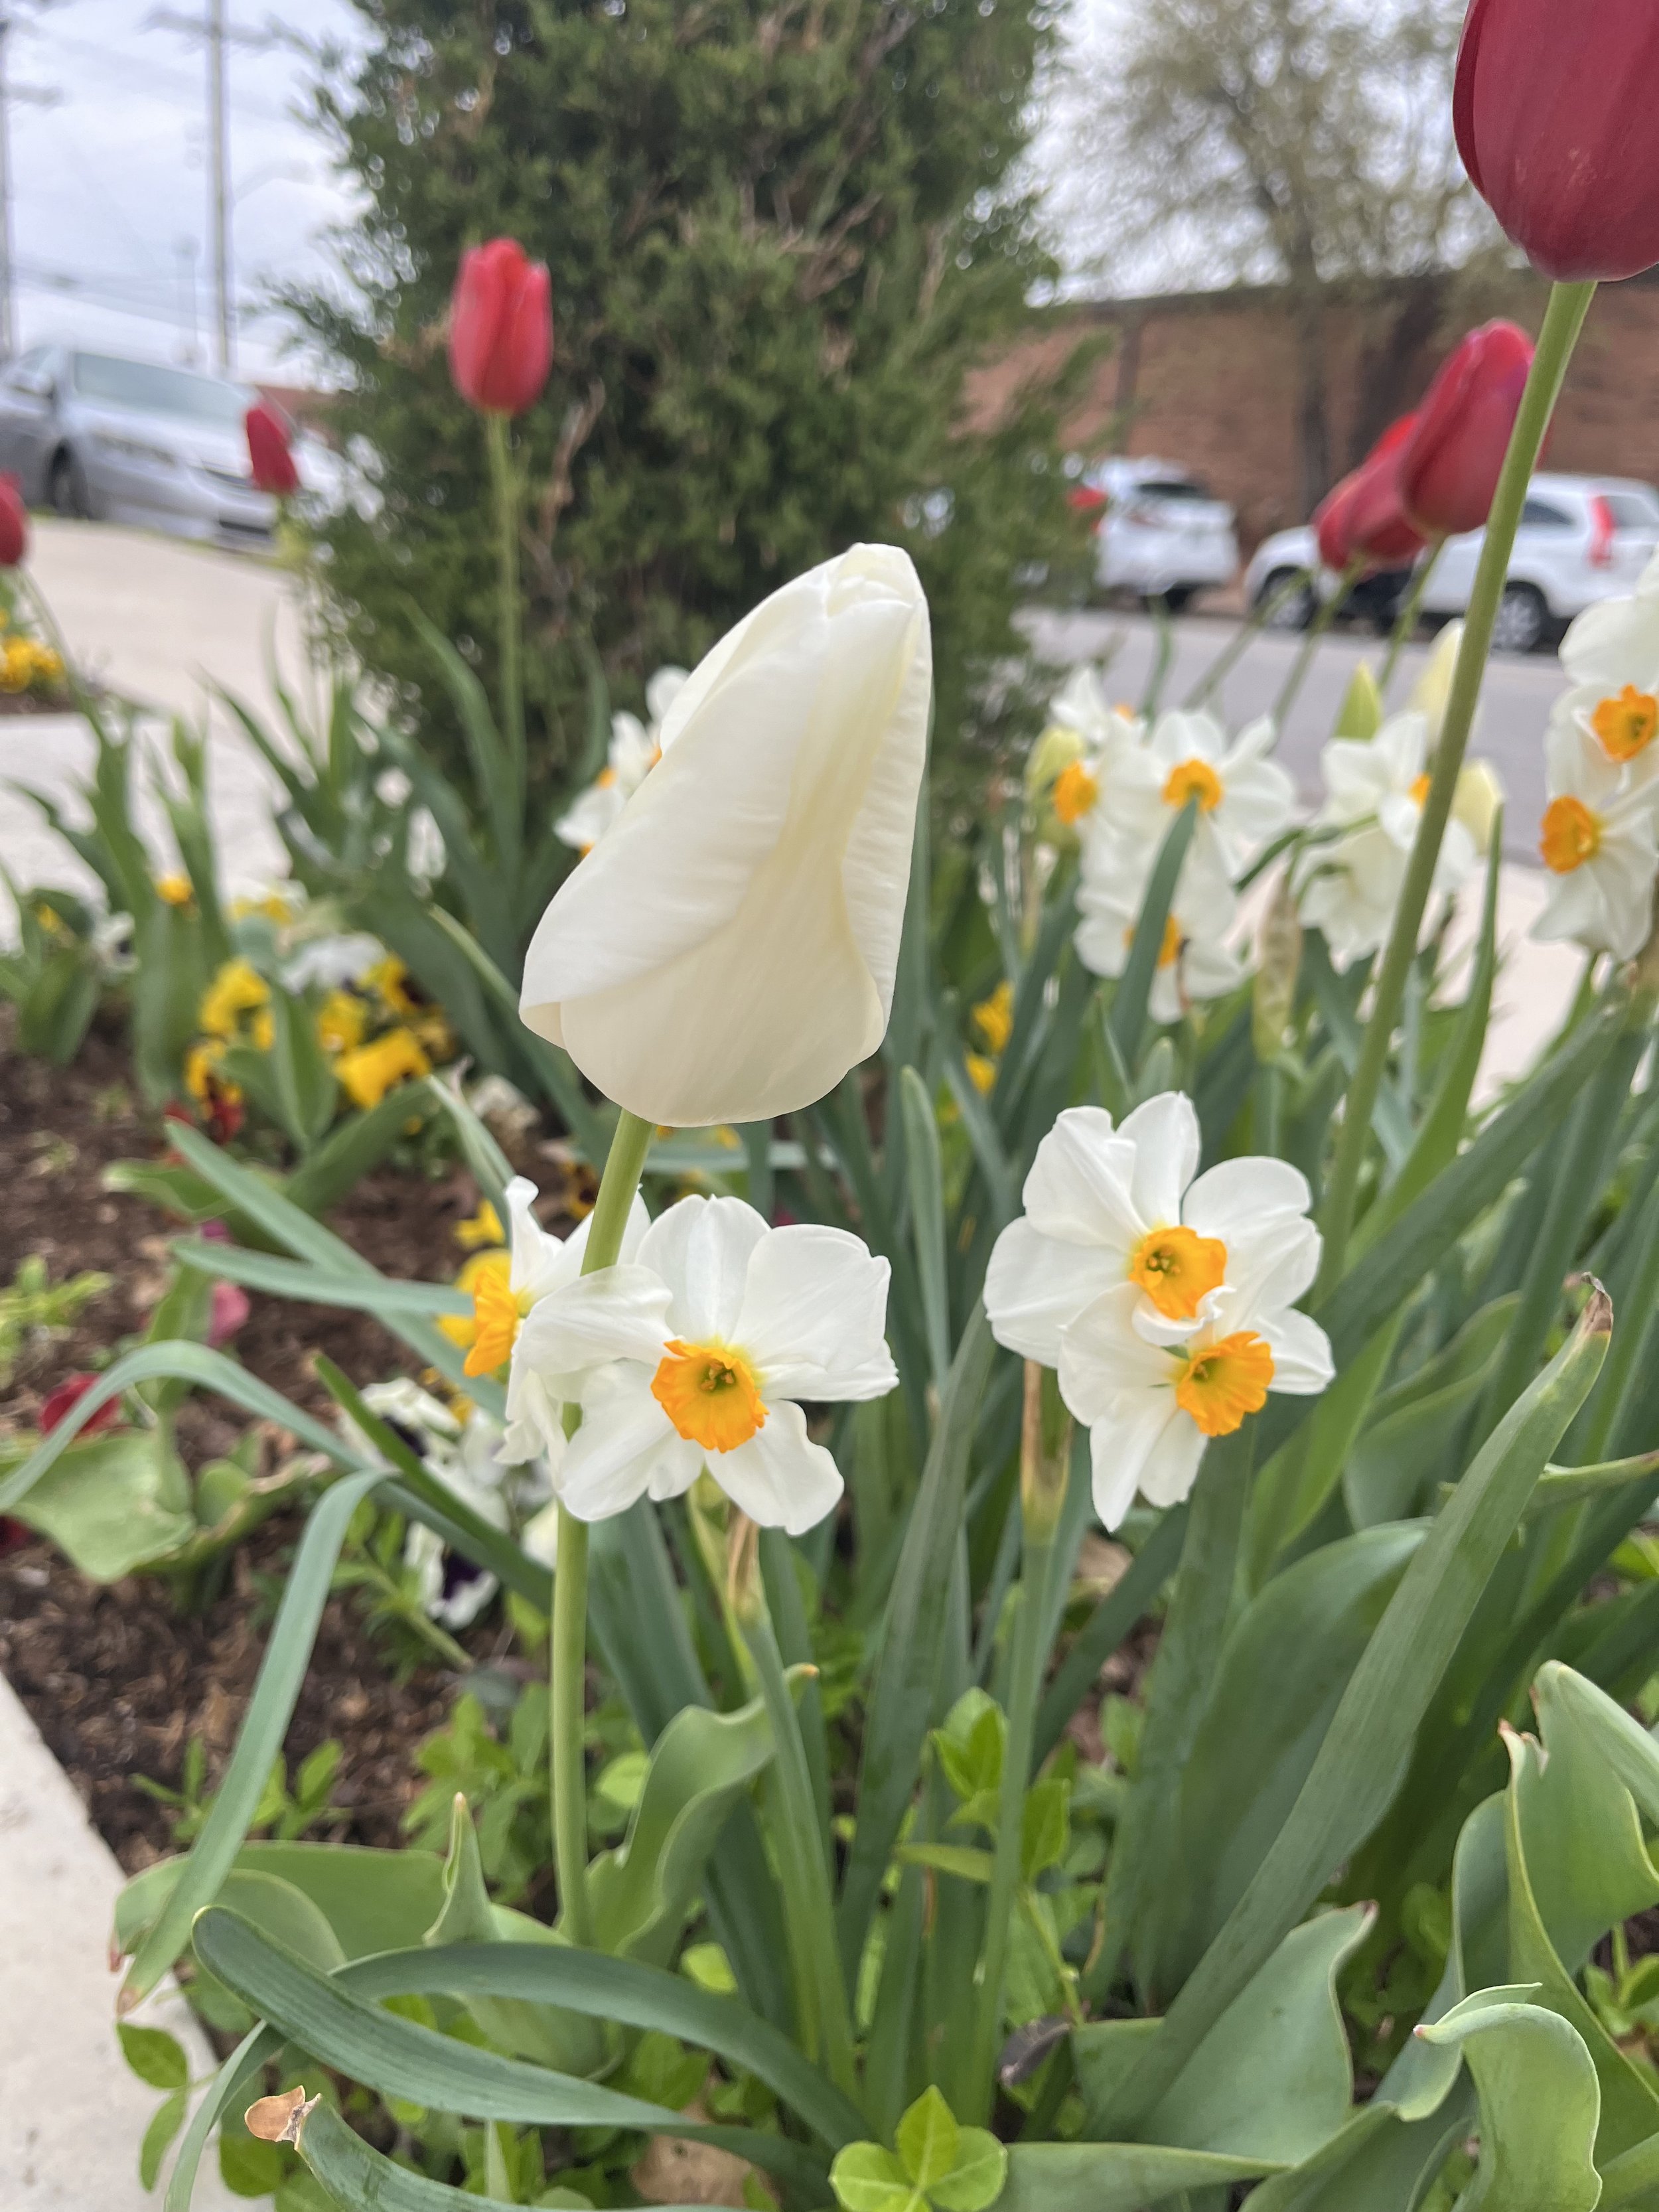
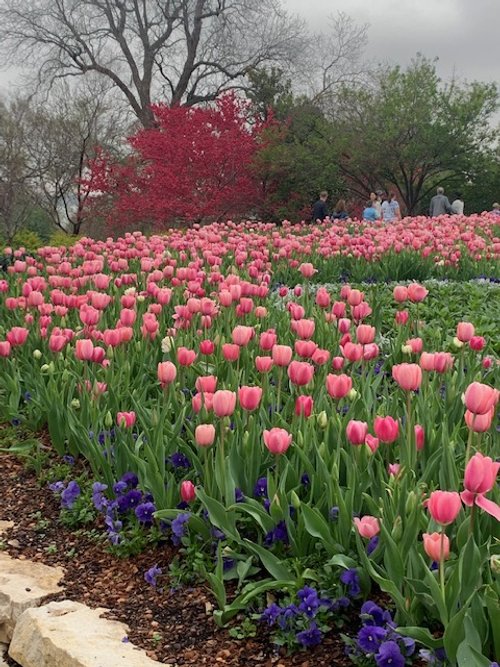
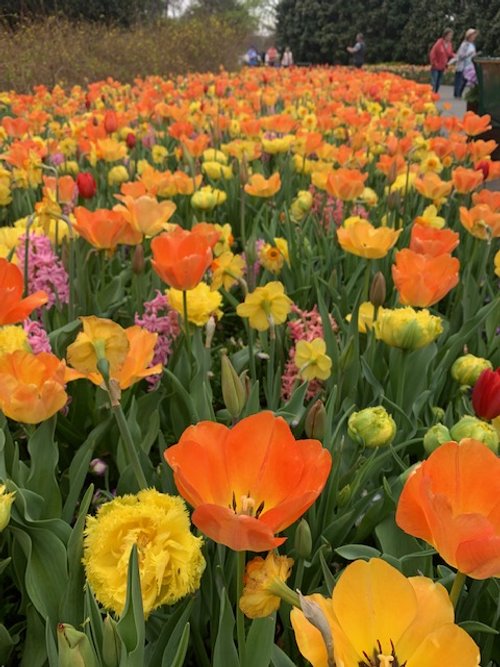
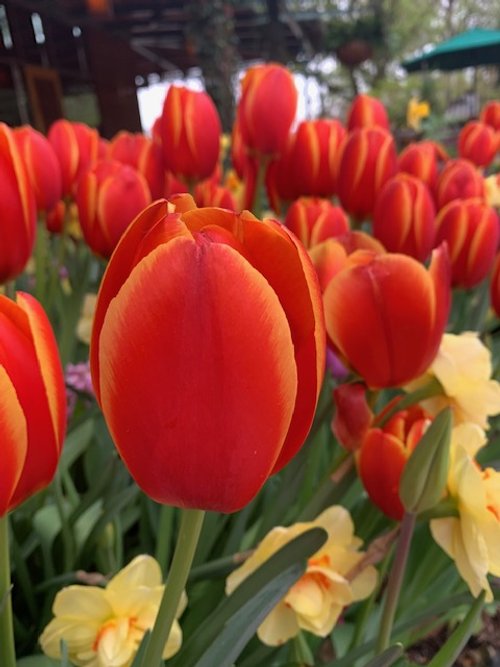
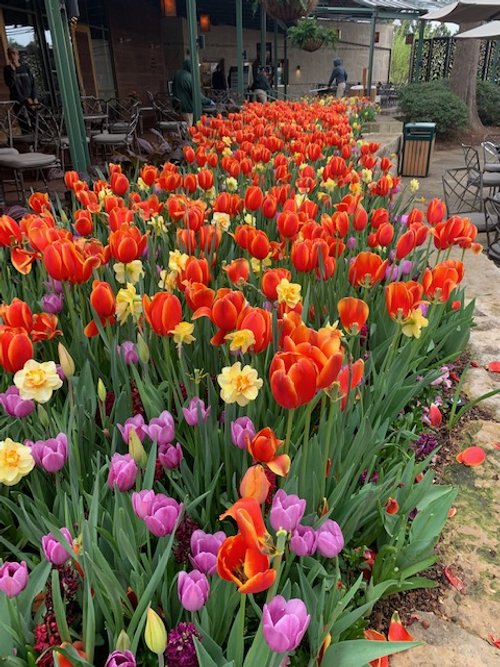
One of my favorite ways to declare spring is Hyacinths, Daffodils and Tulips!
Last October we wrote about spring flower bulbs, “Plan Now. Plant Next Month. Enjoy Next Spring.” https://www.hallstewart.com/hsblog/plant-now-plant-next-month-enjoy-next-spring
If you were inspired and added spring flowering bulbs to your landscape, you are enjoying a spring full of color.
Don’t miss out next spring! Open your calendar right now to October and write “Plan spring bulb planting!”


A friend talked about being greeted with “What has brought you joy today?” at a local business recently.
What a wonderful greeting!
We hope, as the landscape burst with new life, you find joy in the beauty God creates for us every spring, without fail.
Don’t let the busyness of life rob you of the joy of spring!
Get outside. Go on a walk. Visit a park.
Add a new plant to your landscape!
The beauty of spring is all around!
Lorne Hall
Hall | Stewart Lawn + Landscape
(405)367-3873
Hydrangeas Varieties and Care

Hydrangeas have a reputation for being difficult to grow, fussy and high maintenance. That was true of old fashion, traditional hydrangeas that only bloom on last year’s growth. It was common for a late spring freeze to damage buds resulting in little or no blooms, or a pruning mistake would also result in no blooms.
But, the world of hydrangeas keeps changing…every season the hydrangea options get better and better. New varieties just keep coming. Take a stroll through a local nursery and you will be surprised at all the hydrangea options.

First Hydrangea blooms from last May.
The introduction of the Endless Summer Hydrangea in 2004 from Bailey Nurseries with the help of Dr. Michael Dirr from the University of Georgia resulted in what many claim is the best-selling shrub of all time.

The Original Endless Summer Hydrangea

Little Lime Hydrangeas is a shorter option for smaller gardens.
Dirr had been trying to develop a re-blooming hydrangea for years with no success. Then in 1998, Dirr was visiting Bailey’s test field where he found hydrangeas in full bloom…in September! Bailey Nurseries had been propagating and testing a plant they had found in St Paul, MN for 10 years with success. The plant was unique because it bloomed in the spring on last year’s growth, like a traditional old-fashioned hydrangea, and rebloomed on the new growth during the summer and into the fall.
Dirr immediately knew it was “a game changer” for hydrangeas and quickly coined the name ‘Endless Summer’.

Endless Summer Hydrangea will continue to bloom into the fall.

The Original — big round blue or pink blooms

Blushing Bride - pure white blooms that mature to a pink blush.

Twist-n-Shout — reblooming lace-cap in pink or periwinkle blue with red stems.

Bloom Struck — purple or rose-pink flowers with red stems.

Summer Crush — a 2019 introduction with raspberry red or neon purple flowers with a compact growth.

Summer Crush Endless Summer Hydrangea

Pop Star – Introduced in 2023, Pop Star is a compact, big-leaf hydrangea that only grows 18-26” high and wide. It is the quickest Endless Summer to rebloom.

Original Endless Summer Hydrangea in the fall.
The Endless Summer Hydrangea is like traditional hydrangeas in that they prefer morning sun and afternoon shade.
Want to learn more about Endless Sumer Hydrangeas? Follow this link: https://endlesssummerhydrangeas.com/
Another hydrangea “game changer” is the Limelight. Limelight is a summer blooming hydrangea that grows in full sun!
A plant breeder in the Netherlands crossed two unidentified panicle hydrangeas and the outcome was a full sun, summer blooming show in the hydrangea family. Limelight Hydrangeas received a US Plant Patent in 2002.
I first noticed them years ago growing around a parking lot in downtown Oklahoma City in the middle of summer with vibrant white blooms planted in full sun. Of course, I circled the block, took lots of pictures, and started my search to find the name of the plant.
Limelight has become one of my favorite plants.
Limelight varieties:
Limelight (Original) – Blooms in mid to late summer on new growth. Flowers start green, turn to white and then back to green. Limelight is typically large 6-8’ tall multi-trunked shrubs or can be trained into a single-trunked tree formed large shrub.
Limelight Prime – All the characteristics of the original but a little smaller, 4-6’, and sturdier stems. Also, the flower color is more vivid than the original.
Little Lime – Great for smaller gardens and small pockets in the garden. Grows to 3-5’ tall.
Want to learn more about Limelight Hydrangea varieties? Follow this link to a Monrovia article: https://www.monrovia.com/be-inspired/best-panicle-hydrangea-varieties.html
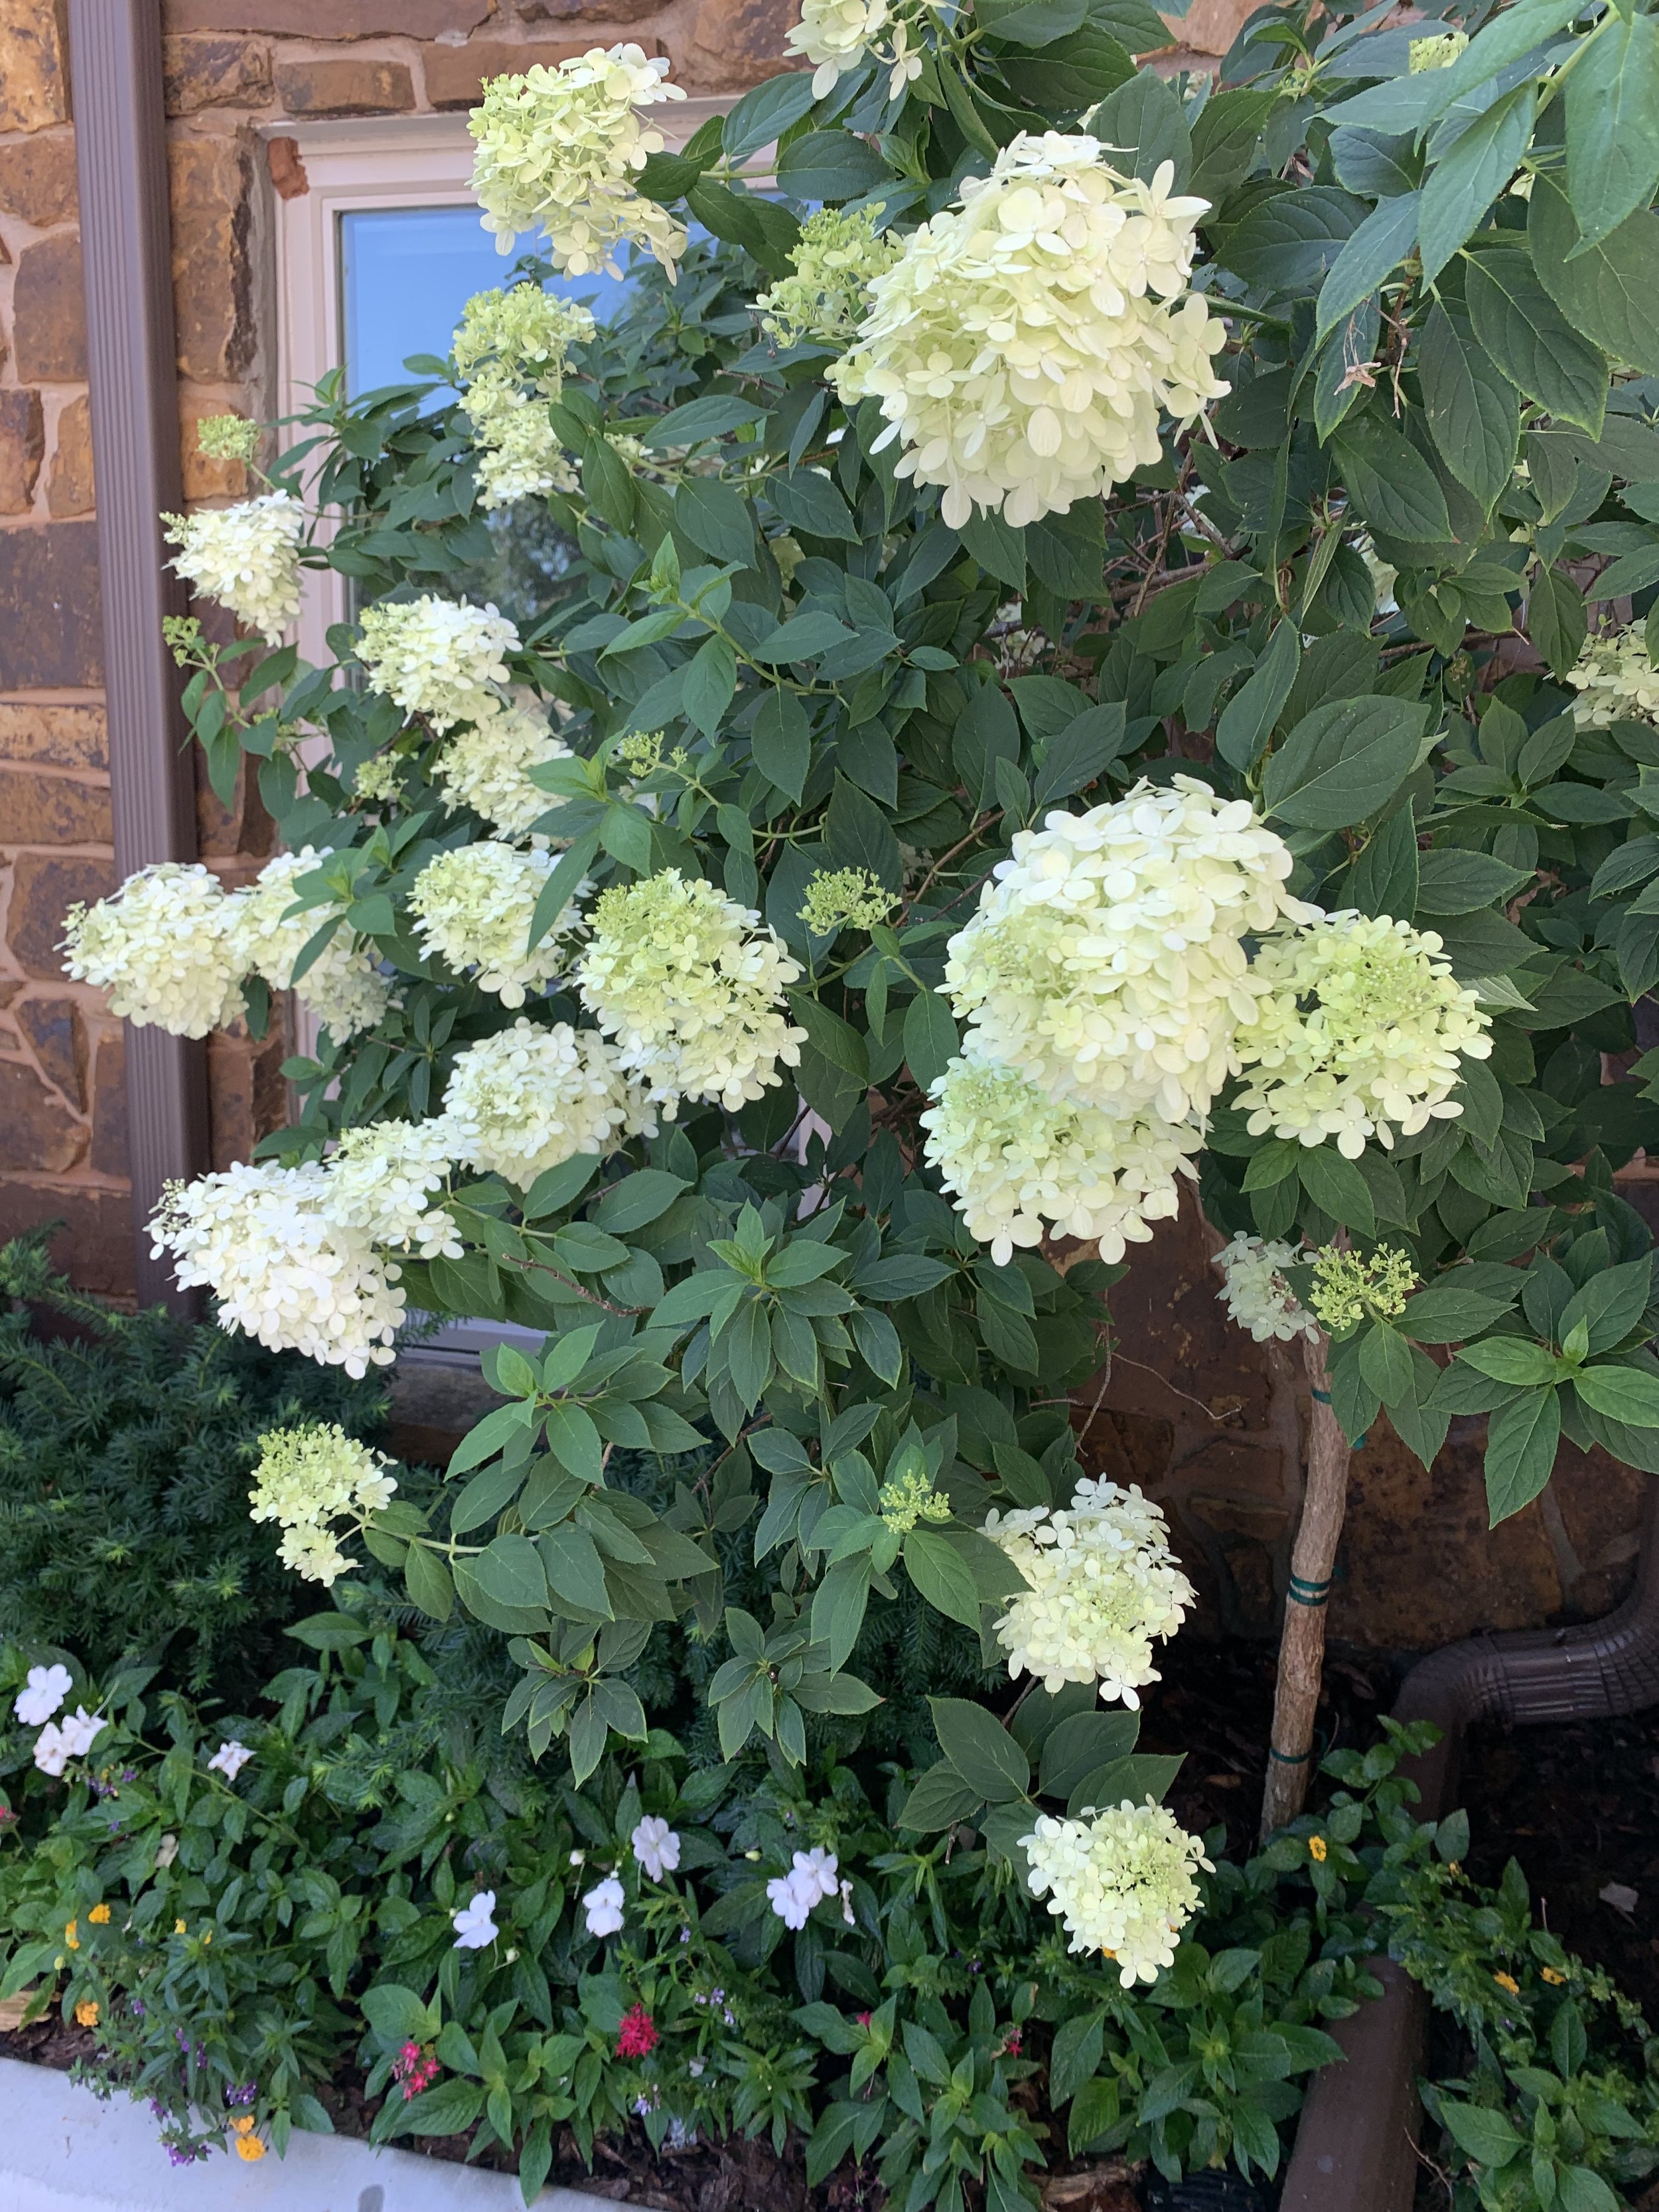
Limelight Hydrangeas make a big statement grown as a single-trunked small tree.
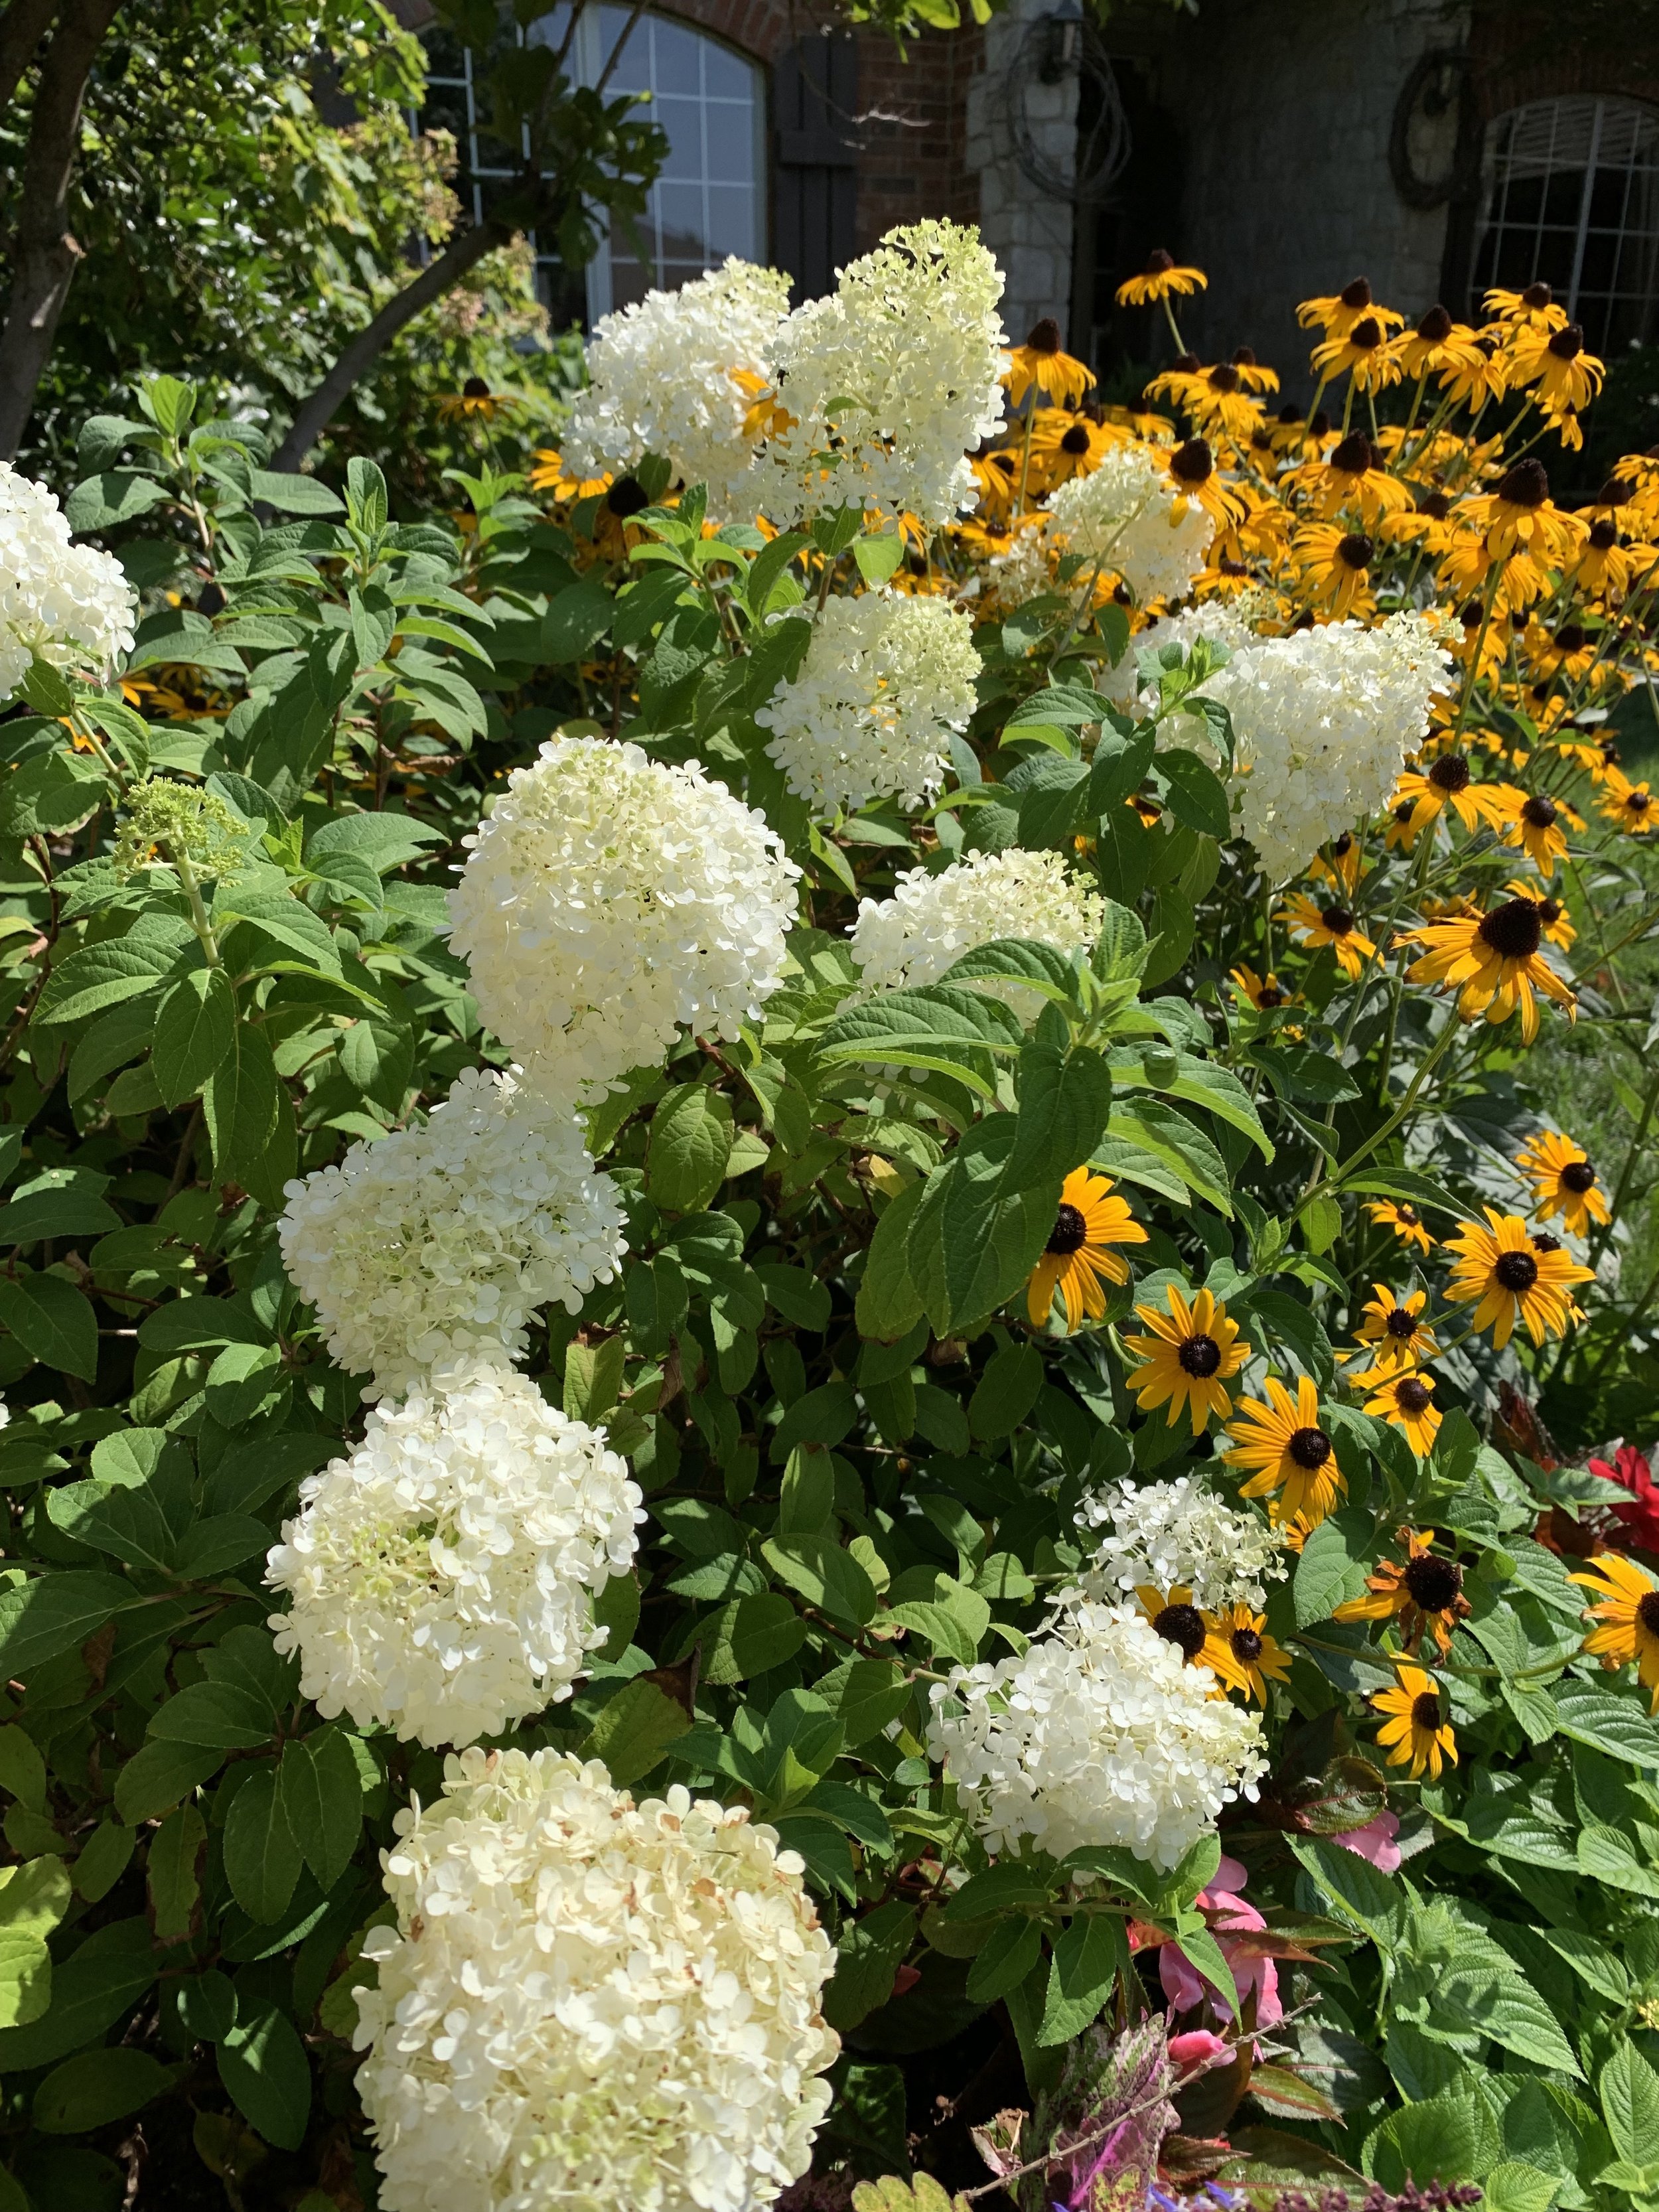
Bobo Hydrangeas are another dwarf variety of Limelight Hydrangeas. They grow in full sun to partial shade and produce large white blooms that turn pink. A characteristic of Bobo Hydrangeas is the strength of their stems. Unlike some panicle hydrangeas the blooms don’t weigh down the stems and flop over.

Limelight Hydrangea blooms gradually go from white to lime as they mature.

Limelight – Blooms in mid to late summer on new growth. Flowers start green, turn to white and then back to green. My favorite thing about Limelight is that it grows in full sun. A hydrangea game-changer: Summer blooming hydrangea in full sun! Limelights are typically large 6-8’ tall multi-trunked shrubs or can be trained into a single-trunked tree formed large shrub. For smaller areas, try the Little Lime or BoBo Hydrangeas which grow to 3’.

Limelight Hydrangea blooming in August in full sun.

Think you have to have a shady landscape to enjoy hydrangeas? Not the case with the Limelight Hydrangea. It grows in full sun with large lime to white blooms in mid-summer.

Fire Light Hydrangeas in the Myriad Garden in downtown Oklahoma City.
A late spring to early summer blooming hydrangea is the Oakleaf Hydrangea. The Oakleaf is one of only two hydrangea species native to the US in the SE from North Carolina, south to Florida and west to Louisiana.
Oakleaf Hydrangeas are named for the deeply lobed oak-like foliage. They grow 4-8’ tall and wide with a rounded habit. The white cone shaped flower clusters fade to pink in the summer and leaves turn deep red hues in the fall.
The Oakleaf prefers morning sun and evening shade. Too much shade and they become leggy, have fewer blooms and poor fall color.

Oakleaf – Instead of traditional mophead blooms, oakleaf hydrangeas have white clusters of cone shaped flowers. It is named for the large oak-like leaves that turn reddish-purple in the fall. It is a large shrub that blooms in the summer on new growth. It also requires less water than a traditional hydrangea.

Oakleaf Hydrangea

Oakleaf Hydrangeas is a large shrub that can reach 5-6’ with long, cone-shaped white flowers with large oak-like leavers that turn bright red in the fall.

Oakleaf Hydrangea in the Dallas Arboretum.

Oakleaf Hydrangea leaves in the fall turn vivid shades of red and purple.
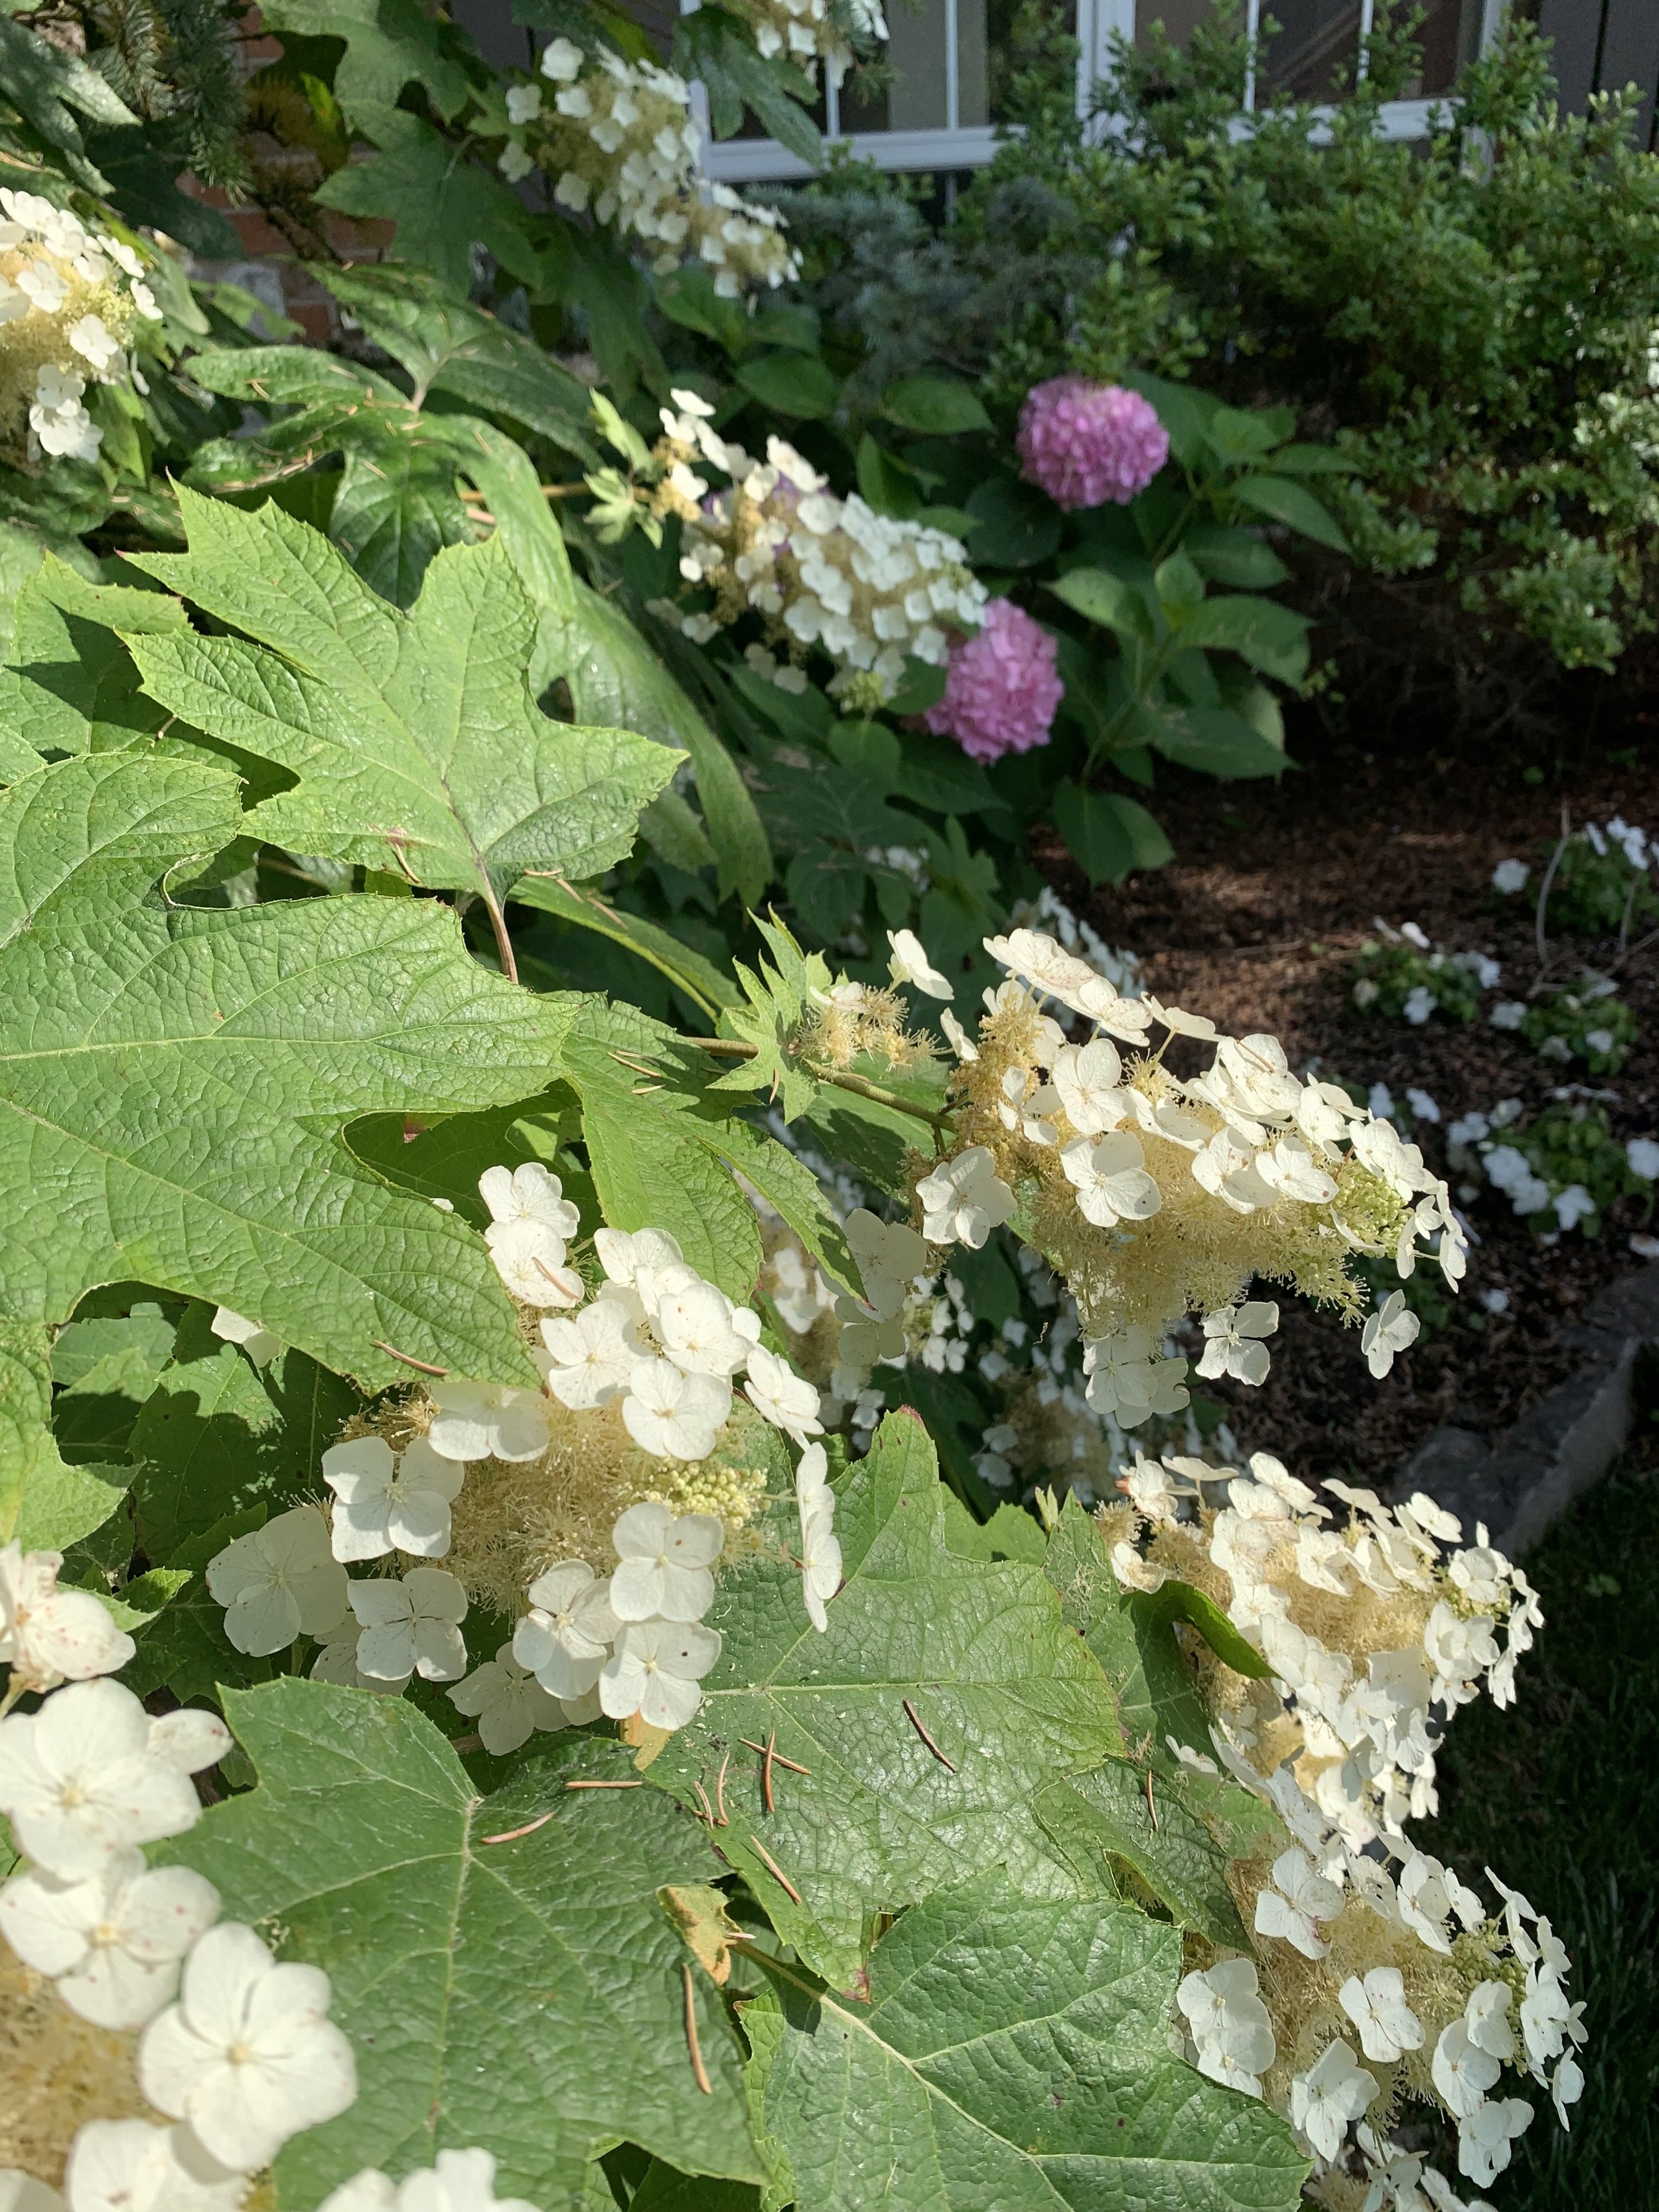
Oakleaf Hydrangea with Endless Summer in the background.
Other favorite hydrangea varieties:

Annabelle – A smooth hydrangea with white blooms on the new growth. Because it is fast growing, it is common for this hydrangea to be cut all the way to the ground each spring.

Phantom – Similar to Limelight but with color changing blooms that start in mid-summer as greenish white then gradually change to a blushing pink as summer transitions into fall. Phantom also grows in full sun.

Seaside Serenade Series by Monrovia – A more compact form of hydrangea ideal for smaller areas that blooms on both last year’s growth and new growth.
Pruning Hydrangeas
Most gardeners feel uncertain and confused about when and how much to prune hydrangeas. The truth is most hydrangeas do not need to be pruned at all. Occasionally, you may need to prune for shape or size, or remove some dead wood, but most seasons pruning can be skipped.
It is common to have some branch die back after the winter in our area. A common mistake is to get in a hurry when pruning back the winter damage. Be patient, don’t get in a hurry to remove dead branches. Wait until April before pruning off the dead branches. Pruning earlier, or pruning to the ground in the spring, could reduce or eliminate blooming this season. When it is time to prune back the dead ends, make your cuts at an angle just above the highest green bud.
When more pruning is required, it is important to know the type of hydrangea you have to know the right time to prune.
Bigleaf, Mophead, French Hydreanes. They bloom once per season in the early summer on old wood, meaning their buds are formed on last year’s growth. Pruning should be done during the summer. If they have become overgrown, remove up to ½ of the total stems by cutting them all the way to the ground. The plant will produce strong new stems that will flower next season. Nikko Blue is an example of this type of hydrangea.
Smooth Hydrangeas. They bloom on new wood, meaning buds are formed on new growth in the current season. Pruning should be done in late winter to early spring. Older smooth hydrangea varieties can become floppy and unruly. Don’t be afraid to prune this variety aggressively. Annabelle is an example of a smooth hydrangea.
Panicle Hydrangeas. They also bloom on new wood. Panicle hydrangeas rarely need to be pruned. But, if they were overgrown last season, prune up to 1/3 of the plant before they leaf out to create a more compact, rounded shape. Limelight is a panicle hydrangea.
Oakleaf Hydrangeas. Oakleafs like to be left alone. Pruning should be limited to removal of dead or broken branches. They bloom on old wood, so if there is a need to prune to improve the shape of the plant, pruning should be done in the summer after it finishes flowering.
Reblooming Hydrangeas. Hydrangeas that bloom on both old and new wood. Early in the season they bloom on the old wood from last season. During the current season they bloom on current season growth. All they really need is deadheading of spent flowers and removal of dead stems. The Endless Summer and Seaside Serenade series are examples of reblooming hydrangeas.

Reblooming hydrangeas in June at the Dallas Arboretum.

Wait until late April to early May to prune the dead from your Endless Summer Hydrangeas.

Oakleaf Hydrangeas rarely have winter die back and are best left alone.
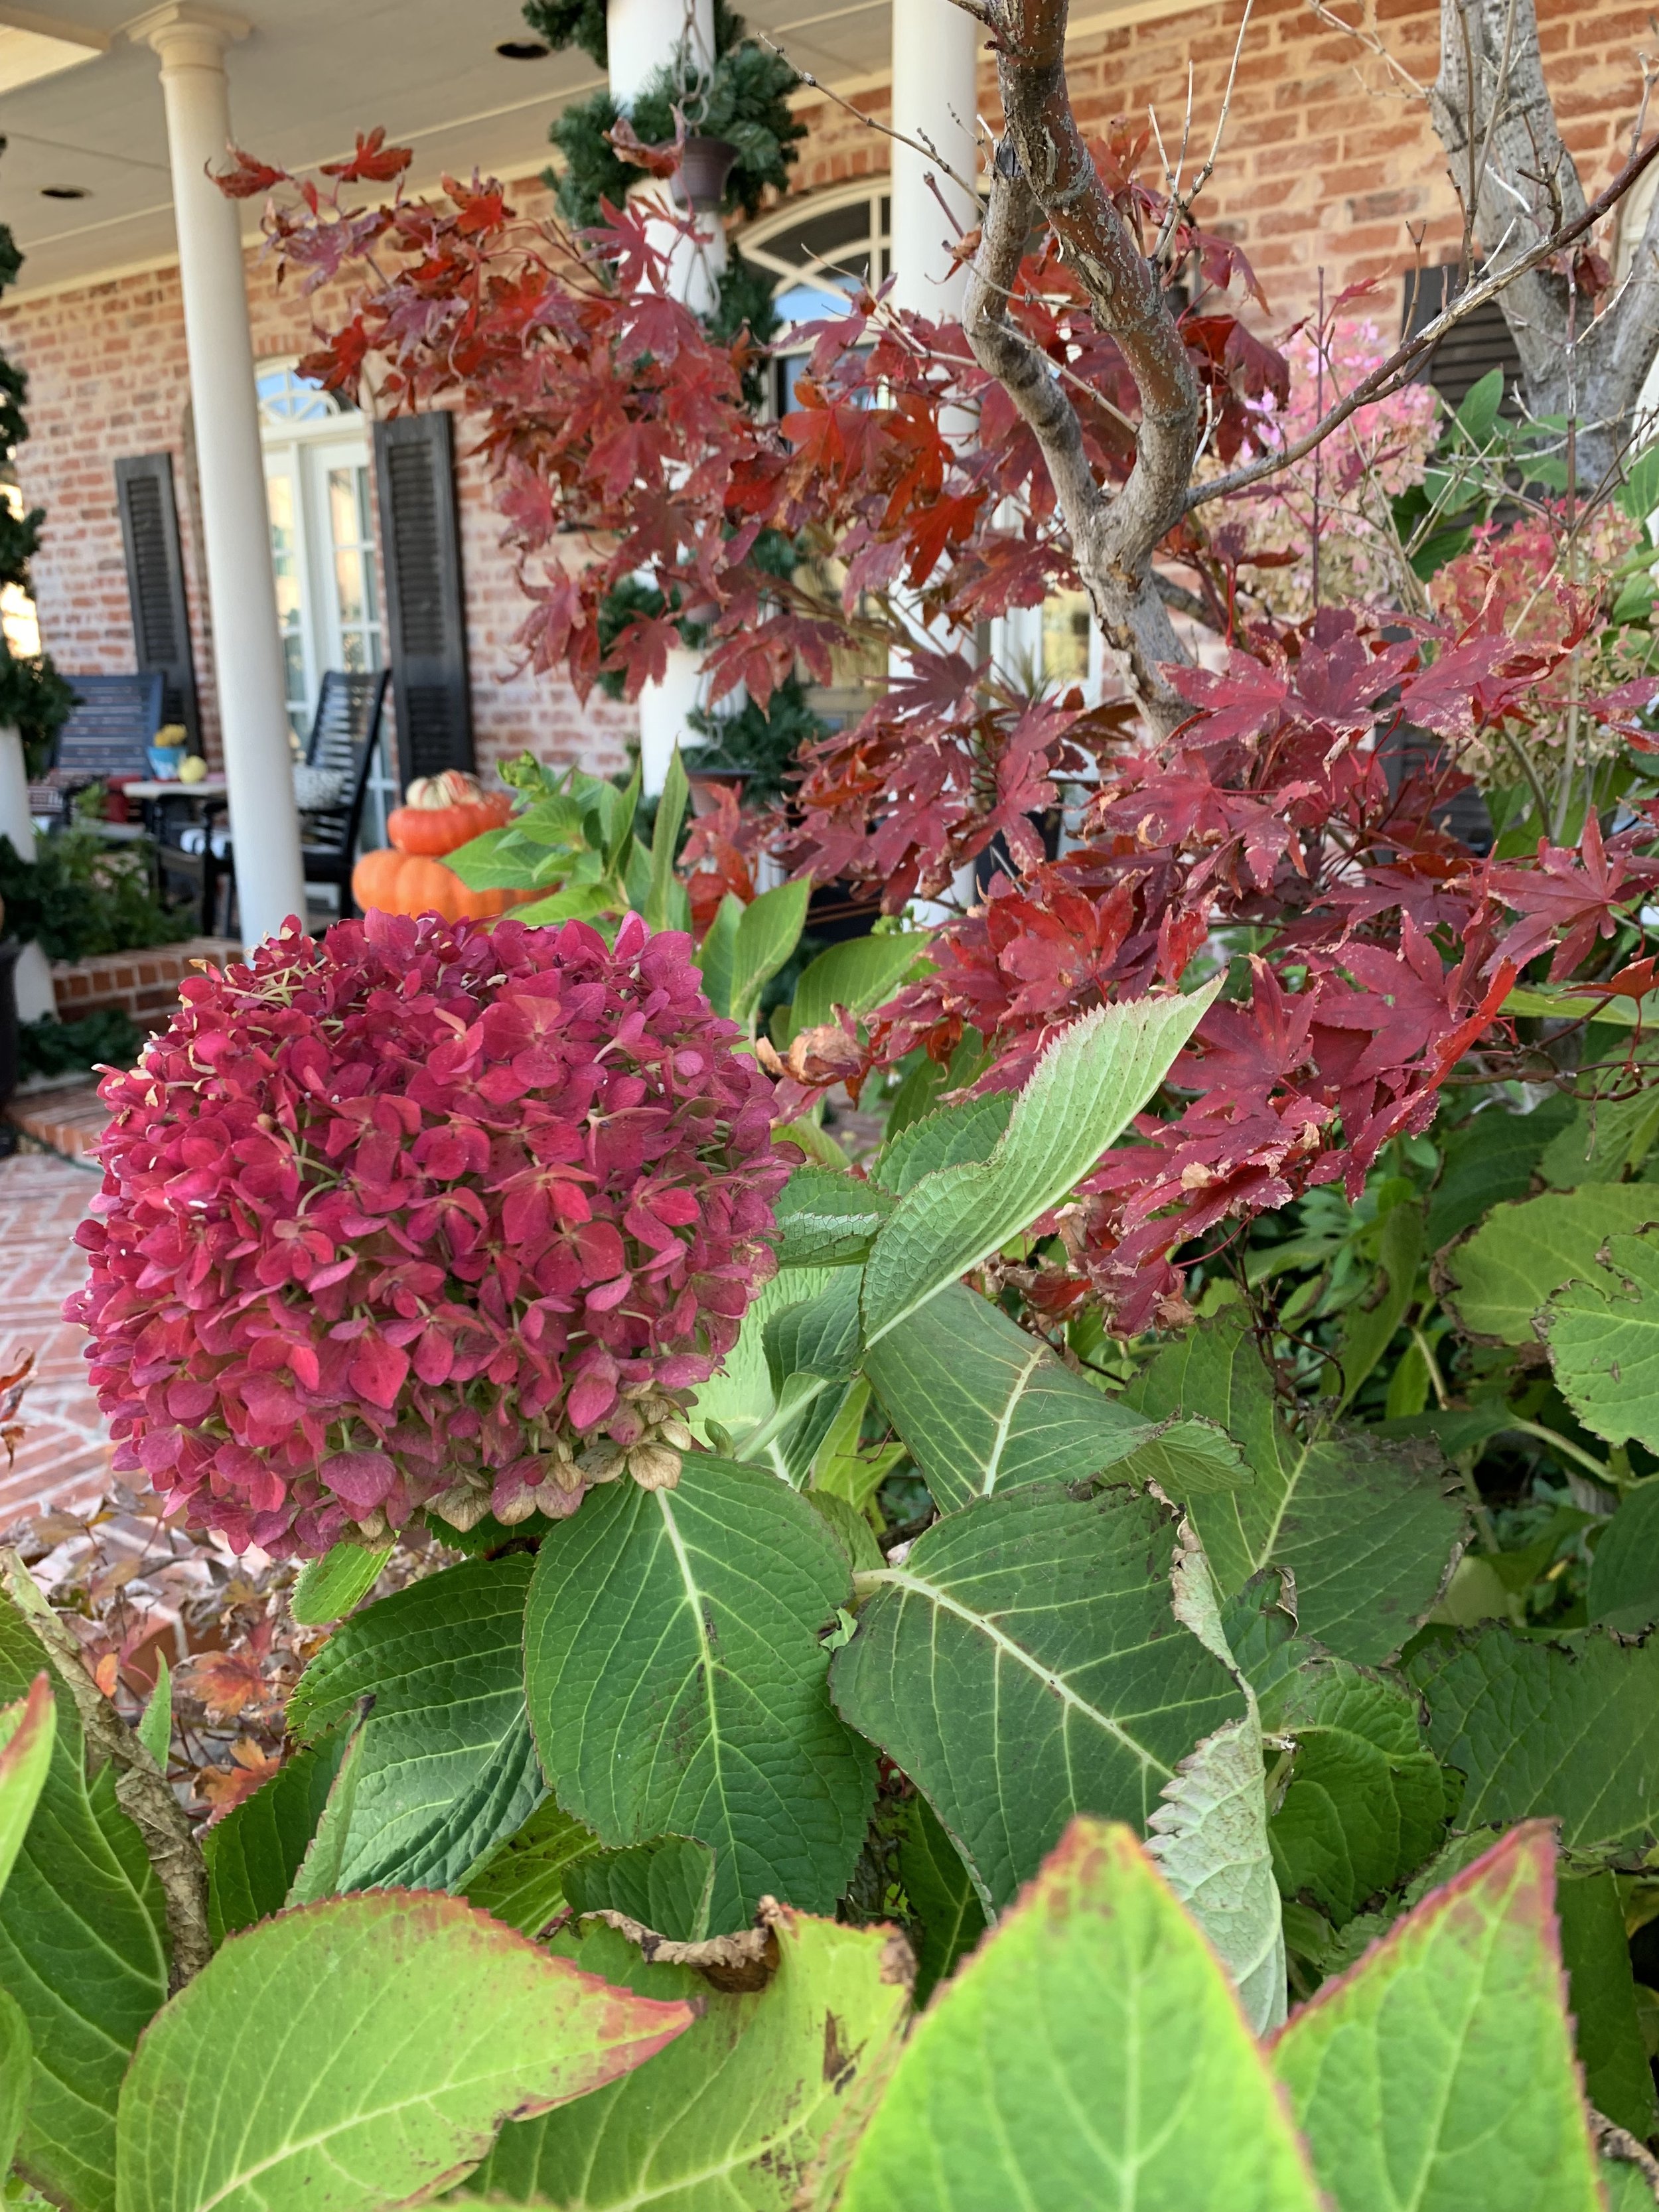
Leaving faded blooms on hydrangea will add interest changing color as they fade.

Deadheading Hydrangeas
Deadheading is the practice of removing spent blooms. You can deadhead hydrangeas, but you don’t have to. Deadheading can increase blooms but is mostly done to keep the plant looking neat. Some gardeners like to leave spent flowers on the plant for seasonal interest as they will change color as they fade. If you do deadhead, prune right above the first set of leaves below the spent flower. Cutting lower will remove emerging buds.
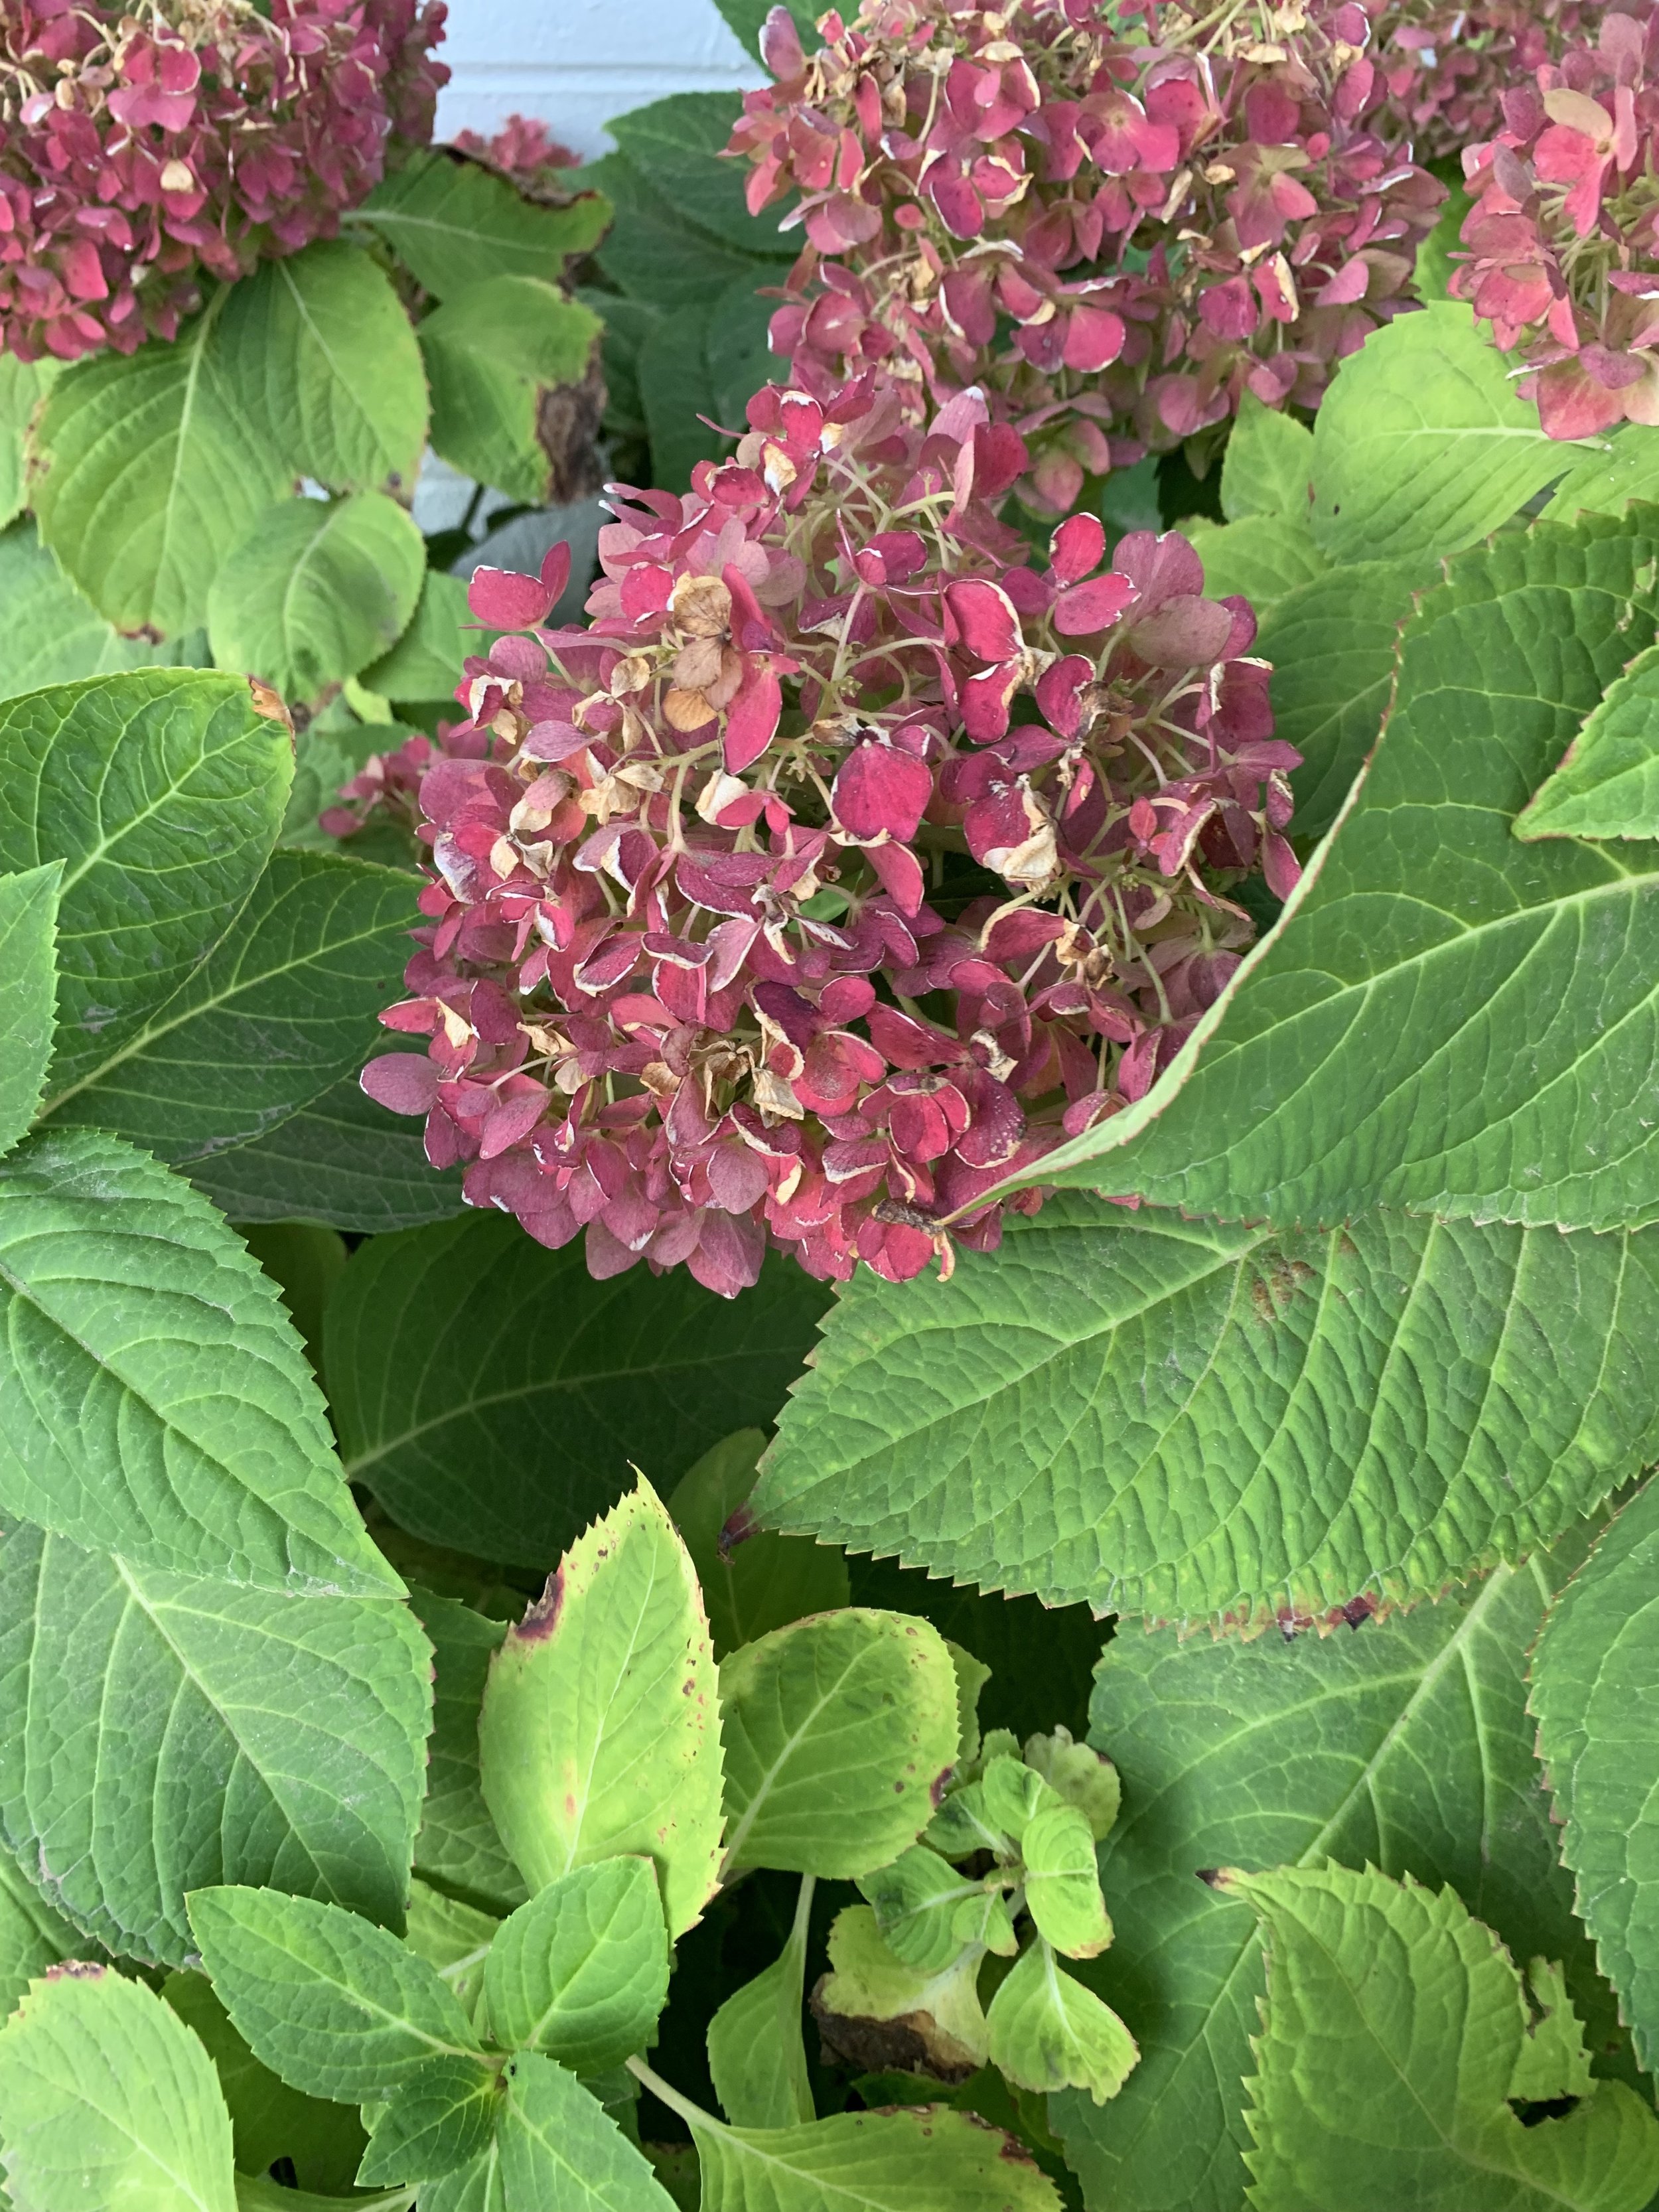
If you don’t deadhead your Endless Summer Hydrangeas the spent flowers will add color to your landscape in the fall. This is the Endless Summer Hydrangea in front of the Hall | Stewart office in October.
Planting Hydrangeas
Hydrangeas prefer rich, well drained soil in a location with morning sun and dappled to full shade in the afternoon and evening. The exception is the Limelight Hydrangea which can be planted in full sun. When planting in our tighter clay soil, start with a hole twice as big as the plant container. Incorporate compost and peat moss into the existing soil, fill the bottom of the hole with enough soil that the root ball will be slightly above the existing grade. Backfill around the root ball with the remaining mix of soil and amendments creating a ring outside the root ball creating area to retain moisture when watering.
Hydrangea Watering
Hydrangeas require more water in the heat of the summer. They perform best in soil that retains some moisture but does not stay wet. It is common for their leaves to wilt slightly on 90+ degree days and then rebound quickly when watered. A good deep soaking every other day in the summer is enough. A 2” layer of mulch will help retain moisture.

Endless Summer Hydrangeas are usually pink in our soils because of the pH being over 6. Sulfur can be used to lower the pH and turn the blooms blue.
Changing Hydrangea Flower Color
Excluding white hydrangeas and many of the new reblooming hydrangeas, soil is the greatest determinate to whether the flower blooms will be blue or pink. Soil with a pH below 6.0 (acidic) will have blue blooms. pH above 6.0 (alkaline) will produce pink flowers. Adding lime to the soil will change blue blooms to pink and adding sulfur will change pink blooms to blue. Endless Summer has a formulated product called Color Me Pink which adds lime to the soil to produce pink blooms and Color Me Blue which adds sulfur to encourage blue blooms. Similar products are avaible from Bonide.
Hydrangea Fertilizer
Hydrangeas respond well to fertilizer in the spring and early summer. Select a slow-release fertilizer that is high in phosphorus, the middle number on the fertilizer label. Phosphorus produces more blooms. If you fertilize with high nitrogen, the first number on the label, you will have more and larger leaves and less blooms.
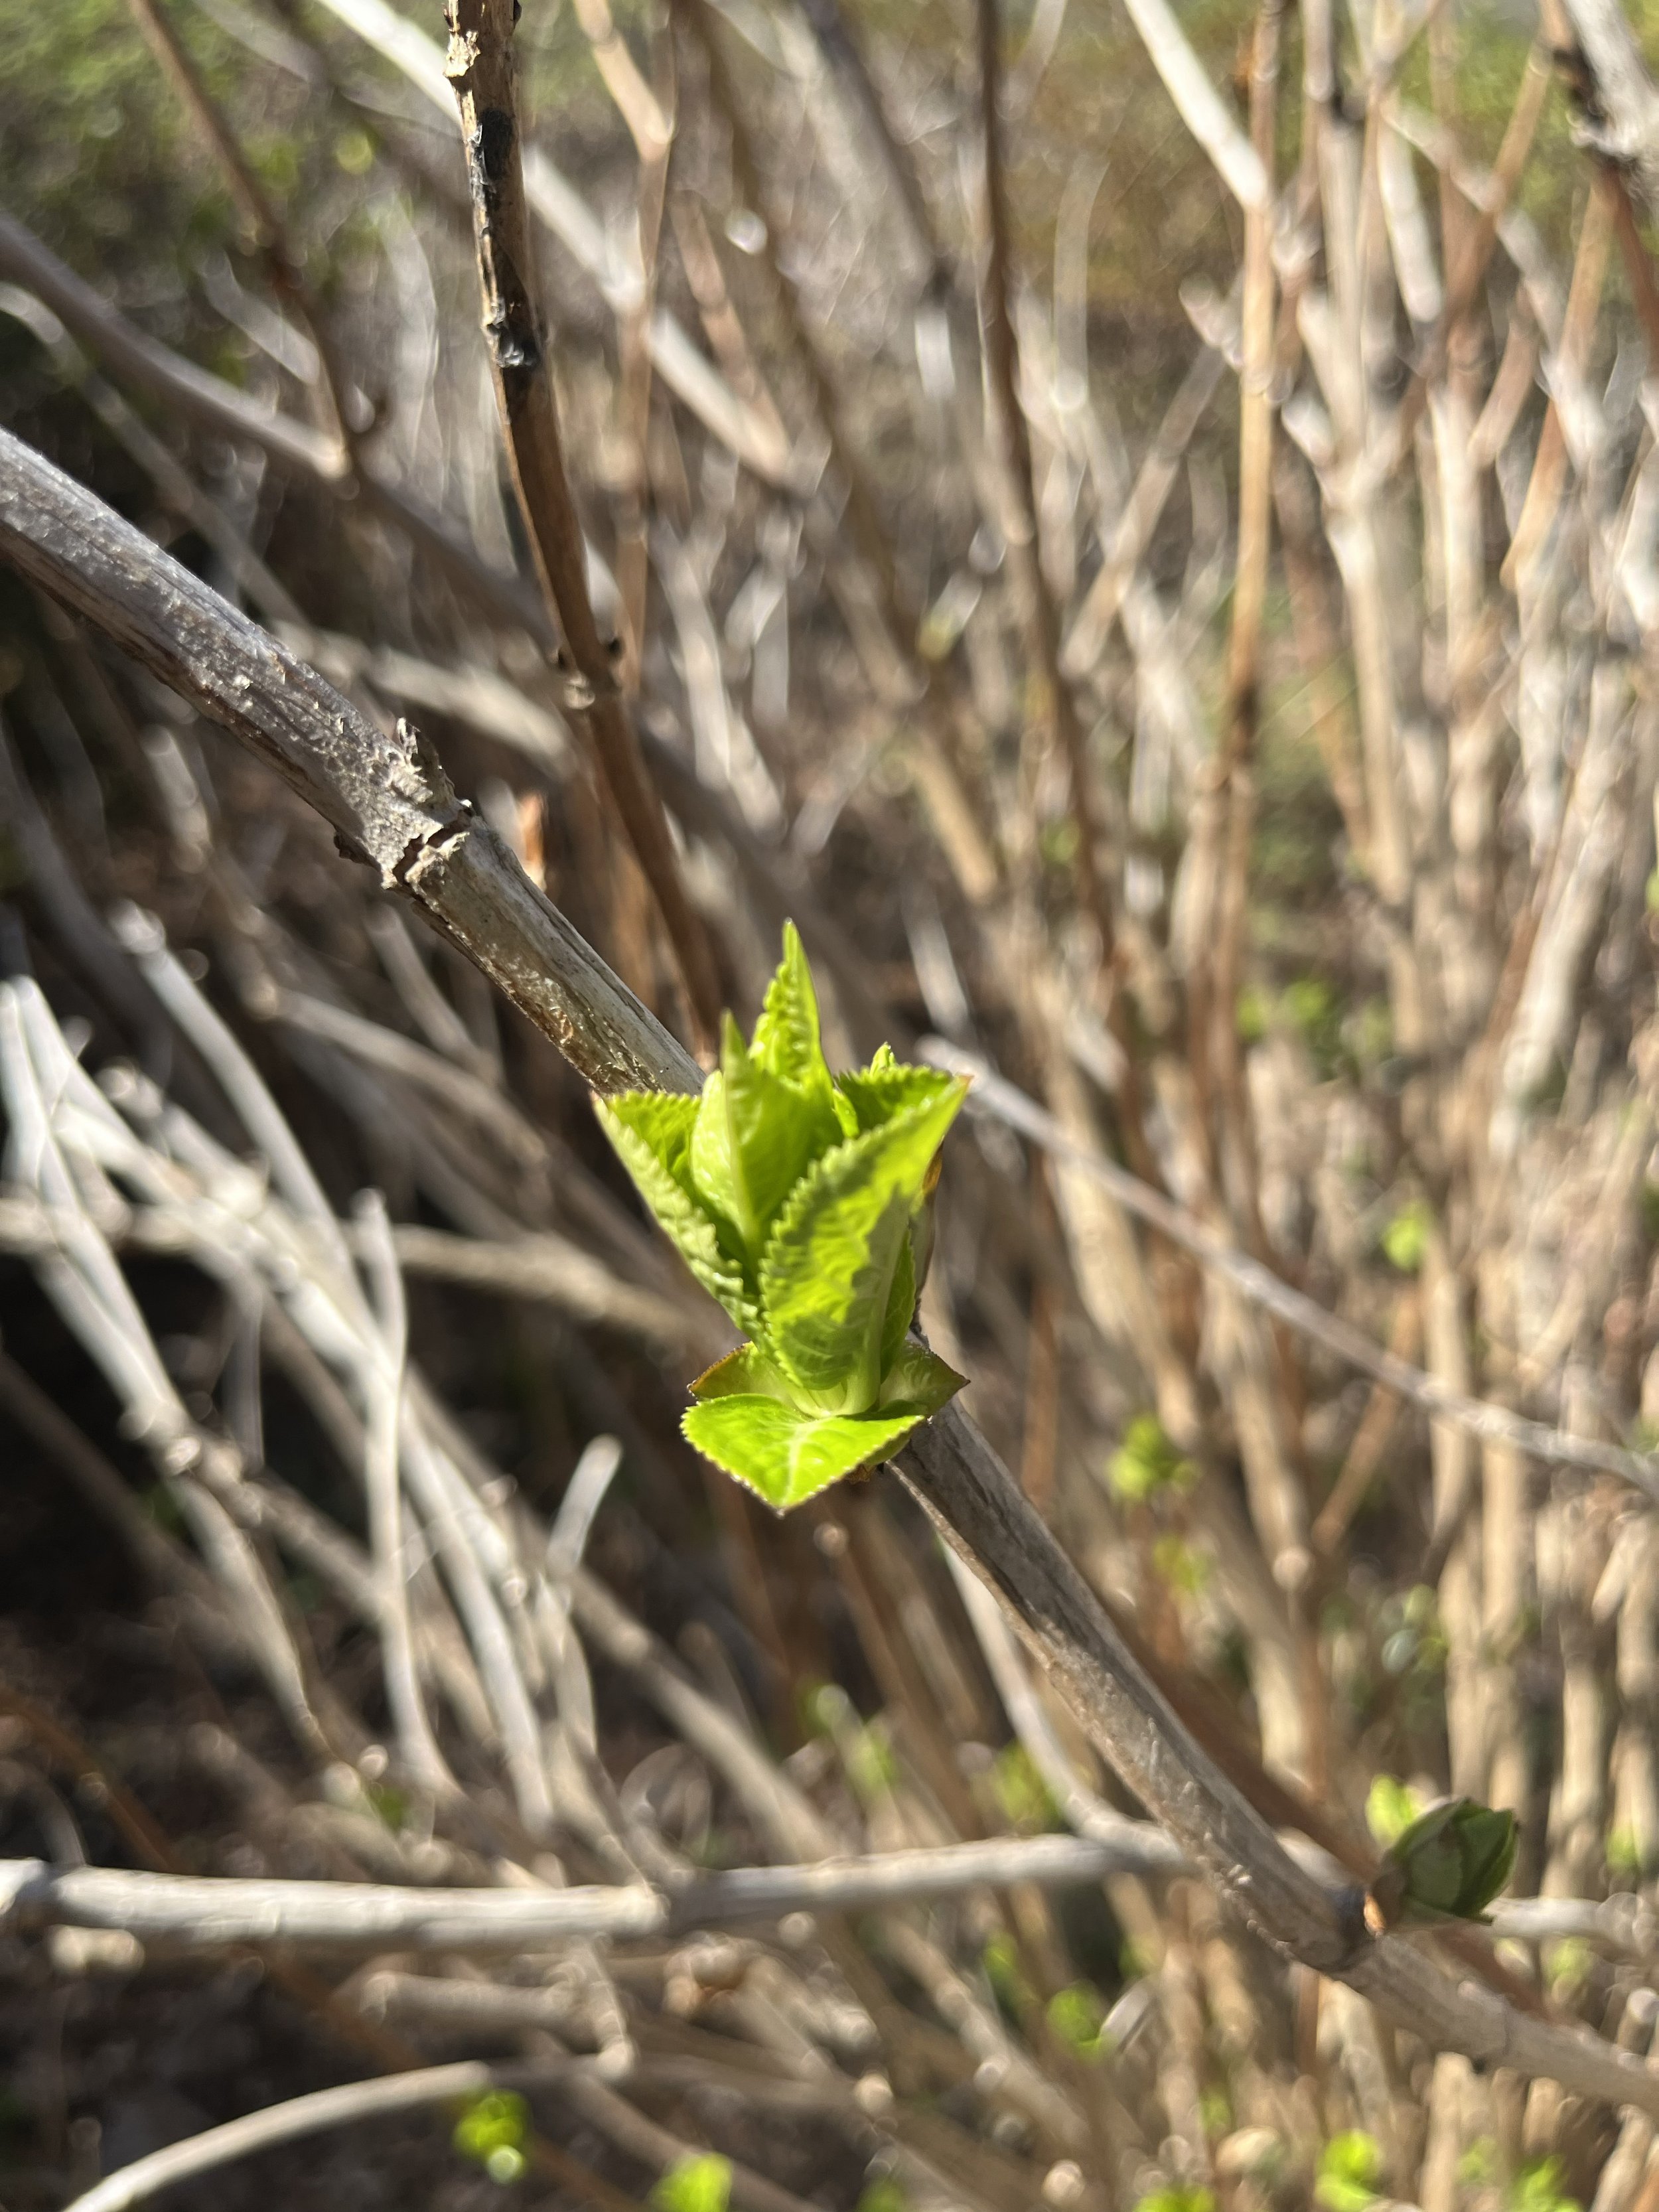
Hydrangeas are starting to bud. Wait until April to prune. Prune just above the highest bud on each branch.
Bonus Info: “Why aren’t my Endless Summer Hydrangeas blooming?”
Pruning – The most common blooming problem is a result of over pruning and pruning at the wrong time. Remember, it is best not to prune them at all. Really the only pruning recommended is at the beginning of the season to remove the brown stems left from the winter. Wait until April to prune and then only prune back to the first bud. During the summer, if you want to you can snip off spent blooms, but it is not required. Otherwise, keep the pruners and shears away from your hydrangeas. And…never prune in the fall.
Fertilizer – Hydrangeas needing fertilizer or having been fertilized wrong will always disappoint. As mentioned above they need slow-release high phosphorus fertilizer. If you are using a high nitrogen, low phosphorus fertilizer, you will have lots of pretty leaves and no blooms. Just remember – use a fertilizer with a low first number and a high second number.
Water – The right amount of water will make a difference. You don’t want the plant to be too wet or too dry. It is ok if they droop in the afternoon heat, but if they are still droopy in the morning, they need a good watering.
Sunshine – Hydrangeas bloom best planted in morning sun with dappled afternoon shade. When planted in a hot location such as on the south or west sides of a structure, they need to be protected from the scorching afternoon sun. The bottom line is you don’t want them to fry, and you don’t what them to go without some sun.
Soil Problems – What you plant your hydrangeas in will impact the results. Hydrangeas require well drained soil with a good amount of organic material. In our native soils it is best to adjust the soil when planting with ample amounts of pine bark, peat moss, and/or pecan hulls.

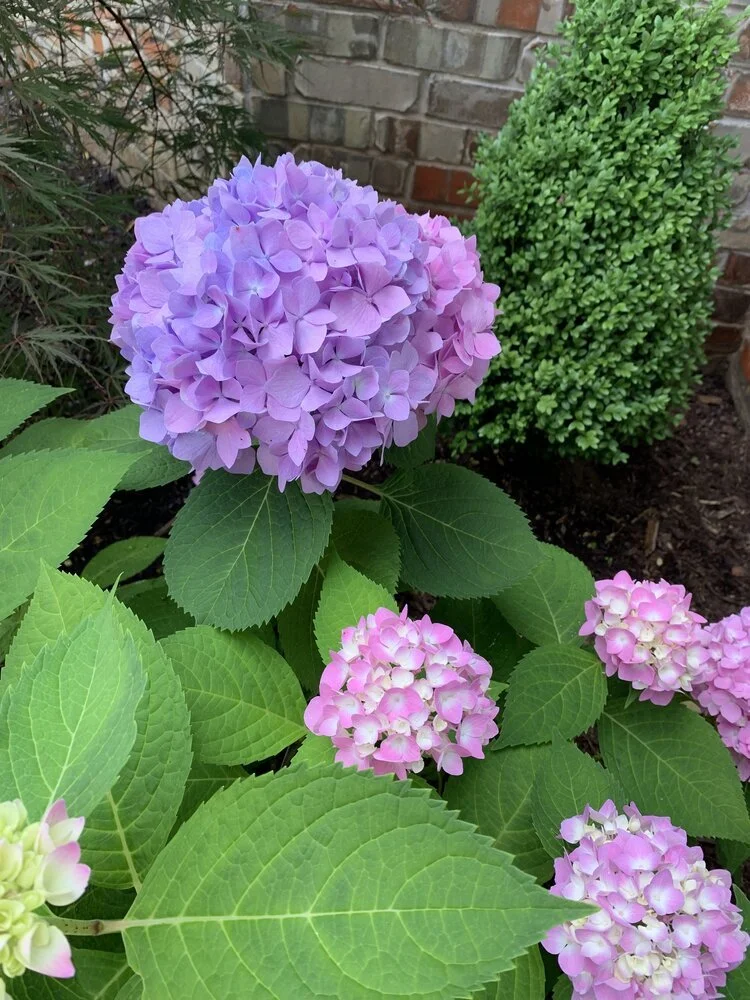
This Endless Summer Hydrangea was added to the landscape last spring and the homeowner was rewarded with extra large blooms this June.
I believe that there is a hydrangea just right for nearly every landscape.
Yes, they require a little more work when planting, and a little more attention to water, but otherwise they are not near as fussy as you would think.
Survey your landscape.
Pick a spot.
Take a trip to a landscape nursery.
Select the perfect hydrangea for your landscape.
It’s worth a try!
Lorne Hall
Hall | Stewart Lawn + Landscape
(405)367-3873
Ornamental Grasses – The Single Maintenance Per Year Plant!

Ornamental grasses are a great addition to any landscape. They are easy to grow. They are tolerant of most soils. Once they are established, they don’t require much water. And, they rarely have insect or disease issues.
Best of all - they require little maintenance.
They need trimming only one time per year.
The rest of the season they need little to no attention.
What is an ornamental grass?
Most commonly they come in two forms: medium to tall grasses and groundcovers.
Groundcovers include Liriope and Mondo Grass. They are often used as borders or in mass plantings. Liriope makes a great groundcover in turf areas that are even too shady for fescue.
Taller grasses can be used as focal point or in mass plantings.
Ornamental grasses provide texture, color, height, and flower plumes. They also add interest in the winter as their blades sway in the breeze.
A few of the more frequently used grasses include Fountain Grass (including the popular Hameln), Japanese Blood Grass, Liriope, Maiden Grass, Mondo Grass, Plume Grass, Mexican Feather Grass, Muhly, and Sweet Flag.

Liriope, commonly know as Monkey Grass, makes a good ground cover. There are several varieties. Purple Explosion produces deep purple spikes in the late summer.

Pink Muhly Grass produces pinkish-purple lacy plumes in the fall.

Liriope is a great solution for areas that are too shady to grow a thick lawn.
When do ornamental grasses need their once per year trim?
Anytime now through mid-March. The goal is to remove all the dormant top before new shoots start to develop. If you make a cut on new shoots, the tip will keep a bruised look all season.

I prefer to wait until late winter to cut back ornamental grasses. They add interest to the winter landscape as they sway in the wind.

Ornamental grasses need to have their dormant foliage removed before new shoots emerge this spring.

Cutting back your ornamental grasses in late winter can be a big task. But, you only have to work on the one time per year. Grasses are nearly maintenance free the rest of the year.
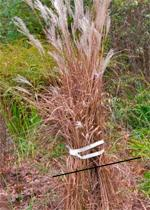
Tying up the foliage first will make the job and clean-up go quicker.

Liriope and Mondo Grasses typically have freeze burnt leaf blades from winter cold spells and need to be trimmed sometime between now and mid-March.
What height does ornamental grass need to be cut?
For pampas grasses, remove the dormant foliage to a height of approximately 12”.
For liriope, trim to a height of 2-3”.
Mondo Grass, particularly Dwarf Mondo, only needs a once per year trim if most of the foliage has browned. Most springs you can use hand pruners to clip out what little brown foliage there is on dwarf mondo.
Another exception to the once per year trim is Mexican Feather Grass. This ornamental grass performs best if it isn’t trimmed at all. As the grass matures, small areas will turn brown. Gently pull the brown areas out anytime they appear.

Mexican Feather Grass is the one exception to cutting them down in the spring. Instead, remove any brown clumps from the grass during the growing season by gently pulling them out.
What are the best tools for the project?
For pampas grasses, use either hand hedge shears or power hedge trimmers depending on how thick the grass clumps have become. To make the job easier, use twine to tie up the foliage before you make your cuts.
For liriope, you can use your string trimmer, or if the area is large enough, go ahead and use the mower on the highest setting.

Mexican Feather Grass prefers not to be cut back in the spring.
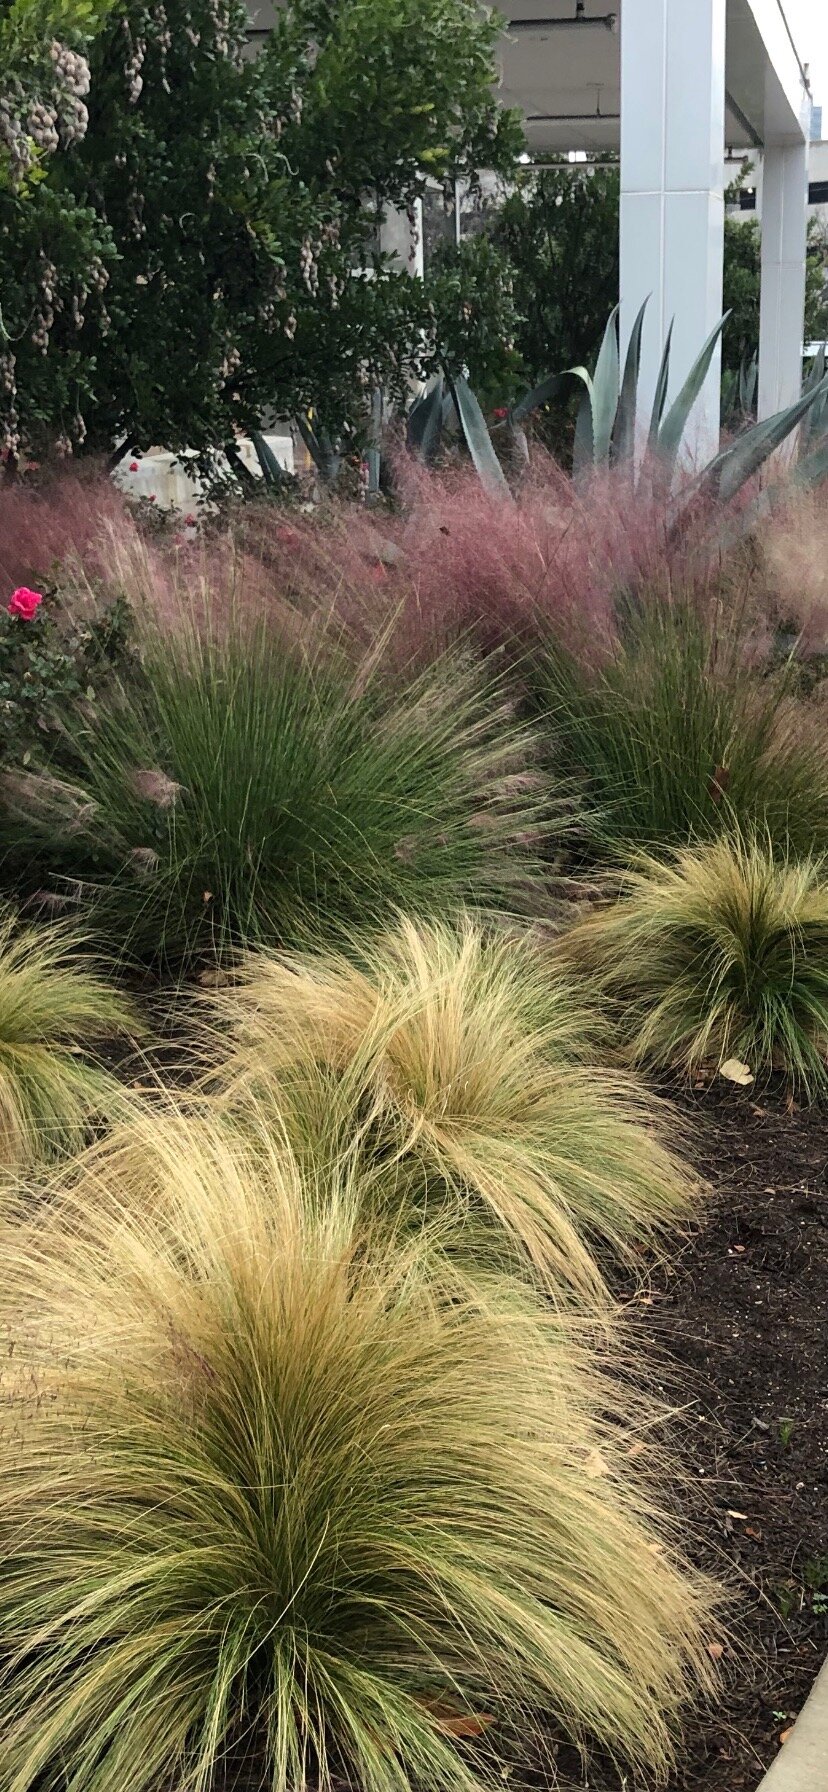
Grouping of Mexican Feather Grass planted with Pink Muhly Grass.
Should I divide my grasses?
It is not uncommon for pampas grasses to die out in the center of the clump as the grass matures and grows. Every 3-5 years it is a good idea to divide grasses in the spring. Using a sharp shovel, simply slice through the grass. Then, replant the clump.
Liriope can easily be transplanted after it is cut back. Use a shovel or even a post-hole digger to dig clumps. Liriope can be invasive. Therefore, I find I need to dig up liriope that has spread beyond the intended area occasionally.
Dividing and replanting grasses is an inexpensive way to expand your landscape.

Liriope, also known as Monkey Grass, should have the brown tops removed before new shoots emerge in mid-March.

When you pull back the brown tops of your liriope you will see the plants are still green. Sometime in the next 4 weeks use your string trimmer or mower to remove the brown tops.

Pink Muhly Grass is with vivid pink to purple plumes in the fall.
When is the best time to plant new ornamental grasses?
Ornamental grasses can be planted year-round in our region. The ideal time is spring or fall. Summer is also good, but they will require more watering until established.
A good source for ornamental grass information:
https://www.monrovia.com/shop/by-type/grasses.html
Have more questions about ornamental grasses? Give us a call (405)367-3873.
Lorne Hall
Hall | Stewart Lawn + Landscape
(405)367-3873

A great combination of plants for winter interest is Reg Twig Dogwood and Ornamental Grasses.
Crabgrass Jr Takes Over The Hall | Stewart Blog


The first signs of crabgrass every spring is in areas of bare soil.

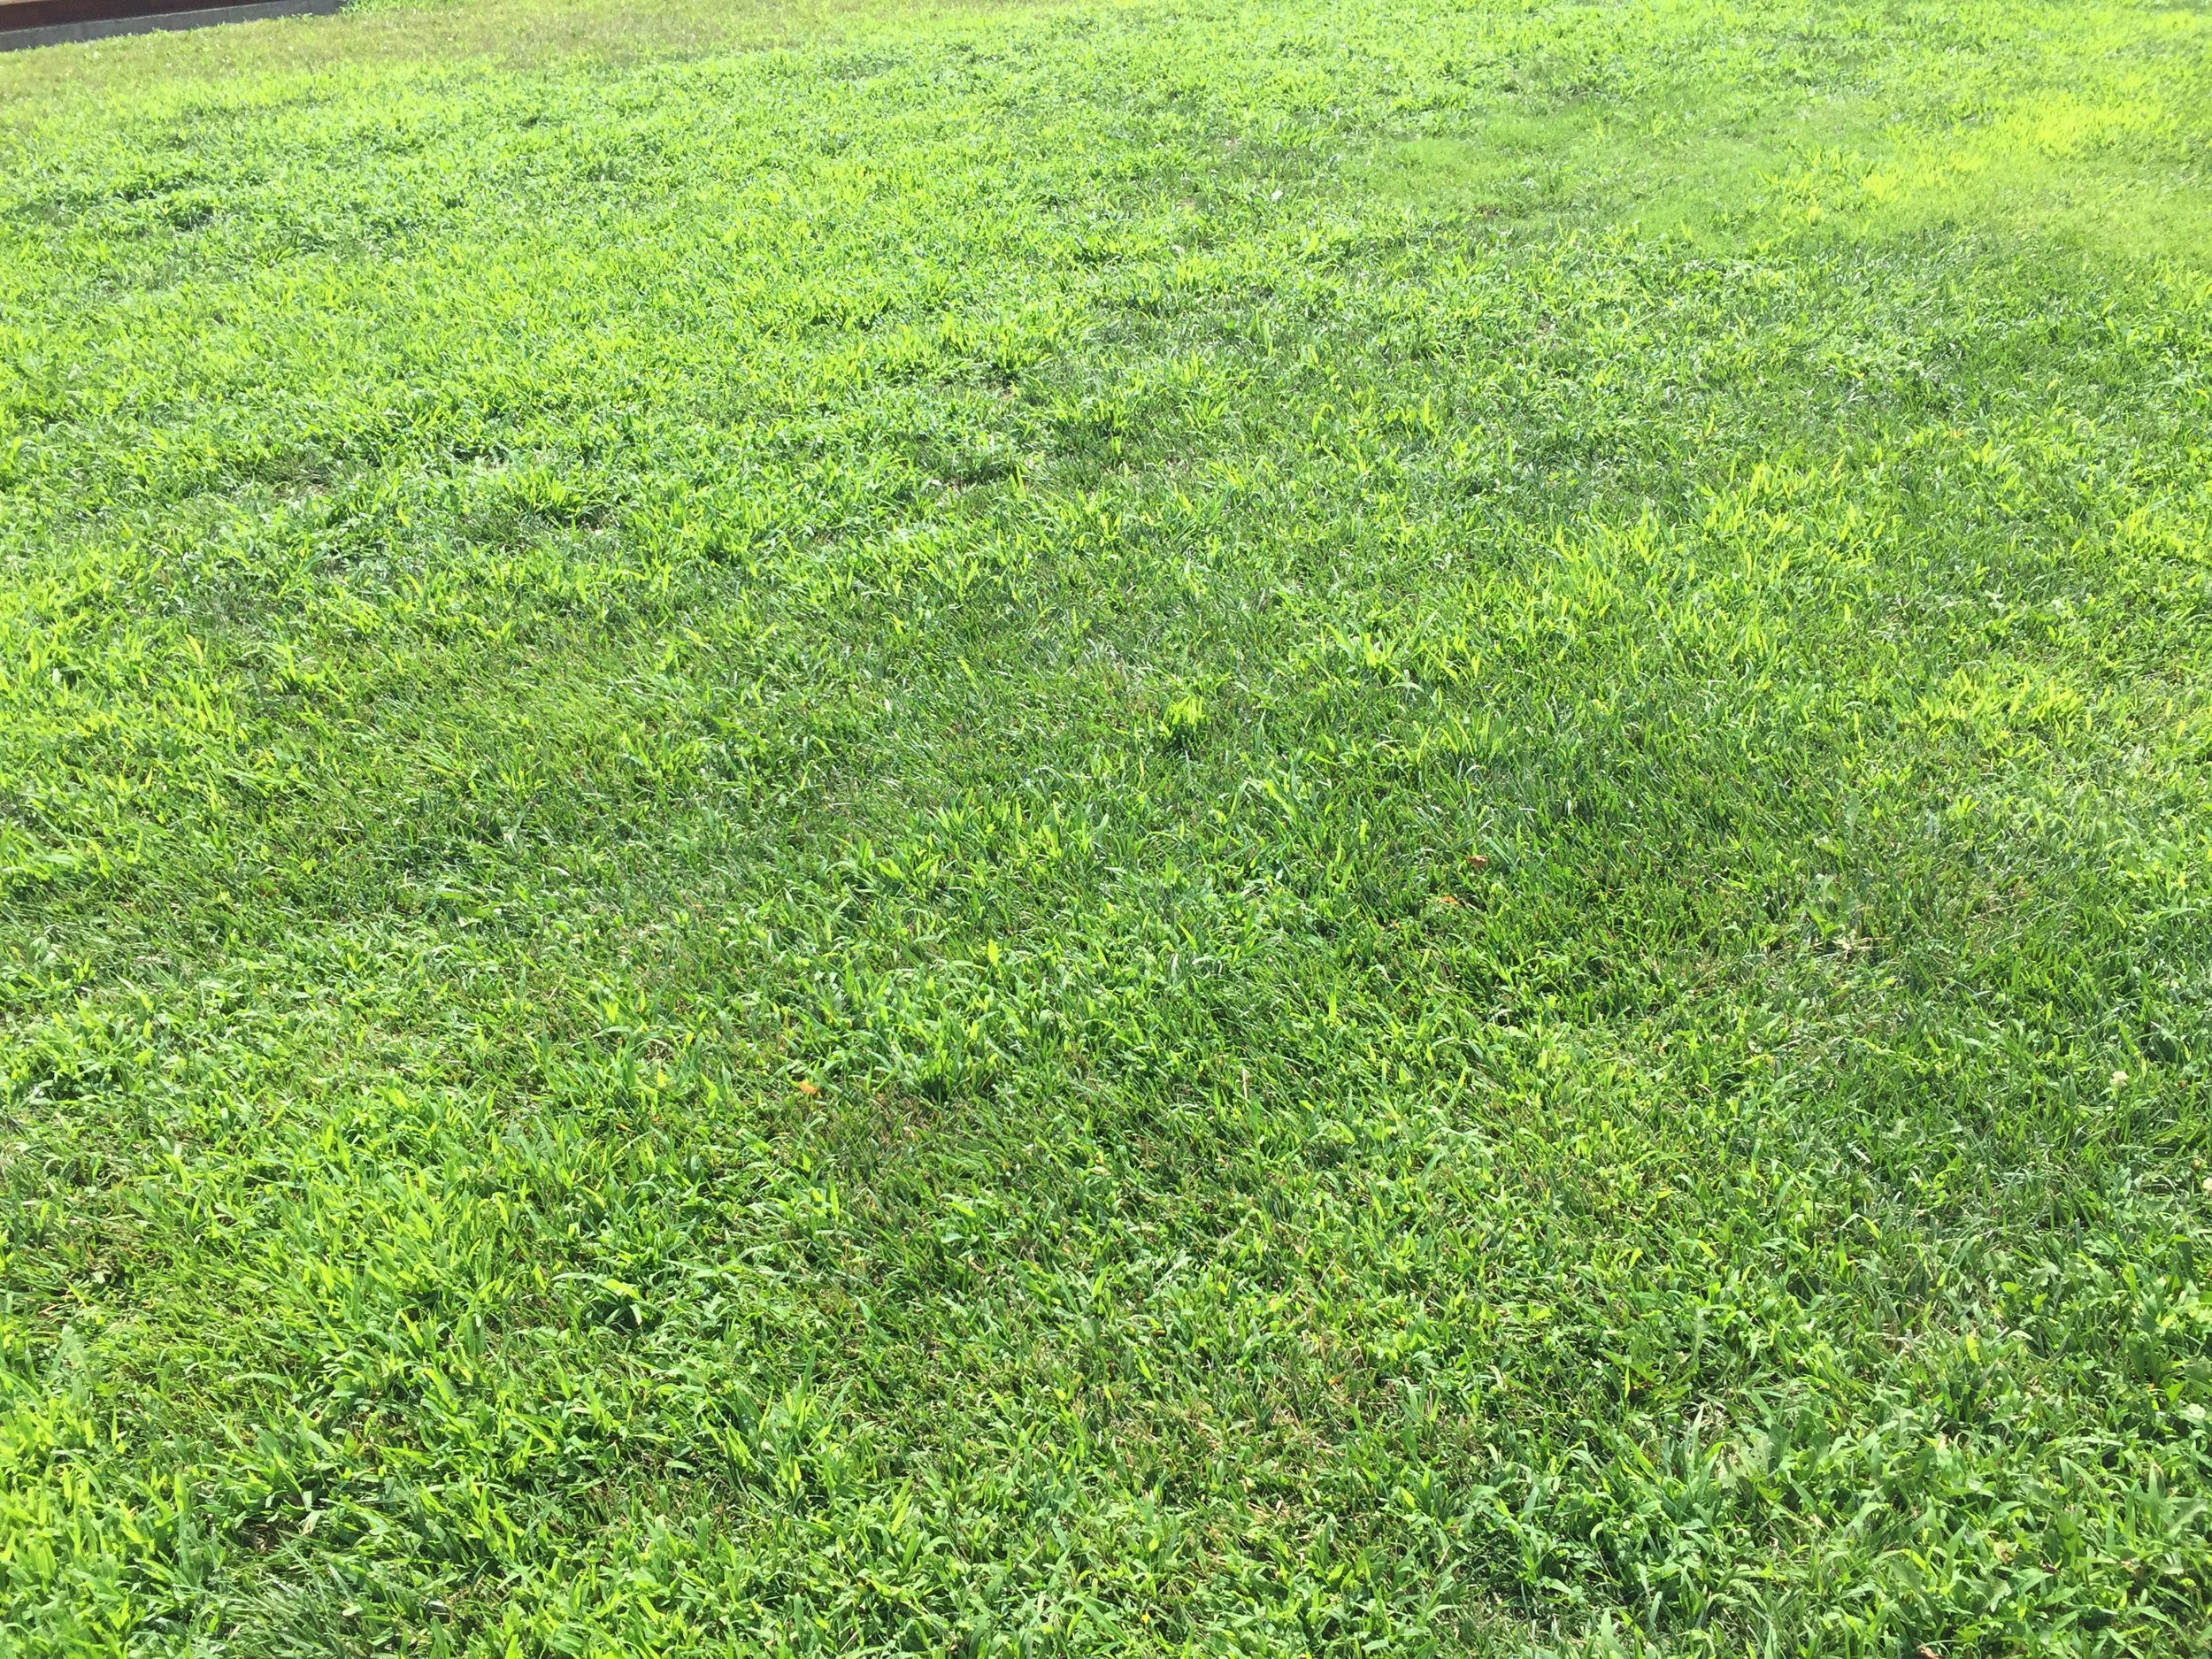
Without a spring pre-emergent your lawn will be more crabgrass than turfgrass by midsummer.


Crabgrass is an aggressive annual grassy weed. A single seed that starts growing in March will be a large grassy weed by early July.


How aggressive is crabgrass? This is a picture from April 2022 of crabgrass 4 weeks after soul temperatures reached 55 degrees, the point that crabgrass starts to germinate.

Crabgrass may be the most feared weed of all. So feared, and so well known, that it is common for lawn owners to refer to any weed in their lawn as “crabgrass.”
Crabgrass should be feared. Crabgrass is a prolific grower and if left unattended will rapidly dominate turf.
Yet, crabgrass is one of the earliest annual summer weeds to prevent when pre-emergent herbicides are applied correctly and timely.
The Hall | Stewart promise is to make sure the best pre-emergent herbicides are applied at the correct label rates and at the correct time each spring to prevent summer annual weeds from germinating in your lawn.
If you are a subscriber to either the Hall | Stewart 7-Step Weed Control & Fertilizer Program or the Hall | Stewart 4-Step Weed Control Only, we will prevent crabgrass from growing in your lawn this year.

When pre-emergent herbicides are applied at the right time in the spring, you can have a crabgrass free lawn all summer.
We have been visiting customer’s lawns since early January, and we will make sure all our customers’ lawns are protected before crabgrass germinates in March.
If you are not on a Hall | Stewart Lawn Care Program, please give us a call.
Our Goal: To help everyone have their best lawn…this year!
Lorne Hall
Hall | Stewart Lawn + Landscape
(405)367-3873
Boxwood – A Staple in the Landscape

Since I’m pretty confident you will not be spending time outside in your lawn and landscape on this blustery winter day, how about we spend a few minutes discussing one of the most, if not the most, common shrub in the landscape, the boxwood?
With 90 species and over 365 different cultivars of boxwoods, it is easy to see why there is a boxwood for every landscape.
Boxwoods grow naturally in a variety of shapes - rounded, upright, and pyramidal.
Boxwoods also come in a variety of sizes: anywhere from 2’ to 15’ tall and 2’ to 8’ wide.
Boxwoods grow from zone 5 through zone 9. Oh, and in case you are wondering, Oklahoma City is right in the middle, zone 7.
Boxwoods are a landscape staple that have a way of enhancing the garden without competing with other plants. They can be used in a formal garden to add an old-world feel and equally fit in well in a casual landscape setting. In the summertime, they provide a background of green while in the winter the provide structure and color.

Barberry add a splash of red against the backdrop of Boxwood lining a front walk.

Boxwood add green to the winter landscape while the perennials take a break. Without the Boxwood defining the bed the area would be void of interest in the winter.
Boxwoods easily shear — making them a great choice for hedges, borders, and foundation plantings. While at the same time, boxwoods make a great stand-alone shrub bringing attention to their natural growth habit.

Boxwoods are a great choice for height in the center of a container adding a rich green backdrop for seasonal color.

A very traditional use of Boxwoods framing the walk creating a welcoming stroll to the front door.
Boxwoods are an excellent choice for a symmetrical planting to frame the landscape, for foundation plantings, for outlining a patio or outdoor seating area to create a room feel, for pathway edges, as a backdrop in the perennial garden, to soften a fence or a wall, or simply planted in a container.
With so many boxwoods, how do you choose the right one for your landscape?
Nine boxwoods I currently enjoy the most:
Winter Gem Boxwood – As a very hardy small hedge, it is a favorite for borders, hedges, and foundation plantings. The Winter Gem has a natural rounded growth habit but shears well, making it easy to shape into spheres, cones, or hedges. The dark green leaves turn a golden bronze hue in the winter, adding an extra interest to the landscape. Winter Gem reaches 4-6’ tall and wide if left untrimmed.
Sprinter Boxwood – An improved Winter Gem introduced by Proven Winters. It is faster growing and maintains a green color through the winter. Use as a low hedge in a formal garden or as a foundation planting. Sprinter Boxwoods grow to 2-4’ tall and wide.
Winter Green Boxwood – Rich green color through the summer and winter. Commonly used as a hedge or foundation planting. Can also be sheared to maintain desired shape and size. Grows 4’ tall and wide.

Winter Gem Boxwood sheared into a cone shape is a simple way to fill a container.
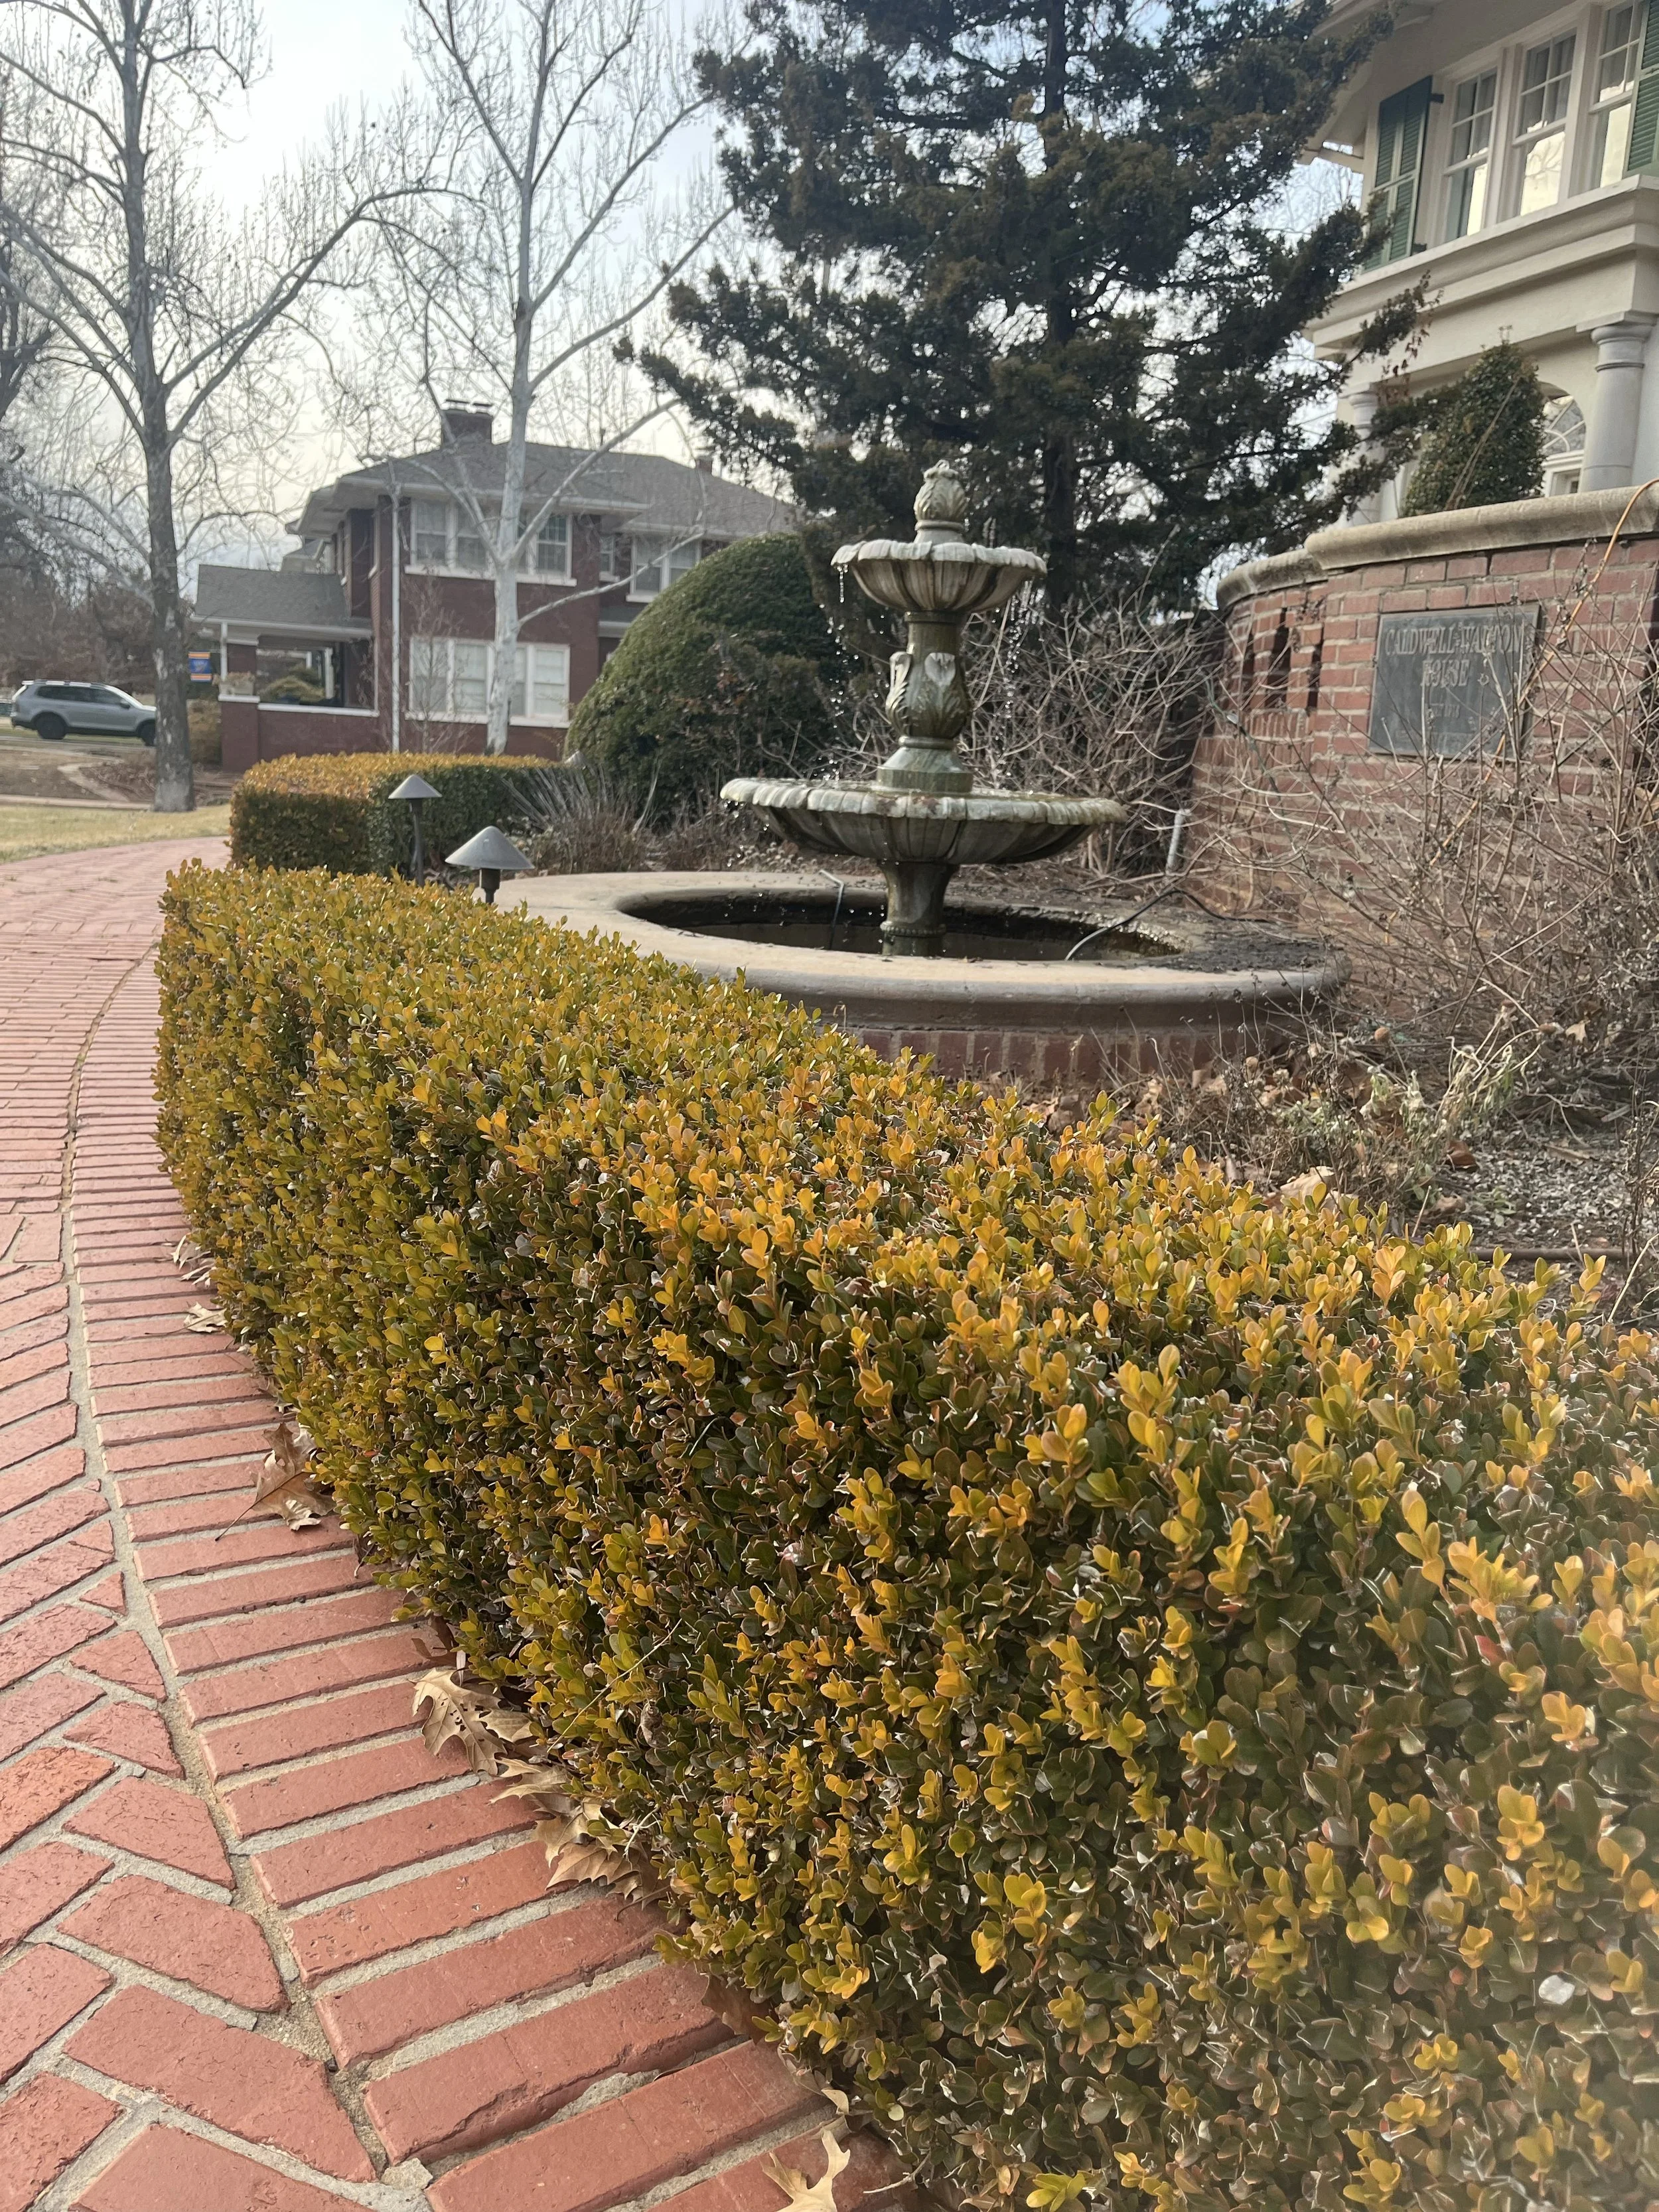
Winter Gem Boxwood in their winter bronze tone add formality to the area around a fountain.
Baby Gem Boxwood – Compact dense green foliage that retains a green color in the winter. Another perfect choice for a formal hedge along a walk. A slow grower that only reaches 3’ tall and wide.

Newly planted Baby Gem Boxwood creating a formal hedge along a walk with Green Mountain Boxwood adding an accent on each end.

Baby Gem Boxwood used to frame a bed with room for annuals in the summer and larger summer blooming plants behind to create layers in the landscape.
Green Tower Boxwood – With a columnar growth habit it is a classic addition to any landscape. Green Tower has dark green leaves with lighter green on the underside and keeps a green color through the winter. Great used as a hedge, for privacy, around a foundation or as a punctuation to accent the landscape. Reaching 9’ tall while only 2’ wide, Green Tower is a great evergreen hedge for tight spaces.
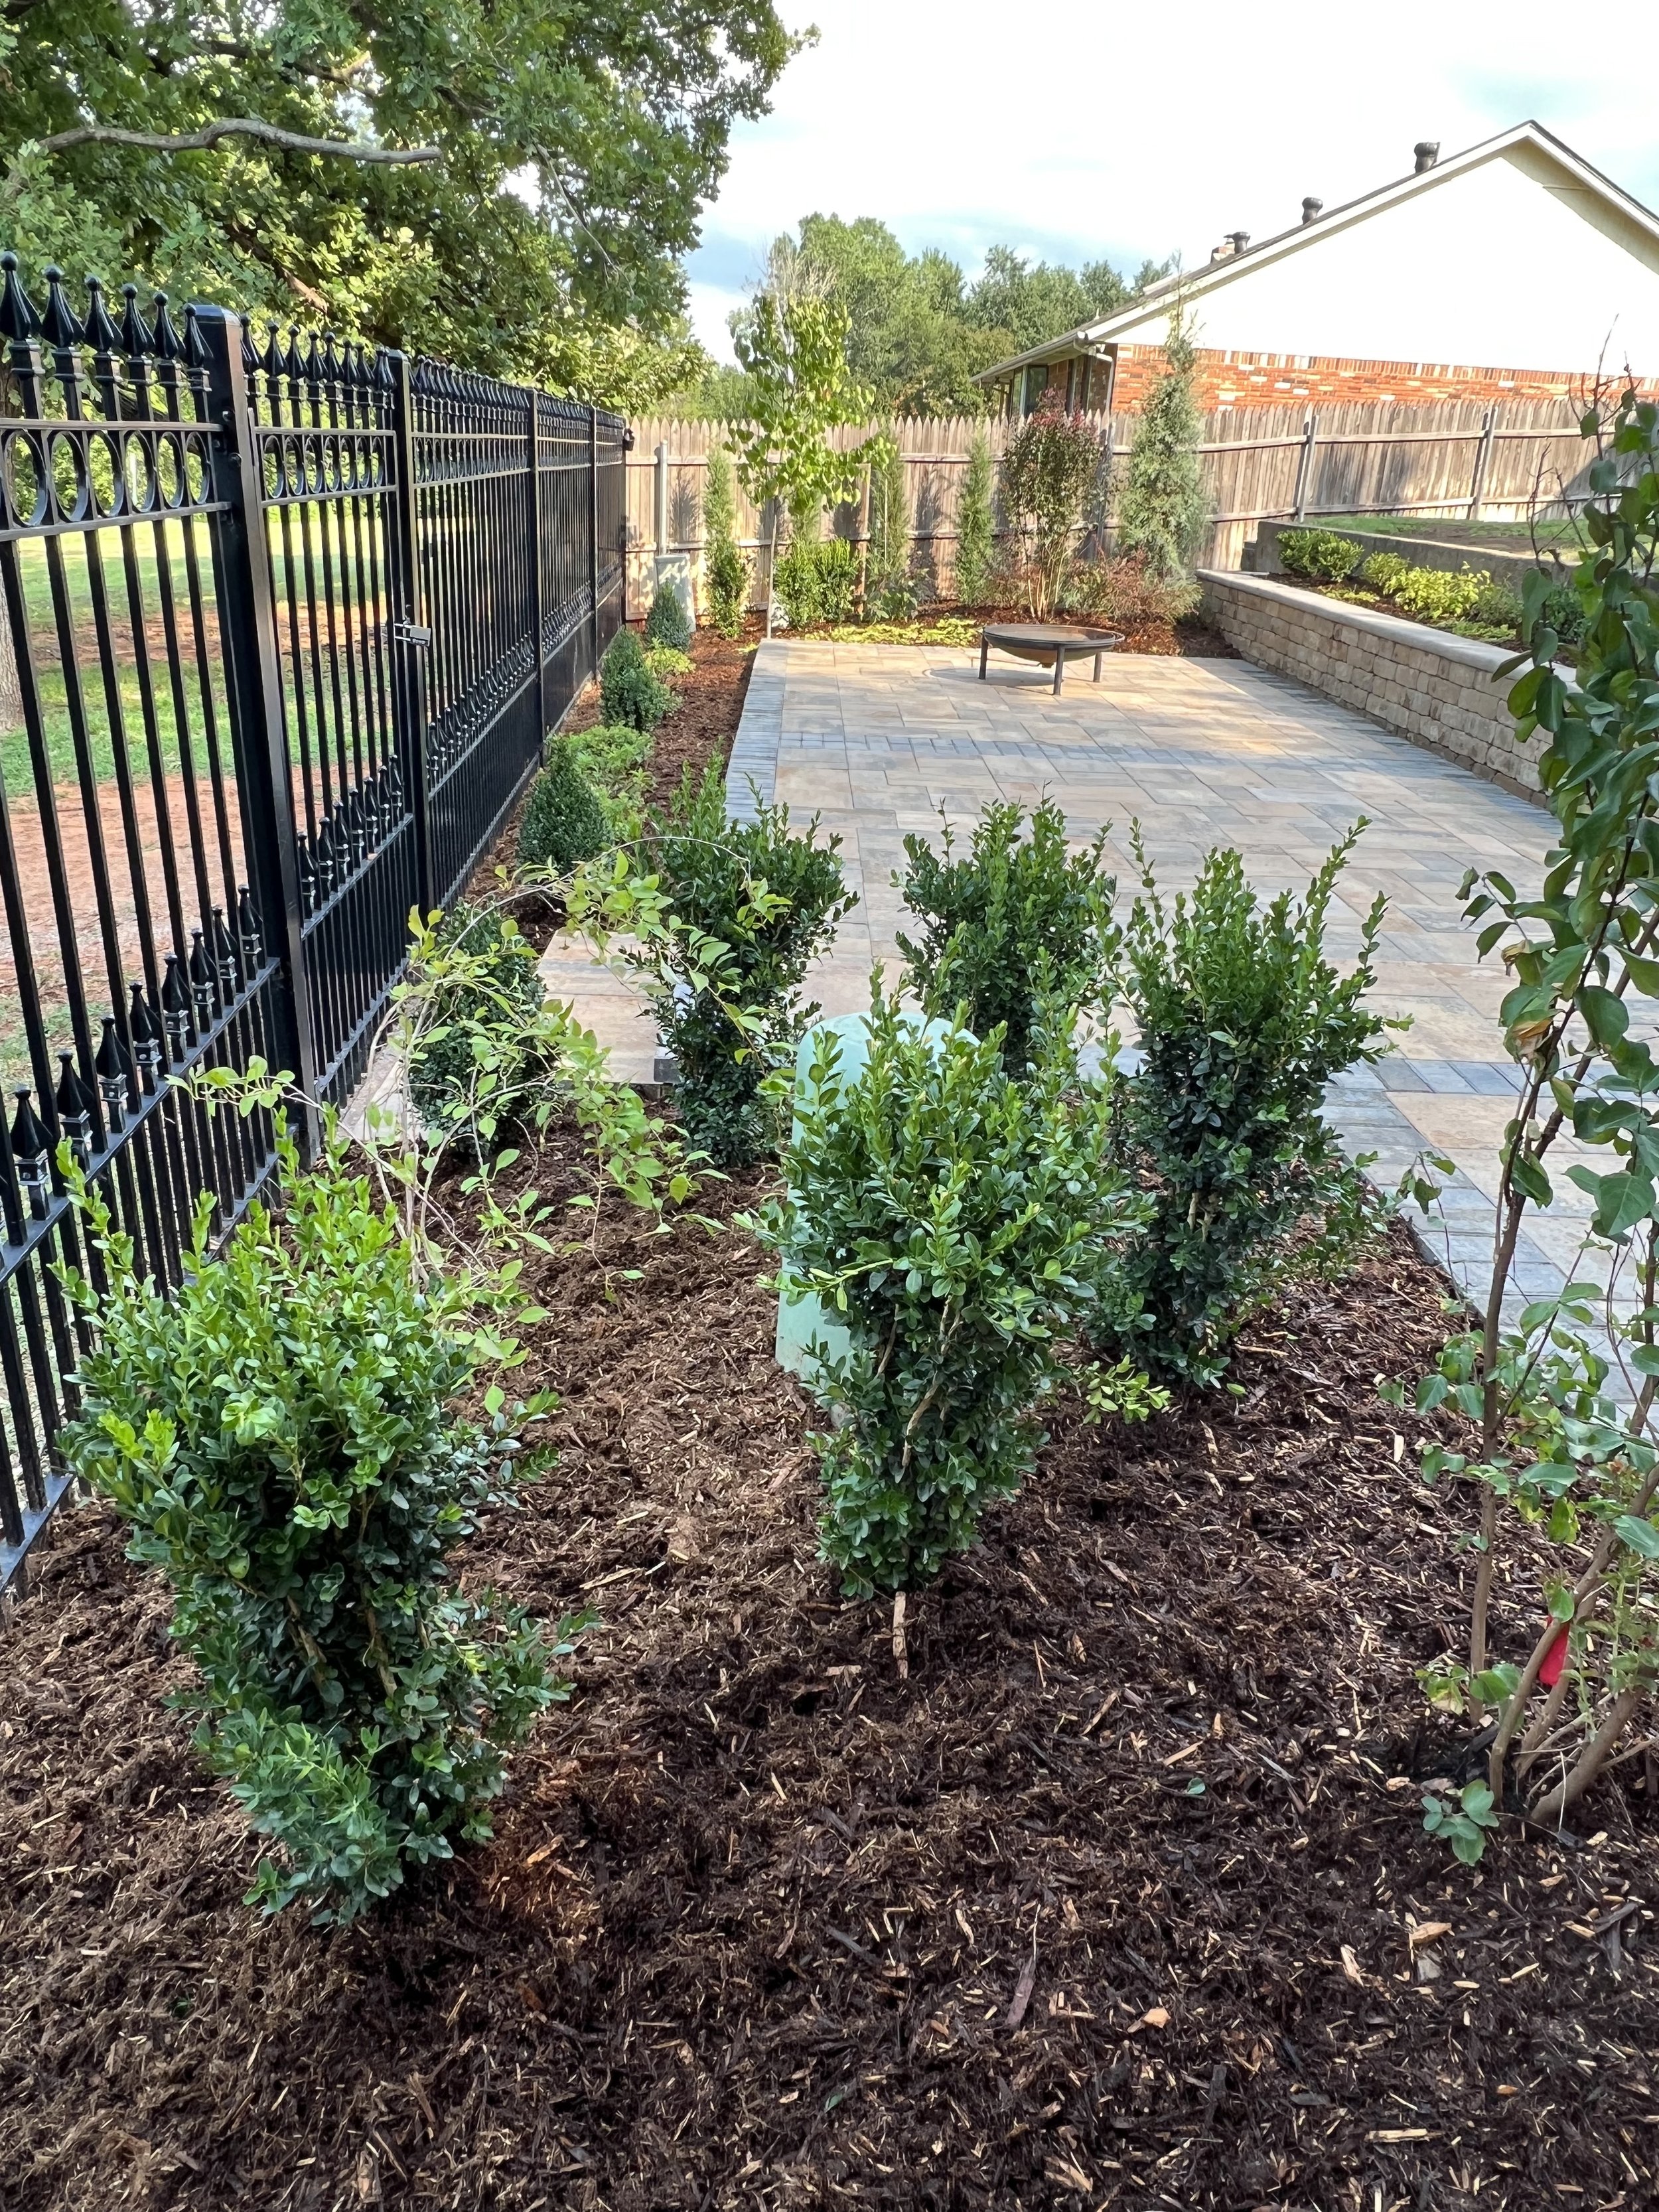
Green Tower Boxwood planted to screen utilities near an outdoor living space.

Green Tower Boxwood adding an accent of green in the spring amongst azaleas and tulips.
Green Mountain Boxwood – With an upright, naturally cone shaped growth habit very little maintenance is needed for them to add an elegant accent to the landscape. When planted as a hedge, the pyramidal shape of the Green Mountain adds interest to an often-ho-hum hedge. It maintains very good winter color. Green Mountains grow up to 5’ tall and 3’ wide.

Green Mountain Boxwood used to add a punctuation in the landscape.

Green Mountain Boxwood growing in their natural round cone shape used to visually separate a walk from a drive. The contrast of the red Nandina and the green Boxwood add interest to the winter landscape.
Green Velvet Boxwood – A great plant for adding year-round structure to the landscape as a stand-alone rounded shrub or as foundation planting. Green Velvet’s dense low growth also makes a good hedge. Foliage remains rich green throughout winter. Green Velvet maintains a 3-4’ rounded growth habit if not pruned.

Green Velvet Boxwood used as a foundation and allowed to grow in their natural rounded shape.

Green Velvet Boxwood along the edge of a drive. Notice the boxwoods are not sheared growing in their natural round habit.
Dwarf English Boxwood – Small rounded slow grower reaching only 2’ tall and 2’ wide. Great as a small hedge along a pathway or in a container as an accent.
Variegated English Boxwoods – Small dark green leaves with creamy white edges. A slower grower that tops out at 5-6’ tall and wide. Great as a border, hedge, stand-alone accent or foundation planting. Best planted out of the afternoon and evening sun as it prefers a little less sun than green boxwoods.
And that is only 9 of the over 365!
Planting Boxwoods
Boxwoods, like most shrubs, prefer good drainage. They are adaptable to various soils but prefer slightly acidic soils. Good drainage is very important if planted in alkaline soils and they do not do well in heavy, wet soils.
Boxwoods prefer 4-6 hours of direct sunlight per day. They can grow in more shade but tend to have a more open, airy growth habit the less sun they receive.
If possible, avoid overly exposed, windy locations. Dry winter winds can cause tip dieback.
Most boxwoods are slow to moderate growers only putting on 3-6” of growth per year. So, when planting a hedge, plant on centers half the mature width. Example: If the mature width of the boxwood variety you selected is 4’, plant on 2’ centers.
When planting stand-alone boxwoods, select areas where there is space for good airflow and the shrub is not crowded by other plants.
Dig a hole twice the size of the pot and slightly deeper. Mix plenty of organic compost with the soil you removed from the hole and put some of the mix back in the hole. Lightly tamp the soil then position the plant with the top of the root ball approximately 1 to 2” above the soil level. Using your soil mixture, halfway fill the area around the plant, tamp it down, add water, then fill the area to the top of the root ball. Water again to remove air pockets in the soil. Level soil with a slight taper away from the top of the root ball. Finish the planting with 2” of a quality organic mulch to hold moisture and cool the soils in the summer and hold warmth in the winter.

Dig a hole twice the size of the pot and slightly deeper.

Put some of the soil and compost mixture in the bottom of the hole and lightly tamp.
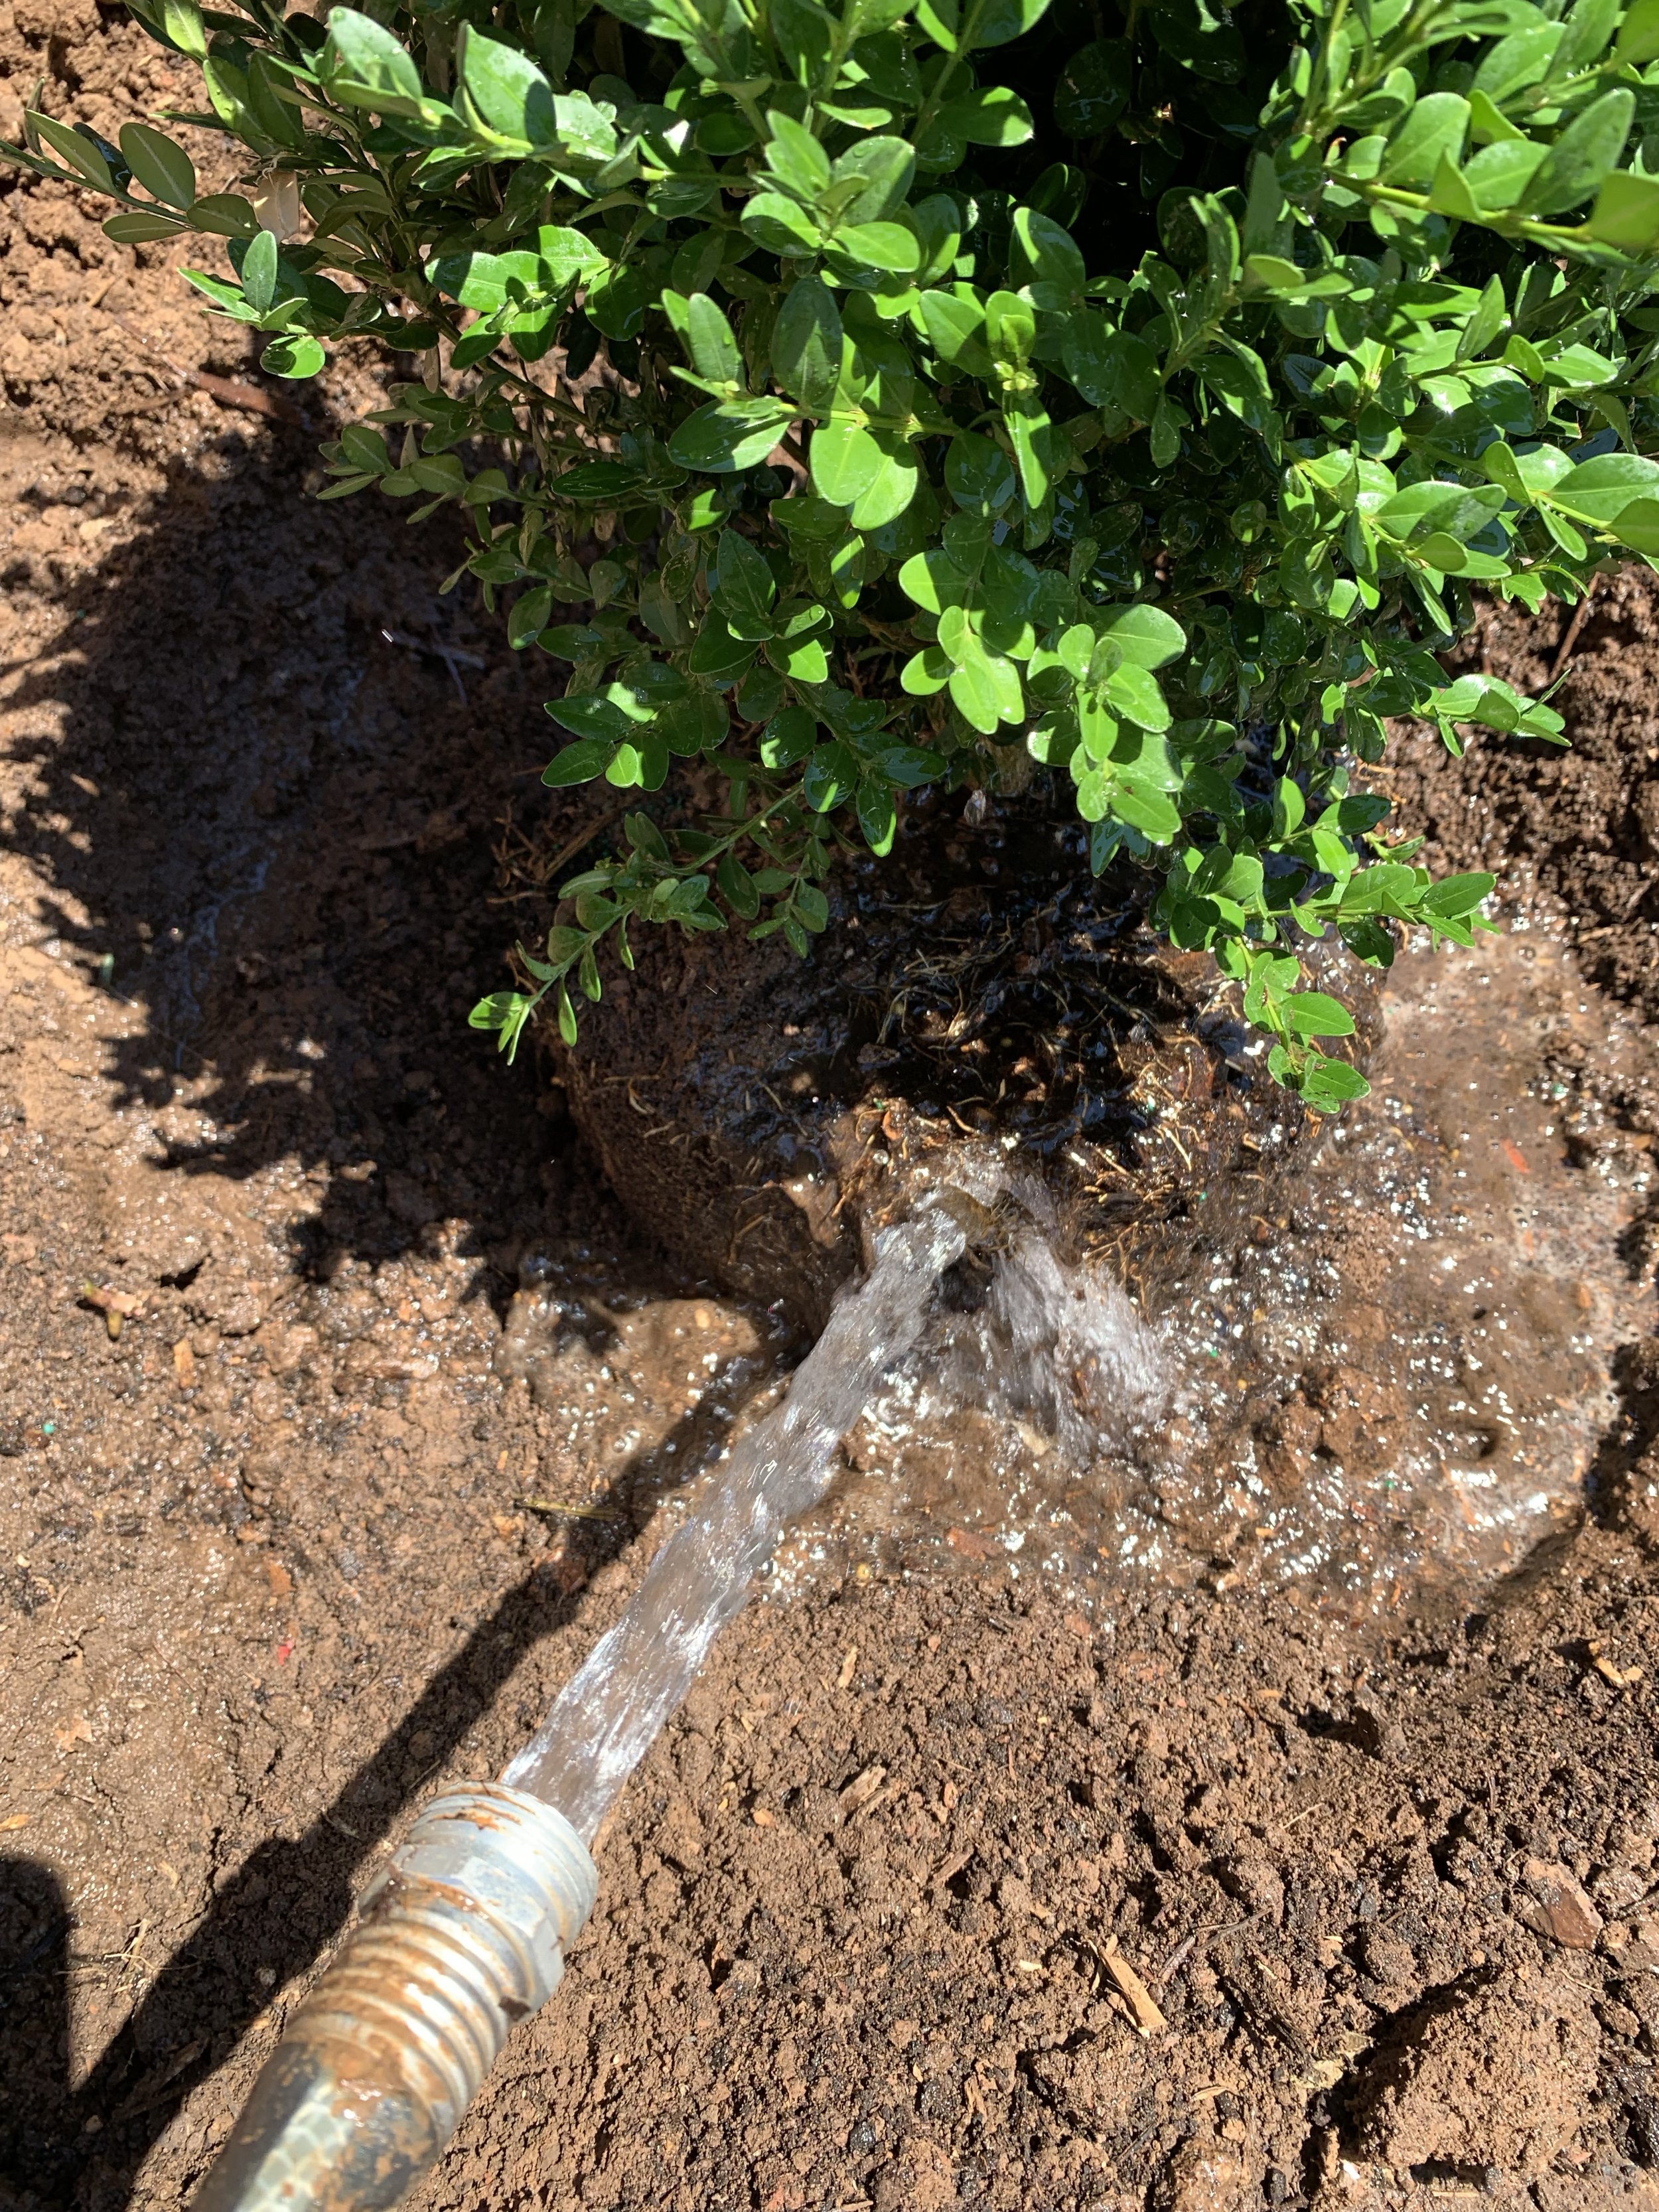
Using your soil mixture partially backfill around the root ball, tamp down the soil, and then add water.

Finish the planting with 2” of a quality organic mulch to hold moisture and moderate soil temperatures.

Mix plenty of organic compost with the soil you removed from the hole you dug.
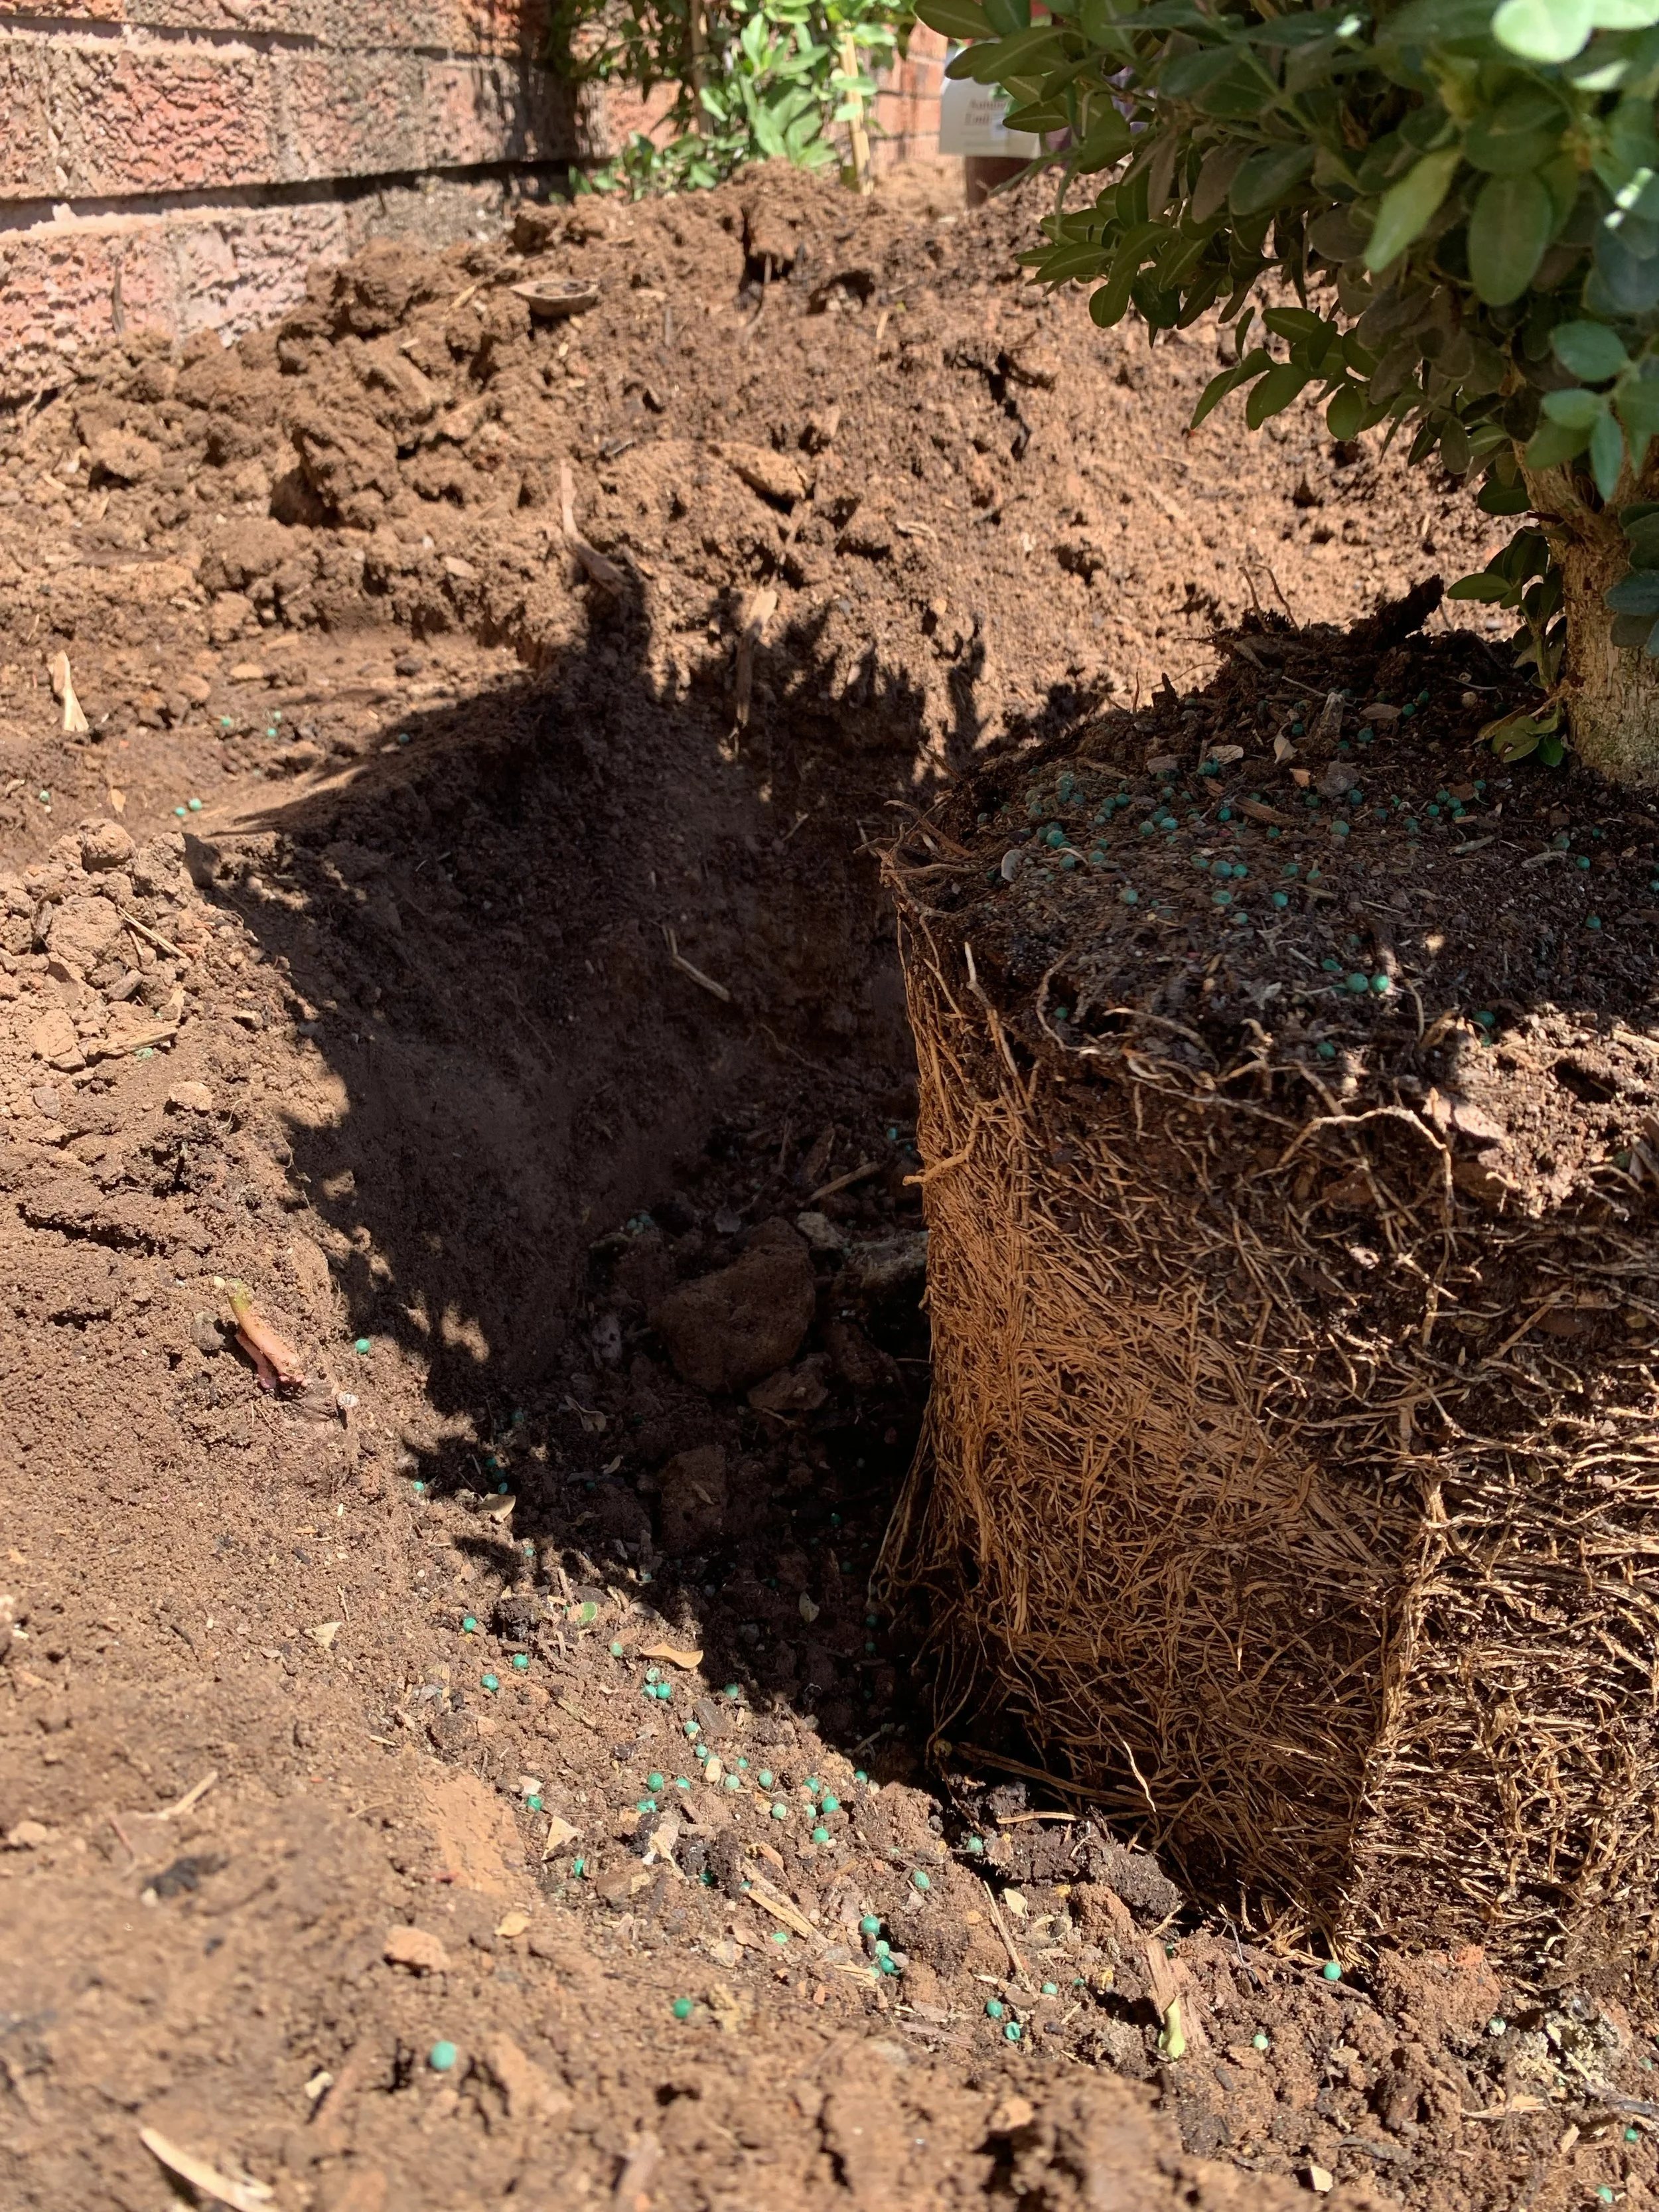
Position the plant with the top of the root ball approximately 1 to 2” above the soil level.

Finish backfilling and level the soil slightly tapering away from the top of the root ball.
As soon as the weather improves, get outside and go on a boxwood scavenger hunt.
Take a stroll around your neighborhood and see how many different boxwoods you can find and how many different ways they are used in the landscape.
What is your favorite way boxwood?
What is your favorite way to use boxwoods in the landscape: hedge, foundation, stand-alone accent, a punctuation, or in a container?
Lorne Hall
Hall | Stewart Lawn + Landscape
(405)367-3873