Best Practices for Successfully Establishing Fescue

Have you noticed how much we have been talking about fescue lately?
On August 11th, we wrote about Bermuda vs Fescue – The Choice is Yours!
Last week in our September Lawn & Landscape Tips the first item we listed was Fescue Overseeding.

As the temperature cools and moisture returns, fescue lawns will regain cooler and health.

Small, shady areas in your lawn where there is low air movement and shade are prime candidates for annual fall seeding with fescue.

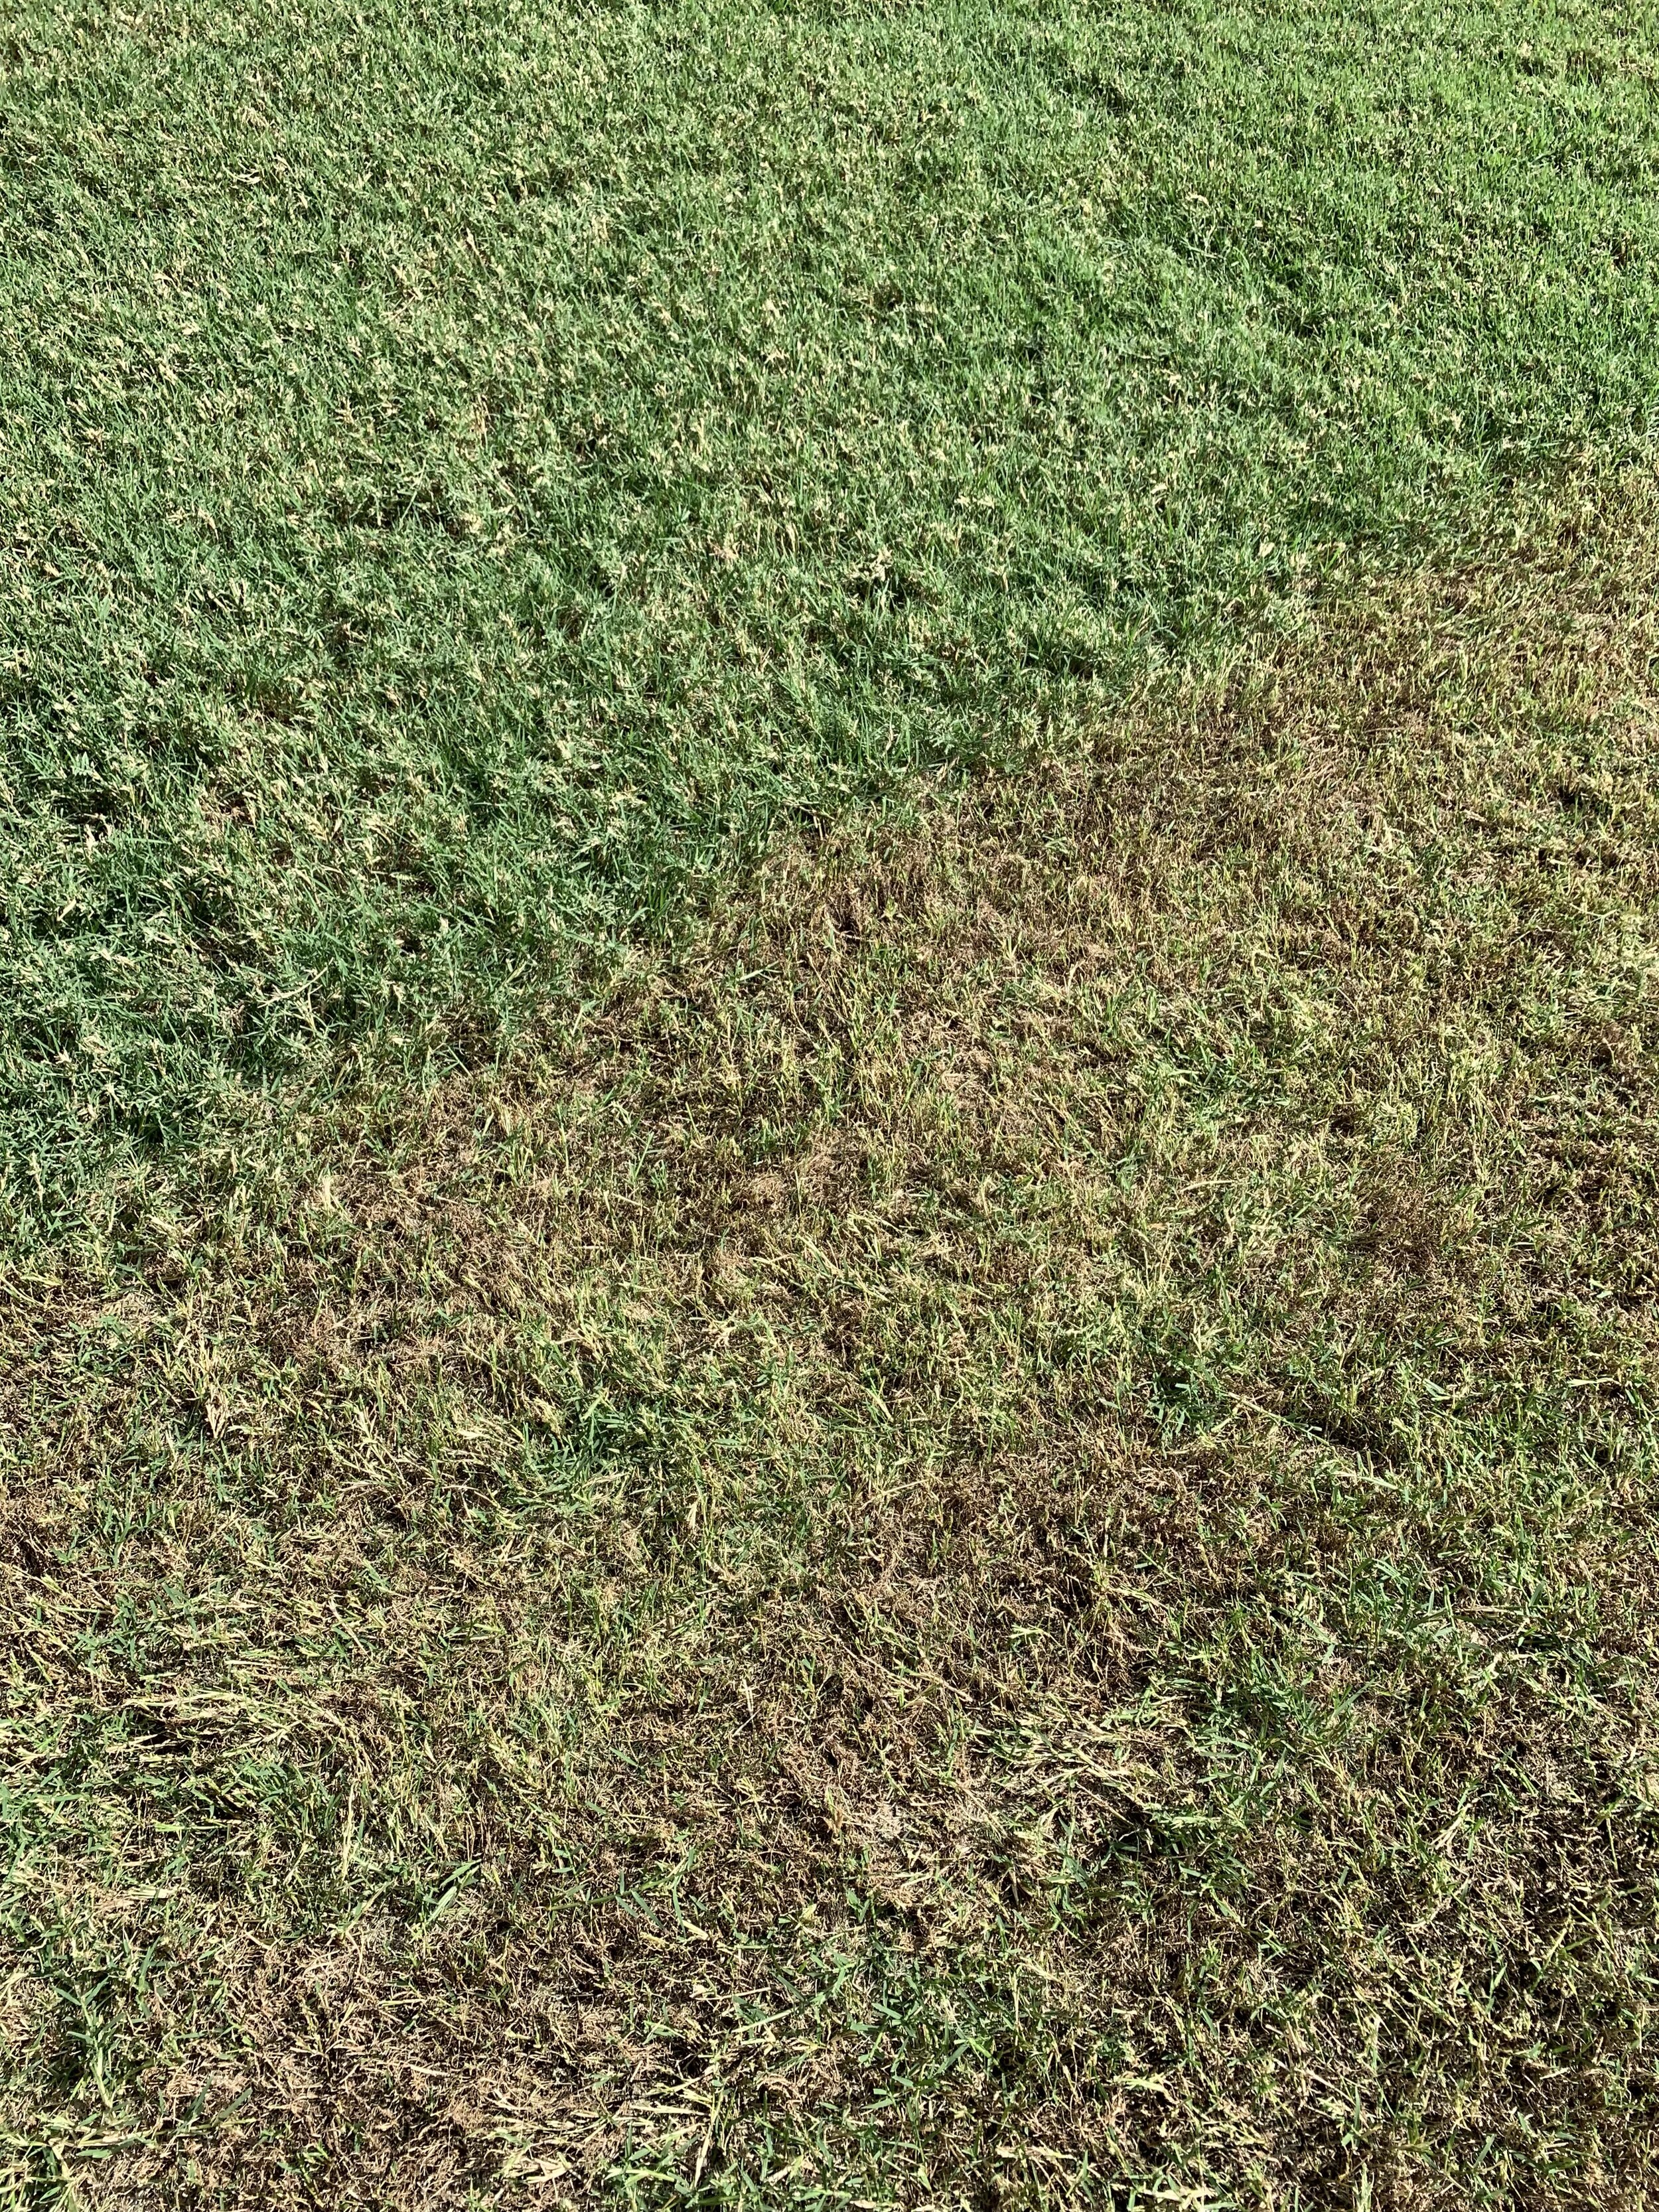
It has been common to find stressed areas of fescue from uneven water distribution this summer.

If you have heavily shaded areas it is common to need to overseed in the fall, regardless of the summer weather conditions.
Fescue is the best turf grass for areas of your lawn that receive dappled sun. Bermuda needs at least 6 hours per day of direct sun light.
Fescue is commonly thought of as a shade grass. But fescue grown using the best maintenance and lawn care practices can thrive in full sun.
Why so much focus on fescue?
Because, you are asking a lot of questions about fescue…
& because, it is the best time to establish a fescue lawn!

It has been a stressful summer for fescue areas with uneven water distribution. Fall is the best time to overseed any damaged areas of fescue.
Who should plan on overseeding with fescue this fall?
If you have areas of your lawn where the bermuda has thinned because of shade, you should seed this fall. Bermuda needs at least 6 hours of direct sunlight for the best performance. Less than 6 hours of direct sunlight and bermuda starts to thin.
If you have fescue areas that have become thin because of brown patch or drought, you should seed this fall.
If you just want to keep your fescue thick and healthy, you should seed this fall. Fescue doesn’t spread like bermuda with runners across the top of the soil. Fescue spreads through tillering through the soil and putting up new vertical shoots. Fescue spread is slow and often rare in the transition zone in which we live. To keep a fescue lawn at it’s best, adding more seed is common. Our best fescue lawns are overseeded every fall.
If you want to have a green lawn longer into the fall and earlier in the spring, you should seed this fall. Fescue is a cool season grass and stays green and active into early December and recovers from the winter in early March. With a fescue lawn, it is common to have a green lawn 10 out of 12 months.

This fall is the best time to repair fescue areas that were damaged during this summer’s heat and drought.

Myth: It is difficult to grow fescue. But, really it isn’t. Growing fescue does require a different approach to your lawn, but it isn’t difficult when you follow the best practices for overseeding with fescue.

4 Best Practices for Successfully Establishing Fescue
Best Practice #1 – Seeding fescue in the fall.
Because fescue is a cool season grass, there are two times per year you can plant fescue seed; Fall (September through October) and Spring (March to early April).
If you wait until spring to seed fescue, you are seeding at the second-best time and there is an enormous chasm between the establishment of fescue now (the best time) and next spring (the second-best time).
Spring seeded fescue will come up great, but it rarely establishes enough root system to make it through the summer heat (fescue’s off season).
Fall seeded fescue has all fall, winter, and spring to establish a root system before enduring the heat of July and August.
Don’t fail at establishing fescue – seed in the fall, not the spring.
Best Practice #1 – Seeding fescue in the fall.

Best Practice #2 – Good Seed to Soil Contact
Good seed to soil contact is important. If you sow seed over the existing soil without some preparation, the chance of a successful seeding is greatly reduced. Research shows the percentage of germination decreases dramatically when seed is just sown on top of the ground.
You will have success if you start by cutting the existing turf short to remove excess grass. Then loosen the soil to create good seed to soil contact.
This bermuda lawn is being cut short in preparation of overseeding it with fescue for the first time.

The lawn was being maintained at 3”.

Cutting it to 2” will improve the seed to soil contact and increase the success of the first time overseed.

Aeration is an important step in establishing good seed to soil contact. Good seed to soil contact and keeping the area moist are two keys two keys to success seeding.
Aeration is the best method to loosen the soil and gain good seed to soil contact. Aerating also gives you the extra benefit of improving the soil structure, increasing water absorption, and developing deeper roots.
Give more attention to bare areas and the edges. Rough up the areas with a rake.
Rototilling isn’t necessary, but breaking the surface of the soil in bare areas is needed.
In areas that are completely bare, spread a thin layer of peat moss over the surface after seeding to increase the seed to soil contact.
If overseeding an existing fescue area with a good stand of grass, spread seed at a rate of 6-8 pounds per 1,000 square feet.
If establishing a new fescue lawn, spread seed at a rate of 10-12 pounds per 1,000 square feet.
Best Practice #2 – Good Seed to Soil Contact
Best Practice #3 – Keep the Seed Tacky Moist Until It Germinates
The first two are very important, but this one is critical for success.
Nothing will deliver you a losing hand quicker than not keeping the seed moist. You can get the first two best practices correct and have complete failure if the seeded area is not kept moist until new grass is visible in the entire area.

Even water distribution is important in keeping the seed tacky moist until it comes up. Check your system. Look for areas where there isn’t complete head to head coverage. The result will be poor germinate around the sprinkler head.

This picture 14 days after seeding demonstrates how critical moisture is to seed germination. The seed in the area where the irrigation does not reach has not germinated at all while the moist areas are nearly fully germinated.

When you keep the seeded area consistently tacky moist you will seed germination within 7-14 days. Best practice is to water the area 3 short cycles per day.
The worst thing you can do is water the seeded area, allow it to dry completely, water again, allow it to dry completely, repeat, repeat, repeat… After a couple of times of drying out completely, the seed will no longer be viable.
For the best success, set your irrigation to run 3 short cycles per day. Set spray type zones to run 3-5 minutes each time. Set rotor type zones to run 7-10 minutes each time. If possible, set the system to run early morning (4:00 AM), late morning (10:00 AM), and mid-afternoon (4:00 PM).
You don’t have to have an irrigation system to establish fescue. Just be diligent at watering every morning and every evening.
Best Practice #3 – Keep the Seed Tacky Moist Until It Germinates
Best Practice #4 – Invest in a Quality Seed
Fescue was first introduced in the US from Europe in the 1800s as a pasture grass. Kentucky-31 Tall Fescue was developed in the 1940s as an improved pasture grass and introduced to the home turf market in the 1960s by Pennington Seed.

Improved fescue varieties are very heat and drought tolerant and can successfully be grown in full sun.
What is the point of the seed history lesson?
If you are buying Kentucky-31 Tall Fescue, you are buying an 80-year-old product when there are over 300 improved fescue varieties that offer darker green color, narrower blades, and improved tolerance to heat, cold, drought, and disease. Kentucky-31 is marginally acceptable as a lawn grass that tends to become thin and clumpy.
No matter the name on the bag of the seed, any improved variety will outperform Kentucky-31.
We believe using a blend is best when seeding fescue. Blends are a combination of two or more varieties within the same species, such as two or more fescues in one mix. Blends are a combination of the best species, tested over time, for the best shade tolerance and disease resistance. The number one problem with fescue is brown patch disease. The best blends use fescue varieties that show strong resistance to brown patch. Also, some blends will contain bluegrass and, or rye for even more vibrant spring color.
Best Practice #4 – Invest in a Quality Seed

All seed grown in Oregon is certified. Buy it when possible.

When purchasing seed look for a blend with fescue varieties that score high in the NTEP trials for heat, drought, and disease resistance.
Two things that will make a seed more expensive, but at the same time a great value, “0% Weed Seed” and “Treated with Gravity SL PGS”.
Gravity SL PGS is a growth stimulant that greatly increases germination rates and root development.
Fescue can be grown successfully in Oklahoma. Even during a hot and dry summer, there are examples of great fescue lawns in every neighborhood. And for the fescue lawns that showed stress this summer, surprisingly most will show signs of a rebound with slightly cooler temperatures and moisture.
Successful fescue lawns are the result of best seeding practices, best cool season turf maintenance practices, and persistence.
But, more importantly, they are a result of different thinking. Establishing and maintaining a fescue lawn requires a different approach.

Bonus Best Practice
Don’t apply a fall pre-emergent before seeding. The same pre-emergent herbicide that prevents weeds will prevent fescue from germinating. Wait until after the new fescue has been mowed 2-3 times before putting a pre-emergent on the lawn.
Special Note: DO NOT use pre-emergent herbicides now in areas that are going to be seeded this fall.
If you need assistance in establishing a fescue lawn or have questions about fescue, give us a call – (405) 367-3873.
Lorne Hall
Hall | Stewart Lawn + Landscape
(405)367-3873

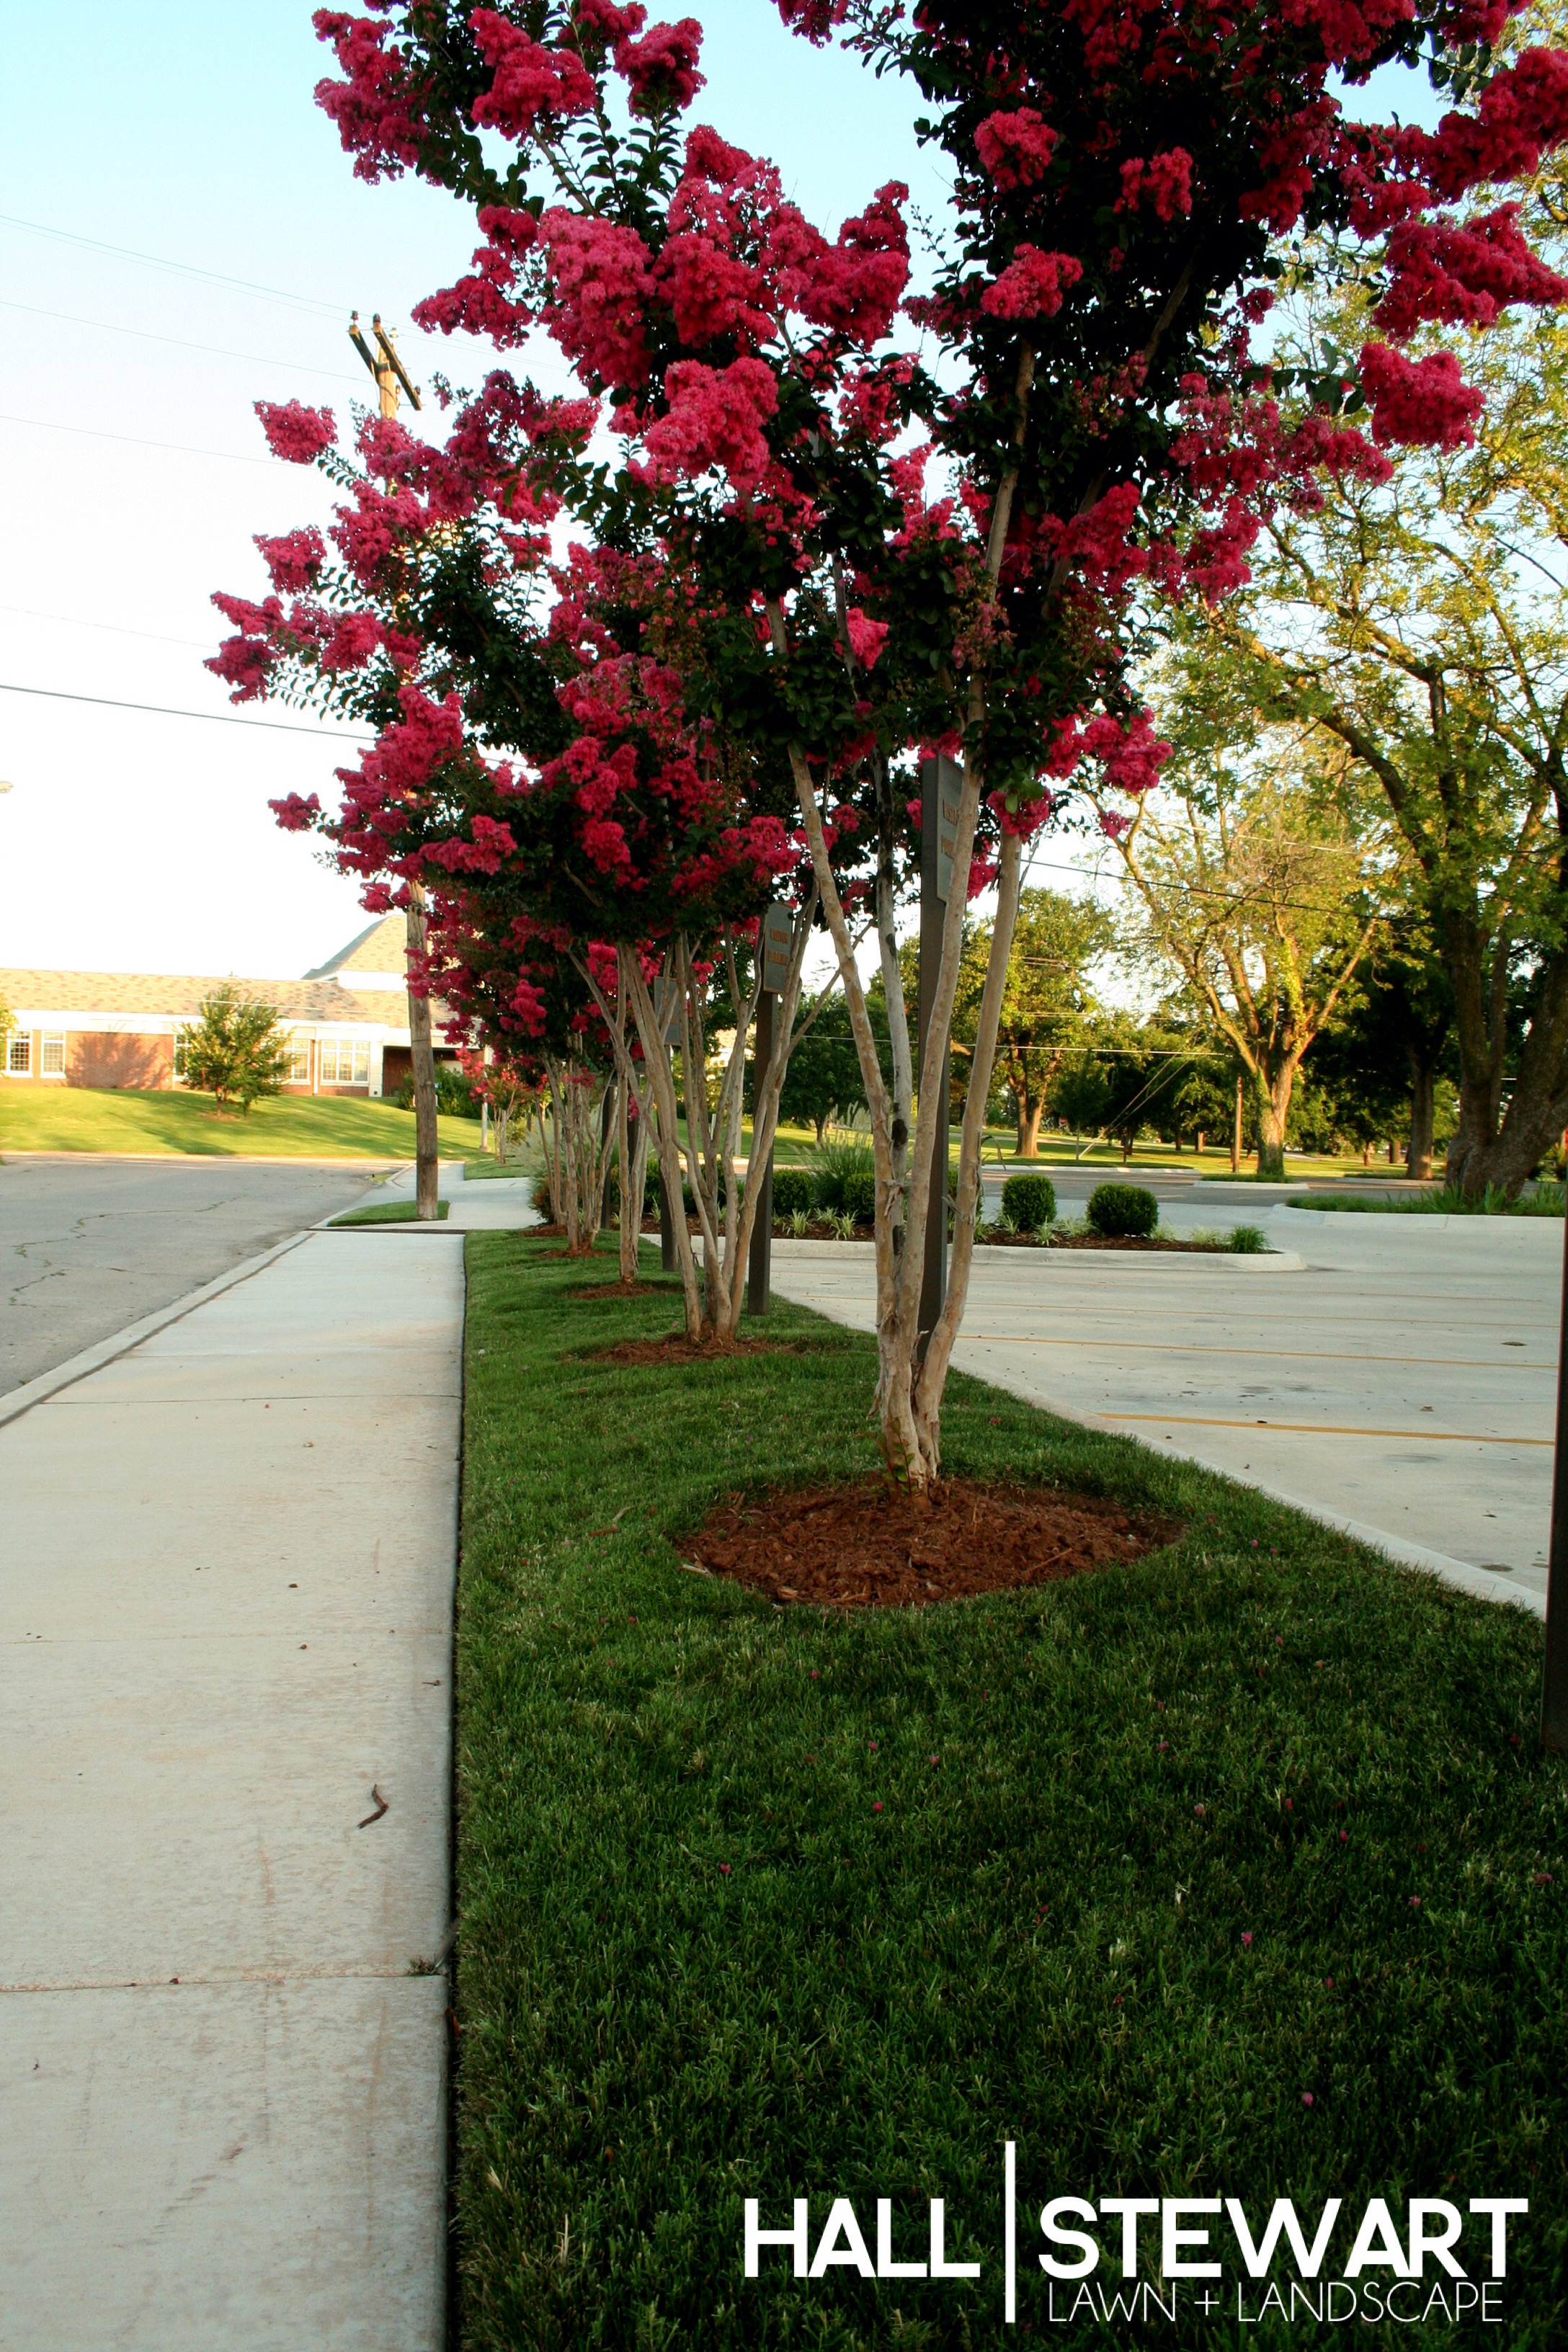
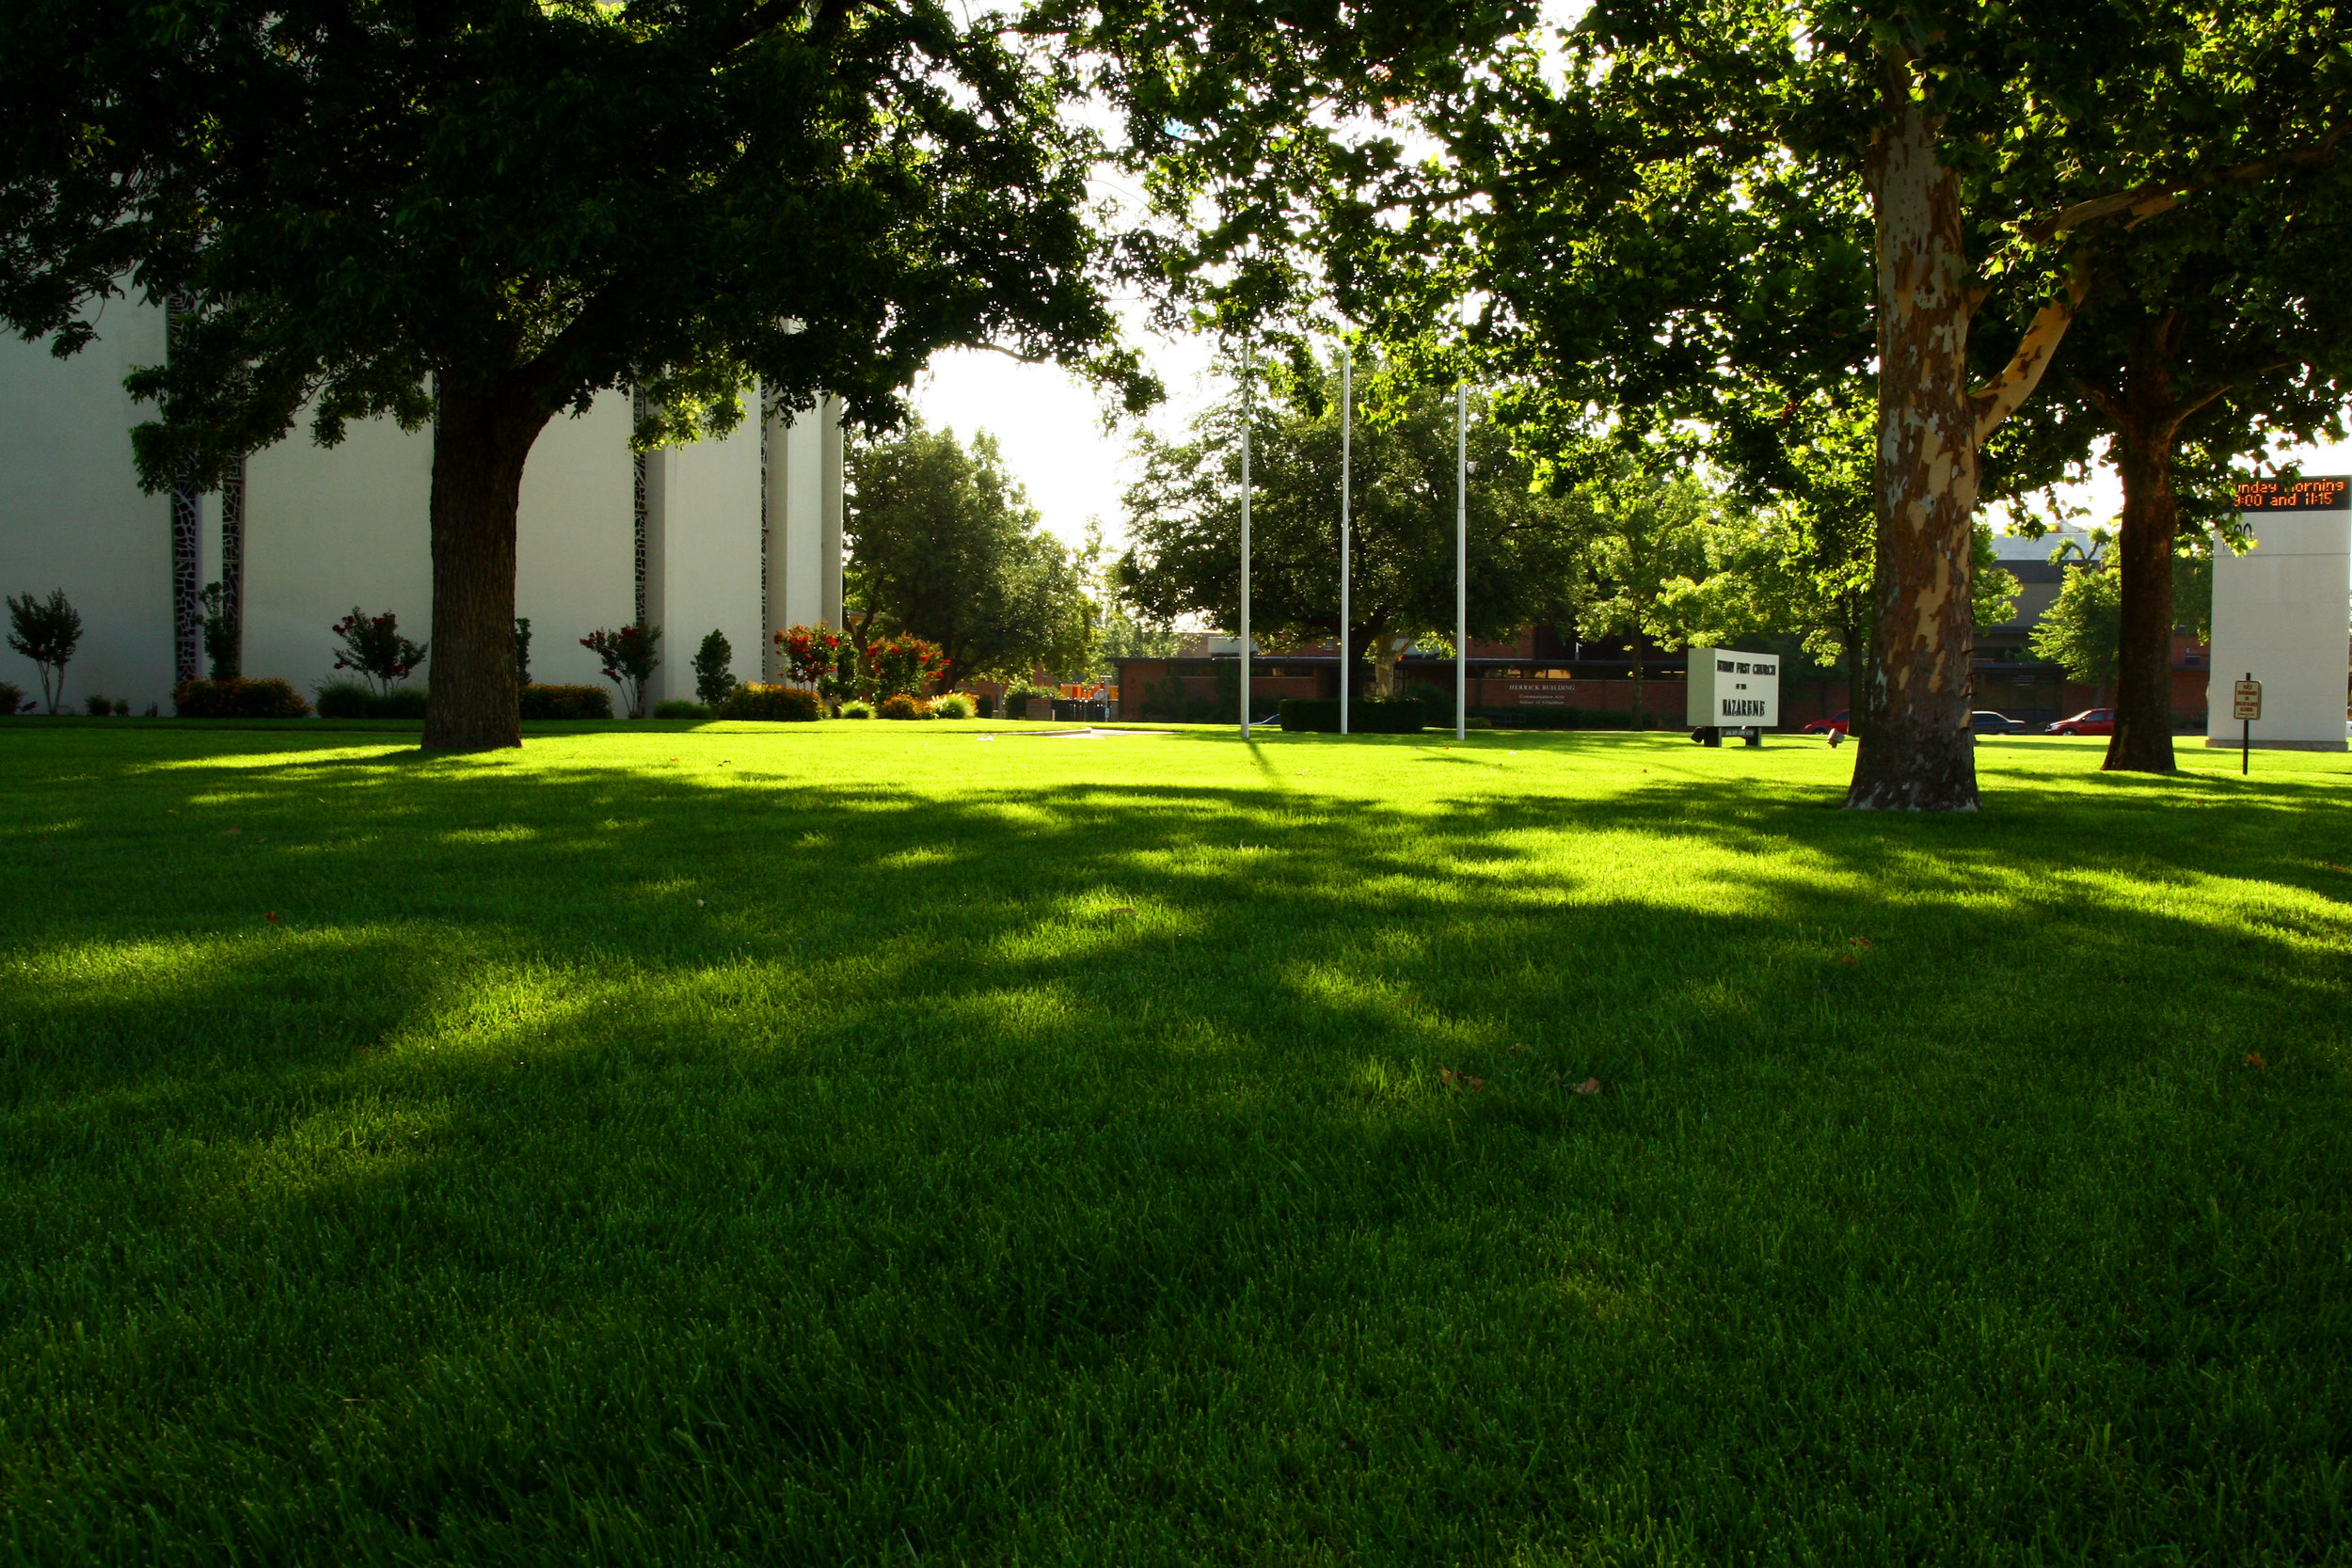
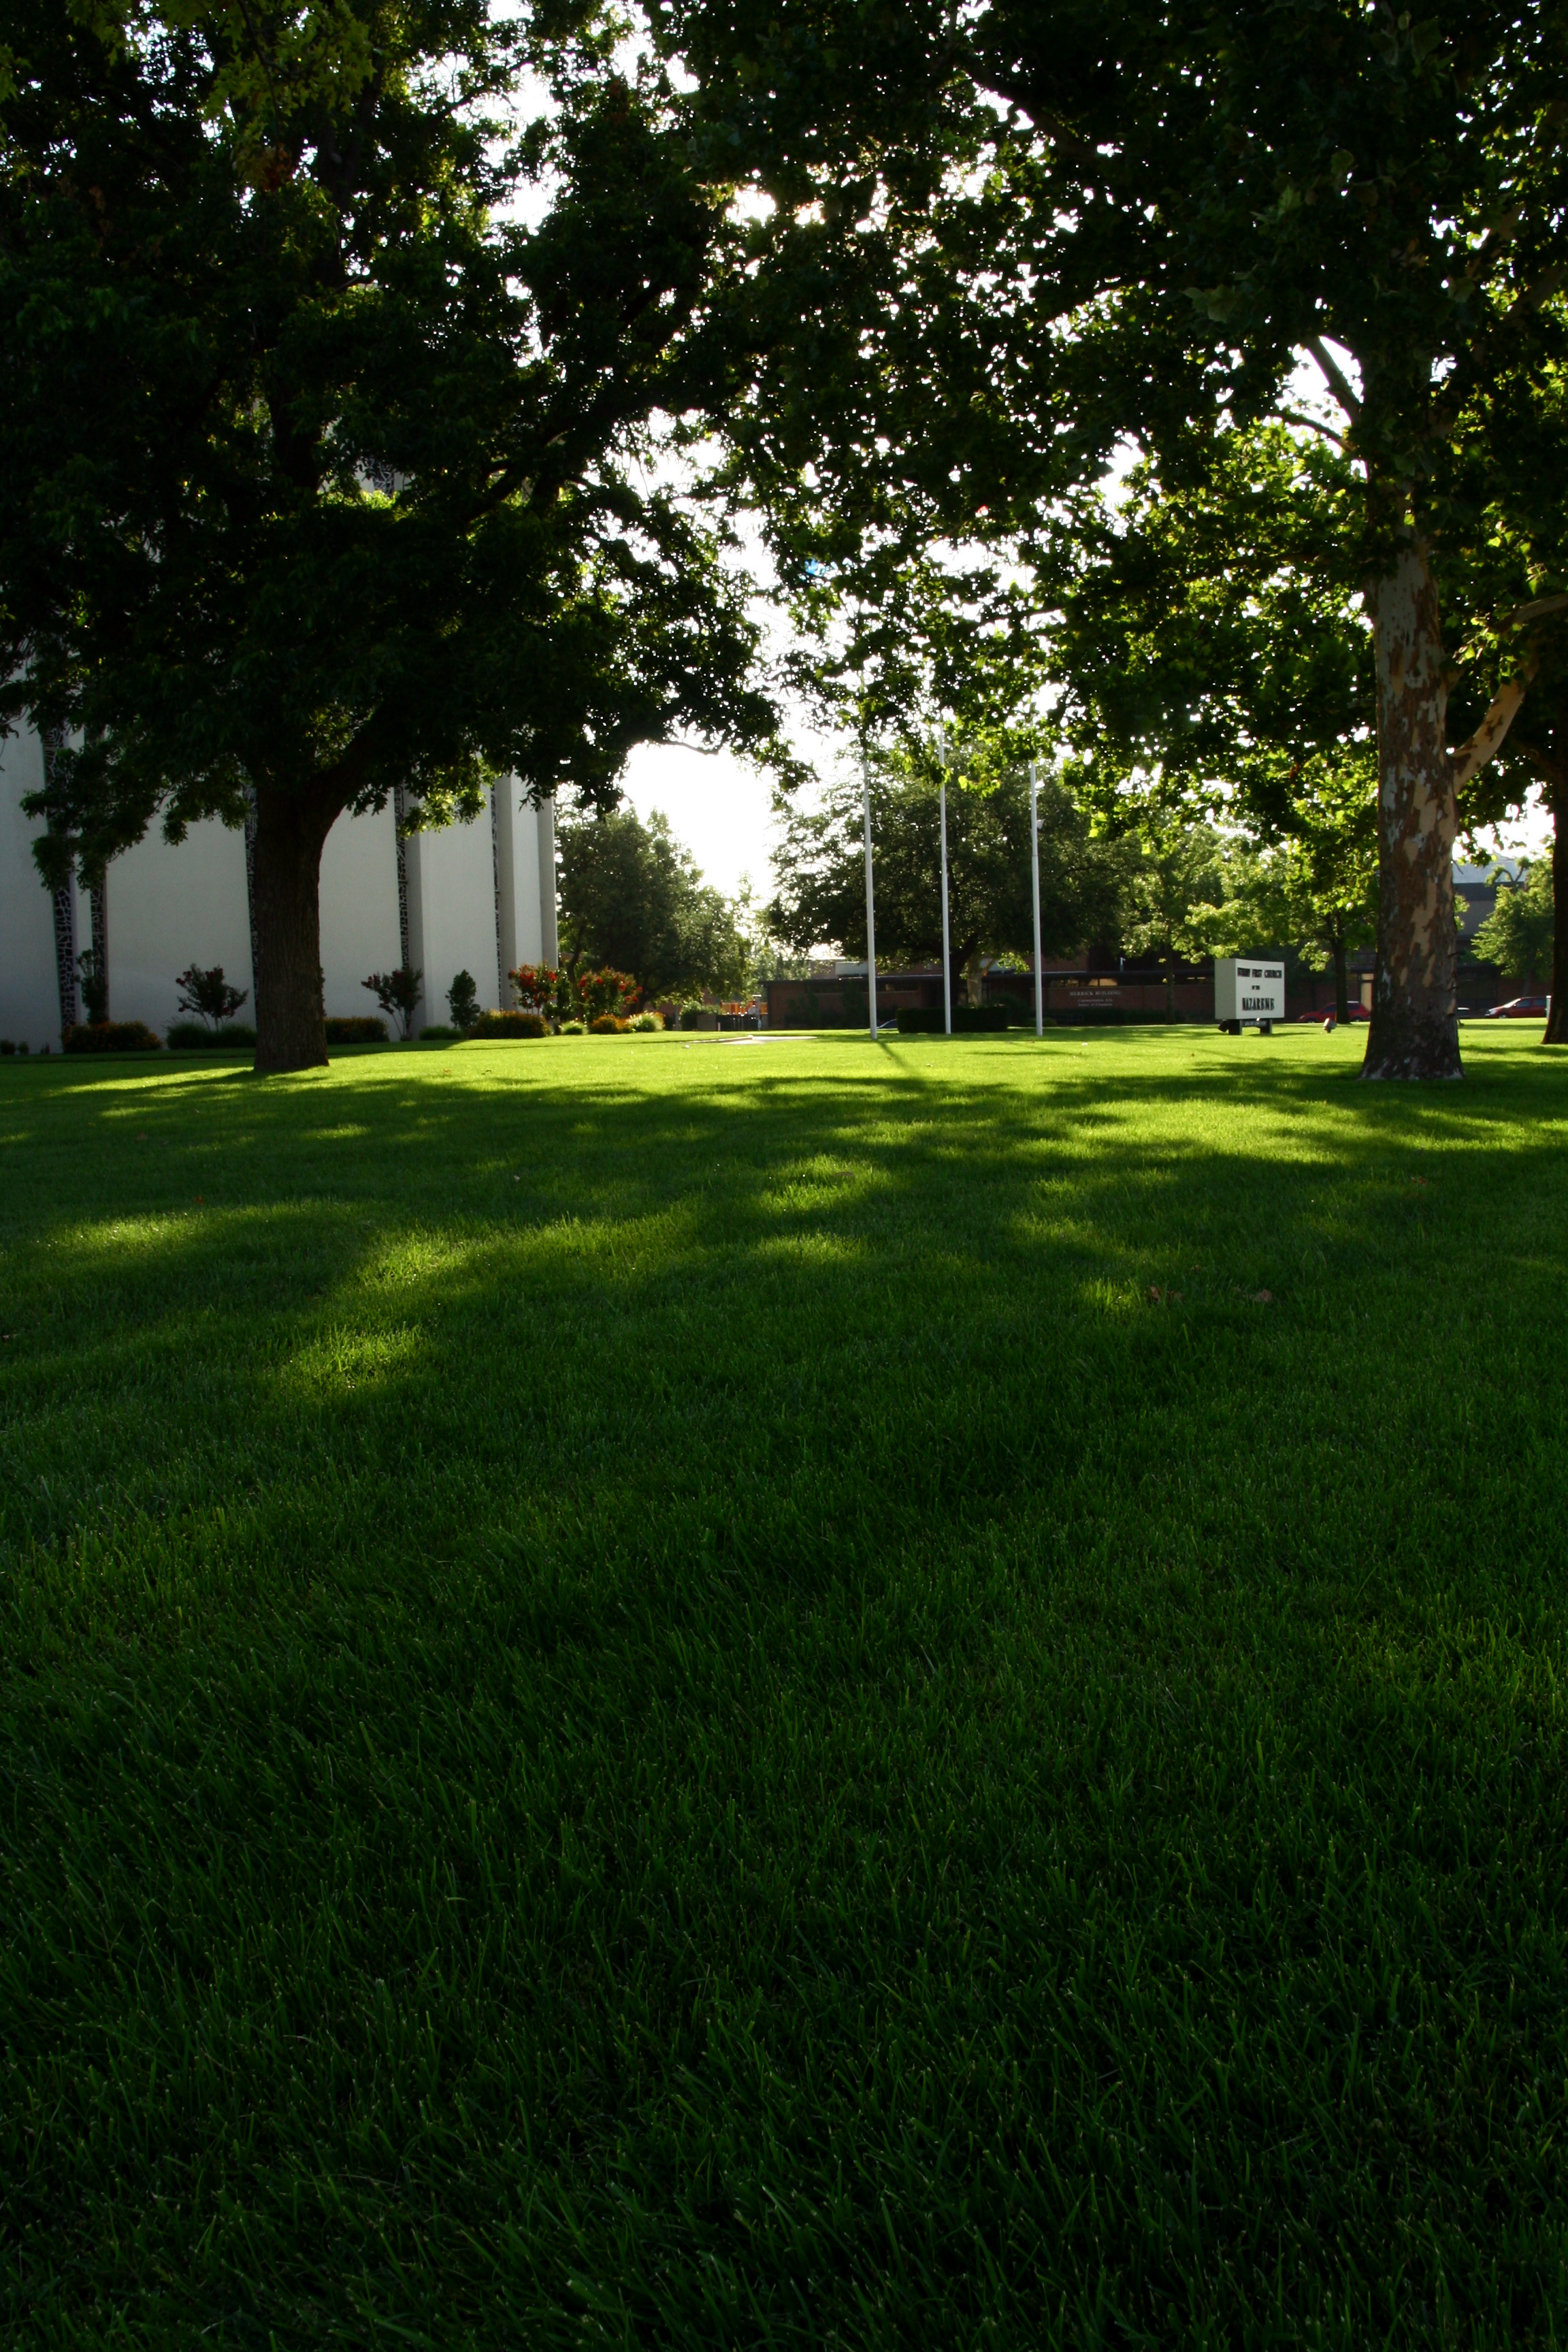
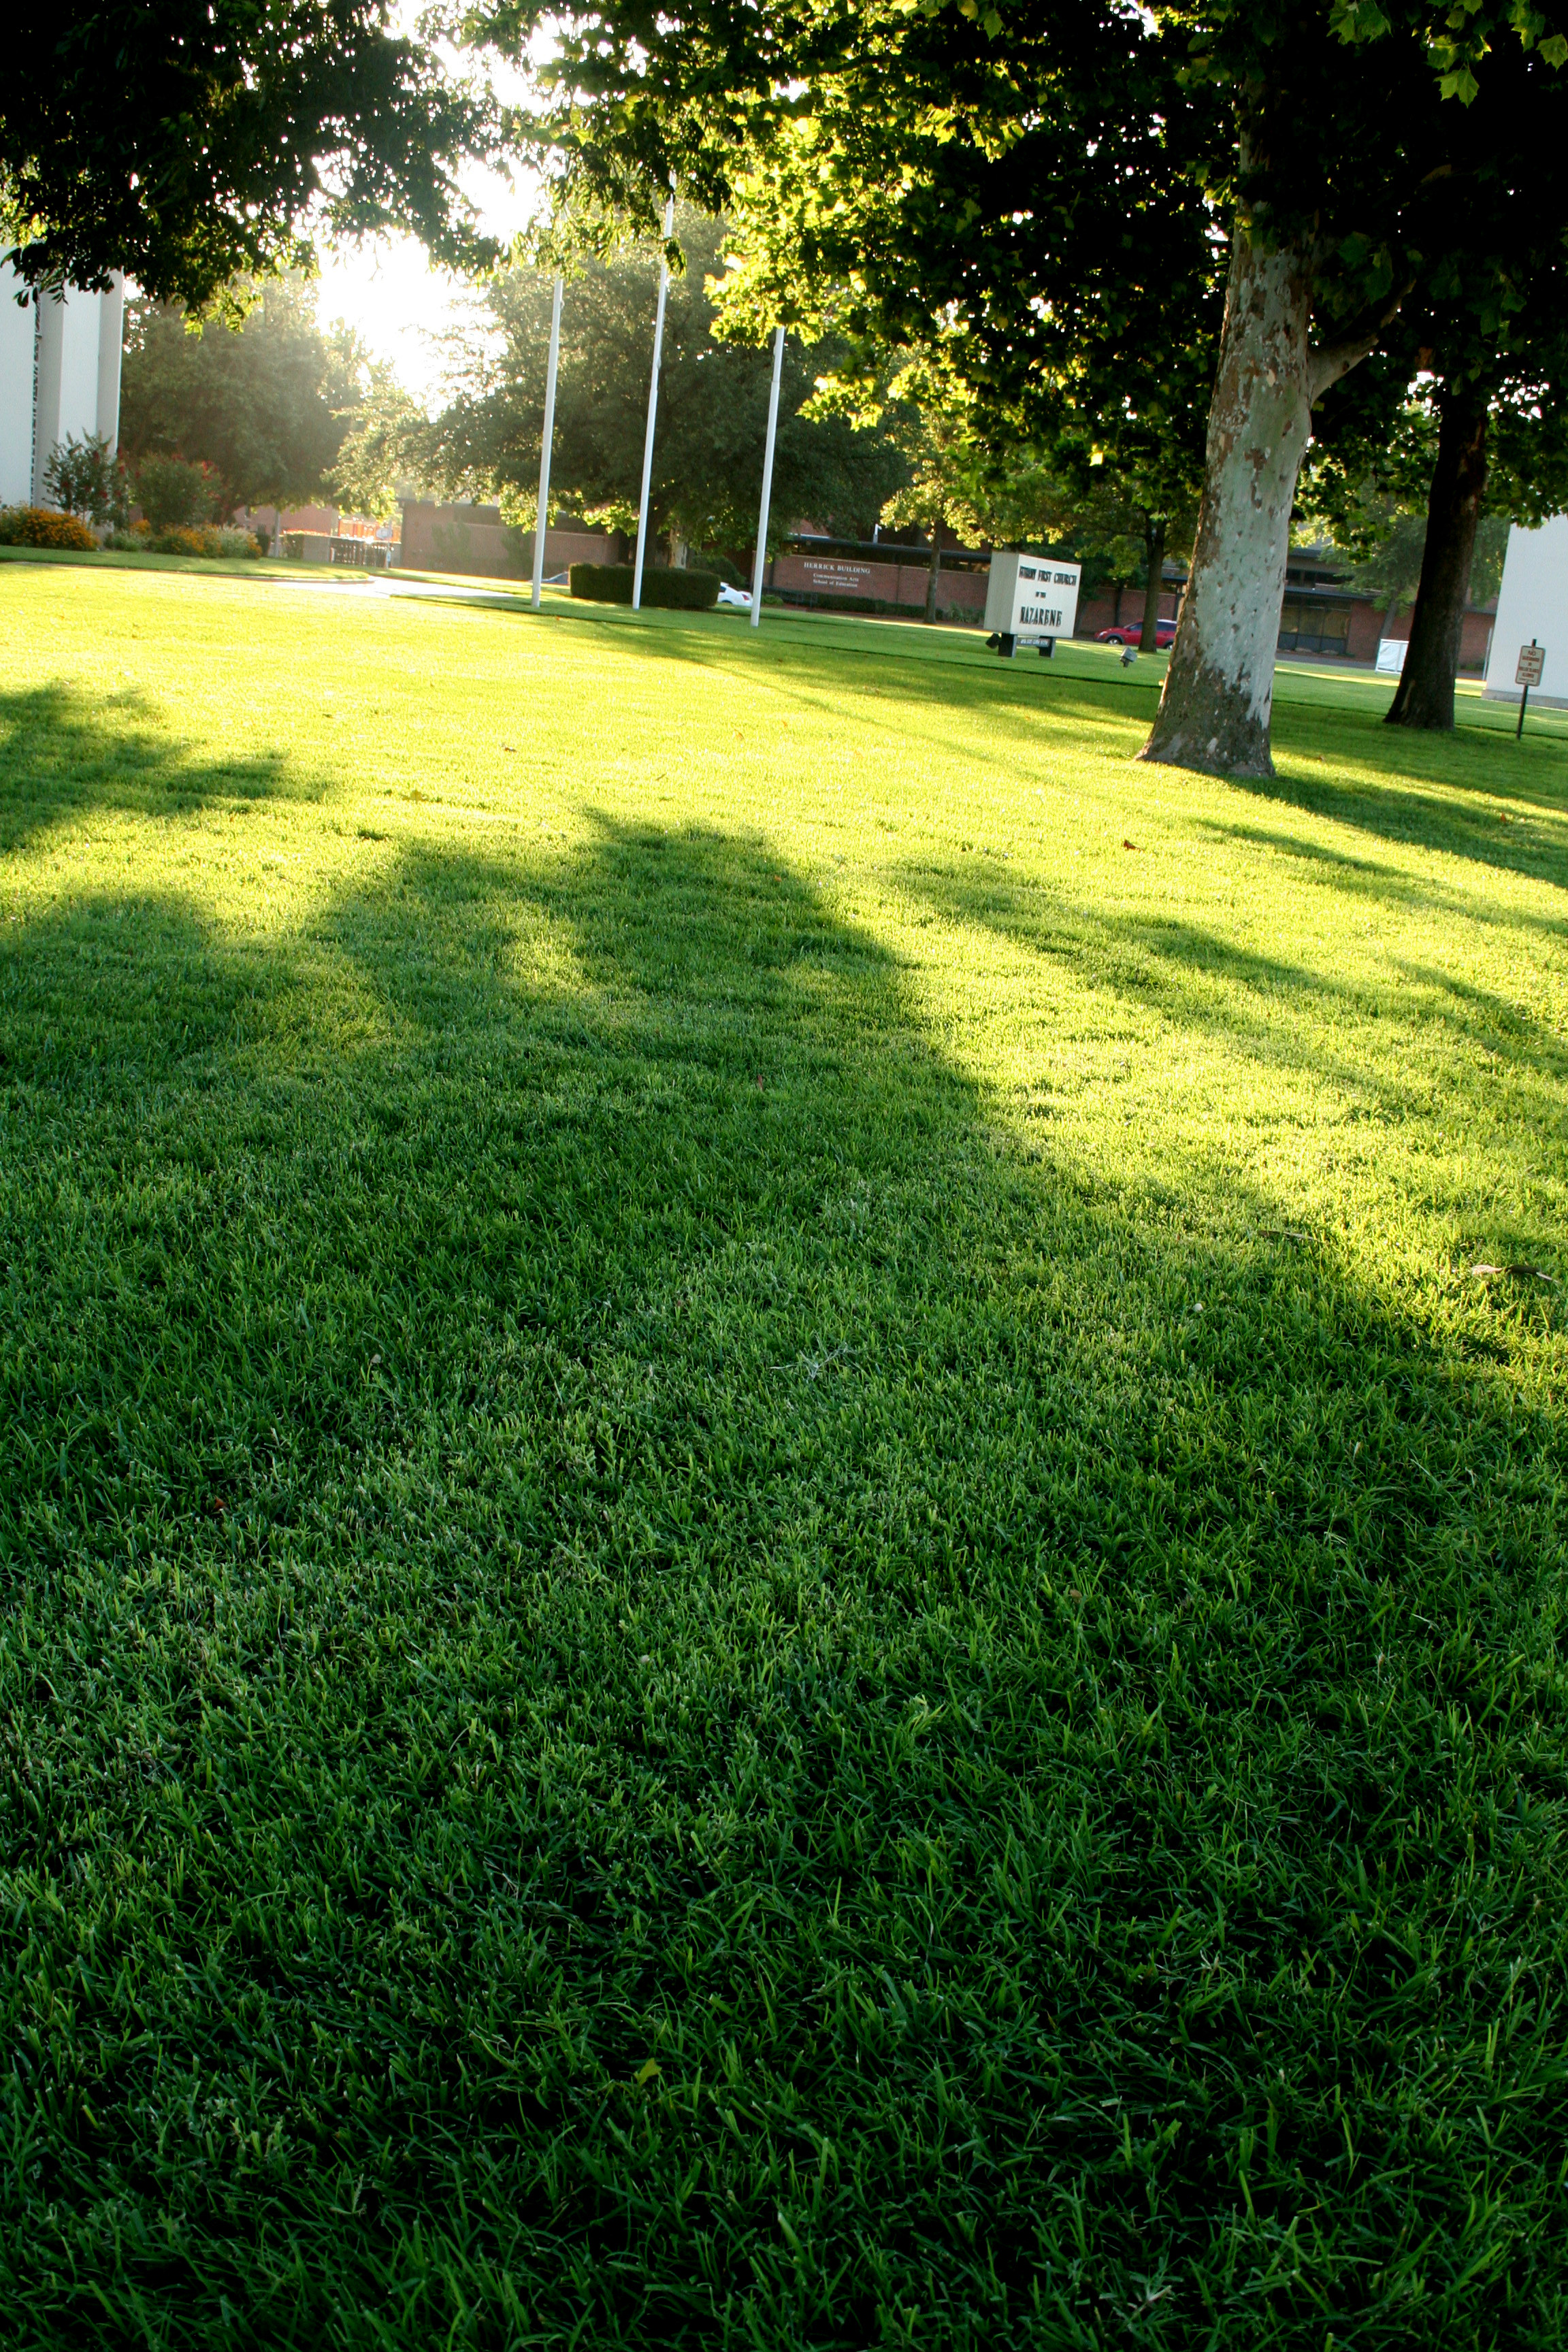
Trees – What Are Your Trees Worth?

Have you ever pondered the value of your trees?
Steve Dobbs, author of the book Oklahoma Gardener’s Guide put it this way:
“Trees are truly the pillars of our landscapes. Think of trees as an investment for future generations.”


So, what are trees worth?
Homes with “excellent” landscaping can expect a sale price 6-7% higher than equivalent houses with “good” landscaping. Improving “average” to “good” landscaping can result in a 4-5% increase. Clemson University
Landscaping can bring a recovery value of 100-200% at selling time. (Kitchen remodeling brings 75-125%, bathroom remodeling 20-120%). Money Magazine
A mature tree can have an appraised value between $1,000 and $10,000. Council of Tree and Landscape Appraisers
99% of real estate appraisers concurred that landscaping enhances the sales appeal of real estate. Trendnomics, National Gardening Association
98% of realtors believe that mature trees have a “strong or moderate impact” on the salability of homes listed for over $250,000. American Forests, Arbor National Mortgage


What are some of the insect and disease issues that are currently threatening your landscape investment?
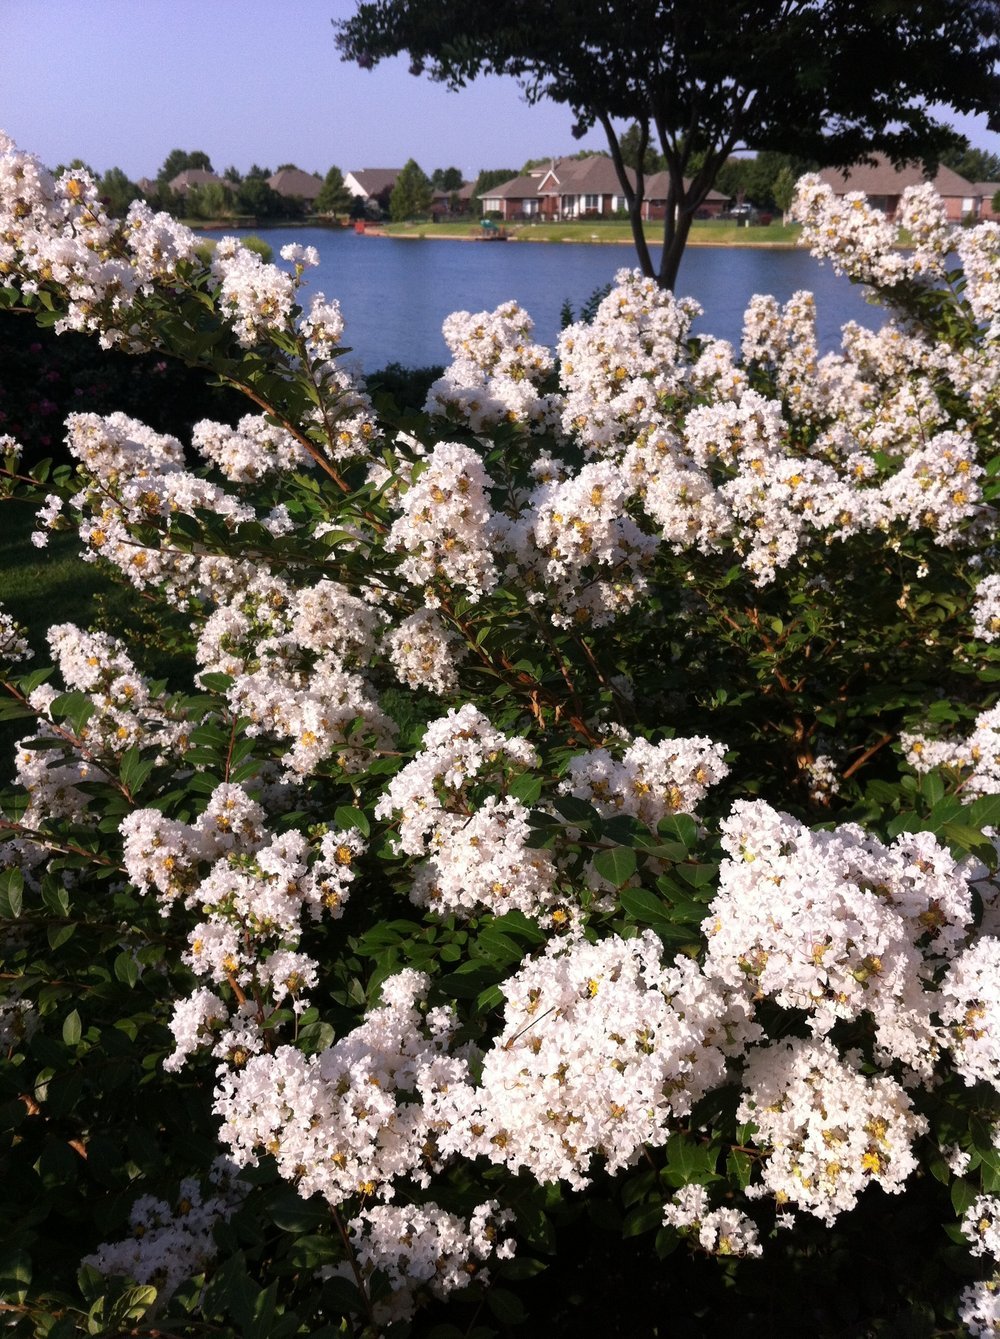
Scale – Common on trees and shrubs. Scales produce honeydew which is a growing medium for sooty mold fungi. The honeydew also attracts ants. Rarely do they kill a plant themselves, but they predispose plants to attack from other insects and pathogens. There are two types of scale — soft scales, common on Redbud and Oaks, — and hard scales, such as the white scale found on Crape Myrtle.

White scale, a hard scale, is commonly found on Crape Myrtle. Just like soft scale on Oaks, rarely will it kill the plant but it does invite other insects and diseases that will cause harm.

Soft scale are common on Oaks. They rarely kill a tree but do weaken it making it susceptible to attacks from other insects and disease.
Bagworms – One of the most damaging pests in our landscapes. Bagworms start out very small and hard to notice. As they mature, their feeding becomes more apparent. On evergreen trees, the tips will appear brown and unhealthy. As they continue to feed, plants can become defoliated and even die, especially on evergreen species because their leaves do not replenish as well as deciduous plants.

Evergreens with tips that are turning brown and looking unhealthy likely are being attacked by bagworms.

Bagworms start out very small and nearly unnoticeable, but as they grow and feed on evergreens they become one of the most damaging pest to our landscapes.
Webworms – Caterpillars weave a loose web around tree branches while they are munching on the leaves. Favorite trees include hickory, mulberry, oak, pecan, popular, redbud, sweetgum, and willow. But, you can find them on most ornamental shade trees when populations are heavy. There can be 2 or 3 generations per season with the last generation causing damage when the branch tries to rebud just before a killing frost. When this occurs, you can expect the affected branch to die.

Webworms weave loose webs around tree branches. The late summer to early fall generation can result in twig and branch die back.
Borers – Nearly all trees are subject to borers when they are injured or weakened by disease or stress. Borer refers to the larval stage of some beetles and moths that feed inside the stems, branches, and trunks of plants. Generally, the presence of borers is indicated by their emergence holes through the bark. Other signs are a gummy fluid oozing from the tree, dead areas under the bark, or small piles of sawdust. When left unchecked trees, will decline and are likely to die. There are many types of borers with varying life cycles and habits.

Evidence of borers are holes, oozing fluid and saw dust. Borers often attack trees that are injured or weakened by disease or stress.

This large Blue Atlas Cedar was under attack by borers last summer. Trunk injections were made with an insecticide to control boring and chewing insects.
Anthracnose – Spores are transported to new buds and shoots in the spring and are enhanced by cool, wet conditions. There are many species of anthracnose that impact a variety of deciduous trees. The primary signs are tan to red-brown lesions that extend along the veins and edges of the leaf followed by considerable defoliation and sometime complete leaf loss.

Anthracnose is a fungus that results in leaves curling, wilting and defoliating. The disease is enhanced by wet and cool conditions.
Chloroses – Iron or manganese chlorosis describes a condition in which a tree’s foliage loses its healthy green color and fades to pale green or yellow hue. If allowed to progress, it will cause slow growth, leaf loss and eventually tree death. It is particularly prevalent in oaks. It is caused by deficiencies of the micro-elements iron and manganese. Trees growing in poorly drained soil are also susceptible.

The signs of chloroses are leaves fading from a healthy green to pale green to yellow.

By injecting minerals directly into the tree, cholorses can be reversed.

A severe case of chloroses on a mature oak.

One year after treatment the oak leaves have returned to a healthy green color.
Sudden Oak Death – Sudden oak death is often a fatal tree disease caused by Phytophthora ramorum which attack roots. Leaves appear drought-stressed, turning dull green, yellow, red or purple as they wilt. Bleeding cankers form at the base of the trunk and eventually lead to death. The disease is often followed by beetle infestations.

Sudden Oak Death will result in leaves turning brown, leaves appearing drought stressed and wilting. A trunk injection of a fungicide will give the tree a chance to recover.
Hall | Stewart Lawn + Landscape Plant Health Care Professionals can help you keep your landscape investment healthy:
Tree & Shrub Care Program –
Four regularly scheduled plant health care visits to keep your trees and shrubs healthy throughout the year. Program includes:
Dormant oil application to smother overwintering insects
Two spring to summer applications to minimize insect and disease population during the growing season
Fall fertilizer application
Applications are tailored to your plant species

Trunk Injections –
An effective treatment to control insect, disease and nutrient issues on larger trees.
Specific formulations are injected directly into the truck where it is quickly taken up by the vascular system and distributed throughout the tree.
In most situations, the treatment provides protection for 12-18 months.
Unlike spraying, herbicides injected directly into the tree limits impact to the surrounding environment.


Deep Root Feeding –
Deep root feeding techniques inject fertilizer 5-6” below the surface ensuring fertilizer reaches tree roots. As trees mature, they are in competition with the turf grass growing on top of roots for nutrients.
Deep root feeding restores soil health for struggling trees by providing essential nutrients.
Signs your large trees may need deep root feeding:
Reduced foliage in the canopy.
Light green to yellowish leaves.
Little to no annual growth.
A healthy tree is more likely to withstand harsh weather conditions, pest infestations, and diseases.


We believe…
Trees are worth it.
Trees make a difference in the appearance of our communities.
Trees make a difference in the way we feel.
Trees increase the value of a property.
Trees, trees... trees just make the world a better place!
We believe trees are the pillars of our landscapes.


Hall | Stewart’s goal is to help you have your best lawn and landscape.
If your trees need help, please call (405)367-3873 or respond to this email to schedule a time for a Plant Health Care Professional to visit your landscape.
Lorne Hall
Hall | Stewart Lawn + Landscape
(405)367-3873
Grubs – Our Most Consistent Turf Damaging Insect

For those of you who experienced the army worm invasion of 2021, I’m confident you disagree with “Grubs are the most consistent turf damaging insect.”
The key word is “consistent.”
Yes, there are many turf damaging insects and when conditions are just right, and populations increase, damage occurs. That was the case in July and August of 2021. Army worm populations reached damaging levels, resulting in battalions of army worms marching across lawns.
But grubs…Grubs are a consistent pest, every year!
White grubs consistently, year over year, cause more turf damage than any other insect.
Here is what you need to know about grubs…

Grubs are white, c-shaped, insects with three sets of legs who feed on all types of turfgrass roots.
What is a grub worm –
Grubs, specially called White Grubs, are white, C-shaped insects with a chestnut-colored head and 3 pairs of legs. Size will range from ¼” to 1 ½” in length depending on age.
They feed on grass roots of all types of turf resulting in yellowing, wilting turf, dead patches, and when left unchecked they will destroy the grass roots to the point that your lawn can be rolled up like it is a piece of carpet.
Signs you have a grub problem -
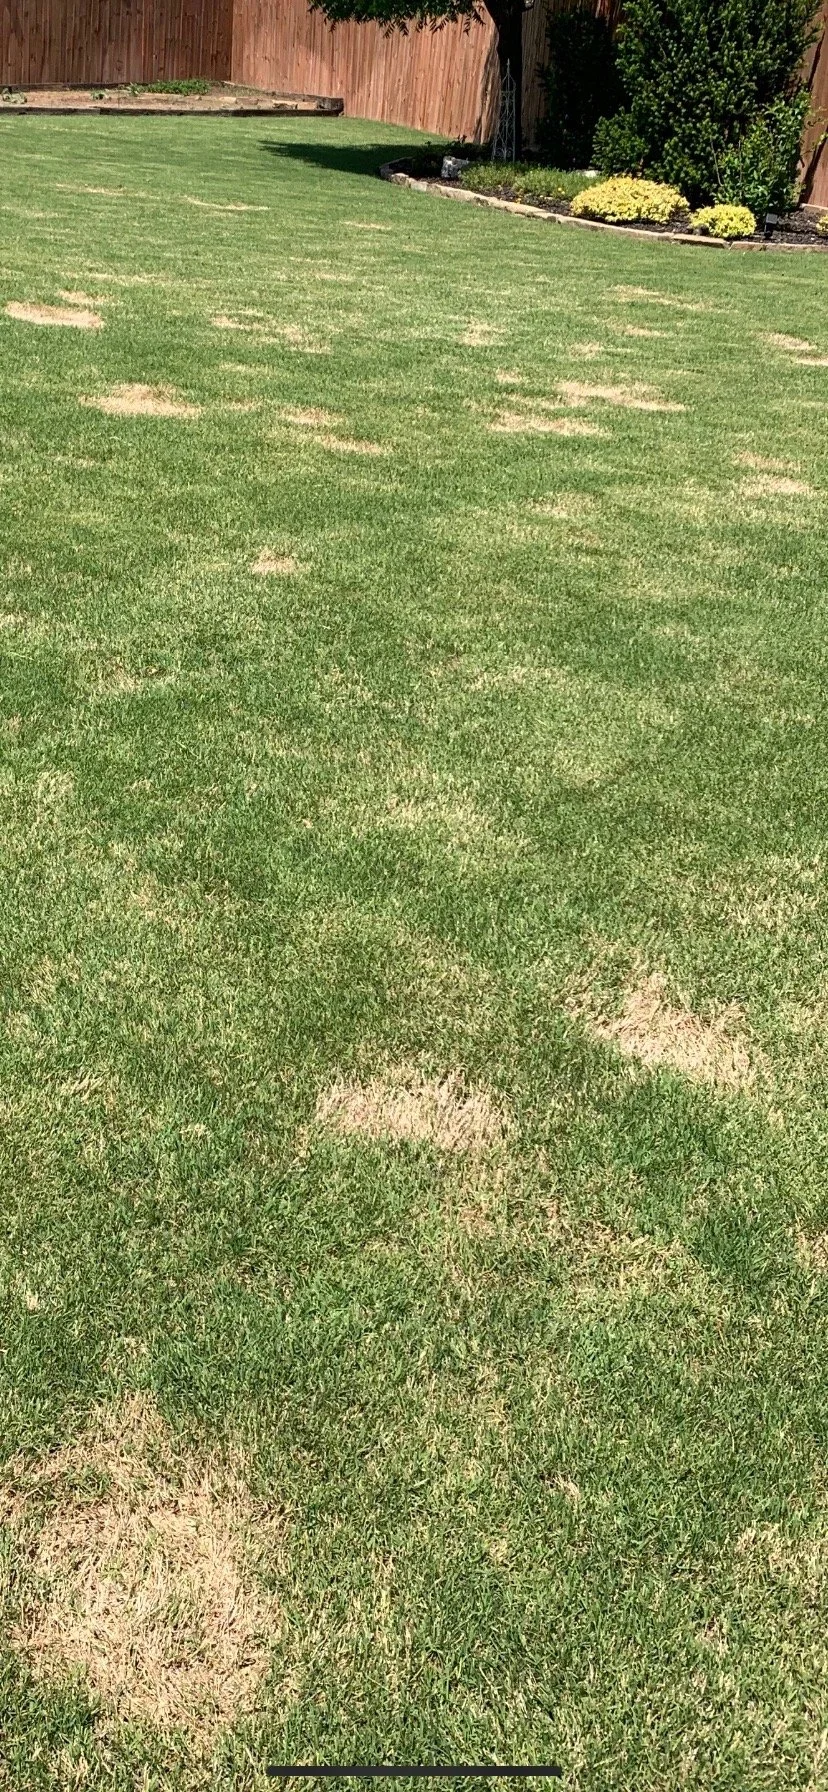
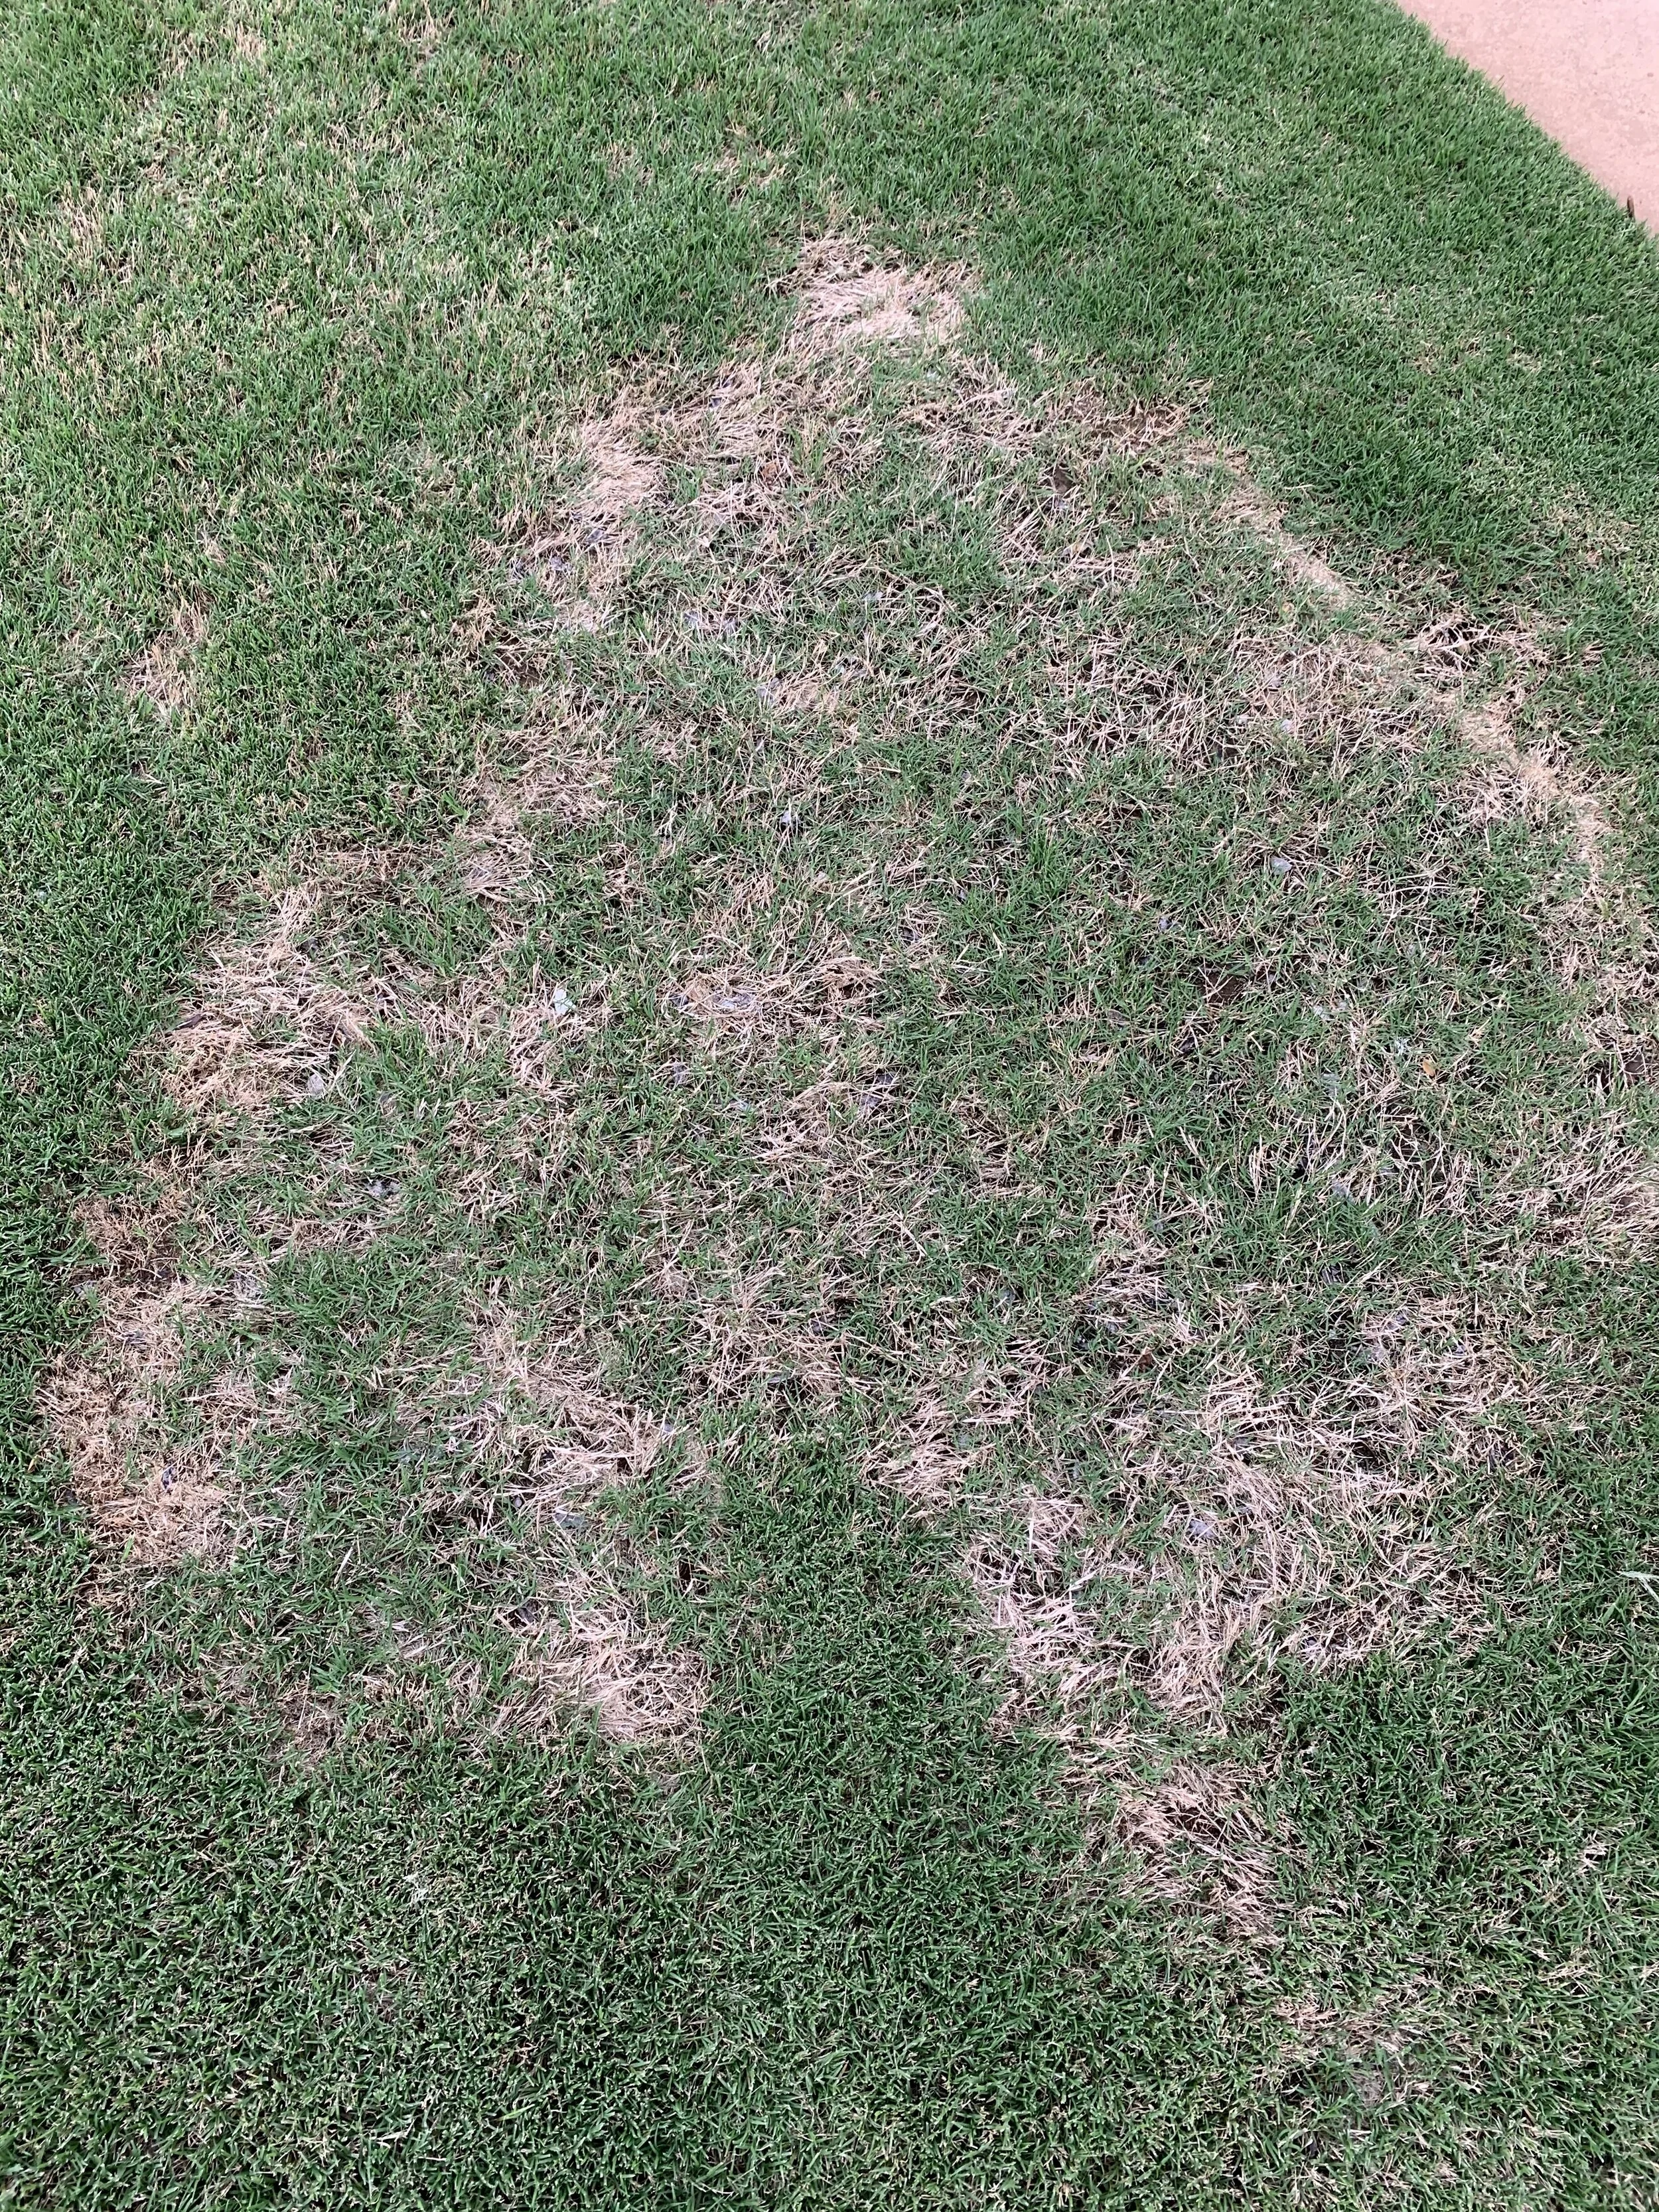
Early indications of grub damage may include patchy areas of wilting, discolored or stressed turf resembling drought stress.
As the grubs continue to destroy roots, the effected patches expand outward into irregular shaped patches of dying turf.
If you have areas that are wilting, discolored, stressed or dying, it could be grubs, our most consistent turf damaging insect.
Often grubs will start out centralized in an area, but will spread throughout an entire lawn when left untreated.
An indication you have white grubs (often before you have any idea you have a grub problem) is damage caused by armadillos, skunks, possums, and raccoons foraging for grubs. If your home is near wooded or native areas, damage from animals digging for grubs is more common.

Animals foraging for grubs will destroy your lawn in just one night. If you have experienced this, annual preventative grub control treatments should be a part of your routine maintenance plan.
The first step in confirming if you have a grub problem is to check your irrigation for proper coverage. Place a Hall | Stewart Water Gauge or any container in the area showing signs of wilting, run your system through a cycle to see if the area is receiving sufficient moisture.
The next step is to dig up small sections on the edge of the dying grass to see if grubs are present.
The third step is to pull on the grass to see if it comes up easily with few roots.

If you can pull up the grass in the damaged area easily, as if there are no roots hold the turf down, then grubs have been feeding on the grass roots.
If the stressed area is receiving water,
if you find grubs when you dig around the edges of the area,
if you can easily pull the turf up,
treatment is required.
If you find an occasional grub, it is common to find a grub, it does not mean you have a grub problem or that treatment is needed.
In a healthy turf, 5 to 10 grubs per square foot is considered the threshold above which damage will occur.
The grub life cycle -
White grubs complete their life cycle of egg, larva, pupa and adult in one year.
The June bug (beetle), the adult form of the grub worm, emerges in late May to early July. The beetles, attracted to outdoor lights and light from windows, are mostly active in the night. After mating, females burrow into the soil and lay about 50 eggs.

The adult form of the White Grub worm is the June Bug. June Bugs lay eggs in July which become White Grubs in August.
Two to three weeks later the larvae hatch and start feeding first on organic matter, later moving to grass roots.
Grubs go through three stages as they grow. In each stage, their size and appetite grow exponentially.
Stage 1 - Late summer through the fall, grubs are small and feeding near the soil surface. During this phase grubs grow rapidly, feed heavily, and are fully grown by early September.
Stage 2 - During the winter, grubs move deeper into the soil and are mostly dormant.
Stage 3 - In the spring, grubs begin moving closer to the soil surface. As soil temperatures warm, the full-grown grub returns to heavy feeding and can be very destructive.
In late May and early June, the larvae return to adulthood as the June beetle starts the cycle all over again.
Because the June beetle is attracted to light, eggs are commonly laid near outdoor lights.
If you live near a neighborhood streetlight or leave your outdoor lights on at night, you are more likely to see heavier populations of June beetles and consequently a higher probability of grub damage.
Control
There are two methods for controlling white grubs: Preventive and Curative.
Preventive applications of insecticides are systemic in nature. Preventive insecticides are absorbed by the turfgrass roots. As grubs feed on treated roots, they consume a lethal dose of the insecticide. Preventive applications are best applied April through early summer.
Curative applications of insecticides are applied in August through the fall. Curative applications control the insect by making contact with the insect. Contact insecticides are most effective when the grubs are small and feeding near the surface in the late summer and early fall.
There are two approaches to grub control:
Approach 1 – Preventive Plan. If you have a history of grub damage, have outdoor lighting, have experienced the destruction of animals foraging for grubs, preventive applications of grub control should be a part of your normal maintenance program.
Approach 2 – Wait and See. Inspection of your lawn on a regular basis is the key to this approach. If you see areas of wilting, yellowing, or dying turf, check the area by first making sure the area is not just dry, then dig around the area to see if grubs are present, then tug on the turf to see if it comes up easily. Follow up with a curative insecticide if you find grubs are the cause of the stress you are witnessing.
Note: When making a grub treatment, watering is important. If soil is dry, watering (1/4-1/2”) before the application will encourage grubs to come closer to the surface. After the insecticide is applied, water is required to move the insecticide into the soil where the grubs are feeding. It is best to water within 2-3 days as the insecticide will not be active until it is watered into the soil.
Hall | Stewart wants you to help you have your best lawn!
Control of grubs is an important step in having your best lawn!
If you need help determining if you have a grub problem or if you have had grub problems in the past, we would be glad to help.
Simply call (405)367-3873 or reply to this email.
Lorne Hall
Hall | Stewart Lawn + Landscape
(405)367-3873
What is your lawn doing for you?

Hard to believe, but we have arrived at the mid-point of the lawn care season. That’s right…if you typically mow your lawn 30 times per season, you have probably made 15 trips across your lawn so far in 2024.
So, why do you do it? What motivates you to have a great lawn?
Why does Hall | Stewart Lawn + Landscape have a passion for helping you have your best lawn?
Are all our efforts only in the pursuit of laying claim to the best lawn on the block?
Why do we work so hard to have a great lawn?
Is there anything more to a healthy, green lawn than curb appeal and feeling good about ourselves?
Have you ever pondered what a healthy lawn does for you?
Too often great lawns get a bad rap.
In the race to reduce carbon output and conserve water, have we forgotten the long list of benefits of a healthy lawn?
Concerns over water supplies, herbicides, pollutants, and your carbon footprint have caused some to race toward a more minimalist approach to landscapes and lawns.
Has the American lawn, green, neatly trimmed, symbol of civic virtue, outlived its purpose?
Is it good for the environment when living plants are replaced with artificial materials or hardscape?
Yes, water will be saved. Yes, there will be less fertilizer used.
But is there more to consider?
When it comes to the benefits of turfgrass most people don’t give it much thought. The environmental benefits of a healthy lawn are seldom considered.
Can you answer the question, “What is your lawn doing for you?”
Let’s explore a few things your lawn is doing for you:


Turfgrass captures carbon.
Healthy lawns absorb carbon dioxide and replace it with oxygen. A lawn is simply a grouping of thousands of oxygen making plants.
The average, managed lawn captures more carbon than a lawnmower produces.
The average lawn captures 300 lbs. of carbon per year and has a net positive impact on our environment.

A 2,500 sq. ft lawn, half the size of the average lawn, provides enough oxygen for a family of four.

What is a managed lawn? A lawn that receives regular mowing, some fertilizer and weed control applications. Maintaining a healthy turfgrass environment provides us with a critical component of a healthy world – less carbon.
An Ohio State Study found lawns that received only an occasional mowing and no fertilizer or weed control capture far less carbon.
Maintenance habits have a big influence on whether turfgrass helps or hurts the environment. Lawns cut too short typically create a negative carbon exchange. Weedy lawns, nutrient deficient lawns, and drought stress lawns result in thin lawns that have a negative impact on the environment.
EPA reports that turf grasses in the United States offset the carbon emissions of 5.2 million cars every year.
Actively growing and healthy lawns reduce heat.
A well-maintained lawn around homes can reduce air temperatures on the average 15 to 30 degrees compared to concrete, asphalt or gravel.
The California Energy Commission found the cooling effect of an average size lawn is equal to nearly 9 tons of air conditioning.
Grass cools the air by absorbing solar radiation and through evapotranspiration.
Studies estimate that improved planting and maintenance of lawns and landscapes around homes could reduce total US air conditioning requirements by 25%.

A healthy turf captures pollutants and reduces runoff.
Less runoff increases infiltration of water into the groundwater supply. A dense root system traps and removes pollutants moving through the soil and into the water supply. The natural filtration system of healthy turfgrass improves water quality.
Lawns are the best natural water purifier.
Turfgrass is more effective at stopping erosion than any other plant. Grass naturally slows runoff and allows more water to be absorbed.
Healthy lawns improve air quality.
Healthy lawns contribute to improved air quality by acting as traps for dust and particles. Because a lawn completely covers a soil surface, particles are prevented from being blown to another area.
Compared to hard surfaces, turf grass traps 10 to 30 times more air particles and pollution.
Lawns are a major component of higher home values.
Smart Money reported consumers value a home with a well-maintained lawn and landscape on average 11.3% over the base value.
Well maintained lawns are one of the most important factors individuals and families consider when deciding where to live.


Yes, there is a place for synthetic turf in the landscape as a part of an experiential environment.

Great lawns benefit the community and human health.
Green areas enhance community pride, provide places for people to come together and promote outdoor activity.
Lawns knit neighborhoods together. Lawns connect people.
Studies show people who live and work with a view of lawns and landscapes compared to hard surfaces are found to recover from stress quicker, experience fewer headaches, and are more productive.
Two studies show that children with Attention-Deficit/Hyperactivity Disorder have shown that green spaces, such as lawn areas, experience less severe symptoms.
Studies have also found the noise absorption capacity of turfgrass is significant.
Lawns are where memories are made. No doubt, everyone can easily think of fond memories on the lawn with family and friends.
The belief that well maintained lawns are an environmental liability is short-sighted.
Don’t fall for myth that a healthy lawn isn’t good for the environment.

Water concerns are legitimate. Education on proper watering is important. Deep, infrequent watering, based on the lawn’s needs, is a key to developing a healthy lawn that is good for the environment.
The scientific study “The Role of Turfgrasses in Environmental Protection and Their Benefits to Humans” stated, “the main cause for excessive landscape water use in most situations is the human factor.”


Excessive use of fertilizers and herbicides is a problem. But, when used properly, according to the label, fertilizers and herbicides are important ingredients in creating a healthy lawn that is beneficial to the world in which we live, work and play.
James Beard, Professor Emeritus of Texas A&M, said, “The environmental benefits of turfgrass are the most sensible and economically feasible approach to counter the greenhouse effect.”
So, what has your lawn done for you lately?
Far more than you can imagine!
Lorne Hall
Hall | Stewart Lawn + Landscape
(405)367-3873


Great Landscape Plantings Have 3 Levels

After last week’s post, What’s Bugging Your Landscape? complete with pictures of yucky bugs, I’m ready to return to a post with inspirational pictures! As one response last week put it, “this one made my skin crawl a little bit.”
Ever wonder what is the difference between an average landscape planting and a great landscape planting?
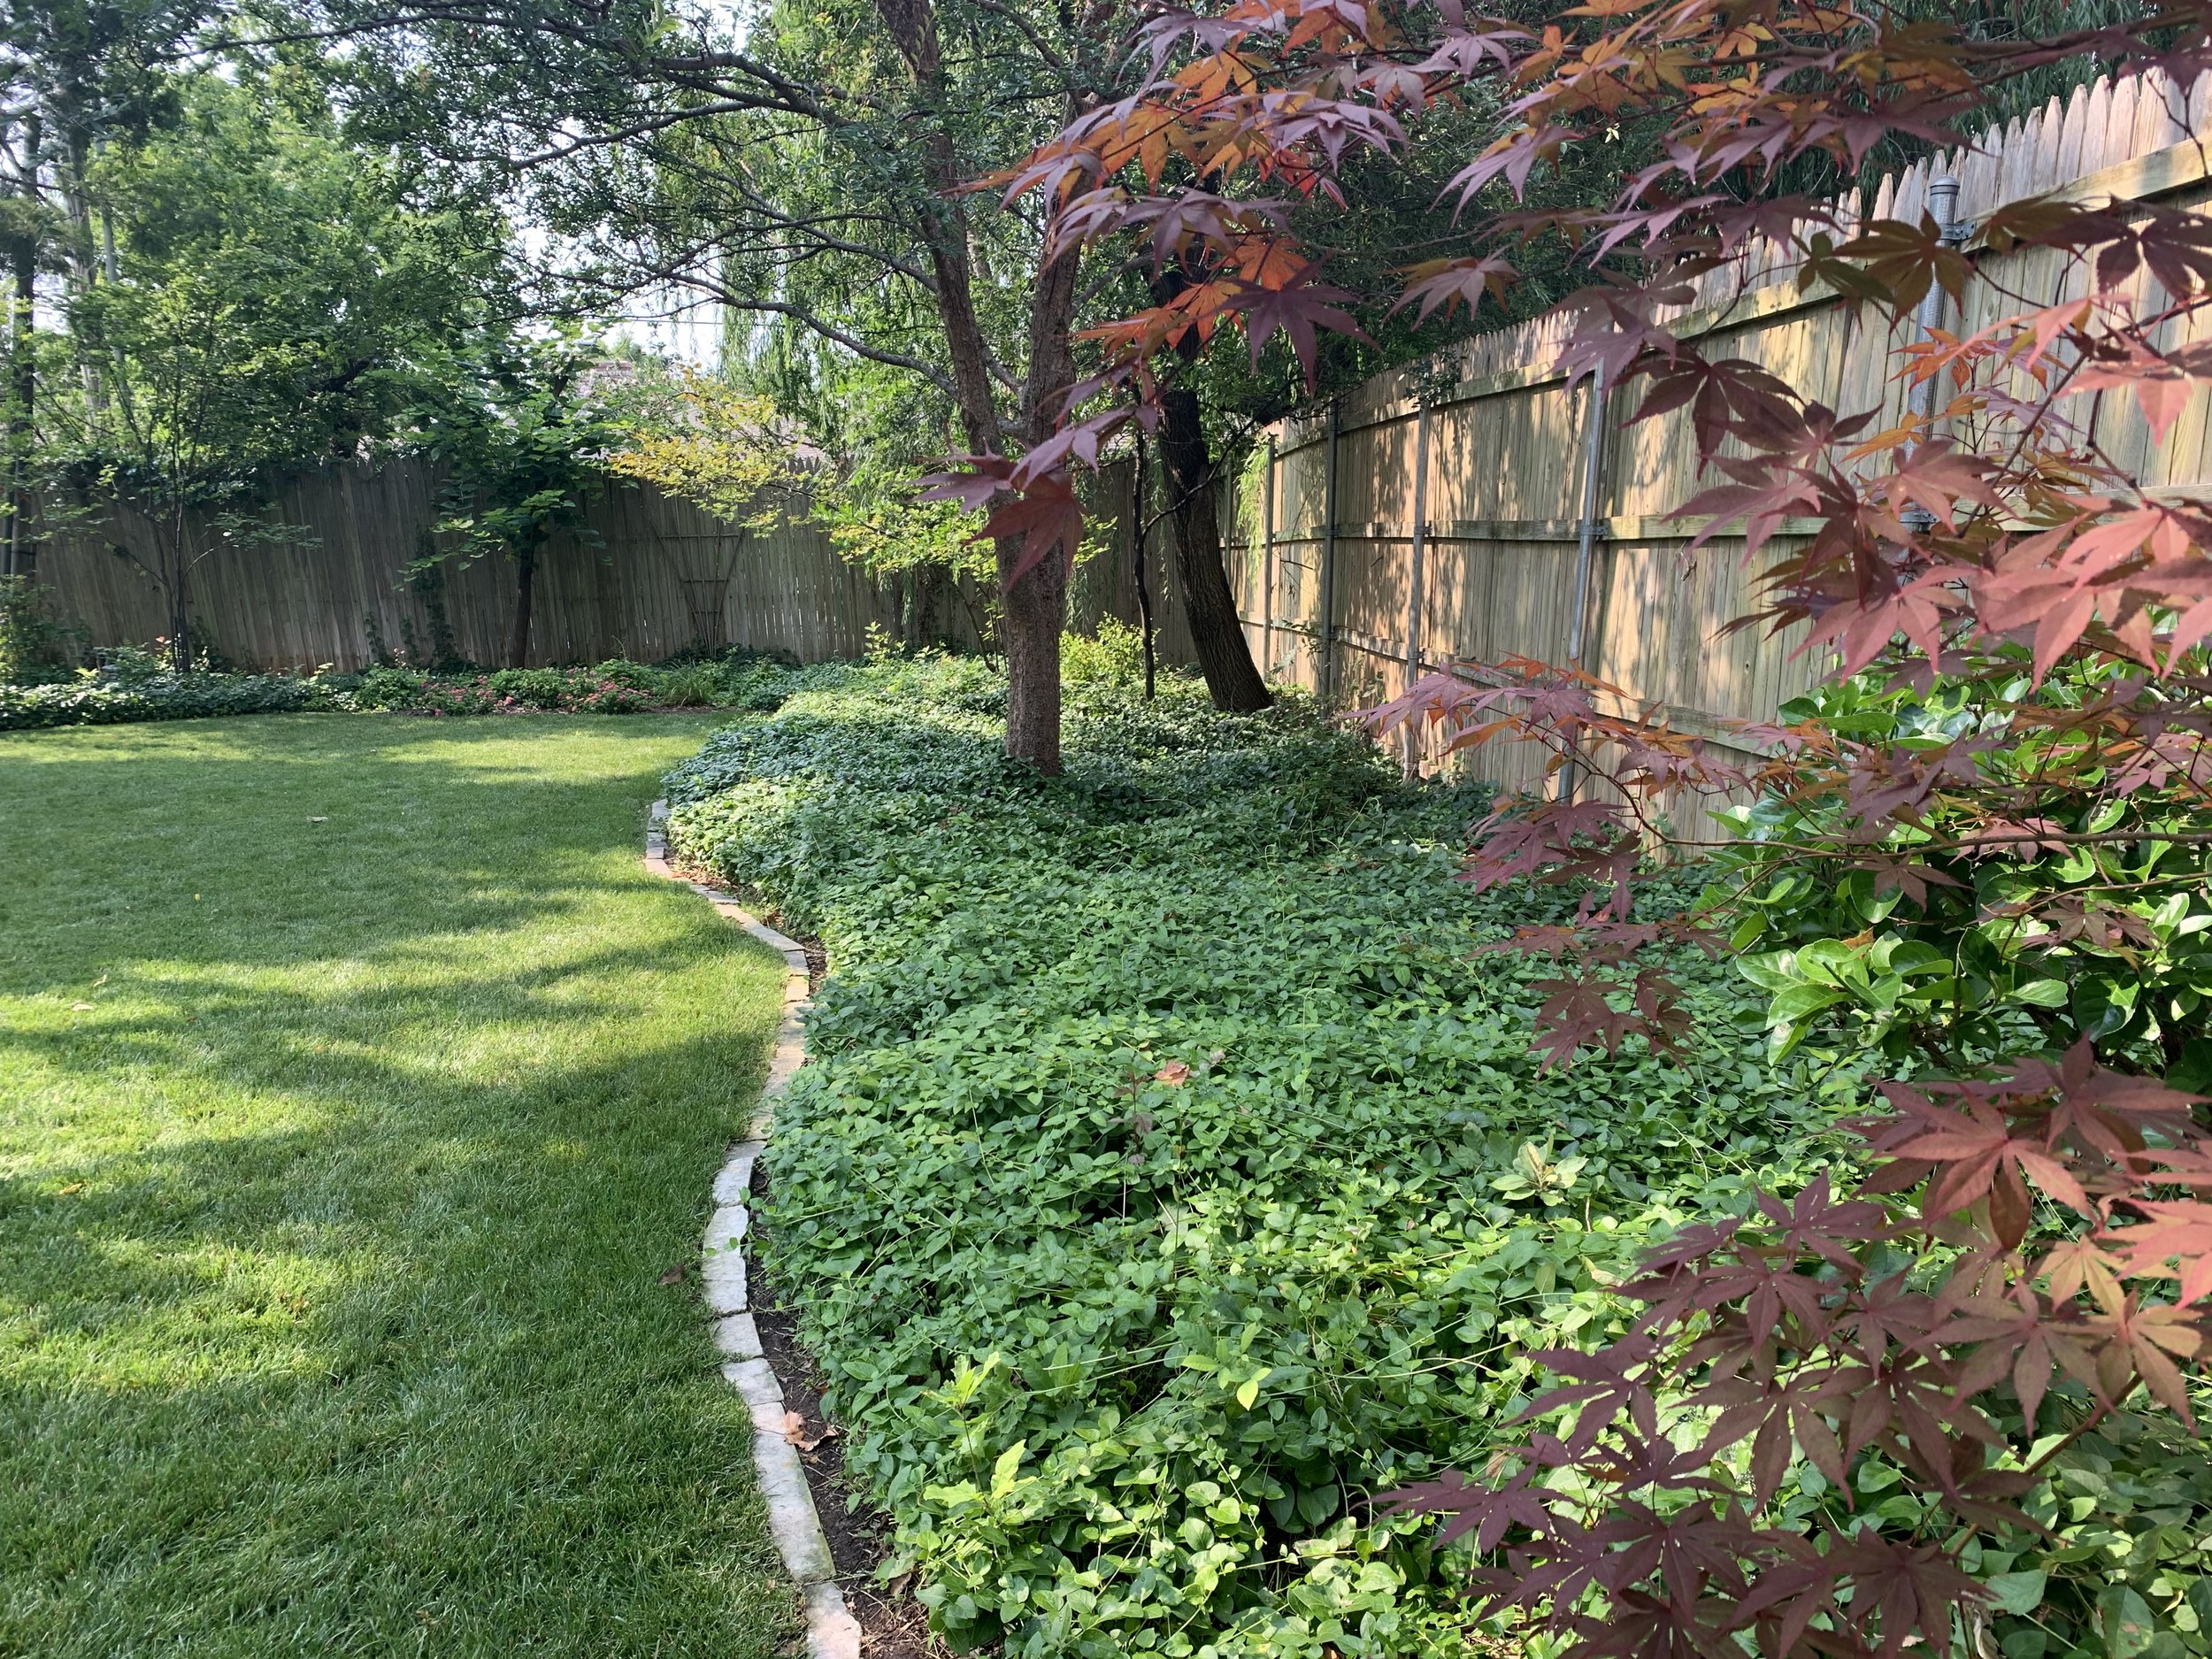
Great landscape plantings contain three levels: a front, a middle, and a back.
Let’s start with some basic design math:
Front – No more than 18” in height. Low ground covers, perennials, annual color and small plants.
Middle – Perennials, annual color, and smaller shrubs with enough height to start creating levels. 18” to 3’ in height.
Back – Shrubs and small trees. 3’ or more in height.
Note - Read the plant label and believe what it says about plant height and growing conditions. Remember, plants perform their best if they are allowed to grow to their natural height and form. If you have only 4’ of height for your back level, don’t plant a shrub with a mature height of 10’ with the idea you will keep it pruned. Even if you are diligent with your maintenance, the plant will never look as good as it would if it could grow naturally.

A newly planted landscape with boxwood and hydrangea for the back. Spirea, drift roses and perennials in the middle, and annual color in the front.
Walls and fences don’t count as the third level. To get the full impact, you need three levels in front of the object.
When selecting plants don’t go for all evergreen plants or all flowering plants. A mixture of evergreens with interesting leaf shapes and colors will add more interest.
The levels don’t have to be in a continuous, linear run of all the same plant material. A layer can contain a mixture of plants. Often the middle level works well with a few, specimen plants of interest, or groupings of perennials. Every landscape should include a few surprises.

Even in patio pots, planting for three levels adds interest. This pot contains a variegated euonymus for height, penta for the middle, and trailing periwinkle.
A few ideas to get you started:
Large ornamental grasses in the back, flowering shrubs in the middle, with a ground cover boarder in the front.
Crape myrtle in the back, evergreen shrubs in the middle, and annual color in the front.
Evergreens for the back with a mix of perennials in the middle and ground covers in the front.
A shady area idea is azalea in the back, hosta in the middle, and dwarf mondo in the front.
Garden trends are seeing a resurgence of classical flower plants such as roses, hydrangeas and peonies. With so many new innovations, using these as one of your layers will give a nostalgic feel to your landscape.
A great resource for ideas and plant materials is Monrovia.com. Monrovia has been a leader in landscape plant material for over 90 years. I am sure you will find their website a great resource. The content in this email is a combination of information from Monrovia and our years of experience in the local landscape industry.

Dwarf Globe Blue Spruce used as a mid level shrub adds color and interest to a landscape.

Espaliering a plant, such as Pyracantha, on a wall or fence is a great way to create levels in small spaces.
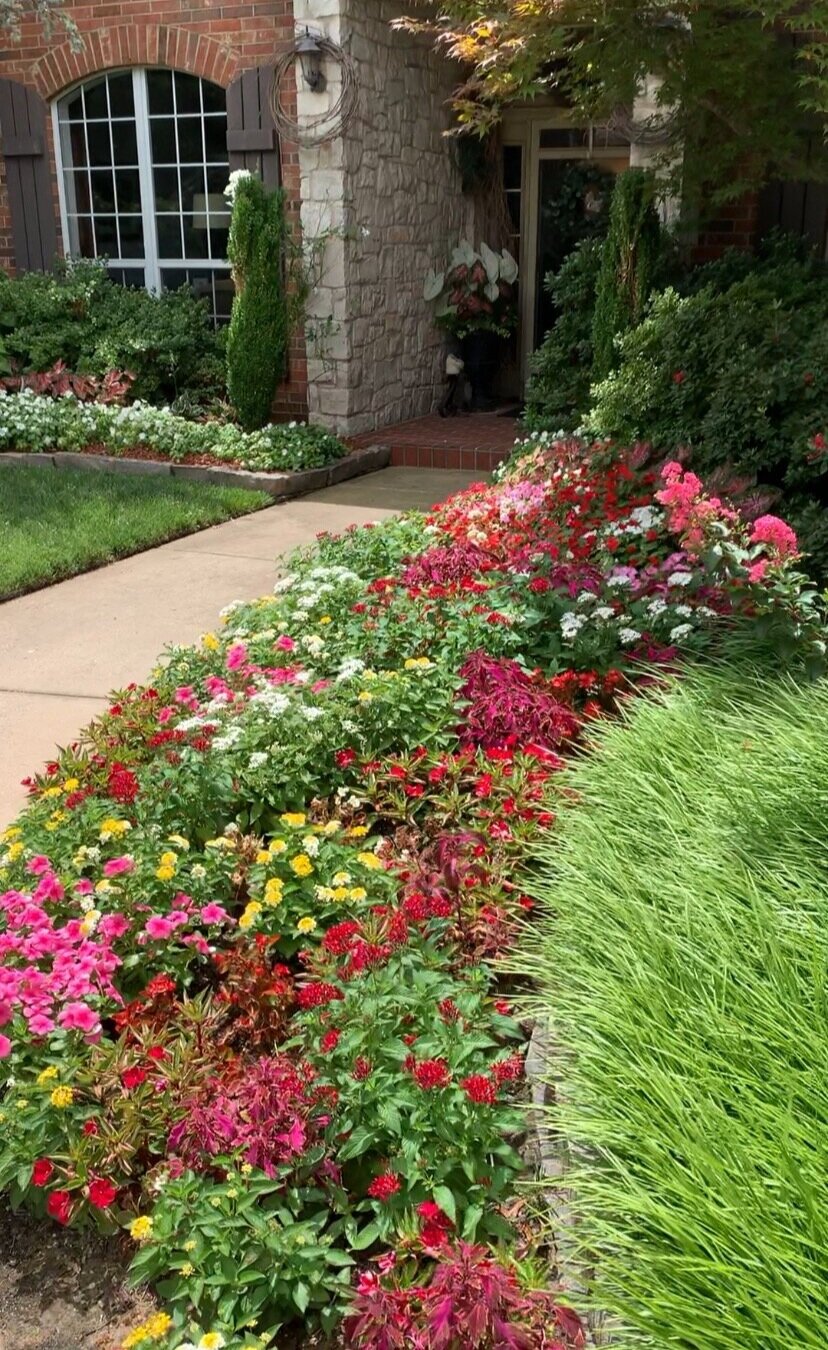
A first level of bright seasonal color creates a welcoming environment to a front door.


Annuals, perennials, flowering shrubs and evergreens planted in levels to add interest.
Height variation in landscape plantings, incorporating a mix of shrubs with different heights, adds depth and dimensions to your landscape.
Larger plants, particularly when you have the room, are great for adding interest and will soften the hard lines of walls and fences. They also are a great way of creating a natural screen or a free-standing boarder. The more space you have the bigger you can go with the back level.
If your space is limited and you still want to gain height, a climbing vine or shrub against a wall or fence is a great solution. Also consider using a flowering tree, boxwood, or pyracantha in an espaliered form.
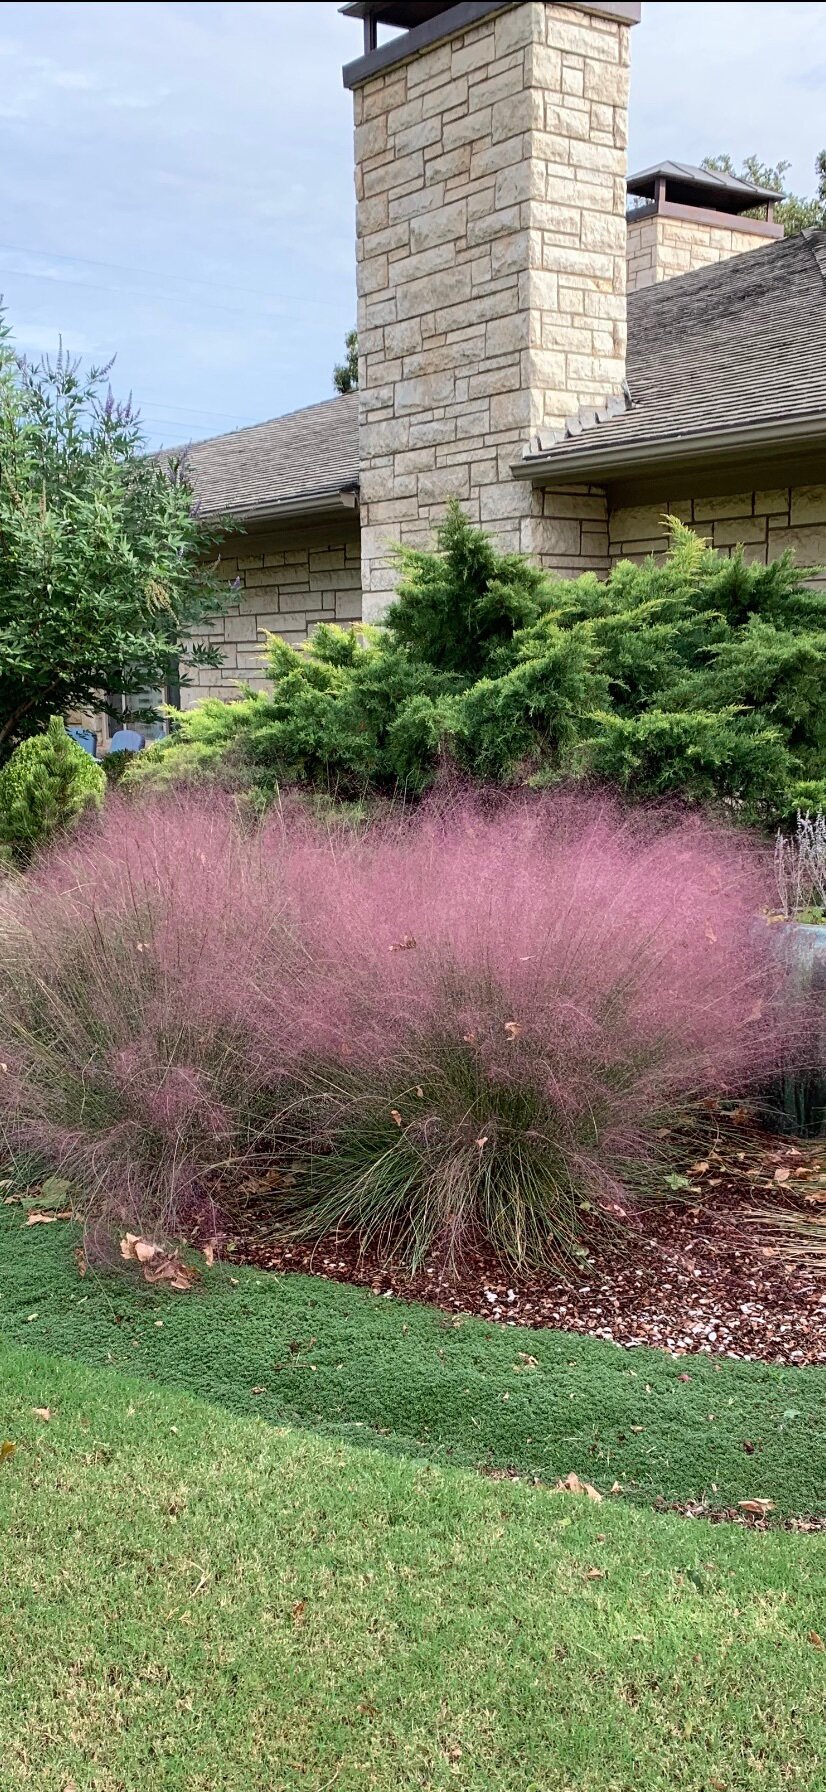
Need a low maintenance landscape option with three levels? Plant Pink Muhly Grass between groundcover and standard Juniper varieties. Little to no trimming will be required.

Large landscape containers are another way to create levels in the landscape.
It is also good to repeat a few shrubs or colors. Even when your goal is an informal landscape, some repetition helps draw all plants together into one landscape planting.
Plantings should have something of interest in every season. Consider one level planted in mostly evergreens, another in perennials, and another in annual color. The higher the visibility, more perennials, seasonal color, or blooming plants are recommended. Curb appeal increases as color increases.
Always welcome guests with flowers. A border of annual color along your front walk with a splash of more color near your front door creates a warm greeting.

Annuals planted in front of perennials to create levels.

Inpatients, Caladiums and Hostas create layers in front of Azalea and Hydrangeas in shady areas.
Best time to plant:
Fall is the best time to plant most plants. In the fall, plant materials benefit from cooler days while the soil temperatures are still warm enough root growth continues. The result is a plant that has a stronger root system the following summer.

Japanese Maple, hydrangea and ferns are a great way to create three levels in shade gardens.

Grasses make a great middle level when creating landscape plantings.
Summer planting:
But, what if you don’t want to just dream about landscapes, you want to plant now. Is it ok to plant during the summer?
Even though fall is the best time to plant new landscaping can be added year-round in central Oklahoma. Avoiding extreme heat (or cold) and drought is best. But, successful planting in the summer is possible with a little extra effort.
Follow these tips when planting in the summer:
Container-grown plants are best for summer planting because there is less transplant shock than with balled and burlaped or bare root plant material.
Dig a whole that is twice as wide as the plant container and 25% deeper.
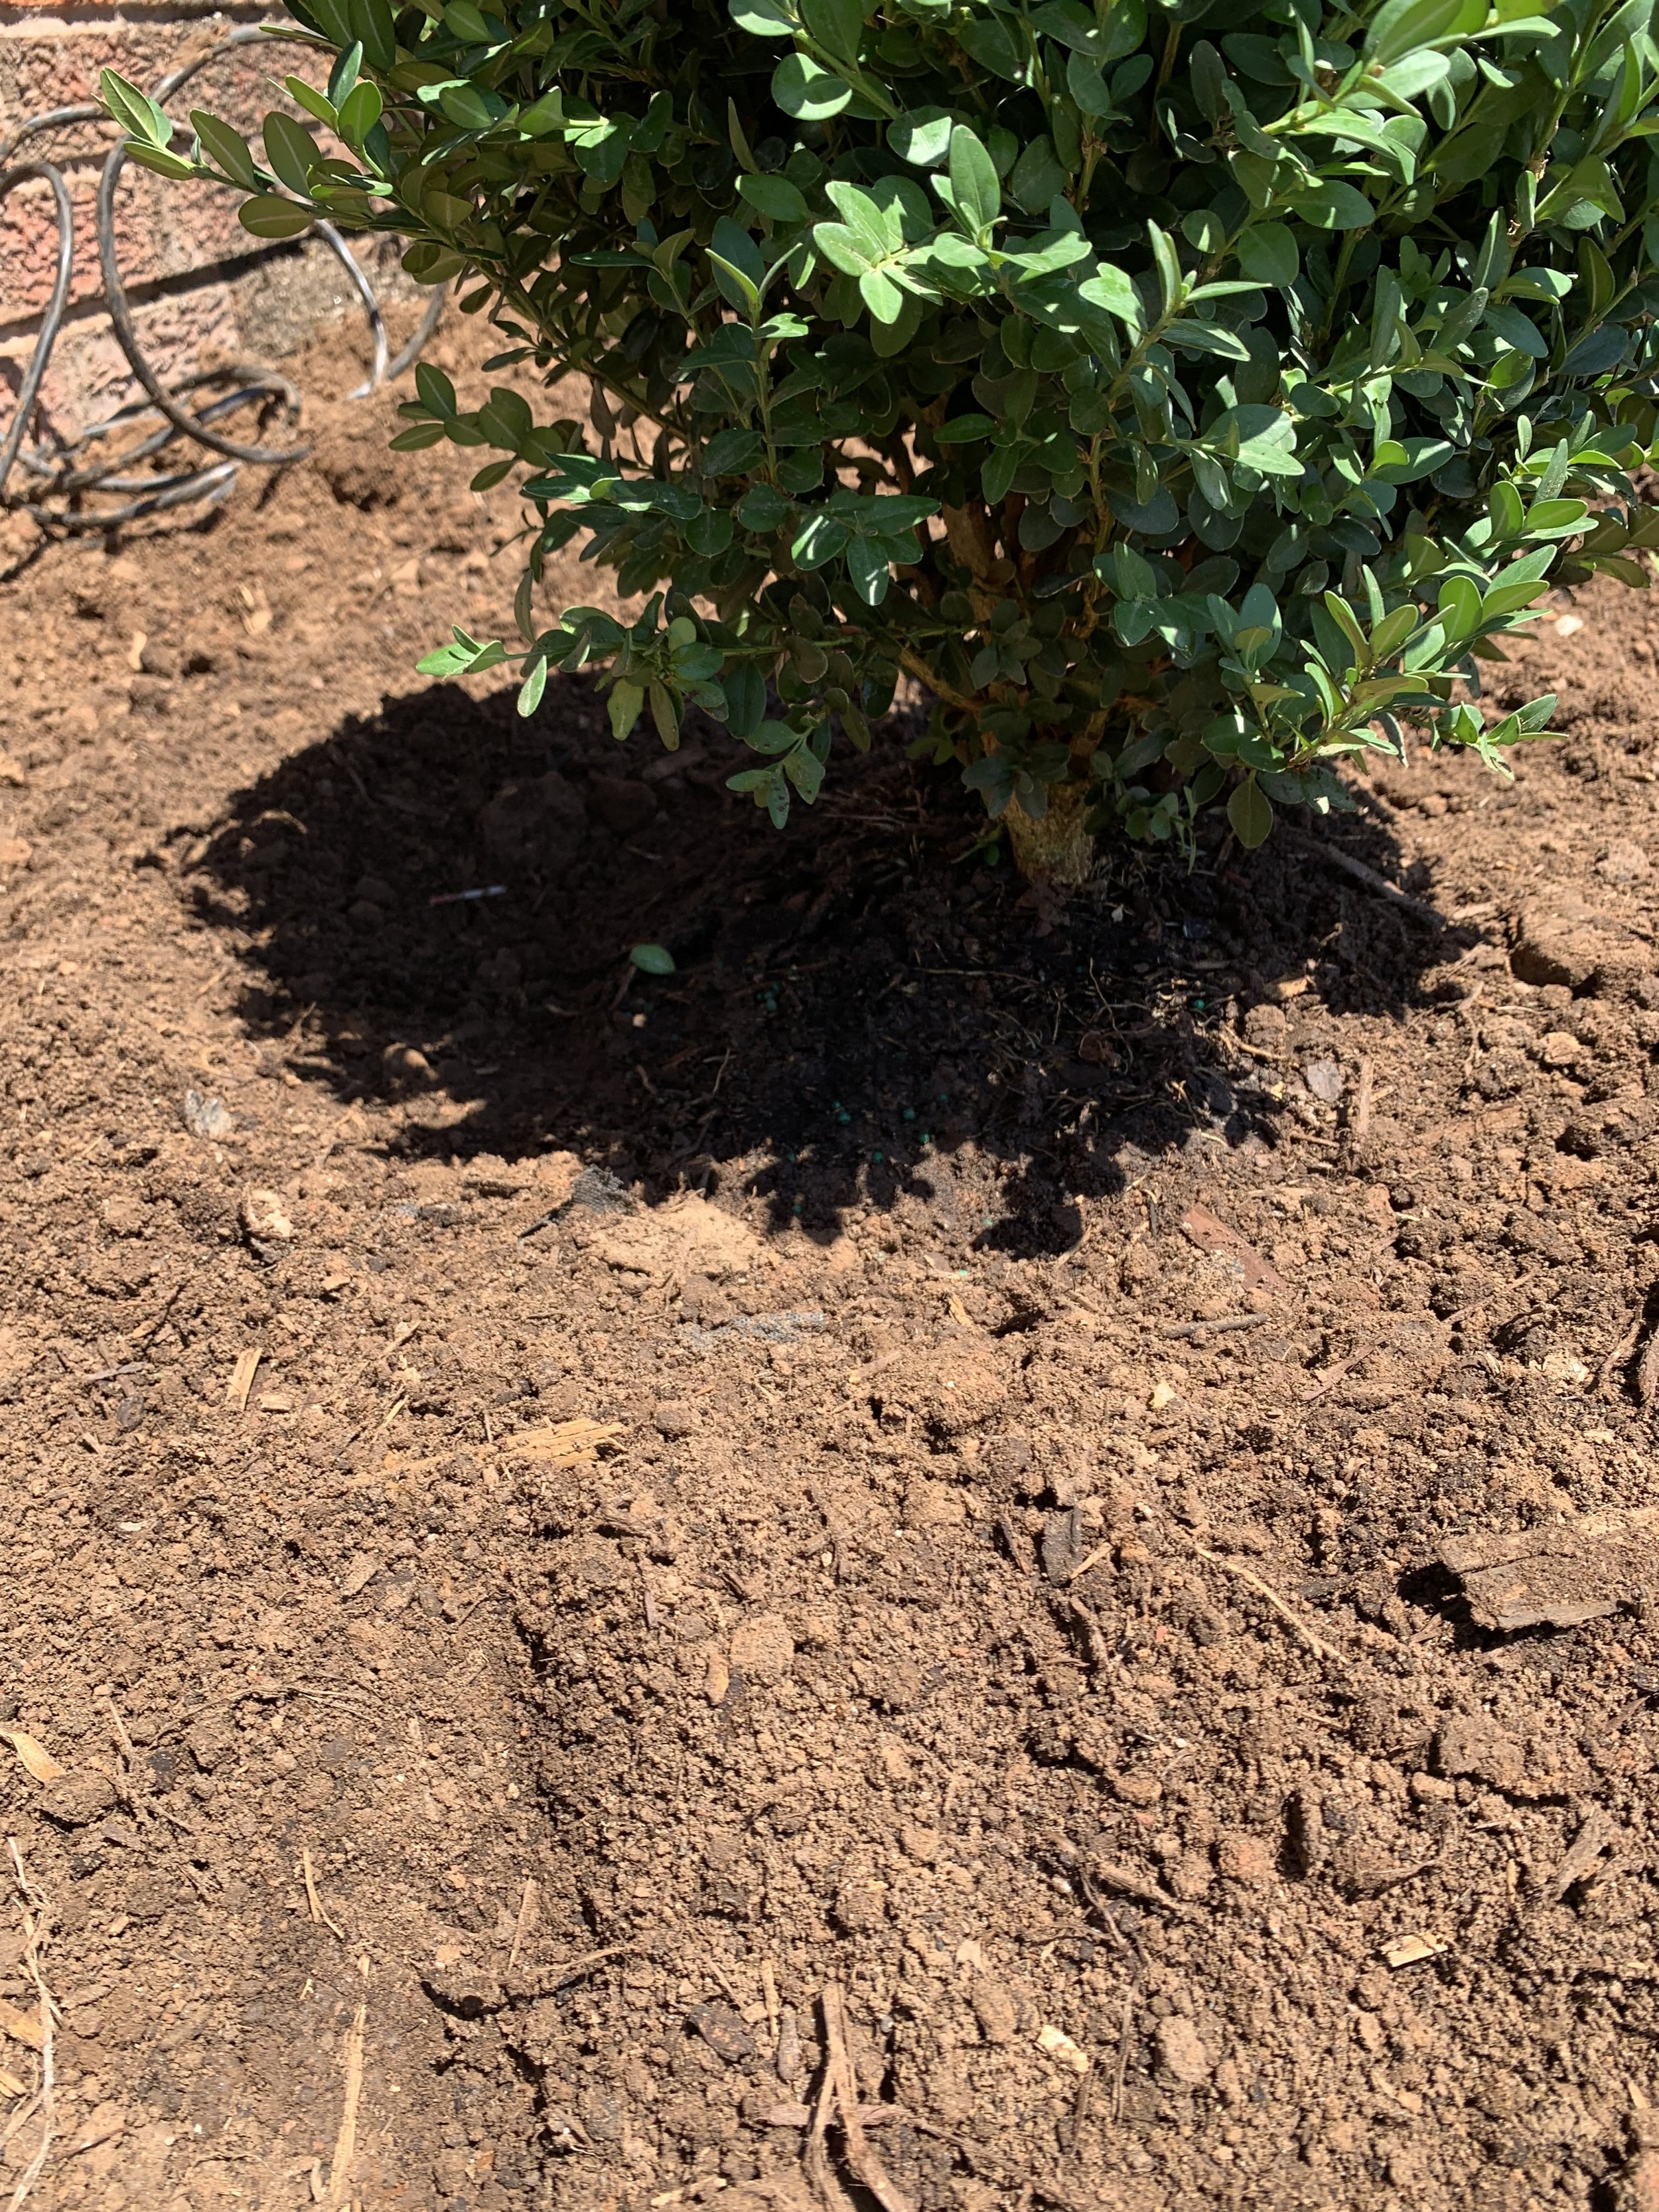
Mix organic compost with the soil you removed from the hole, place some of the mixture in the hole, firm up the soil in the bottom of the hole and place the plant with the top of the soil around the plant 1-2” higher than the surrounding soil.
Backfill 1/3 of the soil around the plant with the compost and soil mixture, lightly firm up and then fill the rest of the hole with water.
After the water drains from the hole, backfill with your soil mixture forming a small saucer around the plant while being careful not to place any soil on top of the plant root ball.
Fill the saucer with water and let it soak into the soil.
Mulch around the plant with 2 to 3” of quality, natural mulch to help keep the soil moisture and temperature consistent.
Deep water daily for the first two weeks when planting in the heat of the year. Don’t let the soil around the plant get too dry for the rest of the summer. But, at the same time, you don’t want to over water, so check soil moisture often. The soil should be moist, but not so moist you can make a mud pie.
For trees, the best practice is to use a tree gator around new trees planted during the summer.
The goal is to keep the plant alive and healthy until the fall. Don’t expect much new growth until next spring.
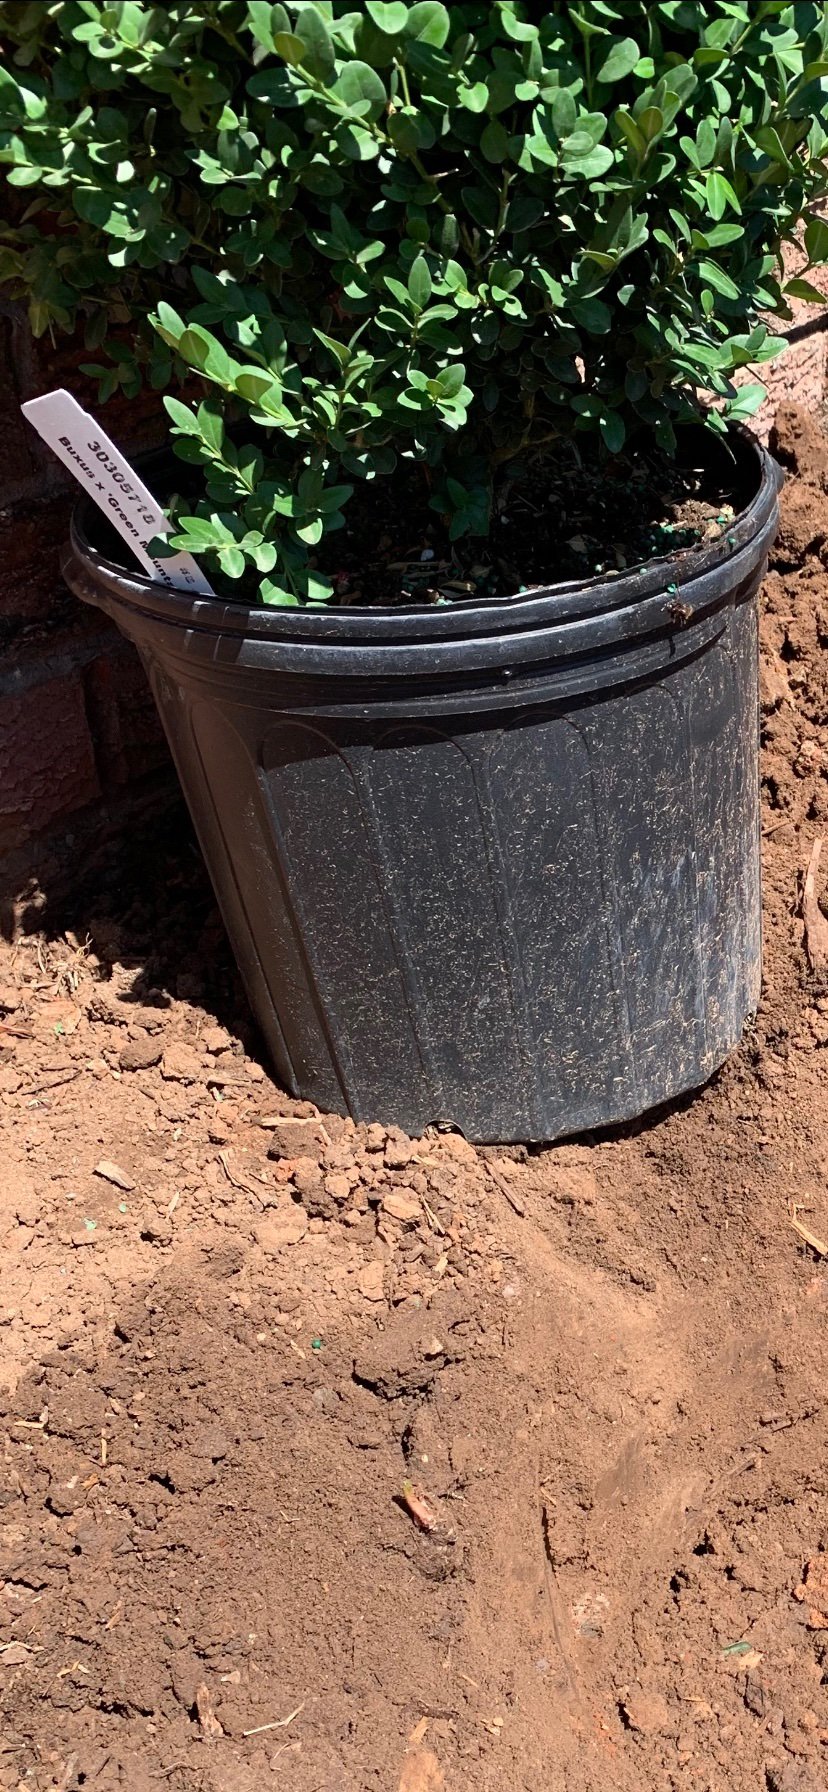
Container-grown plants are best for summer planting because there is less transplant shock than with balled and burlaped or bare root plant material.

Mix organic compost with the soil you removed from the hole, place some of the mixture in the hole, firm up the soil in the bottom of the hole and place the plant with the top of the soil around the plant 1-2” higher than the surrounding soil.

Place the shrub with the root ball 1-2” higher than the surrounding soil.

Fill the rest of the hole with water allowing time for the water to be absorbed into the soil before backfilling.

Finish the planting with 2-3” of quality, natural mulch.

Dig a whole that is twice as wide as the plant container and 25% deeper.

Place some of the compost soil mixture in the hole and lightly stamp it down.

Backfill 1/3 of the soil around the plant with the compost and soil mixture, lightly firm up and then fill the rest of the hole with water.
Backfill the hole being careful not to add soil to the top of the plant’s root ball, lightly pack the soil, create a small saucer ring from the soil, and fill the saucer full of water.
What are your best landscape ideas?
What are your favorite plants?
We would love to hear what is working well in your landscape.
Stay cool.
Keep landscape dreaming.
Lorne Hall
Hall | Stewart Lawn + Landscape
(405)367-3873
3 Keys to a Great Lawn -- #3 Environmental Conditions

When it comes to having a great lawn, what is most important?
Is it the lawn care applications?
Is it mowing practices?
Is it environmental conditions?
All three are keys to a great lawn - Lawn Care Applications, Maintenance, and Environmental Conditions.
Great lawns are not a result of getting one, or even two, of the three correct. Great lawns are equally the result of all three.
In April, we covered Lawn Care Applications.
In May. we discussed Maintenance.
Today we are covering the last key - Environmental Conditions.
Environmental Conditions are all the things that are outside of our control:
Rainfall & Soil Moisture
Air Temperatures & Soil Temperatures
Sunshine & Wind
Oh, don’t you wish you could control environmental conditions!?
Our role when it comes to environmental conditions is to monitor, supplement, and adjust our practices based on the conditions.
A good source for monitoring all weather data is mesonet.org.
The Oklahoma Mesonet is a world-class network of environmental monitoring stations. The network was designed and implemented by scientists at the University of Oklahoma (OU) and at Oklahoma State University (OSU).
The Oklahoma Mesonet was commissioned on January 1, 1994 and consists of 120 automated stations covering Oklahoma. There is at least one Mesonet station in each of Oklahoma's 77 counties.
At each site, the environment is measured by a set of instruments located on or near a 10-meter-tall tower. The measurements are packaged into "observations" every 5 minutes, then the observations are transmitted to a central facility every 5 minutes, 24 hours per day year-round.
The Oklahoma Climatological Survey (OCS) at OU receives the observations, verifies the quality of the data and provides the data to Mesonet customers. It only takes 5 to 10 minutes from the time the measurements are acquired until they become available to the public.
How do environmental conditions impact our lawns and what we can do?
Rainfall & Soil Moisture
The amount of rainfall in the last 7 days is an important starting point for watering decisions. But, knowing the soil moisture is even more important.
The best rainfalls are slow soakers vs downpours. A slow soaker will increase soil moisture and provide your lawn’s root system with life sustaining moisture. A downpour will help the lawn in the short term but has little benefit when it comes to increasing soil moisture. It is important to not only know rainfall amounts but also to know the soil moisture.

Through the month of May, Oklahoma City enjoyed frequent rainfall in varying amounts around the metro. But, the tap has been shut off for the last 12 days. Halfway through the month and June is not living up to its billing as our wettest month.

Based on this map, May’s soil moisture is fading quickly in our 90-degree temperatures.
These two maps combined guide my watering decisions. During the summer months, when the 7-day rainfall map reports less than 1” and soil index is less .7 or less, it is time to start watering. Early this week I started regular watering, early in the morning, every other day for the first time this year.

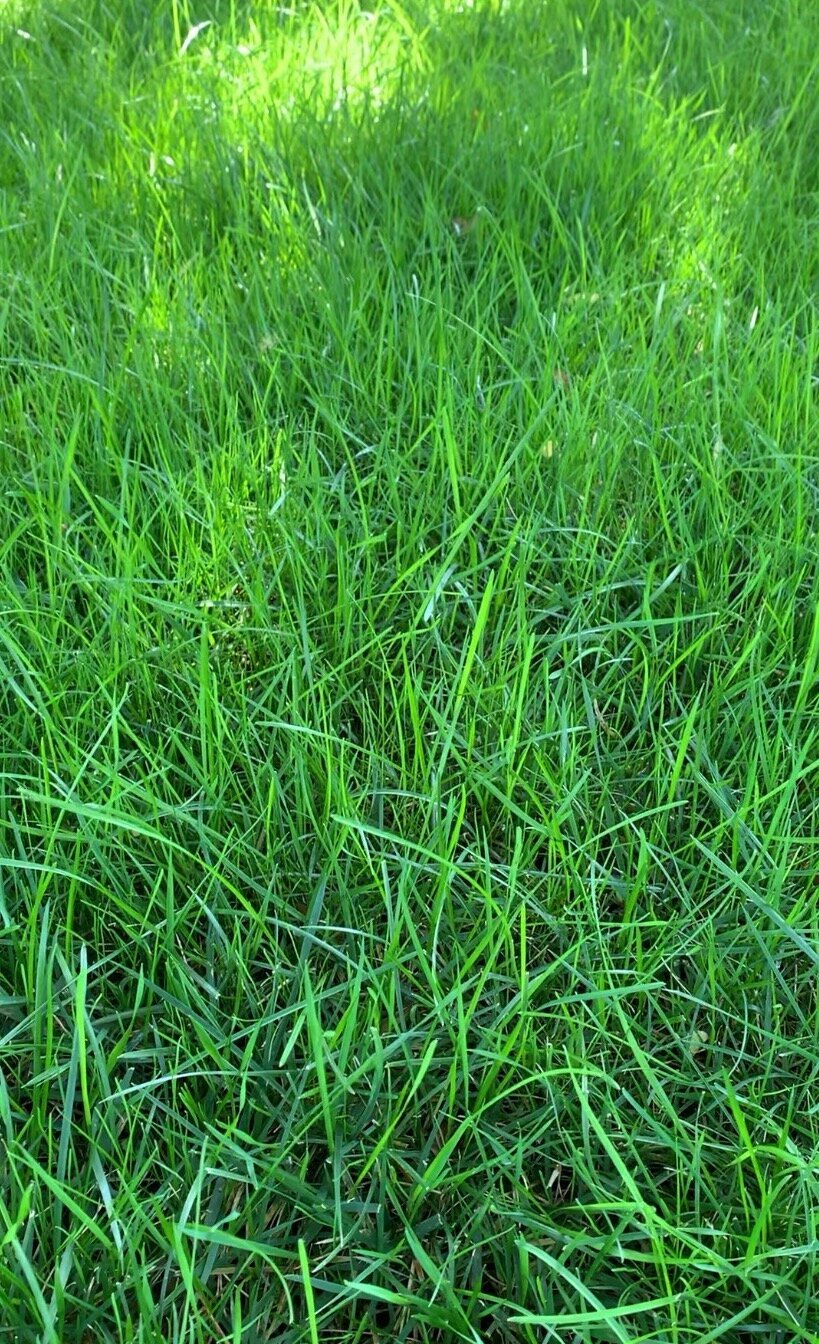
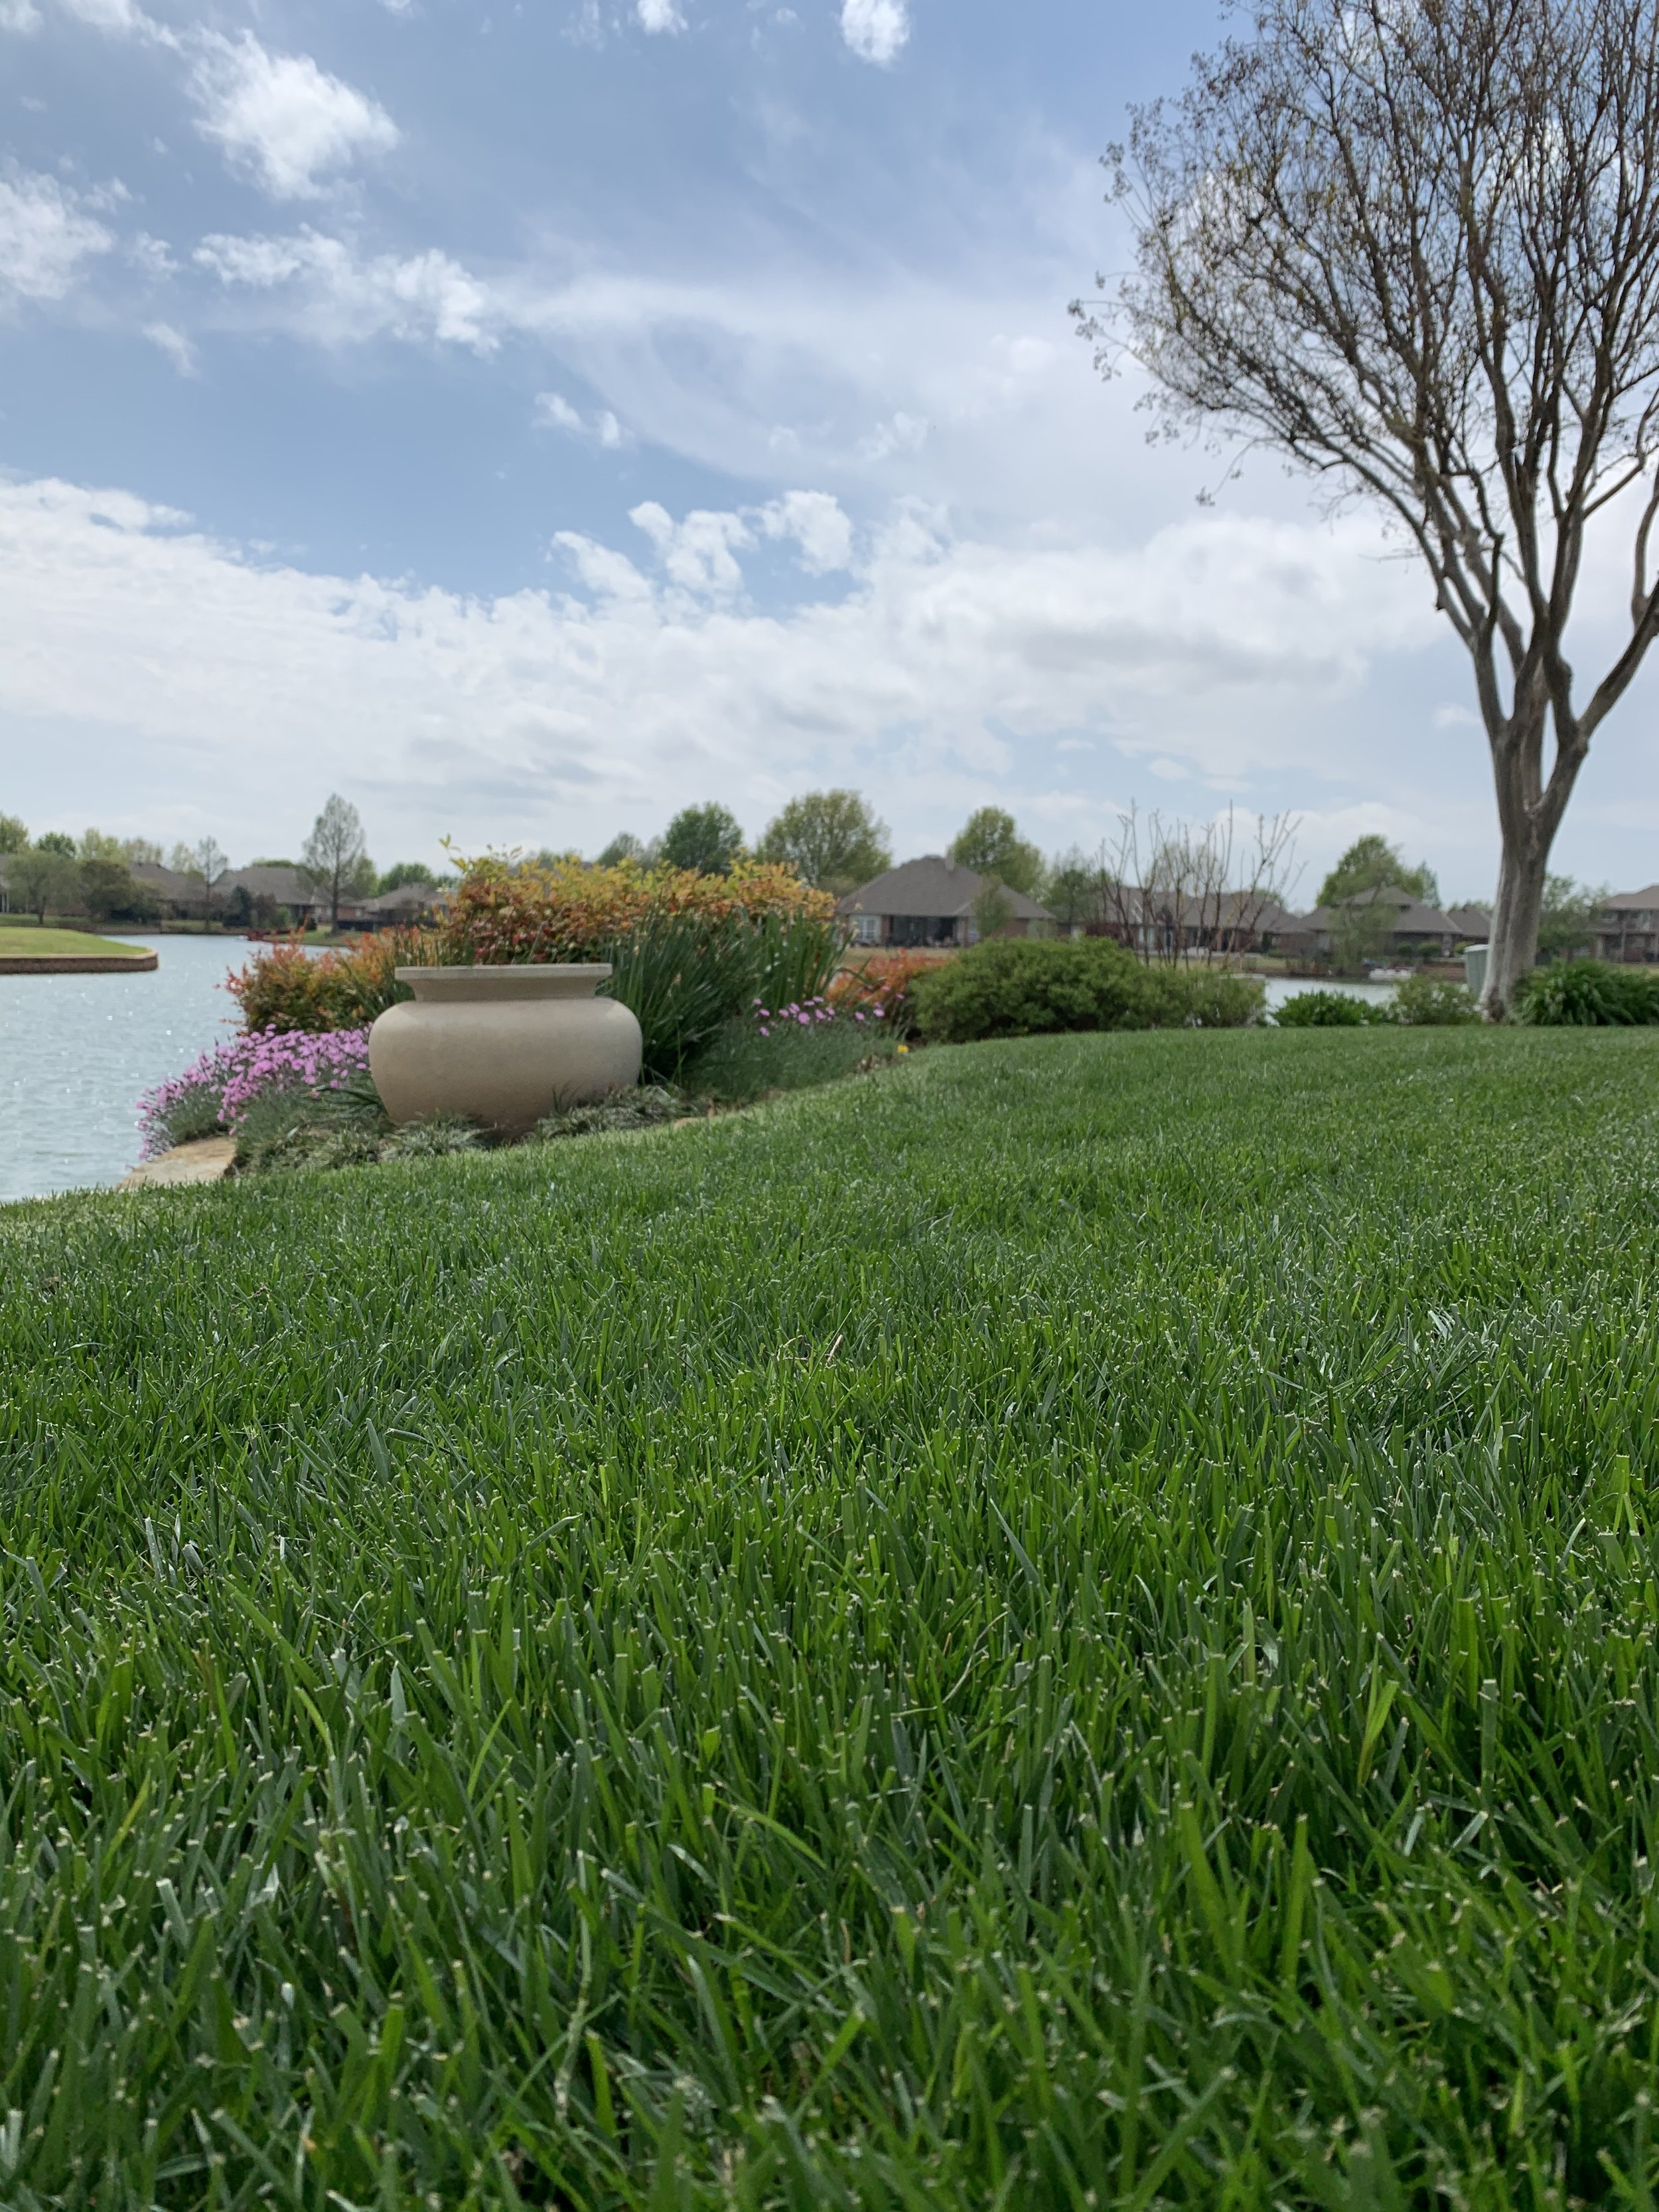
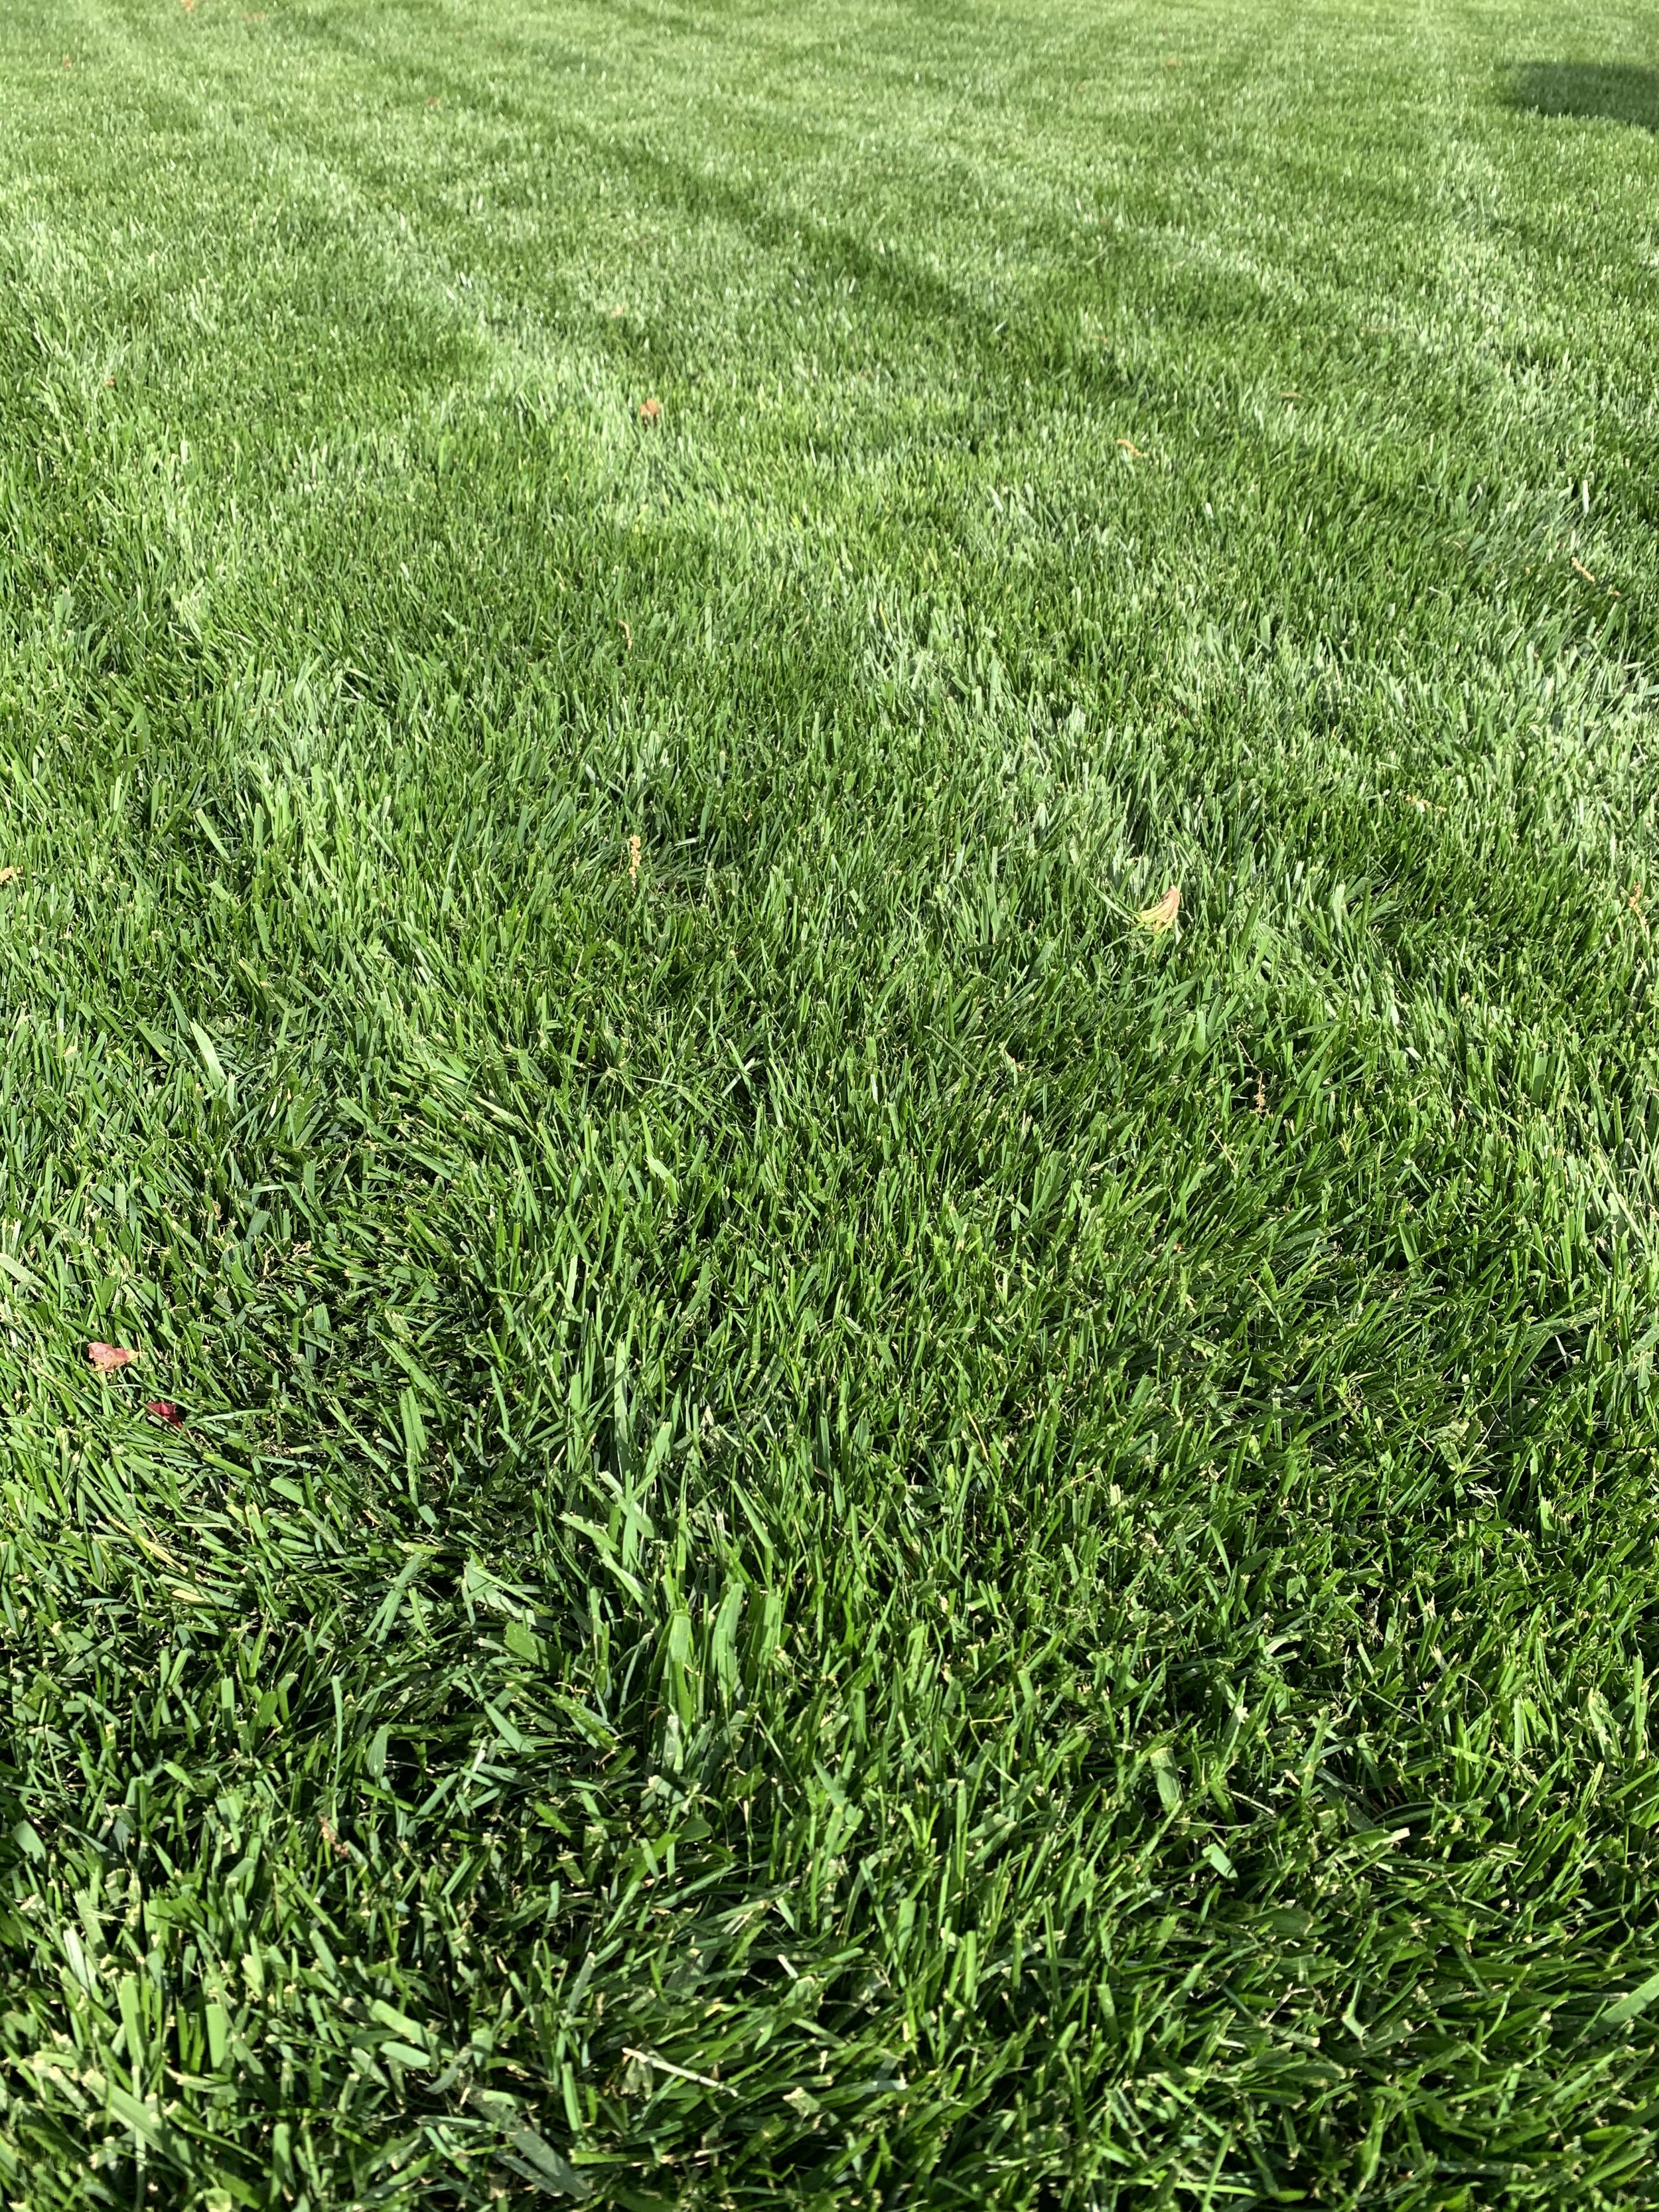
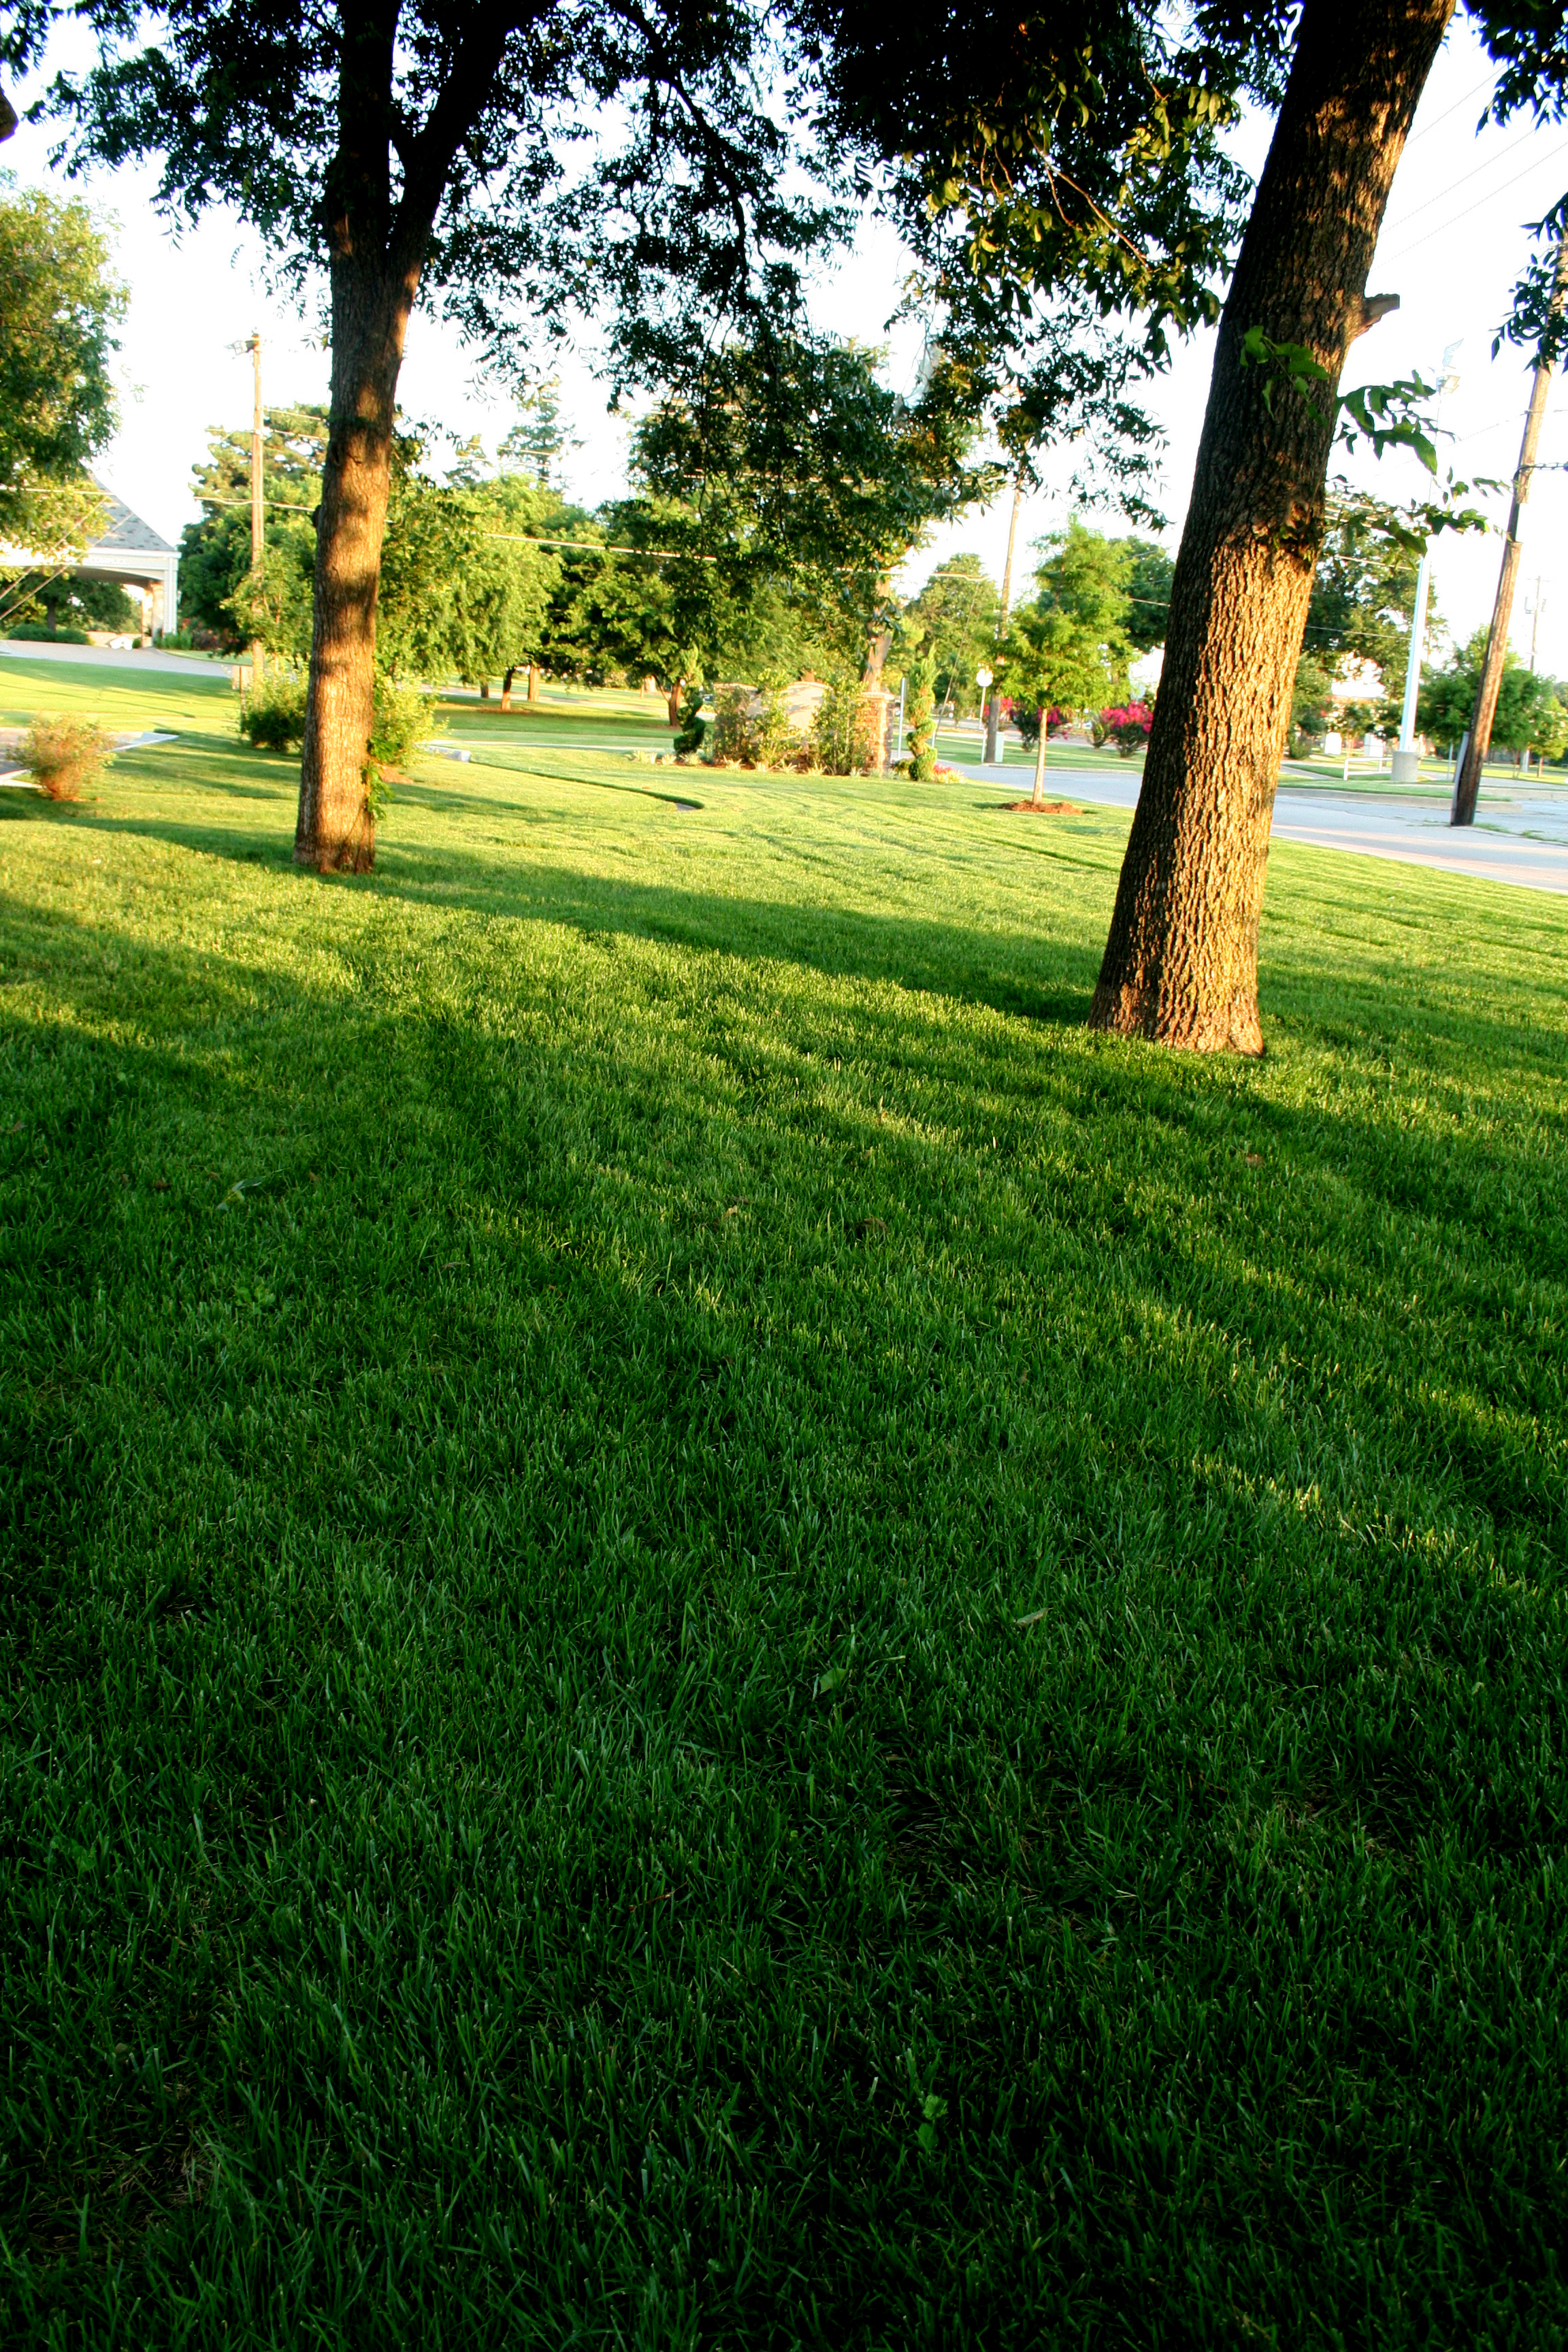
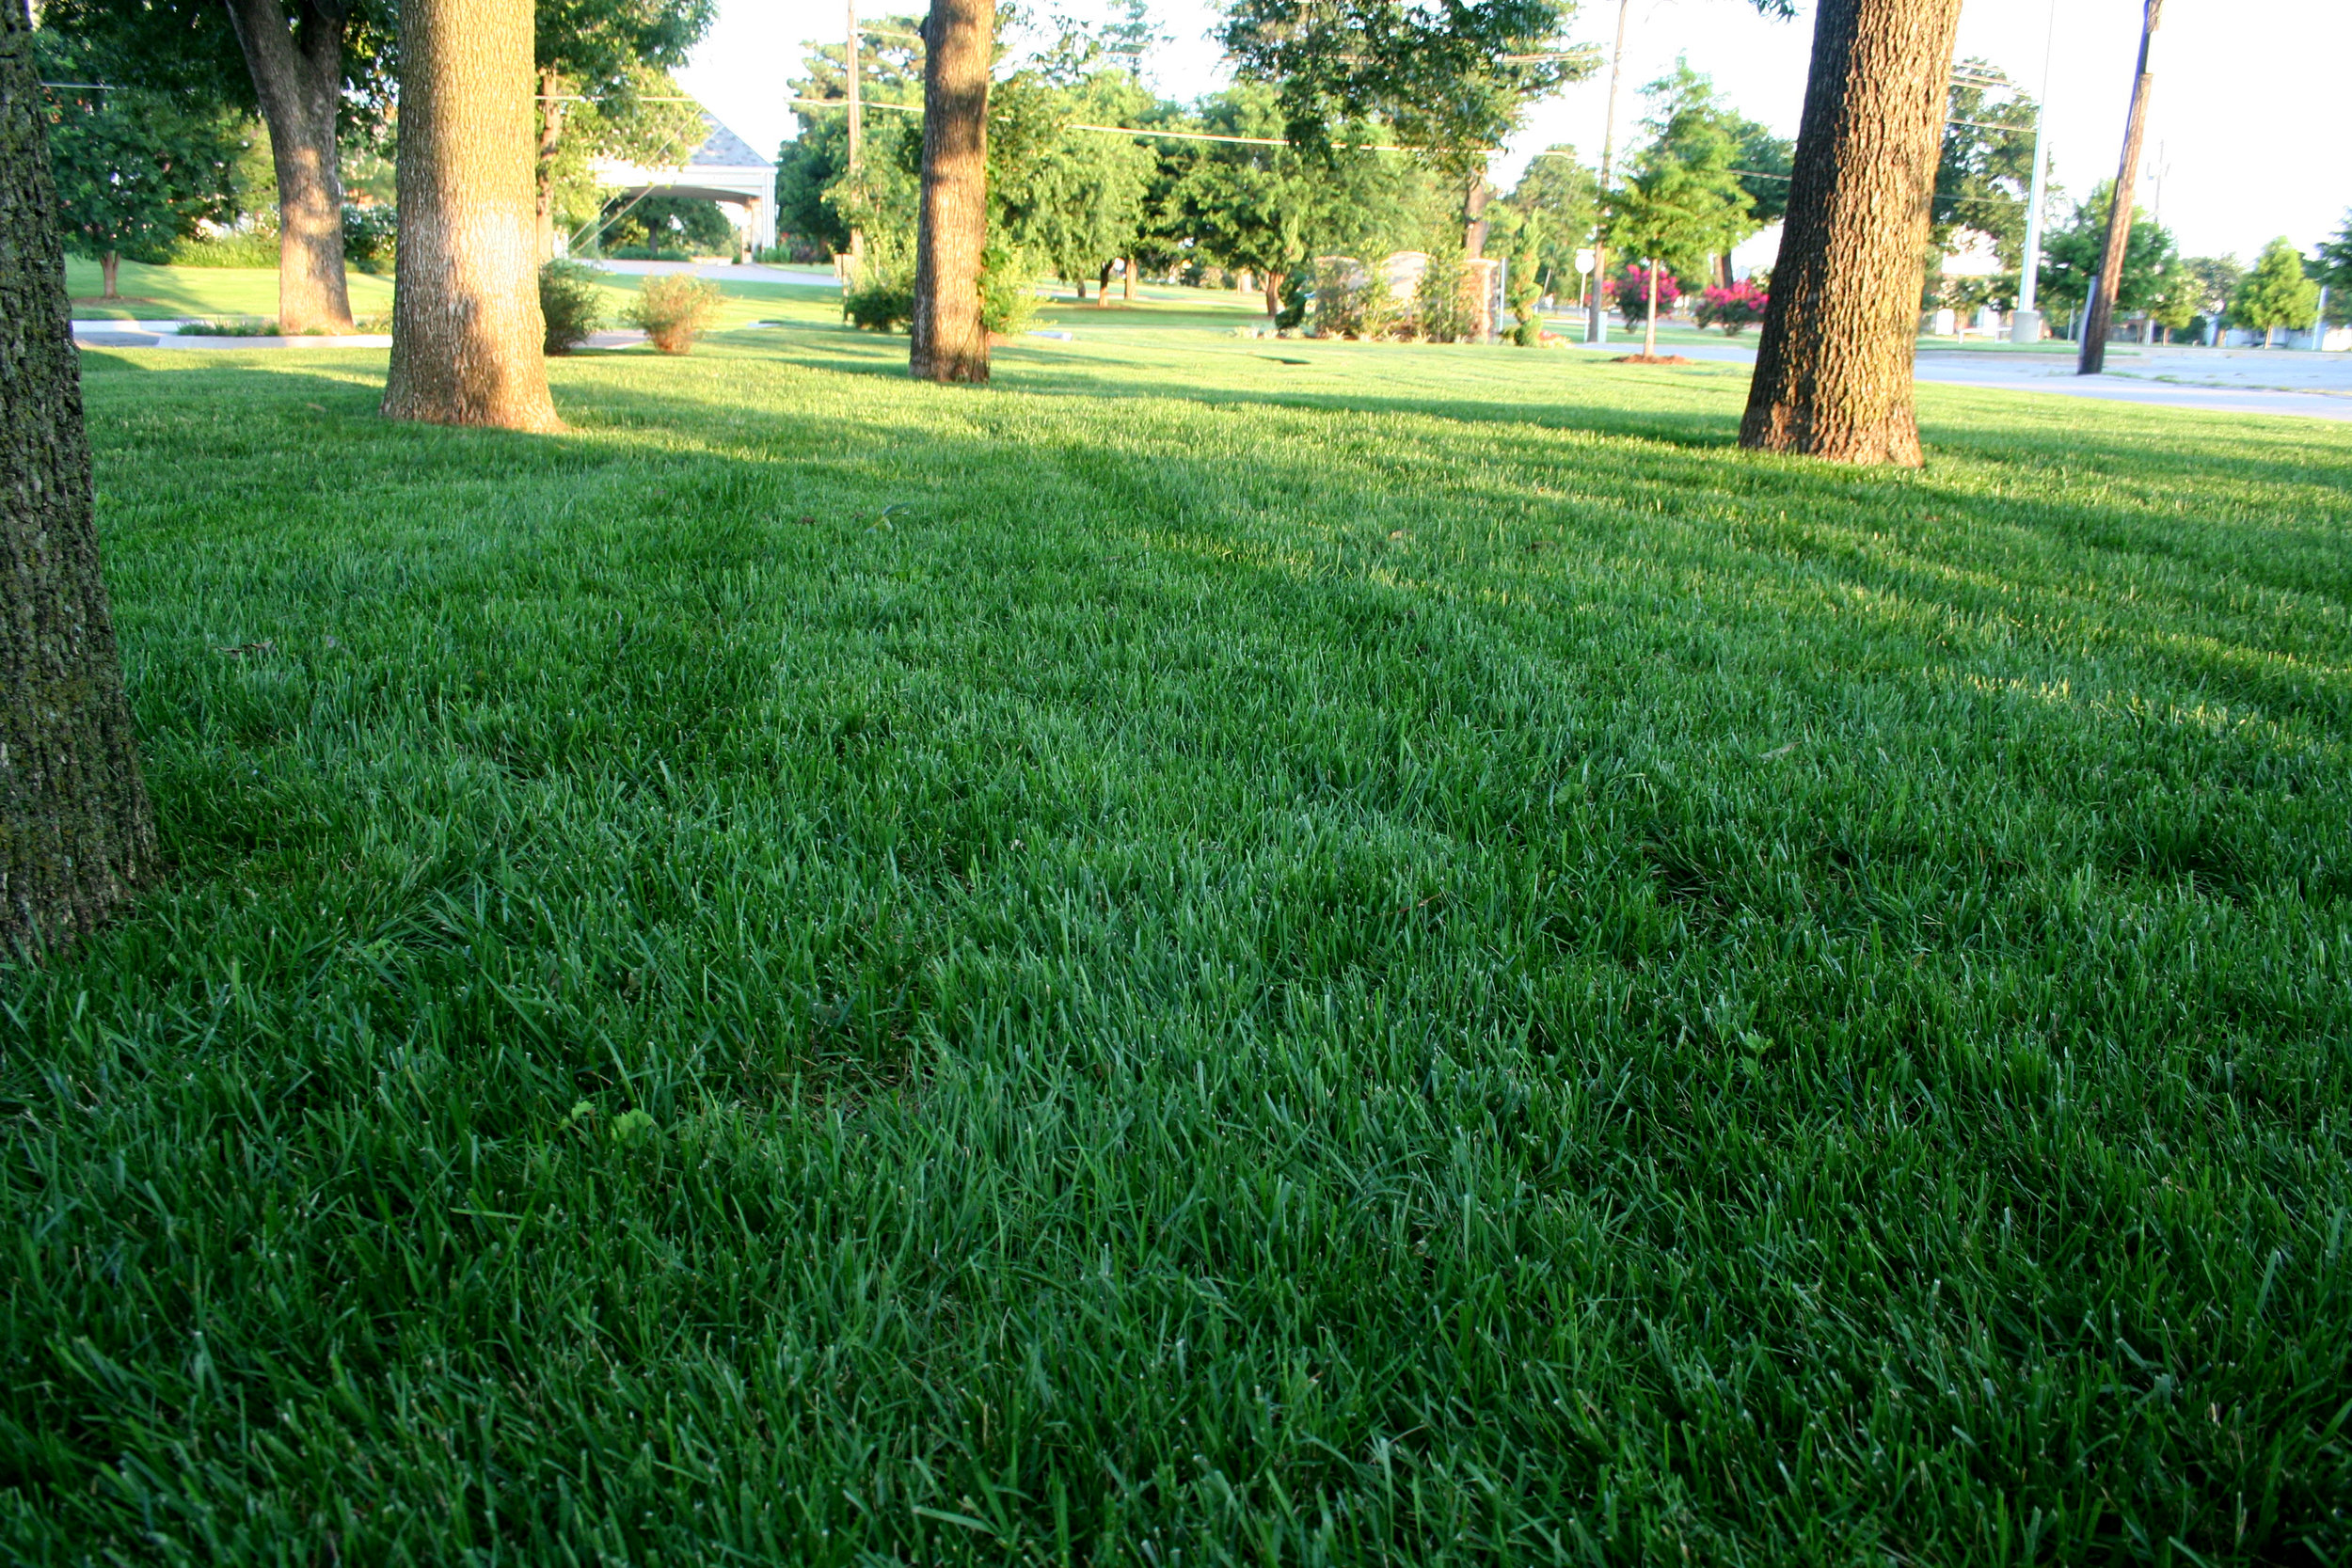
Fescue, when watered with deep soakings every other day, will stand up to 90+ temperatures.
Best Watering Practices -
Deep soakings are always best. Short, shallow watering is detrimental to your lawn and landscape in the heat. The healthiest lawns are watered to the point of runoff and then allowed to dry for a day. Daily watering, except for newly planted lawns, is not beneficial, even in 90+ degree heat.
Only water in the early morning. This is typically the least windy time of day and always the time of the least evaporation. Avoid watering in the evening. Wet grass, especially wet fescue, is prone to disease when it stays wet for more than 5 hours at a time and temperatures are in the 90s.
Lawns need 1” to 1.5” of water per week during the summer months to stay green and active.
How long should you water? Every irrigation system is different – different head types, different size nozzles, different head spacing, different areas, etc. The best way to know how long you should water is to place a few cans around your lawn in a random pattern. Run your sprinklers through a cycle and measure the amount of water in the cans. If the sprinklers ran for 15 minutes and you had .25” of water, you need 60 to 90 minutes per week. Next determine how long you can run your irrigation before you there is excessive runoff. This will tell you how many times per week you need to water. If you can get away with watering every 4th day, you will have a healthier, stronger landscape. Unfortunately, with our tight soils, watering every other day on the required ODD/EVEN system during the hottest times is needed to get the correct amount of water on the lawn without excessive runoff.
If you don’t have the time to audit the amount of water your system puts out, start with these settings, monitor, and adjust: Fixed spray pattern heads with 10-15’ spacings – 15 mins per time. Larger rotor type heads on 10-30’ spacings – 40 mins per time.

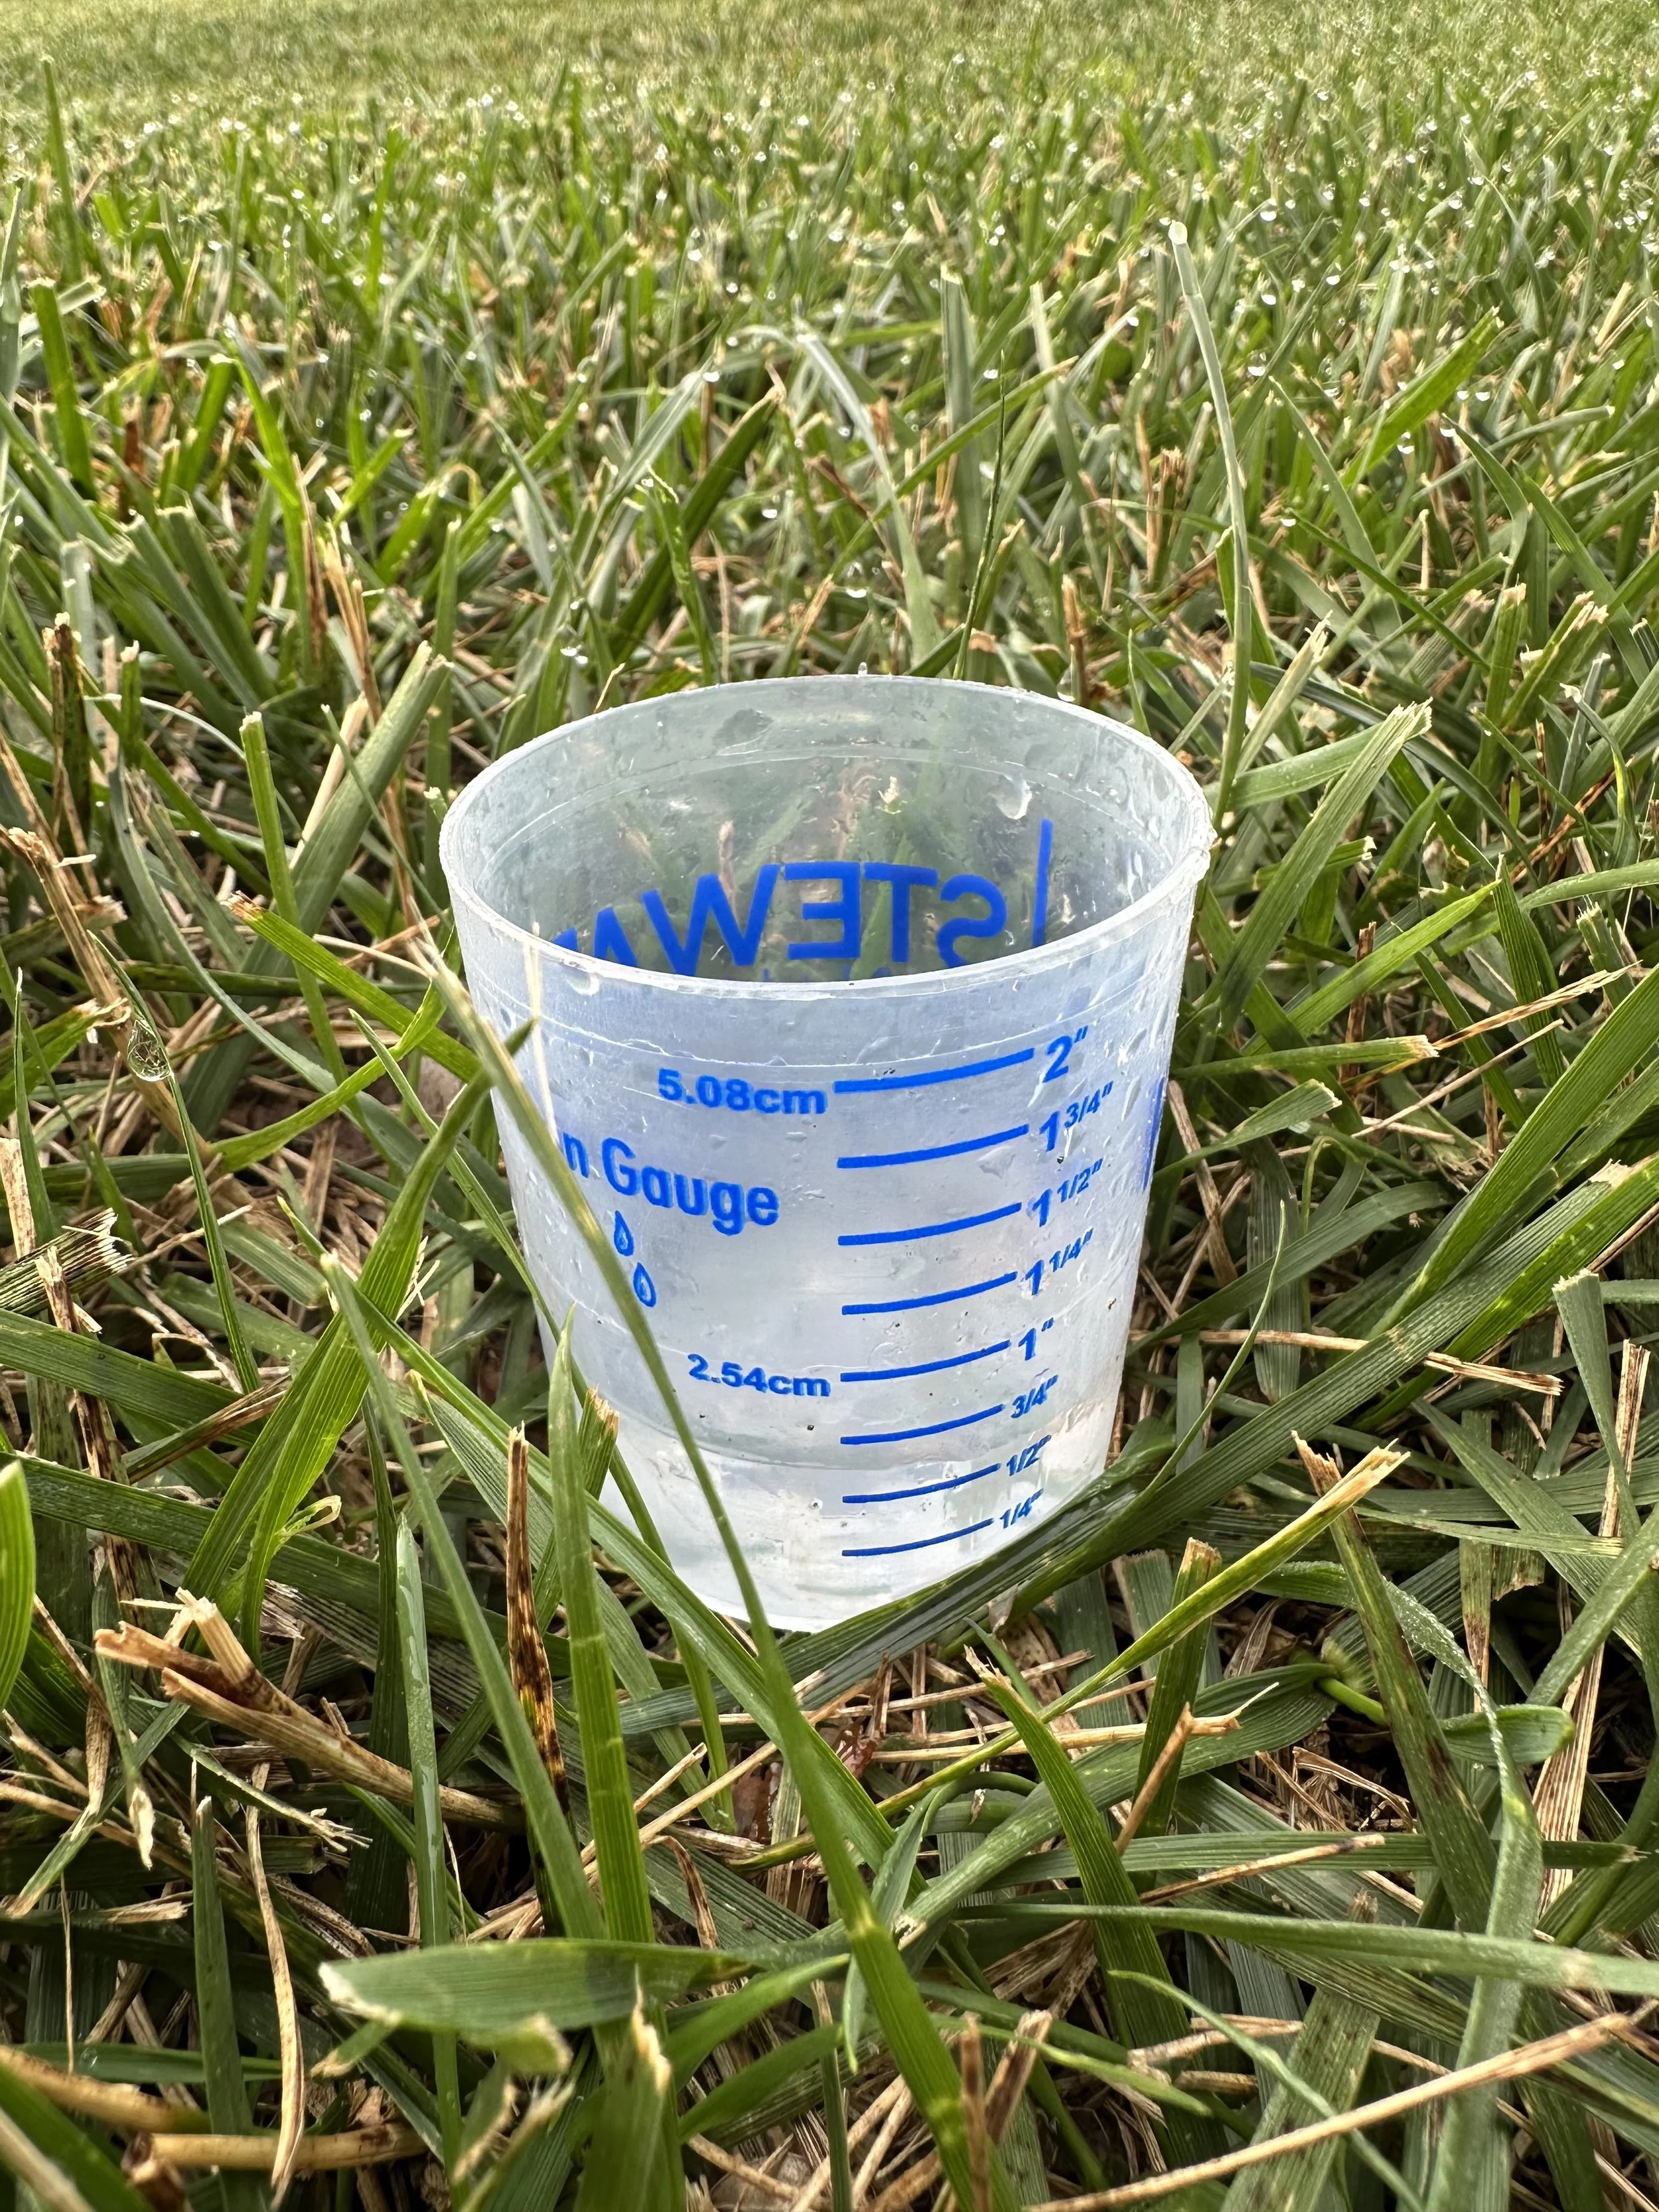
After watering a normal cycle, the Hall | Stewart water gauge is showing just over 1/2” of moisture. In this situation watering 2-3 times per week will give your lawn the correct amount to remain healthy and green.
If you don’t have the time to audit the amount of water your system puts out, start with these settings, monitor, and adjust: Fixed spray pattern heads with 10-15’ spacings – 15 mins per time. Larger rotor type heads on 10-30’ spacings – 40 mins per time.
Set your controller to water with back-to-back run times to reduce the amount of runoff. Moist soil absorbs more water than dry soil. Split the amount of time each zone runs in half and set your controller to come on twice on your water days. Example: Set controller to come on at 4:00 AM and 5:00 AM. When the first cycle is complete, the controller will start the second cycle.
I started the practice of setting irrigation controller to run back-to-back run times a few years ago, on slopes and gradually have incorporated the concept to all lawns. It really makes a difference in water efficiency.
Aeration improves moisture absorption. You can’t beat aeration for improving your soil structure and a benefit of improved soil structure is better water absorption. Lawns that are aerated every year (or at least every other year) do not experience as much runoff.
Watch for uneven water patterns. If you notice areas where the lawn is fading, check your system for a broken head, clogged nozzle, or a head that is out of adjustment.
Even if you don’t have an irrigation system, the concepts of good watering apply. There are several brands of inexpensive hose type timers that make it easy for you to control the timing and frequency.
Too much water can be a problem. You can cause damage to your lawn and landscape quicker by overwatering than you will by underwatering. Waterlogged soil reduces the amount of oxygen. Roots need both moisture and oxygen to survive. Many plants struggle when they do not have a chance to dry out between waterings, such as fescue. Fescue’s biggest problem is brown patch. Brown patch will develop when nighttime temperatures are in the 70’s and the leaf blades stay wet too long. Don’t create your own microclimate that promotes disease by overwatering, watering too often, or watering at night.
The Kansas State Turf and Landscape Blog (Link: https://blogs.k-state.edu/turf/) this week led with “Wet Spring Will Likely Lead To Quick Drought Response As Summer Approaches.” Interesting… wet spring could lead to quick drought? You would think a wet spring would lessen drought stress.
K-State’s point is frequent rains through the spring reduced the need for grass to develop deeper roots. As summer approaches, rainfall decreases, and heat increases the lack of deep root development this spring will result in quicker signs of drought stress on lawns.
Oklahoma City experienced similar moisture patterns in May. Now that we have gone 12 days without rainfall combined with several days of above normal temperatures, we are seeing lawns that are showing signs of drought stress much sooner than expected due to shallower root development.

If you notice areas where your lawn is fading start with an irrigation check to make sure heads are functioning correctly.
Air Temperatures & Soil Temperatures
Air temperatures get all the attention. But the driving factor for lawns is the soil temperature.
Soil temperatures are a key factor in determining when weeds germinate, when lawns start to turn green, and when they are actively growing.

Soil temperature of 55 degrees in the spring is when most summer annual weeds begin to germinate. For the best weed prevention each summer a pre-emergent herbicide must be applied before the soil temperature reaches 55 degrees for three consecutive days. This year summer annual weed germination began the first week of March, earlier than normal.
Soil temperature of 55 degrees is when fescue starts to absorb nutrients, regains a rich green color, and begins prolific growth. Most years in central Oklahoma, March is the month to start fertilizing Fescue.
Soil temperature of 65 degrees is when warm season grasses (bermuda and zoysia) become active. Then once soil temperatures consistently reach 70 degrees bermuda grows its best. In a typical spring, we expect bermuda lawns to green up gradually during April and be active growing by early May. Inconsistent soil temperatures in April and May are the biggest reason for slow warm season turf growth.

Bermuda performs best when soil temperatures are consistently in the 70s.

Brown patch disease in fescue appears as irregular areas that lead you to believe the lawn may not be getting enough water.
Other environmental factors that will impact spring green-up: Shady areas and turf on the north side of homes will come out of dormancy slower because the soil temperature will lag. Low moisture levels during the transition period will slow green-up. Turf grass that must compete with weeds for nutrients and moisture will also be slower. And, compacted soil will slow the process by restricting air, nutrient and water movement to the roots.
Soil temperature below 70 degrees in the fall is when winter annual weeds start to germinate. This typically occurs in mid to late September. For the best weed free lawn during winter dormancy, the first fall pre-emergent herbicide needs to be applied between mid-August and the end of September.
Once soil temperatures begin to cool in September it is important to apply little to no nitrogen fertilizer to warm season turf. Pushing the turf to stay green deep into the fall is the most common cause for Bermuda problems such as spring dead spot.
When soil temperatures begin to cool in September and into October it is the best time to establish fescue from seed.
Soil temperature is the critical measurement for pre-emergent herbicides, fertilizer applications and seeding.

Applications of high nitrogen fertilizer on bermuda lawns after mid-September increases the probability of having spring dead spot the following spring.
There is one important thing you can do to help when temperatures are high – adjust mowing height. Mowing at the maximum mowing height for your turf type provides a canopy that cools the soil and promotes a deep root system. Maintain fescue at 3” to 3.5” and Bermuda at 2.5” during the summer heat. If you mow frequently enough don’t bag your clippings. A light sprinkling of grass clippings will act as mulch for the lawn helping to hold moisture in the soil. The key is mowing often. Leaving clumps of clippings on the lawn is not helpful.
Sunshine & Wind
Turf grass moisture loss is much higher on windy, sunny days. This is a fact we often overlook and fail to adjust for.
Evapotranspiration (ET) is the loss of moisture through evaporation from the soil and transpiration from the leaves. Turf grass leaf blades are usually 75% water. The highest ET rates occur on hot, sunny days with lower humidity and moderate winds. This past week, high ET rates have started taking a toll on many lawns.
Another way sunshine and wind impact lawns are in areas of low air circulation and heavy shade. Areas with thicker plant materials, privacy fences, and structures are more prone to diseases due to low air circulation. Be aware of these areas and make sure you are not keeping these areas too moist.
The last of three things that impacts the quality of your lawn, environmental conditions, is something that you have no control over.
But just because you have no control doesn’t give you an excuse.
Your role, and our role, when it comes to the impact of environmental conditions on your lawn is to be aware, monitor and adjust our practices based on the conditions.
Our goal, no matter the current conditions, is to help you have the best lawn possible.
Lorne Hall
Hall | Stewart Lawn + Landscape
(405)367-3873

Picture of the Week:
Hardy Hibiscus
Hardy Hibiscus is a shrub sized perennial that produces bold, large, colorful blooms throughout the summer. Blooms last only a day or two but are quickly replaced by new blooms.
3 Keys to a Great Lawn - #2 Maintenance

When it comes to having a great lawn, what is most important?
Lawn care applications?
Maintenance practices?
Environmental conditions?
All three are keys to a great lawn - Lawn Care Applications, Maintenance, and Environmental Conditions.
Great lawns are not a result of getting one, or even two, of the three correct.
Great lawns are equally the result of all three.
Today, we are covering the second - Maintenance. In April, we covered Lawn Care Applications and in June we will visit about how Environmental Conditions impact your lawn.
Maintenance includes all mechanical activities involved in caring for your lawn: Mowing, Aerating, Dethatching, Turf Selection, Soil Test, etc.

Mowing
Mowing by far has the biggest impact on the quality of your lawn.
Think about it. More time will be spent mowing your lawn than any other lawn or landscape activity. If your goal is to have a great lawn, you will make somewhere between 28 to 40 trips across your lawn this year. A well-maintained warm season turf (bermuda, zoysia) will be mowed 28 to 32 times per growing season while a great fescue lawn will be mowed 36 to 40 times.
Cutting height is important.
Cutting too low discourages root growth and reduces the lawn’s ability to withstand extreme temperatures and drought.
Cutting too tall results in a stemy turf that is more susceptible to scalping.
Bermuda and zoysia should be mowed at 1-2” March through May. As temperatures start to increase in June, gradually increase the mowing height to 2-2.5” by mid to late summer and maintain that height through the end of the growing season. If mowing bermuda with a reel type mower, the lawn can be maintained at 1.5” during the summer months.

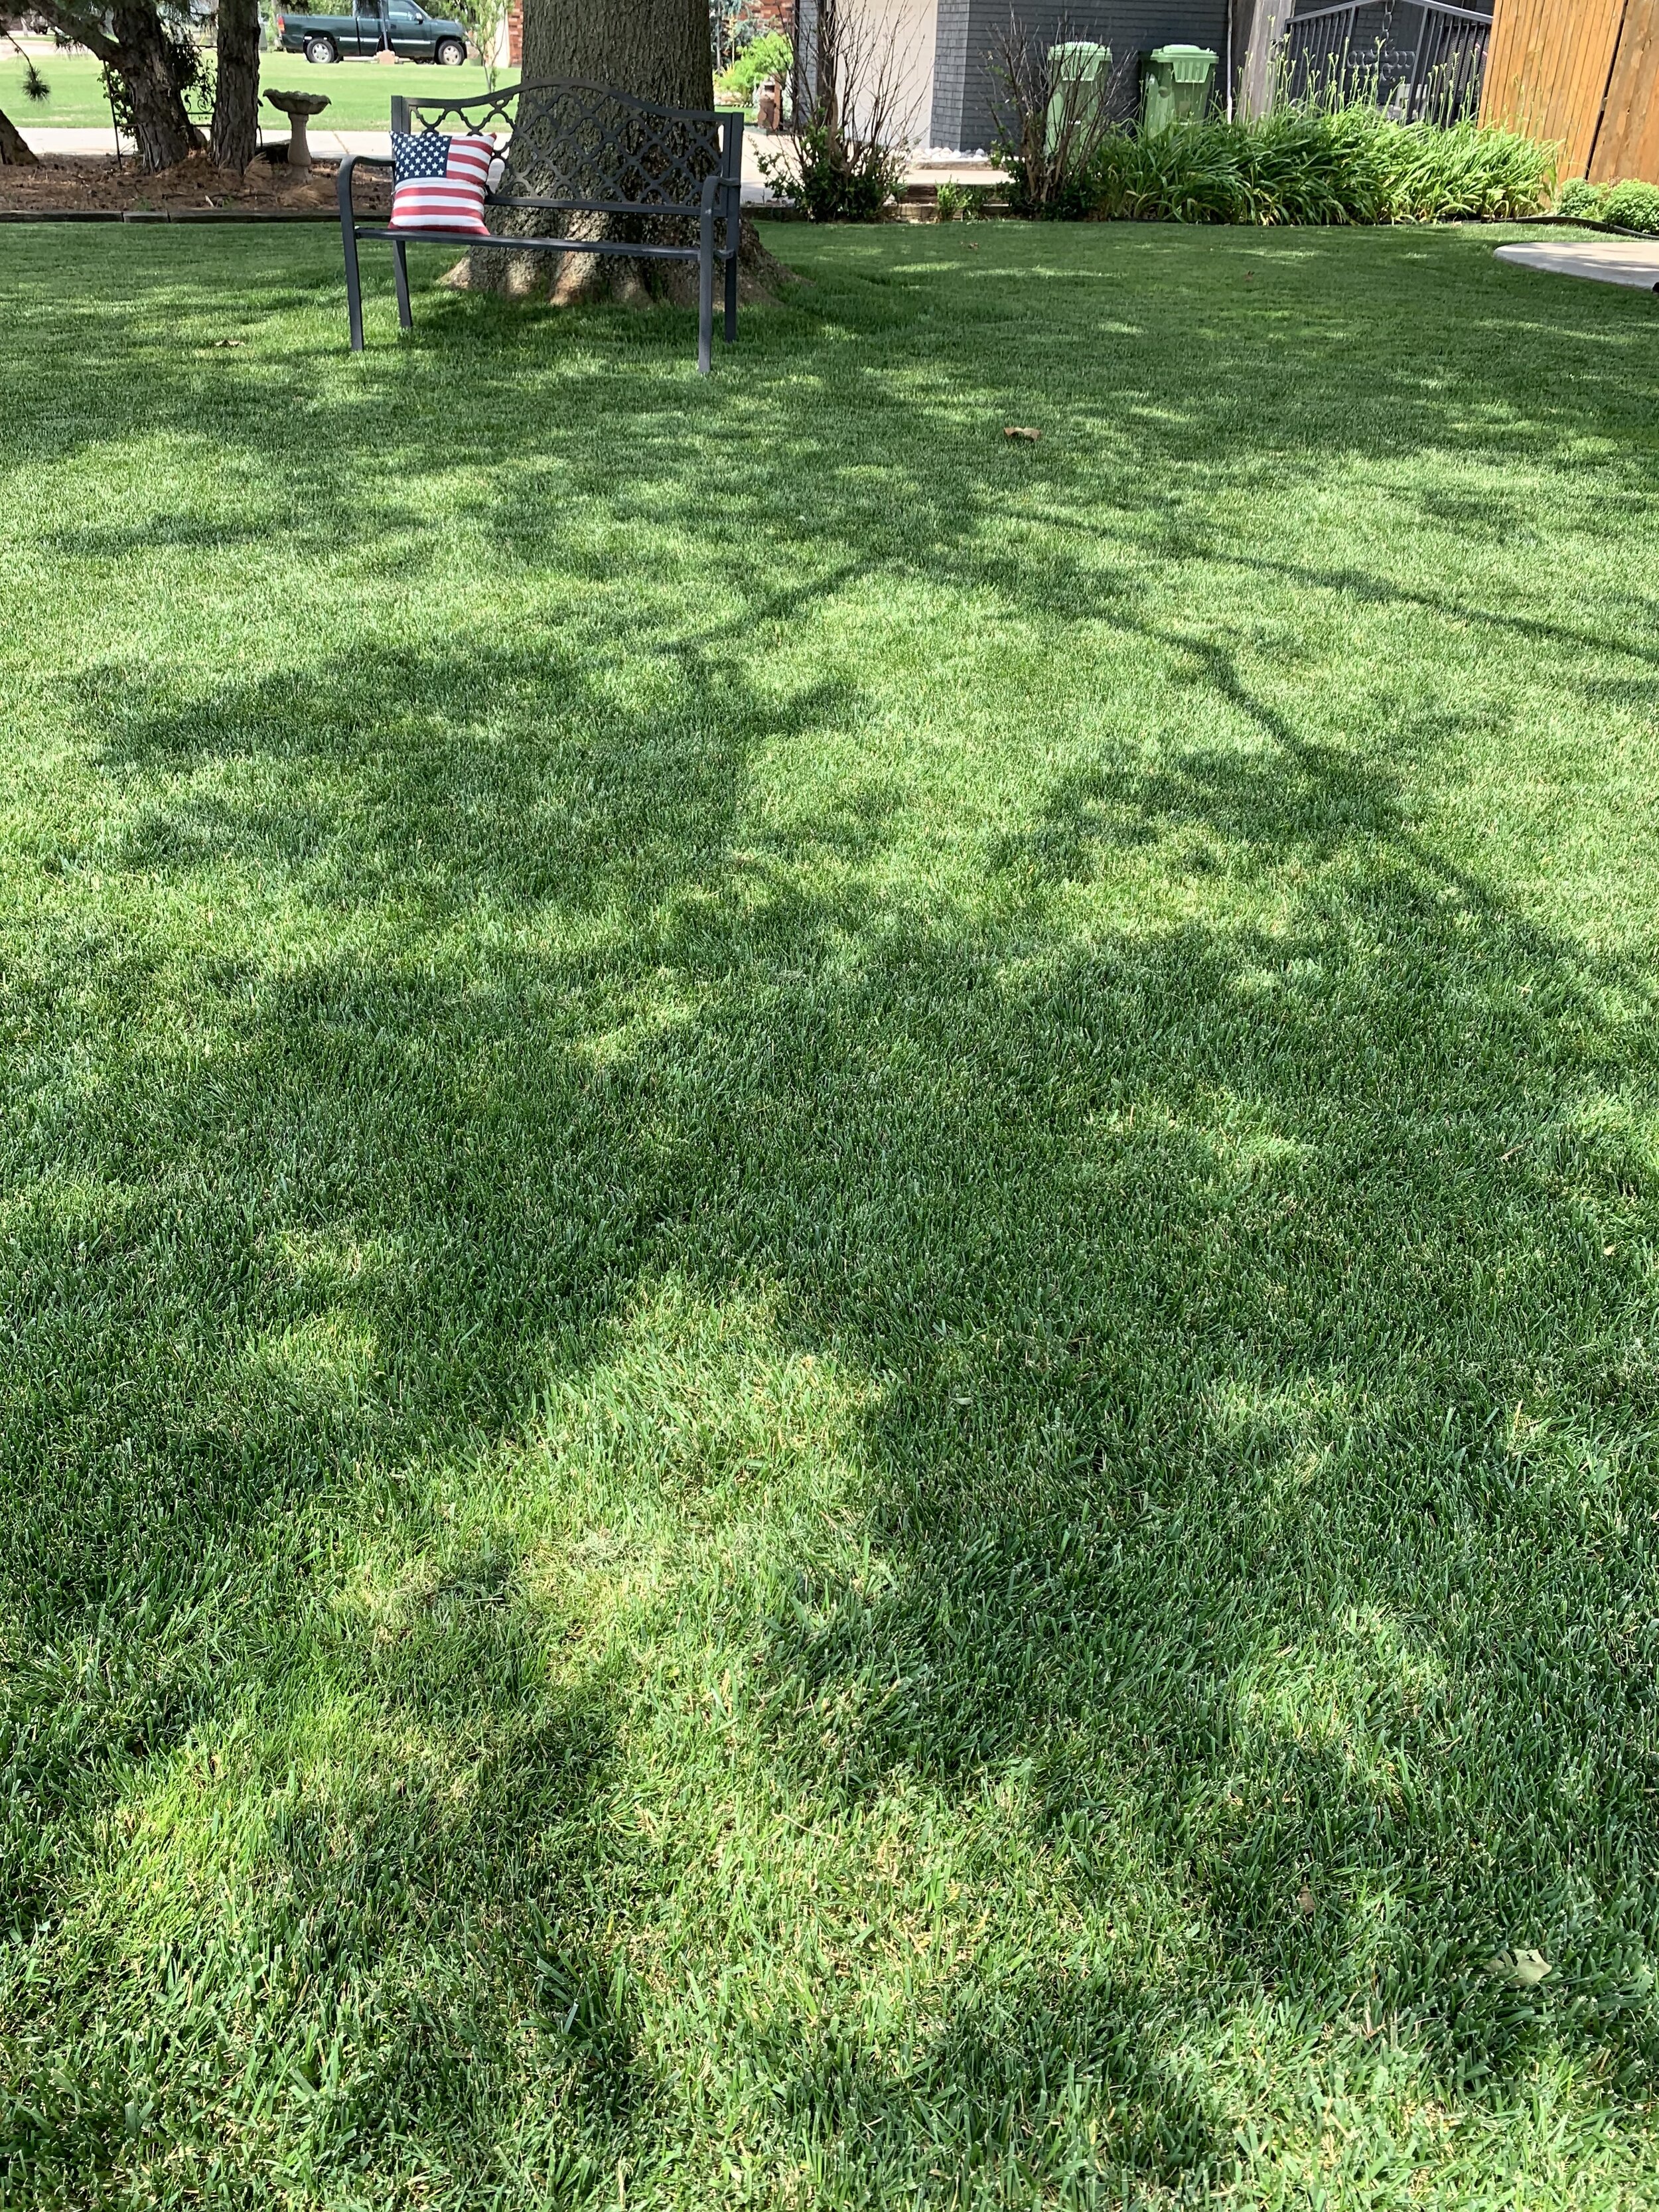
Maintain fescue at 3” during the summer months.
Cutting the lawn shorter in the spring and early summer promotes lateral spread and a tighter turf.
A taller turf in the heat of the year provides a canopy that cools the soil, promotes a deep root system, and provides insulation for low temperatures going into the winter.
Fescue should be mowed at 2.5-3” in the spring March through May. During the heat of the summer, June through September, maintain fescue at 3-3.5”. In the fall, as the weather cools returning to 2.5-3” is fine.
A good rule of thumb is to maintain all turf grown in shade at the recommended highest levels or a little taller. This will increase leaf area to compensate for the lower light levels.

Maintain turf growing in shady areas a little taller. The increased leaf area will compensate for the lower light levels.
Mowing frequency makes a big difference in the quality of a lawn.
The best lawns are mowed based on growth, not a set schedule. If you hire your lawn mowed, mowing on a set schedule, preferably weekly during the growing season, is typically the practical solution. But, if you mow your own lawn, a big step towards a better lawn is to start mowing based on growth.
The best time to mow is at the point where no more than 1/3 of the leaf area will be removed. For example, if you are trying to maintain your lawn at 2”, the lawn should be mowed before it exceeds 3”. Removing more than 1/3 of the height at one time results in cutting below the leaf and into the stems. Removing all the leaf requires the turf to use nutrients stored in the roots to generate new leaves followed by putting energy into storing more nutrients. Scalping into the stems starts a growing cycle that is not optimal for having a great lawn.
Mulch mowing vs bagging your clippings is one of the best things you can do for your lawn.
An added benefit of mowing often enough that no more than 1/3 of the leaf blade is removed at a time is you don’t need to bag your clippings. Leaf blades are mostly water and nitrogen. Every time you remove your clippings you are throwing away valuable moisture and nutrients.
I am a firm believer that what separates the quality of my lawn from other good lawns is that I always mulch mow returning nutrient and moisture rich clippings to the soil.

Mow often and don’t bag your clippings. Mulch mow and return nutrients to the soil. Your lawn will thank you.

When mulch mowing, a few clippings are ok. They will break down quickly and return nutrients and moisture to the soil.

But, if you are like me, you like a neat and clean lawn when you are finished mowing. So, use your blower to distribute any noticeable clippings.

Varying your mowing pattern will reduce soil compaction and give your lawn a professional appearance.
Keep mower blades sharp.
Dull blades bruise leaf tips, reduce growth, and causes a dull-cast appearance over the turf due to frayed leaf blades.
Vary the mowing pattern.
Mowing the same direction 30-40 times per year will create unnecessary soil compaction. Lawns look better when two or three mowing patterns are rotated through.
Aerating
We talk about aerating a lot. Why? The overwhelming common factor of our best lawns is annual aeration.
Aerating is the process of taking small cores out of the lawn with a mechanical core aerator. Aeration reduces compaction and improves the soil structure by improving air, nutrient, and water movement to the root zone. Cores should be left on the lawn and allowed to break down. Gradually the holes created by the aerator are filled in with loose soil from the cores creating pockets for root development. Aerating also reduces thatch.

Bermuda should be aerated any time after spring green up through early summer, April through mid-July.
The best time to aerate fescue is in the fall, September through October.
Aeration will take a lawn from good to great!
Dethatching
Thatch is the undecomposed roots and stems of the turf. Excessive thatch, more than ½,” impedes the flow of water, air, and nutrients into the soil. Lawns with excessive thatch are shallow rooted and therefore are less drought and heat tolerant.
Bermuda lawns are more prone to excessive thatch than fescue. The best time to remove excessive thatch is in the early spring, late February to early March, before the lawn greens up. The best tool to use is a power rake, also known as a dethatcher.
Important note – Lawns that are aerated at least every other year rarely have excessive thatch problems. If your lawn has a moderate amount of thatch, we recommend aeration as a preventative step to dethatching.
Turf Selection
Light is a basic requirement of turfgrass growth and is often the limiting factor in good turf development. All plants, including turf grass, have a minimum light requirement.
Bermuda prefers 8 hours of direct sunlight for optimal growth.
Zoysia will grow well in a little less light, but still needs 6 hours of direct sunlight.
For any areas with less than 5 hours of direct sunlight, fescue is the best option.
We all tend to underestimate the amount of shade our trees, shrubs, buildings, and fences cast on our lawns.

Lawn areas that receive only dappled sun are best planted in fescue.
Over the course of the growing season, take time to observe shade patterns in your landscape and make a plan for any areas with too little direct sunlight to support a thick lawn.
Zoysia is best established from sod and can be installed throughout the season.
Fescue does well established from seed. The best time to establish fescue from overseeding is in September or October. There is a second opportunity in March. But fall, is by far the best time because as a cool season grass, it will have more time to establish a strong root system for the summer heat.
During April and May, establishing fescue from sod is best. Avoid sodding fescue during the summer heat.
Soil Test
When a lawn isn’t growing well, has poor color, looks sickly, and doesn’t respond as expected to fertilizer, a soil test should be done.
There are 13 essential mineral elements in soil. Their availability to be used by turfgrass is based on soil pH. Between pH of 6.0 and 7.0, all essential soil elements are available for optimal turfgrass growth. A soil test will determine if lime is needed to raise the pH or if sulfur is needed to lower the pH.
Fill a quart sized plastic bag with soil from 10-12 random places in your lawn. Using a spade take soil from 2-6” below the surface. Remove roots from the soil. Take the soil sample to your local Oklahoma State University County Extension Office. They will test the soil and send you a report for a nominal fee. The Oklahoma County office is located at 2500 NE 63rd St., Oklahoma City, OK 73111.
Or, give us a call and we will gather a sample and take it to the lab for you.

Just like Lawn Care Applications, Maintenance activities by themselves will not fix
all your lawn problems. But, without proper maintenance activities,
lawn care applications will not be as effective.
We look forward to continuing the conversation of the three keys to a great lawn next month when we discuss how the environment impacts your efforts to have a beautiful lawn.
If you subscribe to a Hall | Stewart Lawn Care Program, good maintenance practices are a key to getting the most out of our lawn care applications.
If you have any questions, please let us know. We enjoy visiting with you about your lawn.
Lorne Hall
Hall | Stewart Lawn + Landscape
(405)367-3873

Spring Dead Spot – Oklahoma’s #1 Turf Disease

Oklahoma is in the transition zone.
What is the transition zone?
It is the zone between where warm season turf grows best and the zone where cool season turf grows best.
Warm Season Turfs: Bermuda Grass and Zoysia Grass.
Cool Season Turfs: Fescue Grass, Rye Grass, Blue Grass
The transition zone is an overlap area where warm season grasses do well in the heat of the summer while cool season grasses do well in the spring and the fall, and some cool season grasses, such as tall fescue, continue to do well through most summers.
The transition zone is the area where you can’t go wrong growing either warm season grasses or cool season grasses.
Developing and maintaining a great warm season turf can be a challenge in the transition zone where winter temperatures often get colder than warm season grasses prefer and where it is common for an April freeze to stunt warm season turf green-up.
Consistently warming soil temperatures are critical for bermuda to exit dormancy and become active.
This year, the spring has been kind to Bermuda and zoysia lawns by not delivering us a freeze after the first of April. Green-up has been gradual and consistent.
Challenging areas remain. Lawns with partial shade, where soil temperatures lag, are trying to catch up. Thin turf areas, as well as lawns with weak root systems, are also behind in green up.
Our goal each week is to discuss the things we encounter while visiting lawns and landscapes. This time of year, as the warm season lawns are greening up, we get a lot of calls about dead spots in Bermuda lawns.
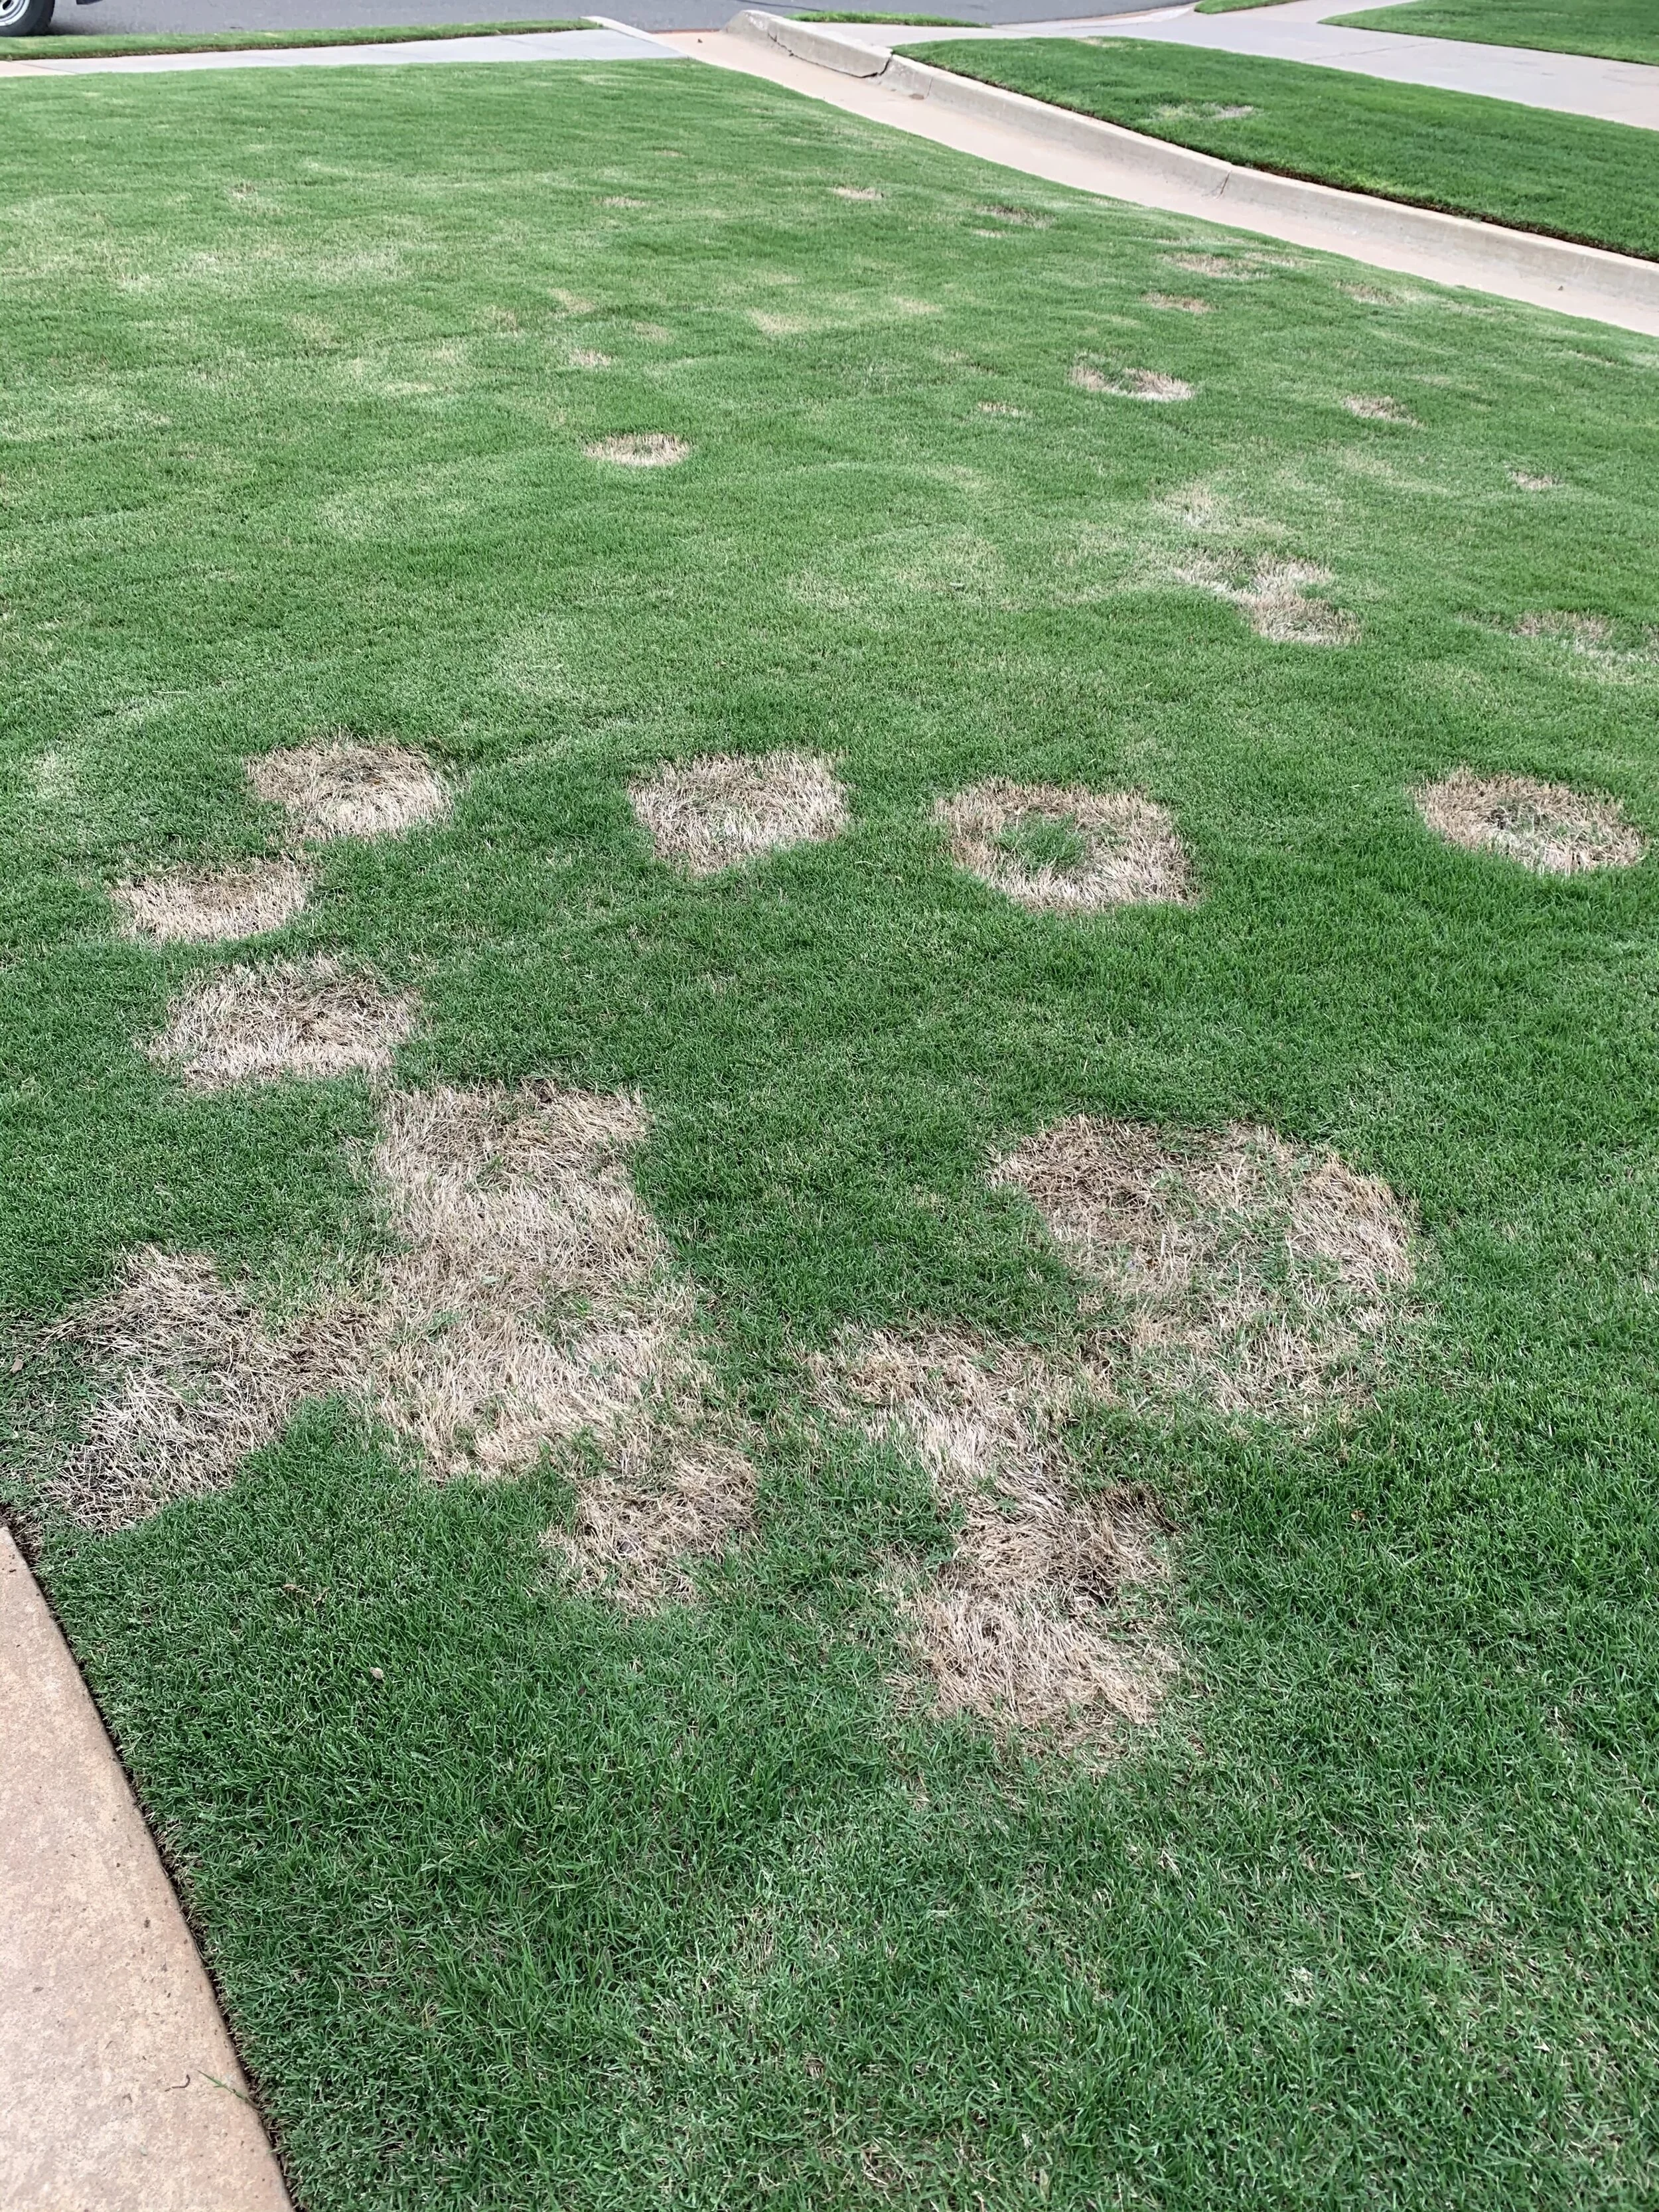
“What are all the circular dead spots in bermuda lawns?”
Is it grubs?
Is it damage caused by a weed killer?
These are common assumptions, but they are neither.
It is a disease…Spring Dead Spot.
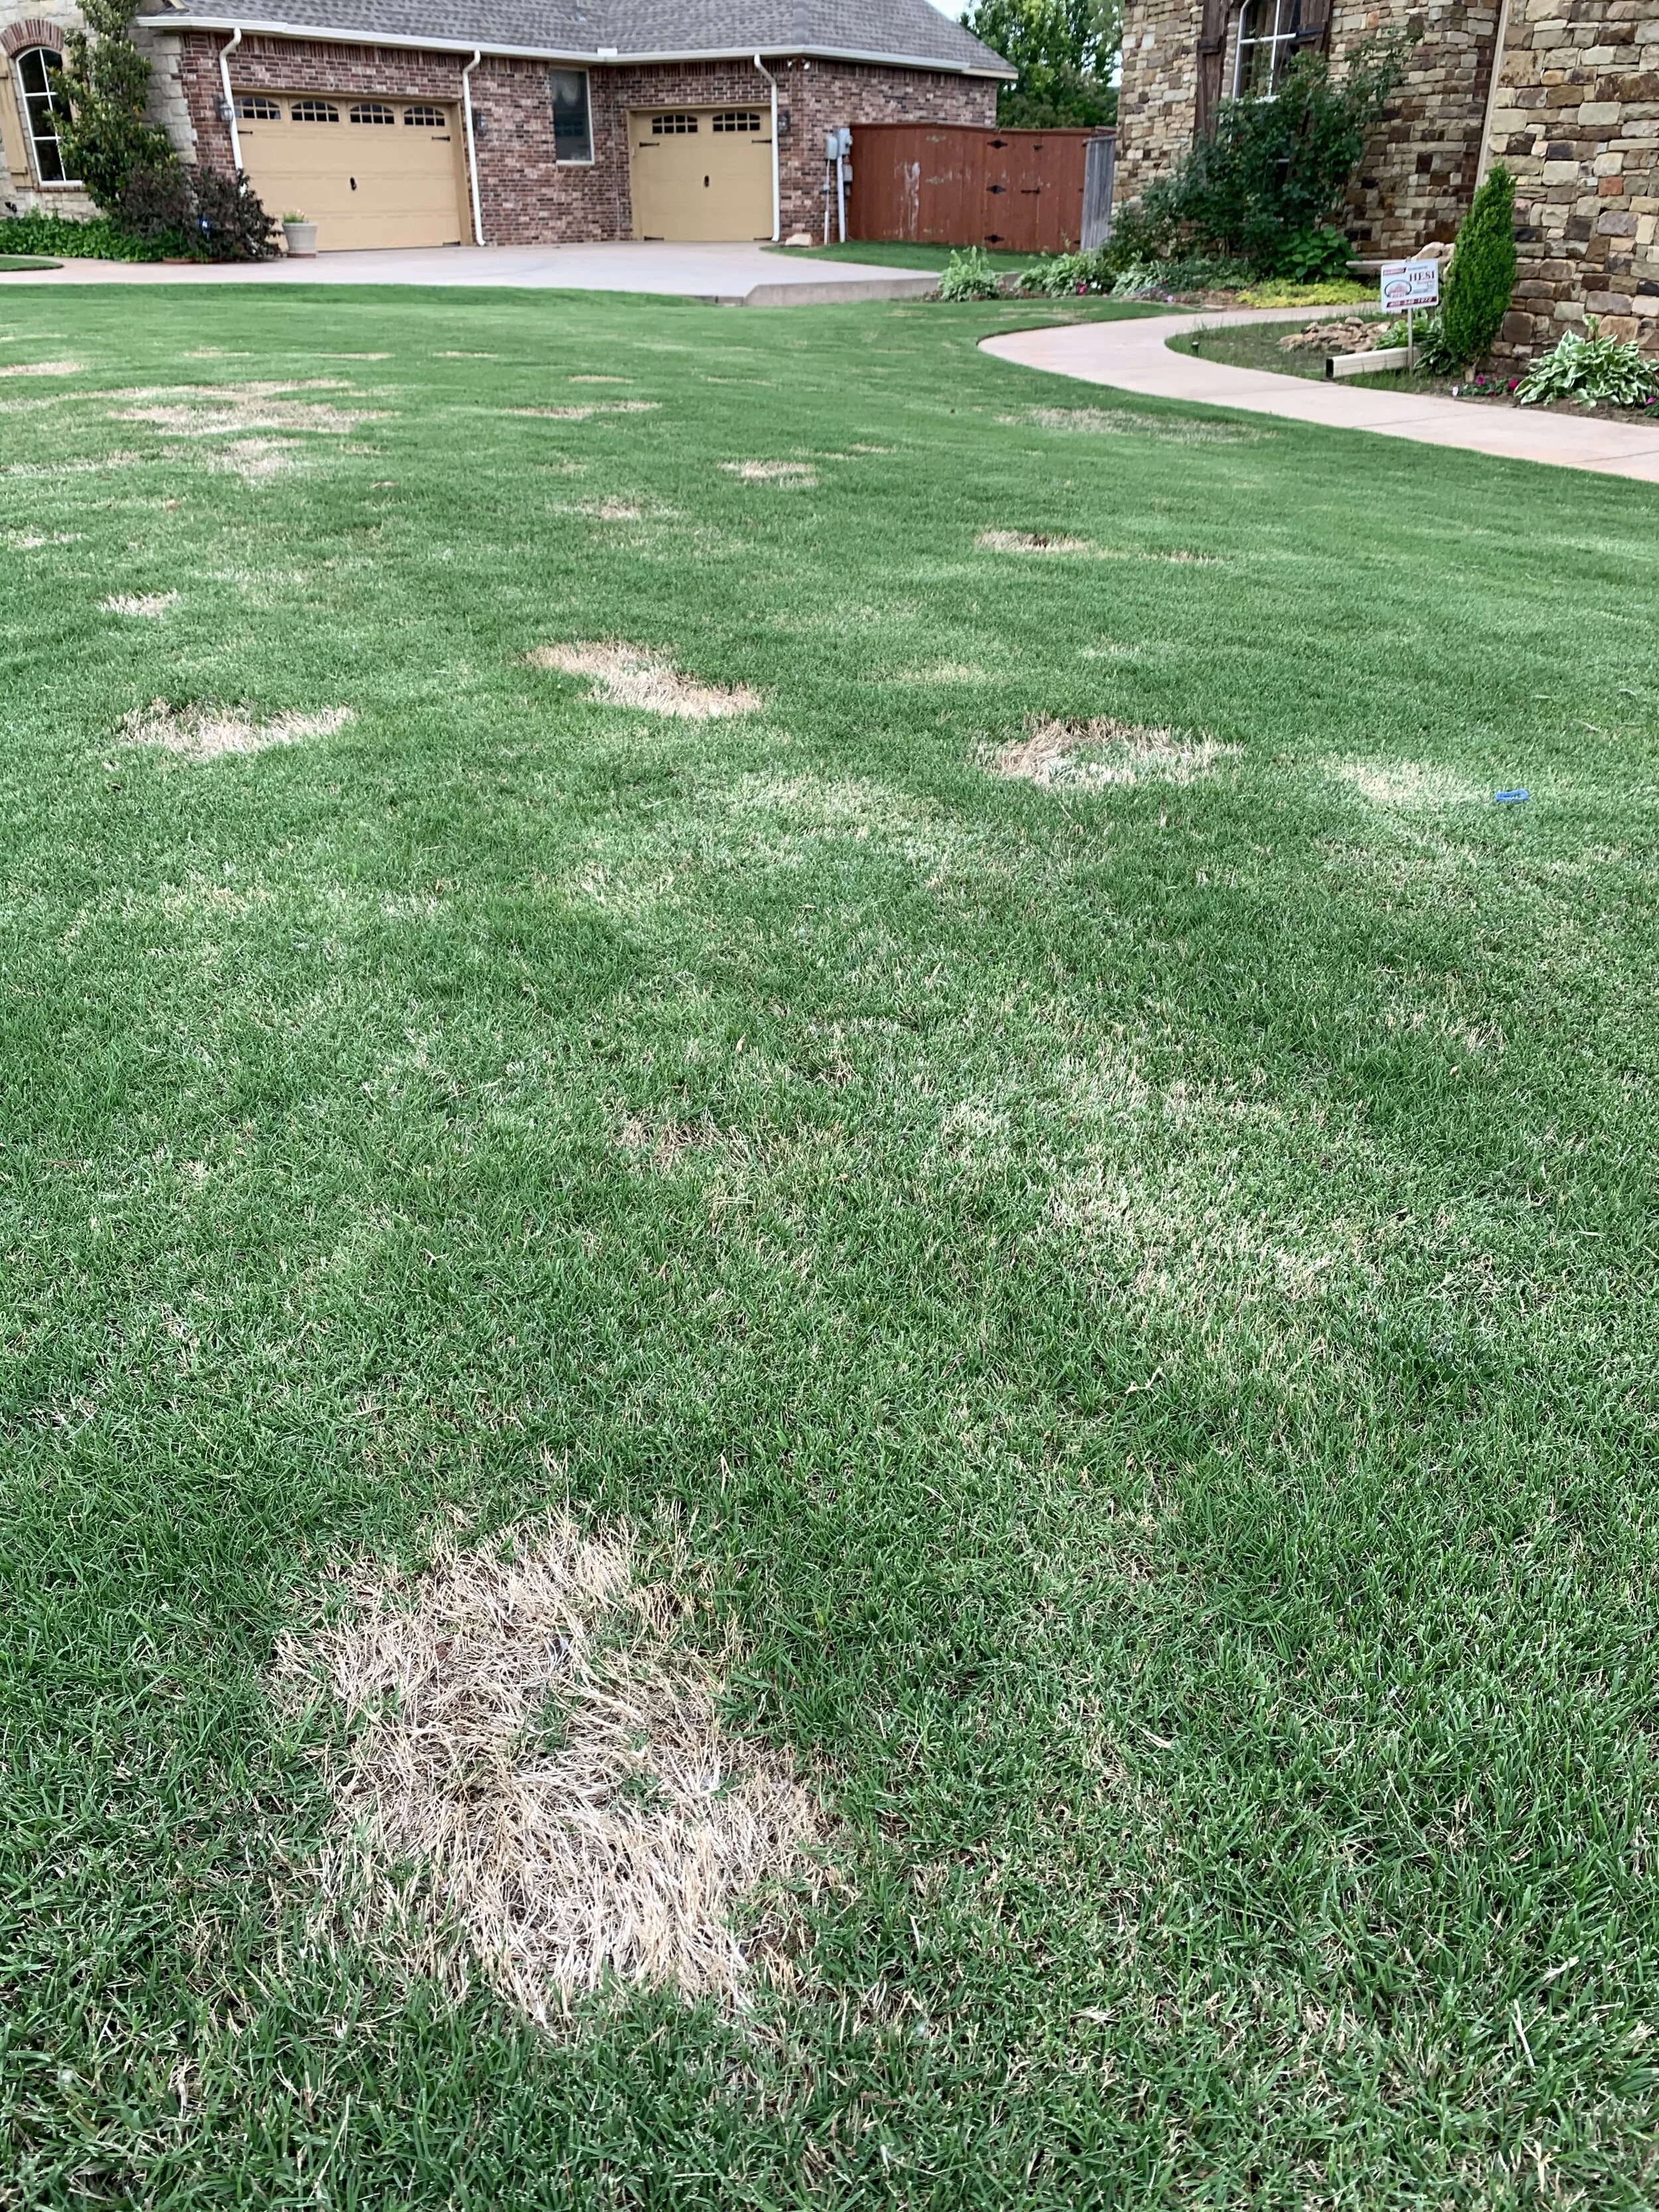
Spring Dead Spot is widespread in Oklahoma and holds the title as the number one disease of Bermuda lawns in the region. You can count on there always being some Spring Dead Spot, but some springs the disease is worse than others. When the fall, winter, and spring conditions are right for Spring Dead Spot, any Bermuda lawn in our region has the potential to be a host for the disease.
Let’s look at the history, symptoms, disease cycle, causes, and possible solutions for preventing and controlling this mysterious Bermuda grass disease.
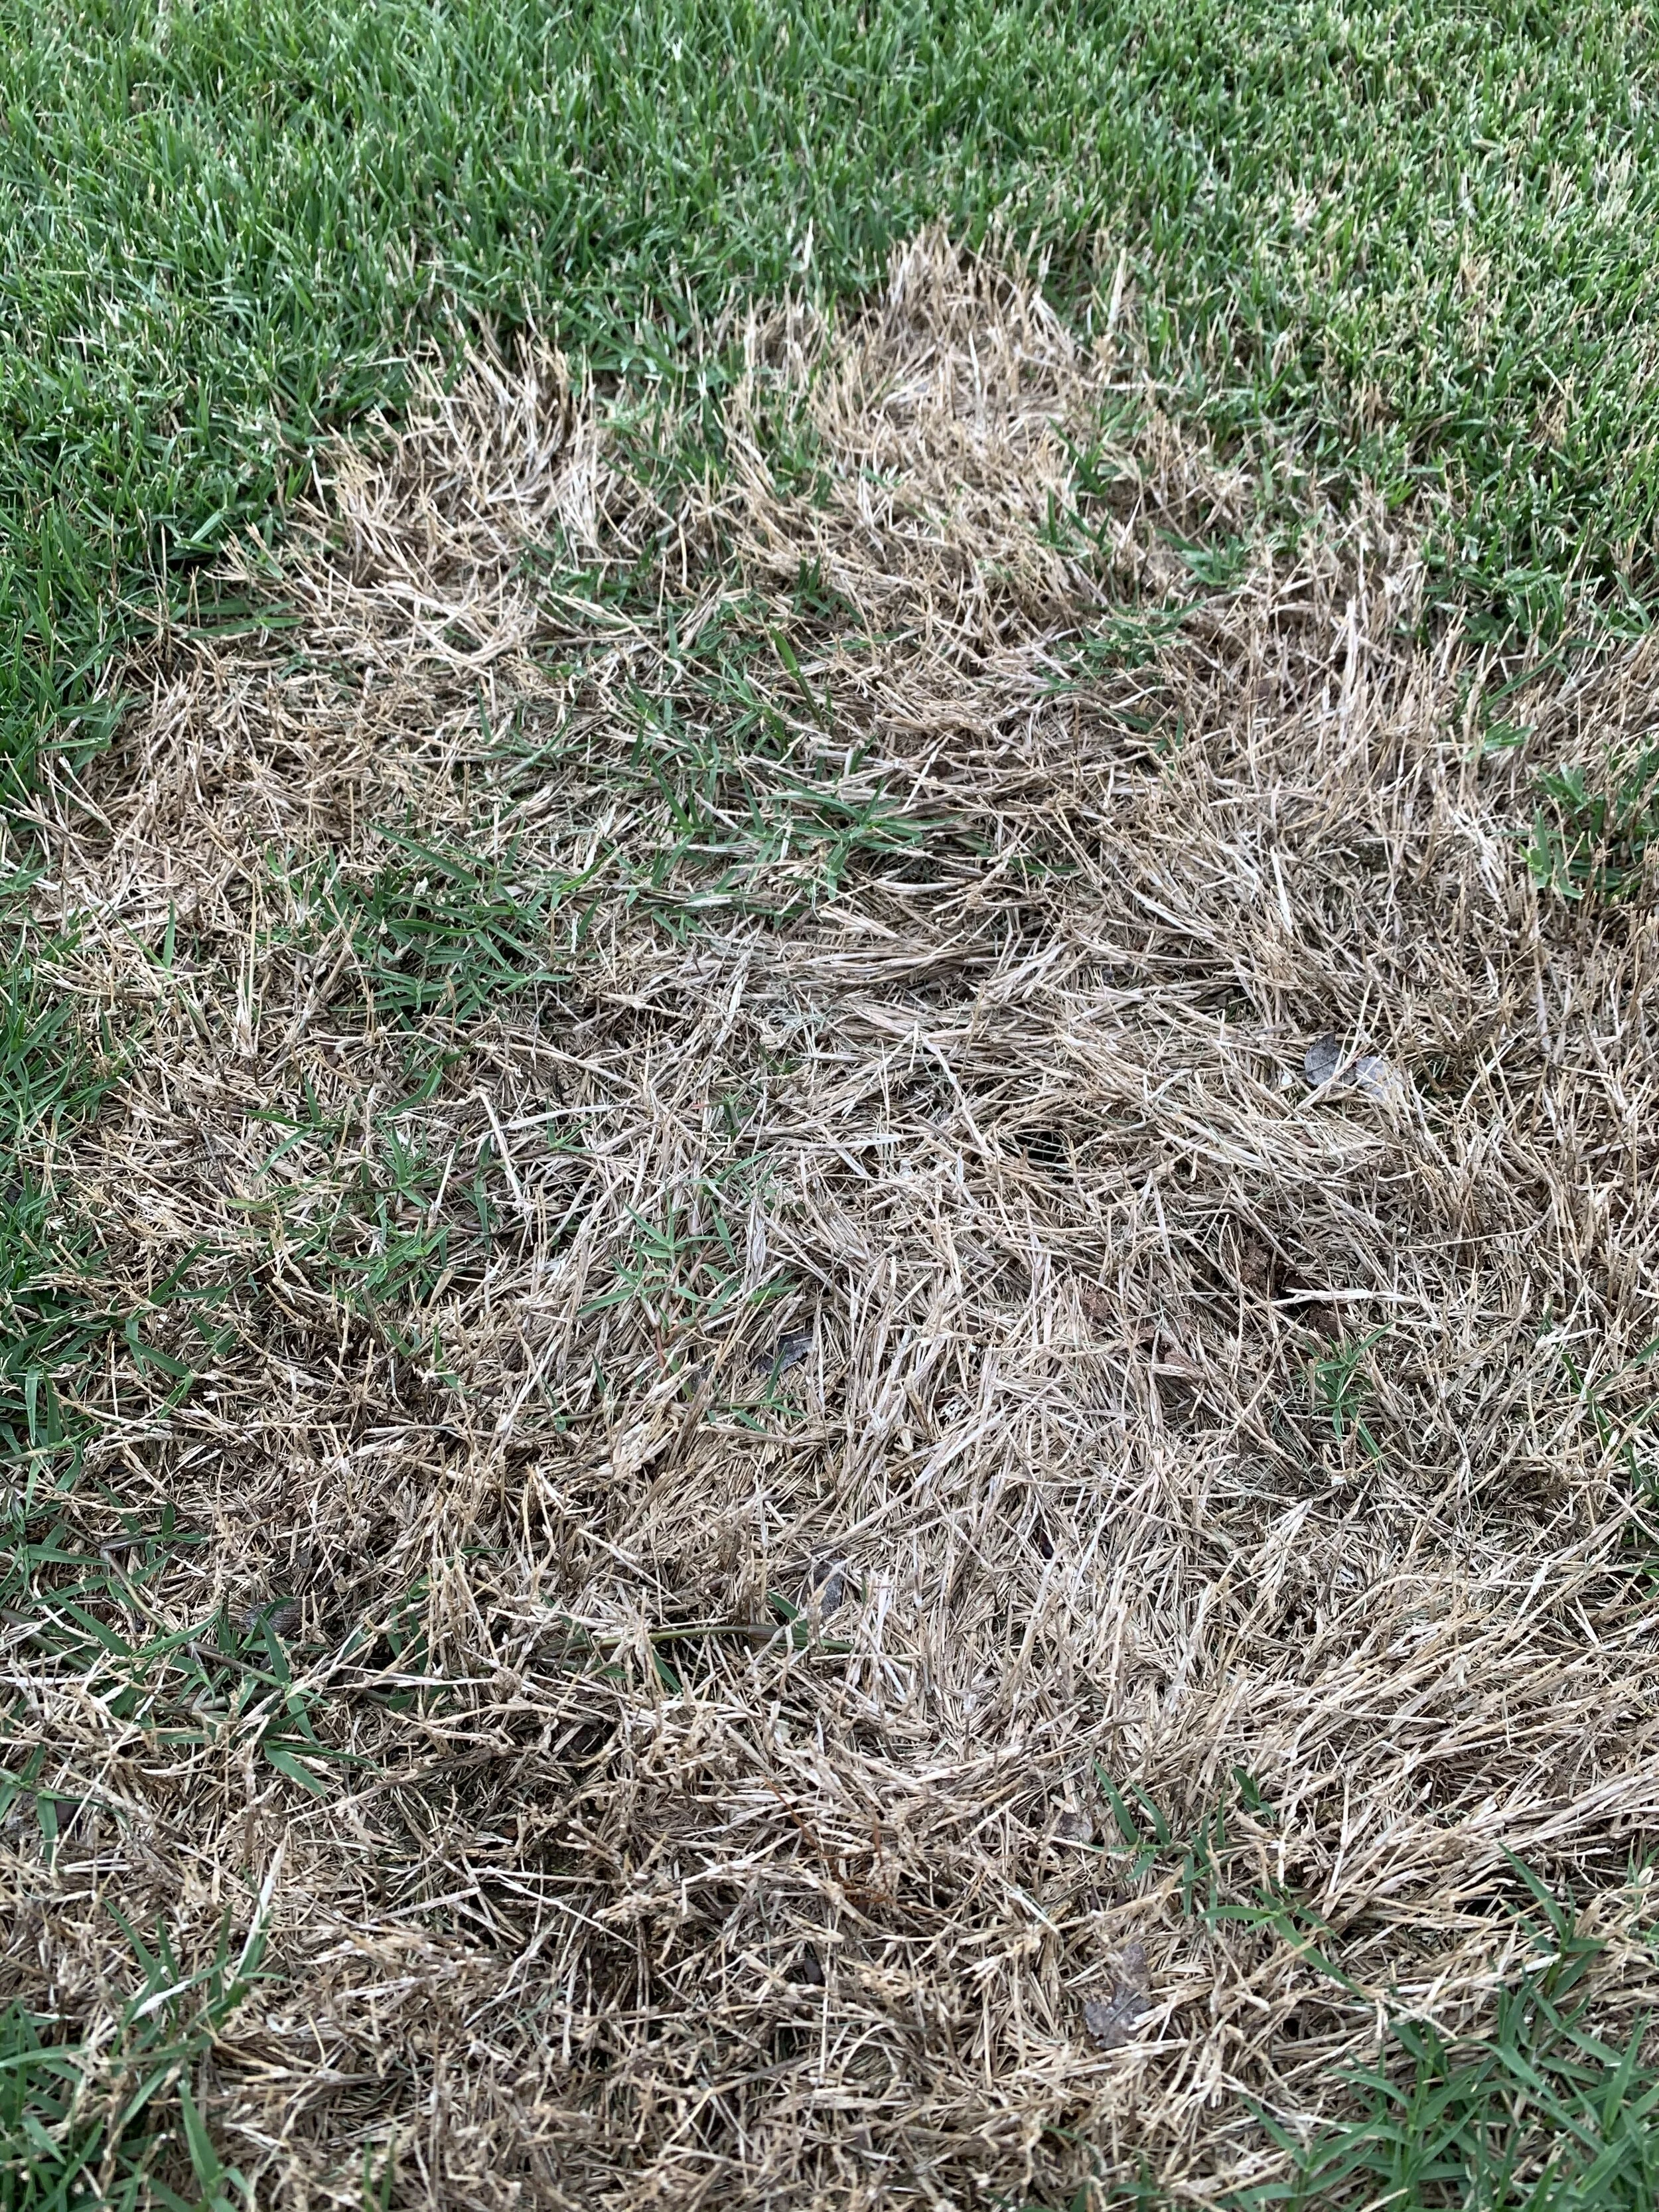
Spring Dead Spot patches will begin to develop grow of healthy grass in the patch after a couple of years.
History
Spring Dead Spot has been a problem for a long time. The first case was discovered in Oklahoma in 1936 by a golf course superintendent following a harsh Oklahoma winter.
By the 1950s, the unknown disease had become so prevalent in our state that Oklahoma State University plant pathologists began simply referring to the disease as Spring Dead Spot.
In the 1960s, the disease became so widespread in suburban Atlanta lawns, particularly hybrid Bermuda, that the University of Georgia launched a research program. After three years of research, the university still didn’t know the cause and never could get the disease to reproduce in test plots.
In more recent years, Oklahoma State University has focused research on the disease. What they have found is the disease is tough to eradicate, tough to manage, and unpredictable.
Symptoms
Spring Dead Spot makes an appearance in the spring with ugly, rounded, bleached white dead spots in Bermuda lawns. The spots range in size from a few inches to a few feet in diameter. If you dig up the roots in the area, they will appear black and rotting.
Damaged patches tend to recur in the same spots year after year. After a couple of years, the center of the spots will begin to develop a patch of healthy turf.
Spring Dead Spot typically isn’t active in newer lawns. It is common for it to first make an appearance 3 or 4 years into a new lawn. Just as strangely, the disease often becomes less active after a few years. All this just adds to the mystery of the disease.
This coincides with my experience: the disease is more common in newer neighborhoods and rarely found in older established areas of the city.
Because the pathogen causes rotting of the roots, rhizomes and stolons, the susceptibility to winter injury increases in the affected areas. The colder the winter or the harsher the April freeze, the more spring dead spot damage we see.
A better example of healthy turf grass growing in the Spring Dead Spot patch after a couple of years.
Disease Cycle
In Oklahoma, the disease becomes active starting in September as soil temperatures begin to cool and reach 70 degrees and remains active through the winter if soil temperatures stay above 50 degrees.
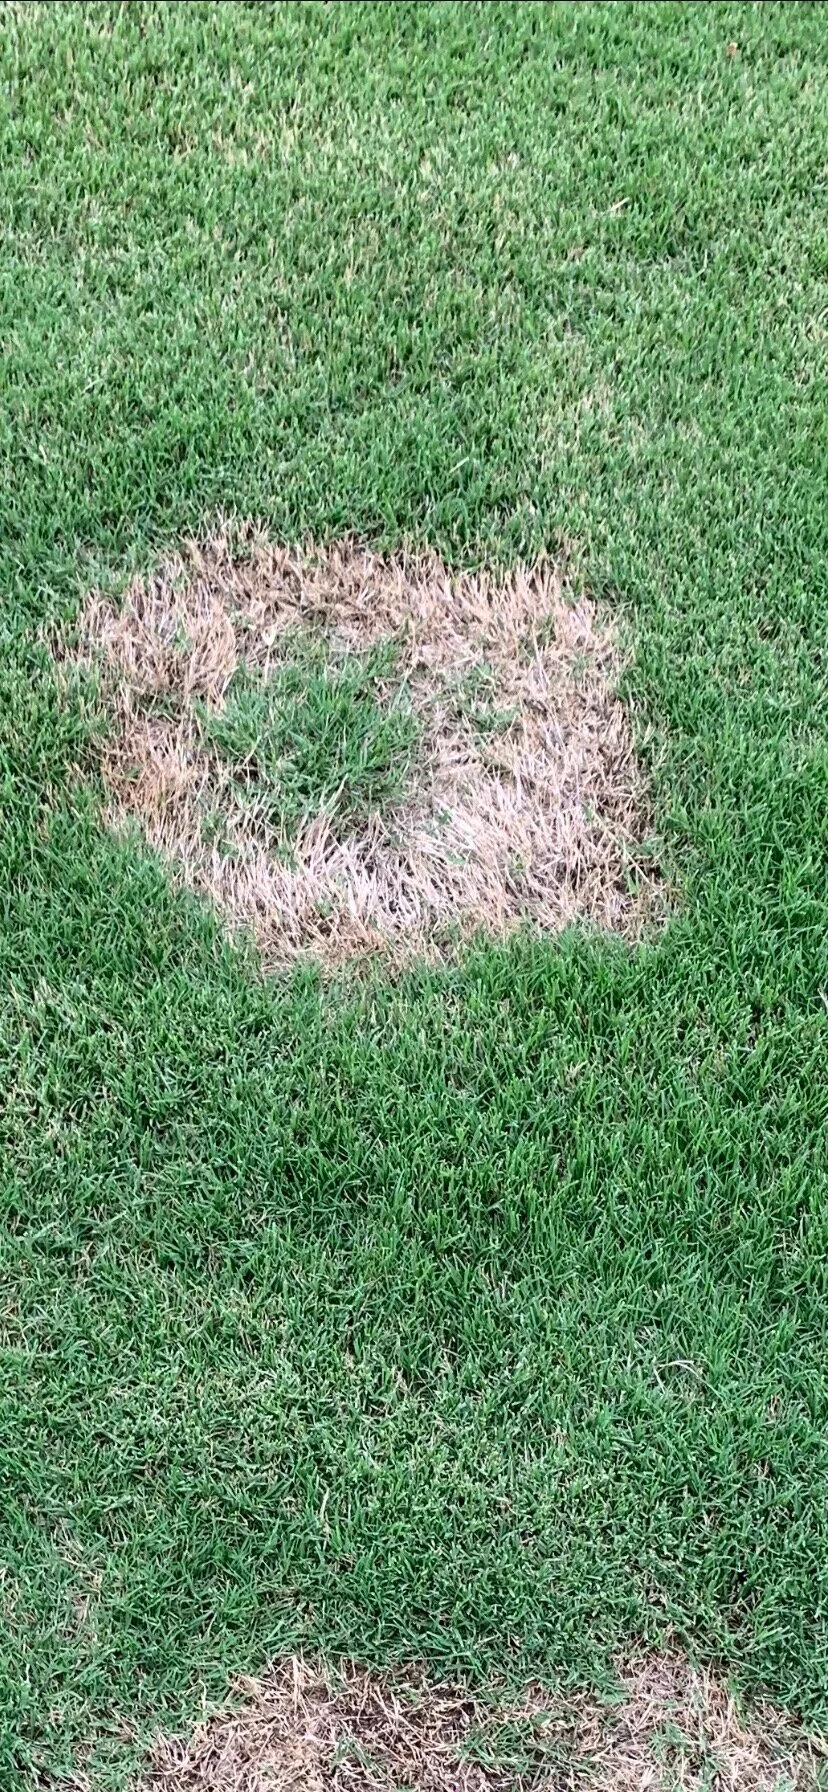
Recovery starts in the late spring and continues through the summer as healthy turf around the Spring Dead Spot area grows into the damaged area.
Because the damaged spot often doesn’t have time to completely heal and develop strong roots, the same spots reappear each spring. Research shows that the spots can reappear in the spring because of freeze damage, even if the disease isn’t active that year.
Causes
The most serious Spring Dead Spot outbreaks occur in highly managed Bermuda, often hybrid types. It is a common problem in turf that receives heavy nitrogen fertilizer applications, mowed at low settings, and receives frequent foot traffic.
Turf grass that receives late-season applications of nitrogen to extend green color are more prone to the development of Spring Dead Spot.
More cold tolerant varieties of Bermuda grasses have less problems with the disease than hybrid types that are less cold hardy.
Cultural Practices for Spring Dead Spot Management
No single management practice will provide complete control of Spring Dead Spot. The best prevention and control of Spring Dead Spot comes from practices that promote a dense turf and a healthy root system. Because the disease is more prevalent in tight compacted soils, which often have poor root systems, annual aeration is important as it will promote a healthy root system and lessen the probability of the disease.
Although the impact of soil pH is unclear on the development of Spring Dead Spot, an annual soil test to ensure the correct pH is maintained will encourage plant vigor and reduce turf stress.
Recovery improves with a fertilizer routine that ensures the lawn will receive 3 to 5 pounds of nitrogen per 1,000 square feet during the growing season with the first application being made in April to May as soil temperatures consistently rise.
Applications of more than .5 pounds of nitrogen after September 15 must be avoided. Some research shows that heavier applications of potassium in the fall promotes winter hardiness. Others believe, soils in our region already contain sufficient potassium, if the soil pH is near neutral.
The desire to have a green and actively growing bermuda lawn as long into the fall as possible may be the most common practice that leads to the development of Spring Dead Spot.
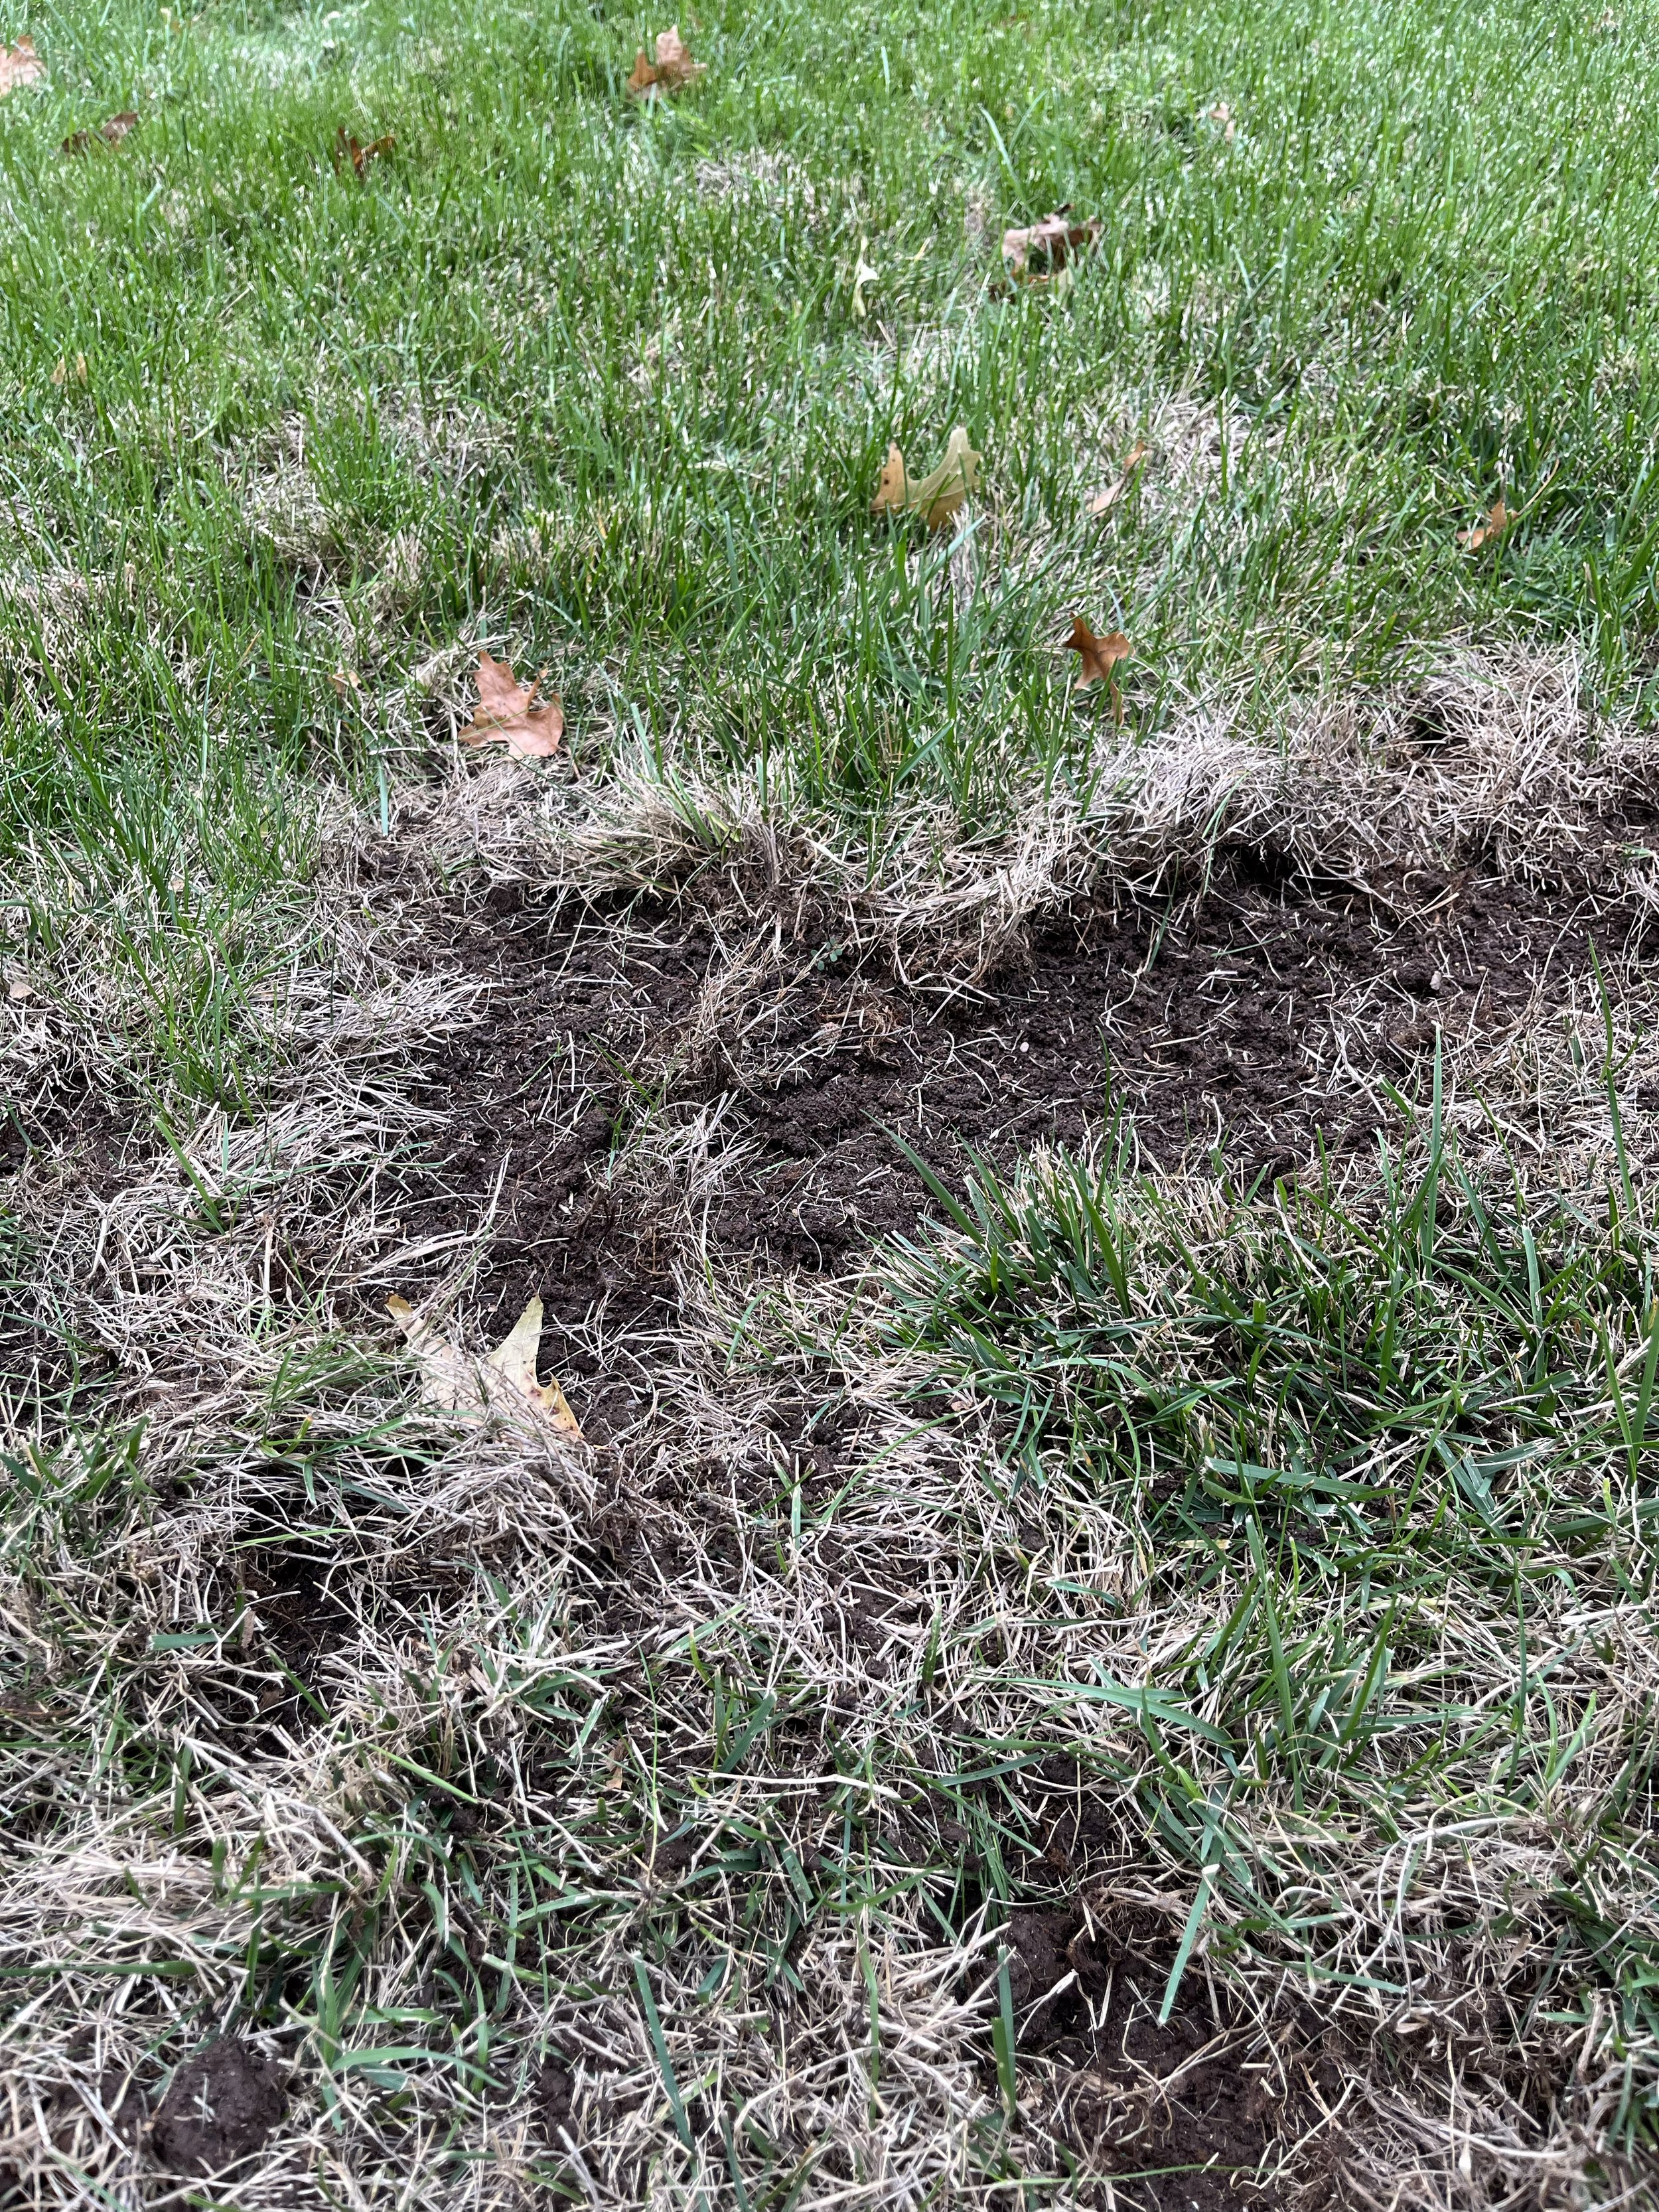
If you have small areas of the disease in your lawn, the best solution is to remove the soil in the damaged area to a depth of 12” and replace it with new soil.
Raising the mower height going into September will increase the leaf surface resulting in higher levels of carbohydrate reserves in the roots. The result will be more insulation for winter temperatures.
Spring Dead Spot after a few seasons of recovery.
Chemical Management
A fungicide applied in the fall as soon as soil temperatures fall to 70 degrees followed by a second application in 30 days may result in control of the disease. It is important to commit to two applications as research shows a single application is generally not effective. Spring applications of fungicides are not as effective as the disease is not active in the spring.
Keep in mind fungicide results can be inconsistent from year to year. Control through fungicides requires a 2-to-4-year commitment for consistent results.
Prevention and control of Spring Dead Spot can be tricky.
The disease can be very frustrating.
Everyone wants their turf to look the best, but if you have a Bermuda lawn, there is always the chance Spring Dead Spot will make an appearance.
If you are experiencing Spring Dead Spot keep in mind the best recovery occurs over time and with warmer temperatures. Don’t give up!
Commit - To best maintenance practices, including aeration, to develop a thick turf with a healthy root system.
Most Critical - Avoid the temptation to promote late season growth.
Remove & Replace Soil – The best solution is to remove 12” of soil in the affected areas and replace it with new soil.
Schedule - A fall fungicide treatment plan.
If you have more questions about Spring Dead Spot, or any other lawn care issue, please give us a call.
Lorne Hall
Hall | Stewart Lawn + Landscape
(405)367-3873

The best way to repair small areas of Spring Dead Spot is to remove the damaged soil to the depth of 12” and replace with fresh soil.
3 Keys to a Great Lawn -- #1 Lawn Care Applications

When it comes to having a great lawn, what is most important?
Lawn care applications?
Maintenance practices?
Environmental conditions?
All three are keys to a great lawn - Lawn Care Applications, Maintenance, and Environmental Conditions.
Great lawns are not a result of getting one, or even two, of the three correct.
Great lawns are equally the result of all three.
Discussing the three keys to a great lawn is too much for one writing, so we are going to cover each key separately.
Today, we will cover Lawn Care Applications. Next month we will visit about how proper Maintenance impacts your lawn and discuss the impact Environmental Conditions have on the greatness of your lawn in June.
Lawn care applications are comprised of two components — weed control and fertilizer.
Weed Control Applications - Correct Timing of Weed Control Applications is Important
Three things you need to know about weeds:
First - Knowing weed life cycle is important when it comes to prevention and control.
Annual weeds germinate from seed, grow and flower (produce seed) all within one year.
Perennial weeds continue to grow year after year increasing in both size and root.

Second - Identifying the type of weed, are either broadleaf or grassy, is equally important.
Broadleaf weeds are the easiest to spot because they look very different from grass. Broadleaf weeds have a stem with leaves attached.
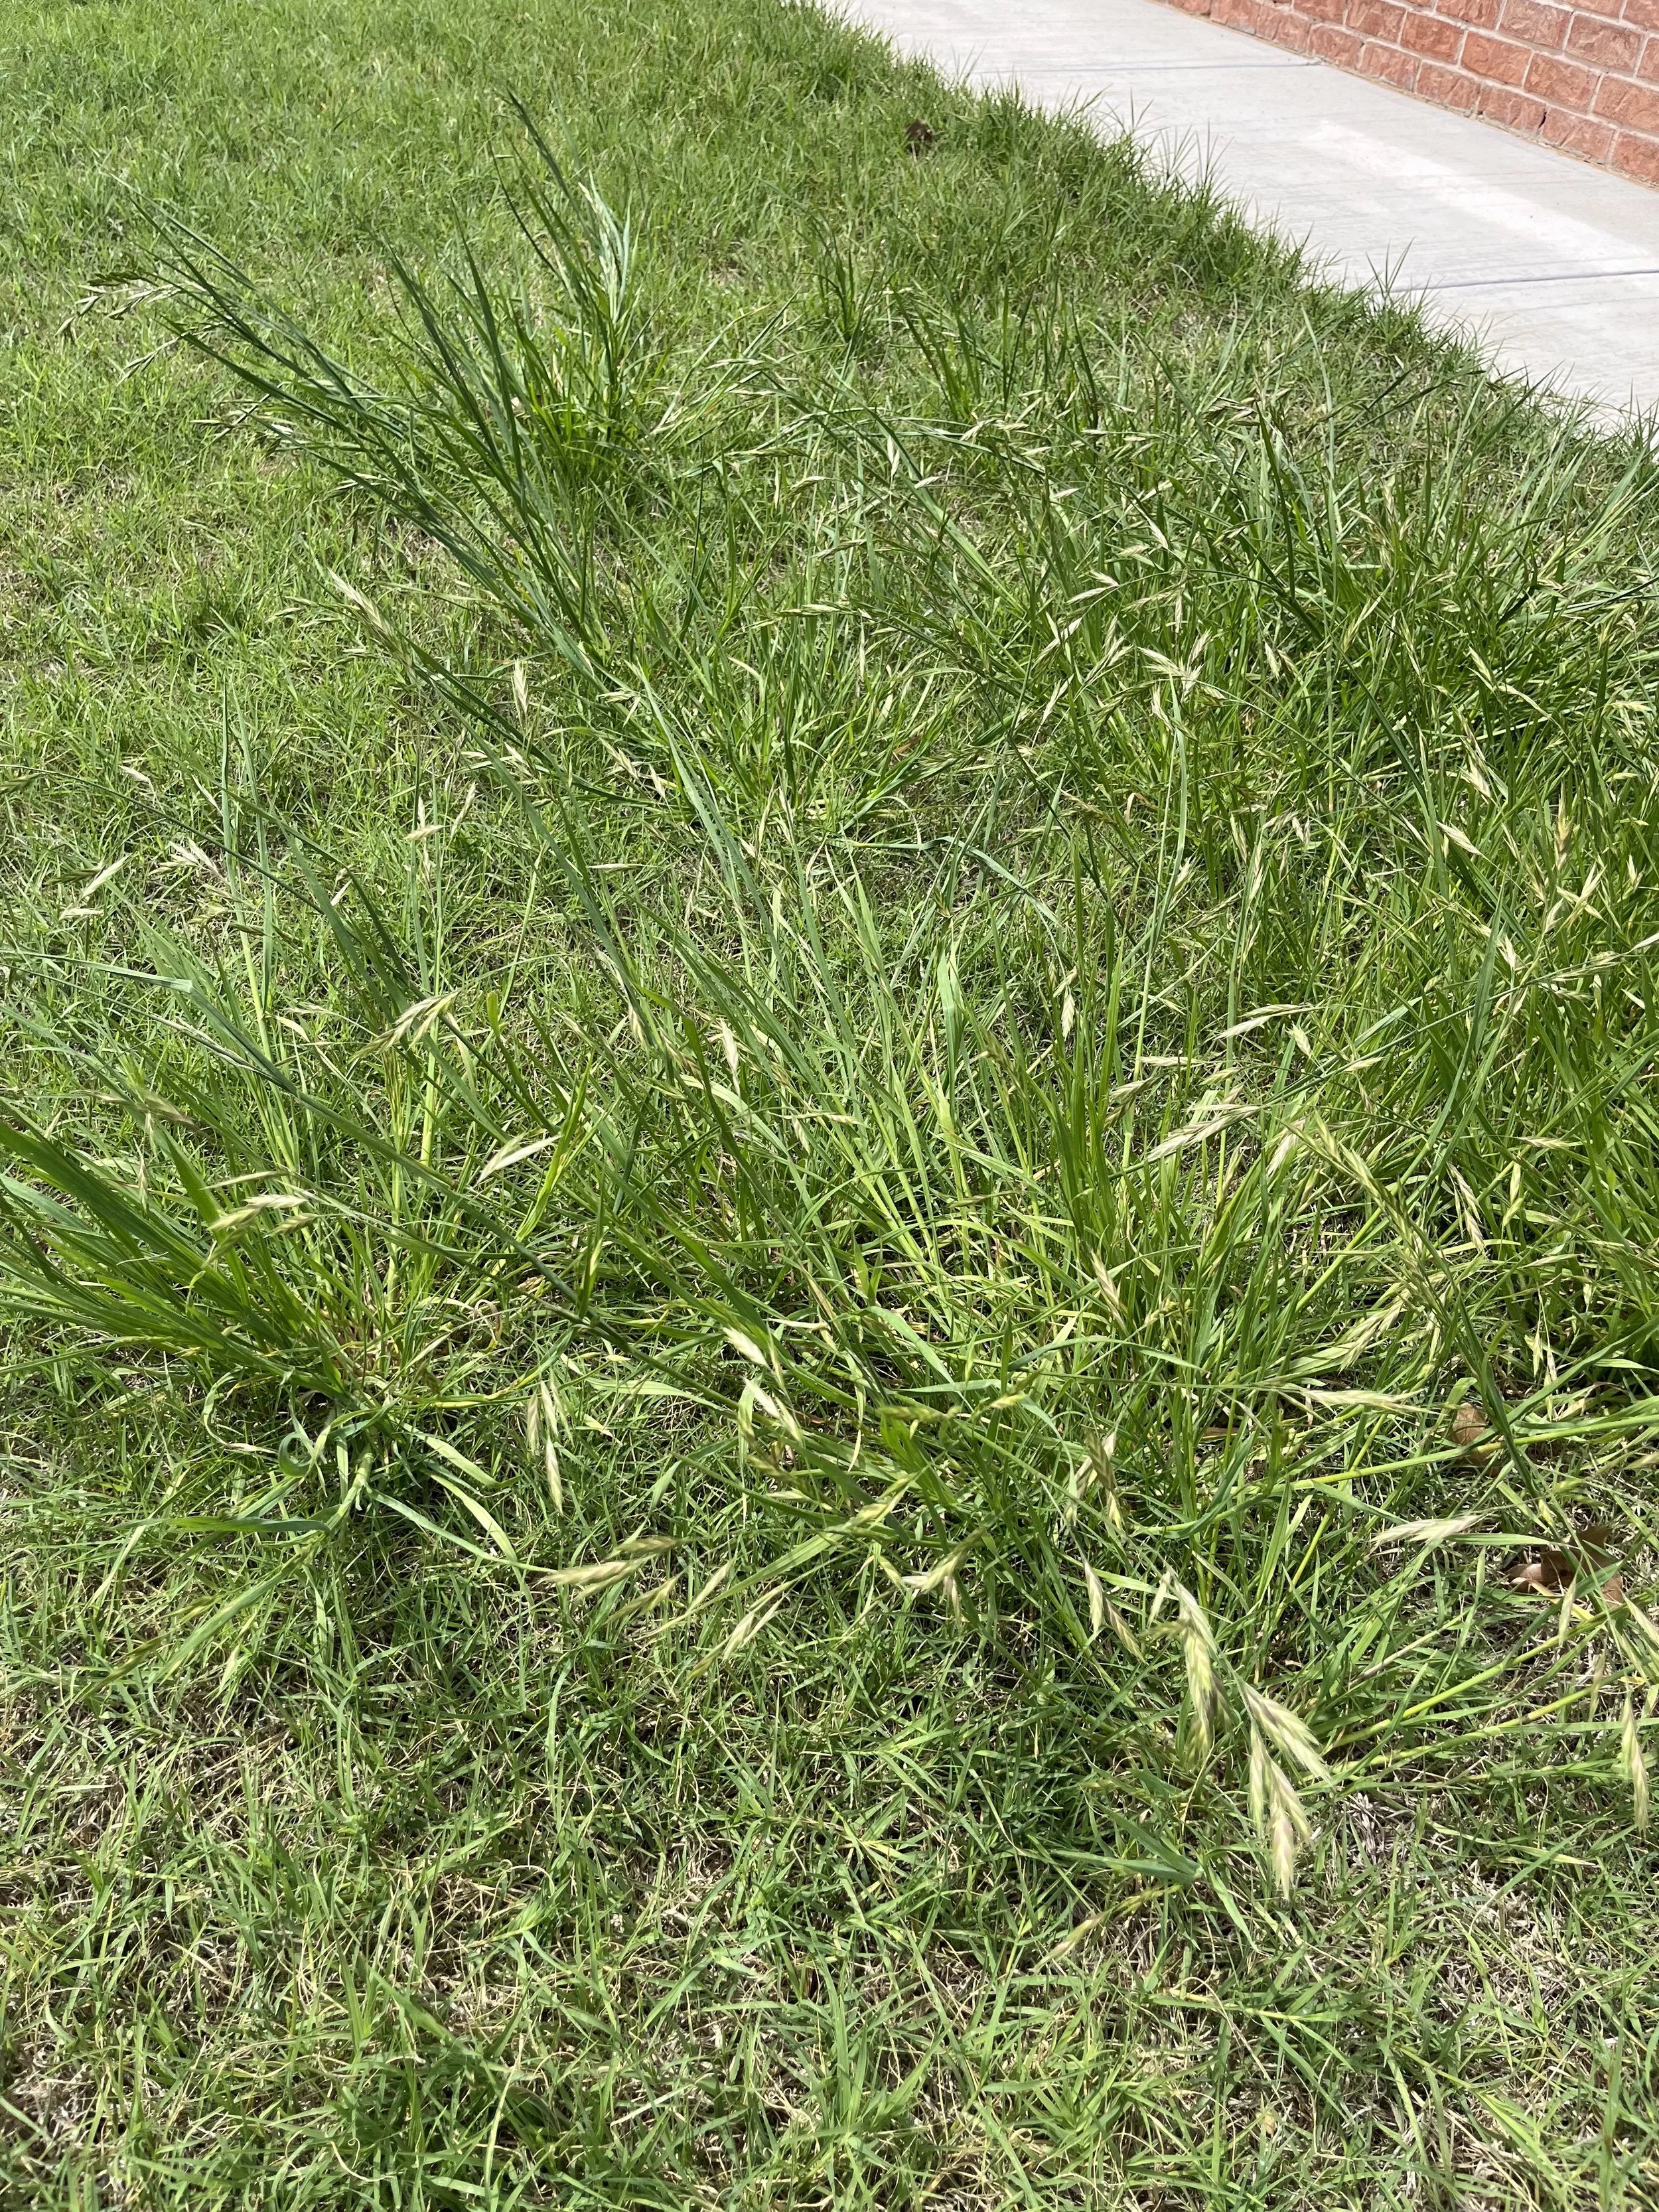
Grassy weeds are actually undesired grass that grow as one single leaf. Grassy weeds are similar to turf grass. Often, they are not as noticeable when they are small but will destroy the aesthetics of a lawn as they mature.
Third – Weeds are either winter weeds or summer weeds.
With annual weeds there is a correct time to prevent and with perennial weeds there is a best time to control. Annual weeds are easiest to prevent, but they can be very difficult to control when mature.
Lawns that are littered with mature weeds during March and April are the lawns that did not receive a fall pre-emergent application last year.

Mature weeds are slower to respond to herbicides. Once a weed starts producing flowers they slow growth and don’t take in herbicides as quickly.
Winter annuals are prevented with a pre-emergent herbicide in late summer and fall. Summer annual weeds are prevented in the late winter and spring. Timing is the key to both. For the best results, the pre-emergent needs to be applied before the weeds germinate.
To prevent summer annual weeds, an application must be made before soil temperatures reach 55 degrees for three consecutive days, which is typically in mid-March.
To prevent winter annual weeds, an application must be made before the first cool spell occurs in late September to early October.
Commonly asked question: “Is it too late to start a lawn care program this year?”
No, it is never too late to start. Weeds will continue to germinate all summer. Turf development is important during the growing season. Starting a lawn care program at any point during the season is better than not starting at all.
Effective prevention of annual weeds is enhanced when a second pre-emergent application is made 30-60 days after the first application. Pre-emergent herbicides have a life. Depending on conditions, the product used and the quality of the application, pre-emergent herbicides will last 60 to 120 days. A second application creates a season long barrier of weed prevention.
A proactive approach to weed control is two timely pre-emergent herbicide applications to prevent summer annual weeds and two timely applications to prevent winter annual weeds.

Mature crabgrass is much harder to control during the growing season.

Now that soil temperatures have consistently been above 55 degrees for a few weeks crabgrass has started growing in lawns that did not receive a pre-emergent early this year. A pre-emergent now will prevent more crabgrass and other summer annuals from germinating.

Crabgrass, a summer annual grassy weed, is very easy to prevent with a pre-emergent applied in before soil temperatures reach 55 degrees. It is also easy to control when it is in the first stage of growth. This picture was taken this week and is the first crabgrass I have seen this year, two weeks later than normal.

Most weeds littering lawns in March, such as henbit, can easily be prevented with fall pre-emergent herbicides.

A well timed lawn care program will result in your best lawn.
Persistence is a key to gaining control of weeds. Between keeping the area mowed and spraying with herbicides, control can be gained.
Hall | Stewart Lawn Care Programs, both our most popular 7-Step Weed Control & Fertilizer Program and our 4-Step Weed Control Only Program, include 4 pre-emergent herbicide applications each year:
Late Winter - January through early March
Spring – Mid March through mid-May
Early Fall – Mid August through September
Late Fall – October through November
But, not all weeds can be prevented. Existing weeds and perennial weeds require post emergent weed control applications.
The key to controlling perennial weeds and mature annual weeds is applying the right herbicide at the right time and the willingness to make follow-up applications when required.
Post Emergent Weed Control Takes Persistence
Fall (October-November) is the best time to control winter broadleaf weeds when they are small and actively growing. Spring (April-May) is the best time to control summer broadleaf weeds.

When a weed is actively growing it absorbs herbicides much quicker. Once a weed begins flowering growth slows as it focuses on reproduction. During this stage weed control is possible, but slower.

Nutsedge is one of the difficult to control weeds that often requires additional treatments.
Post-emergent weed control is always more difficult when the weed is mature and flowering. Herbicides work by translocating through the plant. When a weed is actively growing, it absorbs the product quickly. Once the weed starts to flower (seed), it slows growth and focuses on reproduction. During this stage, control is much slower.
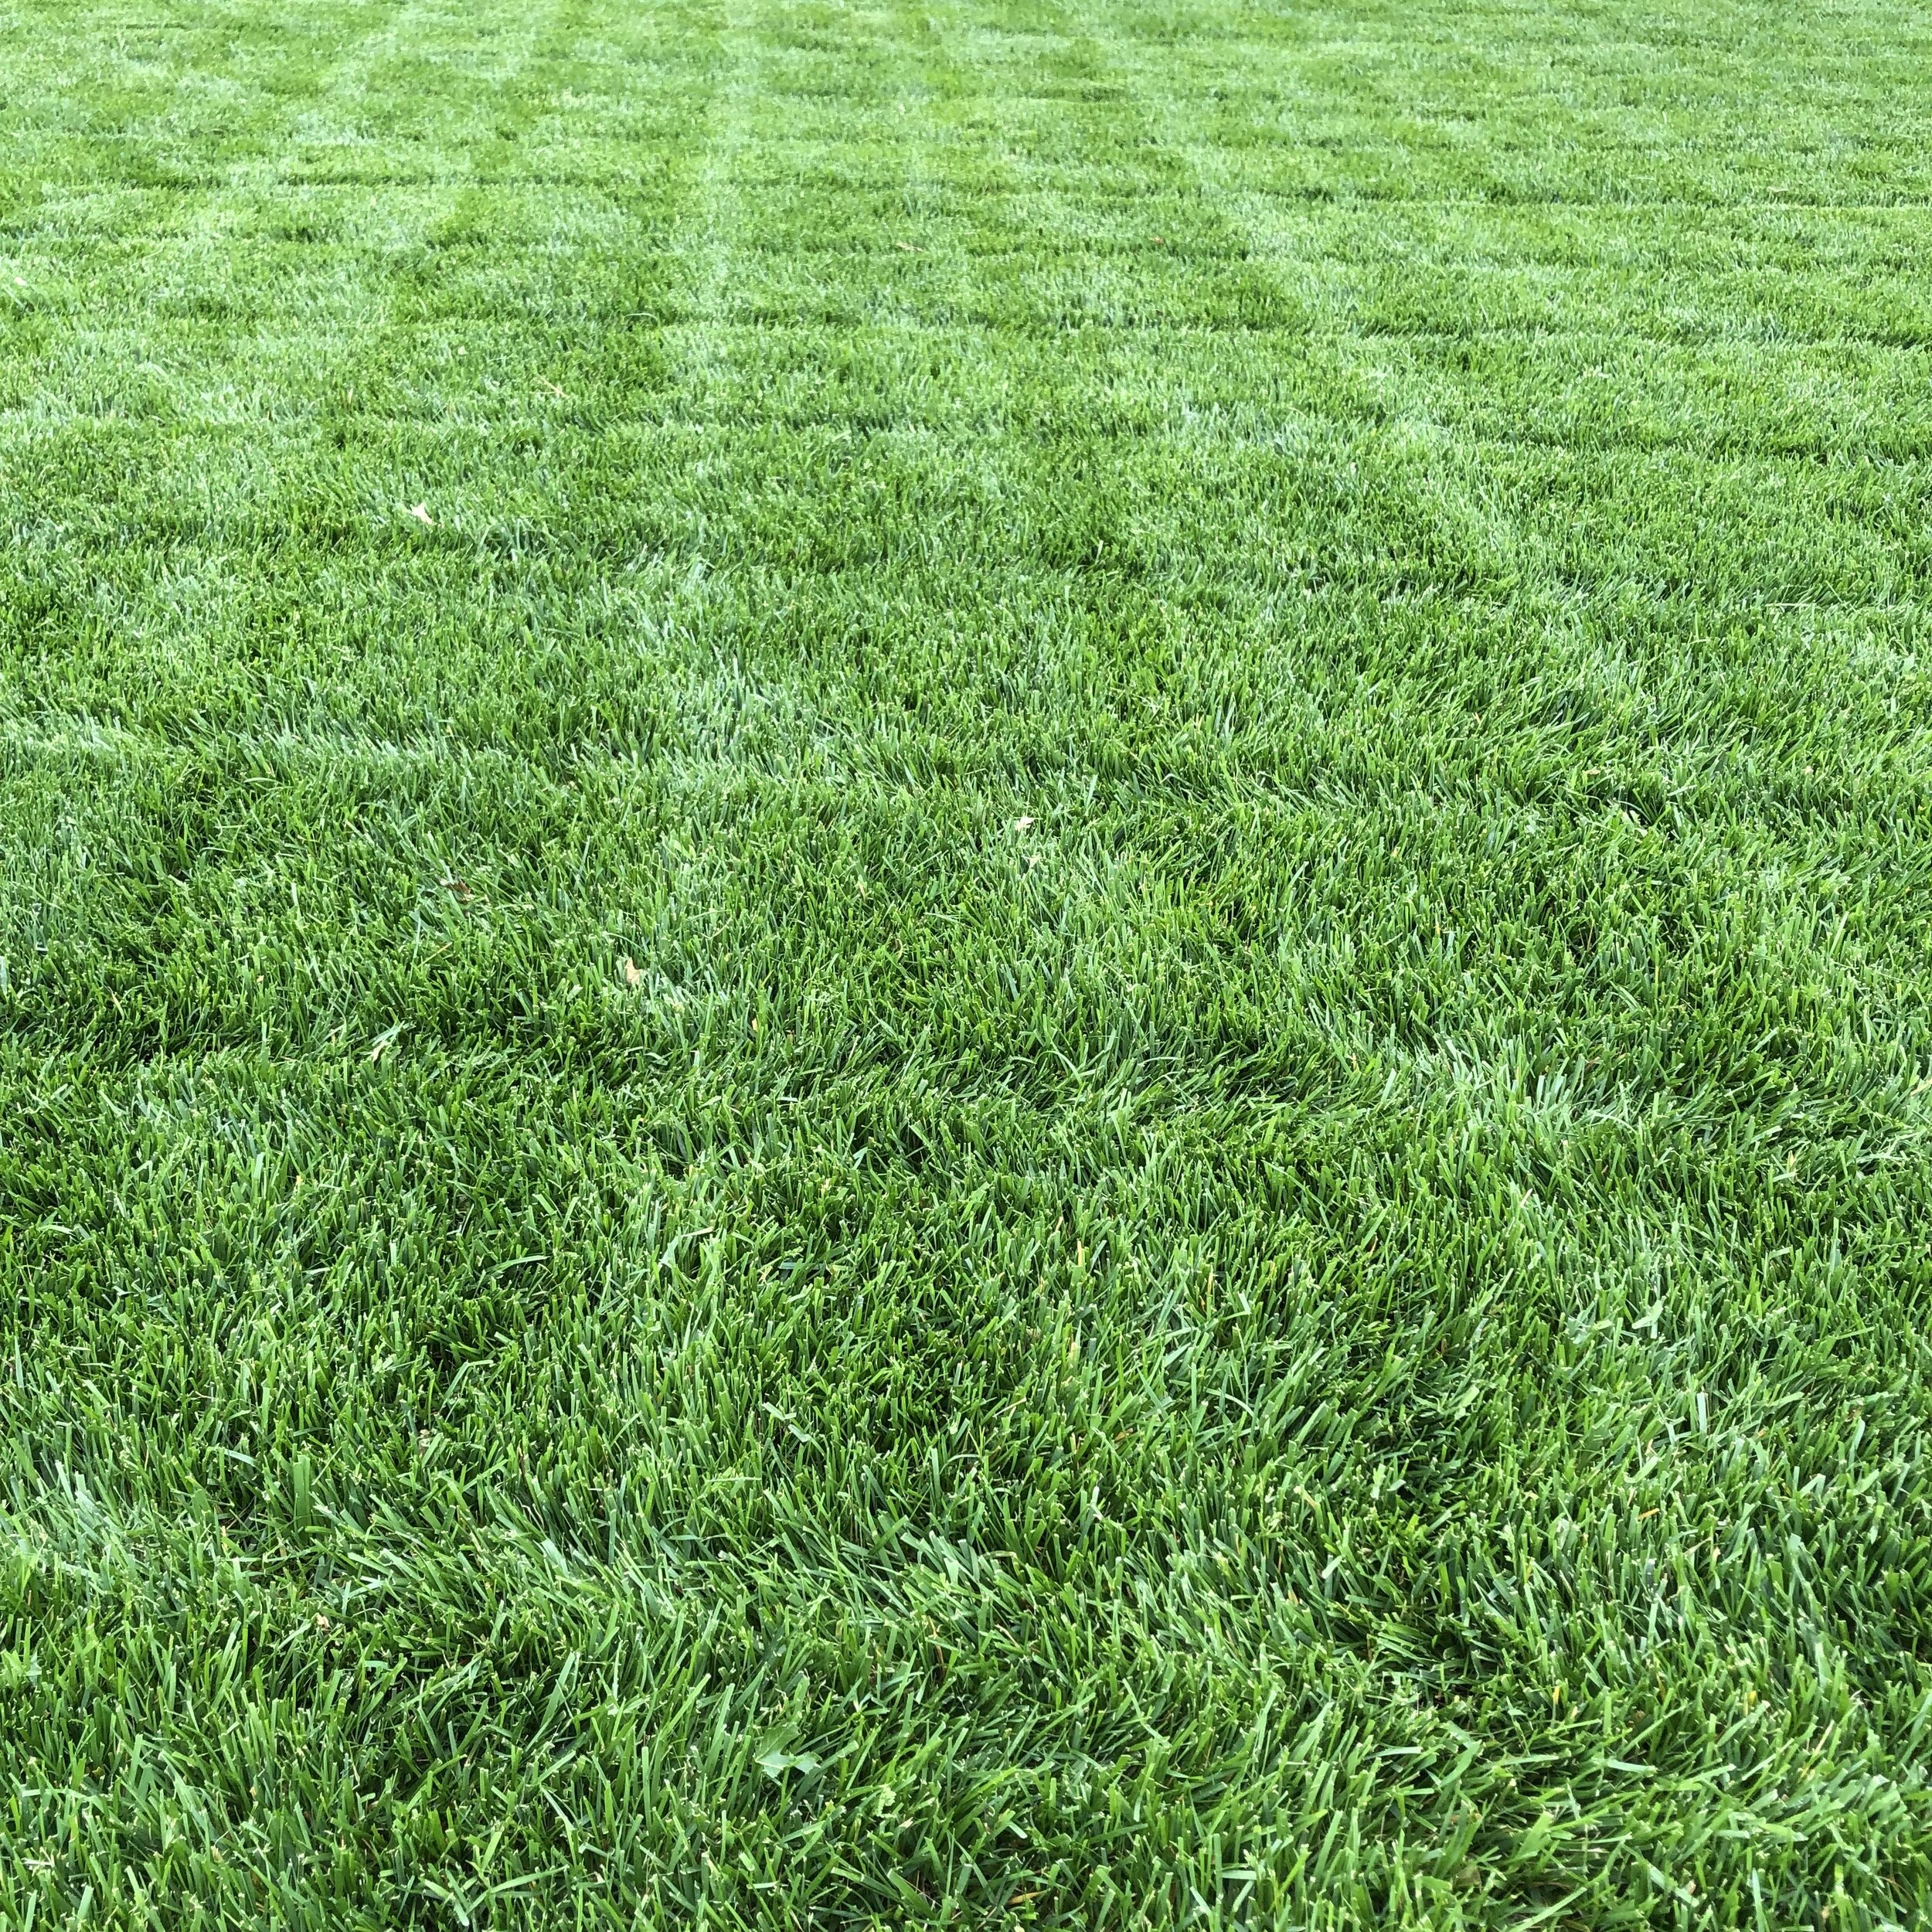
A key to successful control of existing weeds is retreatment if needed 14 days after an application.
Difficult to control weeds, such as nutsedge, violets, geraniums to name a few, take time to gain 100% control. Follow up applications are often needed. Persistence is the key.
Hall | Stewart Lawn Care Programs include follow-up visits when needed to gain control of difficult weeds.

Poa annua, a winter annual grassy weed, thrives in thin turf.

The best defense against weeds is a healthy thick turf.
Fertilizer Applications – Healthy turf is the best prevention of weeds.
Weed control and fertilizer work hand-in-hand to produce a great lawn. Common weed problems are less in an actively growing, fertilized, watered and maintained turf.
A healthy, properly fertilized, dense turfgrass can resist weed invasion and is able to better tolerate heat, cold, drought and wear.
The three key ingredients in fertilizer are nitrogen, phosphorus, and potassium. All three are needed by your turf.
Nitrogen gives a lawn the best quality of color and density, but it is void in our soil. Therefore, it needs to be added the most.
Phosphorus and potassium are required for healthy turf growth but because they are present in our soil they do not need to be replaced as much.
Both Bermuda and fescue are at their best when they receive a total of 4 to 5 lbs of nitrogen per 1,000 sq. ft during the growing season spaced out over 4-5 applications.
Bermuda, being a warm season grass, needs to be fed the most during the summer. The first application should be made within 2 to 6 weeks of spring green up. An application before the lawn has come out of dormancy is a waste of product and does not benefit the turf. The last application should be made by the end of September. Heavy fall fertilizer in an attempt to force growth and color deep into the fall can be a contributor to spring dead spot. Follow this link to read more about spring dead spot.


Bermuda, warm season turf, looks best through the summer heat when nighttime temperatures are consistently 65+. Bermuda respond well to regularly scheduled fertilizer applications, high in nitrogen during the summer.
Fescue, a cool season turf requires a completely different schedule and thought process. Cool season grass is at its peak in the spring and fall. During the summer, growth slows, and the plant actually enters a period of semi-dormancy even though it never actually loses all its color.
Cool season turf needs fertilizer between the first of March and the end of May. This creates a strong and healthy turf with the best opportunity of surviving the summer heat. High nitrogen fertilizer June through August can damage fescue. In the fall, September through November, resume fertilizer applications.

Fescue, a cool season grass, looks best in the spring and fall. Fescue lawns need the same amount of annual fertilizer as Bermuda, but it must be applied in the spring and fall. Fertilizer during the summer will damage a fescue lawn.

Picture of the Week:
Iris are now adding color to our landscapes. Just like all the blooms this spring, they also seem more vibrant than usual. Iris are an old fashioned hardy perennial that require minimal care and live a long time.
Fertilizing fescue in the summer will always lead to disappointment.
Great lawns are the result of a properly timed weed control and fertilizer program that is tailored to your type of grass.
If you are not currently subscribing to a Hall | Stewart Lawn Care Program and have struggled with getting the critical timing right on your lawn, we would enjoy visiting with you.
If you are a Hall | Stewart customer, we look forward to every opportunity to be on your lawn helping you have a great lawn!
We will continue The Three Keys to a Great Lawn series in May with a look at Maintenance Practices and in June with a look at Environmental Conditions.
Lorne Hall
Hall | Stewart Lawn + Landscape
(405)367-3873
Growing Azaleas in Central Oklahoma

When it comes to springs, the Spring of 2024 just keeps adding color to our world!
This week, Azaleas are the plants adding burst of color to the landscape.
“Azaleas are the one plant that will cause a traffic jam.” Allan Storjohann
Can you grow a traffic jam causing azaleas in our area?
The Tulsa area is blessed with wonderful azaleas, but common belief is azaleas just don’t do well in central Oklahoma.
This is a myth. Azaleas can be grown in the Oklahoma City.
But, they require thinking differently about your landscape and a commitment to make it happen.
Azalea success in central Oklahoma won’t happen if you just dig a hole anywhere in your landscape and drop in an azalea.


8 Things You Need to Know to Grow Azaleas in Central Oklahoma
1. Soil preparation is key. Azaleas require well drained acidic soils (5.0-6.0 pH). Central Oklahoma is known for tight clay alkaline soils (6.5-7.5 pH). The first step is to remove all the existing Oklahoma clay and replace it with a mixture of pecan hulls, peat moss, and pine bark. No soil. That is correct – azaleas do best when the native soil in our area is removed. My favorite mixture is 1/3 pecan hulls, 1/3 peat moss, and 1/3 pine bark. But, you will have success with a 50/50 mixture of any 2 of the 3.

20 year old Hino-Crimson Azaleas planted in a raised bed in a mixture of pecan hulls, peat moss, and pine bark with all the native soil removed.

2. The size of the hole you dig is important. The standard for planting most trees and shrubs is a hole twice the size of the plant root ball. But, when planting azaleas dig the hole 3 to 4 times the size of the plant root ball. You don’t need a very deep hole – it only needs to be 6-10” deeper than the level of the root ball once it is planted. Azaleas roots are shallow and like to grow out. So, think wide and not deep when digging.


3. Raised beds are best. Azaleas like moisture but they do not like to have their roots sitting in water. The best way to achieve a well-drained planting in tight soil is to raise the planting. A great option is to install a 4-12” stone border to gain height or, incorporate a berm in the landscape planting for your azaleas. When placing the shrub, keep the top of the root ball 1-2” above the grade and gently slope your planting mixture away from the shrub. The number one reason azaleas die is from root rot.

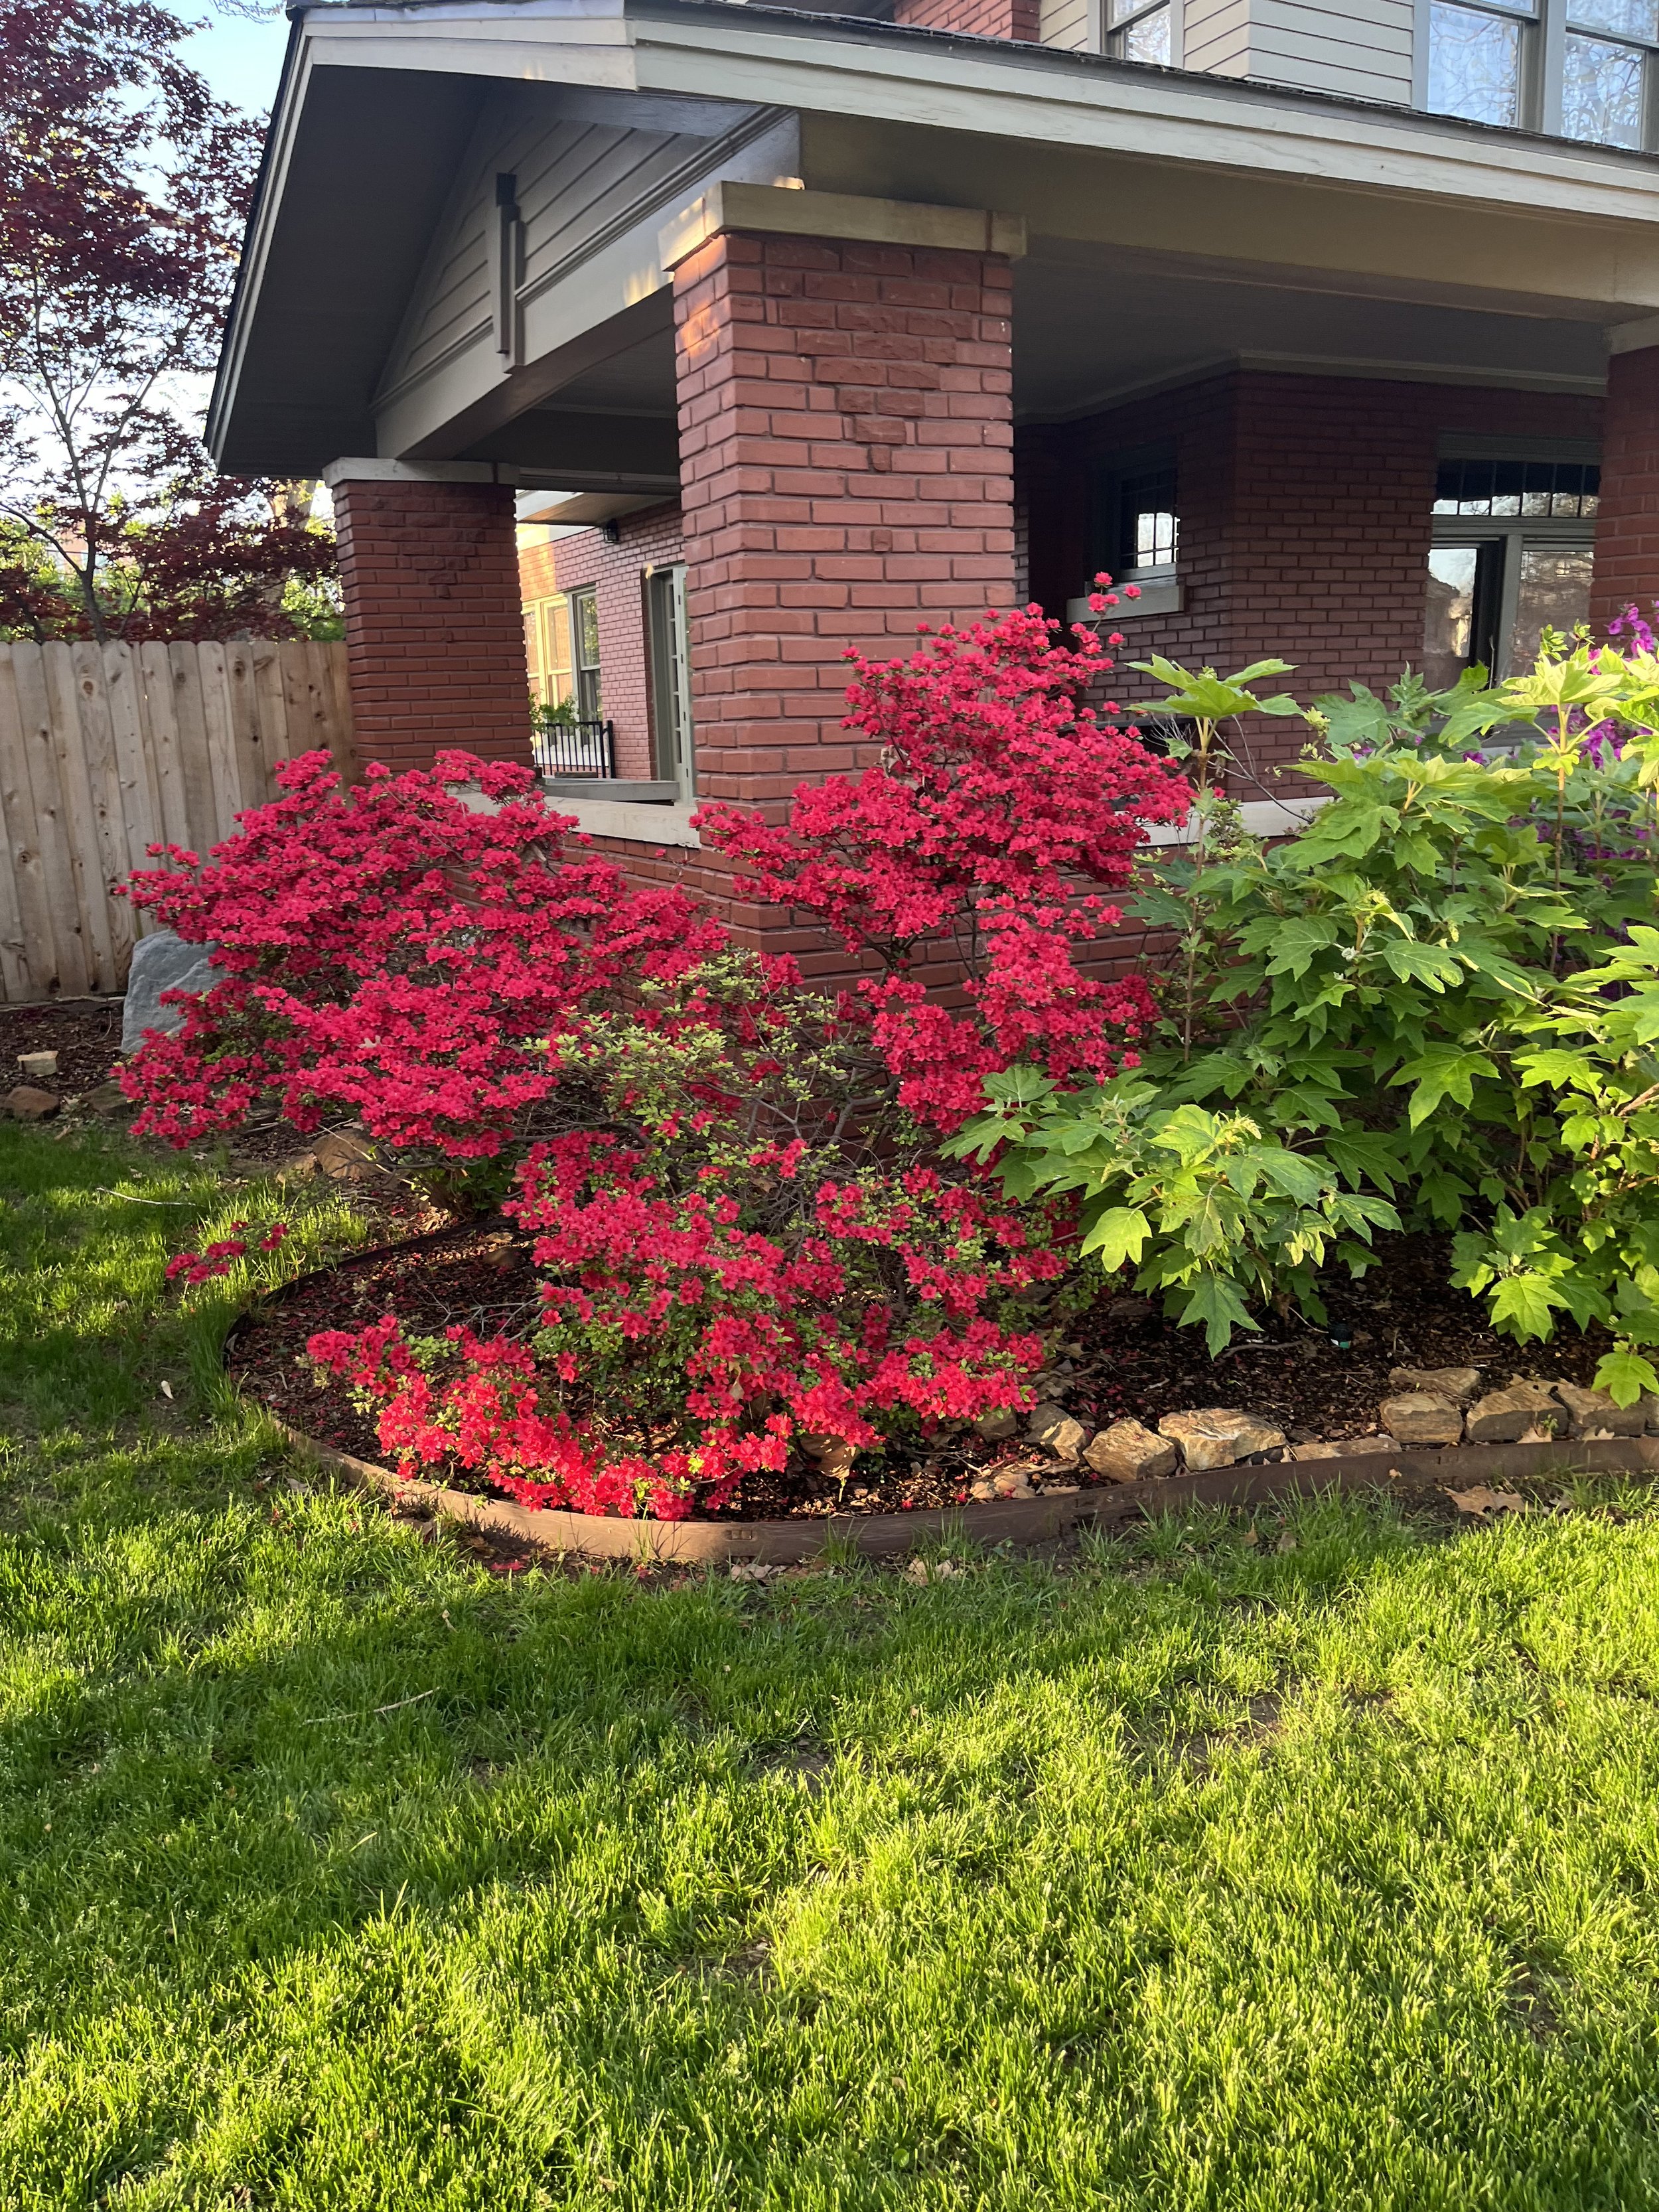
4. Plant in the shade. Azaleas need mostly shade. They like the morning sun and filtered sunlight. A great place for an azalea is under large trees, particularly oak and pine. Pine needles and oak leaves will add acid back to the soil. If you lack large shade trees, plant them on the north and east sides of your home. Never plant azaleas where they will be exposed to the hot afternoon and evening sun. Also, avoid windy locations.
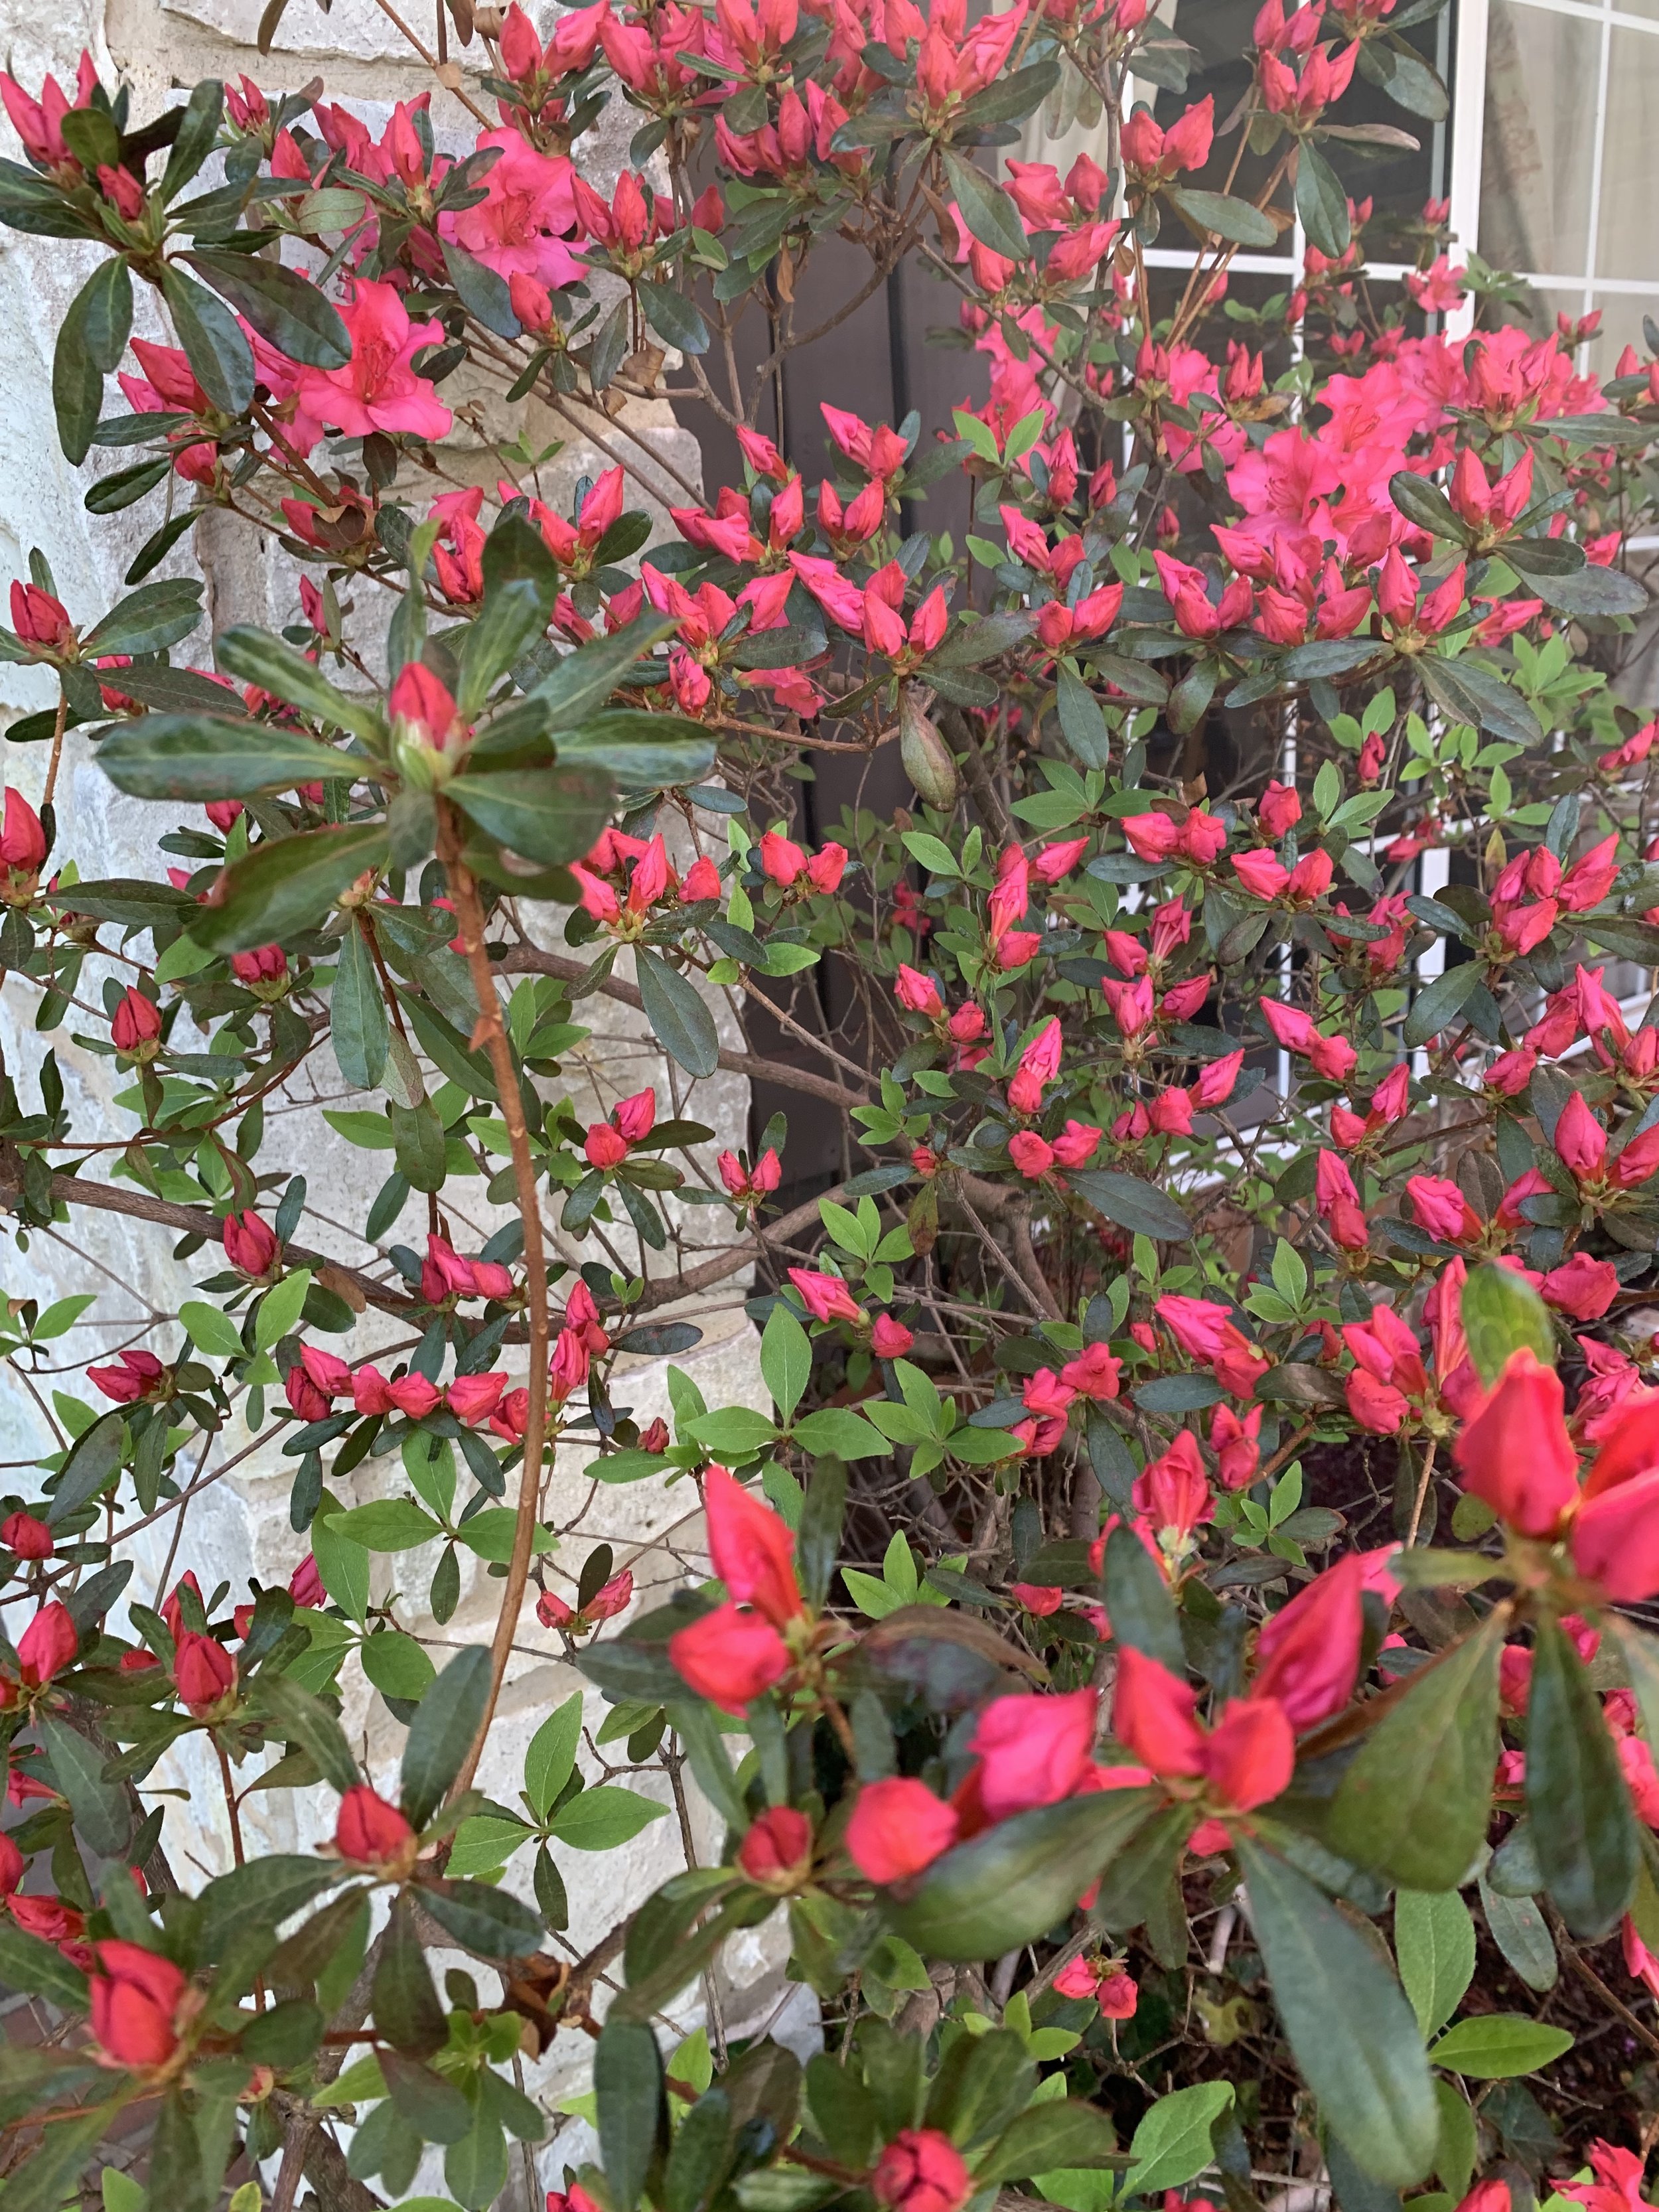
Red Ruffle Azaleas that have been lightly pruned over the years to maintain their natural shape.

5. Consistent water. When we are receiving sufficient rainfall azaleas do not need any additional water. But, when temperatures rise and moisture declines, regular watering is very important. Try to provide 1 – 1.5” of water per week during the summer months. Due to their shallow root structure, roots can dry out quickly. When temperatures are in the 90s or higher, water every other day with a deep soaking.
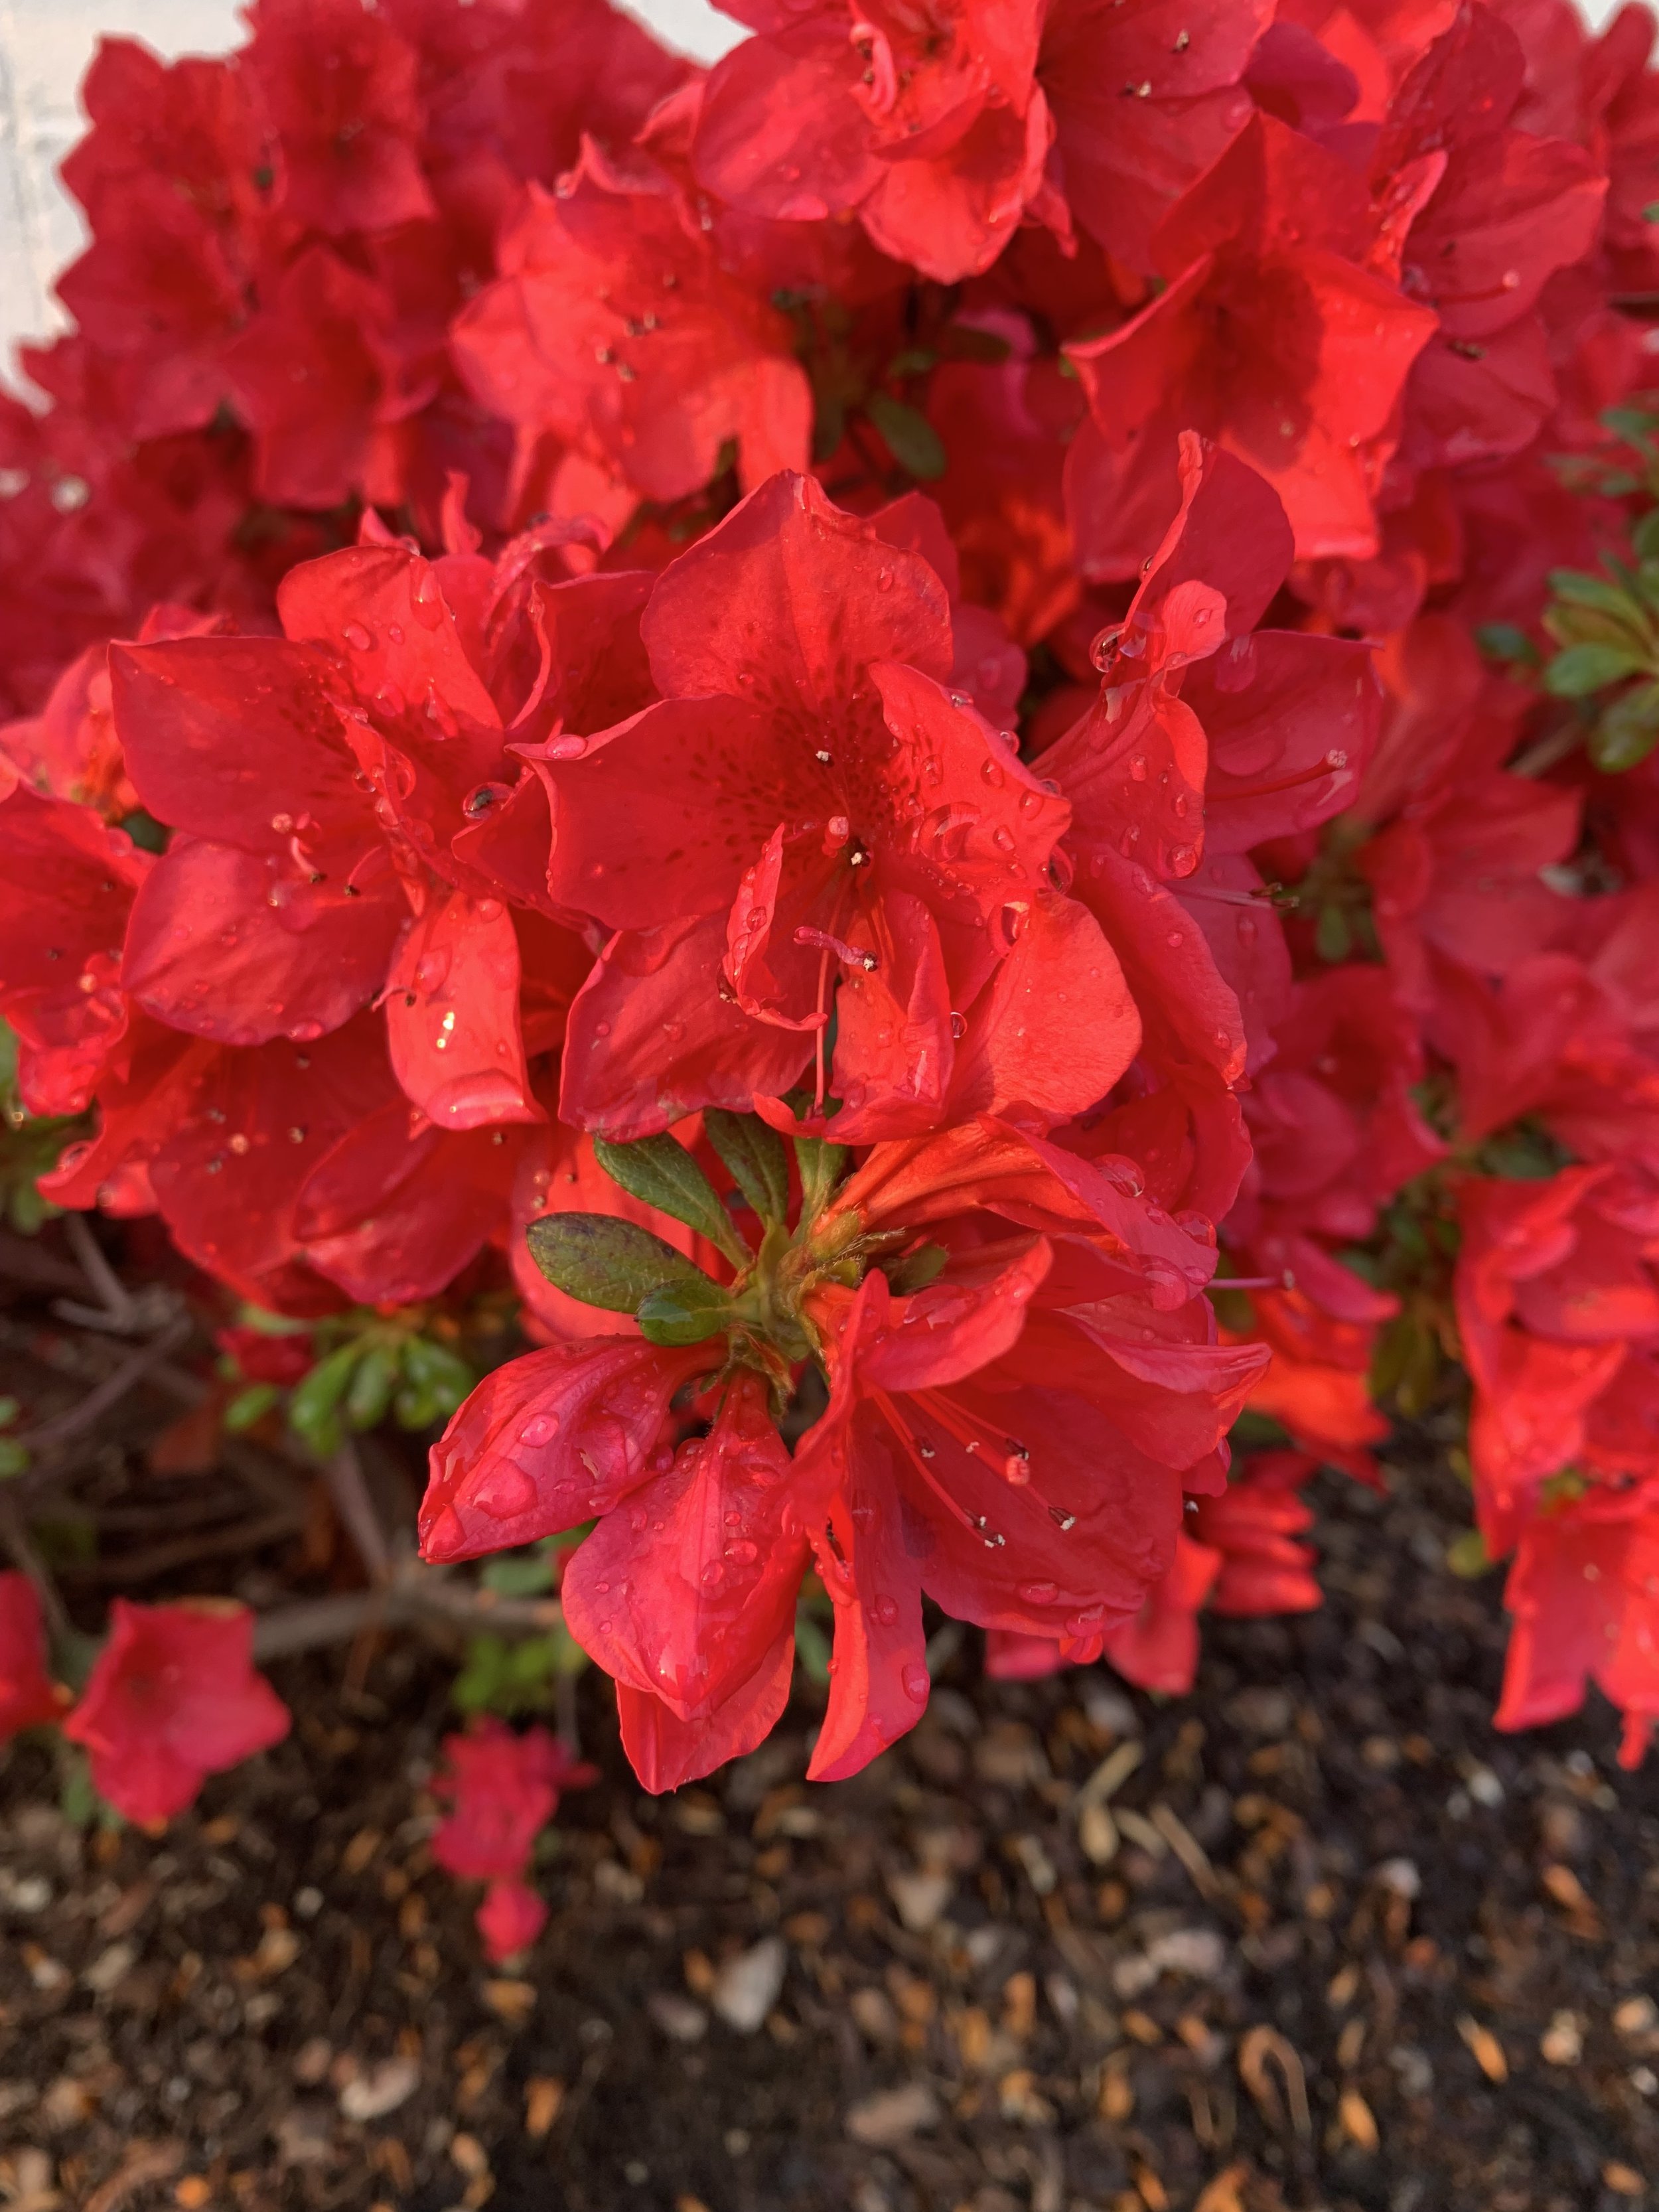
Encore Autumn Embers Azaleas

6. Avoid soil cultivation. Cultivating the soil will disturb the shallow roots. Control weeds by hand pulling and by mulching with 2-4” of pecan hulls, pine bark, or pine needles. These mulches will increase the acidity of the soil, cool the soil, and retain moisture.

Encore Autumn Embers Azaleas planted three years ago on the north side of an office building.

7. Correct pruning. Prune azaleas after the blooms drop in May or June. Do not prune after July 4th because you will be removing next spring’s blooms. Azaleas respond well to having branches that have grown too long pruned back to the branch. This will help maintain a natural shape of the plant and maximize blooms next spring. Sheering is not recommended. Dead wood can be removed anytime.

Azaleas just starting to bloom.

8. Feed them. Fertilizer applications after blooming in May and June are best. Fertilizing in early spring isn’t recommended as it will promote leaf growth and reduce the amount of blossoms. Use an azalea/camellia/rhododendron food with trace elements for acid growing conditions. Miracle-Gro Water Soluble Azalea Plant Food and Ferti-Lome Azalea/Evergreen Food Plus are a couple of good examples.

Encore Azaleas have the added benefit of a fall bloom.

When it comes to azaleas, there are a lot of varieties and colors to choose from. Traditional azaleas that do well in Central Oklahoma include Hino-crimson and the Ruffles series. Over the past few years, the Encore varieties have become very popular and performed well. Traditional varieties are heavy spring bloomers. Encore Azaleas bloom in the spring with a second lighter bloom in the fall.
Here are a couple of good sources for azalea varieties: https://www.monrovia.com/search/?q=azalea and https://encoreazalea.com/the-collection/
I planted Hino-Crimson and Red Ruffle Azaleas at our house over 20 years ago using the methods above. Every spring the colors are stunning. This time of year, you can’t drive down our street without slowing to steal a glance.
When planted correctly and maintained well, you won’t regret the time
and effort you put into growing azaleas.
Lorne Hall
Hall | Stewart Lawn + Landscape
(405)367-3873


PS - Next weekend is one of my favorite TV weekends of the year!
Starting Thursday, the networks will start broadcasting and continue through Sunday hours of live coverage of azaleas, dogwoods, and well-maintained turf. It is just wonderful!
You do have to tolerate an occasional professional golfer blocking your view of the rich dark green hues of fescue, topped with vibrant pinks, reds, and purples of azaleas, with splashes of white dogwoods.
I know…I know... Most people are tuning to see who will win the Masters.
Not me! I’m tuning in to see the best televised display of spring color in the world.
Follow our 8 Things You Need to Know to Grow Azaleas in Central Oklahoma and create your own Master’s landscape in central Oklahoma.
Dallisgrass – The “Address It As Soon As You See It” Weed

VIEWER DISCRETION ADVISED:
This email may not be suitable for all lawn and landscape lovers.
WARNING: This week’s post does not contain any pretty lawn and landscape pictures. Only ugly pictures of dallisgrass infestations. If you only click on our emails for inspiring pictures, please do not continue. We promise to return to normal content next week.
Often the content of our weekly emails is the result of what we are seeing in lawns and landscapes. This time of year, while doing lawn evaluations for soon to be Hall | Stewart clients, it is common to encounter lawns with dallisgrass issues.
Let’s spend a few minutes learning about this invasive weed and learn why it is so important to “address it as soon as you see it.”
Dallisgrass is a perennial grassy weed that was introduced to the US from Uruguay and Argentina in the 1800’s by A.T. Dallis as a fast-growing forage plant. Unfortunately, dallisgrass liked the environment a little too well and soon was growing out of control.
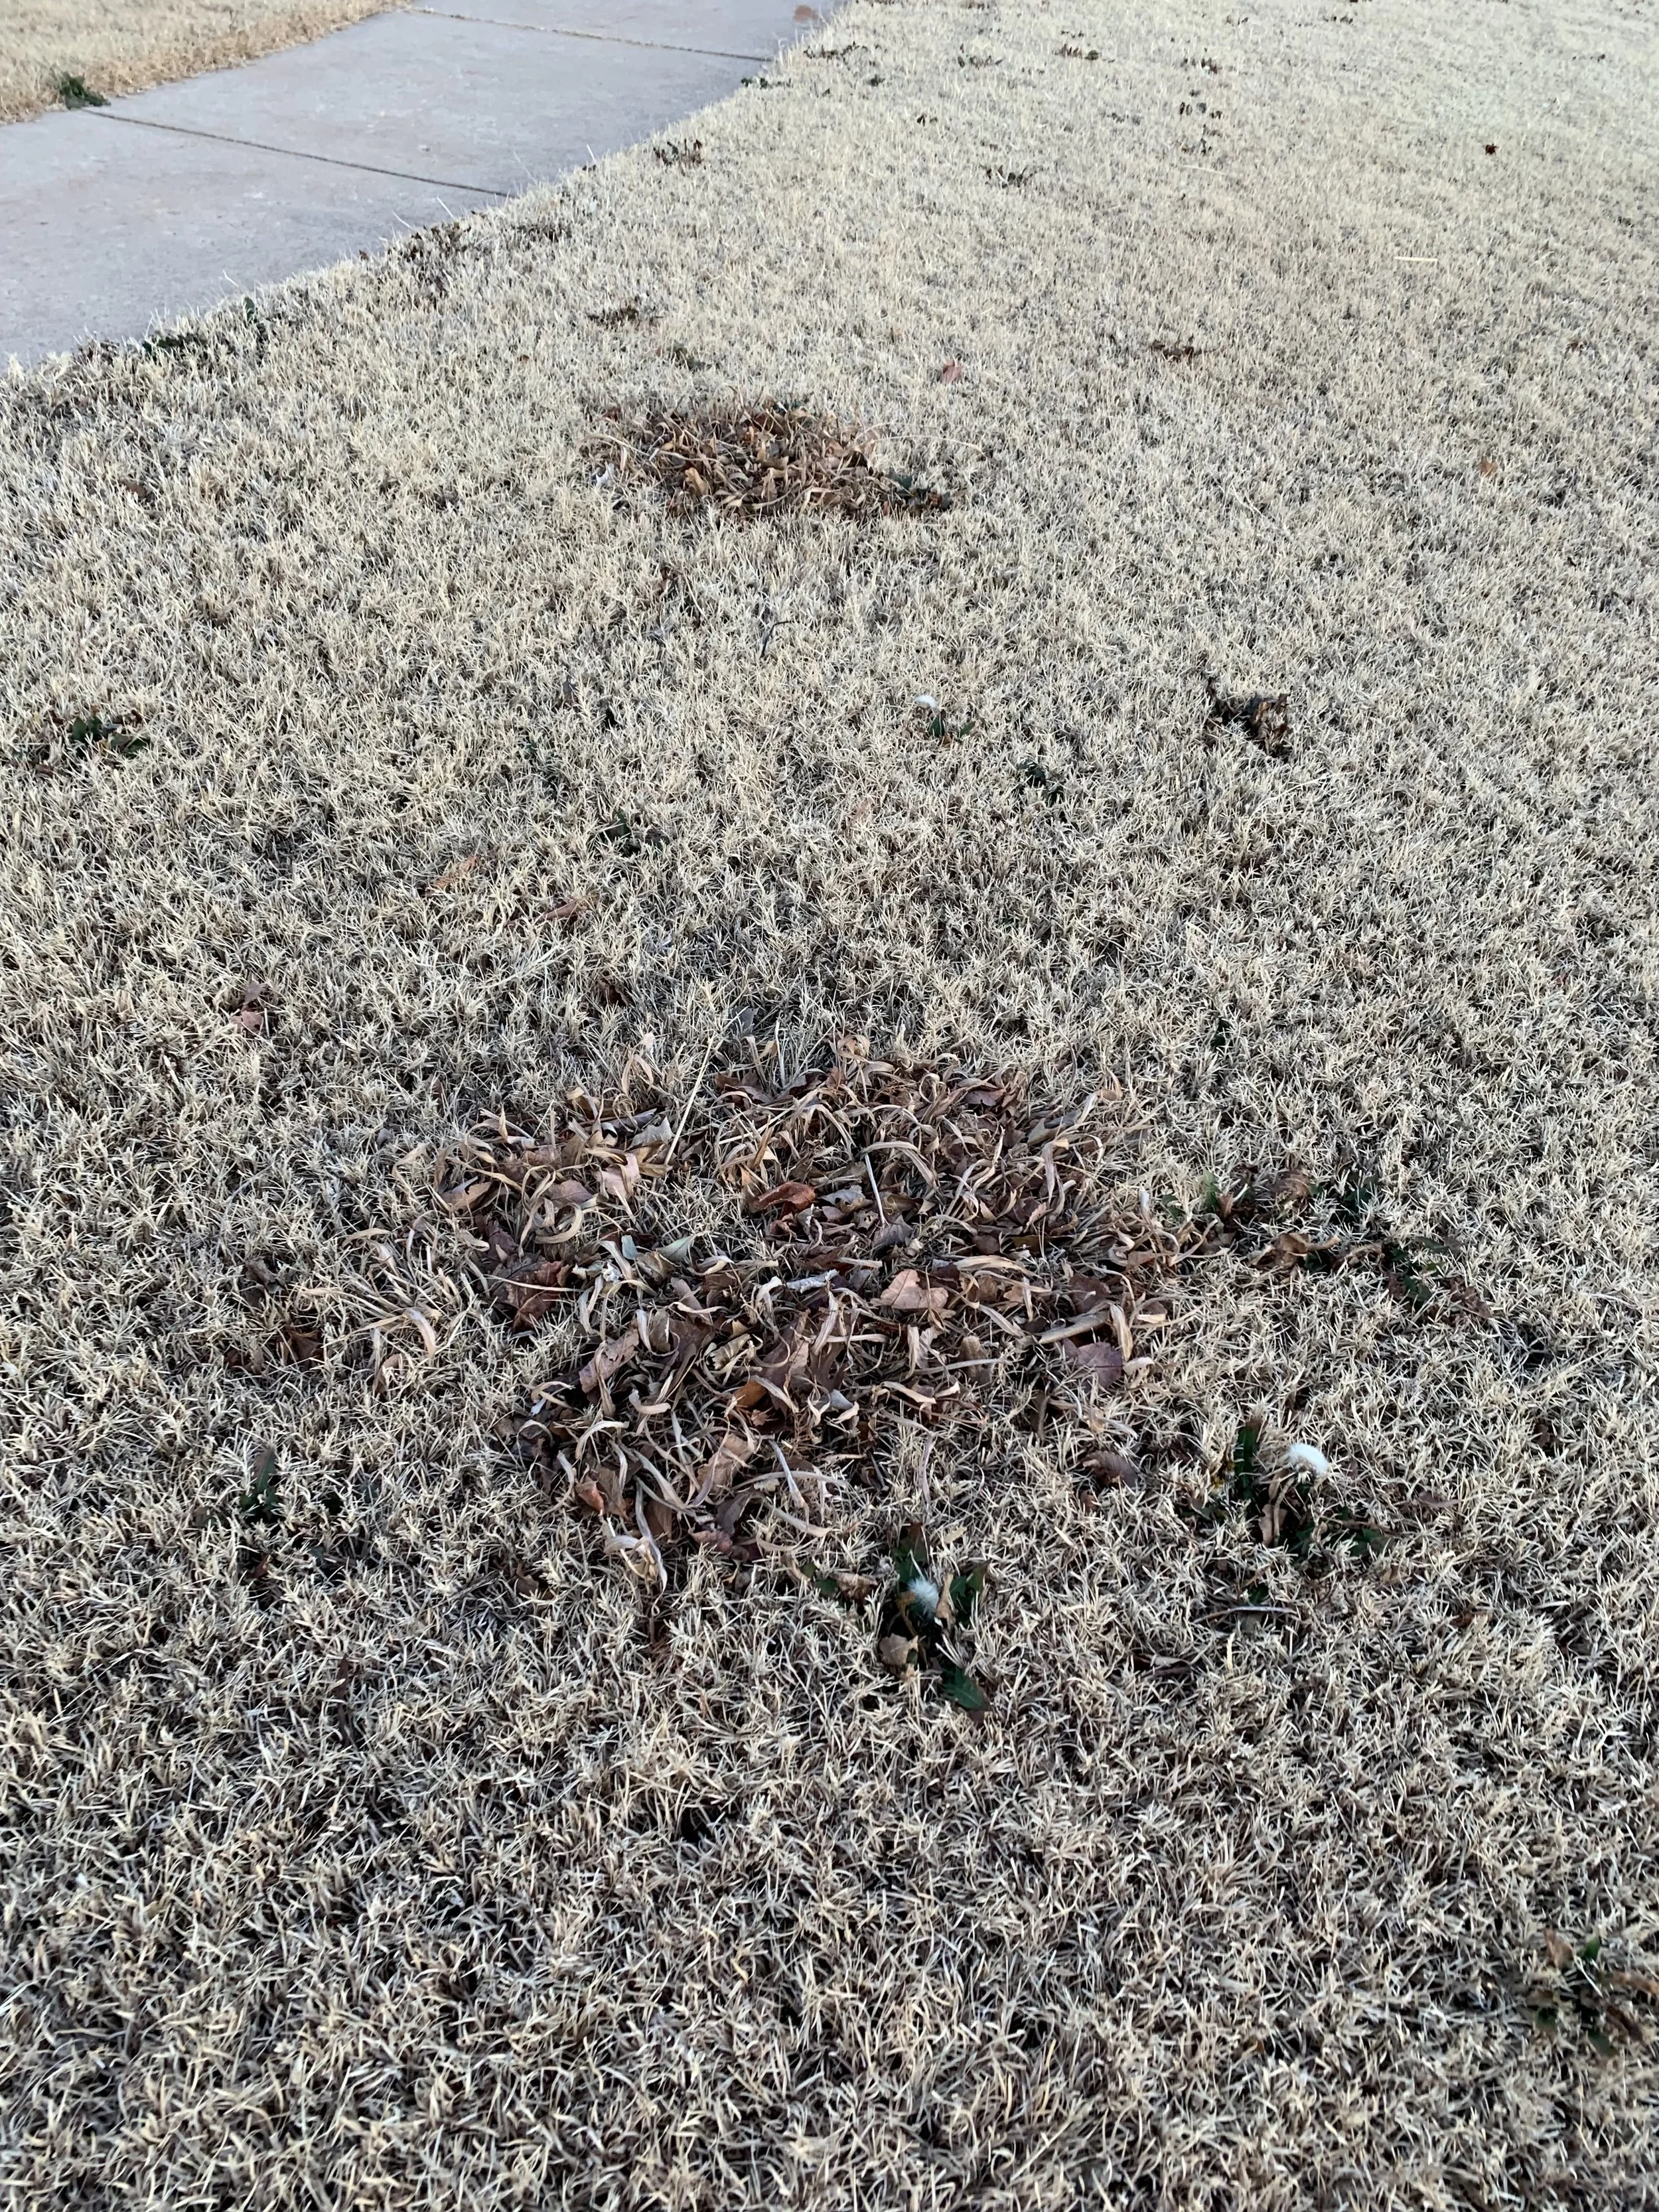
Dallisgrass is a grassy perennial weed that is very noticeable this time of year in dormant bermuda lawns.
How fun would it be to bring to market a plant that is beneficial for generations to come and have it named after you! Poor A.T., he thought he was helping, but instead of a plant people love named after him, he has a weed with his name that is the catalyst for a lot of foul language.
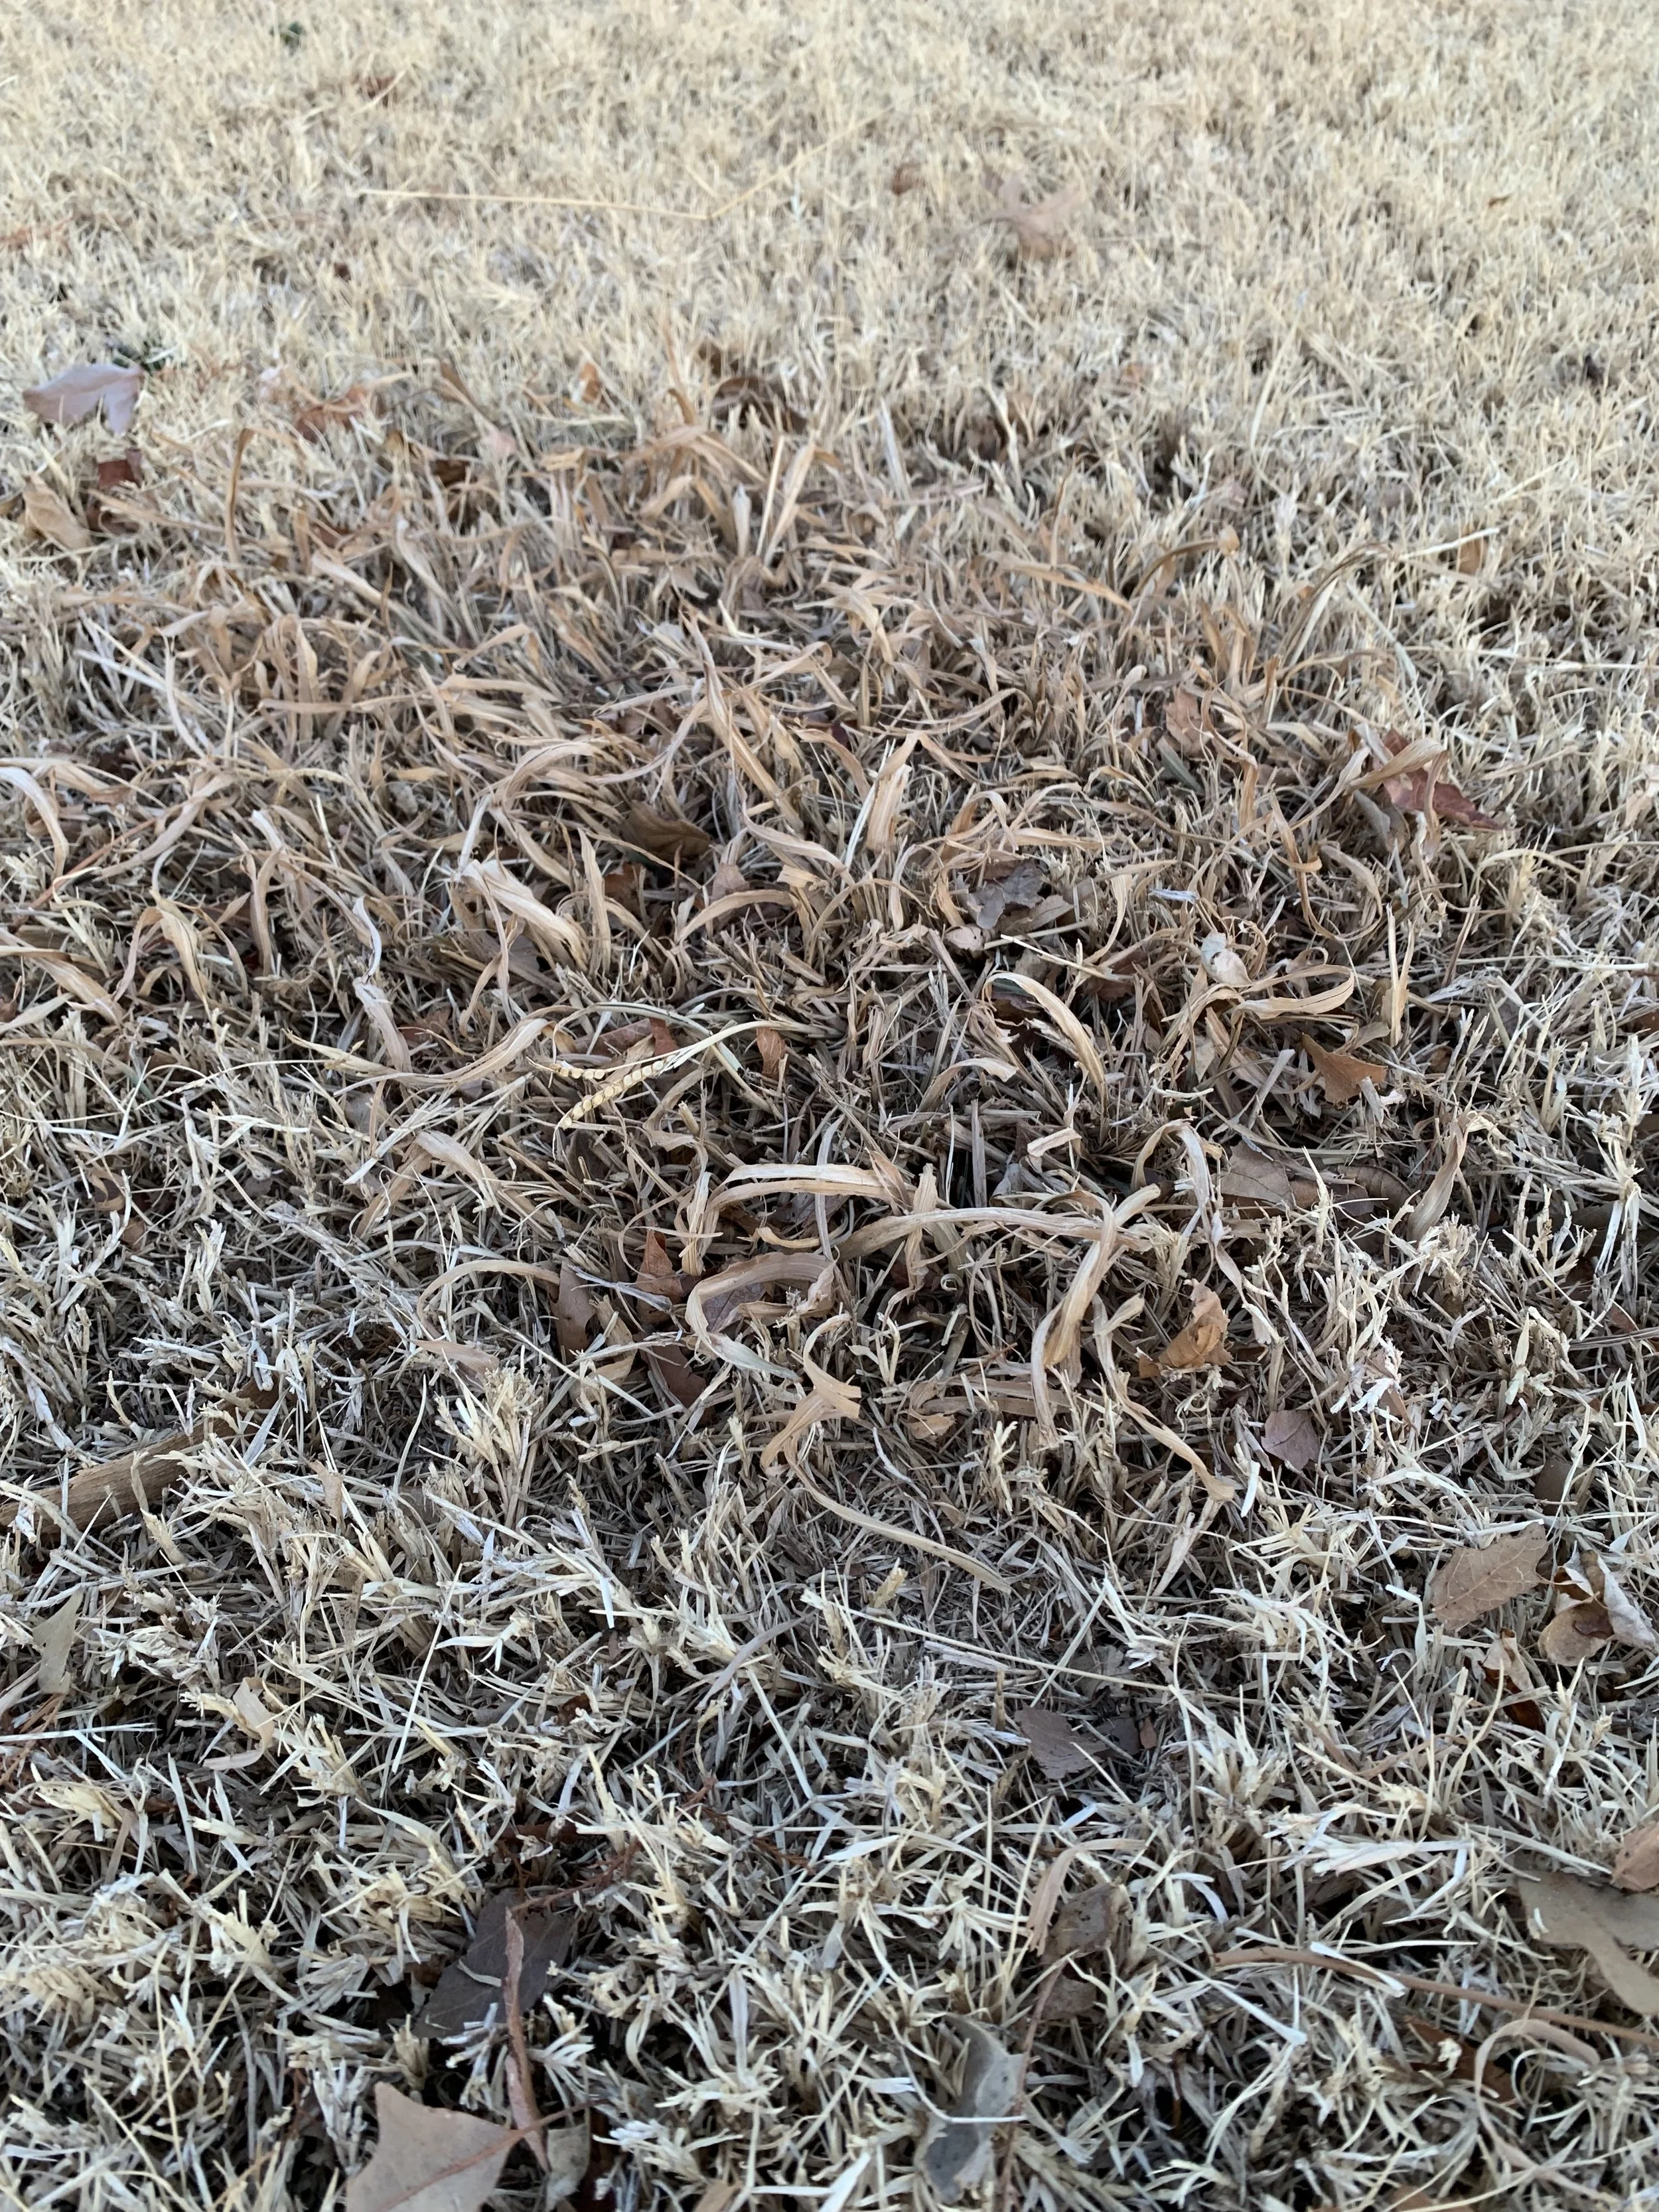
Dallisgrass is often confused with crabgrass. Crabgrass is an annual, meaning it dies every winter and can be completely prevented with a pre-emergent. While dallisgrass is a perennial, a pre-emergent will prevent the spread of new clumps but repeated post-emergent grassy weed control is required to eradicate existing clumps.
What is Dallisgrass?
Dallisgrass is a coarse textured perennial that grows in an ever-enlarging circular clump and is often confused with crabgrass.
A perennial is a plant that comes back year after year. Dallisgrass goes dormant during the winter, but the rhizomes do not die. In the spring, new growth appears from the roots.
Dallisgrass has short underground rhizomes that gradually grow outward. It has wide ¼ to ½” leaf blades that grow 4-12” long when not mowed.
Mature clumps typically have dying centers while the outer edge continues to grow smothering turfgrass as it spreads.
Individual plants increase in size while new clumps start from weed seeds.
Dallisgrass flourishes in all soils, sandy to clay, but is partial to compacted, wet soils.
Dallisgrass is a very common problem for lawns throughout the south from coast to coast.
How To Control Dallisgrass
1. Healthy Turf - As with all weeds, maintaining a healthy, dense turf is the first step. Good mowing, watering, fertilizing and aeration practices result in a thick turf leaving less area for dallisgrass seeds to come in contract with and germinate. Thin turf and bare soil areas are an invitation to all weeds, especially dallisgrass.
2. Pre-Emergent Applications – Although dallisgrass is a perennial, it does produce an abundance of seeds that are spread by wind, animals and lawn equipment. Pre-emergent applications will not control existing dallisgrass, but it will prevent it from allowing more clumps to develop in your lawn. Seeds germinate in 60-65 degree soil temperatures, a few weeks after crabgrass germinates.
The second spring pre-emergent application between mid-March to early May is critical in stopping the spread of dallisgrass.

Dallisgrass goes dormant in the winter but the rhizomes stay alive and often keep some green color near the soil surface.
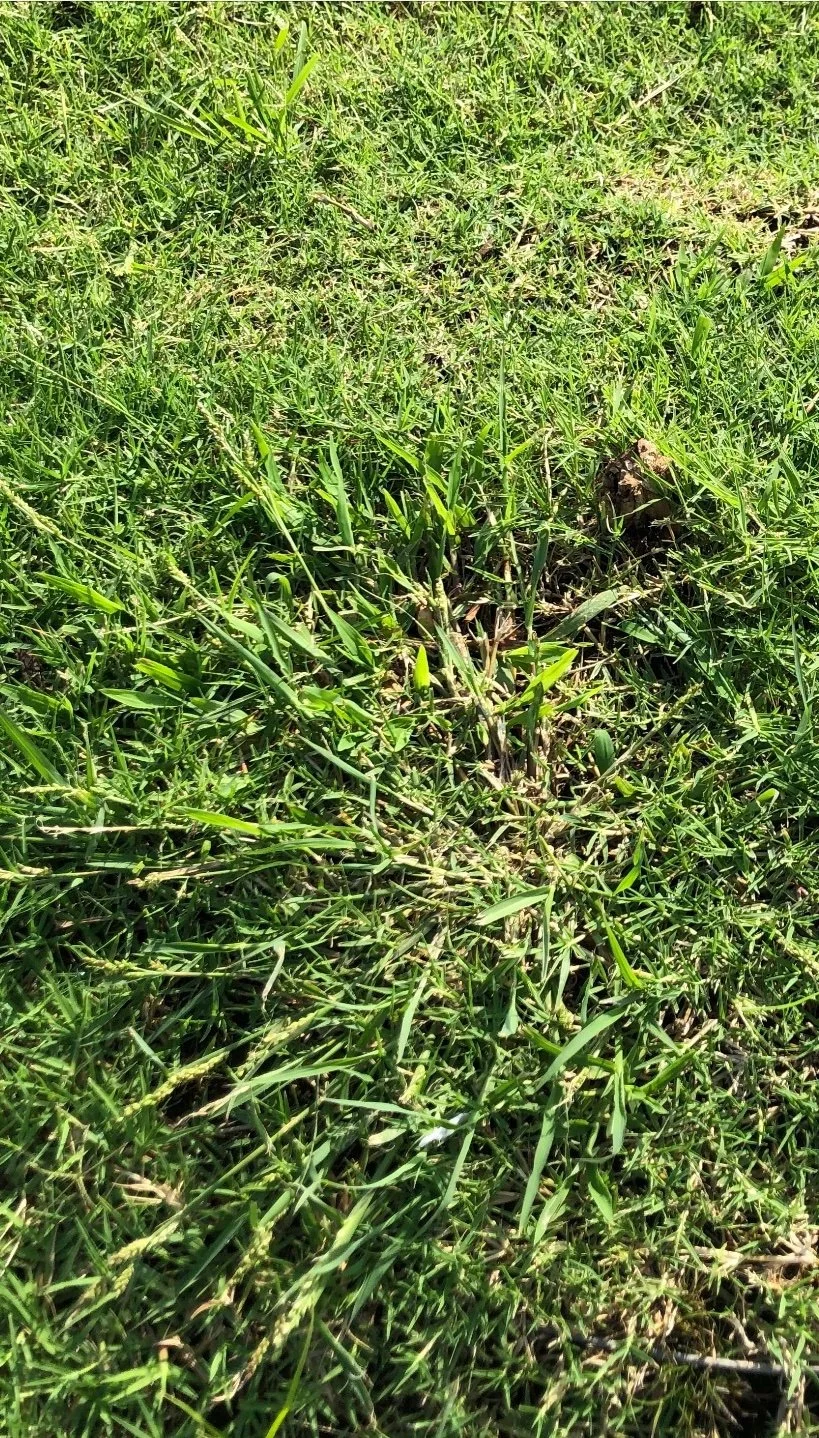
Dallisgrass grows outward smothering turfgrass as it spreads. Over time the center of the weed dies out while the rhizomes continue to spread.
3. Selective Post-Emergent Applications – Grassy weed control products labeled for crabgrass will work on dallisgrass, but repeat applications are required every 2-3 weeks until the rhizomes are completely dead. MSMA was the go-to product for years, but it is no longer available for home lawn use. One product labelled for homeowner use is Weed-B-Gone Crabgrass Killer. Always follow label instructions. Know your type of turf, and make sure the product is labeled for your turf type. Licensed lawn care professionals have restricted use herbicides available to use that provide better control of dallisgrass.
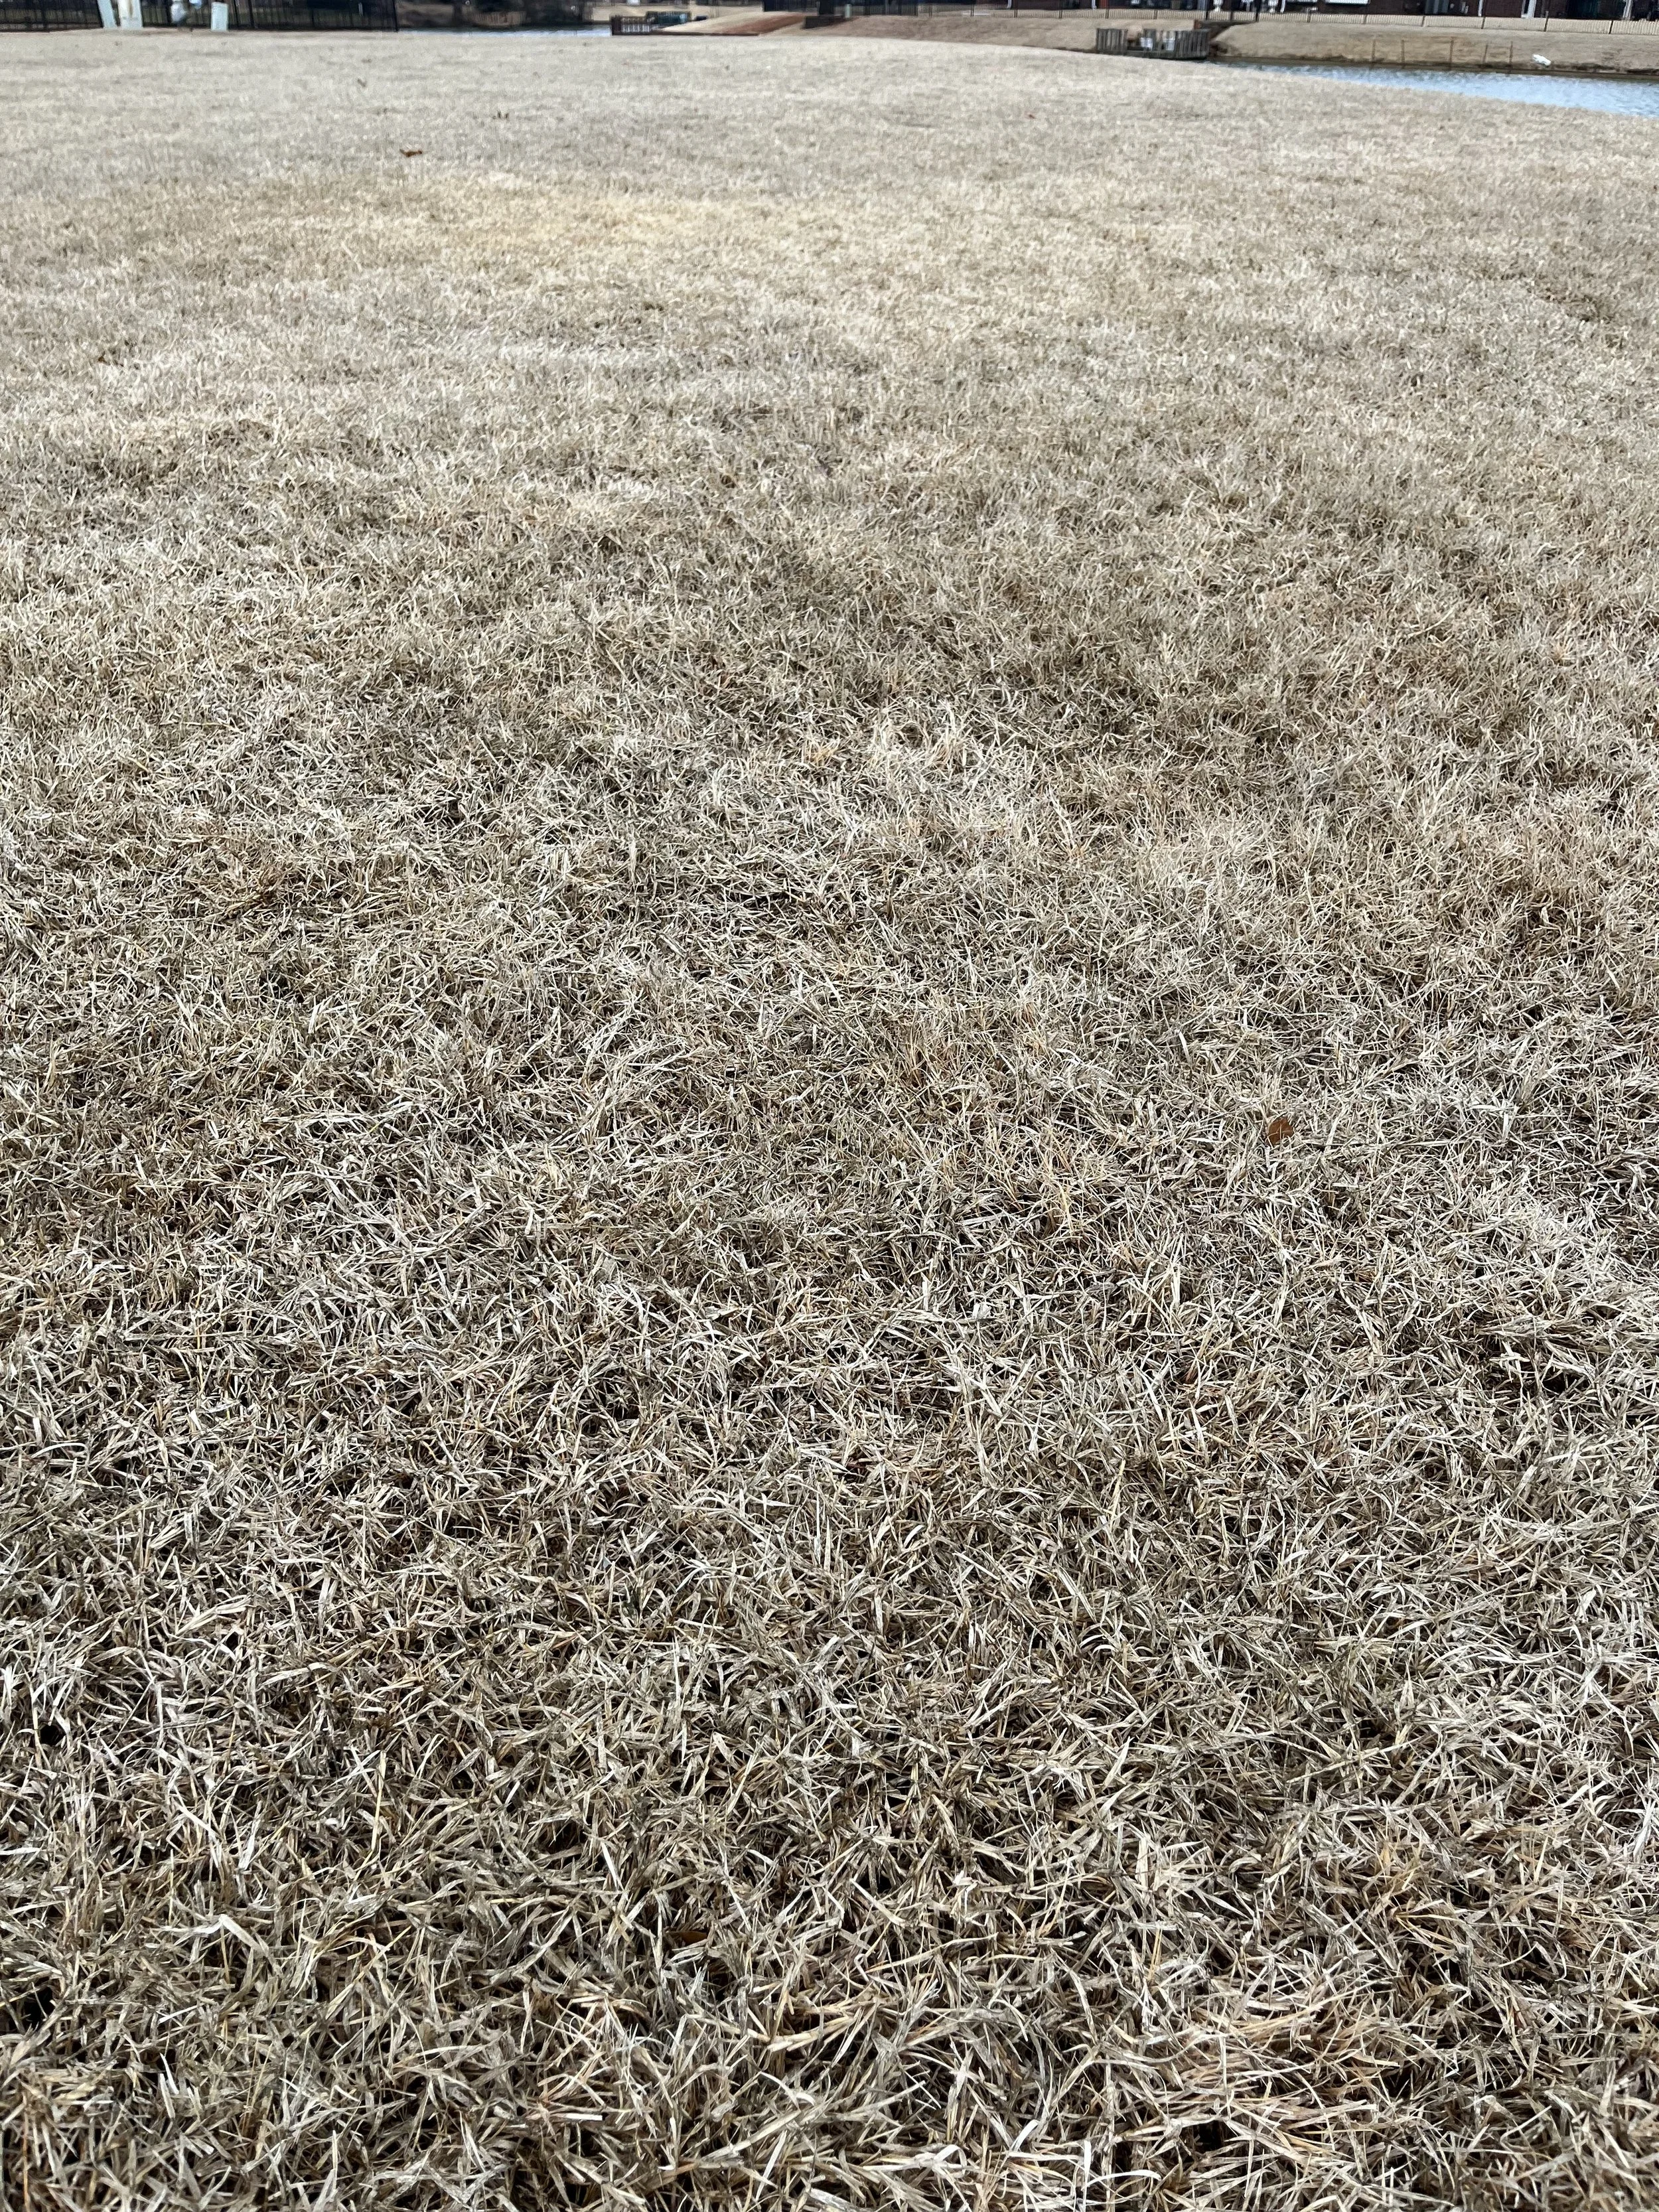
This lawn was overtaken with dallisgrass when we started working on it last spring. The owner agreed to allowing us to use glyphosate early in the growing season to aggressively control dallisgrass resulting large bare areas. Over the summer, most of the areas recovered. But another year of good turf management practices and this lawn is needed to return the lawn to looking great. Control of dallisgrass and recovery is often a two year process.
4, Non-Selective Post-Emergent Application – The best control of large areas of dallisgrass infestations where there is little to no desirable turfgrass remaining is to treat with glyphosate. Glyphosate is a non-selective herbicide, meaning it kills everything it comes in contact with. Repeated applications are still required. If spot treating clumps of dallisgrass in your lawn, take care not to allow the spray to reach desirable turf. Once the weed is completely killed, rhizomes included, resodding may be required.
5. Digging It Out – The most environmentally friendly, but the most time consuming and physically demanding, is to dig out the invasive weeds. A good step in preventing a dallisgrass outbreak is to dig out small clumps, rhizomes and all, as soon as you see them in your lawn.
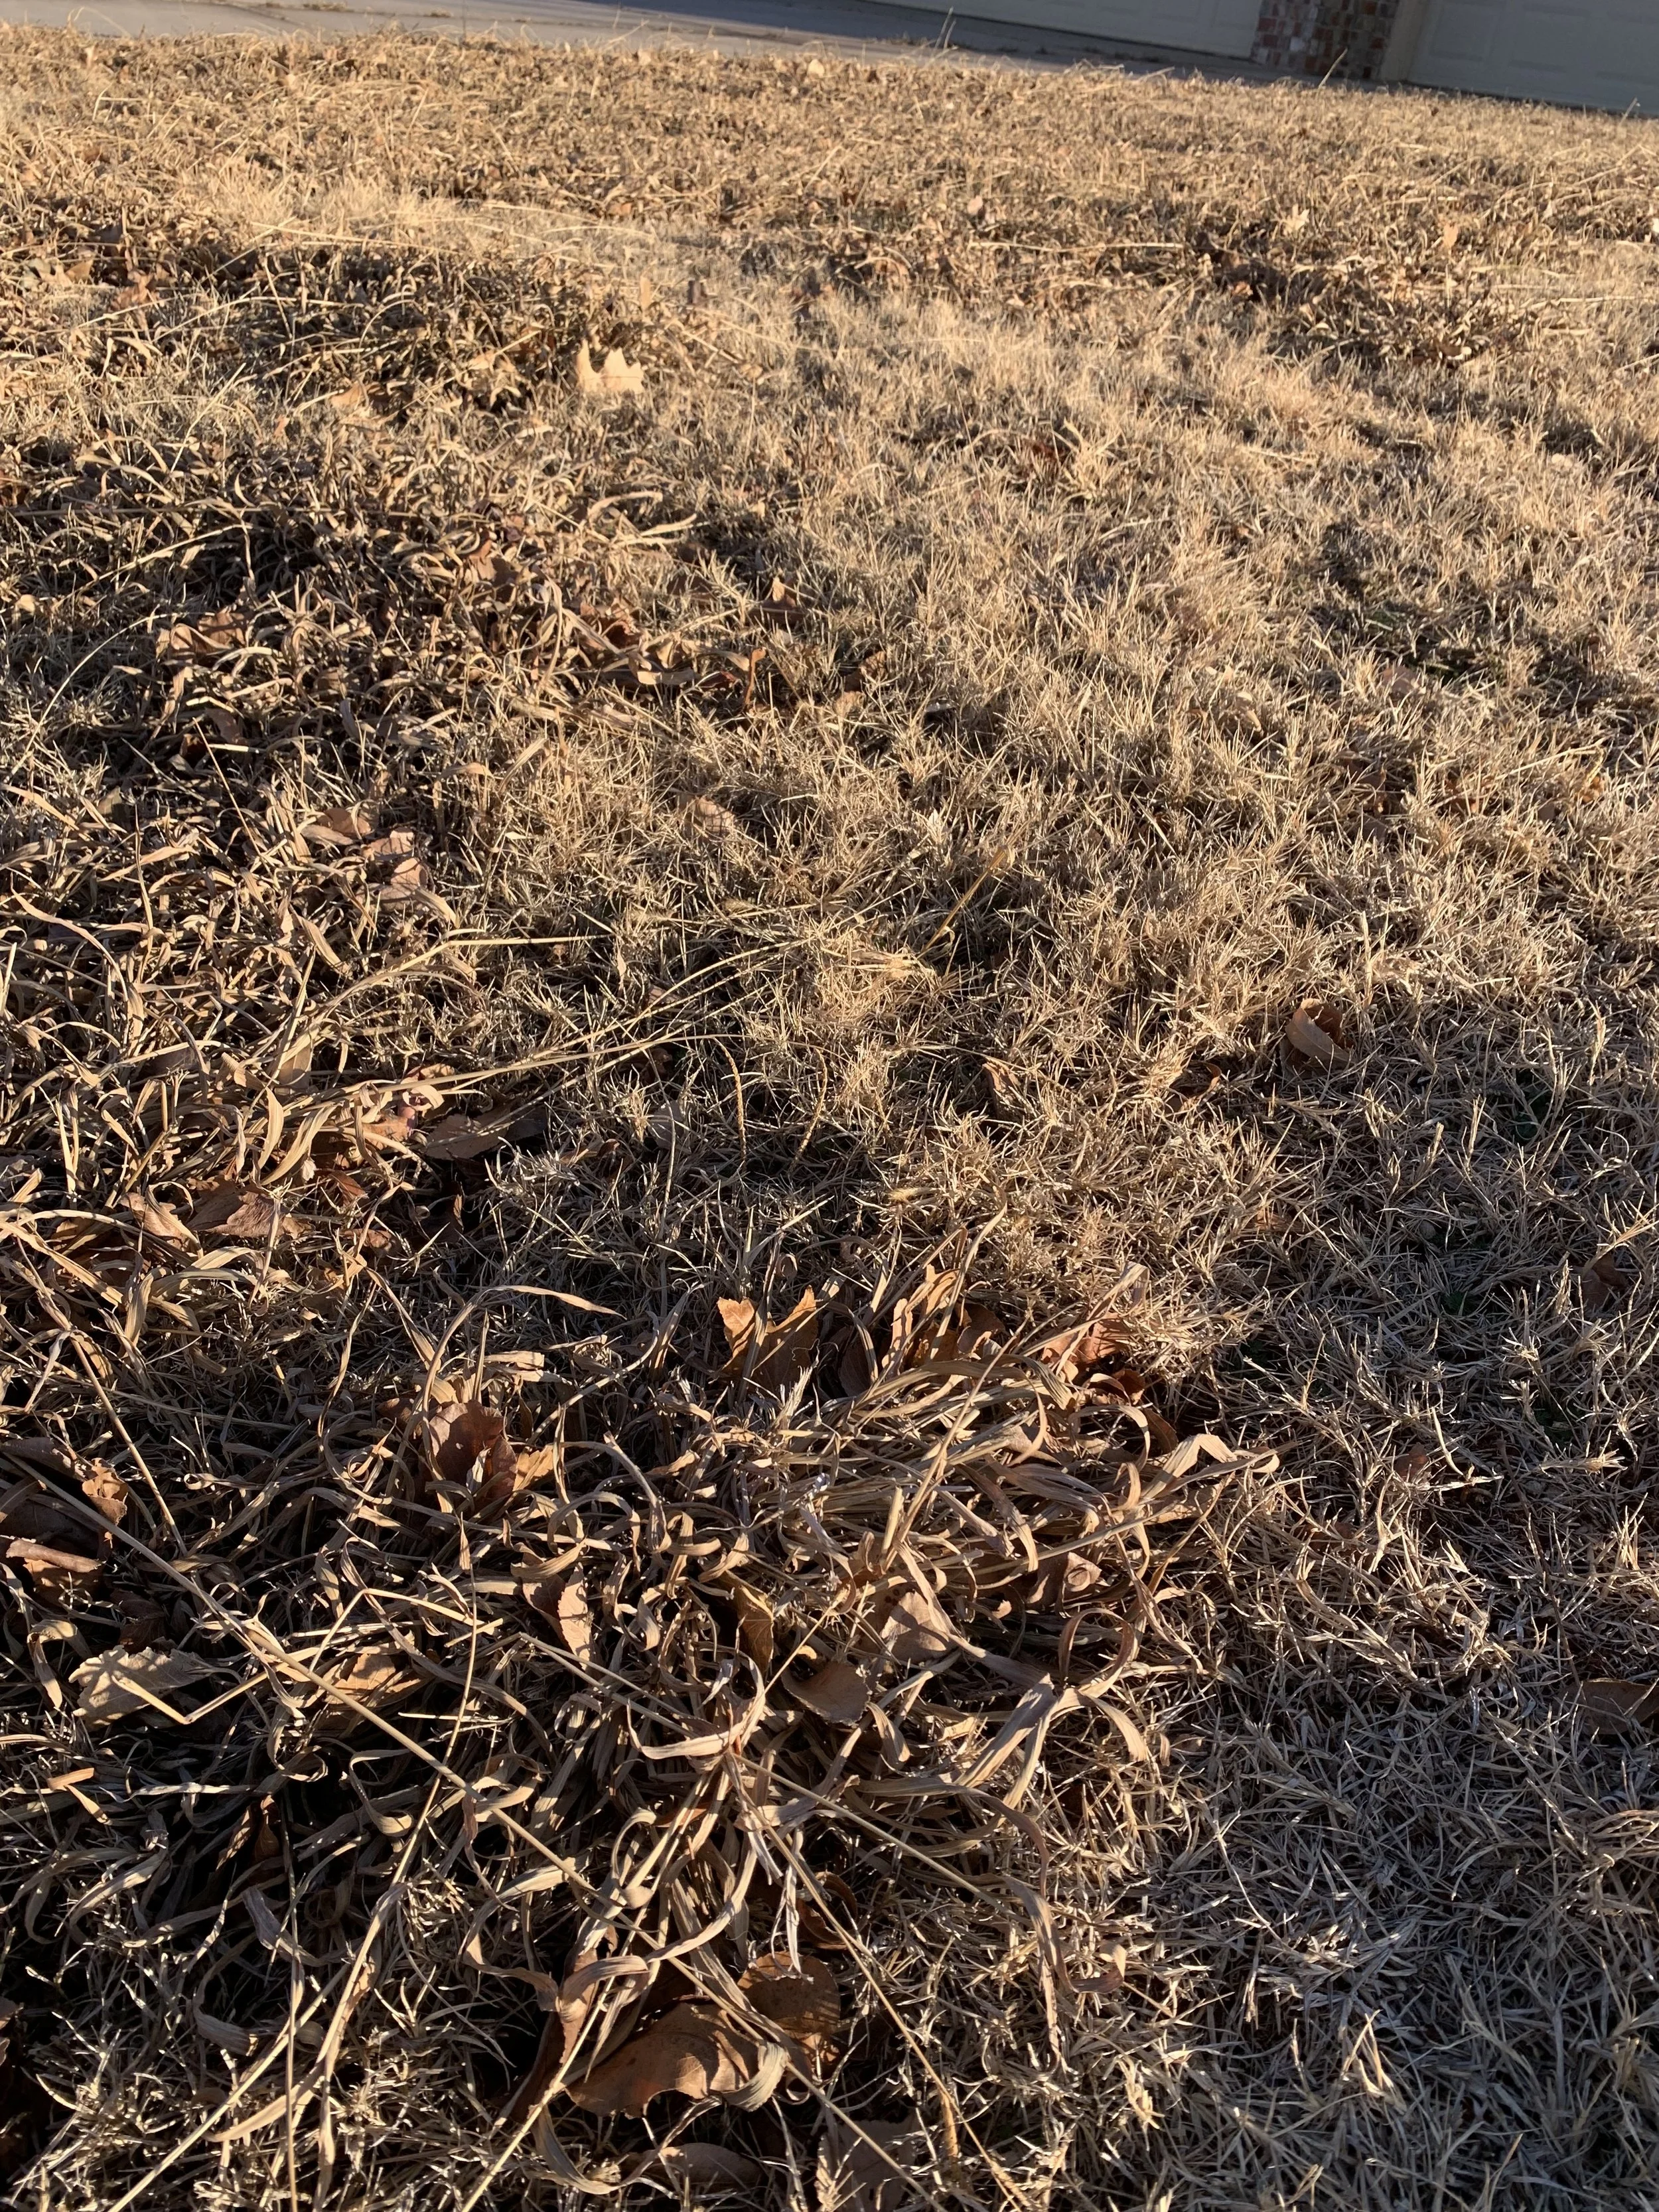
Large areas of dallisgrass where little to now desirable turfgrass remains are best completely killed out with a non-selective herbicide and then resodded.

Non-selective herbicides were used in June to control dallisgrass in this lawn. After the dallisgrass was completely controlled, the areas were sodded with Bermuda.
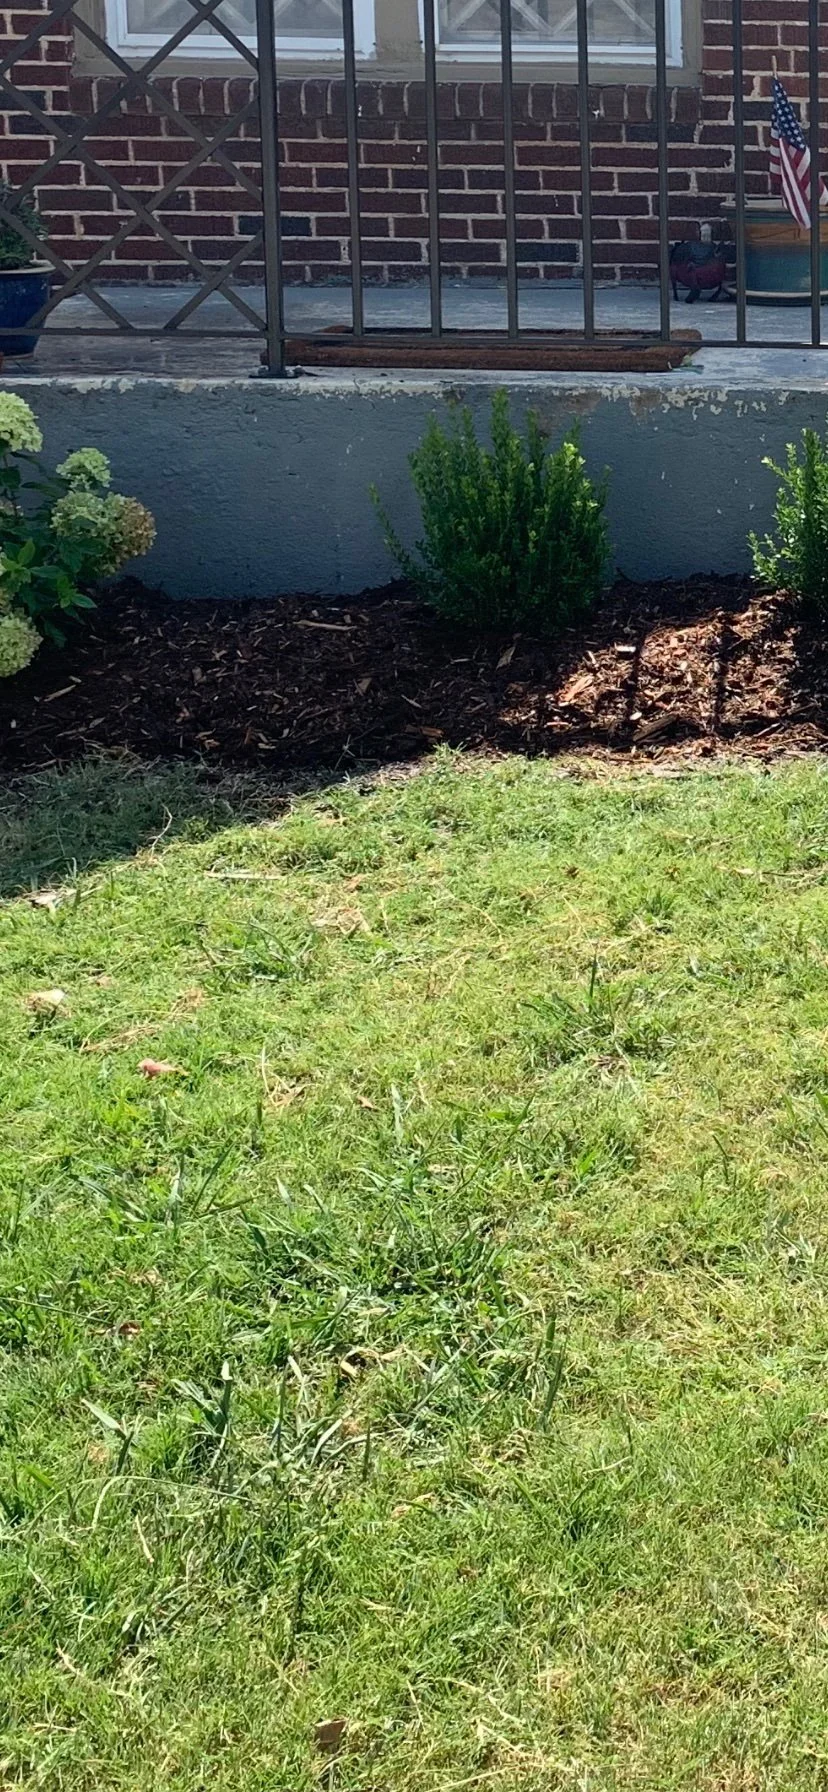
Dallisgrass grows faster than turfgrass spoiling a well maintained lawn and landscape.
Because dallisgrass is a perennial, persistence is required. Total eradication of a large area may take more than one season. Multiple treatments over a two-year period can be expected.
It is one of the more difficult to control weeds homeowners will face and the longer it has been established the harder it is to gain control.
Address dallisgrass as soon as you see it. The longer you wait the more invasive it will become.
If you have dallisgrass problems, or if you need help in identifying dallisgrass, please give us a call or respond to this email.
Lorne Hall
Hall | Stewart Lawn + Landscape
(405)367-3873
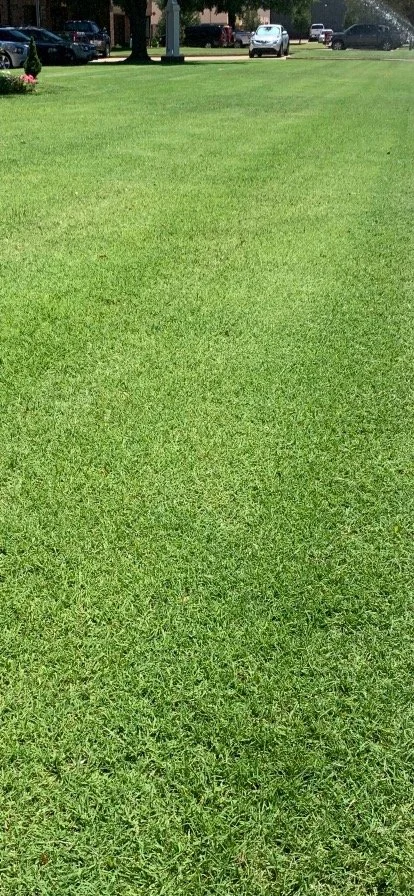
The goal is to have a clean and healthy lawn this summer. It is critical you address dallisgrass as soon as you see it.
Japanese Maples – Year Round Interest

With over 140 hours of the past 7 days below freezing with very little snow cover, our lawns and landscapes look as if they have been left uncovered in the deep freeze and are now suffering from a bad case of freezer burn.
After a long cold week of long johns, heavy coats and gloves, I doubt you are looking for a list of lawn and landscape tasks to accomplish over the next few days.
So, go ahead, pour yourself another cup of coffee, grab a blanket, and head to your comfy chair closest to the fireplace and spend a few minutes dreaming about beautiful landscapes.
Specifically, let’s dream of Japanese Maples – The Aristocrat of the Landscape
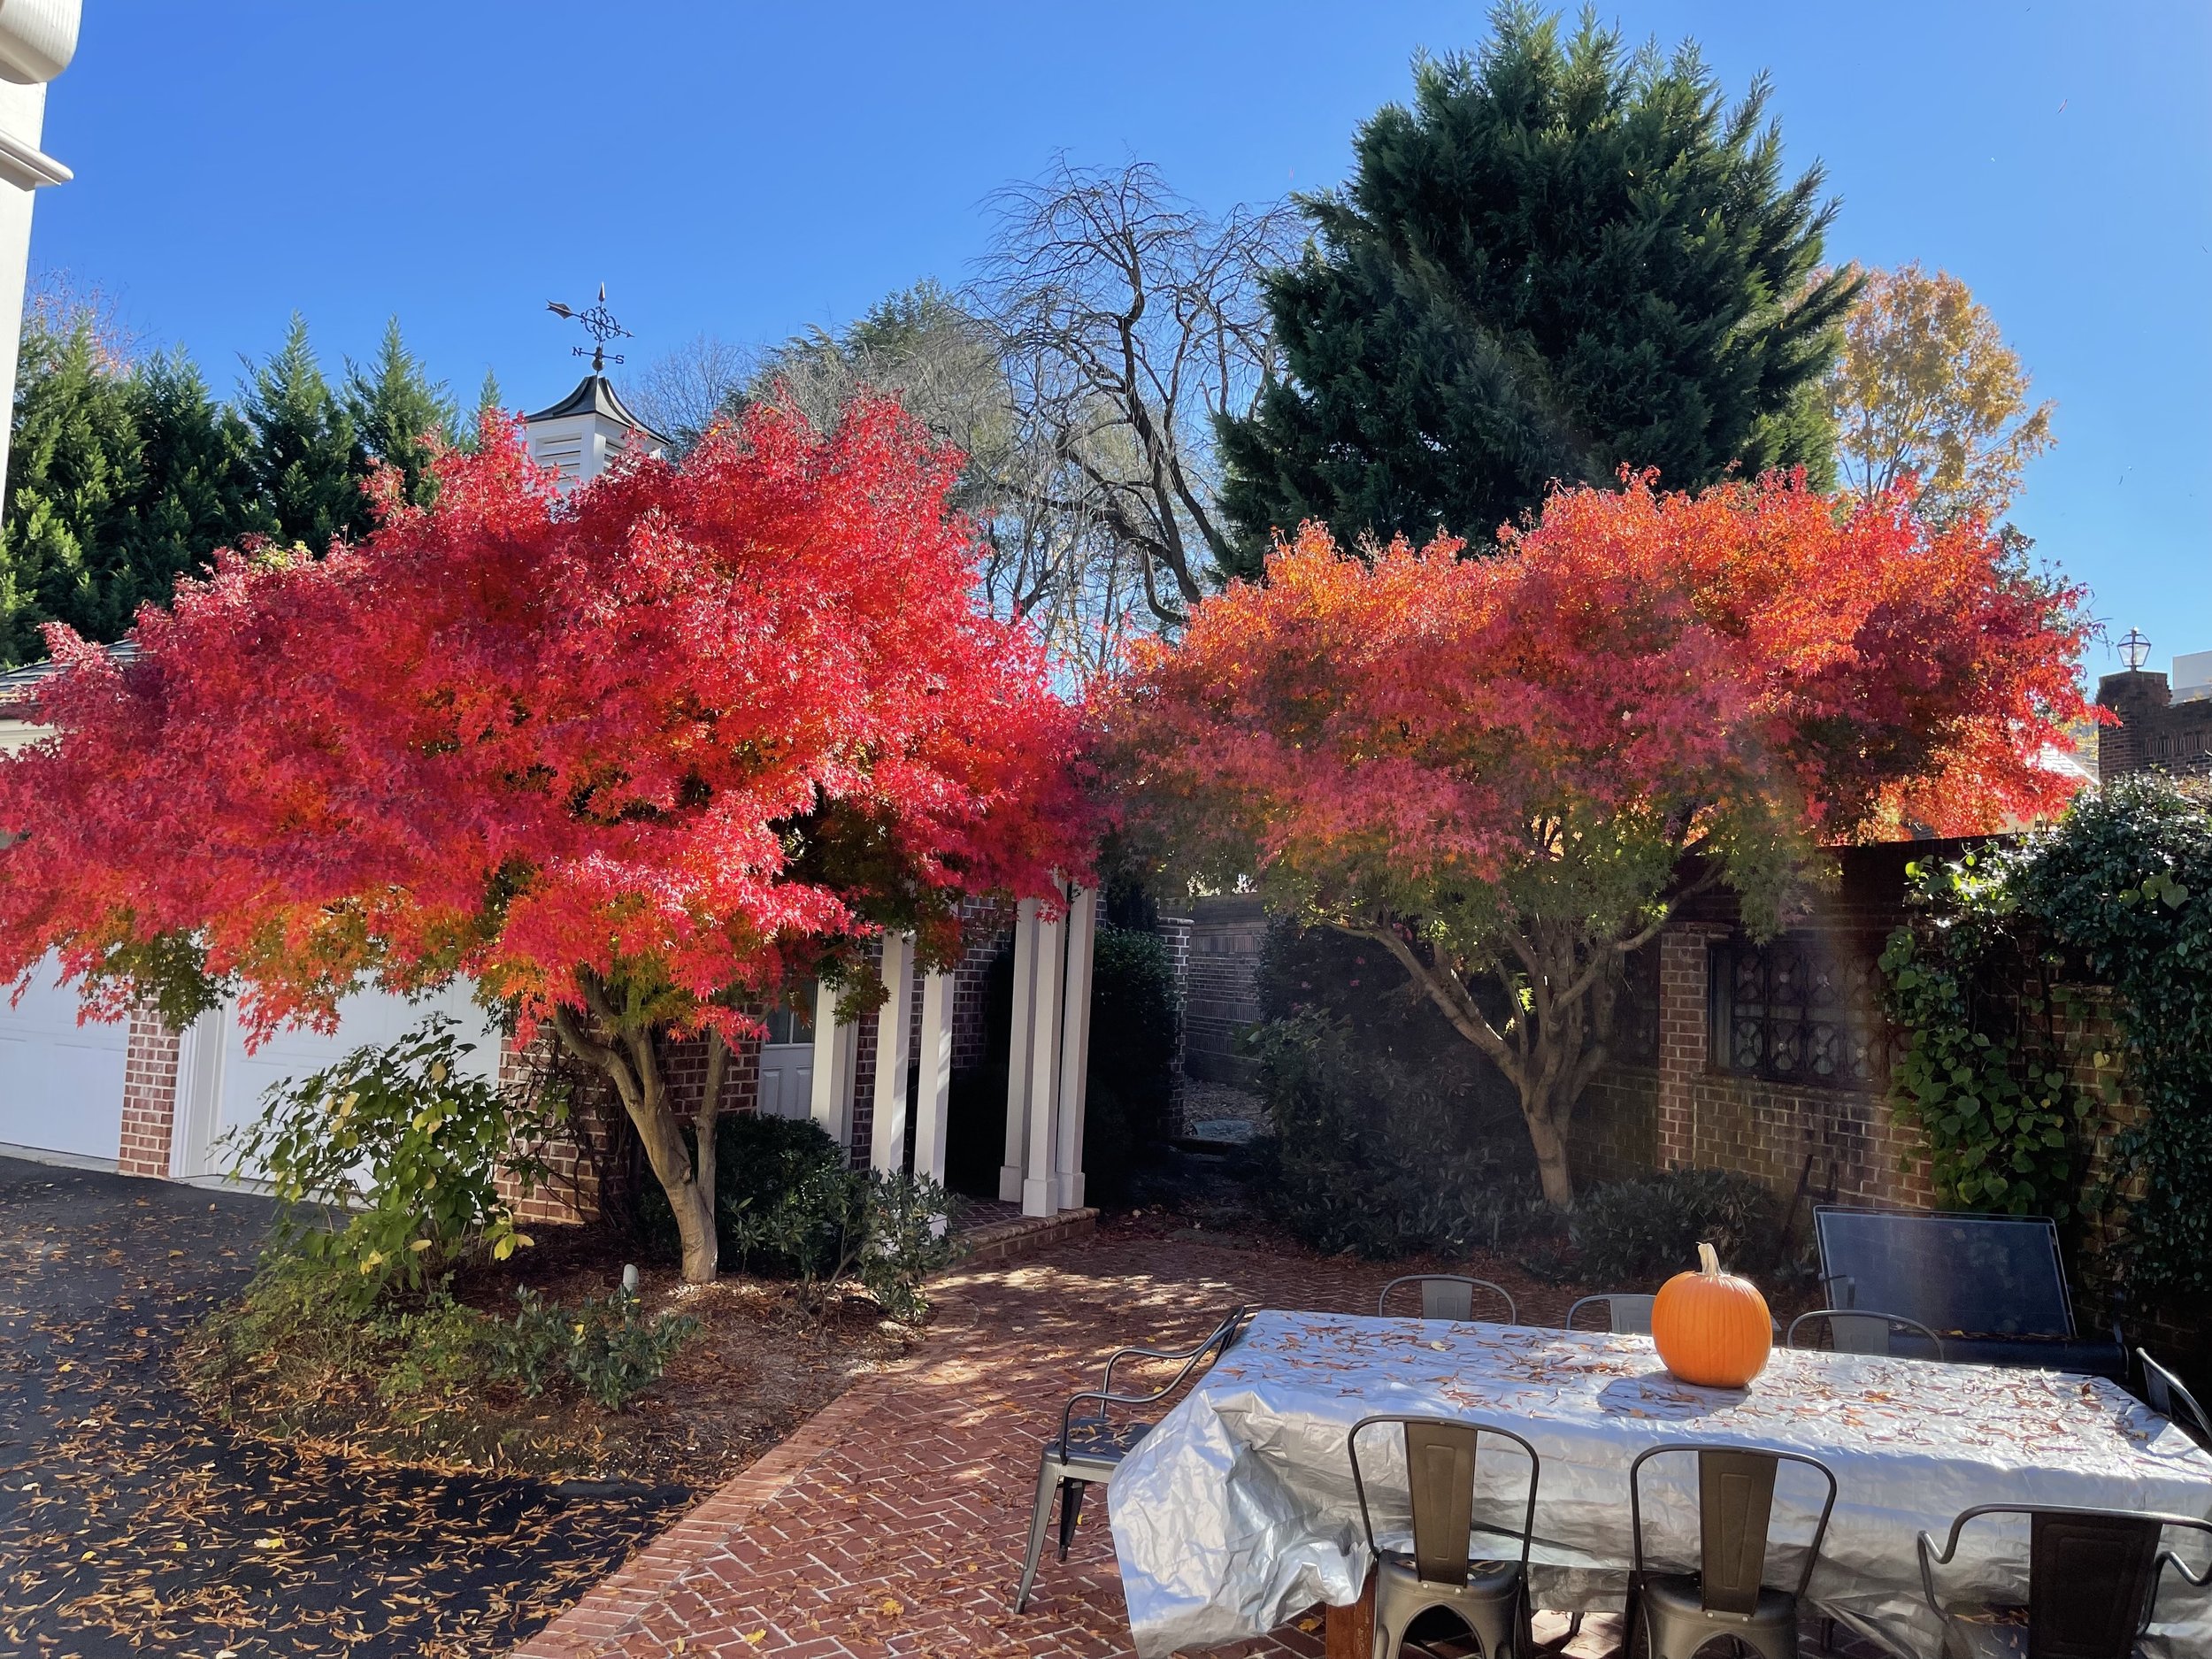

Japanese Maples are sure to add bright colors to your fall landscape.
Michael Dirr, author of the Dirr’s Hardy Trees and Shrubs textbook, writes:
“True aristocrats are rare among people and trees, but Japanese Maple is in the first order.
It is difficult to imagine a garden that could not benefit from one of the many forms of Acer palmatum.
The normal habit is round to broad-rounded, with the branches assuming a layered,
almost stratified architecture similar to Flowering Dogwood.
Leaves are light green to dark green, to reddish purple.
Fall color is sensational with rich yellow and reds through the fall.
The winter silhouette is attractive, providing interest during the off season.
Landscape uses for the species and its many cultivars are limited only by
the imagination of the gardener.”
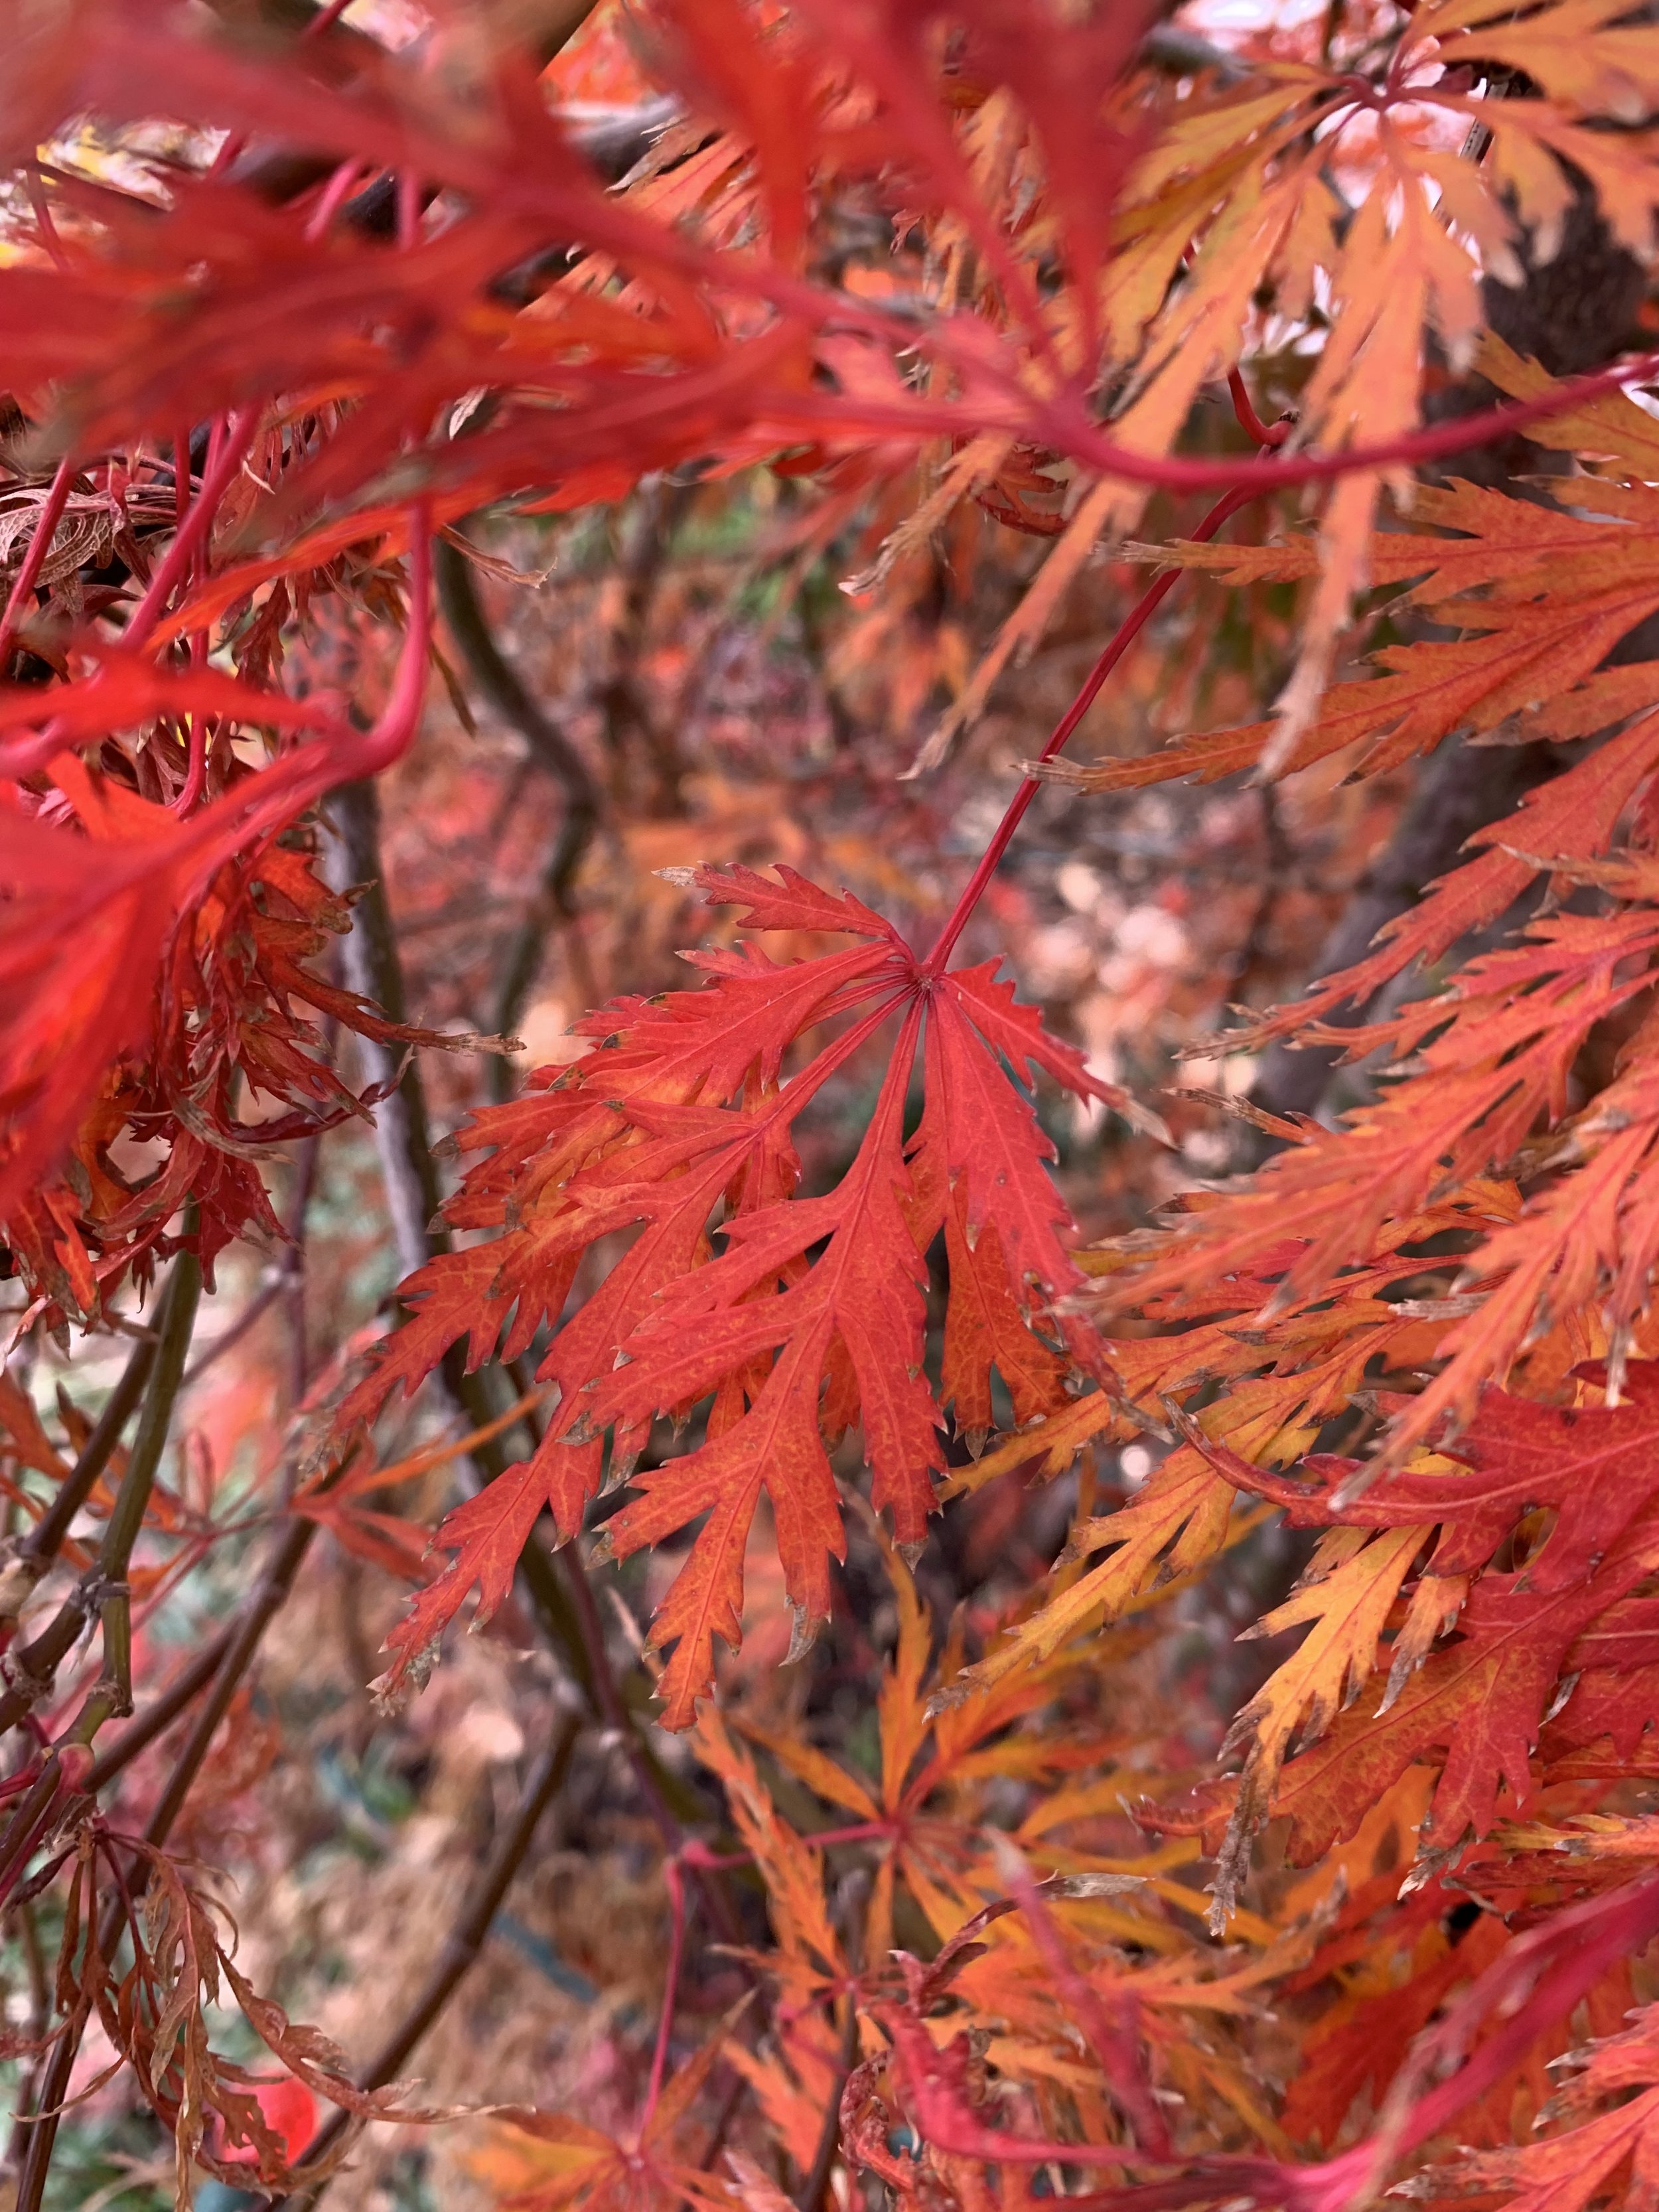
Japanese Maples have added spectacular color to the fall landscape this year. Garnet is a graceful small variety with lacy leaves and a weeping growth habit.
A few things everyone needs to know about Japanese Maples:
Site
Japanese Maples grow well from zone 5-8, making them a good choice for Oklahoma City’s zone 7. They perform best when planted in dappled sun to shade and out of direct afternoon sun. Shade does have its limits…they need some sun for the best fall foliage color. During the summer heat, it is common for them to experience some leaf scorch, especially if they receive direct sun. They prefer well-drained soil and consistent moisture. During the heat of the year, you can expect them to need extra deep watering the first couple of seasons. But once they are established, they are essentially carefree.
Monrovia, a leader in the development and growing of landscape plants, refers to “Japanese Maples a statement plant…one of the most compelling plants you can add to your landscape.”
With over 1,000 varieties and cultivars of the Japanese Maples, there has to be one perfect for your landscape.

Tamukeyama Japanese Maple has deep red-purple leaves through the summer and bright red fall foliage. With cascading branches it grows in a mounding shape 10’ fall and 10’ wide.

Coral Bark Japanese Maples have pale green leaves in the summer, Golden yellow fall color, and bright red-coral branches in the winter.
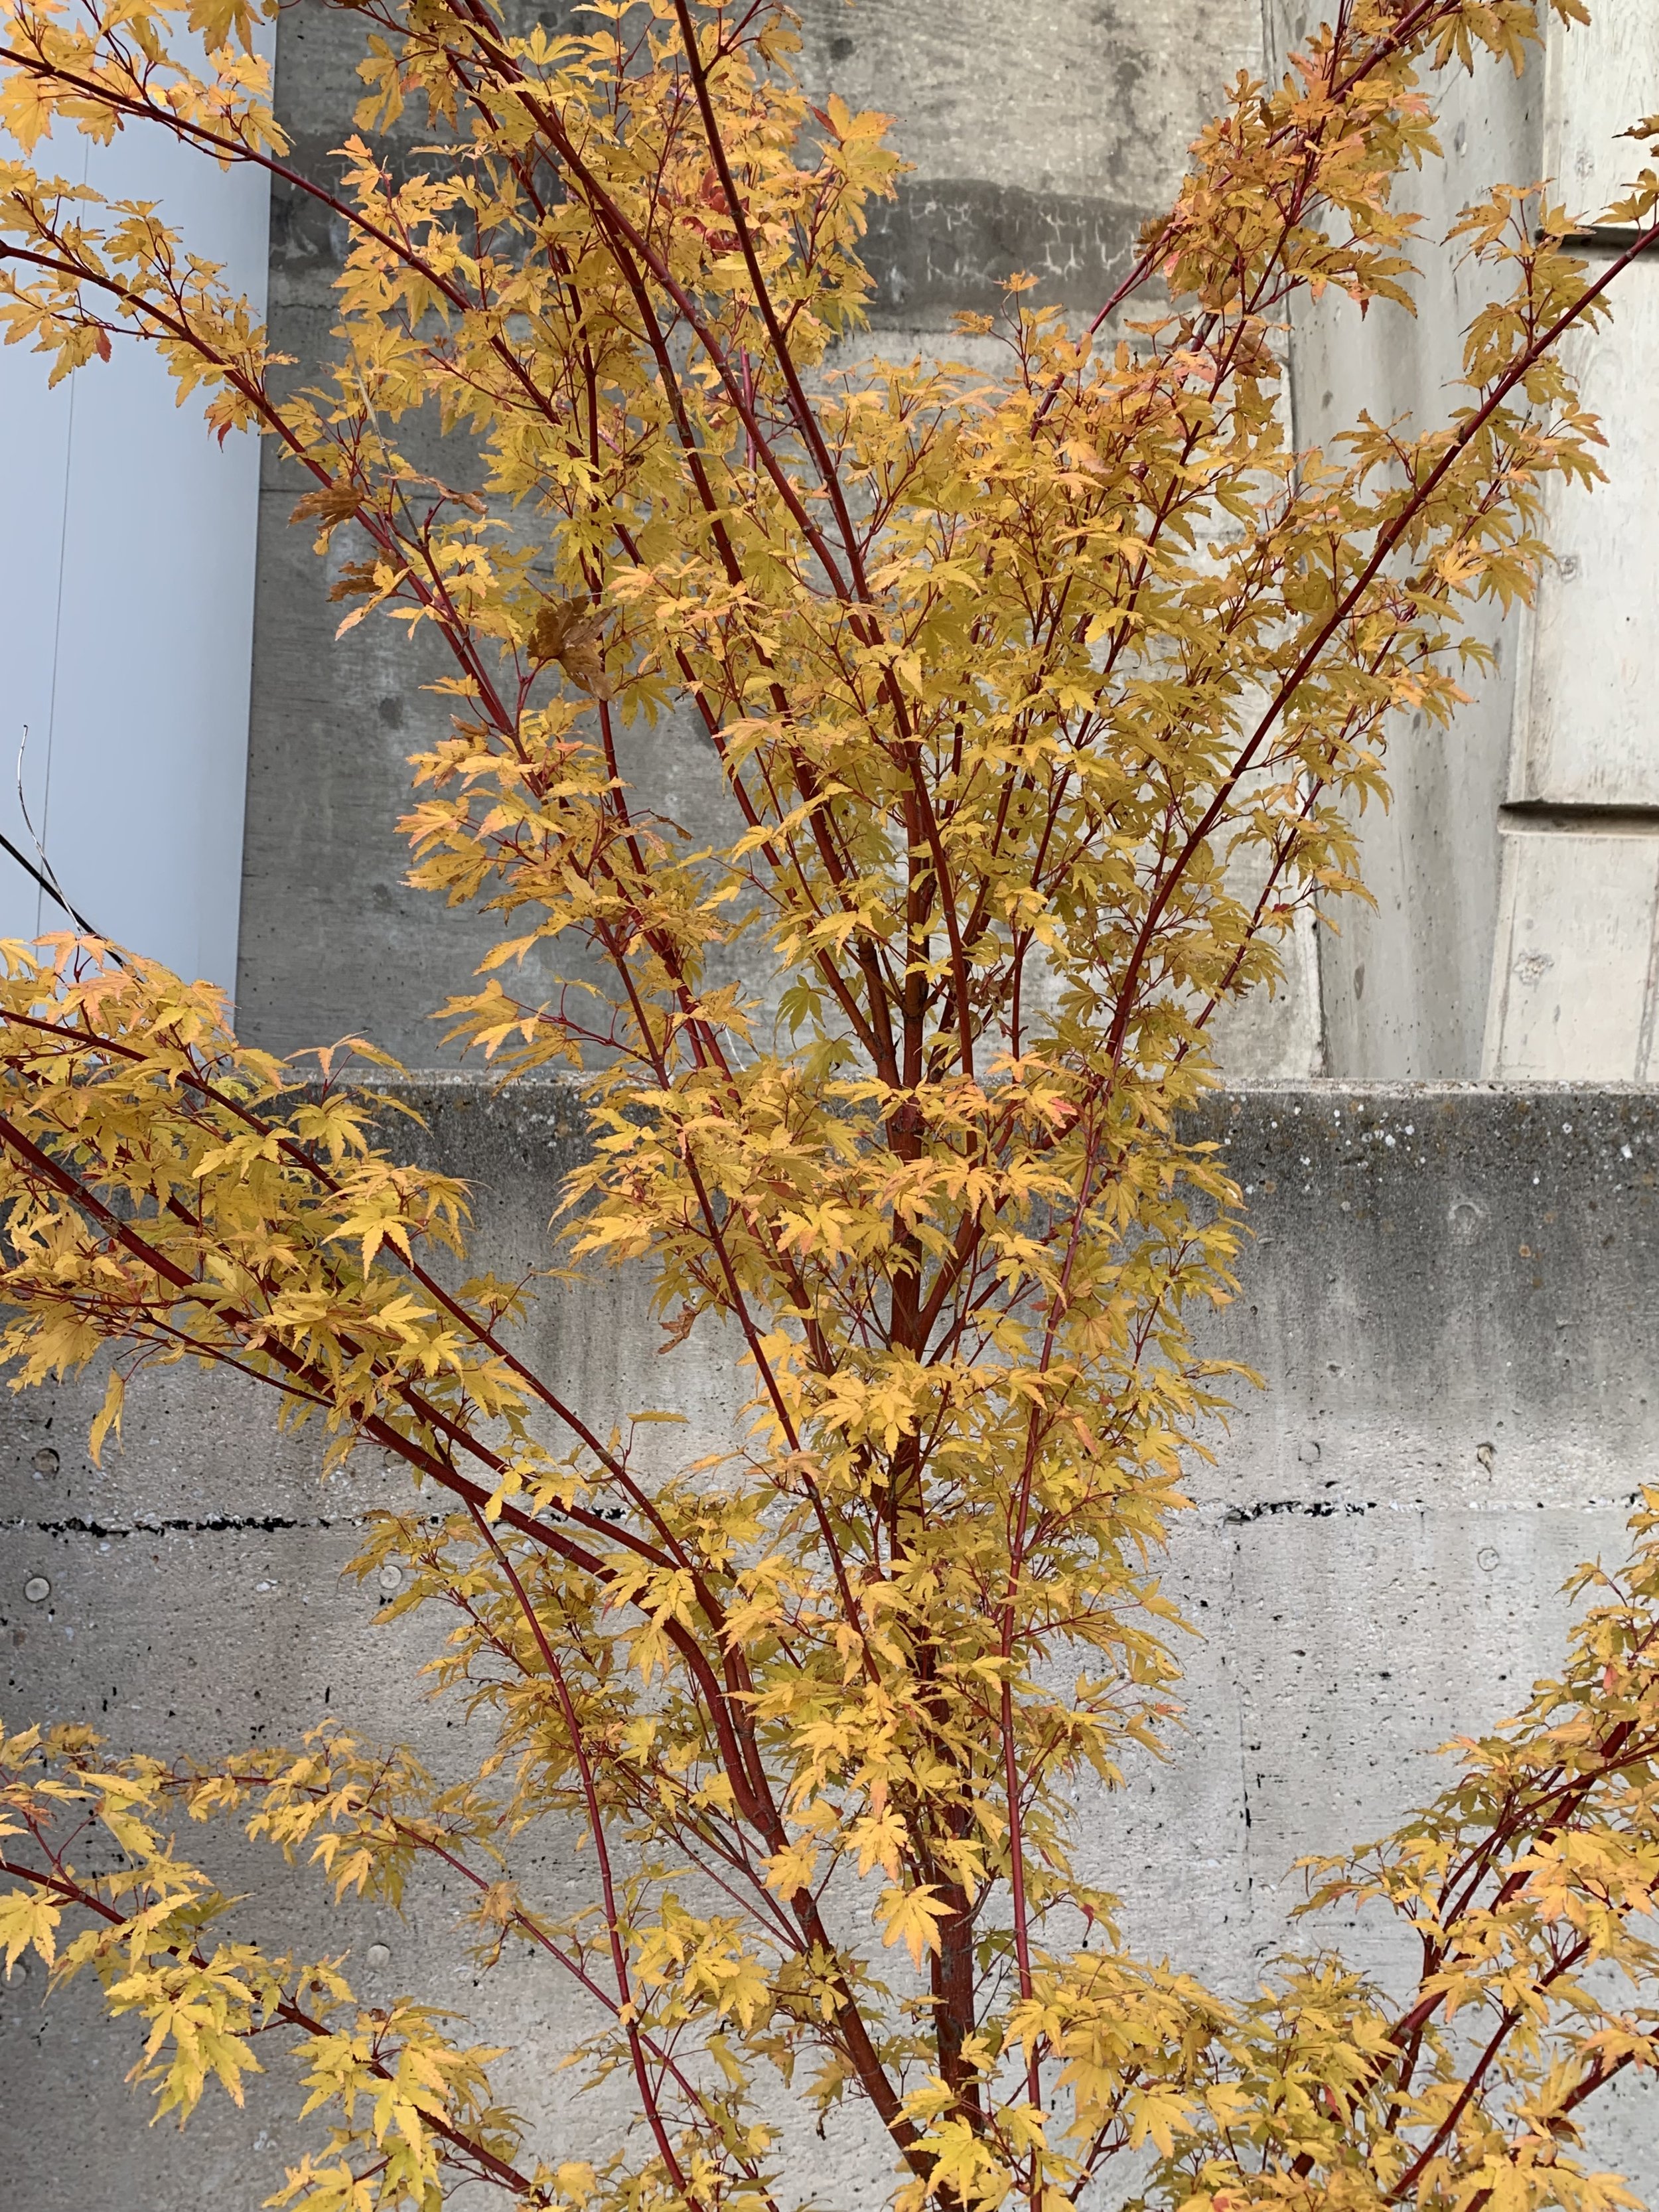
Coral Bark Japanese Maple

Japanese Maples are a staple landscape plant that will add interest to a landscape year round.

A mature Japanese Maple, such as this Bloodgood, will grow in full sun locations where the soil is shaded.
Size & Form
Japanese Maples range from a few feet tall to 25’. Considered a deciduous small tree or shrub, there are rounded, dwarf, weeping, upright, cascading, single trunk, multi-trunk…. varieties.
How can you use a Japanese Maple in your landscape?
You can create a solitary specimen as a spotlight in the landscape.
You can plant them in a group as a grove.
Or, you can use them in large containers.
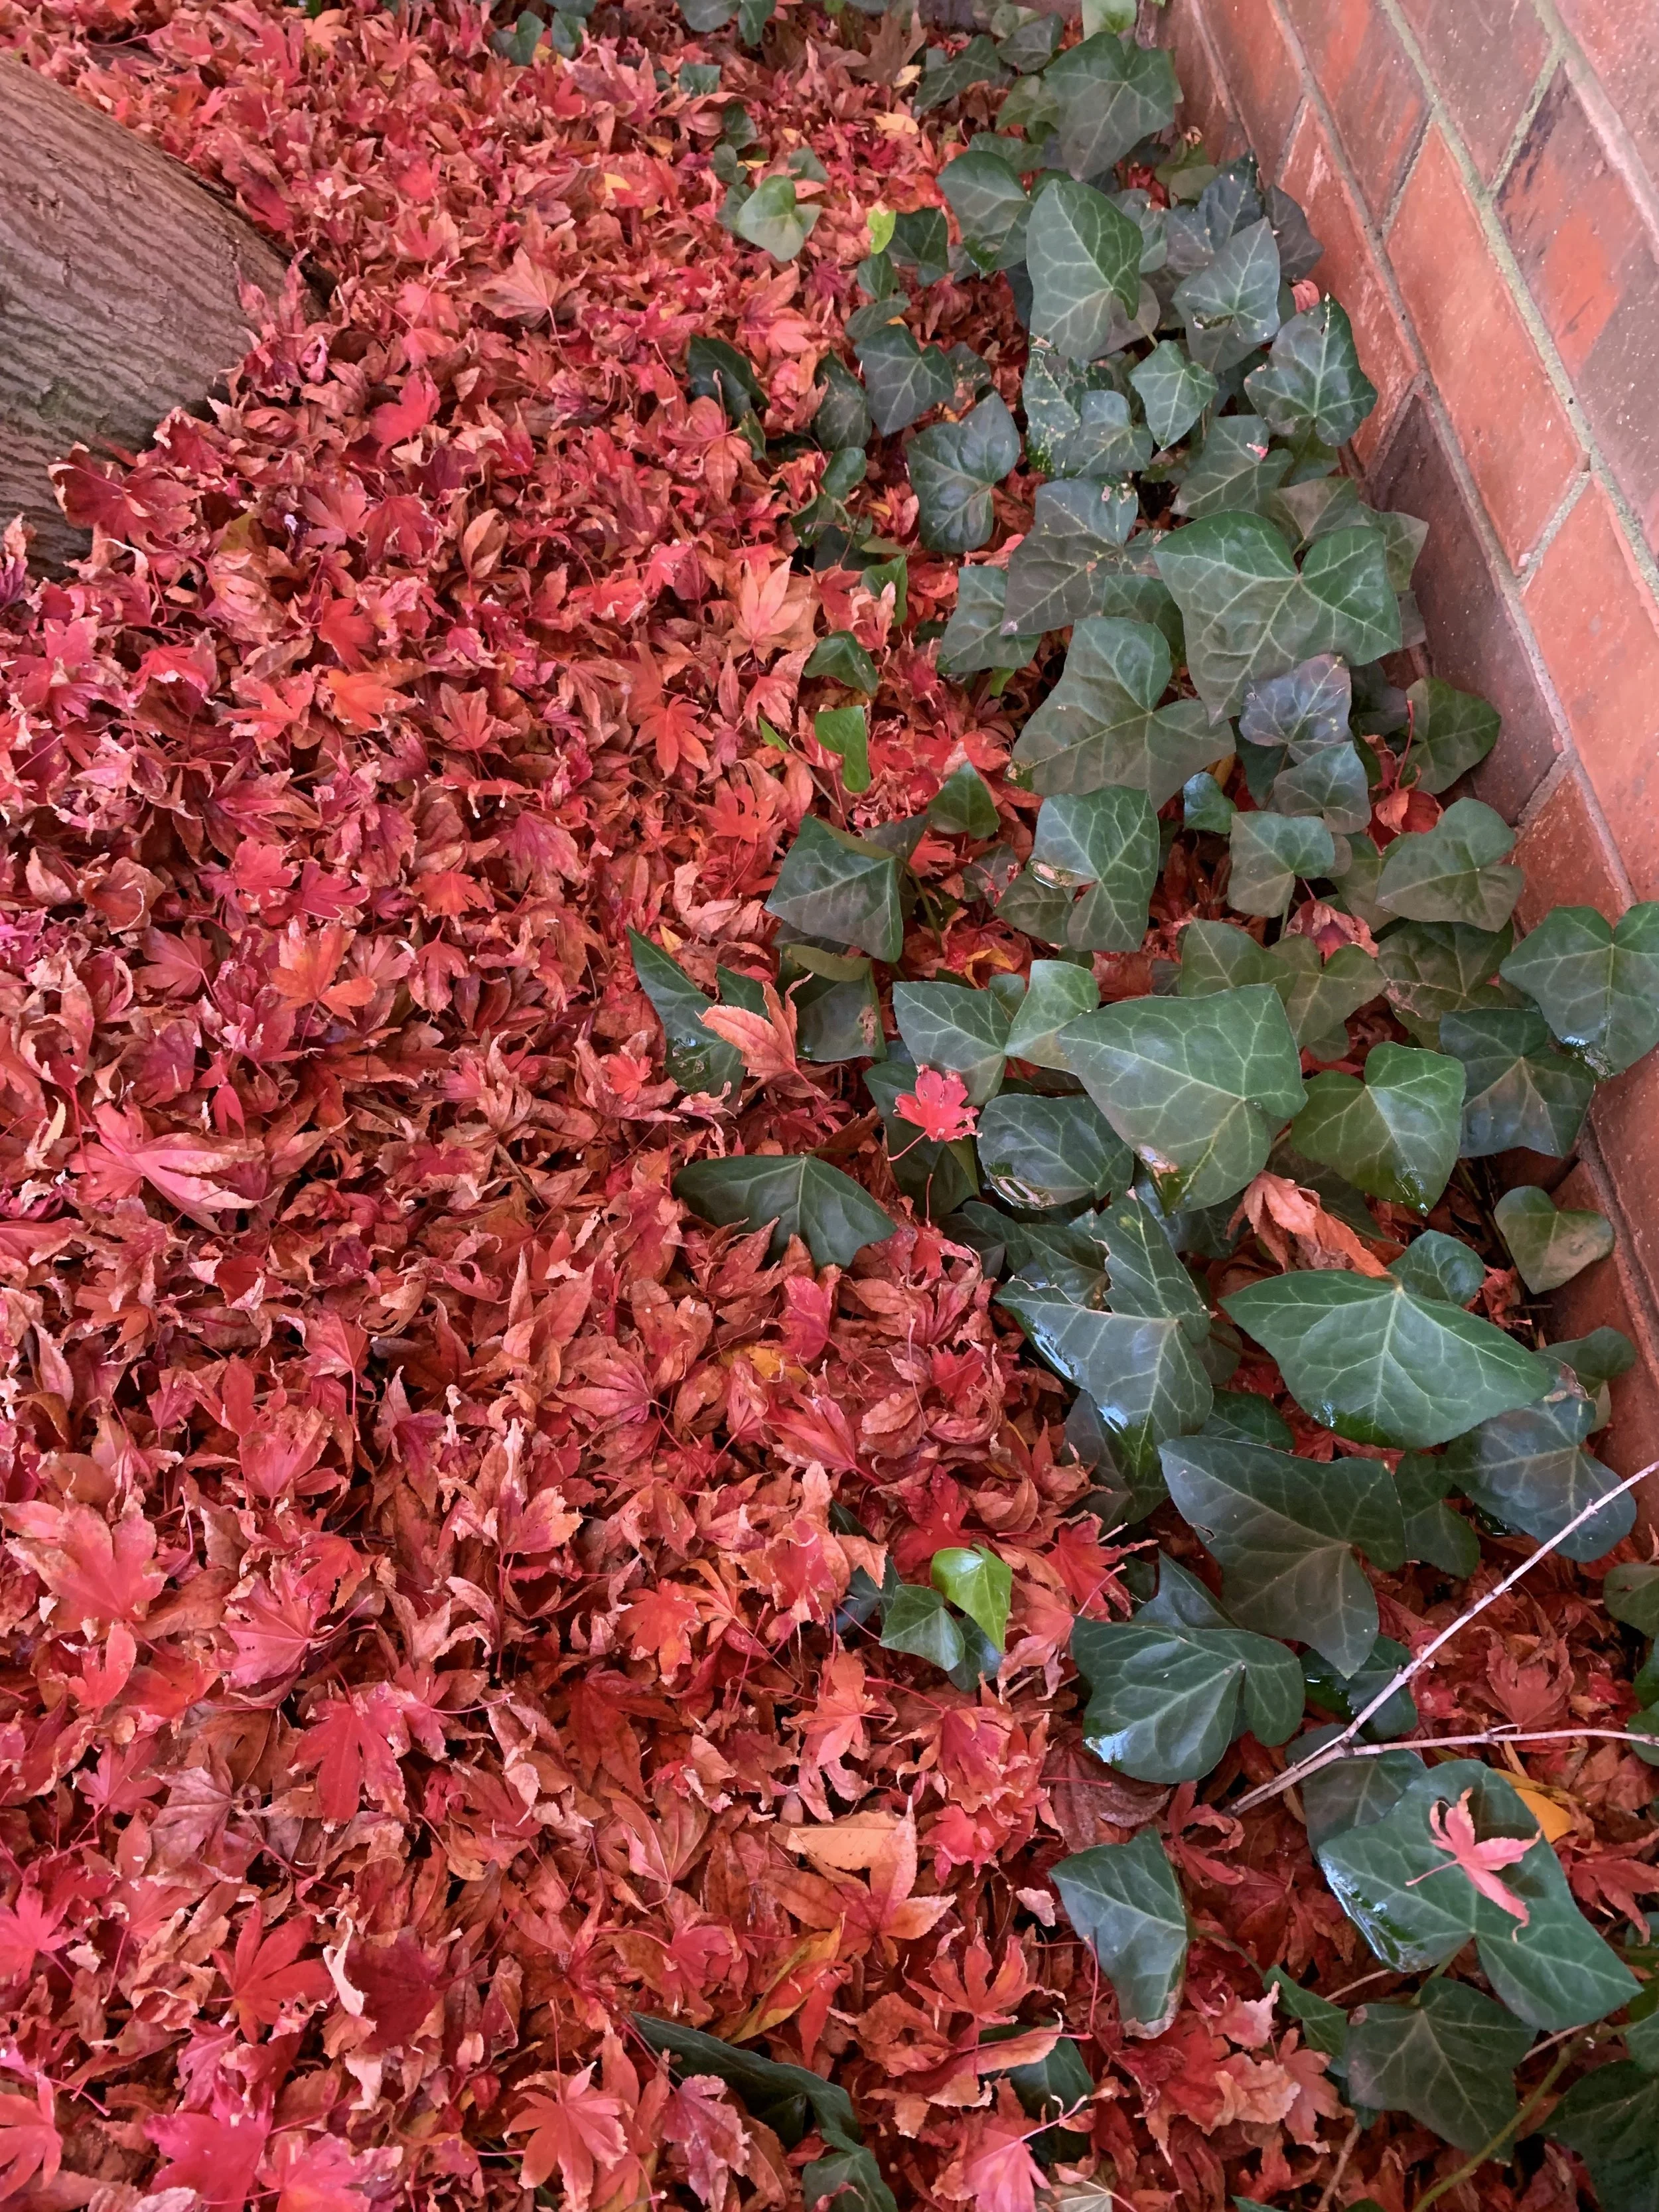
Leaves from a Bloodgood Japanese Maple cover the ground with a red carpet as they drop from the tree.
Leaf Shape
Japanese Maple foliage is divided into two types: traditional maple type, 2-5” wide palm-shaped with 5-7 lobes, or delicate and lacy.

Japanese Maples varieties will have either traditional maple shaped leaves or delicate and lacy leaves like this weeping variety.

Green and red Japanese Maples planted in a group to create a grove.

Bloodgood Japanese Maples make a bold statement in April when their leaves emerge a brilliant red.
Leaf Color
Japanese Maples are among the most wide-range, colorful trees. The foliage ranges from red, green, orange, deep red-purple and bright red-pink depending on the time of year. Some leaf out brilliant reds in the spring, change to green in the summer, and finish the year in bright reds, yellows and oranges. Other varieties start red in the spring, keep a red cast all summer keeping the red color through fall.
Monrovia’s website is a great place to explore Japanese Maples.
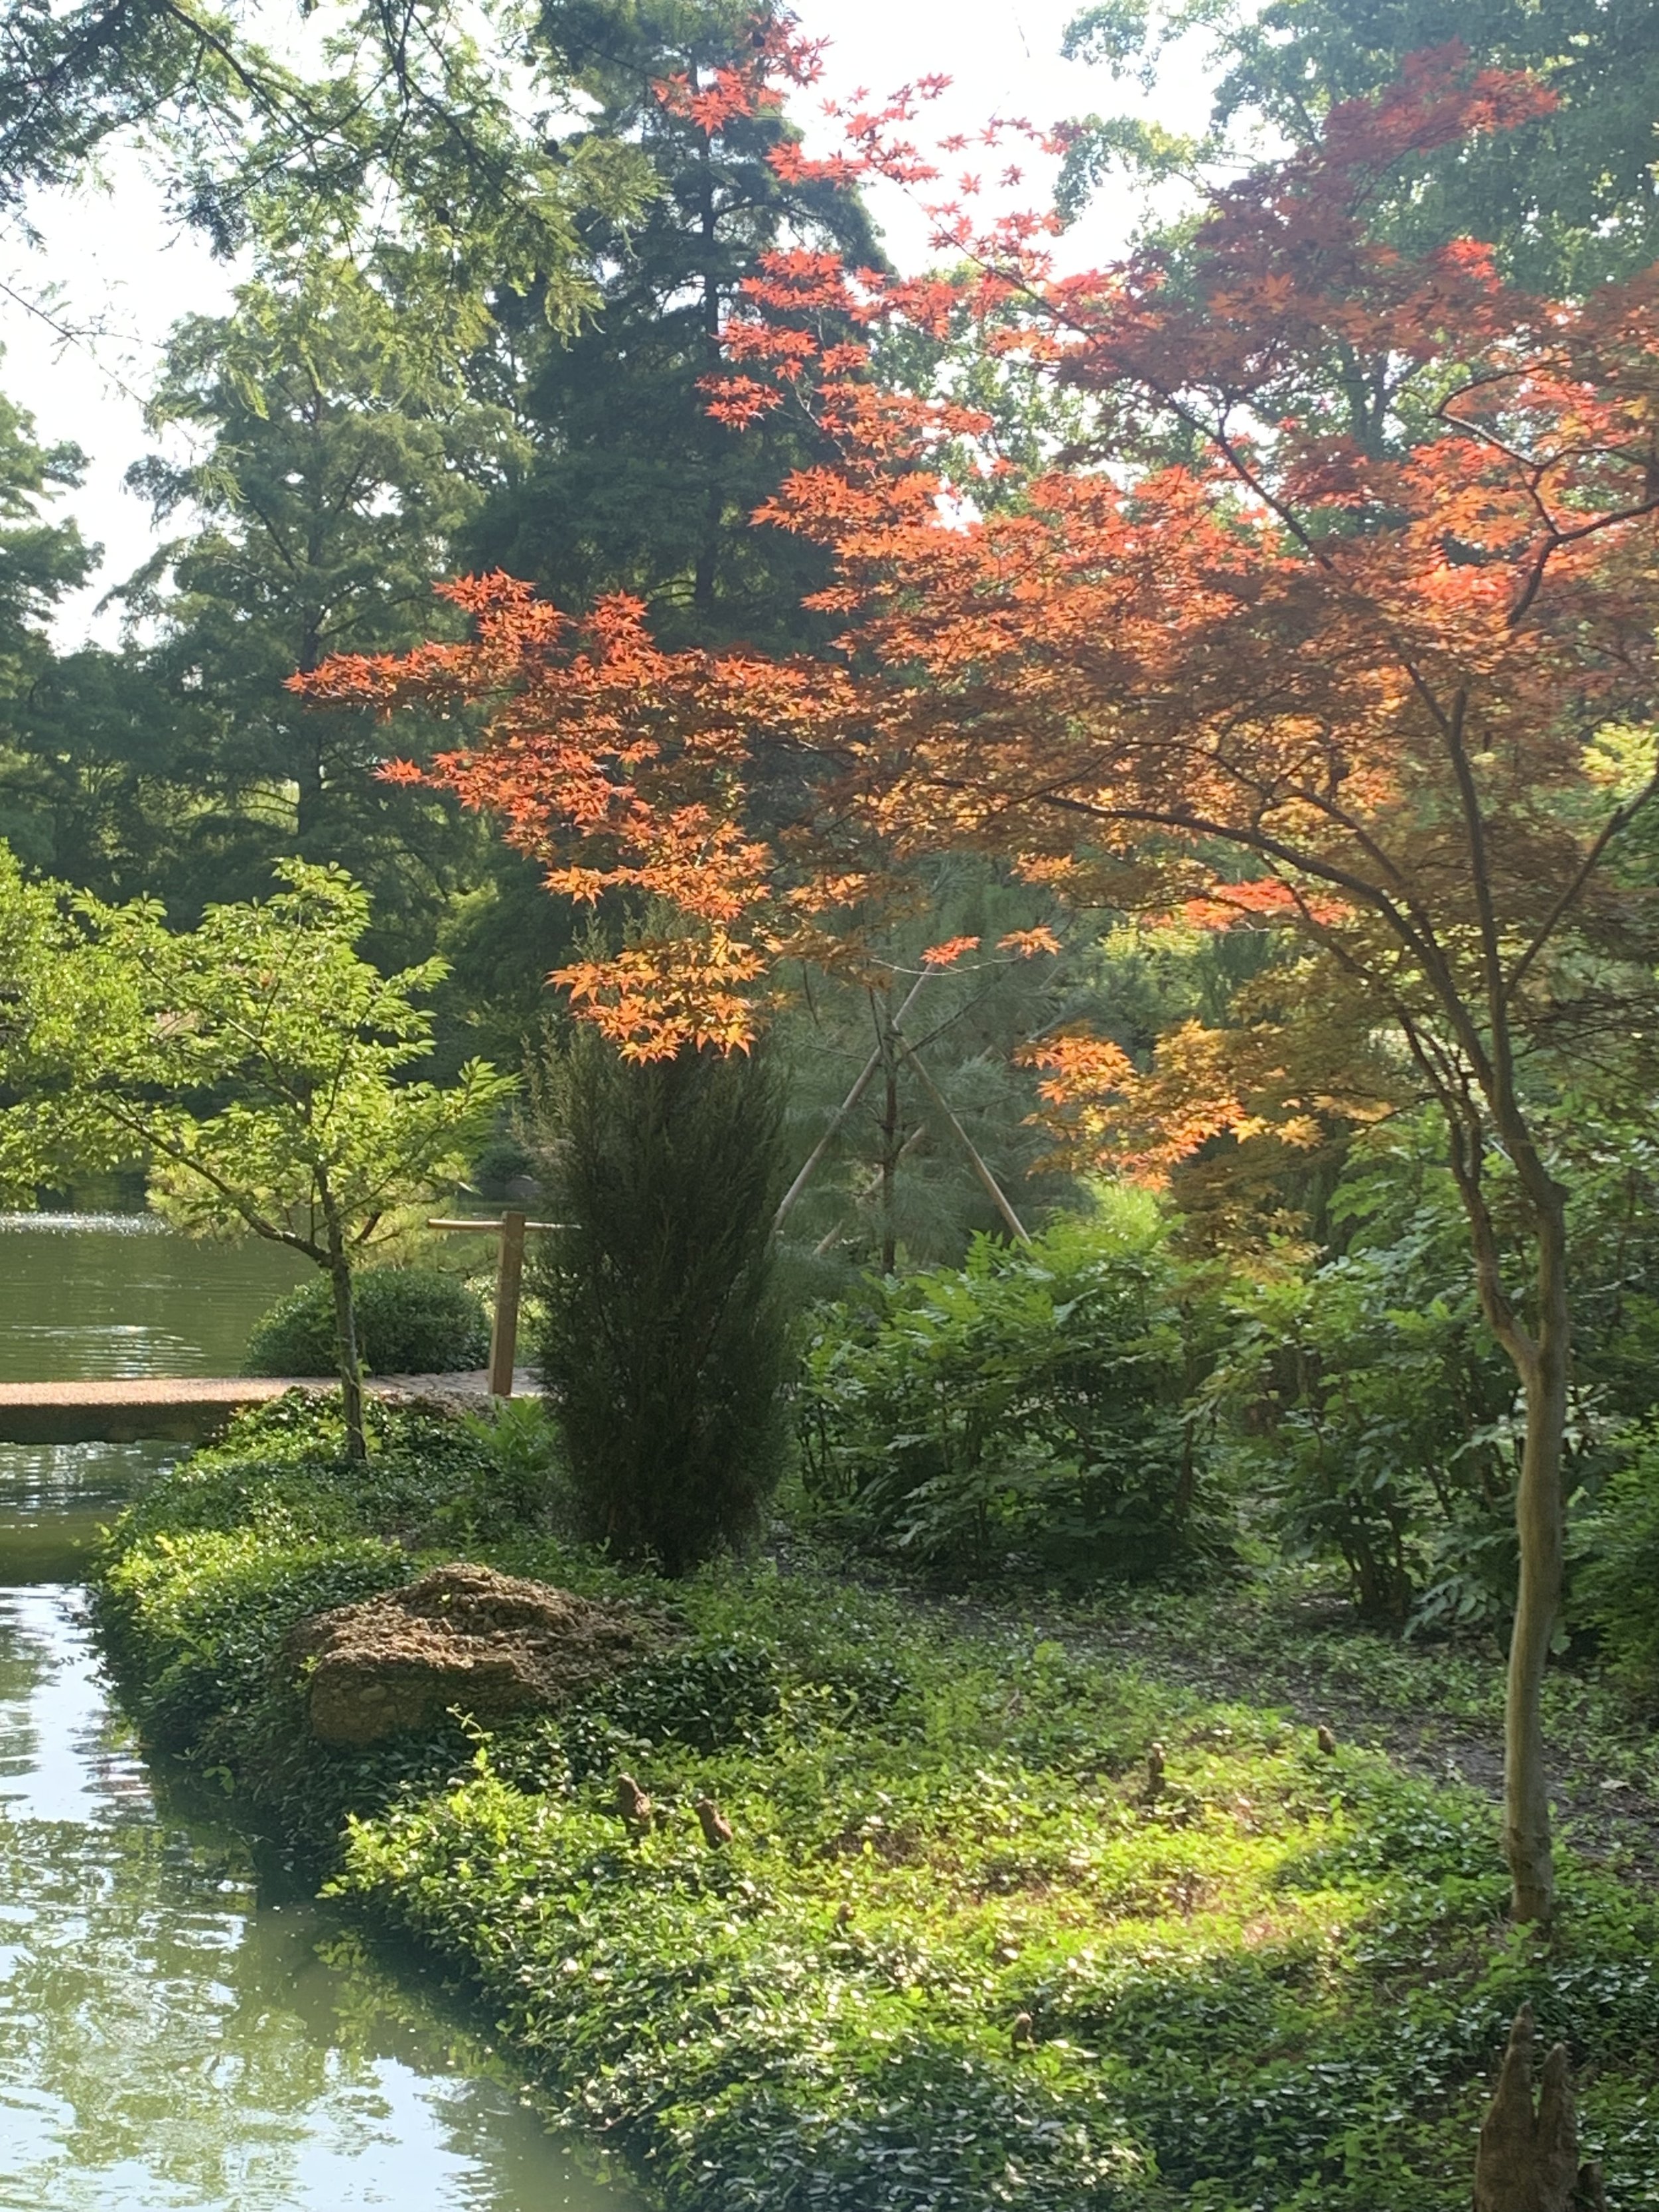
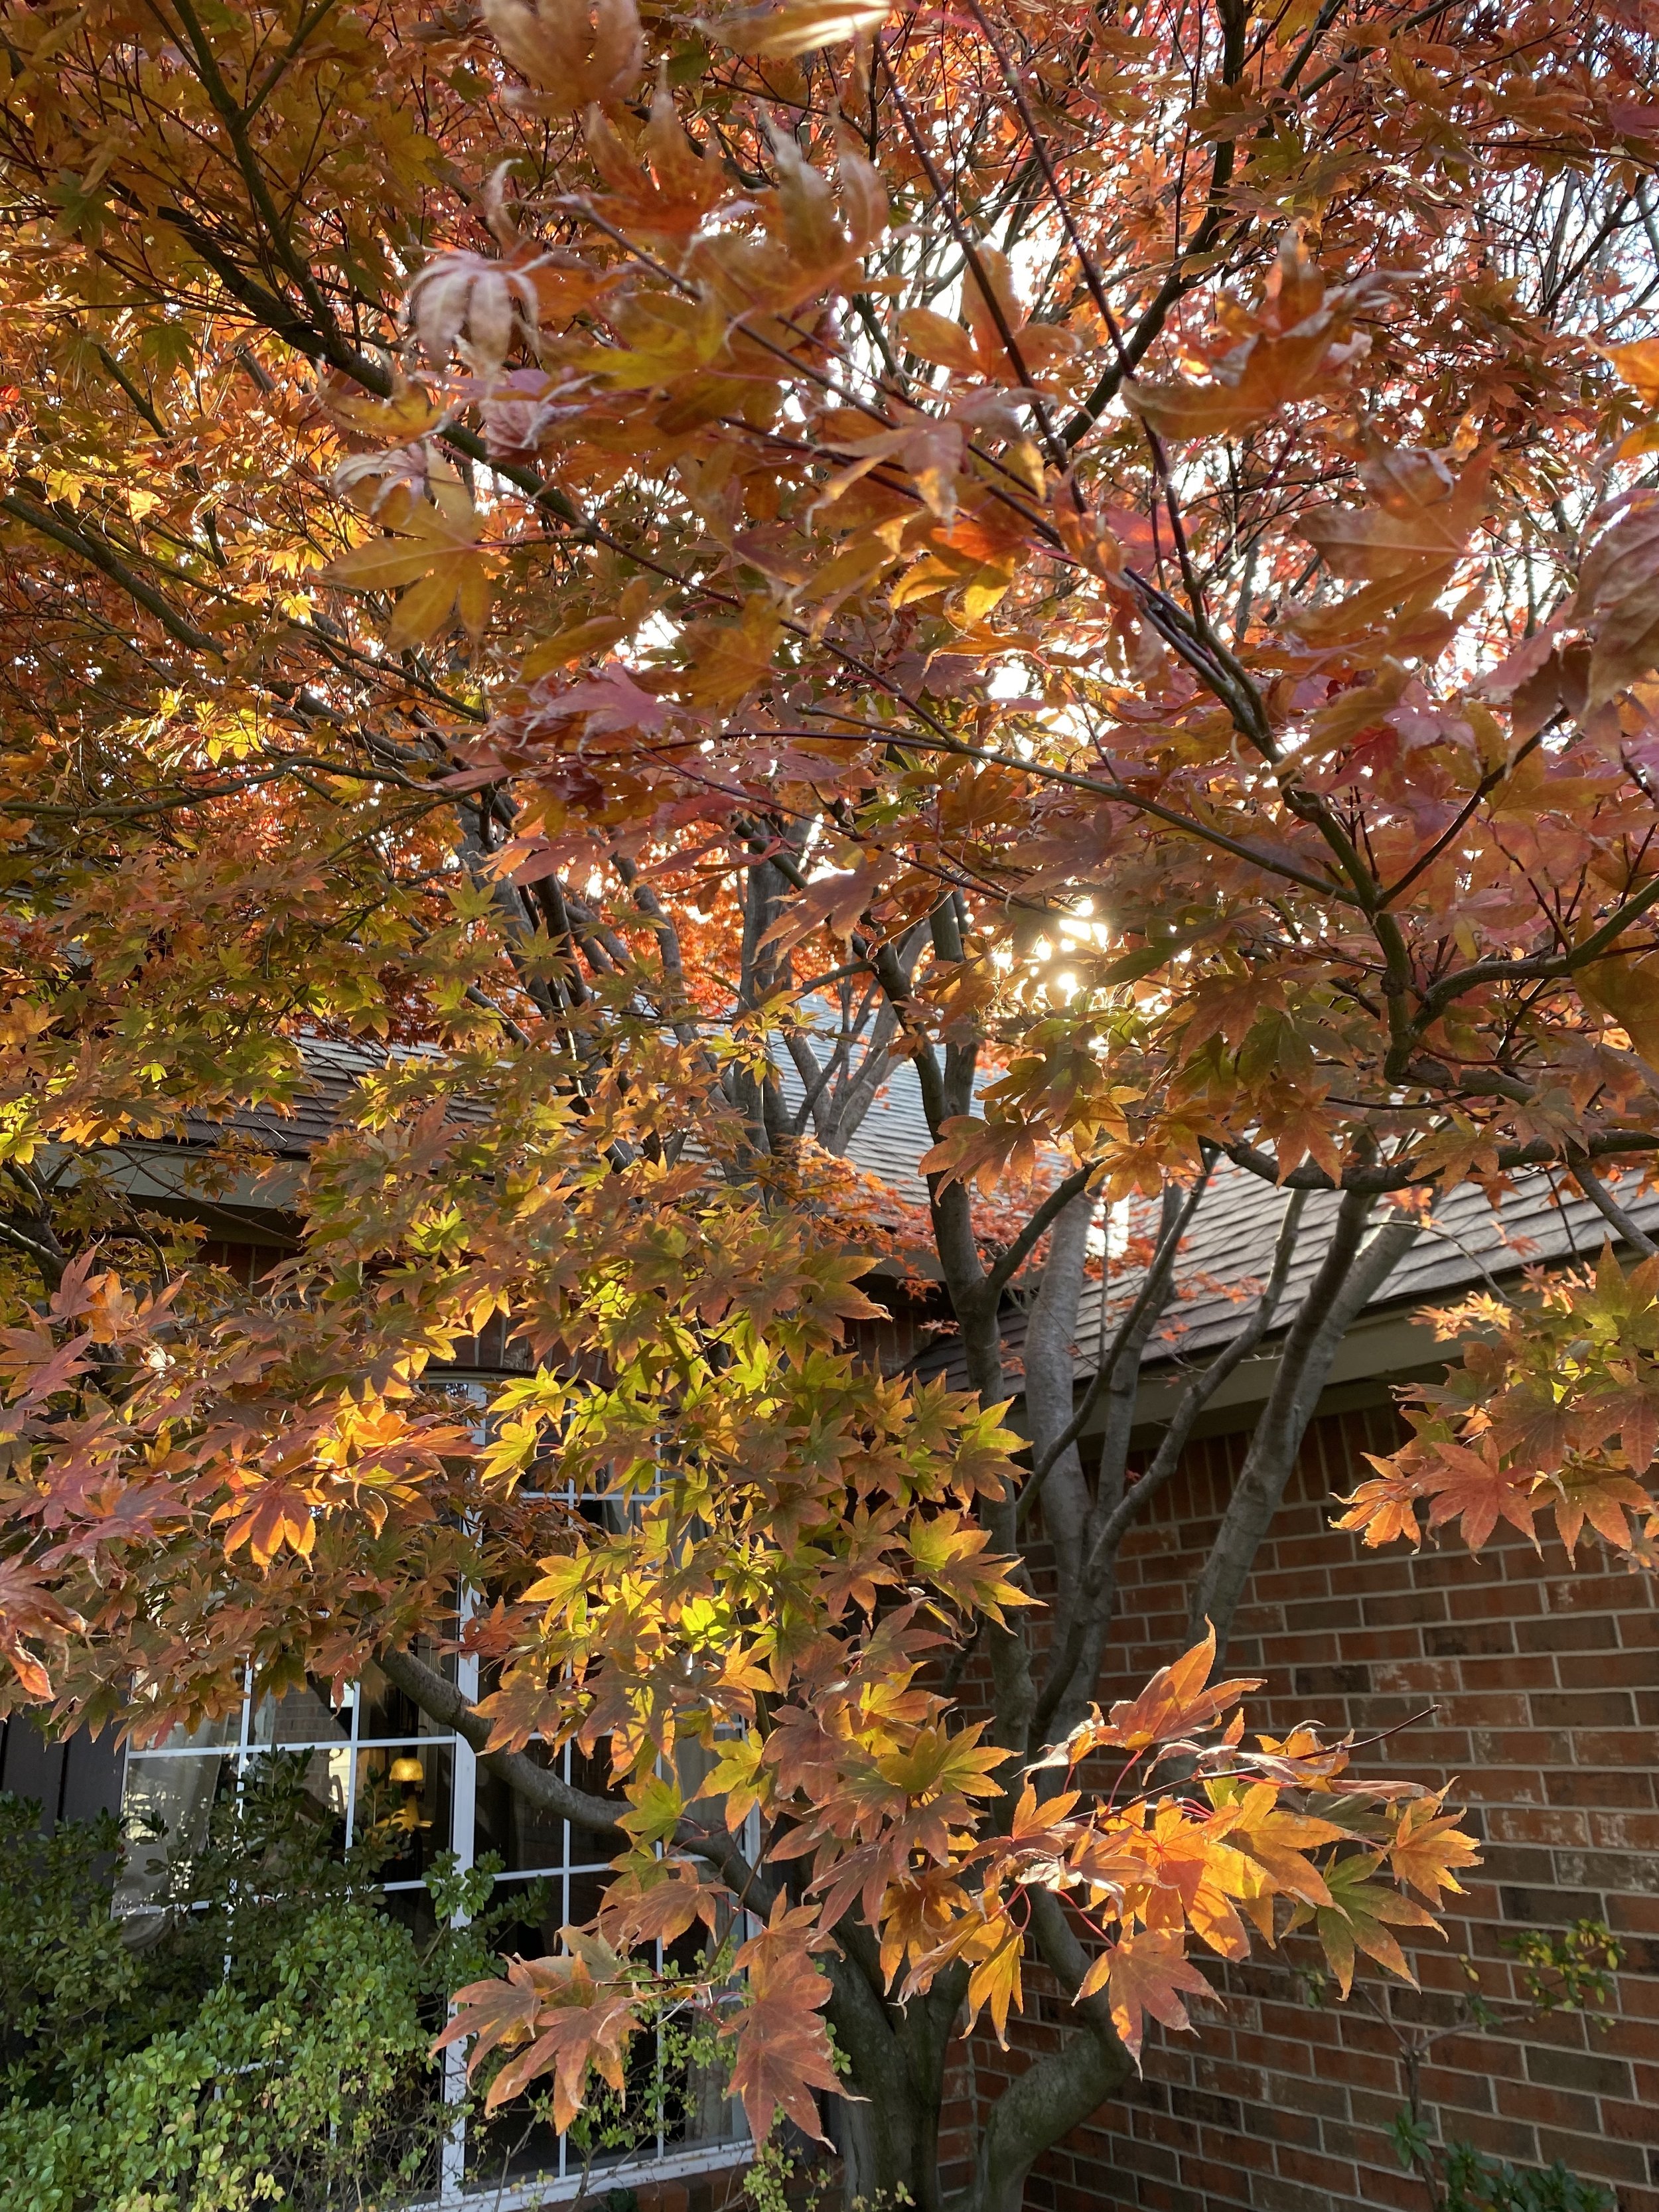

Fun Fact – Fried maple leaves are a very popular snack in Japan. The city of Minoh is famous for their fired maple leaves. The leaves are dipped and fried in tempura batter.
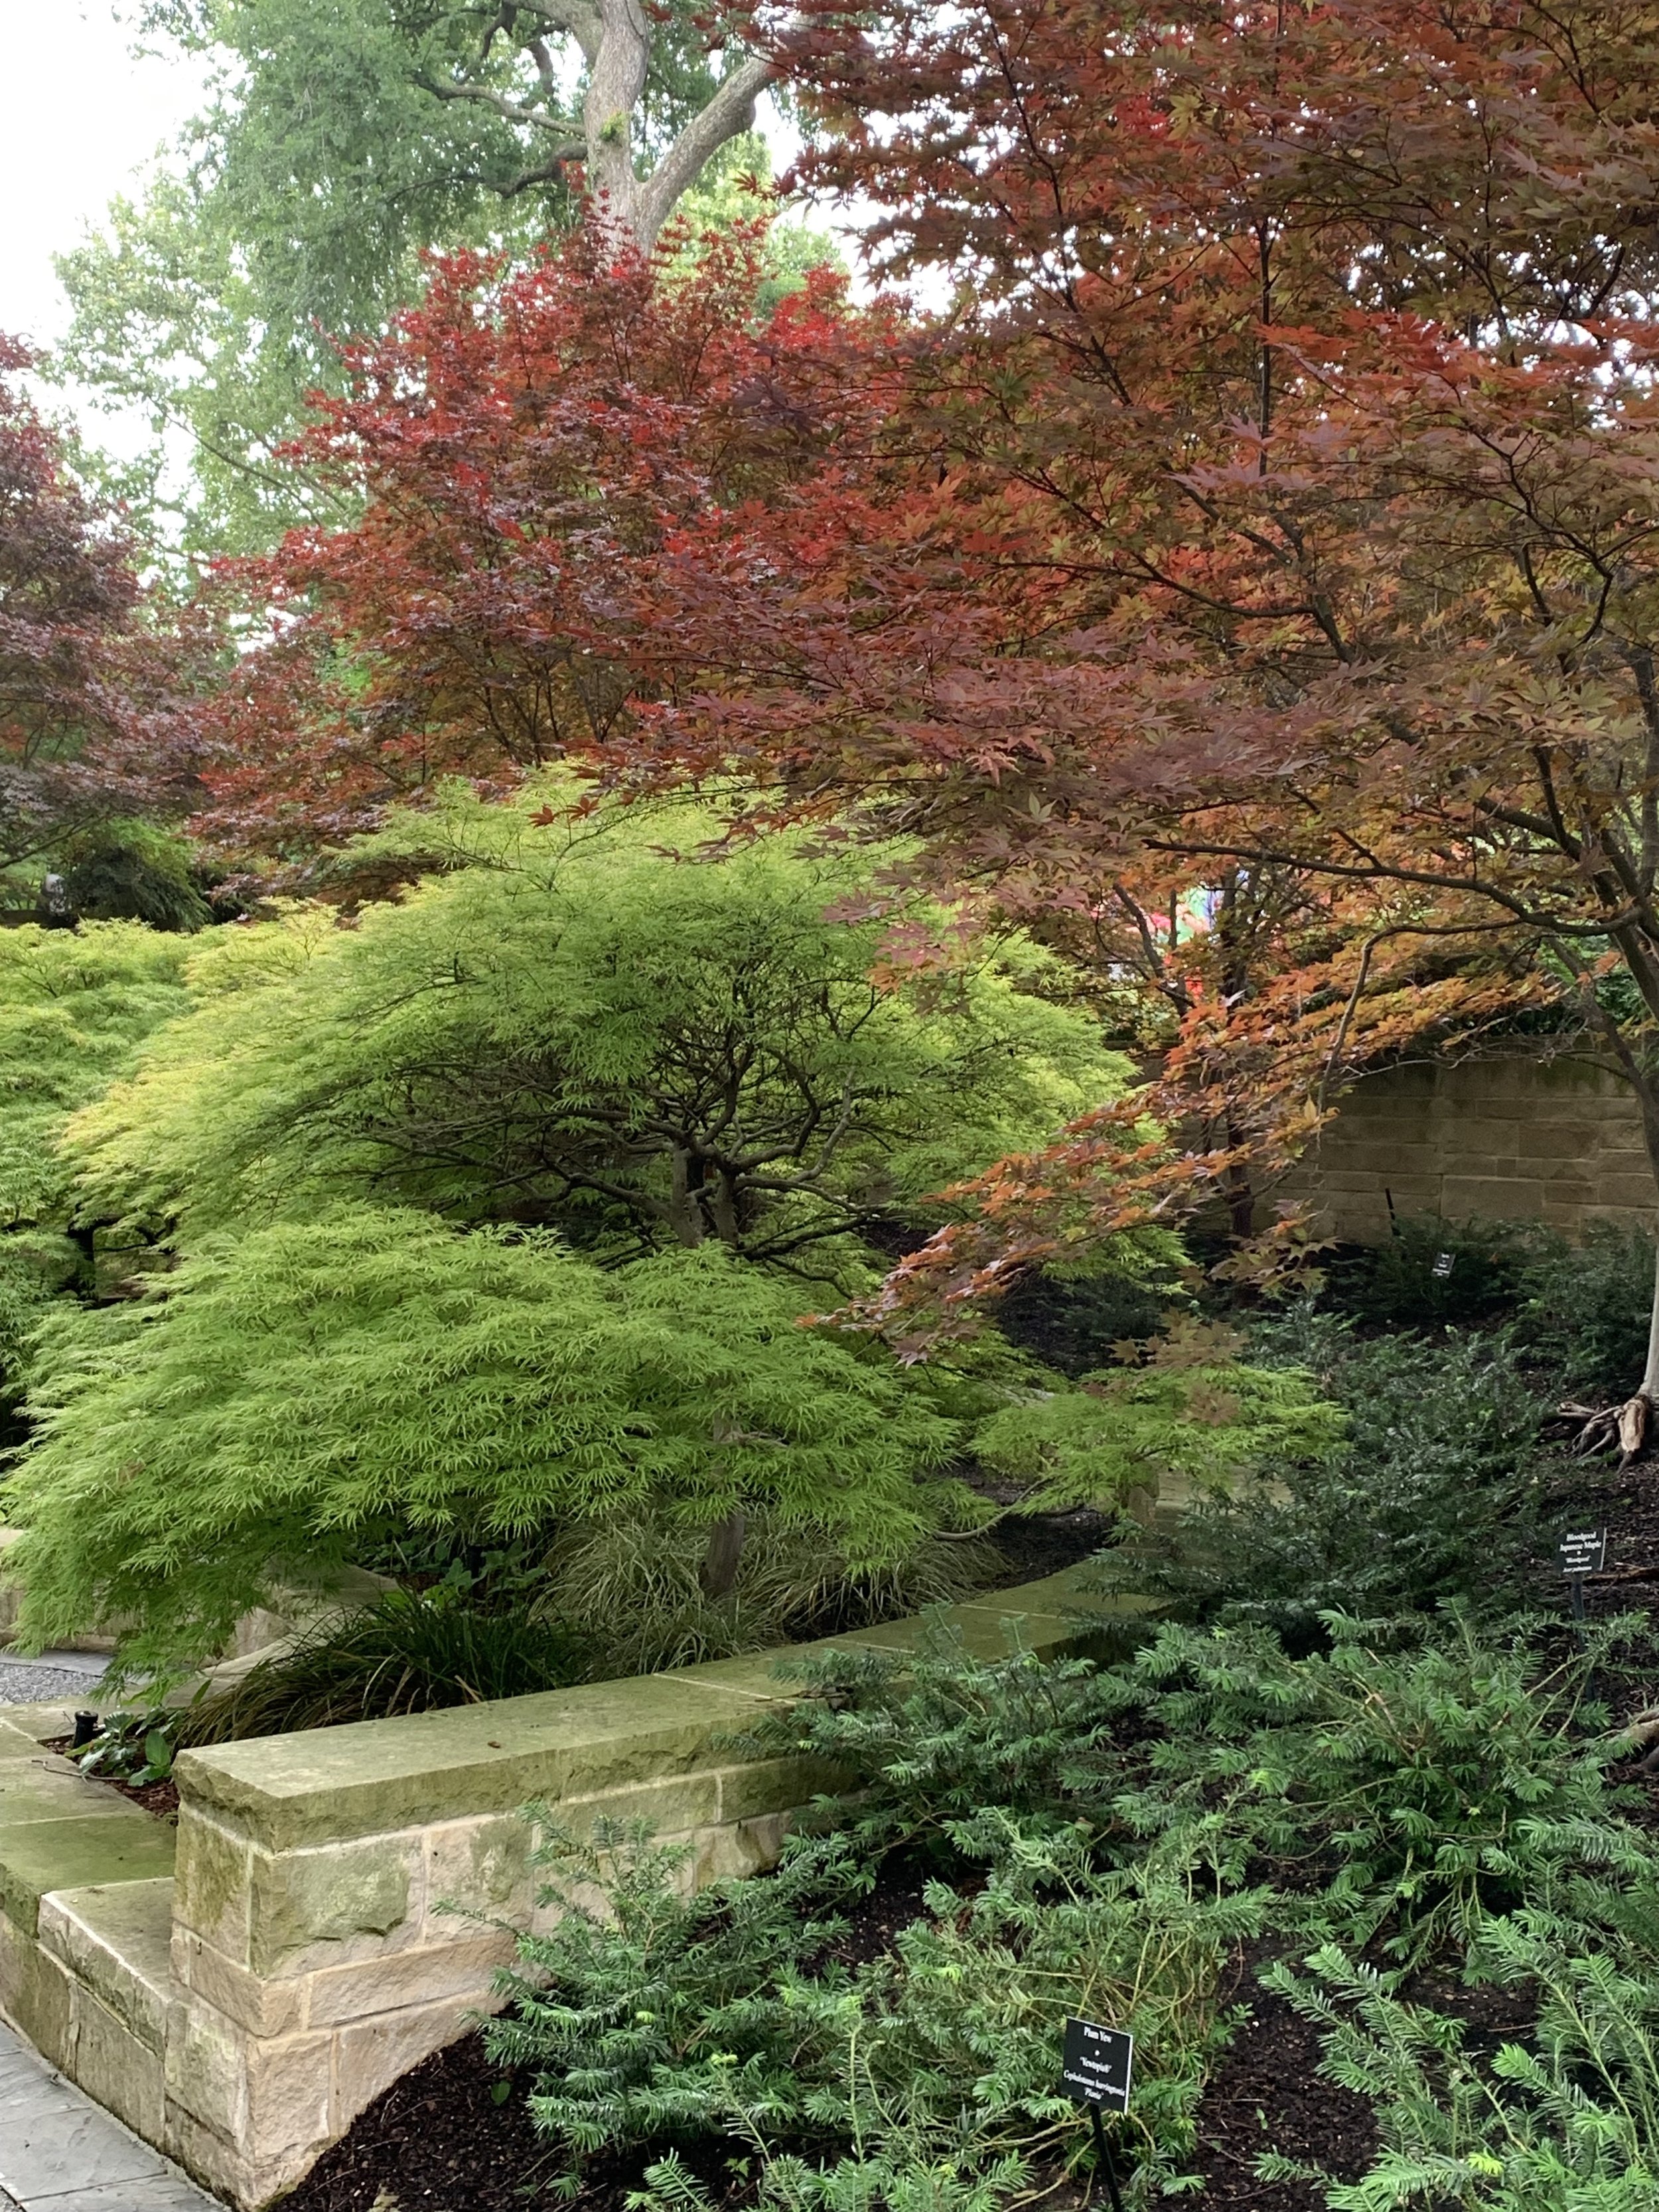
How To Plant A Japanese Maple
Dig a hole twice as wide as the tree container and a few inches deeper.
Backfill the bottom of the hole with a mixture of the soil from the site and a compost material (Back to Nature or Landscape Grower’s Mix are a couple of favorites). Tamp firmly the soil in the bottom of the hole.
Place the tree in the hole with the top of the root ball approximately 2” higher than the surrounding grade.
Back fill halfway with your soil and compost mixture.
Lightly tamp down the soil and water well.
Finish filling around the tree.
Mulch with a 2” layer of a Grade A Cedar Mulch and water well.
Japanese Maples are a great staple plant for every landscape. If you don’t have one, you should consider adding a Japanese Maple to your landscape this year.
Oh, you have one? Don’t you think you should add another?
Lorne Hall
Hall | Stewart Lawn + Landscape
(405)367-3873
Winter & Your Landscape

It’s January and the local weather forecasters are warning us about winter weather approaching in the days to come.
What does winter weather mean for your lawn and landscape?

For young trees and trees with thin bark, wrapping the trunk in the winter will protect the tree from damage due to freezing and thawing temperatures.
If you have perennials or winter annuals such as pansies or kale, winter moisture is critical to their performance going into the spring.
Fescue lawns will retain more color in the winter and rebound quicker in the spring if they are not allowed to become bone dry during the winter.
Newly sodded lawns, due to a shallow root system, can experience freeze damage if the roots are dry during a winter cold spell.
Finally, all newer landscapes, those installed in the last two years require a little more watering attention over the winter.
The goal is to make sure the top few inches of soil is moist well ahead of freezing temperatures. Roots are still active and providing moisture for the plant. Once the soil freezes, the roots no longer have the ability to replace moisture lost to transpiration.
Our rule of thumb is to keep your irrigation operational through the winter, monitor the weather, and be ready to water once every 7-14 days if we have not received a good rainfall.
Biggest Winter Issue – Lack of moisture
Lack of adequate soil moisture is often a major cause of winter damage. All lawns, shrubs, trees, perennials, and annuals need moisture during the winter. This is particularly true about evergreens. Remember, your lawn and landscape are dormant, not dead, and moisture is still important.
Most winter plant injury occurs when we receive a harsh cold spell while plant root systems are dry.
Winter watering is particularly critical for evergreen shrubs and trees. Windy days zap the moisture stored in their leaves making them sensitive to winter injury when we receive a harsh cold snap when they are dry.
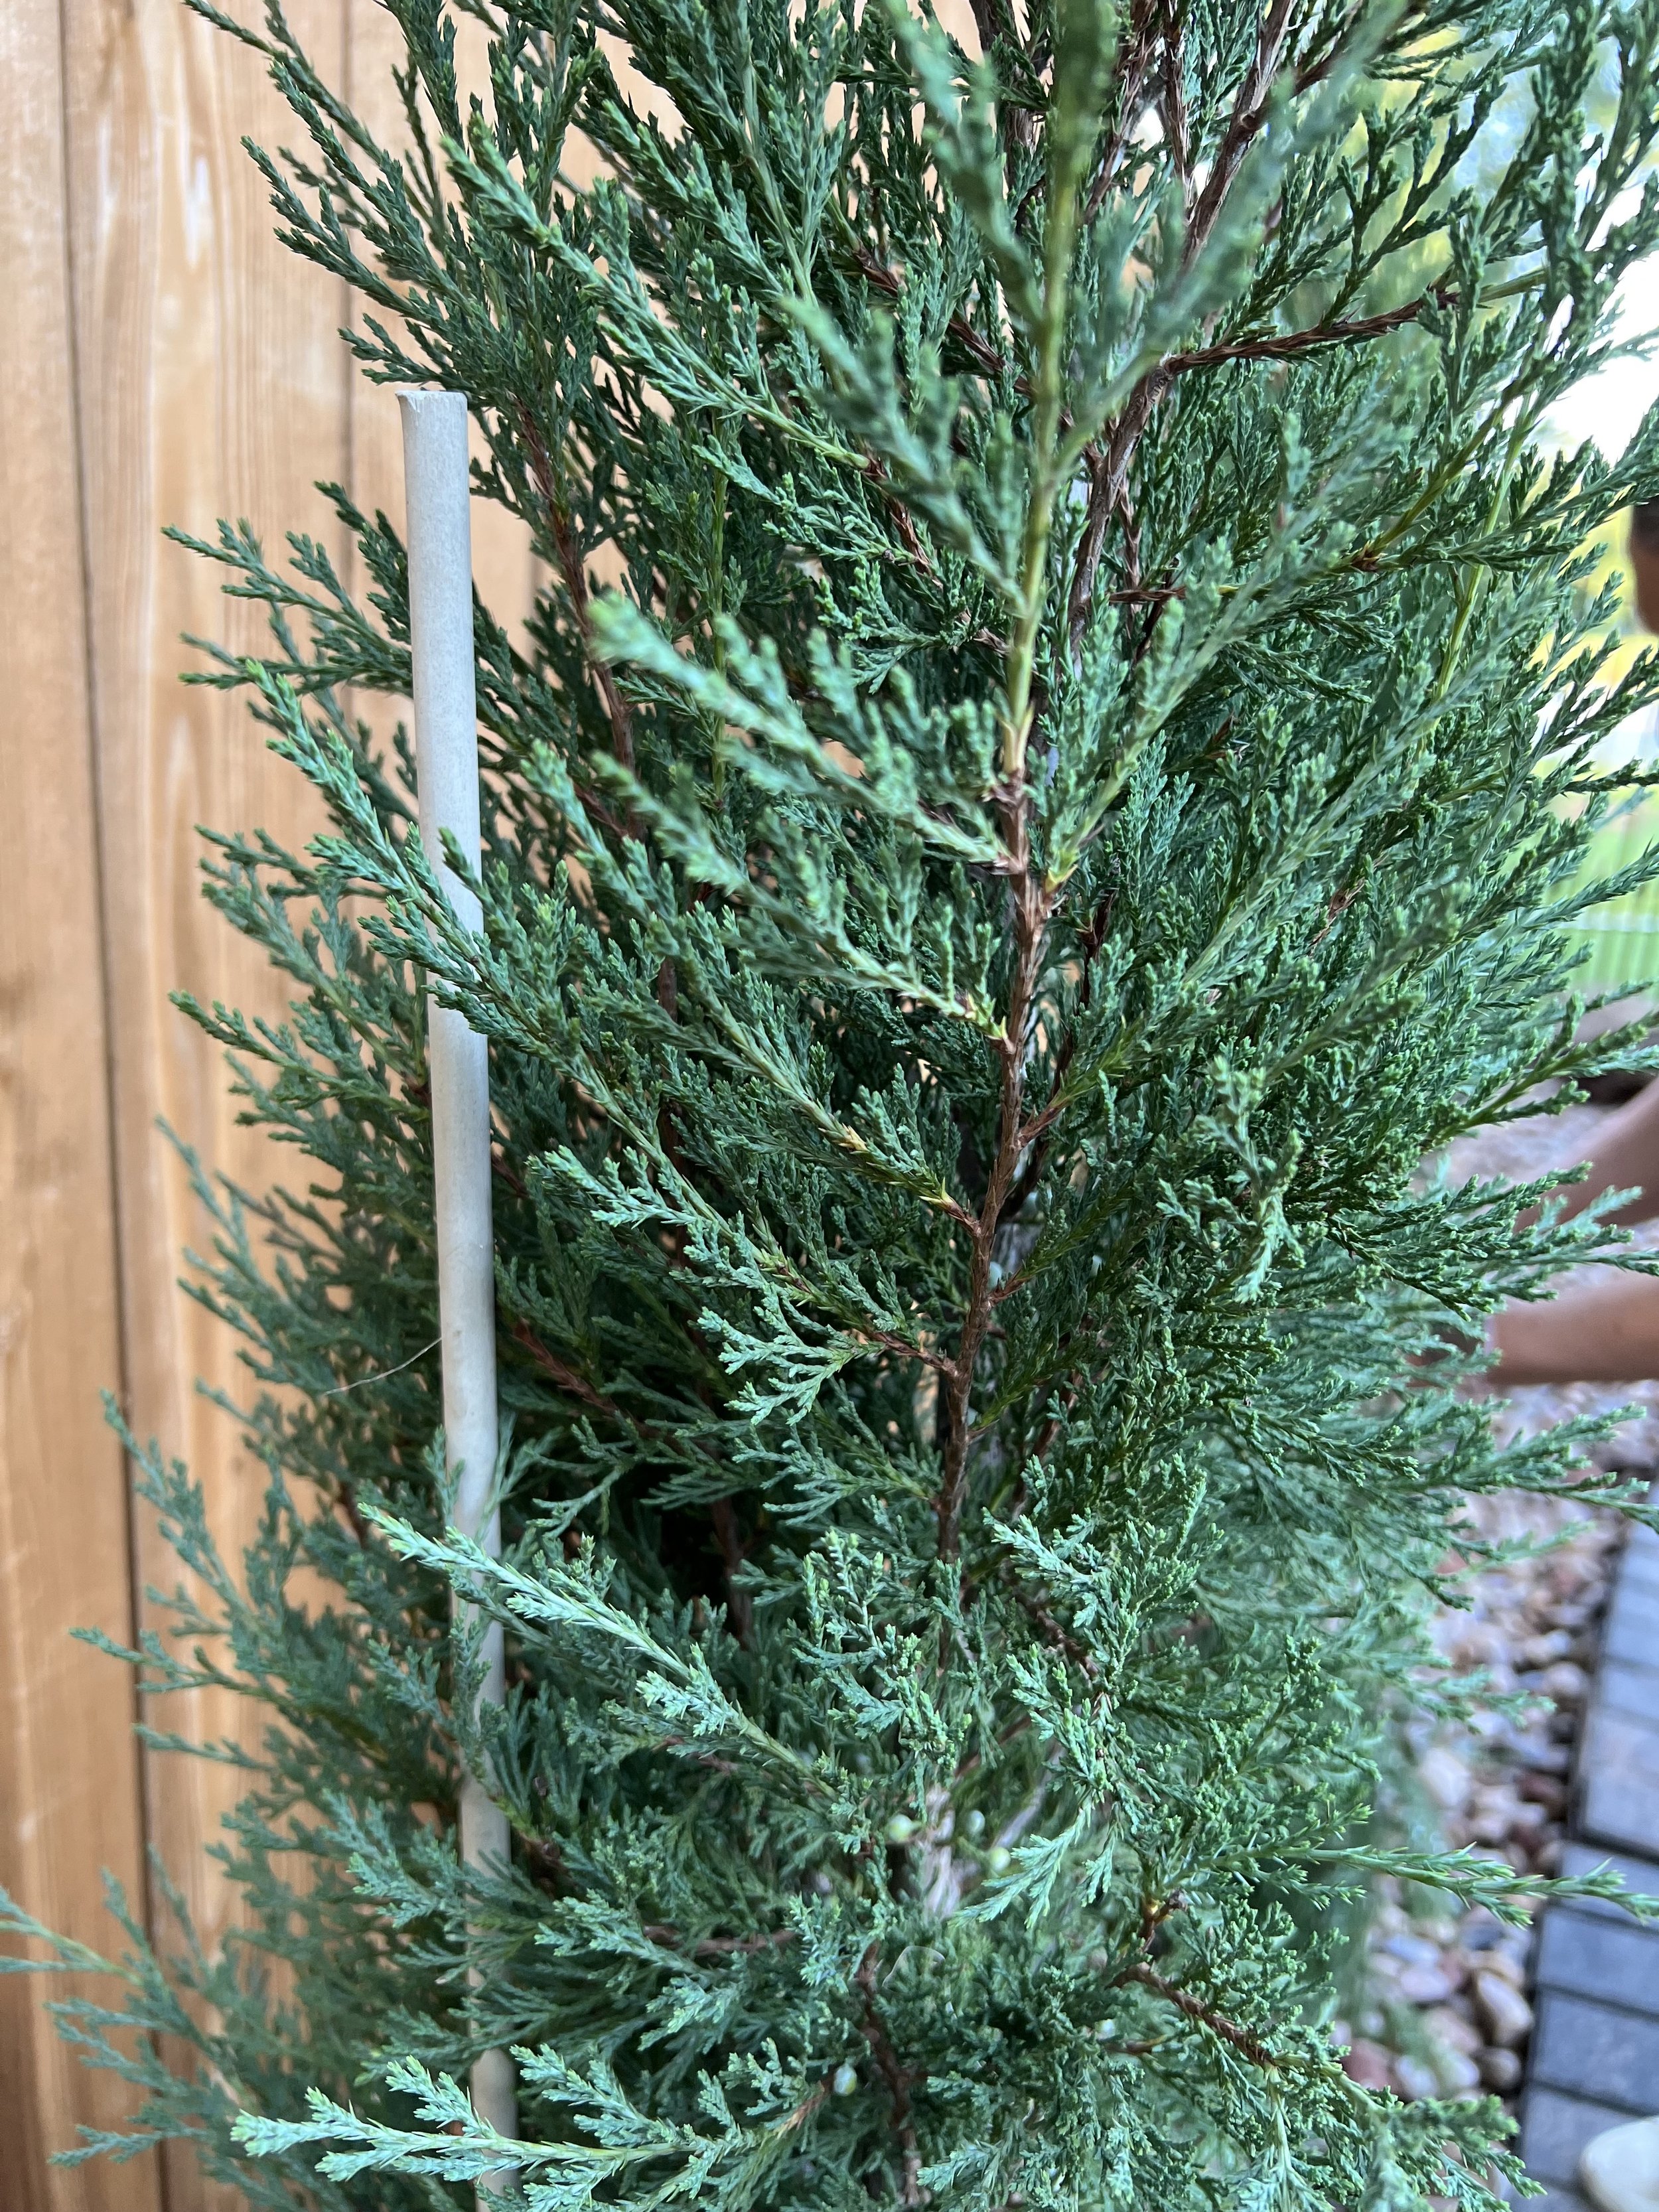
Windy and cold winter temperatures dry needle and evergreen plants foliage. It is important they have moist soil for the days leading up to extreme winter weather.
Shallow-rooted plants, such as azalea and Japanese maple, are also prone to winter injury when they do not receive regular moisture during dormancy.
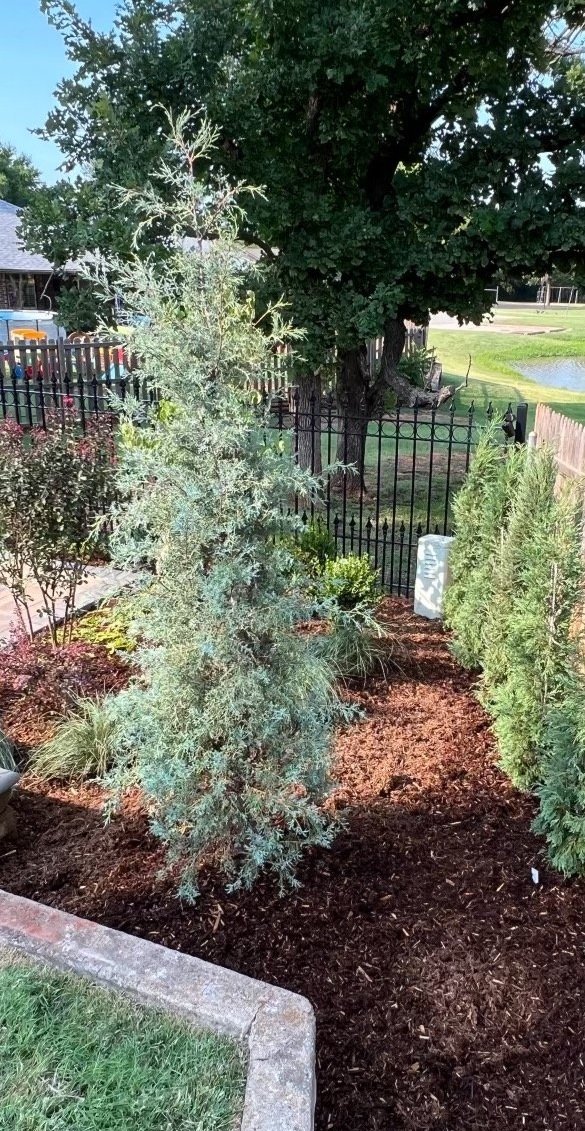
Newly planted landscapes need additional water in the winter for the first two years until the roots are established in the native soil.
Current Watering Recommendation:
We received ¼” of rain this week. If we do not receive at least a ½” of rain early this week, give your lawn and landscape a good deep soaking before the next cold front arrives.
First Step in Avoiding Winter Damage – Select plants that are winter hardy in our area.
Plant cold hardiness is based on the USDA Hardiness Zones. Central Oklahoma is Zone 7A. Plants with a 7A rating can withstand temperatures of 0 to 5 degrees. Northern Oklahoma is Zone 6B, -5 to 0 degrees. And southern Oklahoma is Zone 7B which can survive temperatures of 5 to 10 degrees.
If you live in central Oklahoma and are tempted to experiment with a plant that grows best in Zone 7B, plant it in a protected area that is shielded from dry winter winds.
Also, when selecting plants, look for plants that perform well in our tighter, clay soils. A 7A plant that grows best in loose soil may live for years when we have mild winters only to fail when we have a winter of extreme temperatures.

When making plant selections, don’t overlook ones that add winter interest such as Nandina with their bright red berries.

The best weather for your plants during extreme temperatures is a snowfall of 2 or more inches.
Snowfall is moisture!
If we get a ½” rainfall, there is a lot of runoff. But, when the snow melts, it slowly soaks in. Every single drop benefits the roots of your turf, flowers, shrubs, and trees. On average, a 4” snow equals nearly a 1/2” rainfall.
The Old Farmer’s Almanac calls snow a “poor man’s fertilizer.”
Snow is full of nitrogen. As snow falls it collects nitrogen that is naturally in the air and distributes it evenly over your lawn and landscape.
Best Weather Condition for Extreme Cold – Snow.
Fresh snow is like a warm blanket when temperatures dip into the teens or lower!
Snowfall is nature’s way of insulating your valuable landscape from cold temperatures. A fresh snow cover of more than 2” is very beneficial to the landscape by trapping soil warmth below the snow.
Without snow, soil temperatures fluctuate more, dipping deeper during cold spells. It is common for soil temperatures to be as much as 10 degrees warmer when there is a snow cover.
Your landscape is thankful for a blanket of snow to trap the warm soil temperatures around its roots and keep the cold windy temperatures at bay.


A Key to Preventing Winter Damage – Healthy Plants.
Rarely does a healthy plant die due to winter injury. Plants in poor health are the first to die during cold periods.
Keep your plants healthy during the growing season and they will be better suited for the winter cold. Inspect often for insects and disease. Make sure they are receiving the correct nutrients in the correct amounts. Practice good watering techniques throughout the growing season.
The healthier your plants, the better they will do in the extreme temperatures of winter.
One More Great Winter Practice – Mulch.
A fresh 2-3” layer of mulch will provide insulation for your plant roots, retain moisture, and moderate soil temperatures.
As always, let us know if you have any questions or if we can help you have your best lawn and landscape.
And…stay warm…. after all, it is January.
Lorne Hall
Hall | Stewart Lawn + Landscape
(405)367-3873

Merry Christmas!

Christmas…the season of hope!
What are you hoping for this Christmas? The top item on your wish list? Time with family and friends? Joy? Health?
Hope is a feeling of expectation and desire for a certain thing to happen.
Everyone is hoping for something.
But, what happens when the thing you are hoping for does not happen?
The feeling of hope is replaced with a feeling of disappointment. When the feeling of disappointment lingers it is easy to find ourselves feeling hopeless. Hopelessness is the feeling of despair about something.
I don’t like the feelings of disappointment. I really don’t like the feeling of hopelessness. We have all been there. Especially when we have placed our hope in finances, relationships, health, and careers…...
But this is Christmas… the celebration of real hope!
A hope that does not disappoint!
A hope that erases hopelessness!
Christmas, the celebration of the birth of Christ.
Christmas, the celebration of the birth of hope and love for all mankind.
May your entire holiday season be filled with the true hope and love of Christ!
Merry Christmas from your friends at Hall | Stewart Lawn + Landscape

Small Trees in the Landscape
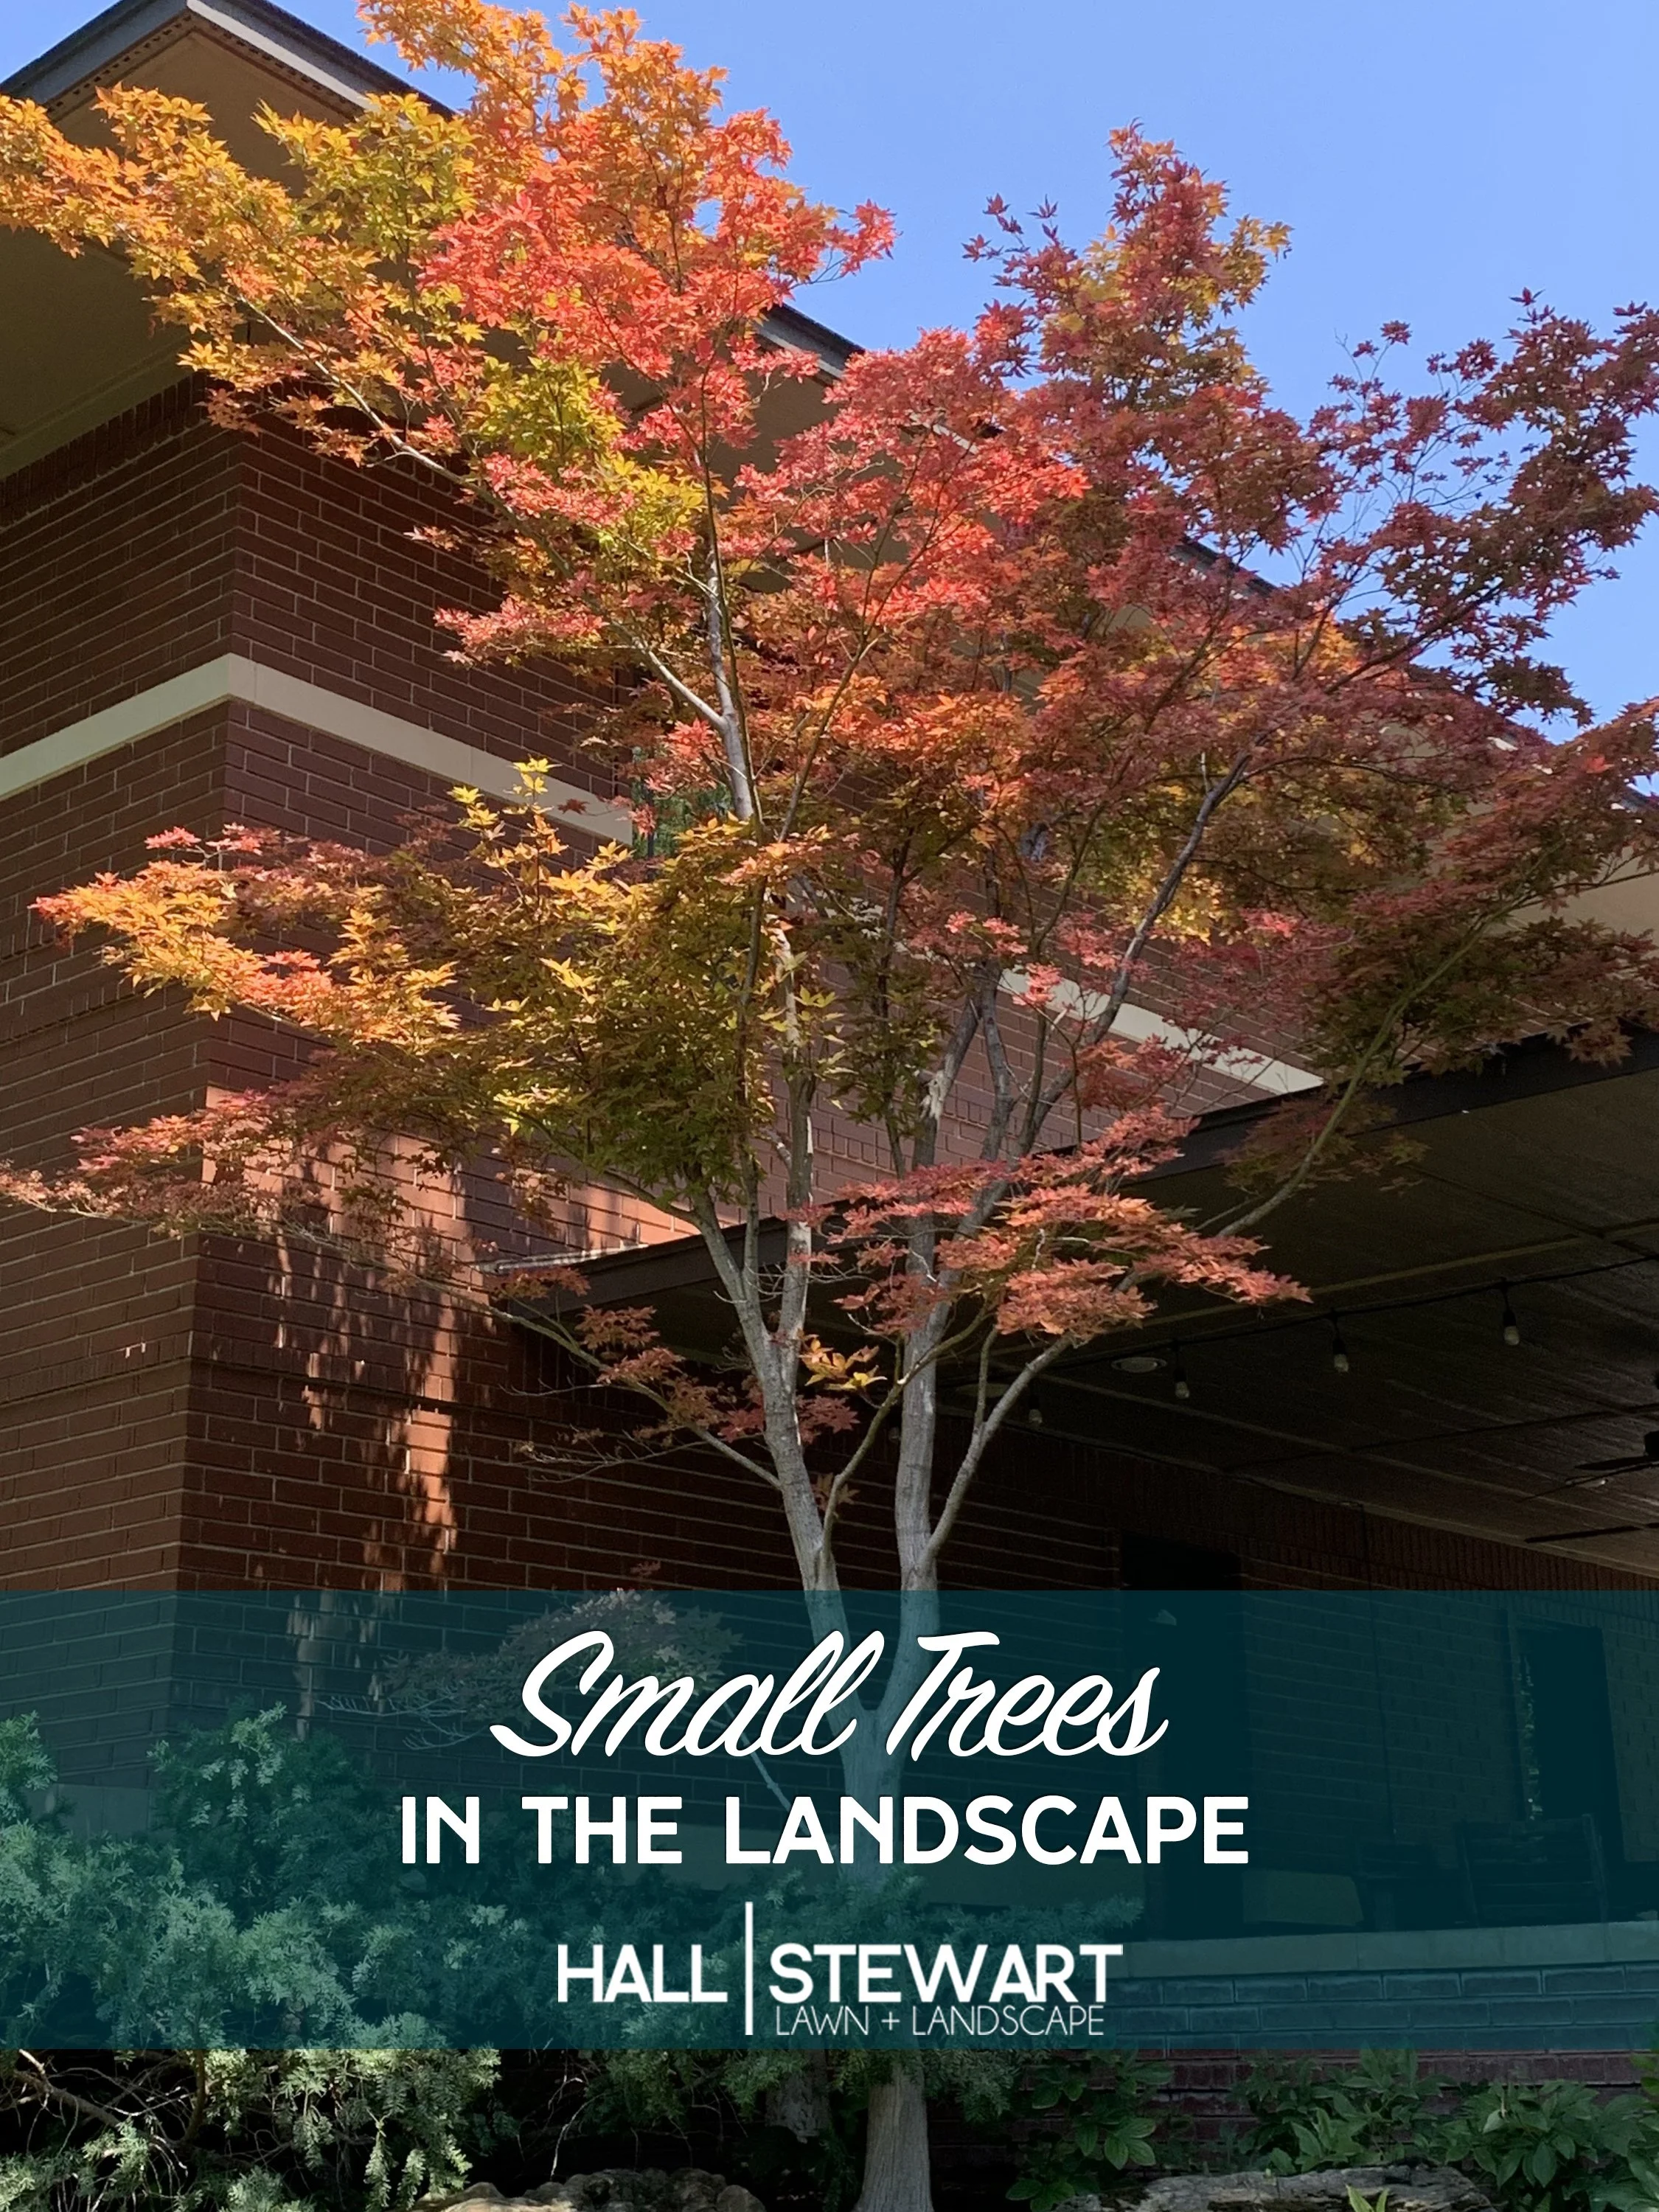
A few times we have posted an article titled Great Landscapes Have Three Levels. In the article, we mention the use of small trees as one of the ways to create three levels.
Wintertime, with fewer lawn and landscape maintenance activities dominating your time, is the perfect time to evaluate your landscape. Let’s spend a few minutes learning about the importance of small trees in the landscape.
Reasons For Using Small Trees
Small trees often are the punctuation points of your landscape. They are the anchor plants that give the landscape balance.
Small trees are the stars of the landscape with the rest of the landscape playing a supporting role.
Often, they are the first to be placed in the design and commonly the first to be planted.
Small trees add height, color, and texture to the landscape.
They complement the landscape.
They direct the eye to key features or views.
Small trees can frame a house or an entry.
They can be used to create privacy or screen an undesirable view.
Small trees give the landscape balance.
Small trees are defined as those that have a mature height of 12-30’.
Small trees are typically multi-stemmed but can be a single trunk plant as well.
The list of small trees is long.
Here are a few to consider:
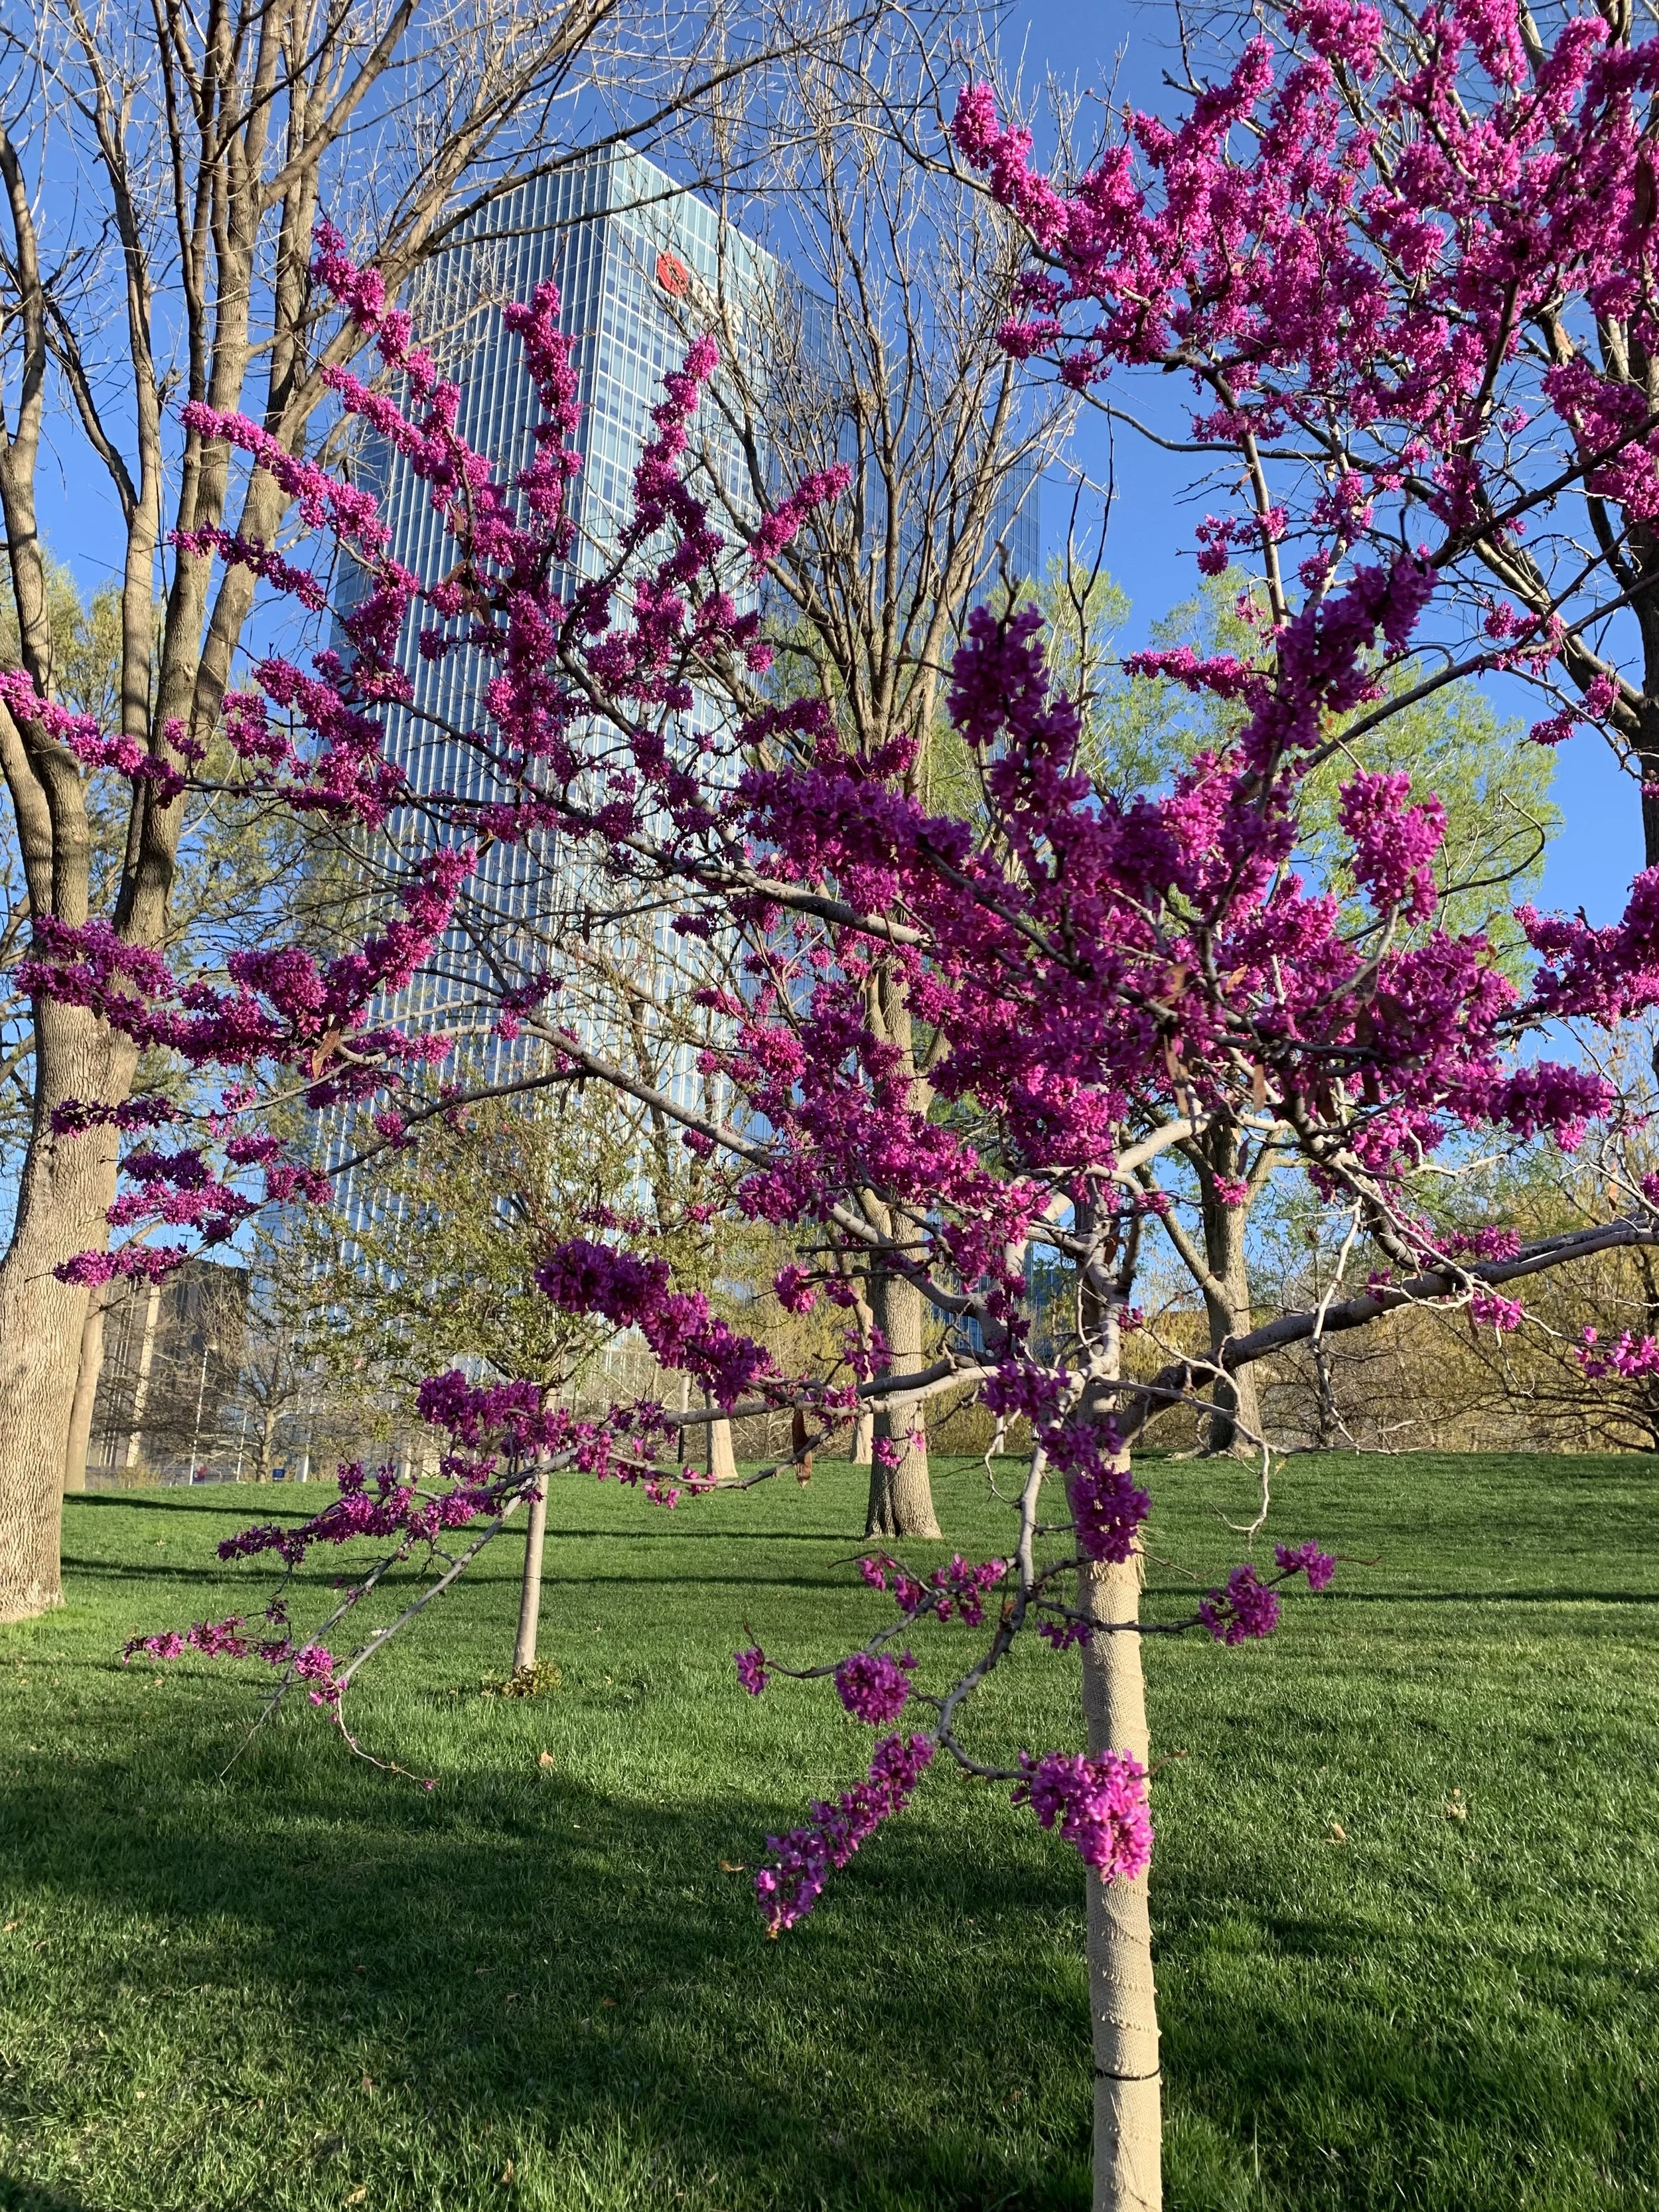
Redbud
Redbud – There are many varieties, but the Oklahoma Redbud stands out as a great landscape specimen with vibrant pink-purple flowers on bare branches in the early spring and glossy heart-shaped leaves during the growing season. 15-20’ tall and wide.
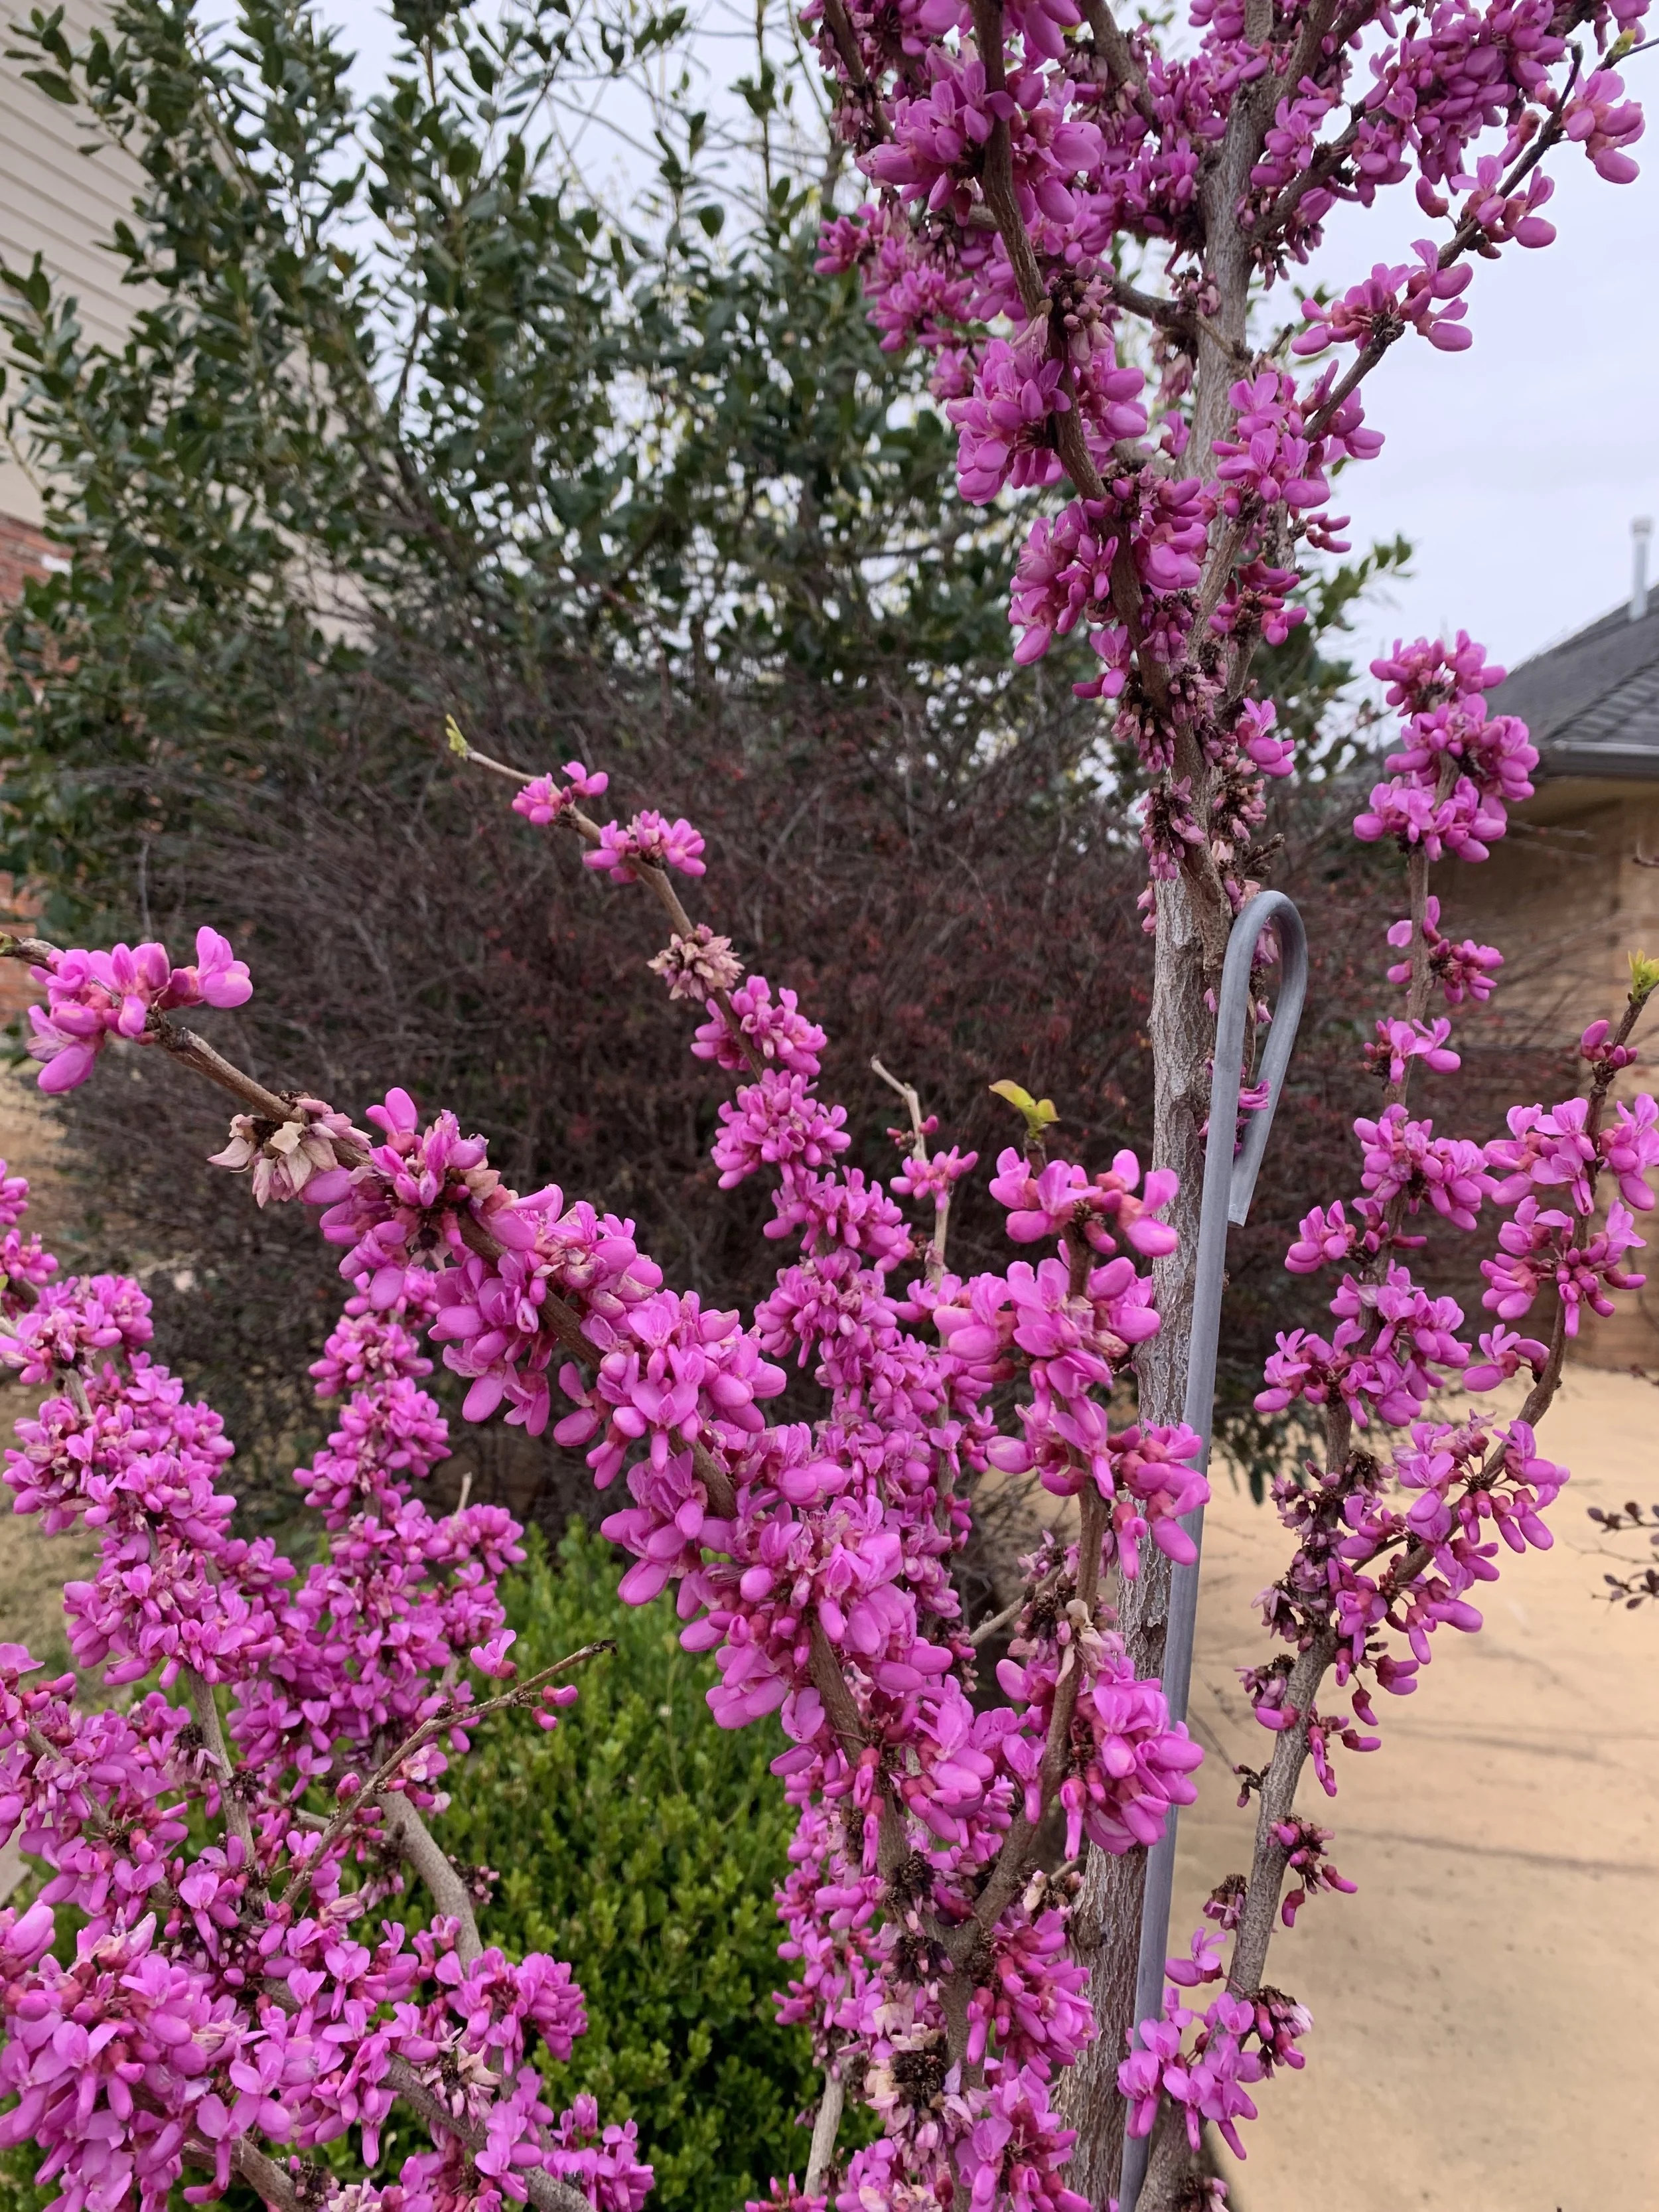
Redbud
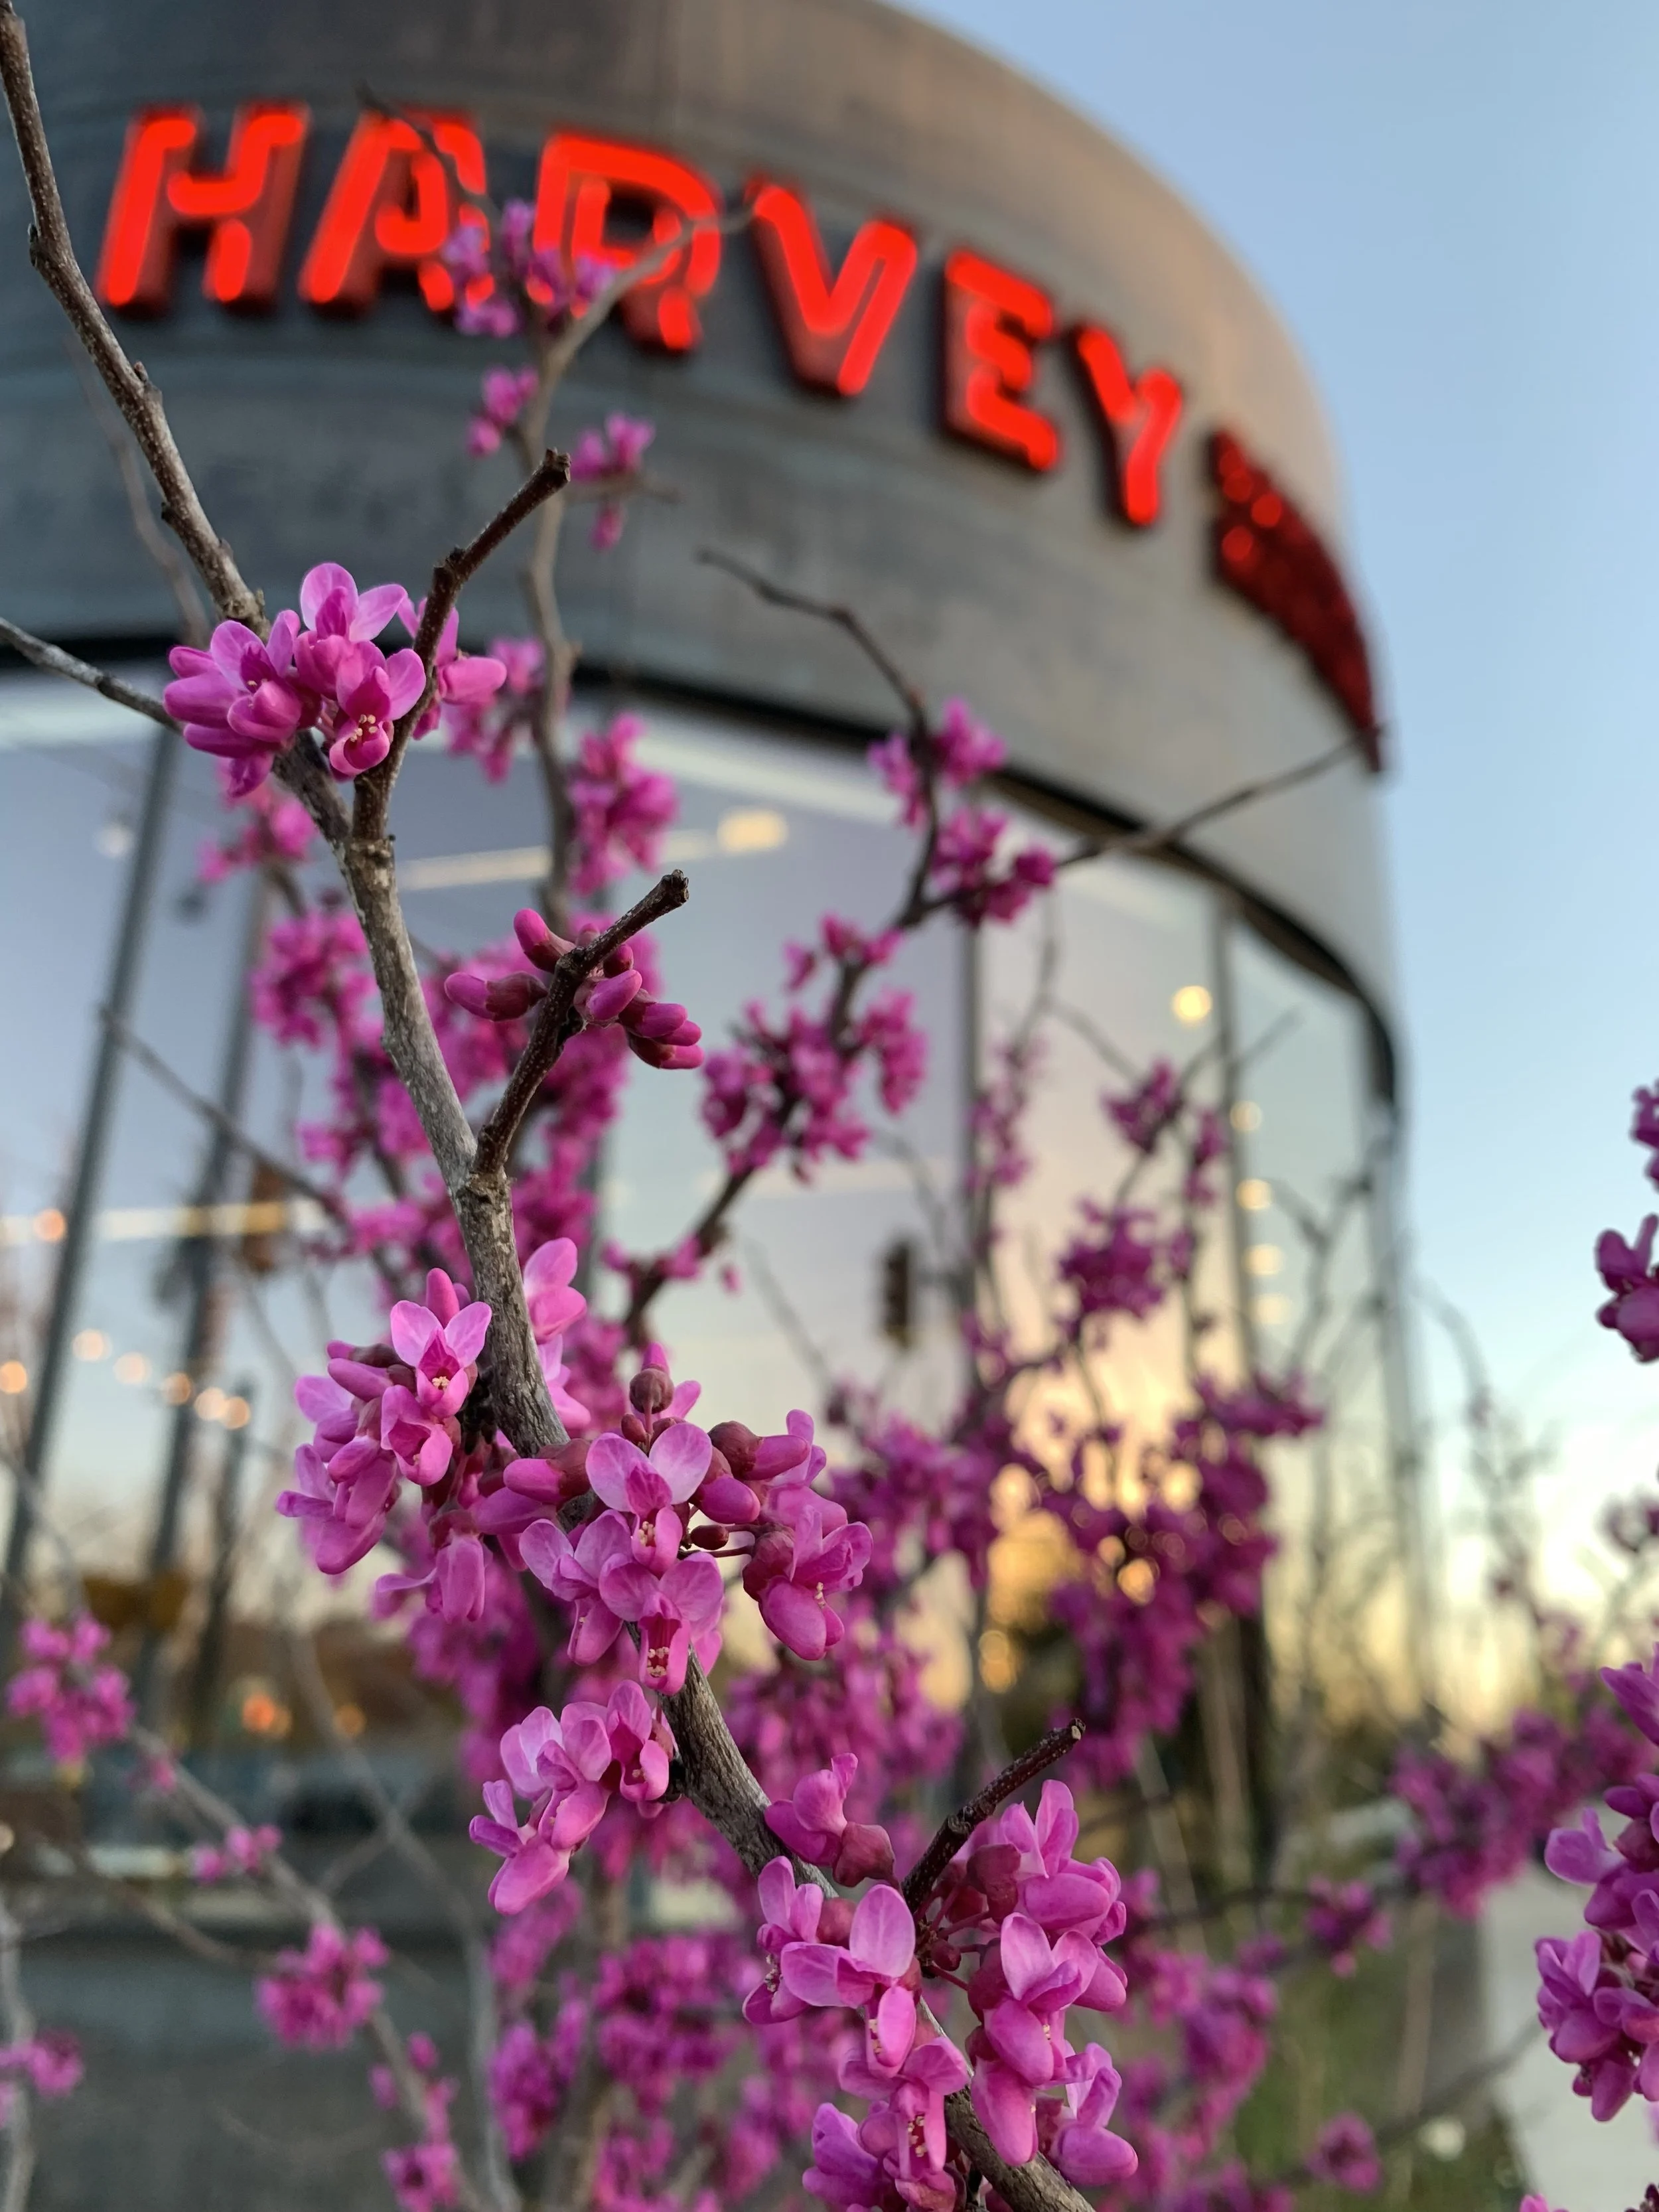
Redbud

Japanese Maple

Japanese Maple
Japanese Maple – A favorite small tree for the north or east side of a house. There are weeping, upright, and spreading varieties. Varieties with red leaves, purple leaves, green leaves, and yellow leaves. Their color and texture create interest in any shady to dappled sun area. 10-25’ high and wide.
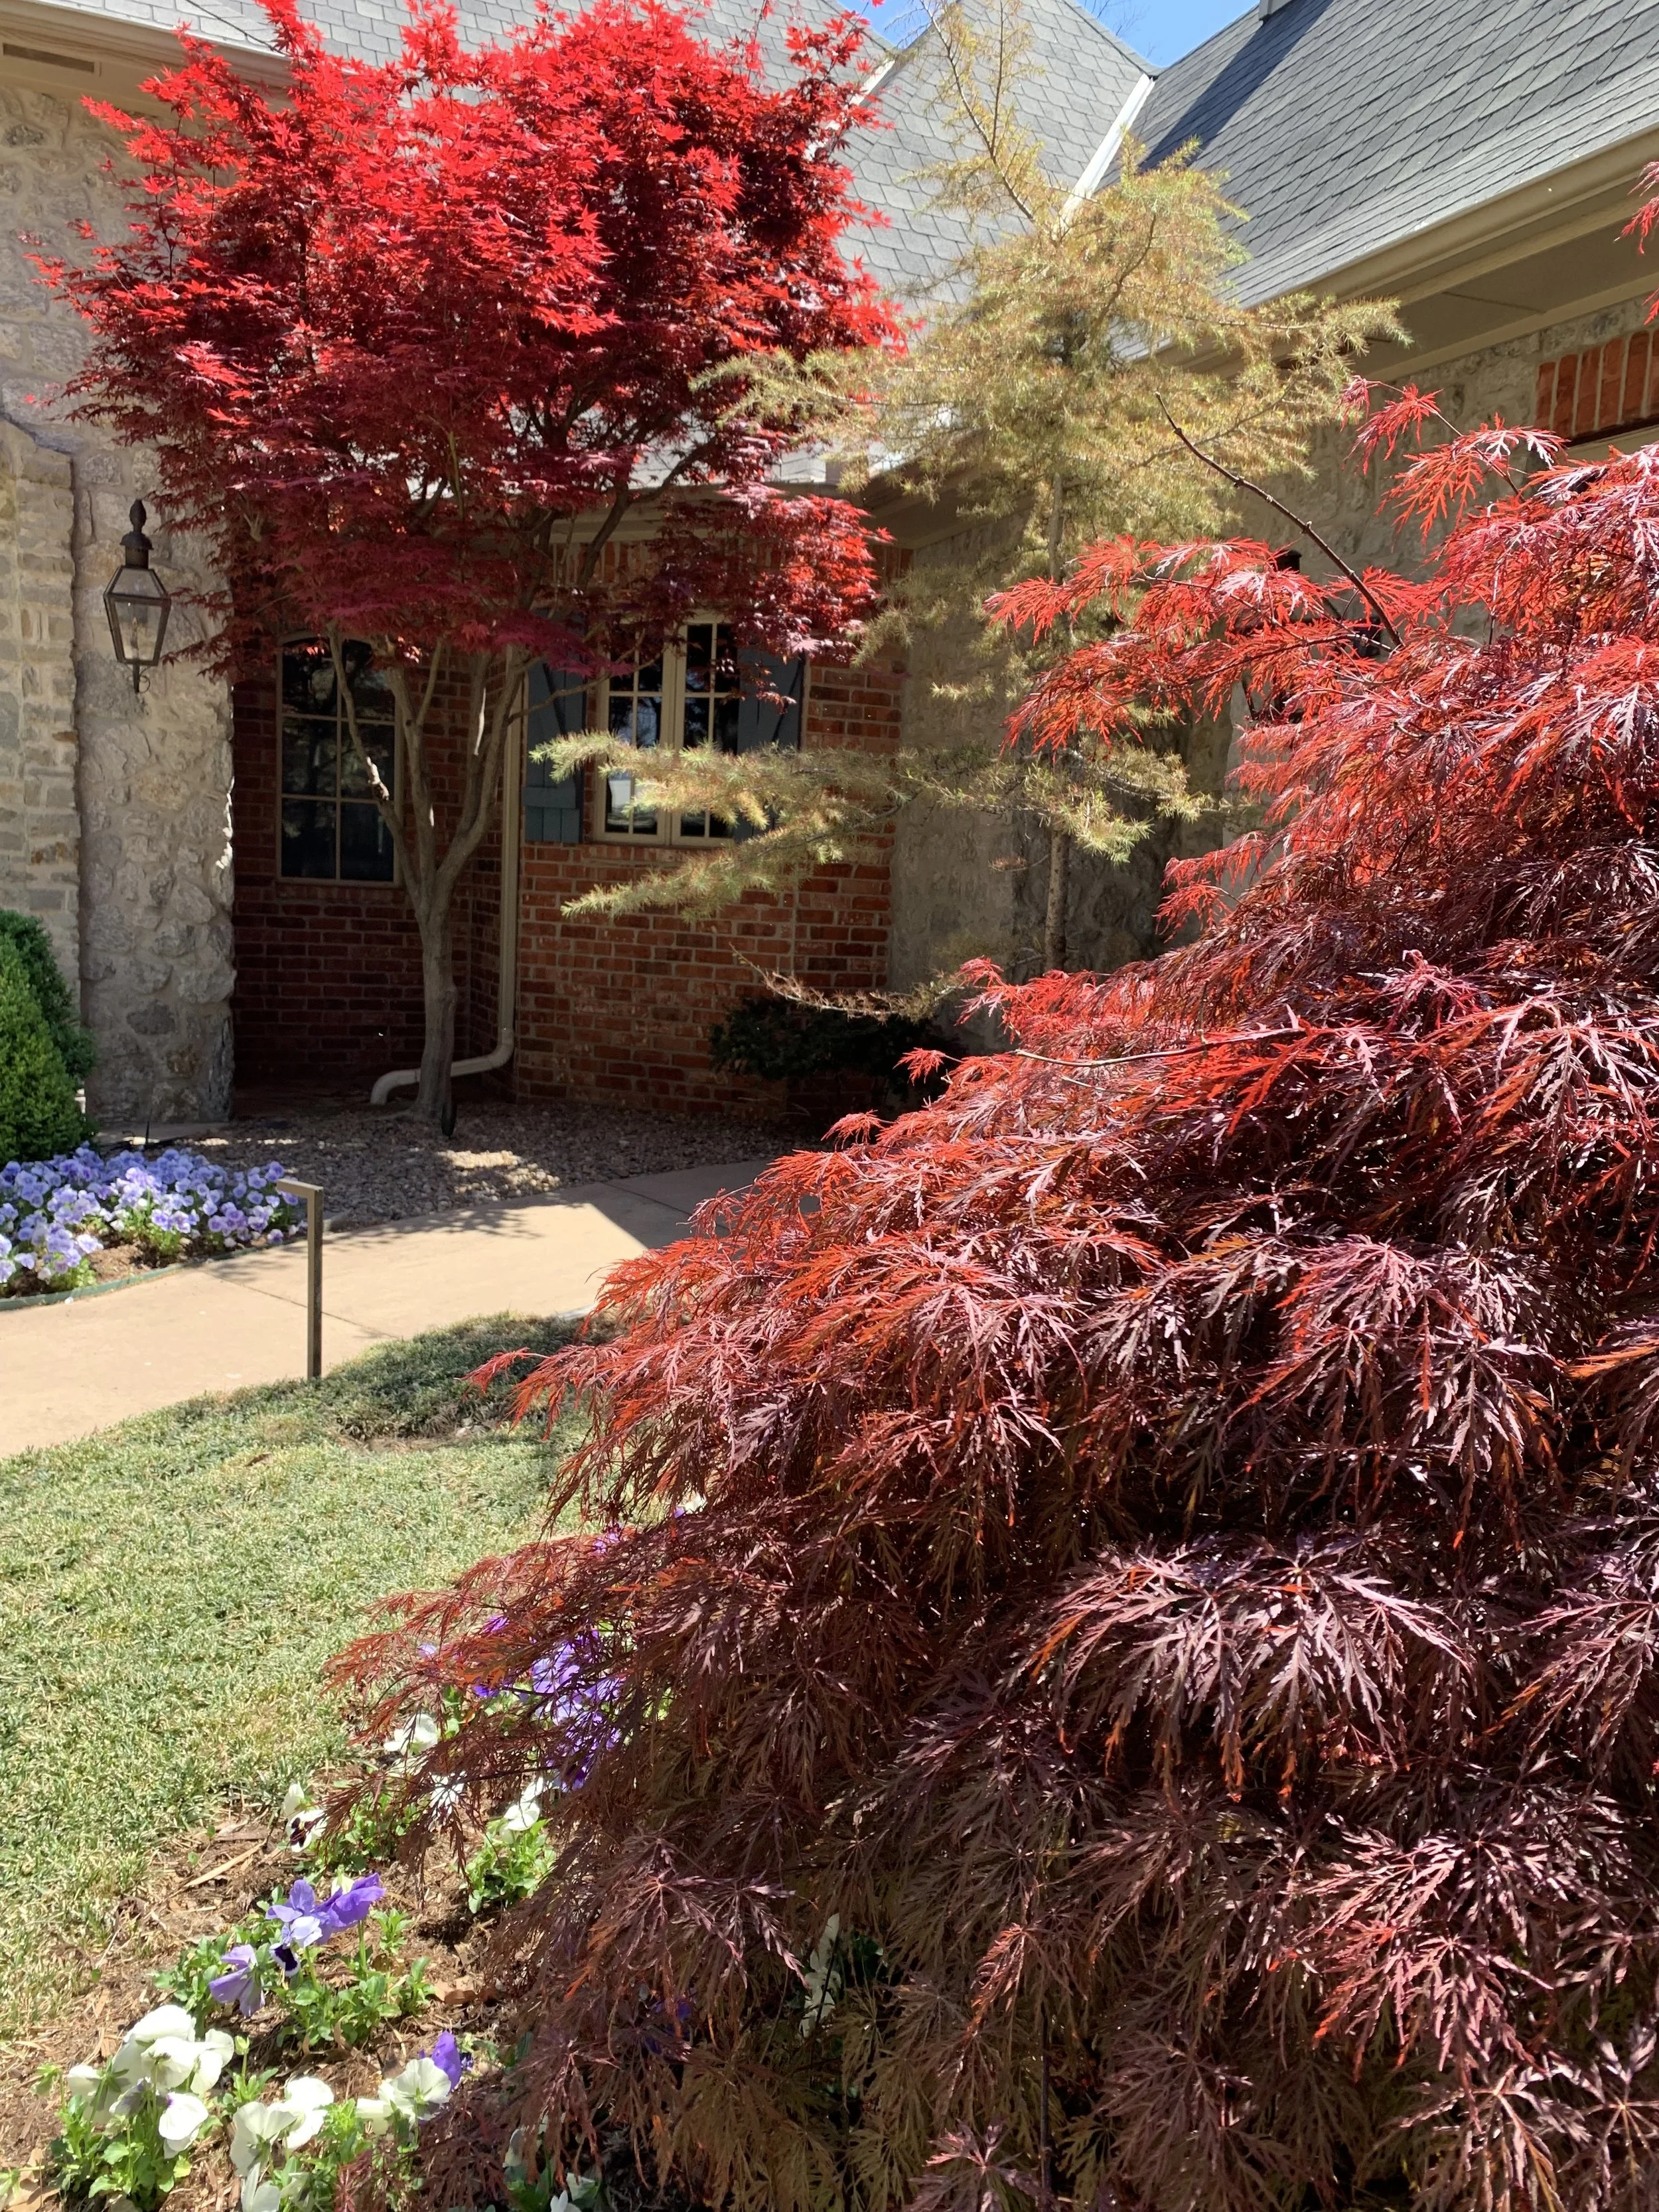
Japanese Maple
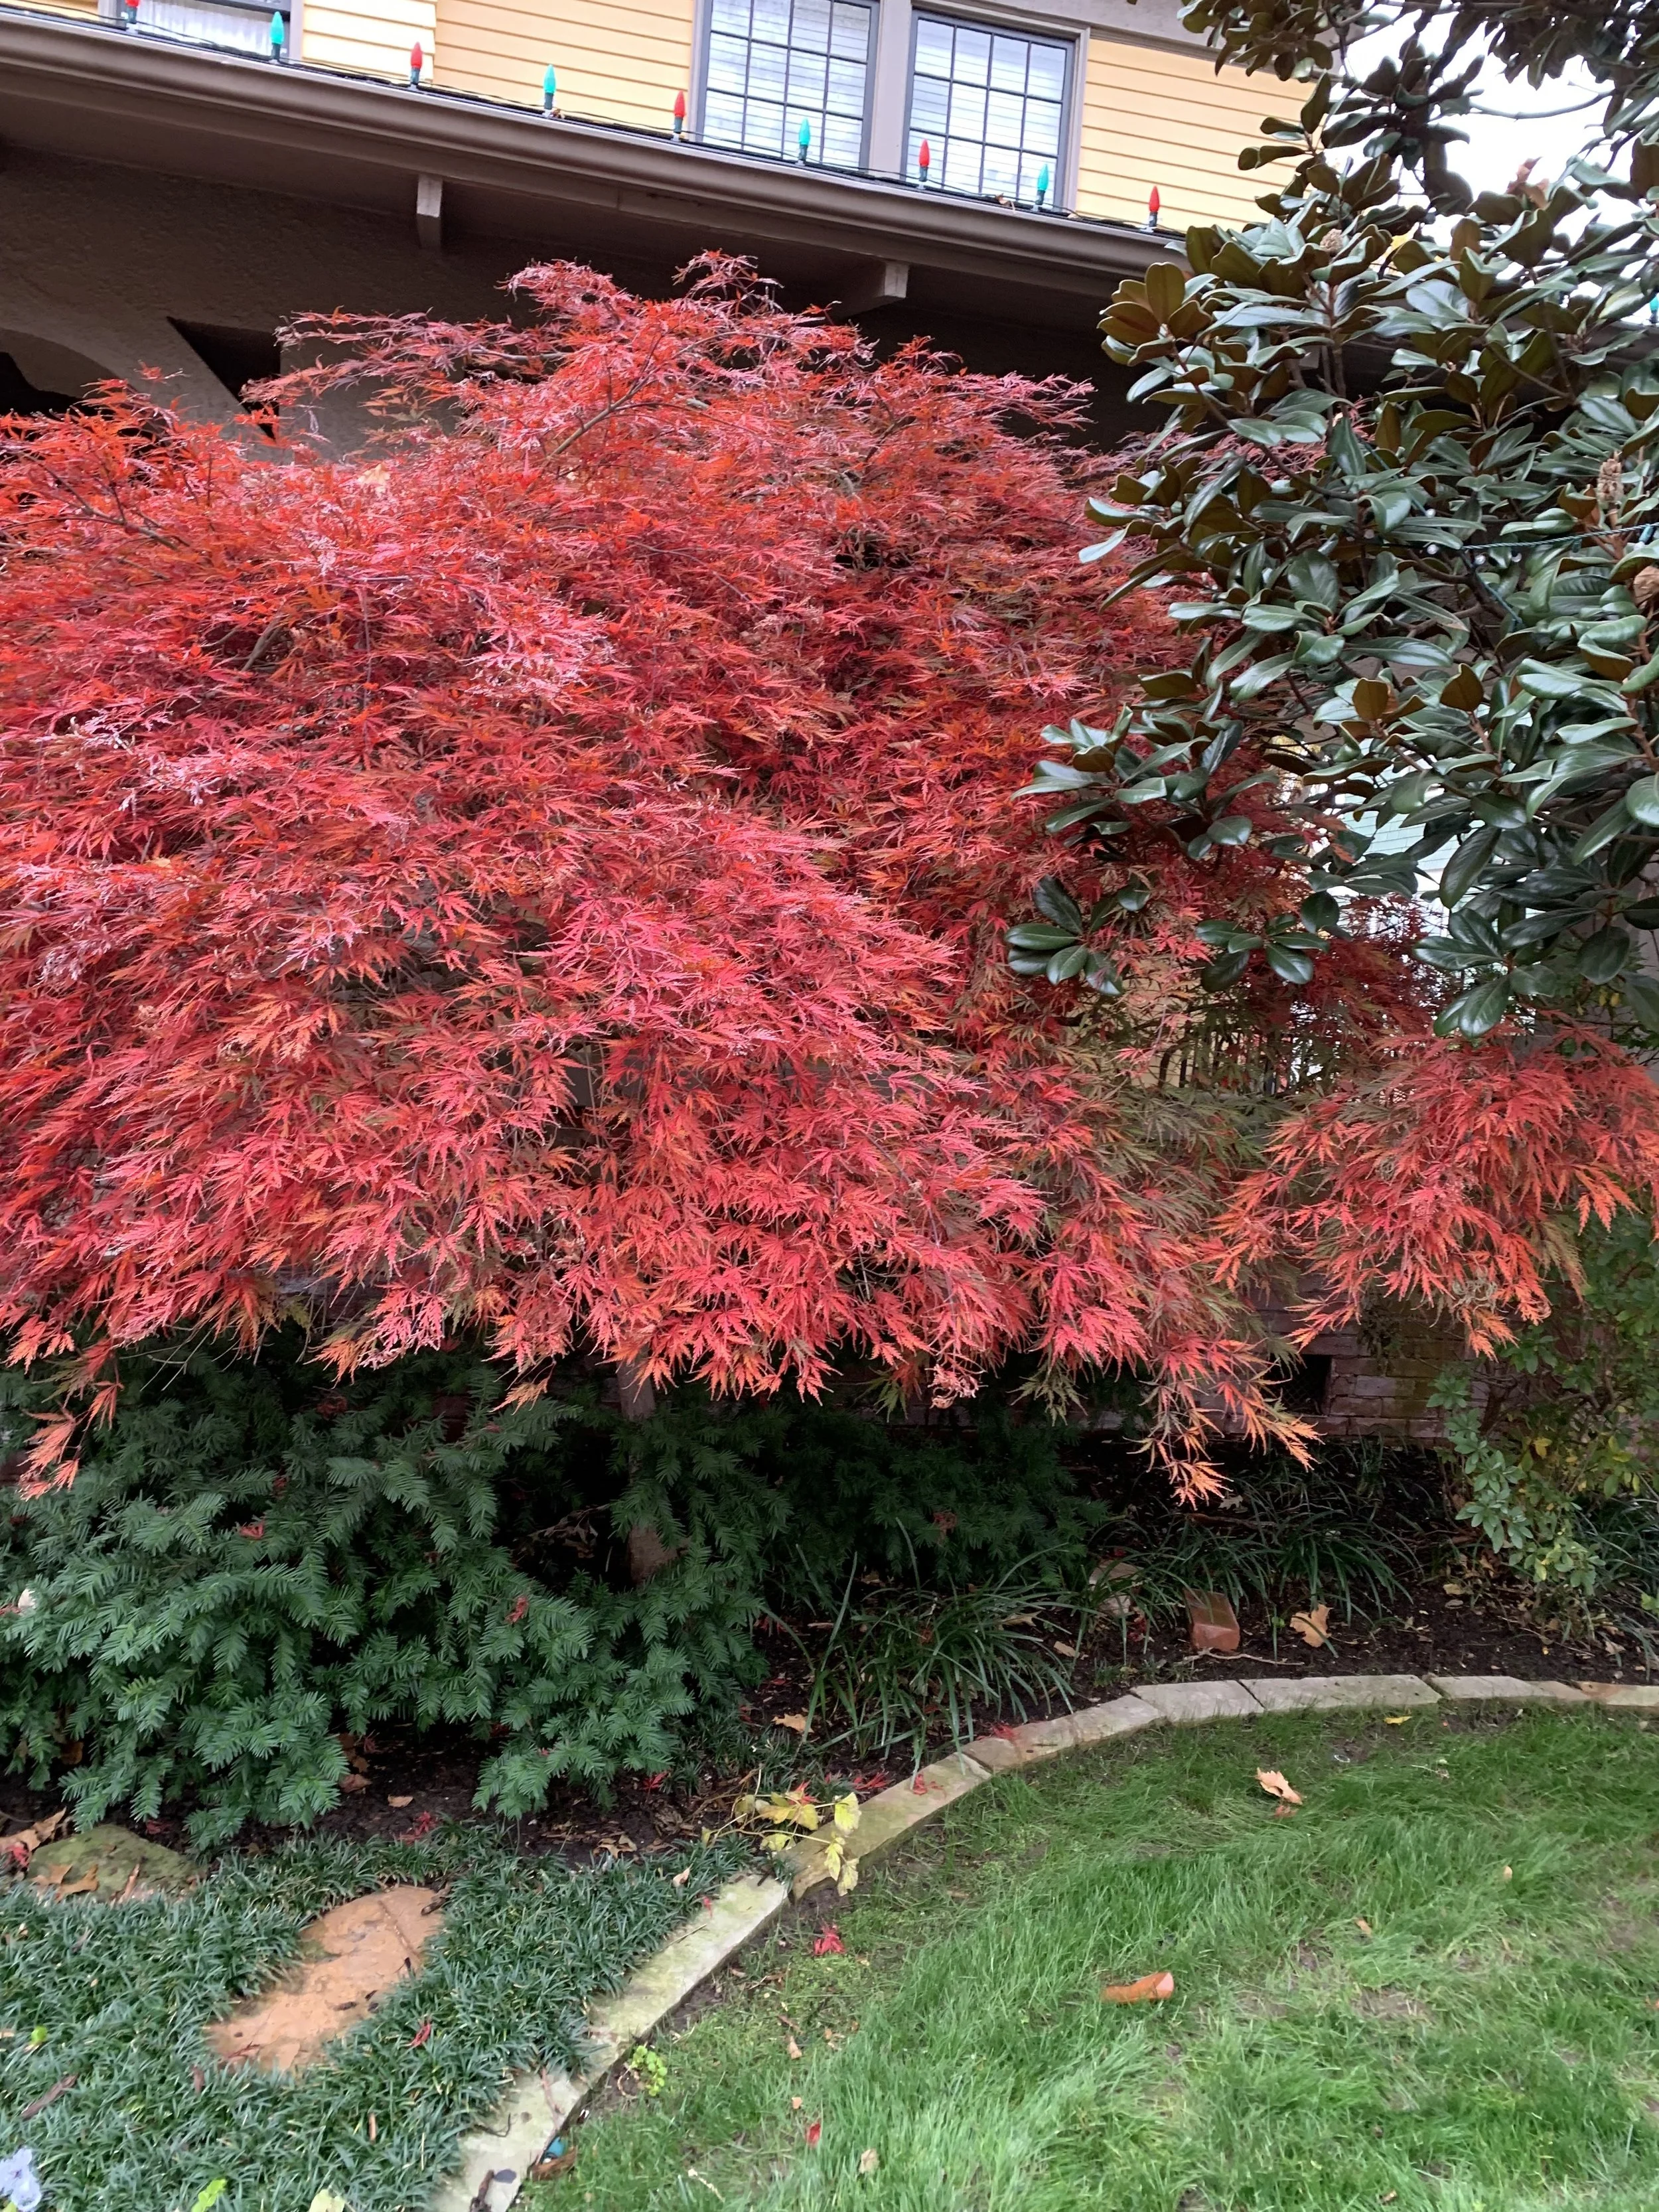
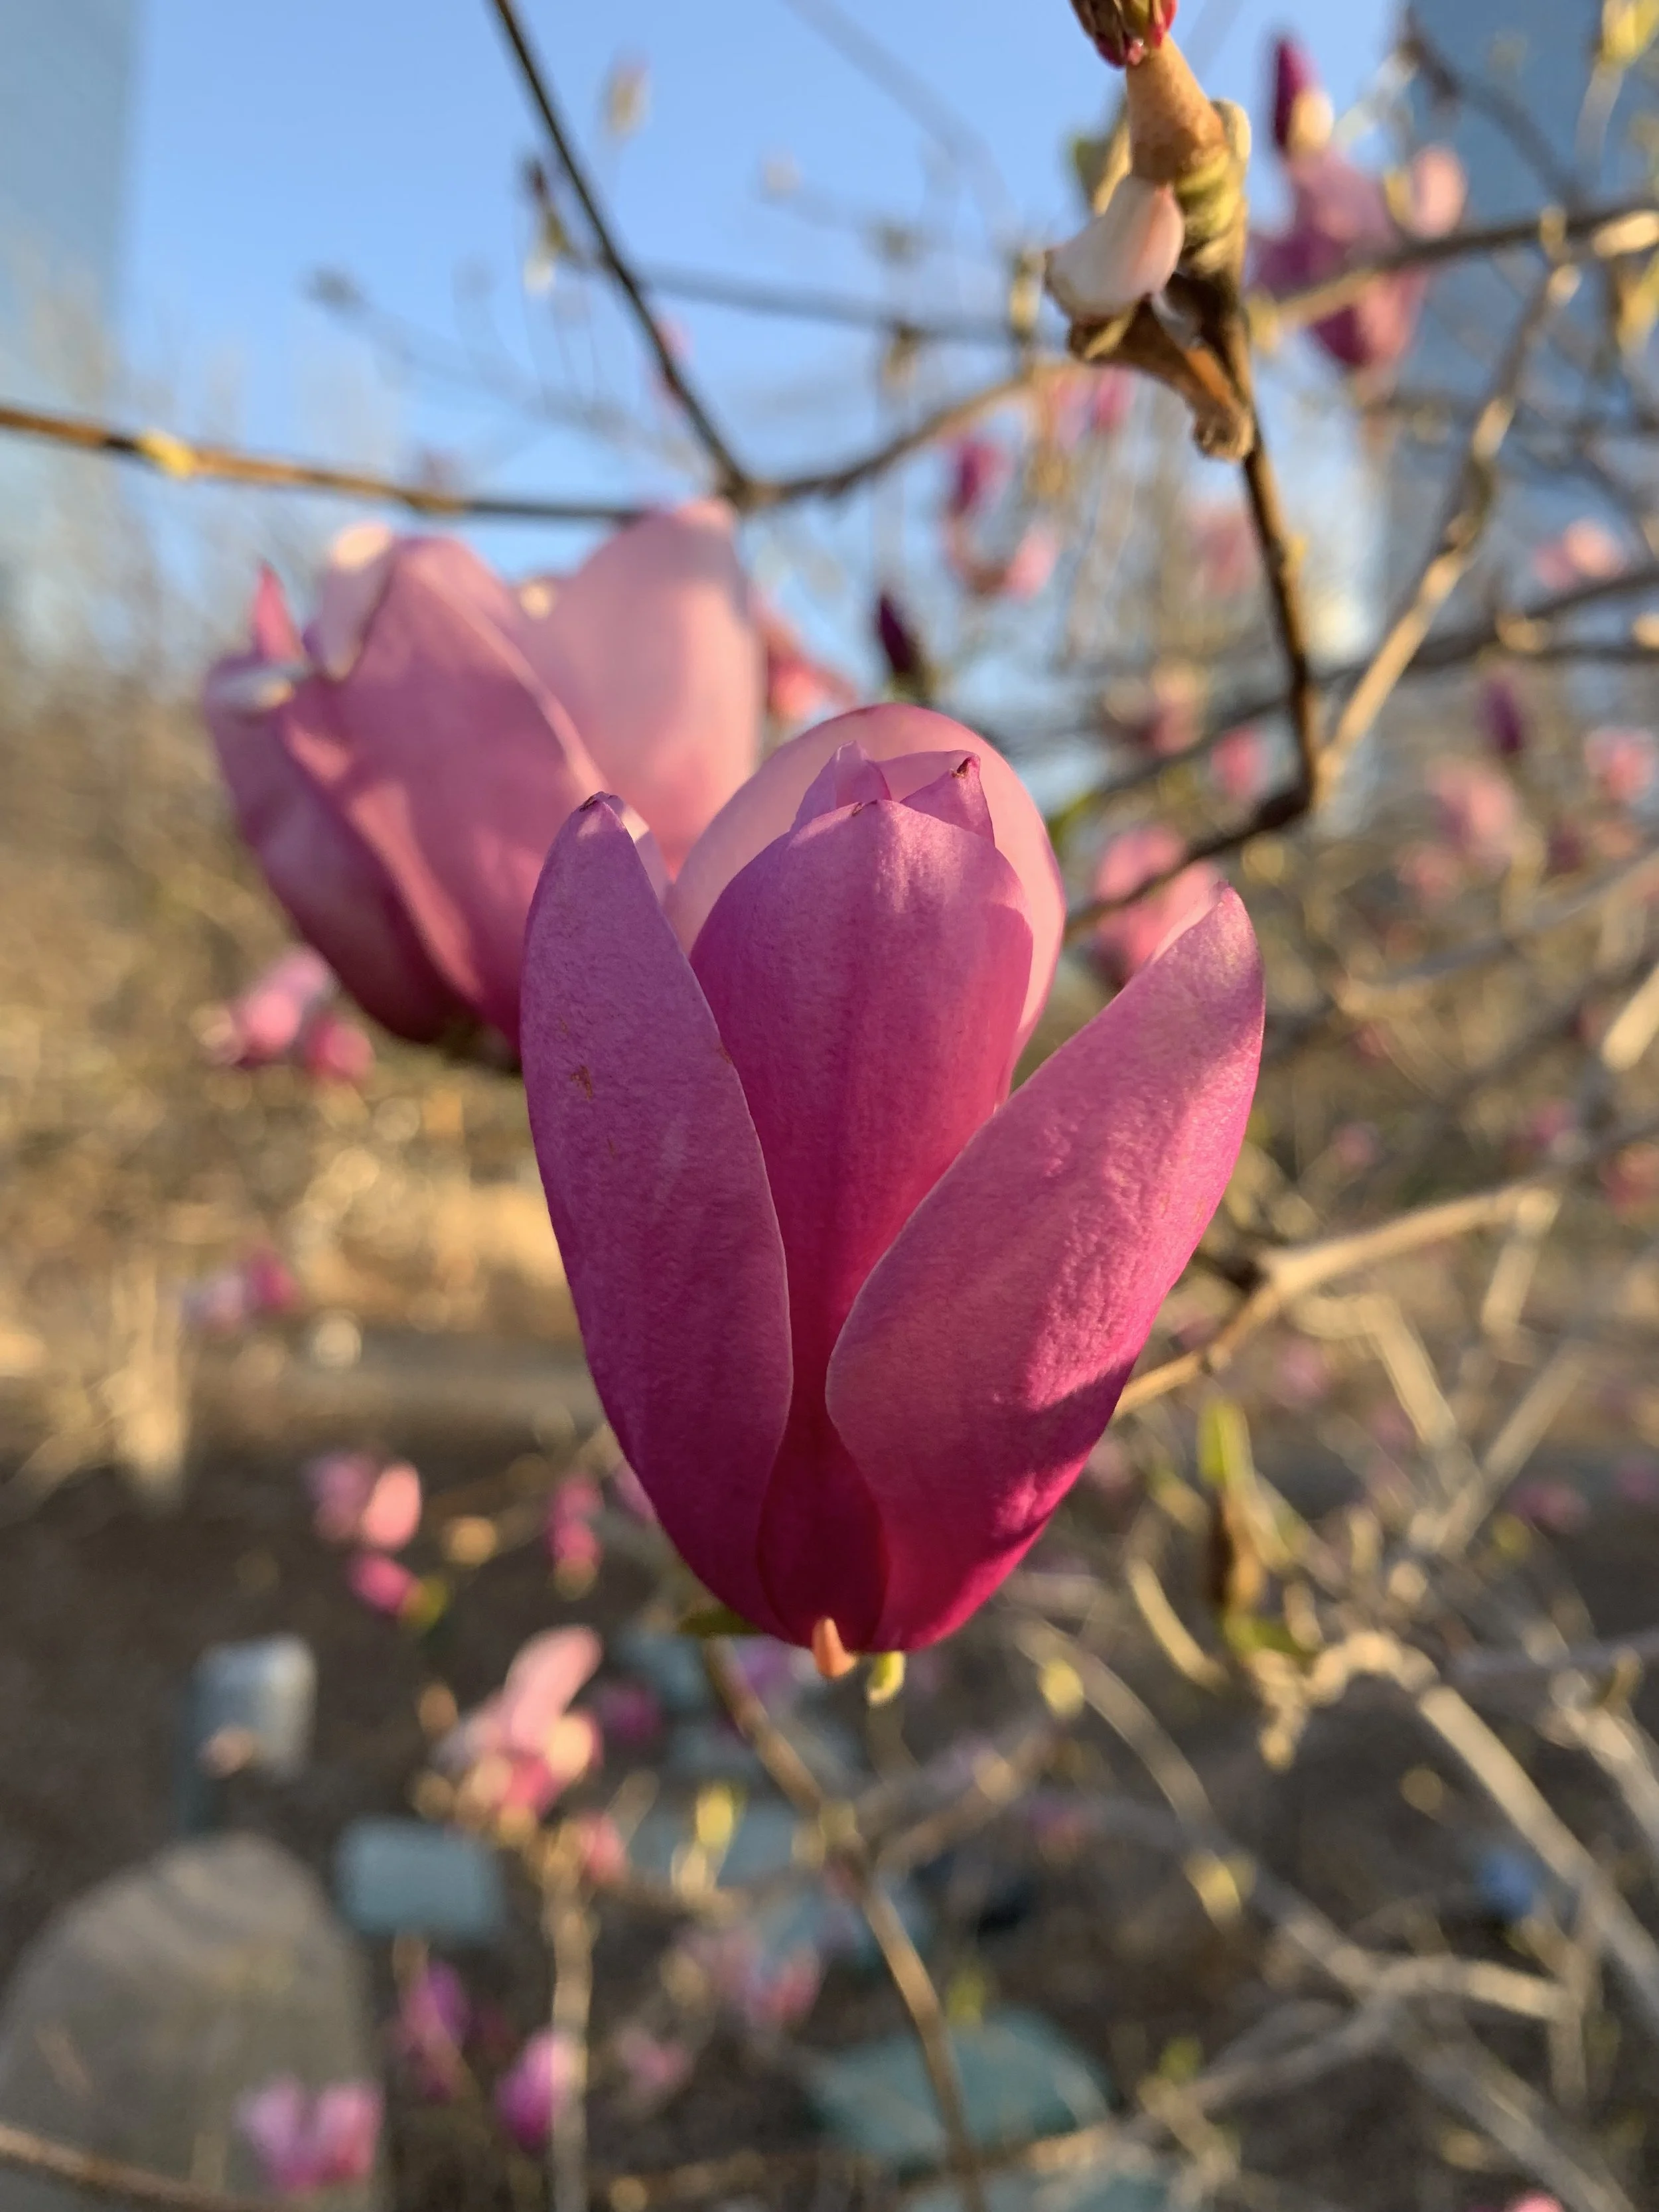
Saucer Magnolia
Saucer Magnolia – Large saucer-shaped blooms of white, pink, or purple in the early spring on spreading multi-trunk branches. 20’ tall and 20’ wide.
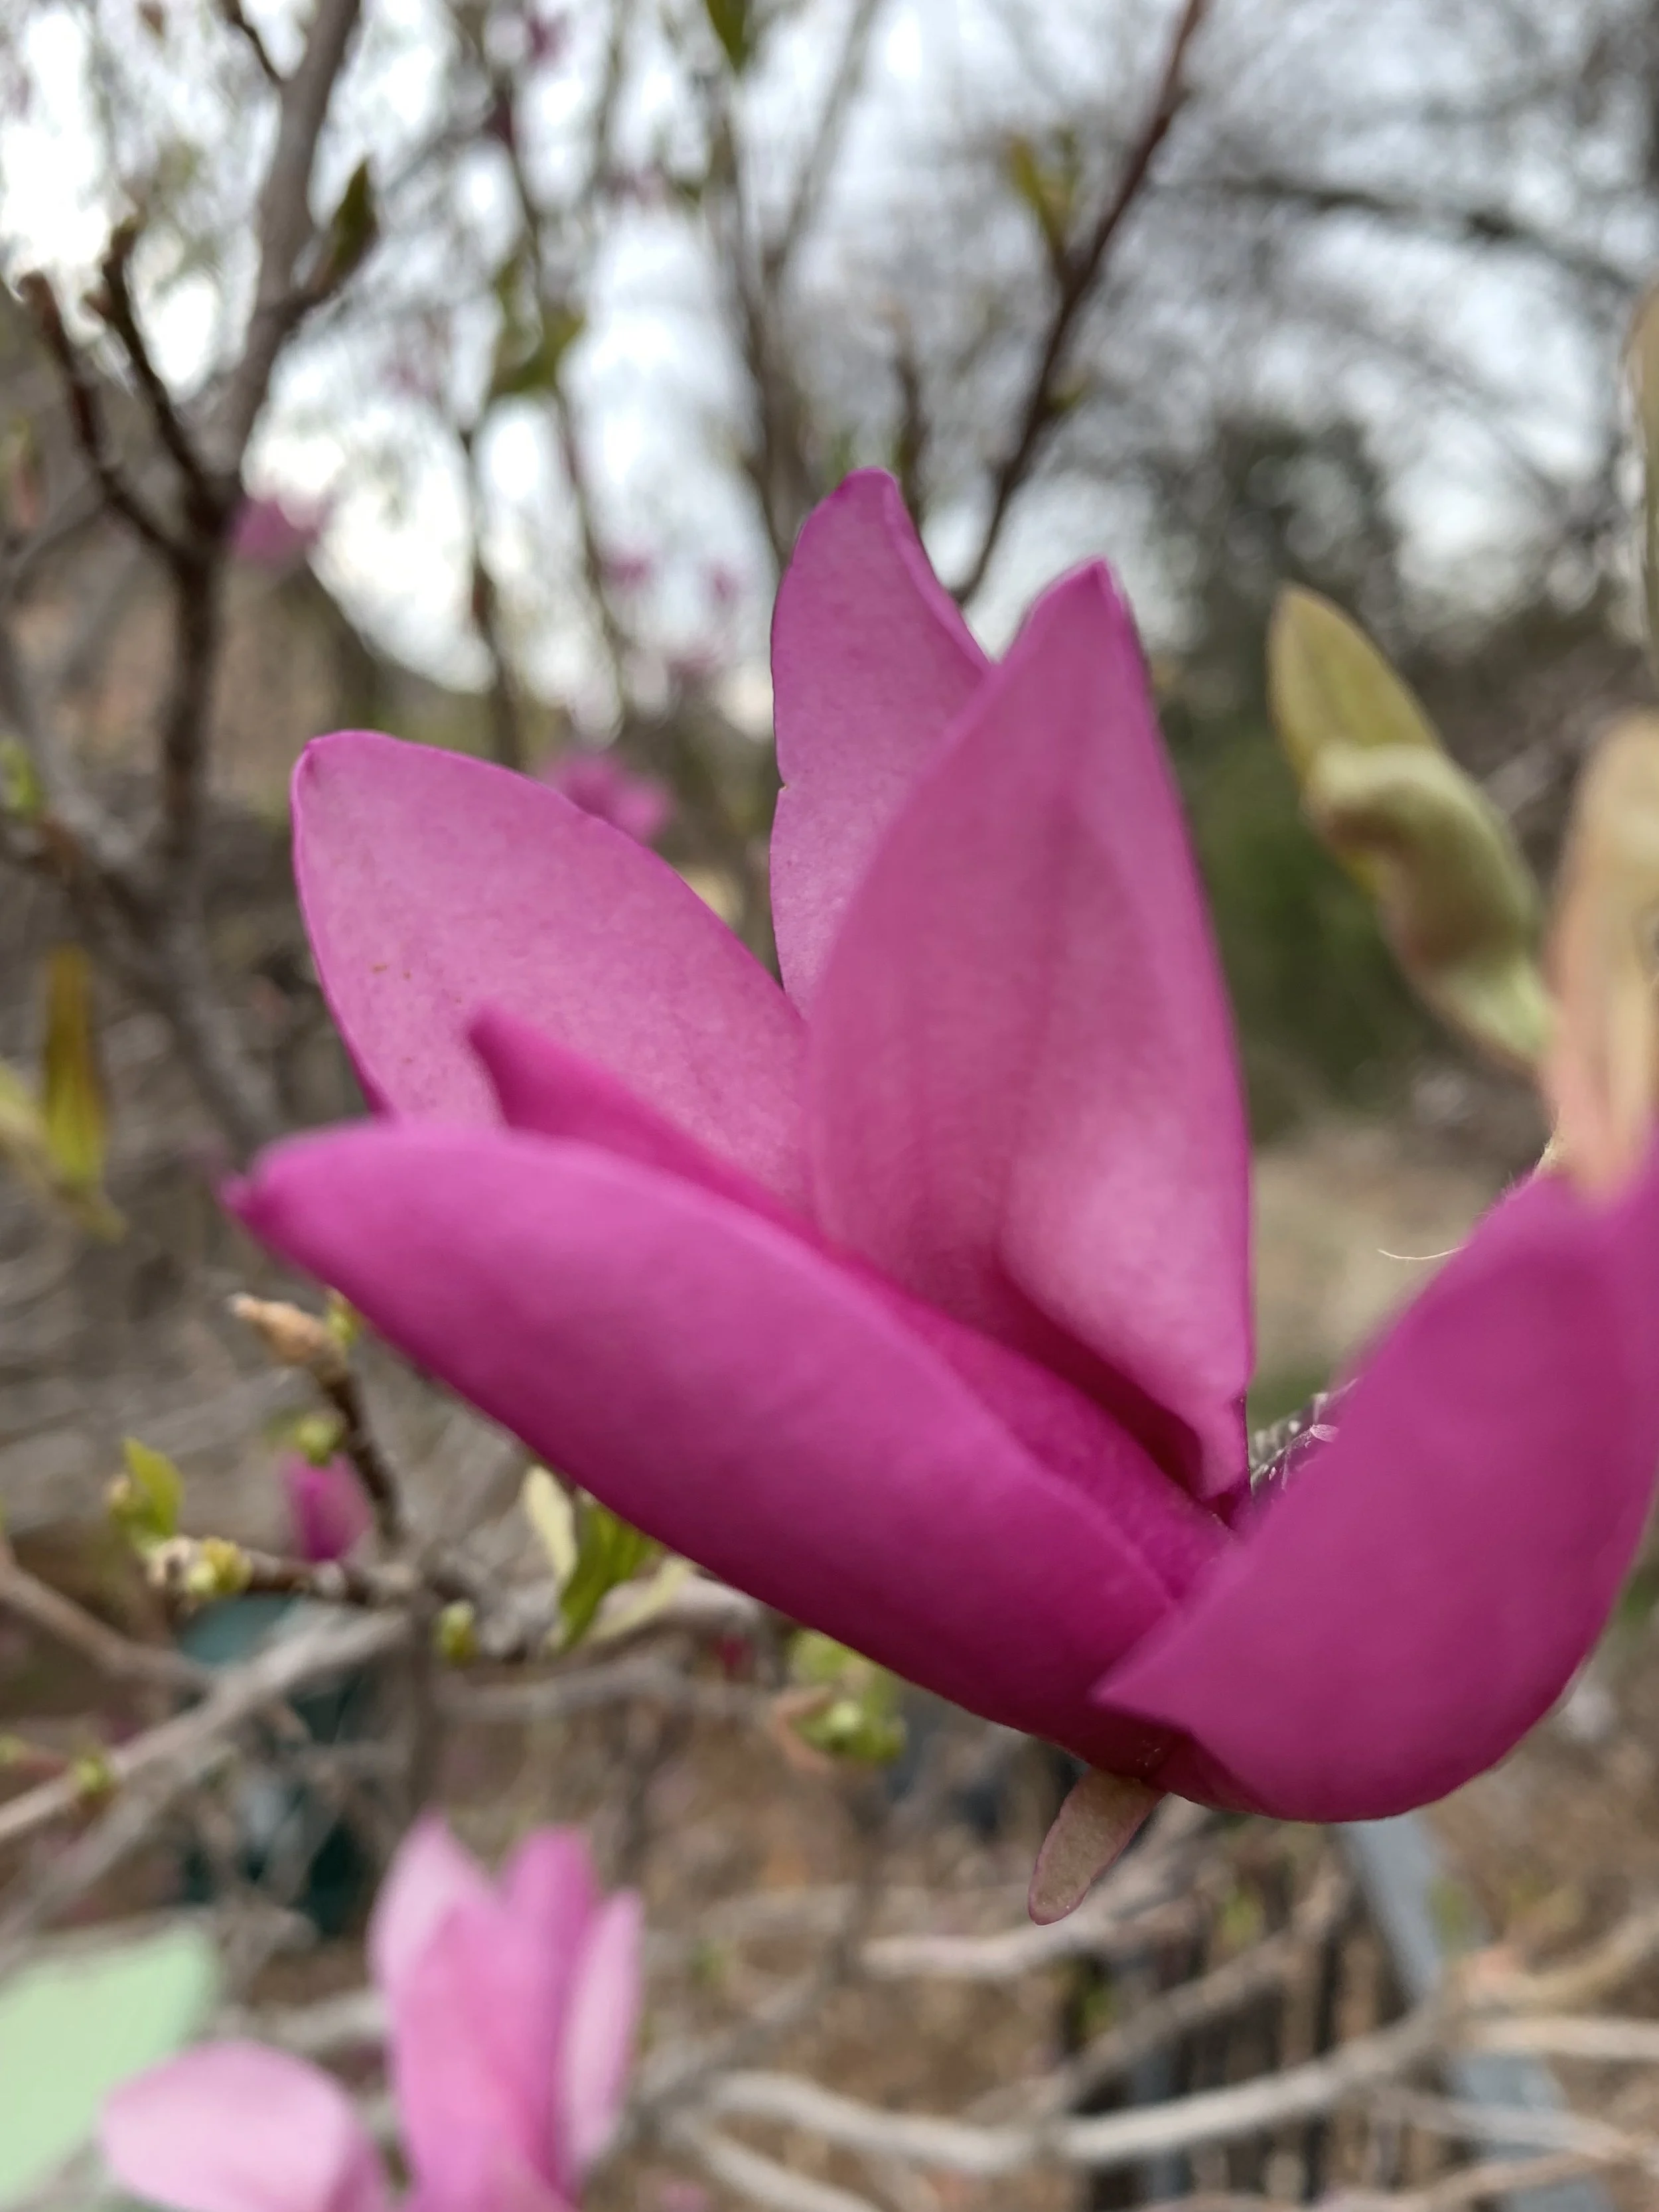
Saucer Magnolia
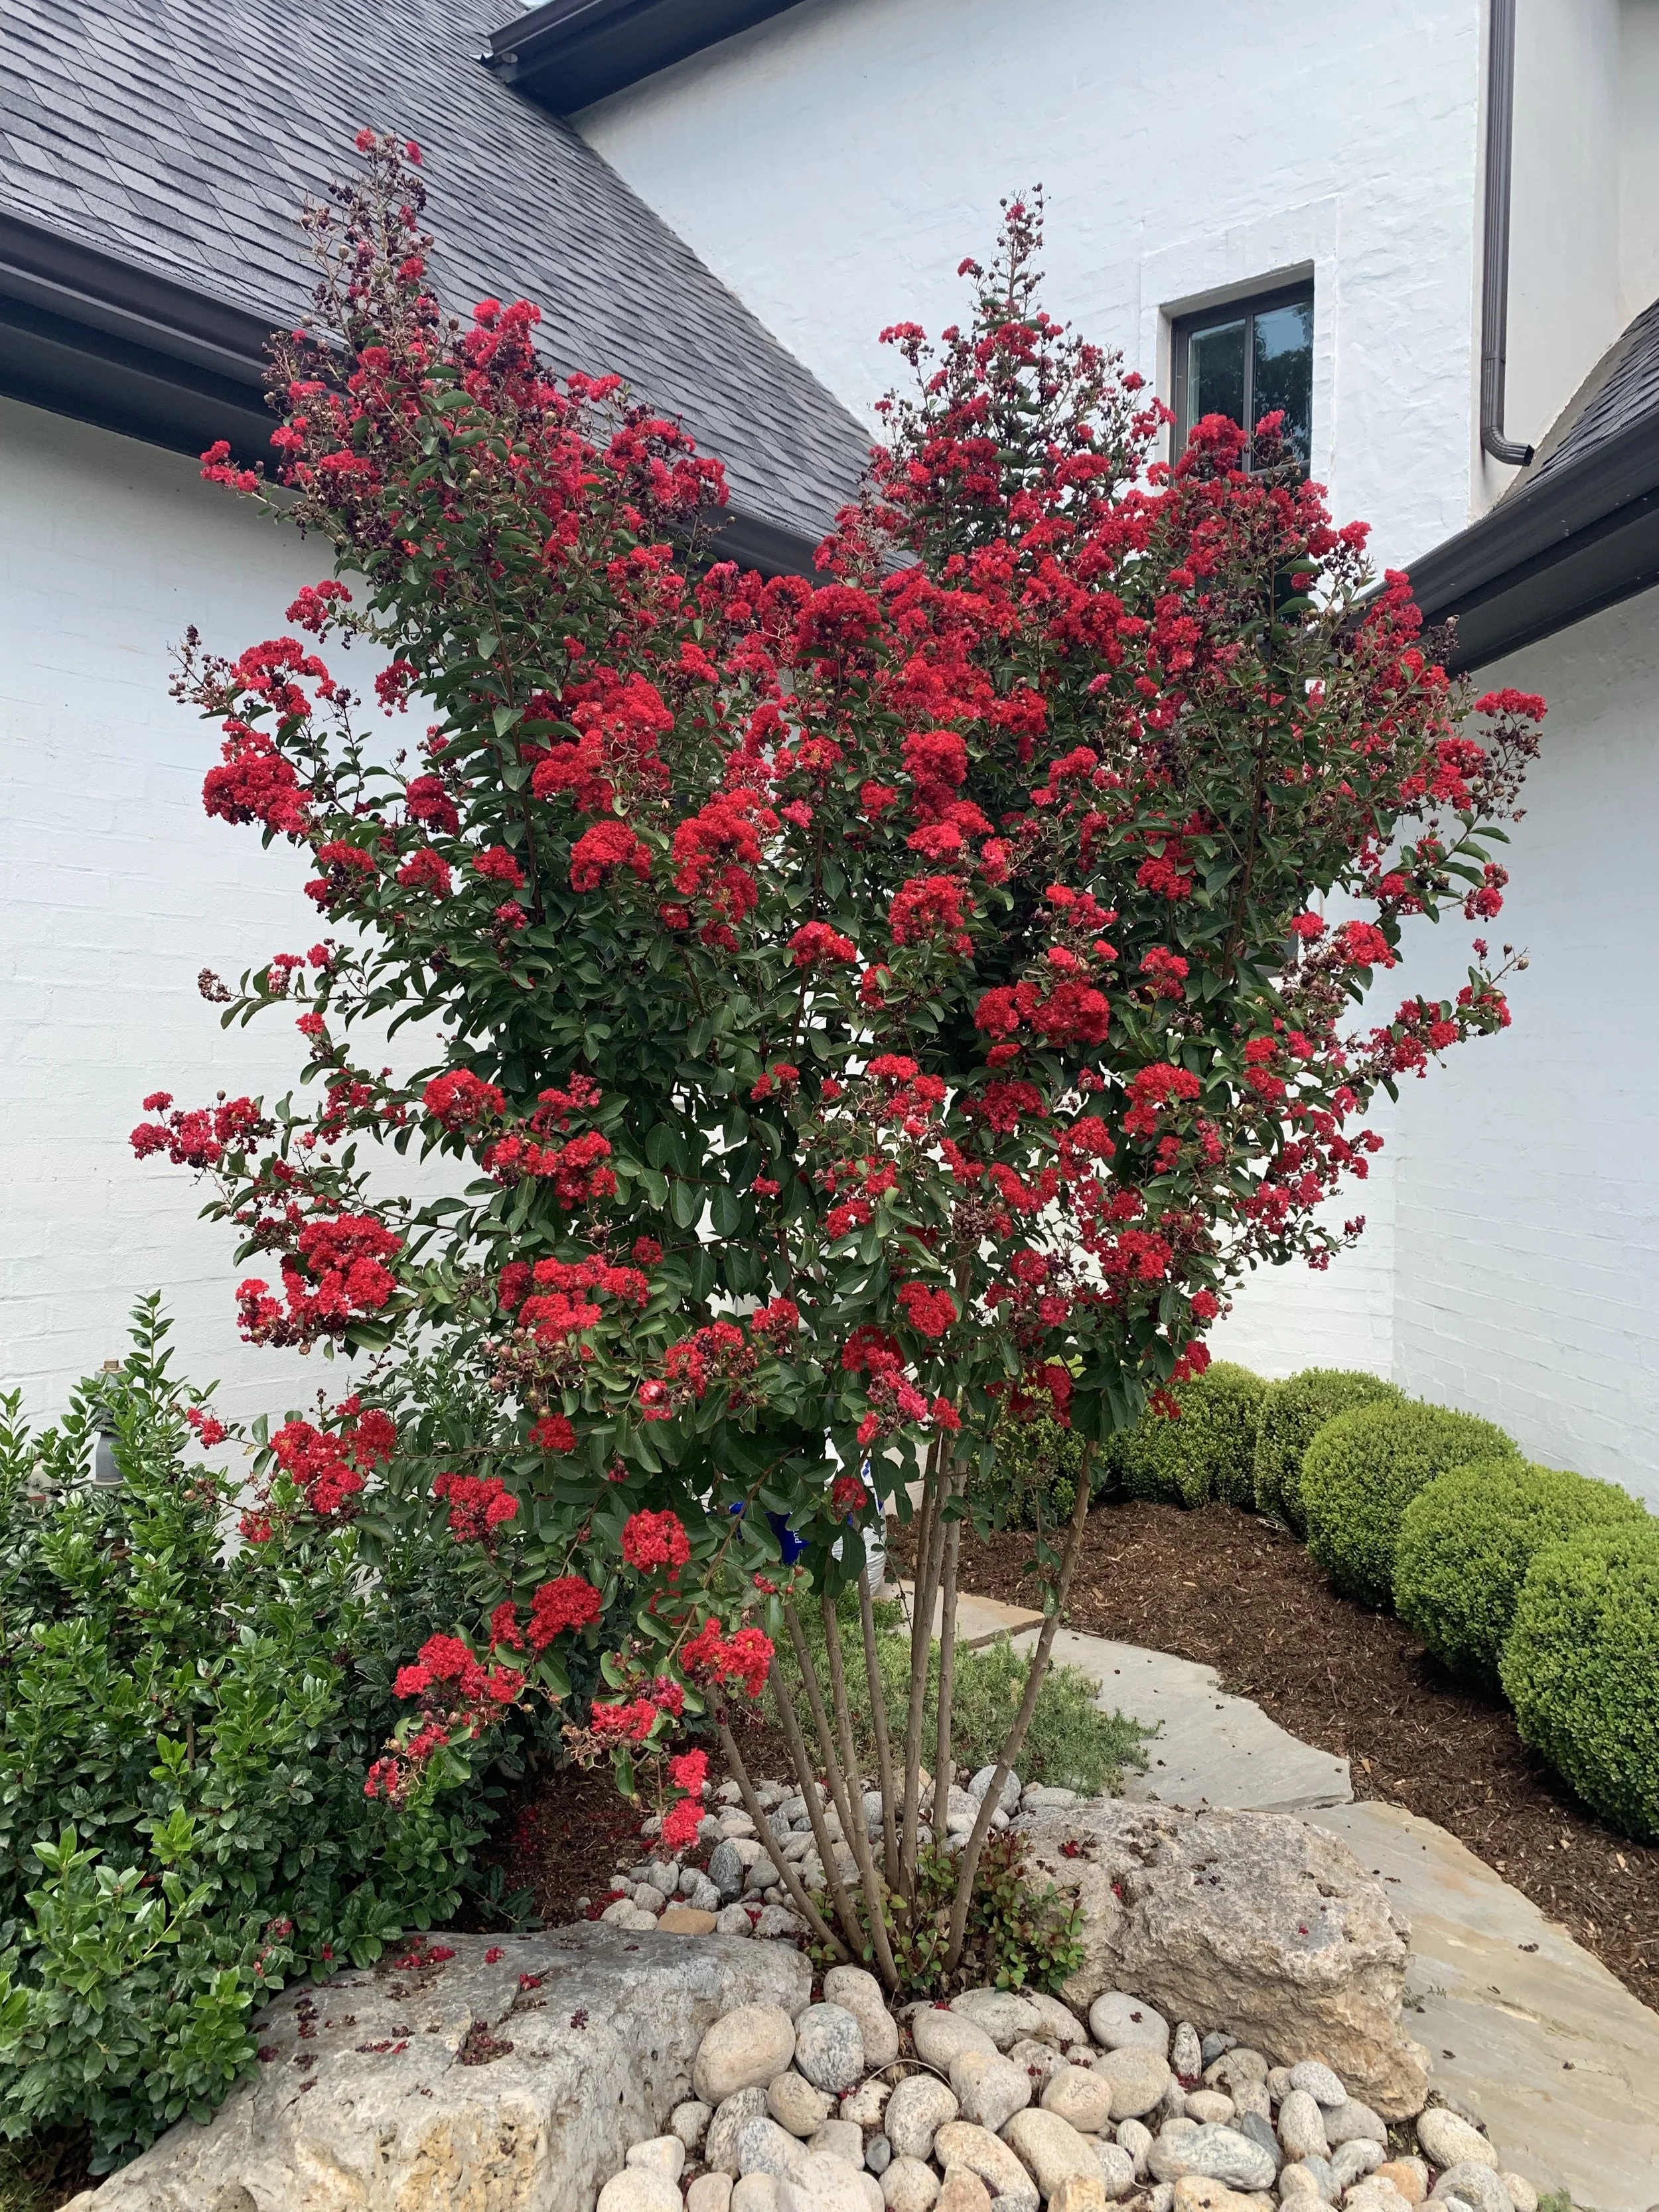
Crape Myrtle
Crape Myrtle – Our longest summer blooming plant with so many colors and growth habits to choose from there has to be one just right for any landscape. 12-30’ tall and 10-20’ wide.
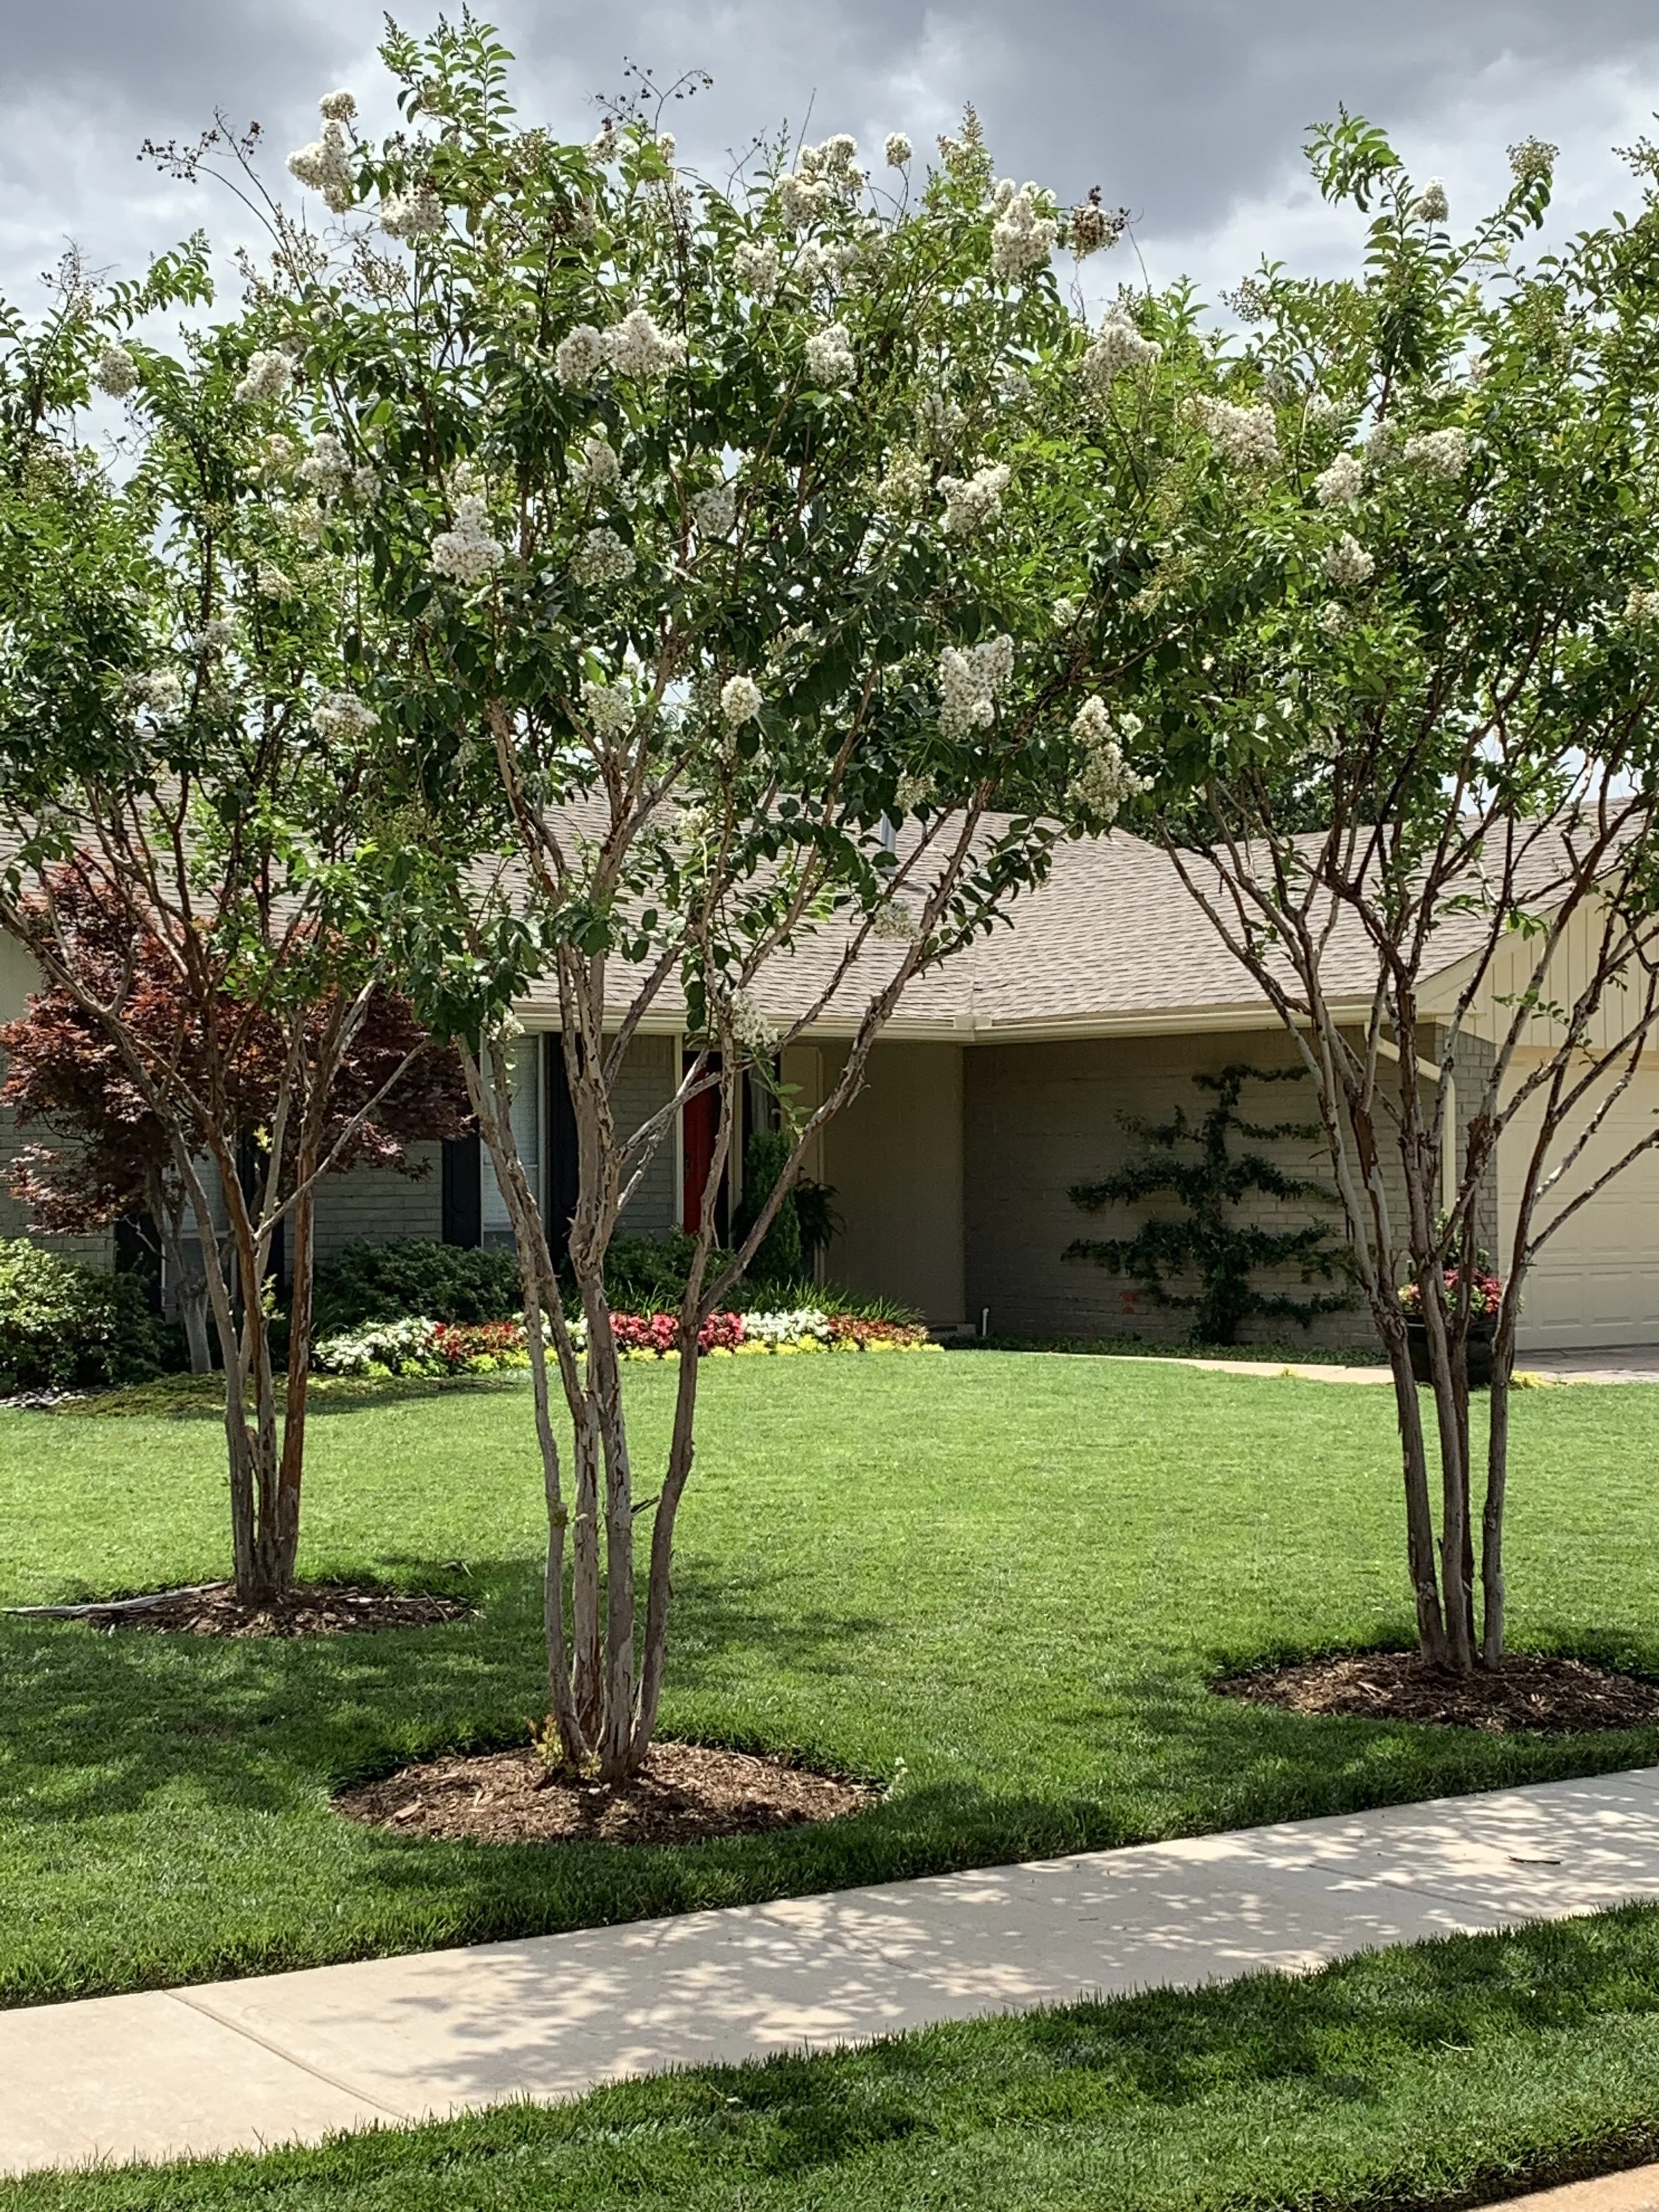
Crape Myrtle
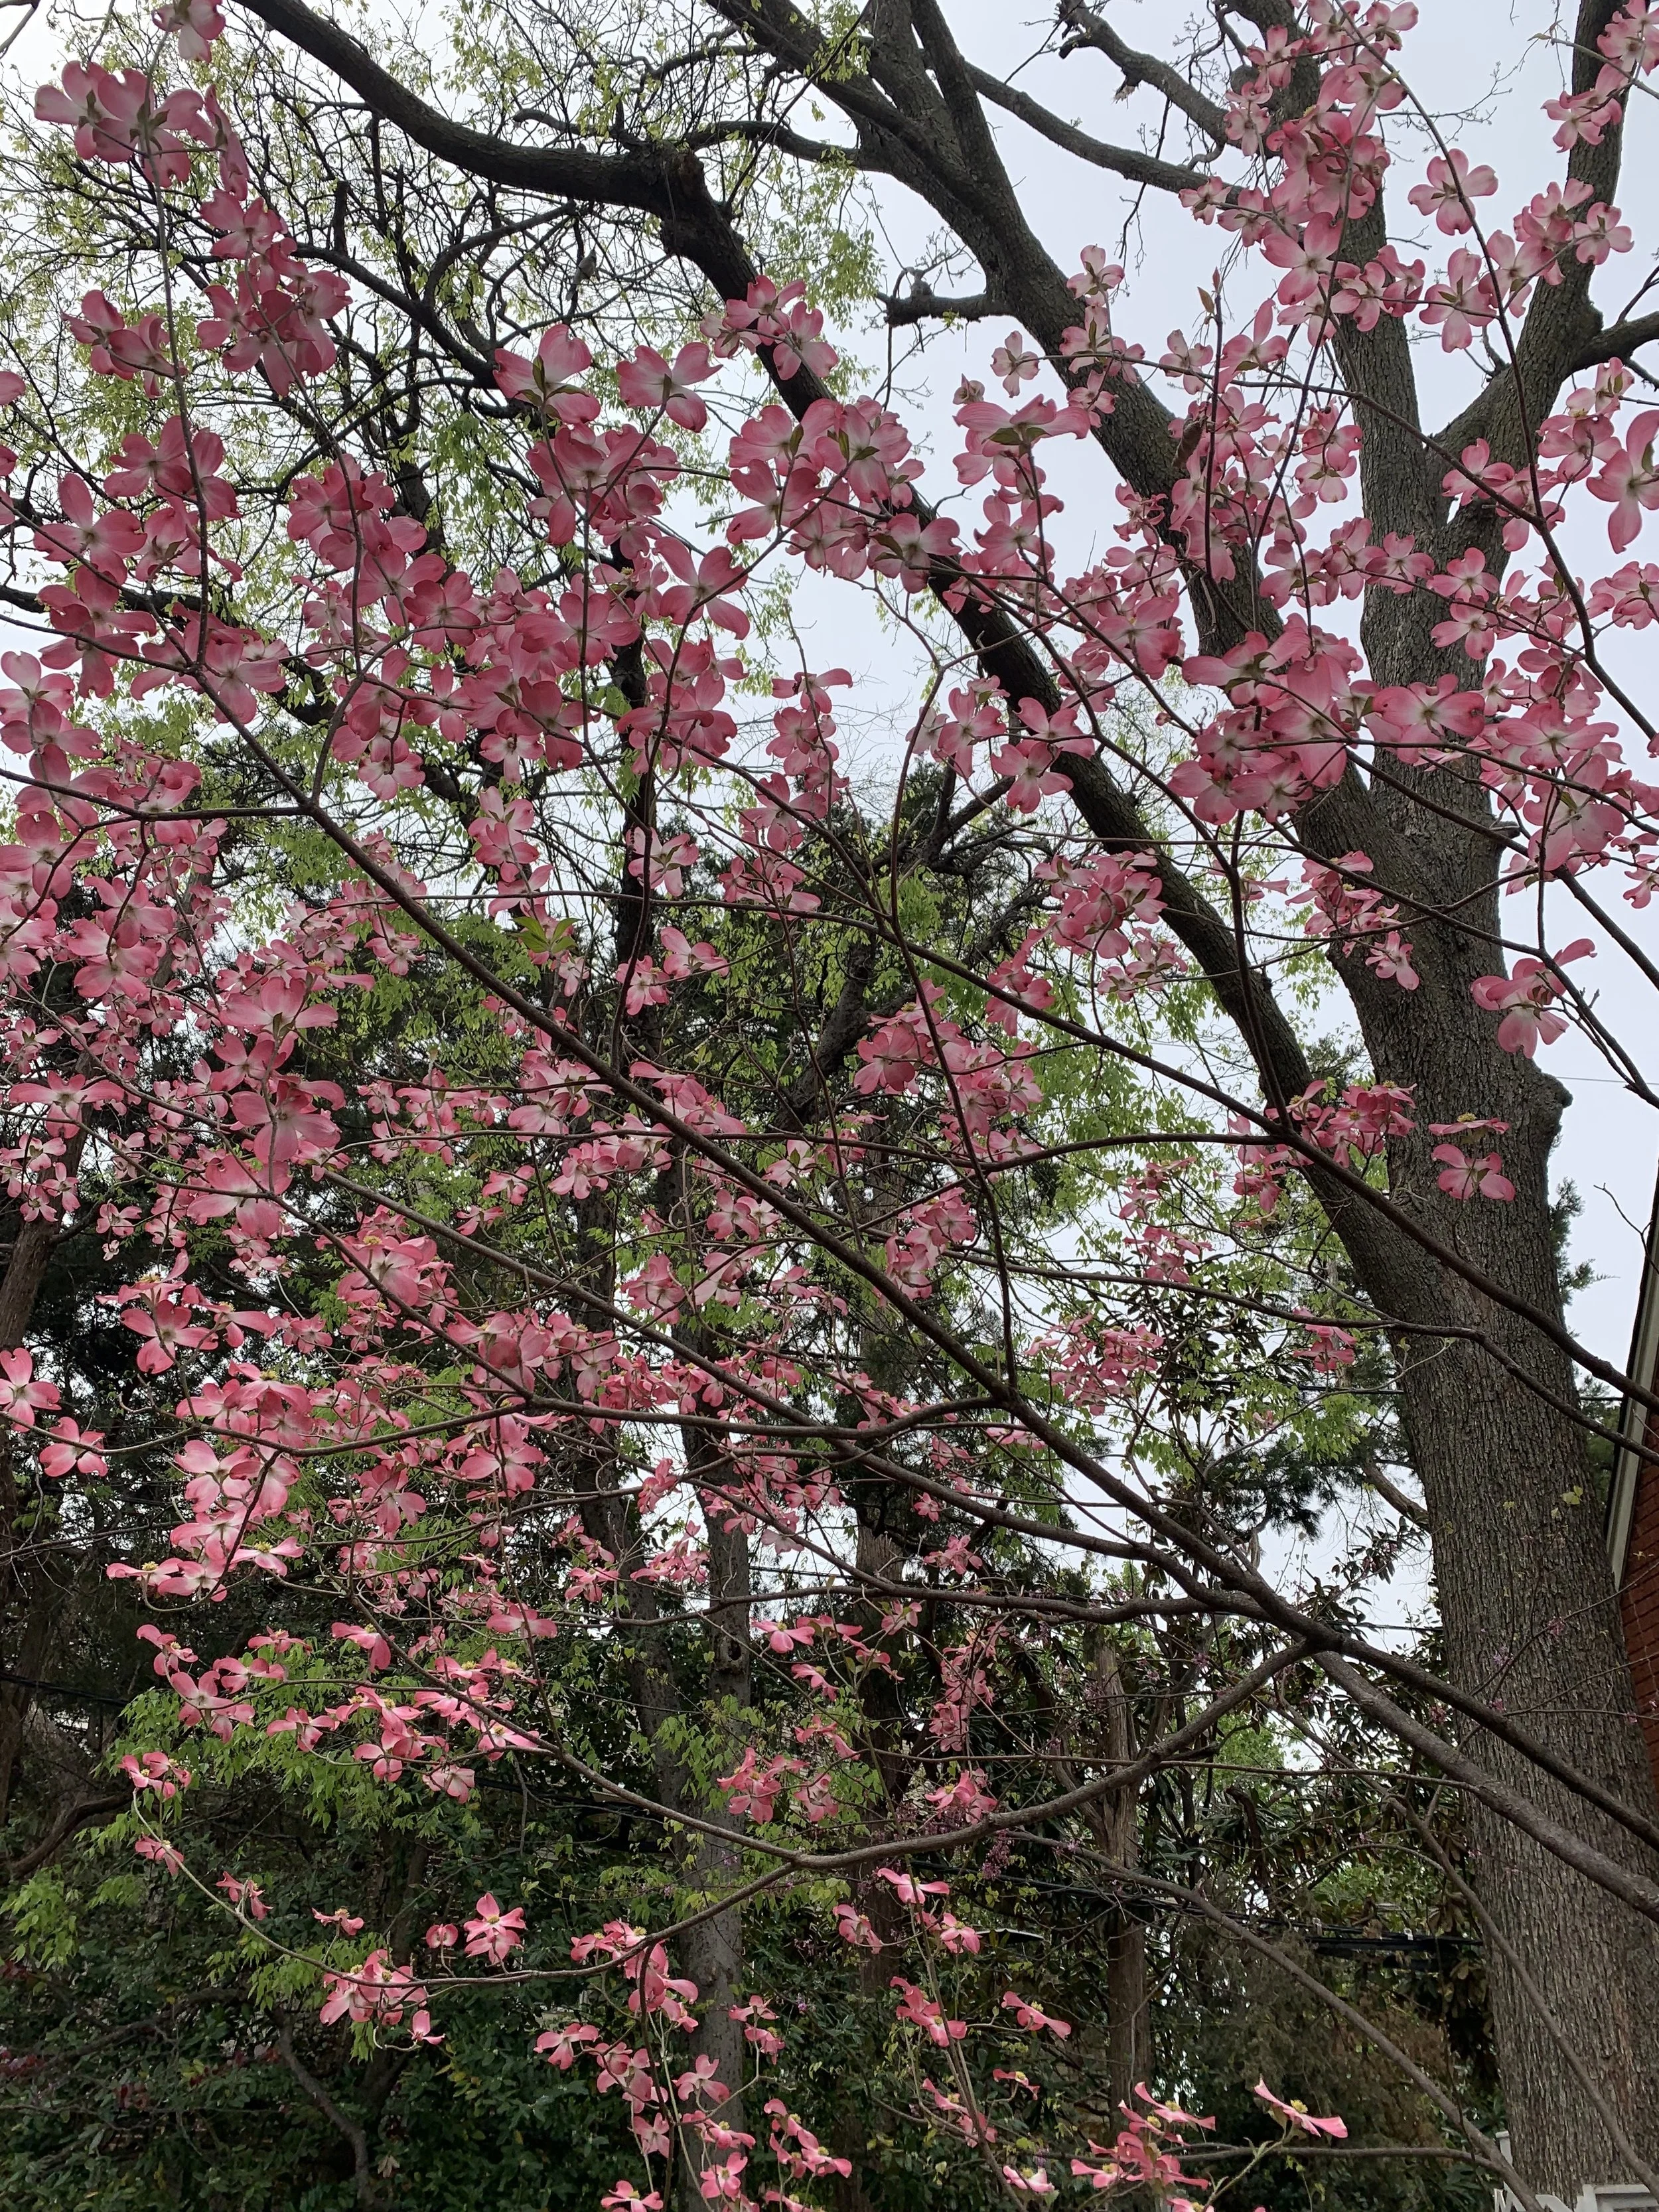
Dogwood
Dogwood – White or pink blooms in the late spring. Great for areas protected from the afternoon sun or as an understory accent tree. 15’-20’ tall and wide.
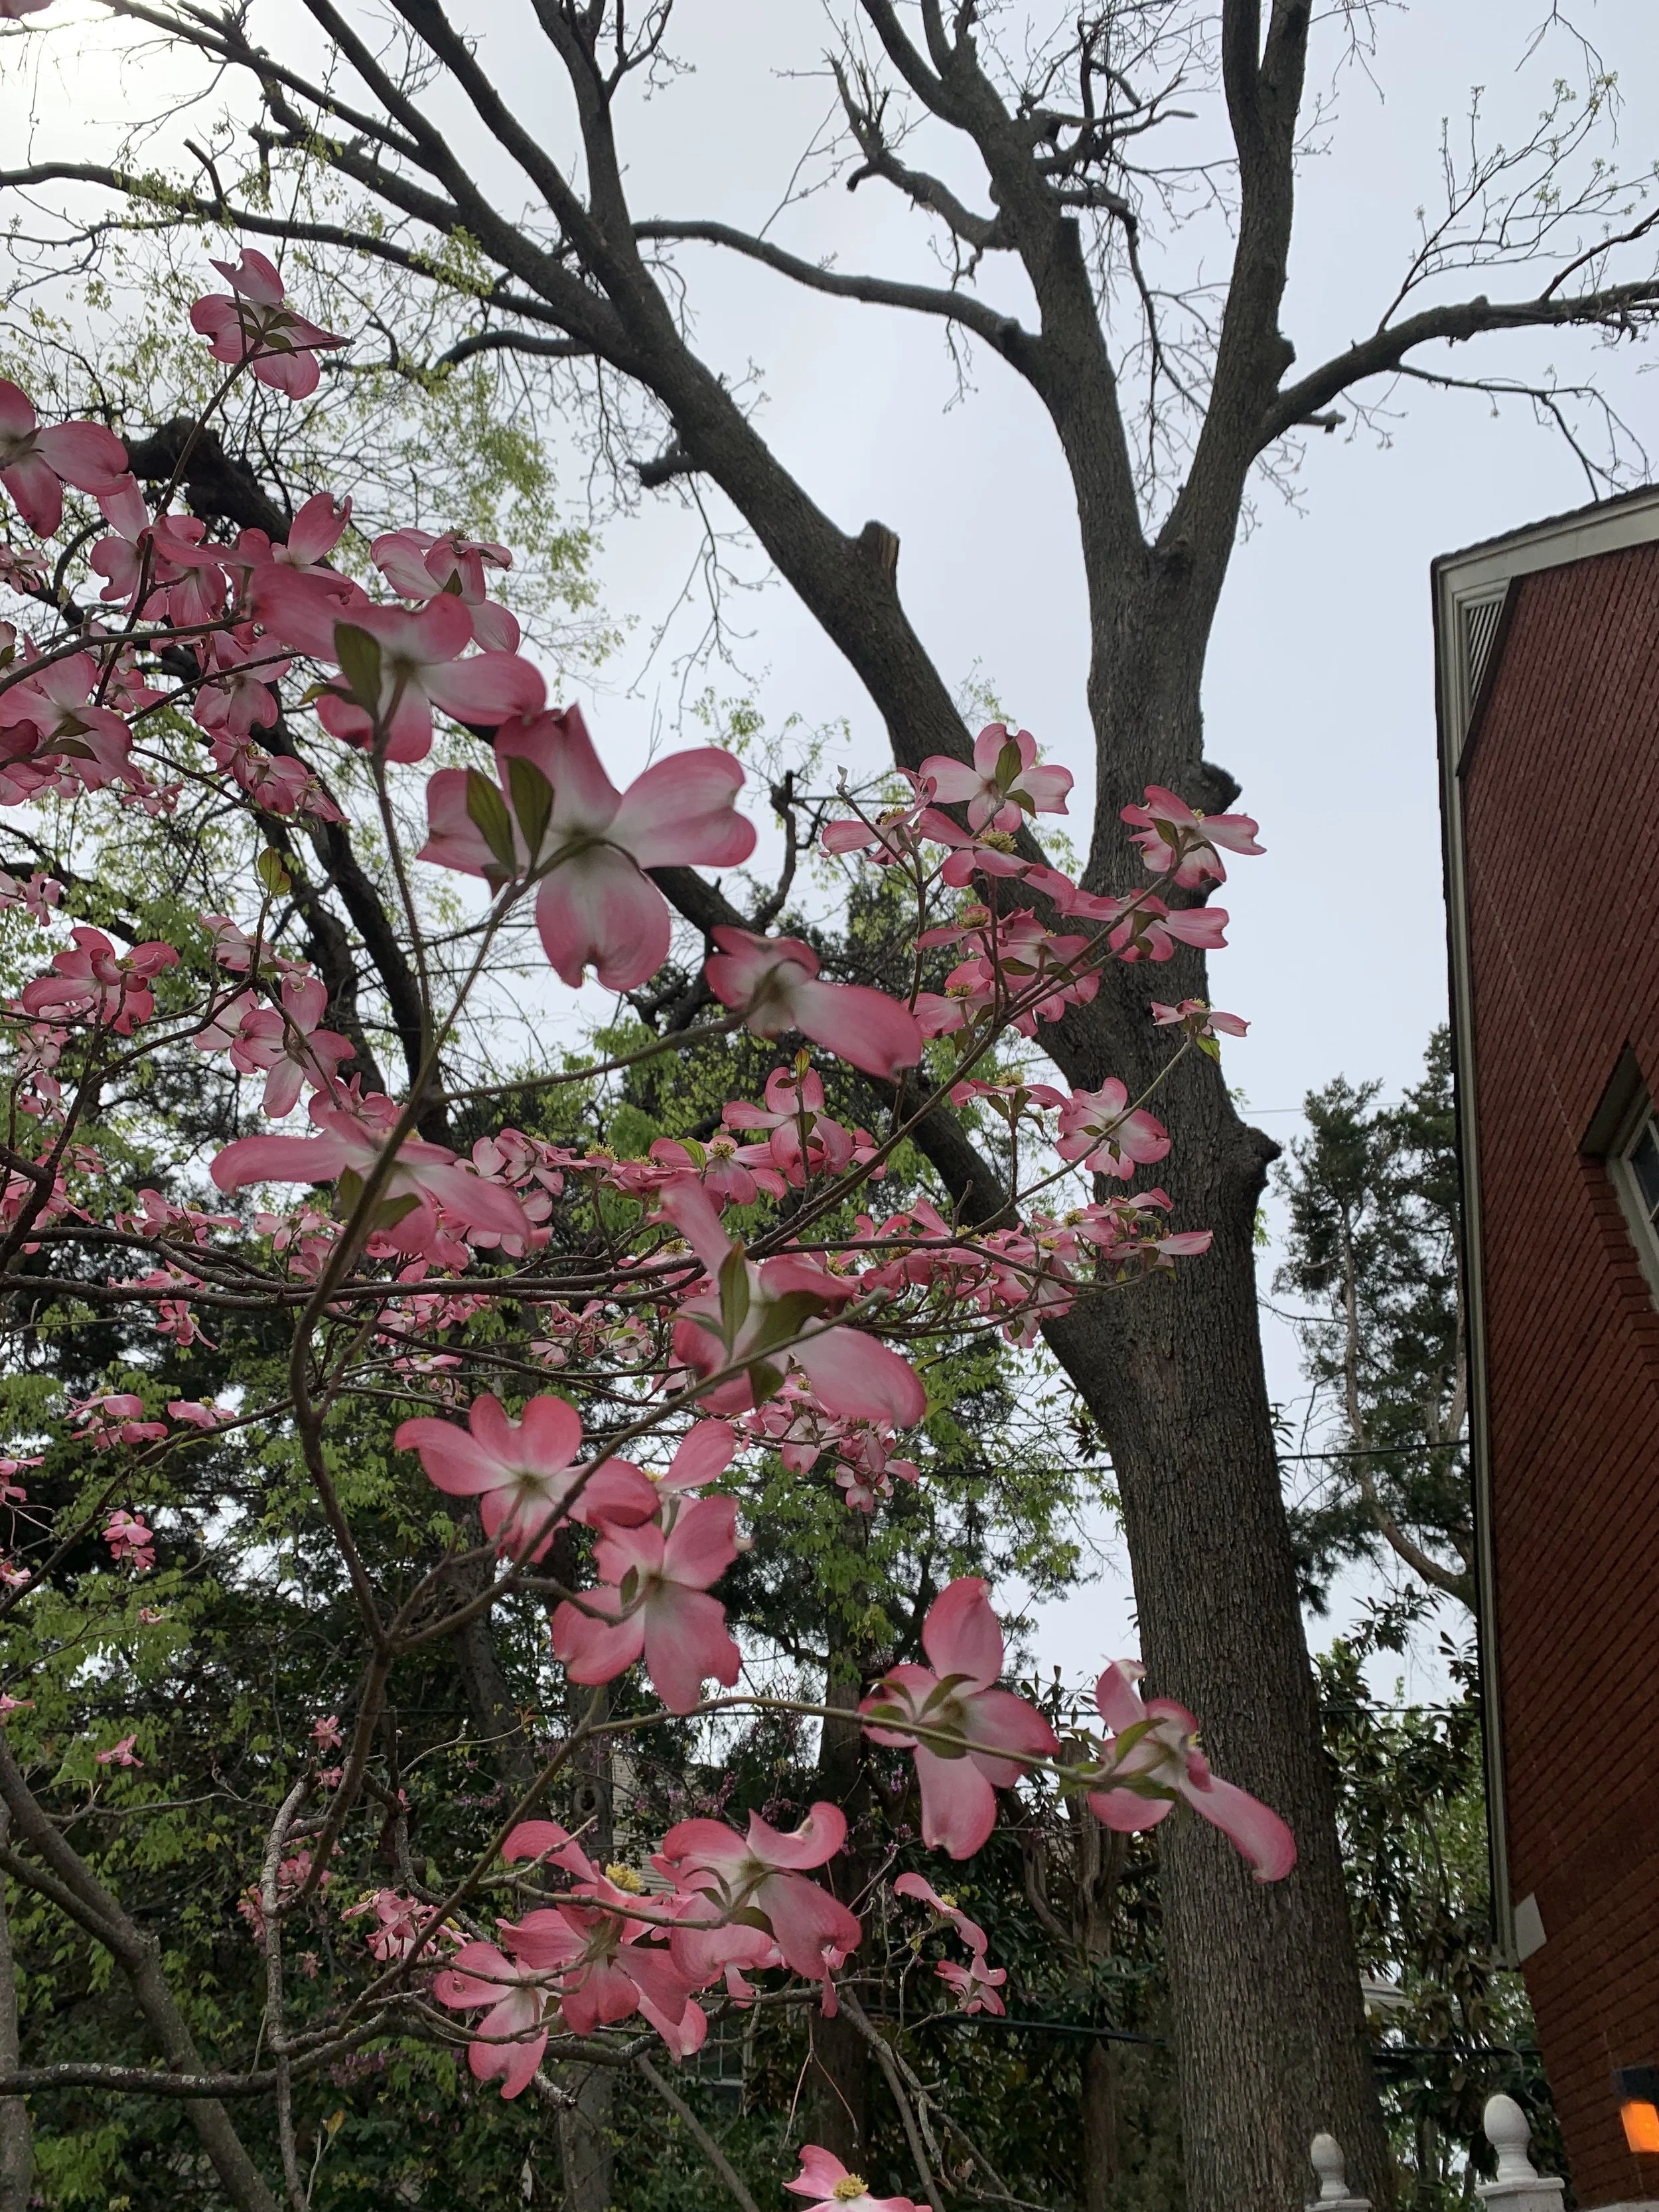
Dogwood
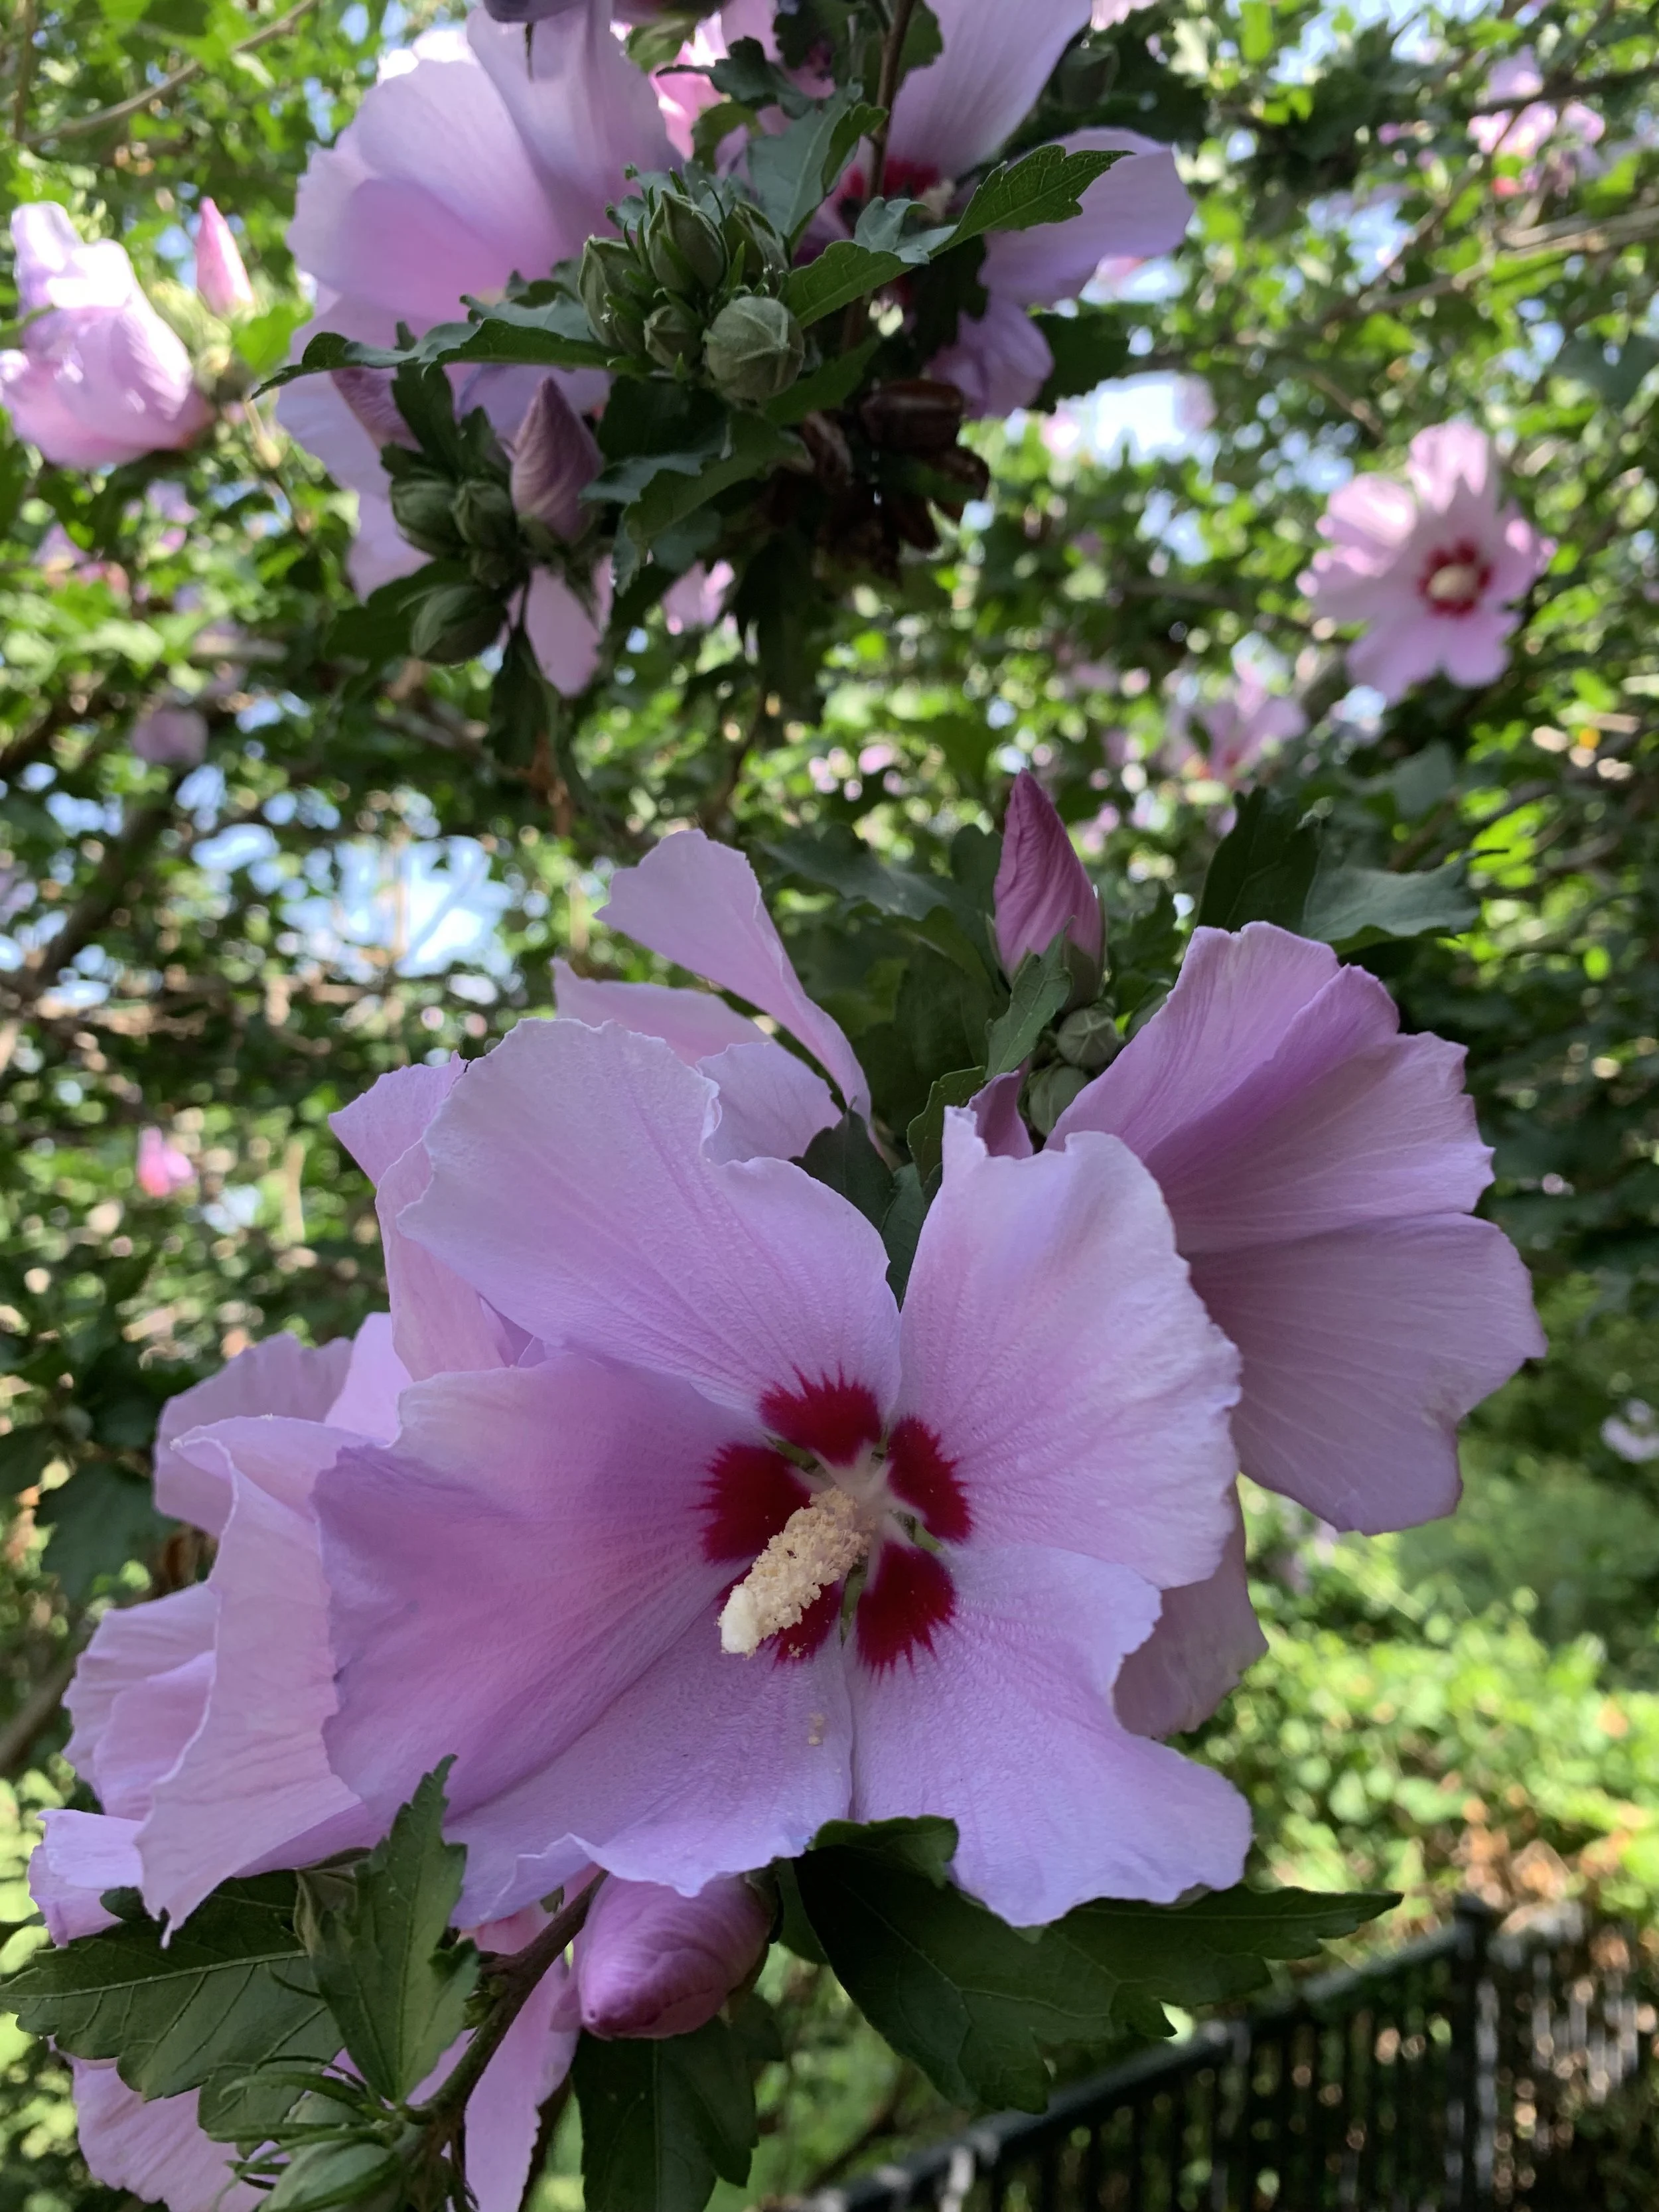
Rose of Sharon
Rose of Sharon – A graceful vase-shaped small tree that adds a tropical look to the landscape. A mid-summer to fall bloomer available in shades of white, red, pink, lavender, and blue. 15’ tall and 10’ wide.
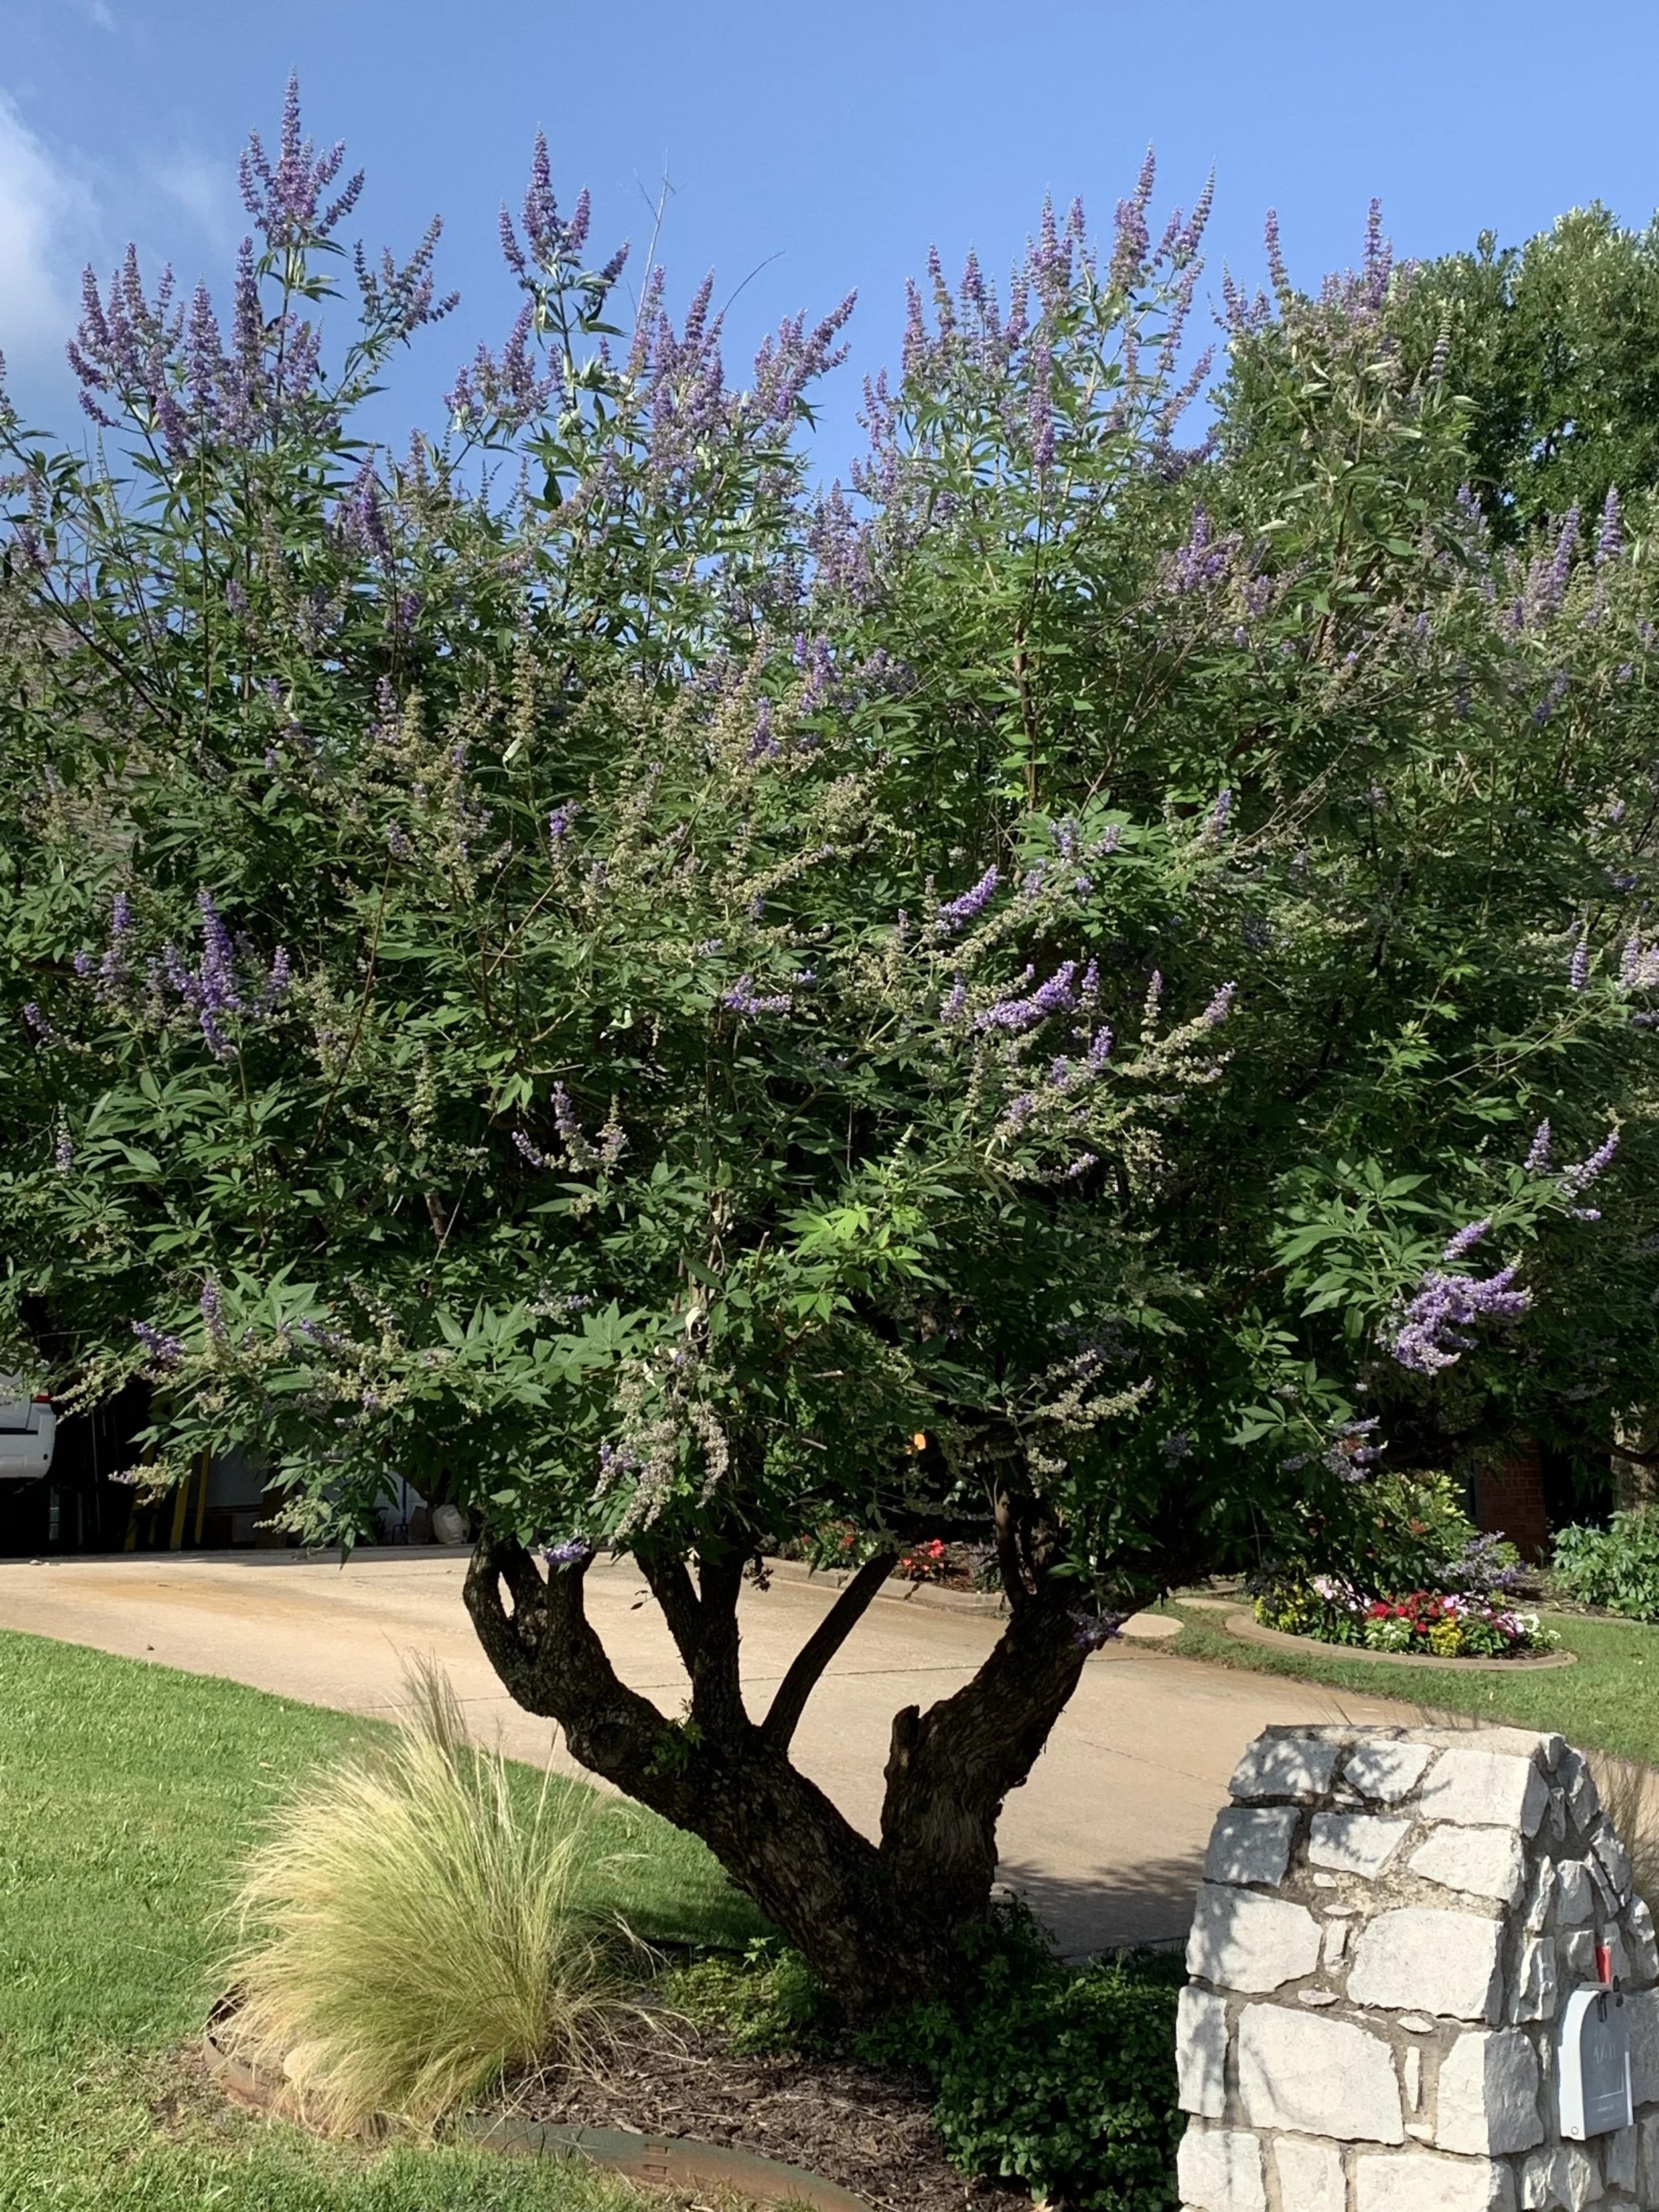
Chaste Tree
Chaste Tree – Also known as Vitex, has summer lilac-colored blooms with grayish-green foliage on a broad, spreading multi-trunk frame. 15-20’ tall and wide.
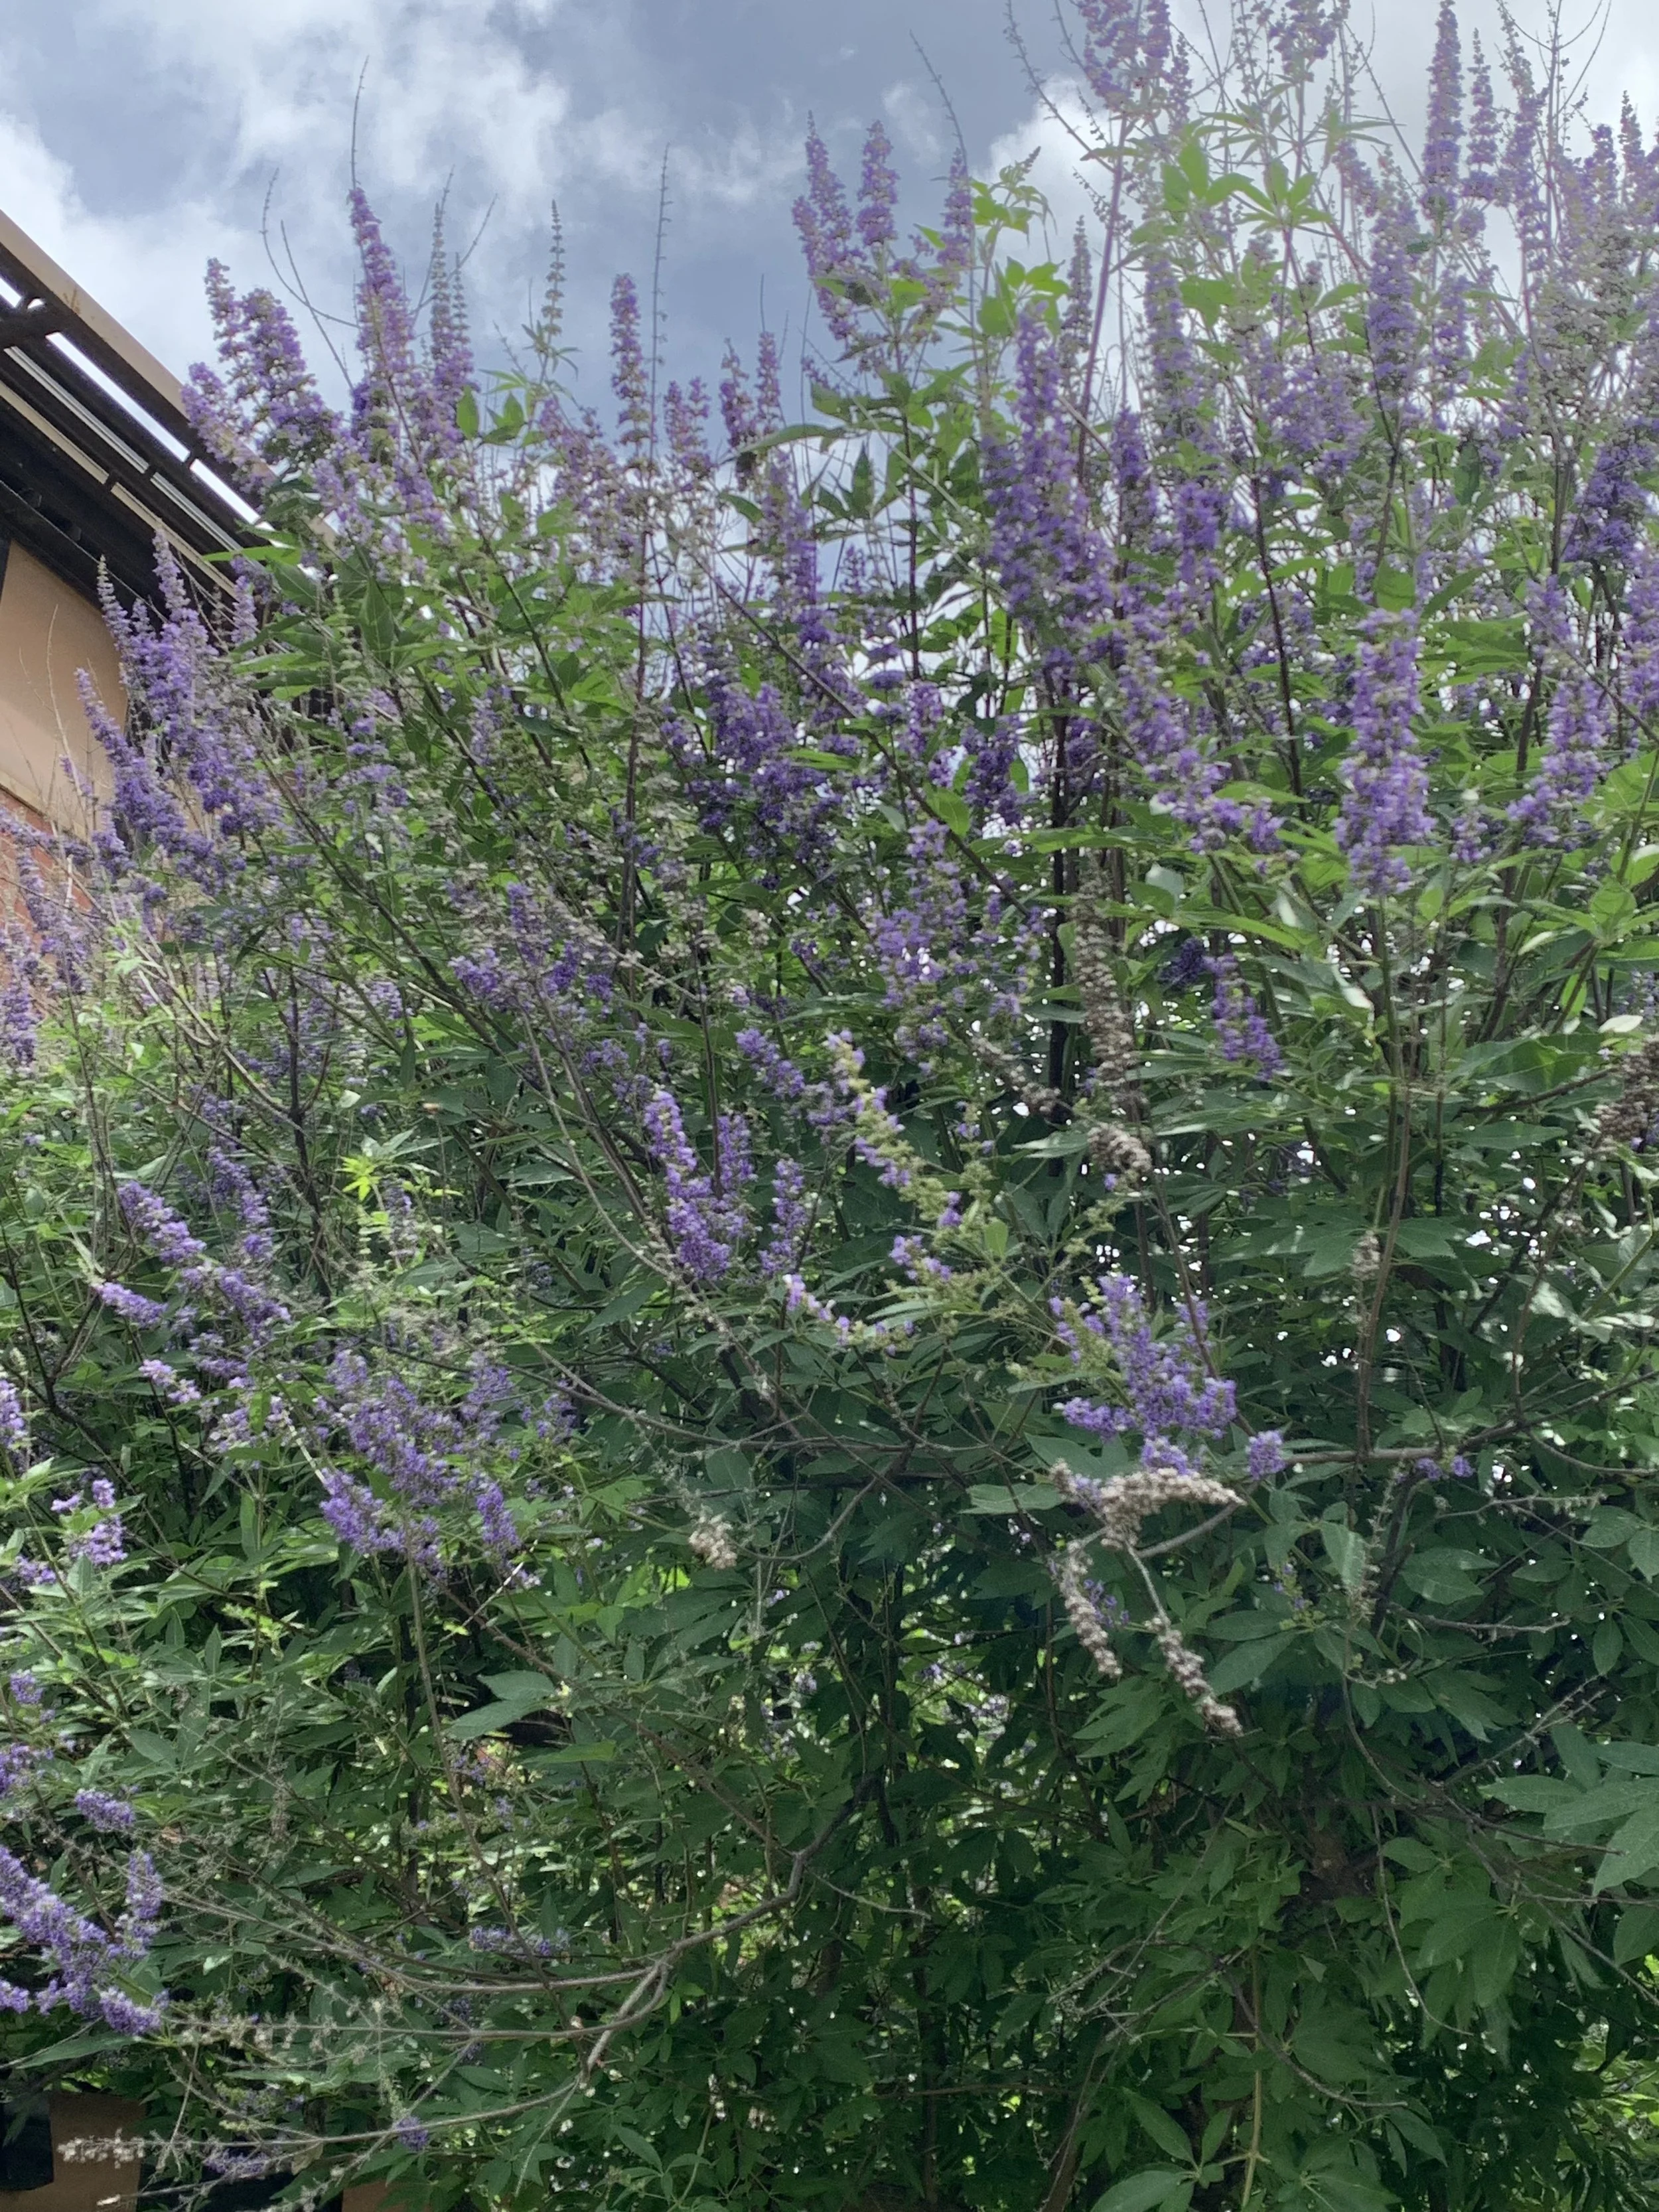
Chaste Tree
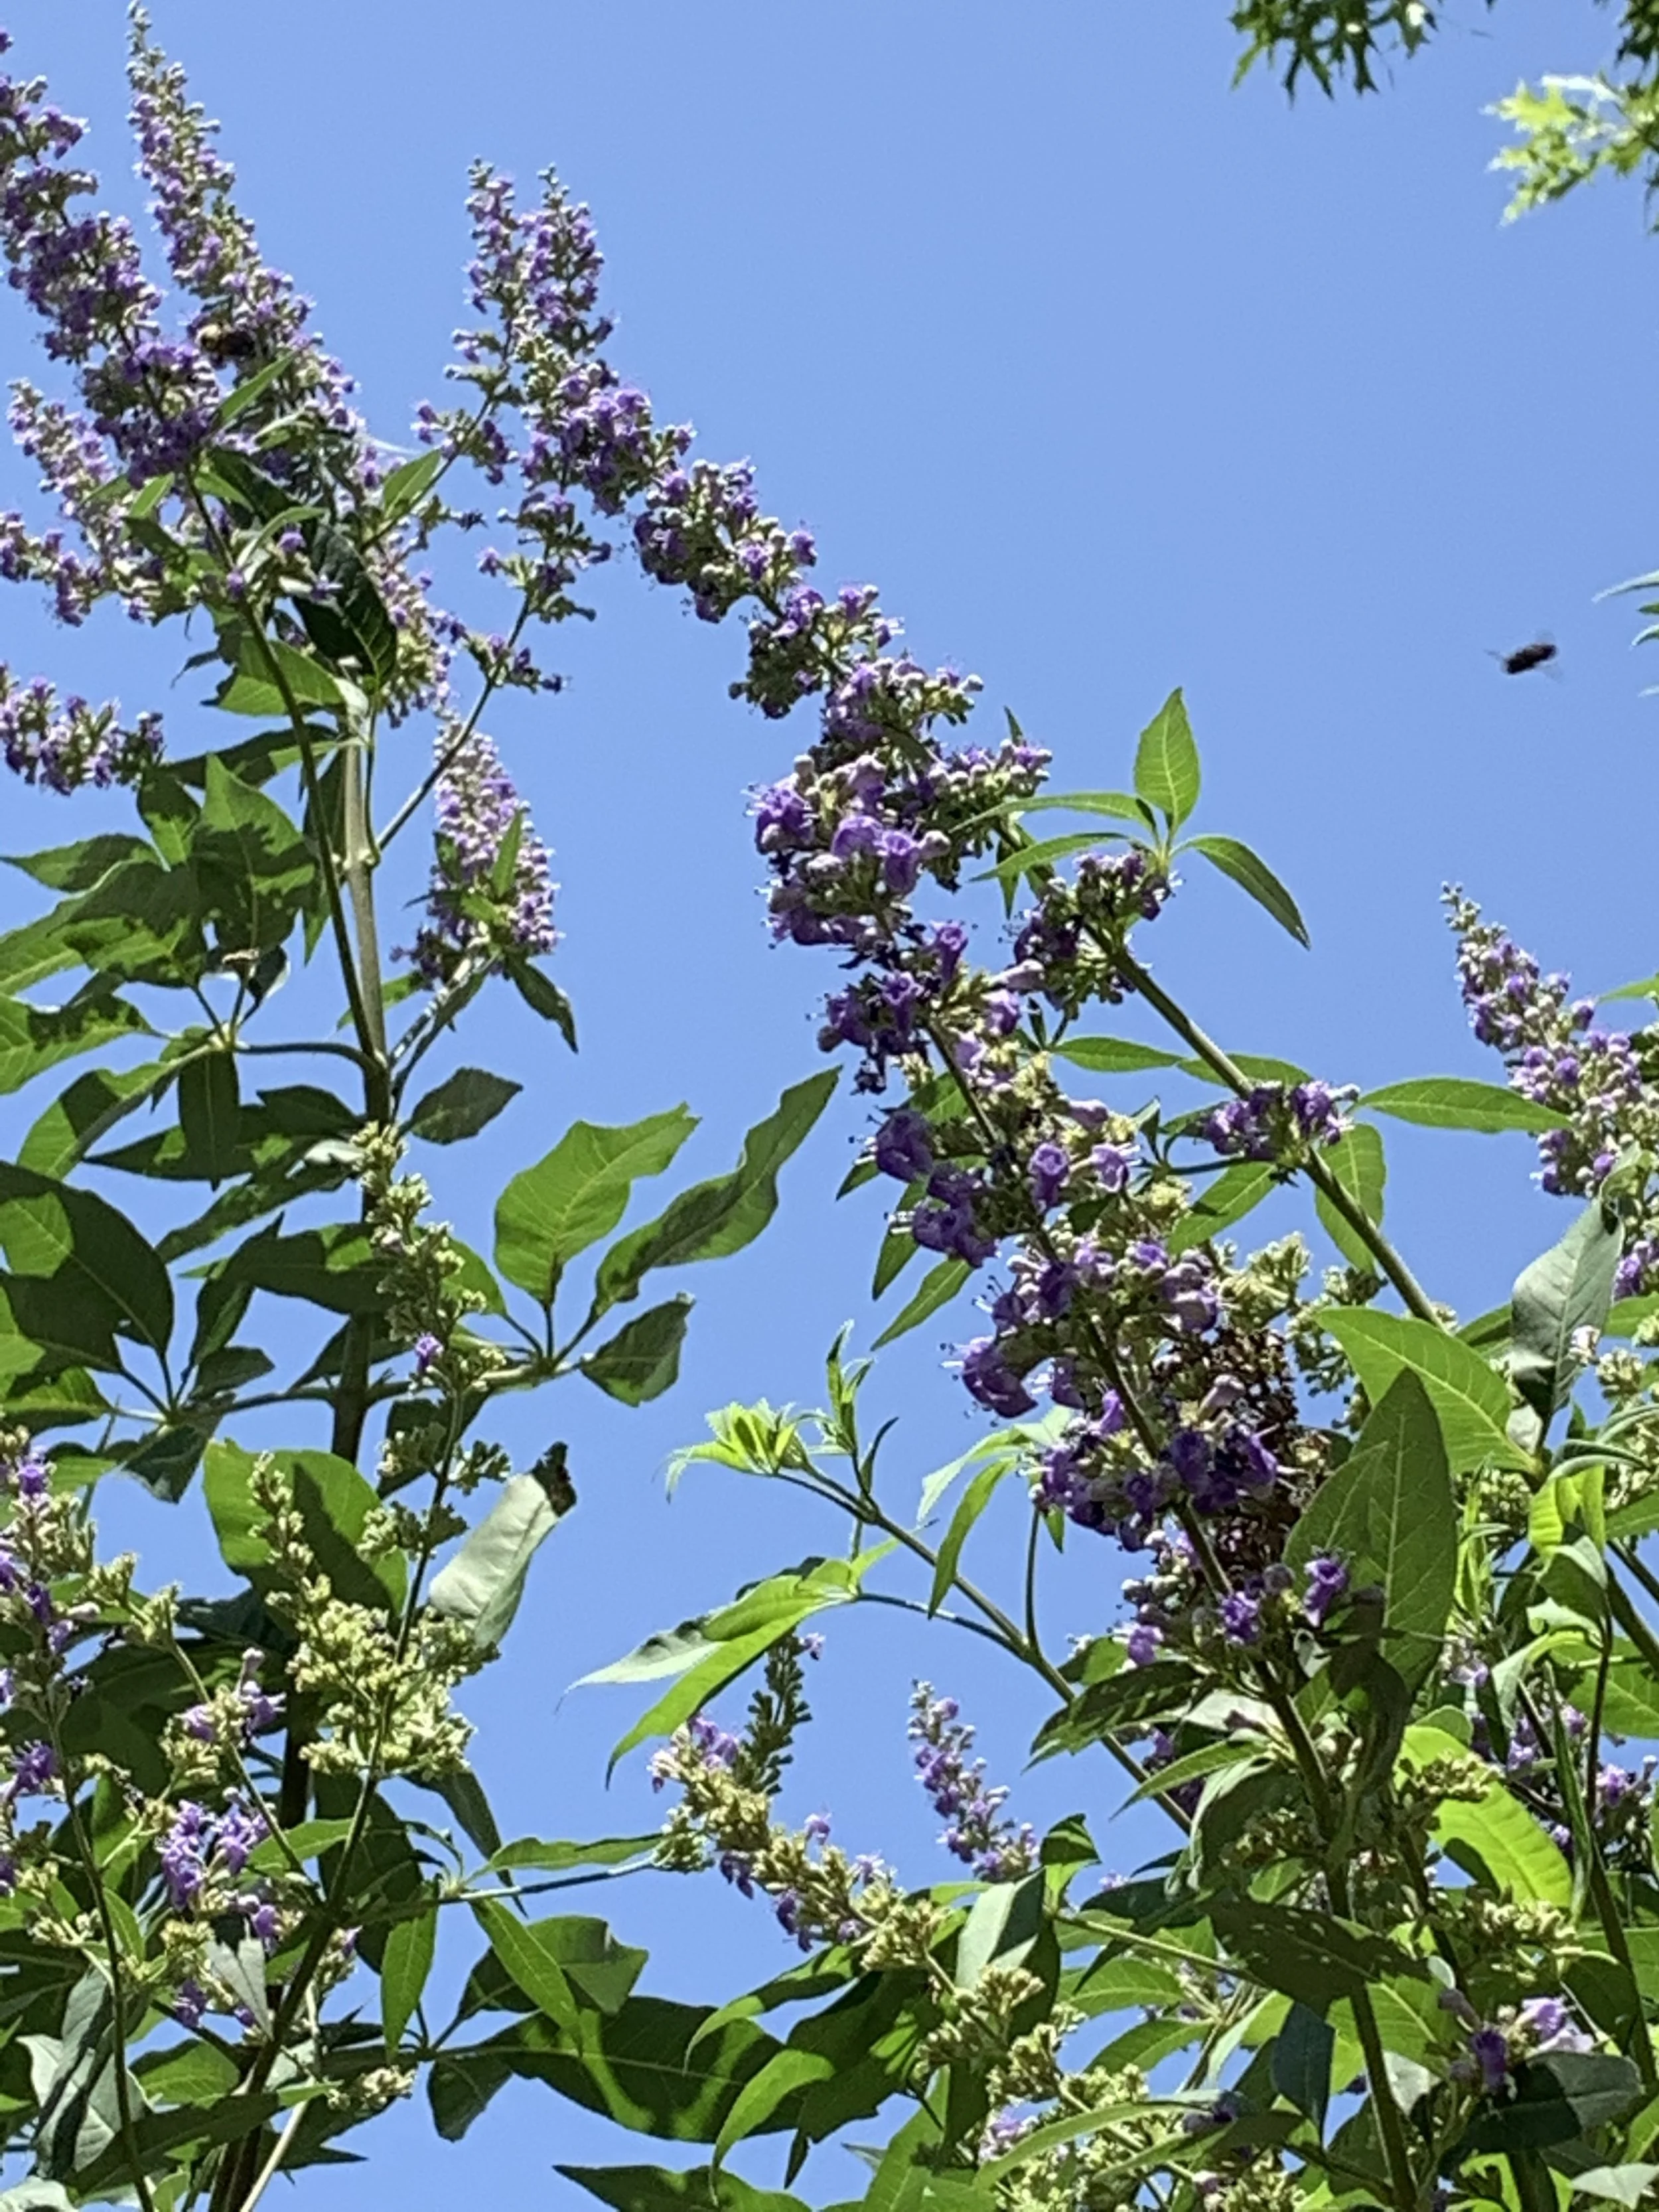
Chaste Tree
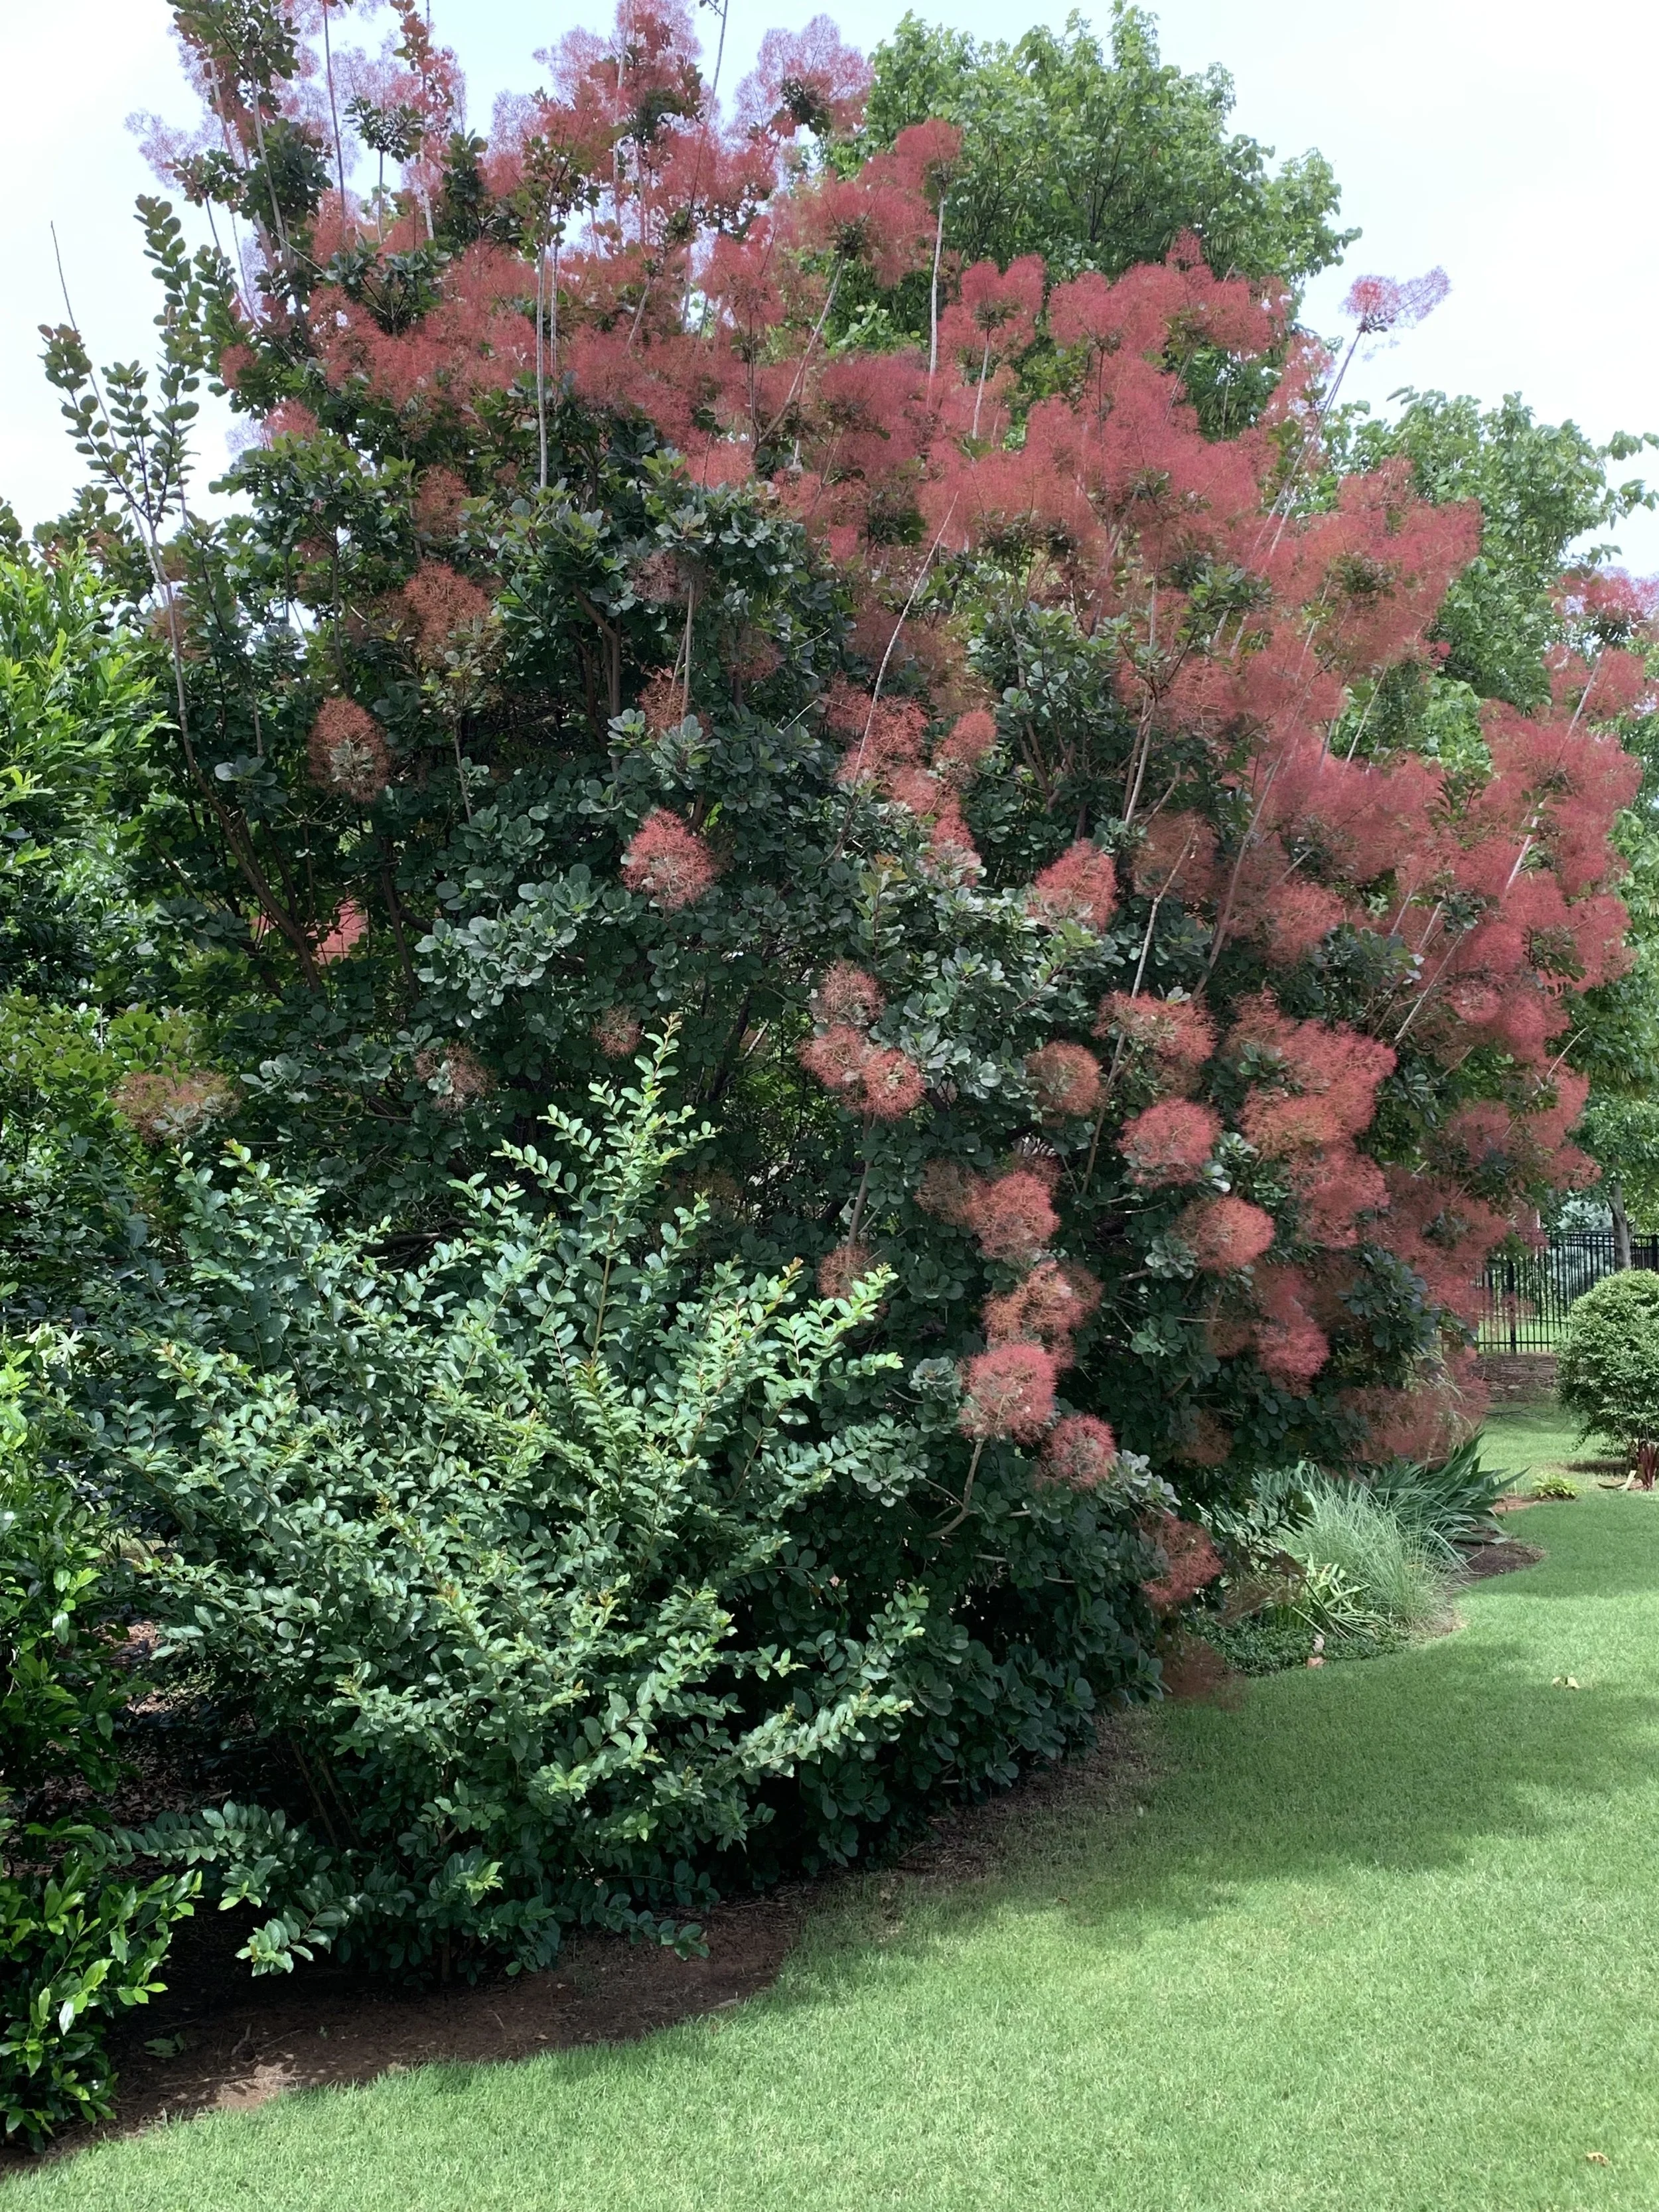
Smoke Tree
Smoke Tree - Varieties of purple or yellow foliage with airy smoke-like plumes in the summer. 15’ tall and 10’ wide.
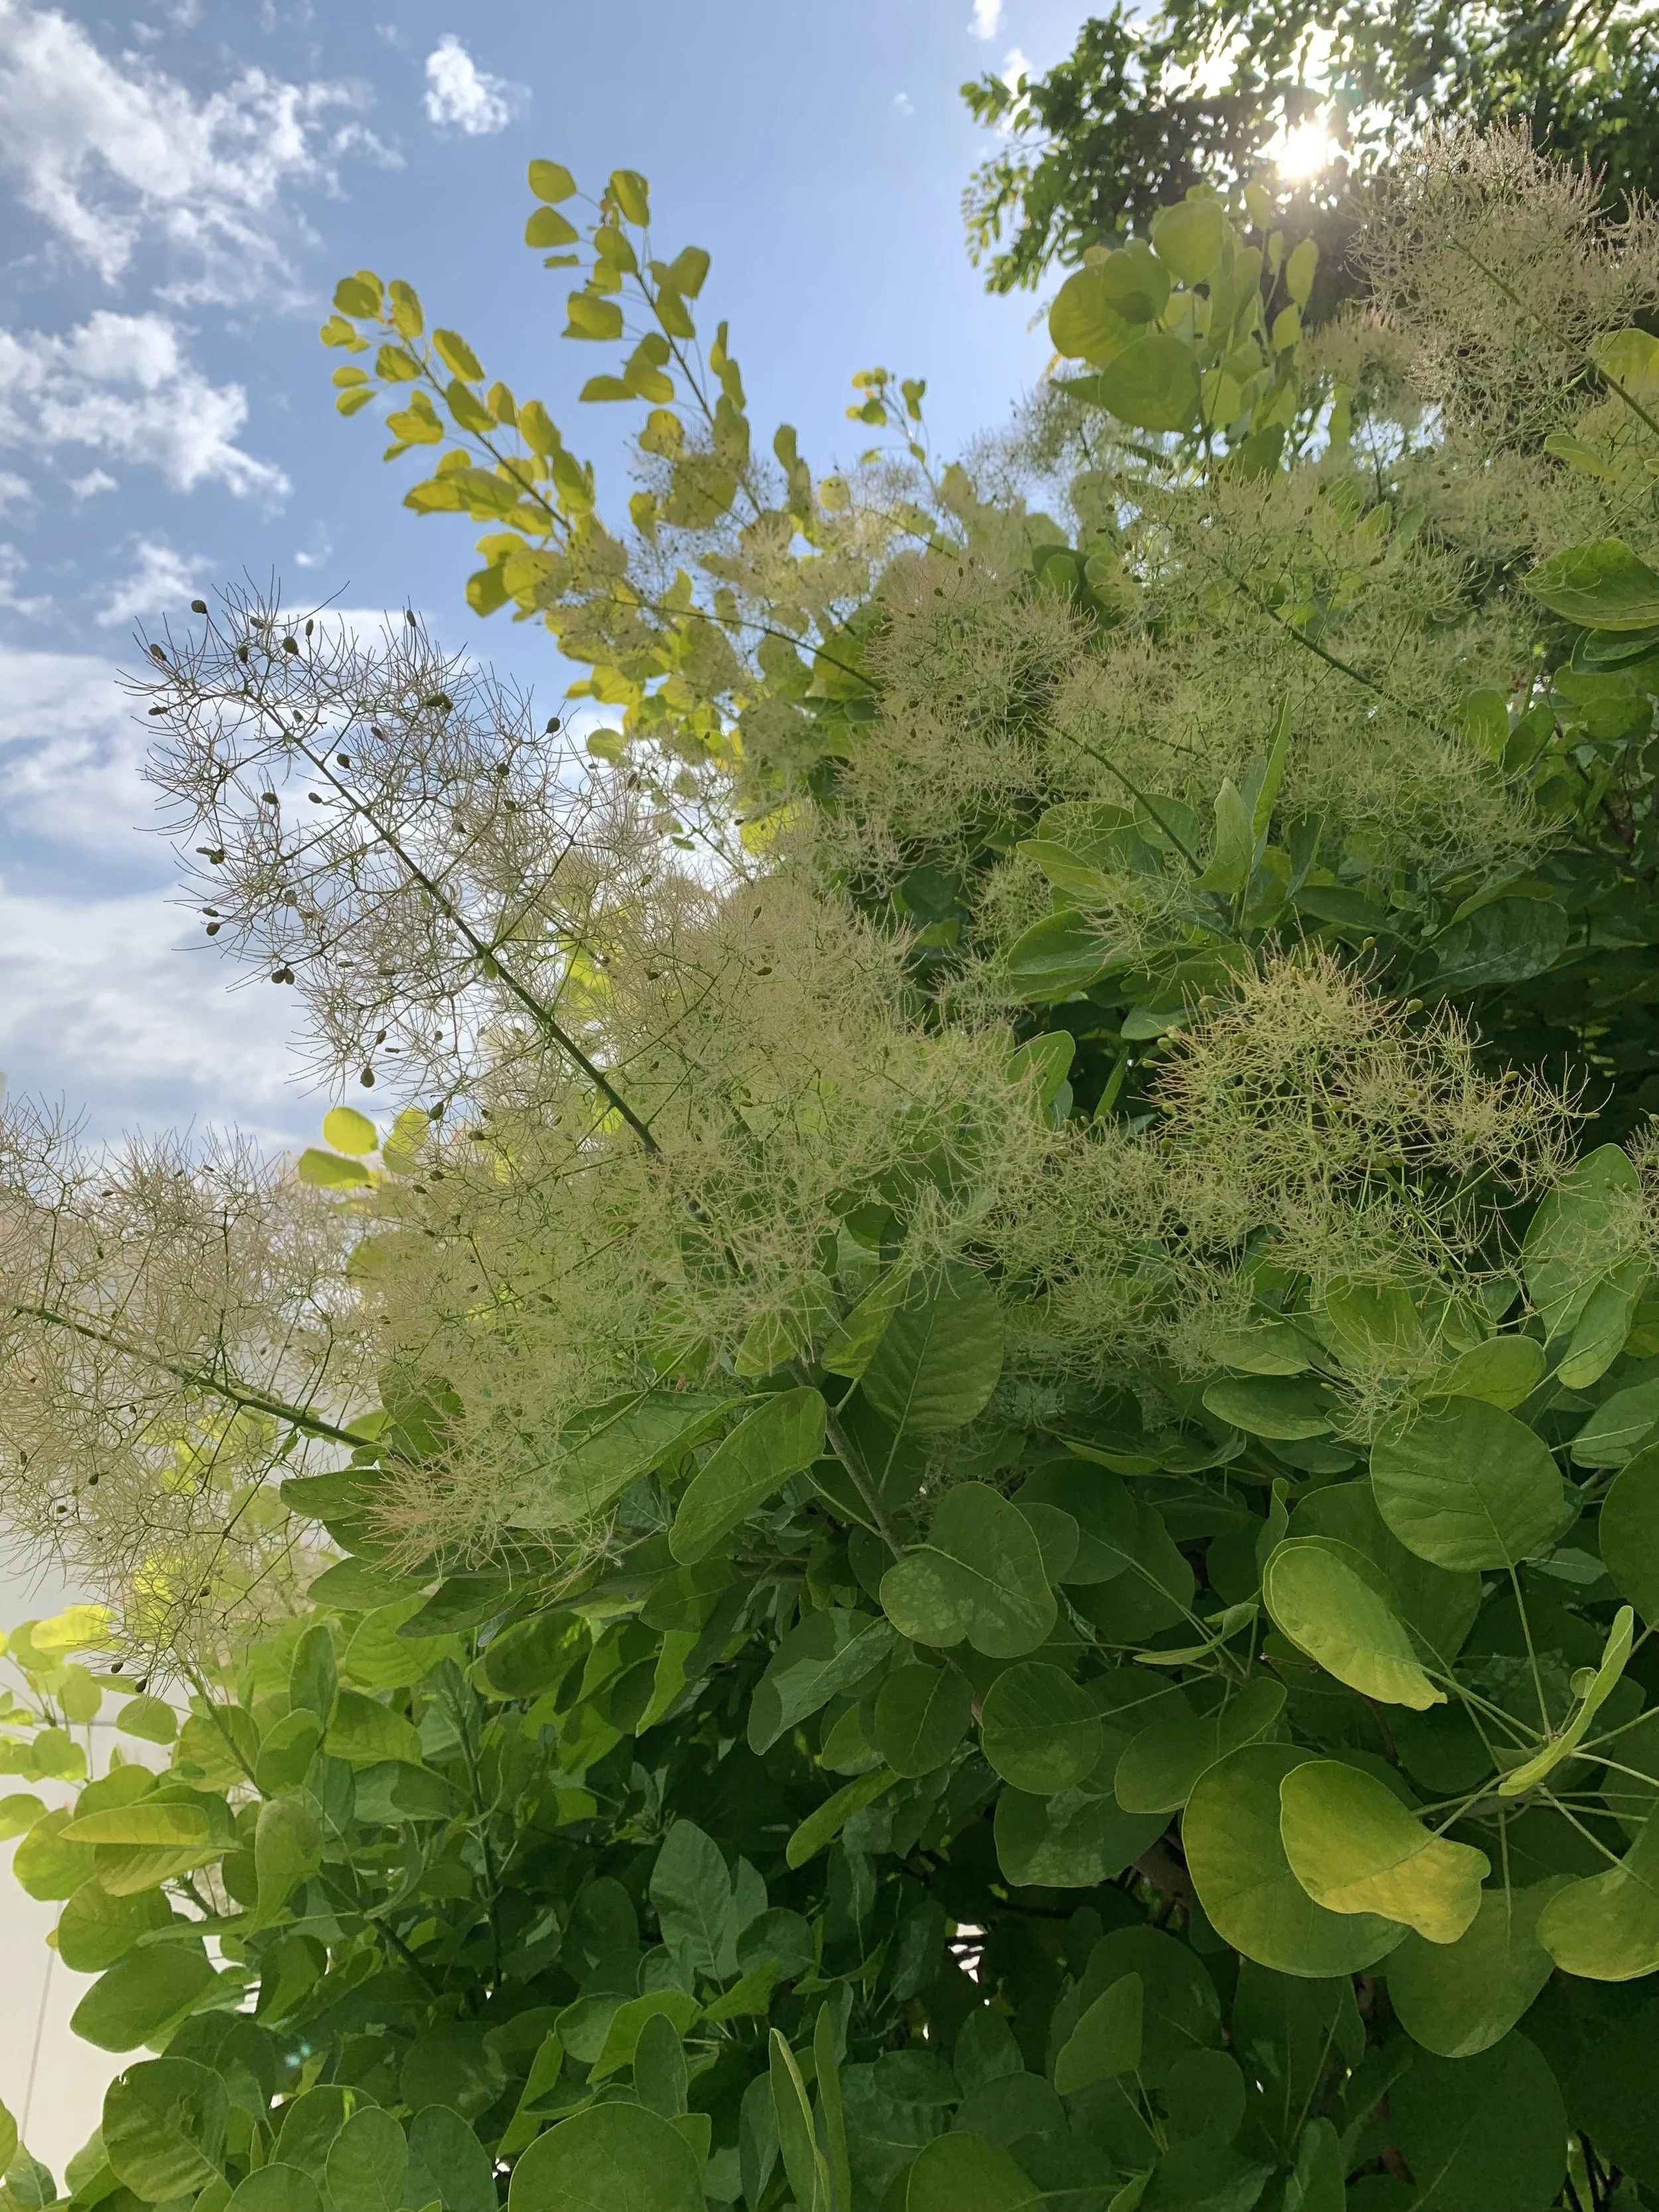
Smoke Tree
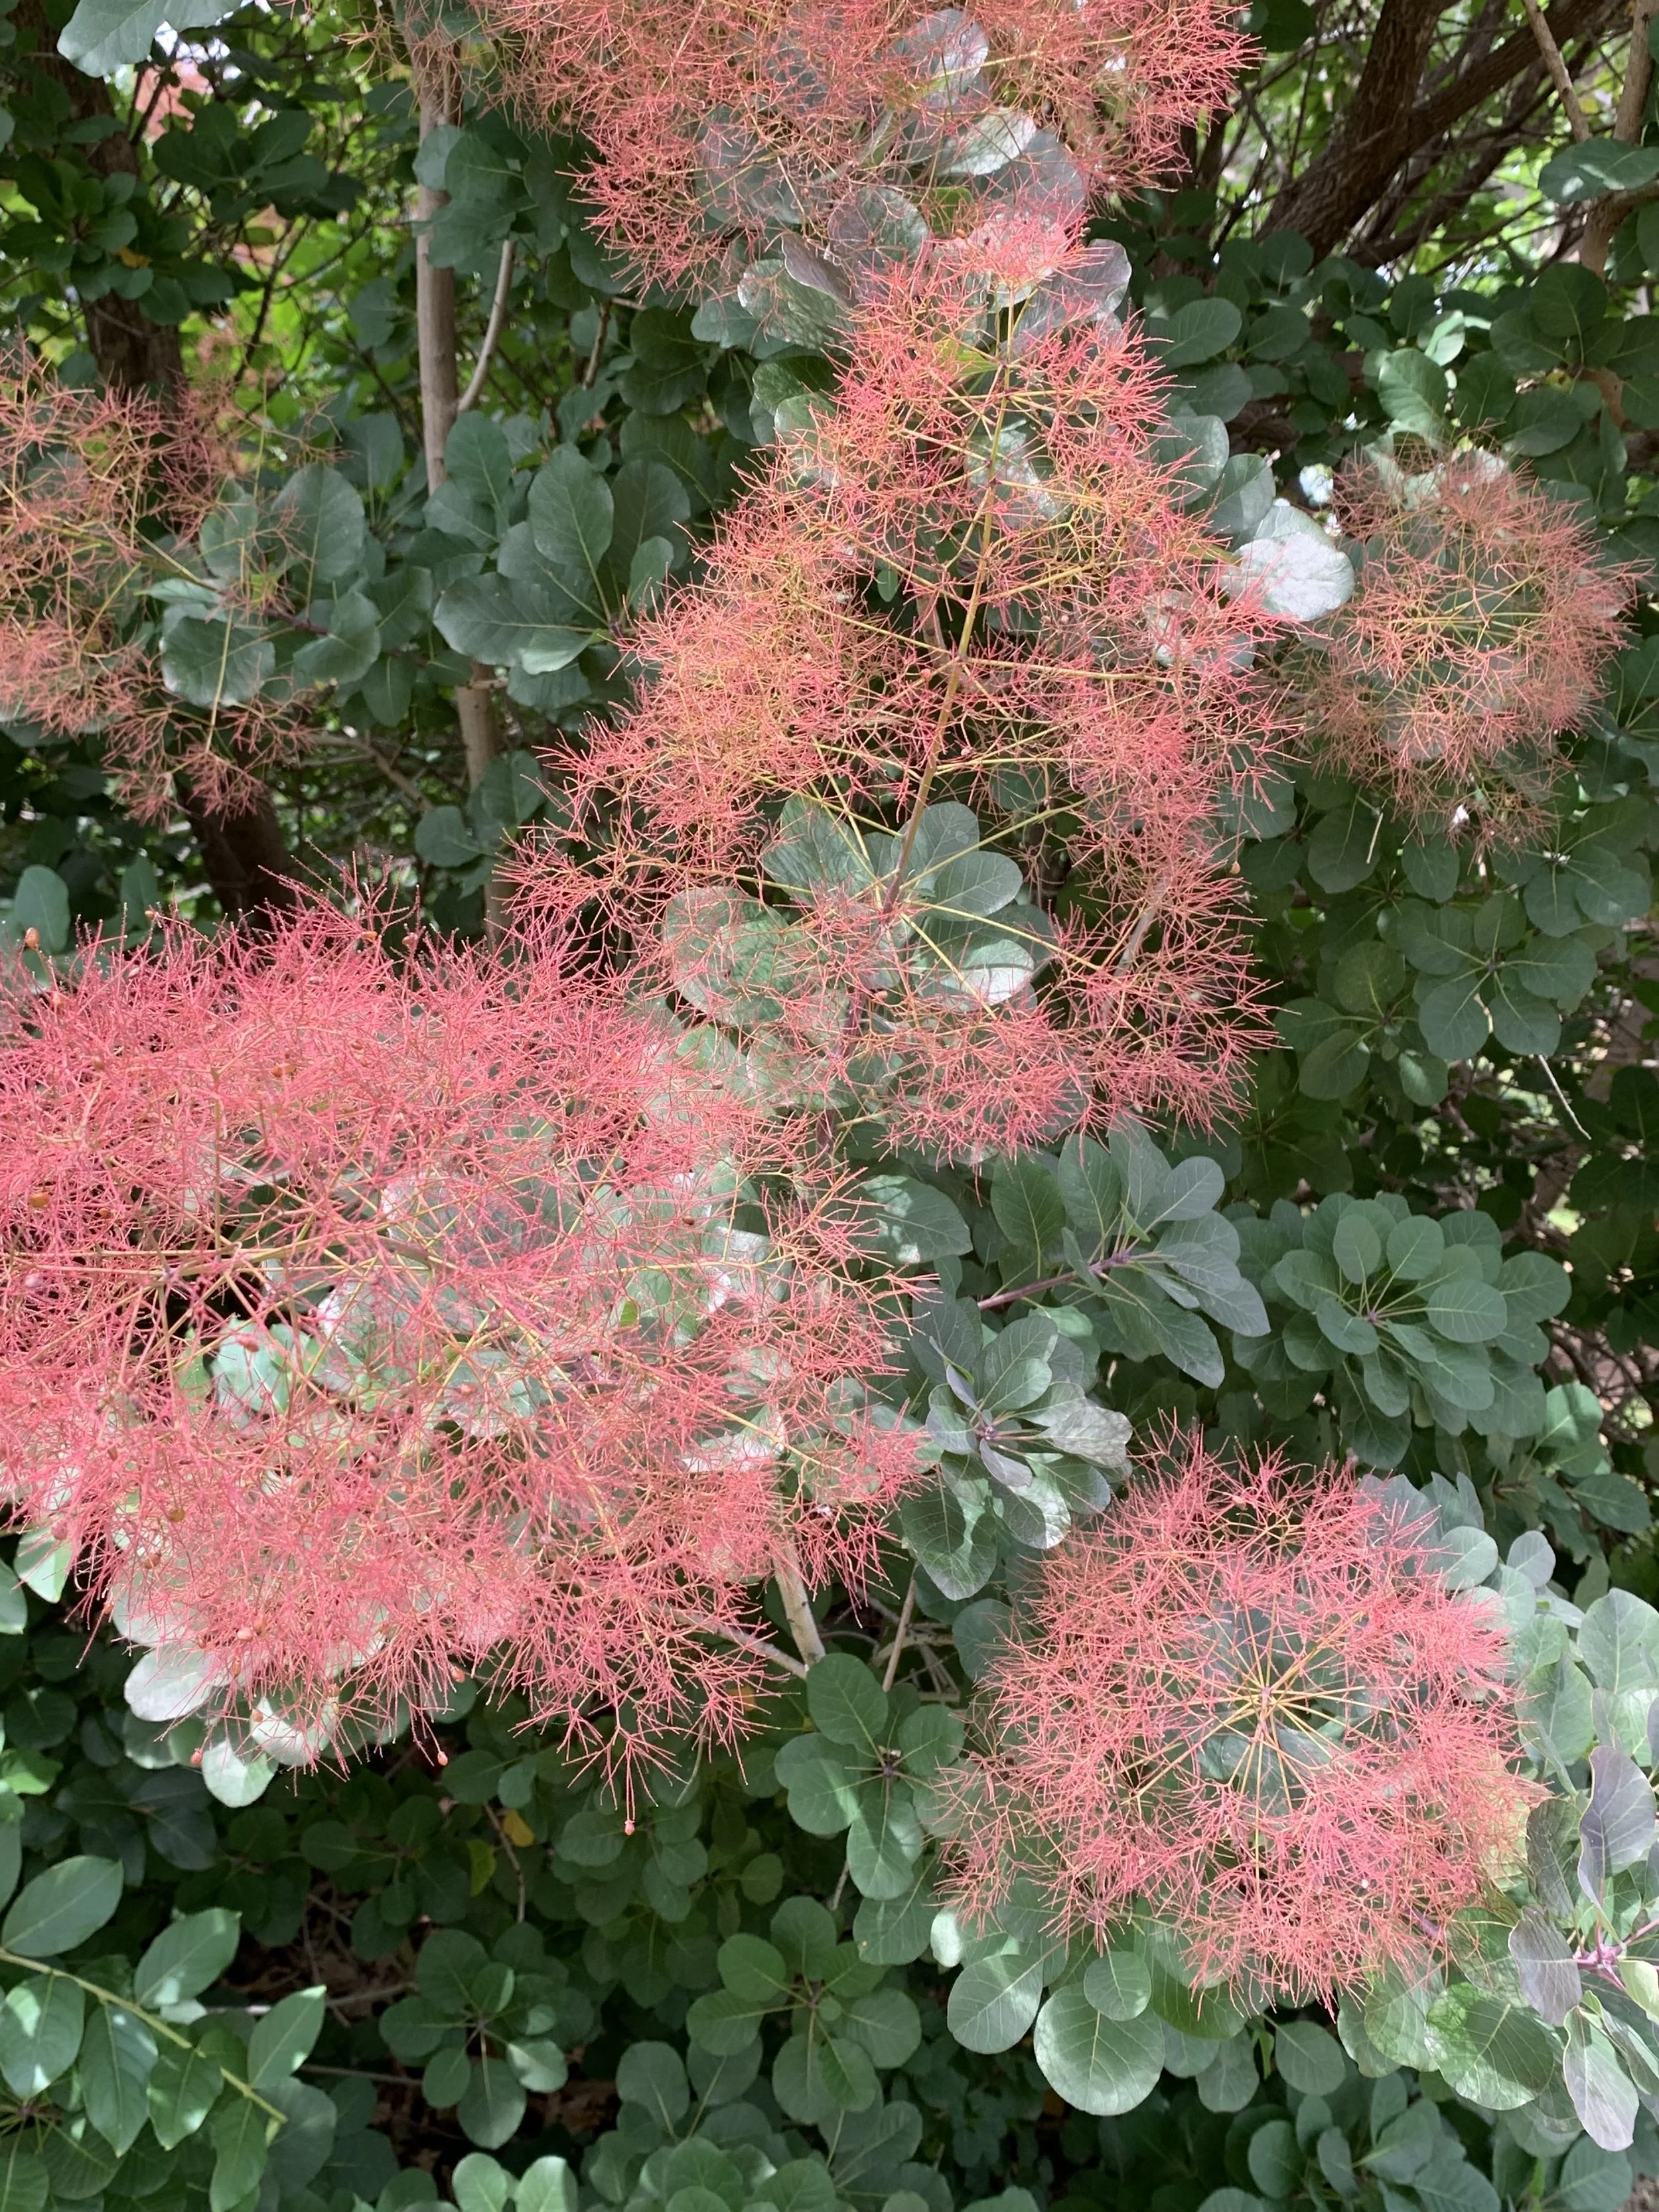
Smoke Tree

Taylor Juniper
Taylor Juniper - Narrow columnar evergreen with bluish-green foliage creating a formal elegant look. Also, can be used to create screening or privacy. 25-30’ tall and only 3’ wide.

Taylor Juniper

Taylor Juniper
These are only a few small trees to consider. The list could go on and on.
How have you used small trees in your landscape?
What small trees do you have in your landscape?
Lorne Hall
Hall | Stewart Lawn + Landscape
(405)367-3873
Thankful v. Grateful

What? Is this the weekly Hall | Stewart post?
I realize you read this every week for the latest lawn and landscape information and the title appears off subject today. It is. You have my permission to go ahead and hit delete now…you won’t hurt my feelings.
This week, Thanksgiving week, had me pondering the difference between ‘being thankful’ vs ‘being grateful’.
I love this time of year. I believe Thanksgiving may be the best holiday on the calendar. It isn’t over-commercialized. It is simple. It is a break in our busyness to spend time with friends and family and give thanks.
Tuesday morning, at our Hall | Stewart Weekly Huddle, we asked the question “What are you thankful for this year?”
The responses ranged from: “My wife!” to “My family!” to “Our team!” to “My newborn baby boy!” to “Our great customers who we get to help have their best lawns!”
However, one team member’s response started me thinking more deeply about thankfulness. Leo said, “I’m thankful for my changed life, my relationship with my Savior, and a life that is on a totally different trajectory than my old life!”
It started me wondering if that was thankfulness or was that gratefulness.
Is there a difference?
A Google search started. Conversations ensued.
Thesaurus.com states that in most cases they are viewed as exact synonyms.
Dictionary.com says they are close synonyms commonly used to mean the same thing.
Exact? Close? Or is there a difference?
I think there is a difference between thankful and grateful.
For me, being thankful is an event. Thankful is when someone does something for you. A gift. A helpful hand. A kind word. It is an acknowledgment of benefits received.
Grateful is something deeper. It is something richer. Gratefulness is felt in the soul. Gratitude comes from the heart. It goes beyond appreciation to a state of being.
I was very thankful to have another Thanksgiving with my mom whose mind has been fading for the past few years. Rarely does it appear she knows who I am anymore, but nonetheless, I was thankful to be with her on Thursday. I am grateful for her impact on my life and my family. She always wanted more for us than she had and encouraged us to achieve far more than we ever thought we could achieve. I am more than thankful for my mom; I have heartfelt gratitude for her.
Another personal example that has me pondering the difference…
A few weeks ago, a DYI home project took a quick turn for the worse resulting in a Saturday afternoon in the emergency room followed by surgery on Monday to put one of my hands back together. I am deeply thankful for the Integris Baptist Emergency Department doctors, nurses, and staff who practiced their craft so wonderfully that afternoon. I am also deeply thankful for a skilled surgeon who had the knowledge and experience to know exactly how to fix my damaged hand. And, the physical therapist who I am spending, and will be spending, way too much time with over the next few weeks, I am tremendously thankful.
But, it is the deepest heartfelt gratefulness I have for my wife who has so patiently woken up to my early schedule every day for the last 5 weeks to help me get ready and tie my shoes. I am more than thankful for her; I am grateful she is by my side as I heal.
It is gratefulness I feel that my dad was with me when the accident happened, got me to the hospital quickly, and then returned to finish my project in the days that followed. It is gratefulness I feel for family and friends who called, texted, prayed and showed up to check on Lori during my surgery. It is gratefulness that I feel for my Hall | Stewart partner and team members who stepped up to cover the workload I couldn’t do with my one un-injured hand.
Grateful is a deeper, stronger, more emotional version of thankful.
Thankful is recognition of a transaction.
Grateful is recognition, an acknowledgment of the difference others make in our lives.
Seth Godin said it well this week in his Thanksgiving Day post, “The magic of gratitude is that it improves everything it touches.”
Gratitude is a state of being. A position of gratitude changes your perspective.
What are your thoughts? Are they the same or is there a difference?
(I promise to return to talking about what we know best – lawns and landscapes!)
May your days be filled with a spirit of gratitude!
Lorne Hall
Hall | Stewart
(405)367-3873
Your Lawn & Landscape Still Needs Moisture… Even During The Off Season!

As the lawn and landscape season winds down there is one very important never-ending task: Monitoring the weather to make sure your lawn and landscape is receiving enough moisture.
After last week’s 2.5” of rainfall followed by our first freeze this week, the temptation is to turn the irrigation off and roll up the hoses. But, if your lawn and landscape could talk, they would be encouraging you to not cut off the water just yet and be prepared to give them a drink from time to time through the winter.
Most winter plant injury occurs when we receive a harsh cold spell while plant root systems are dry.
Sure, your lawn, trees, shrubs, and flowers don’t need as much water through the winter, but they do need some. Your landscape needs at least ½” of moisture every two weeks through the winter.
Current Watering Recommendation:
Give your lawn and landscape a good deep soaking every 4-7 days.

Pansies need moisture through the winter to survive and make a strong spring show.
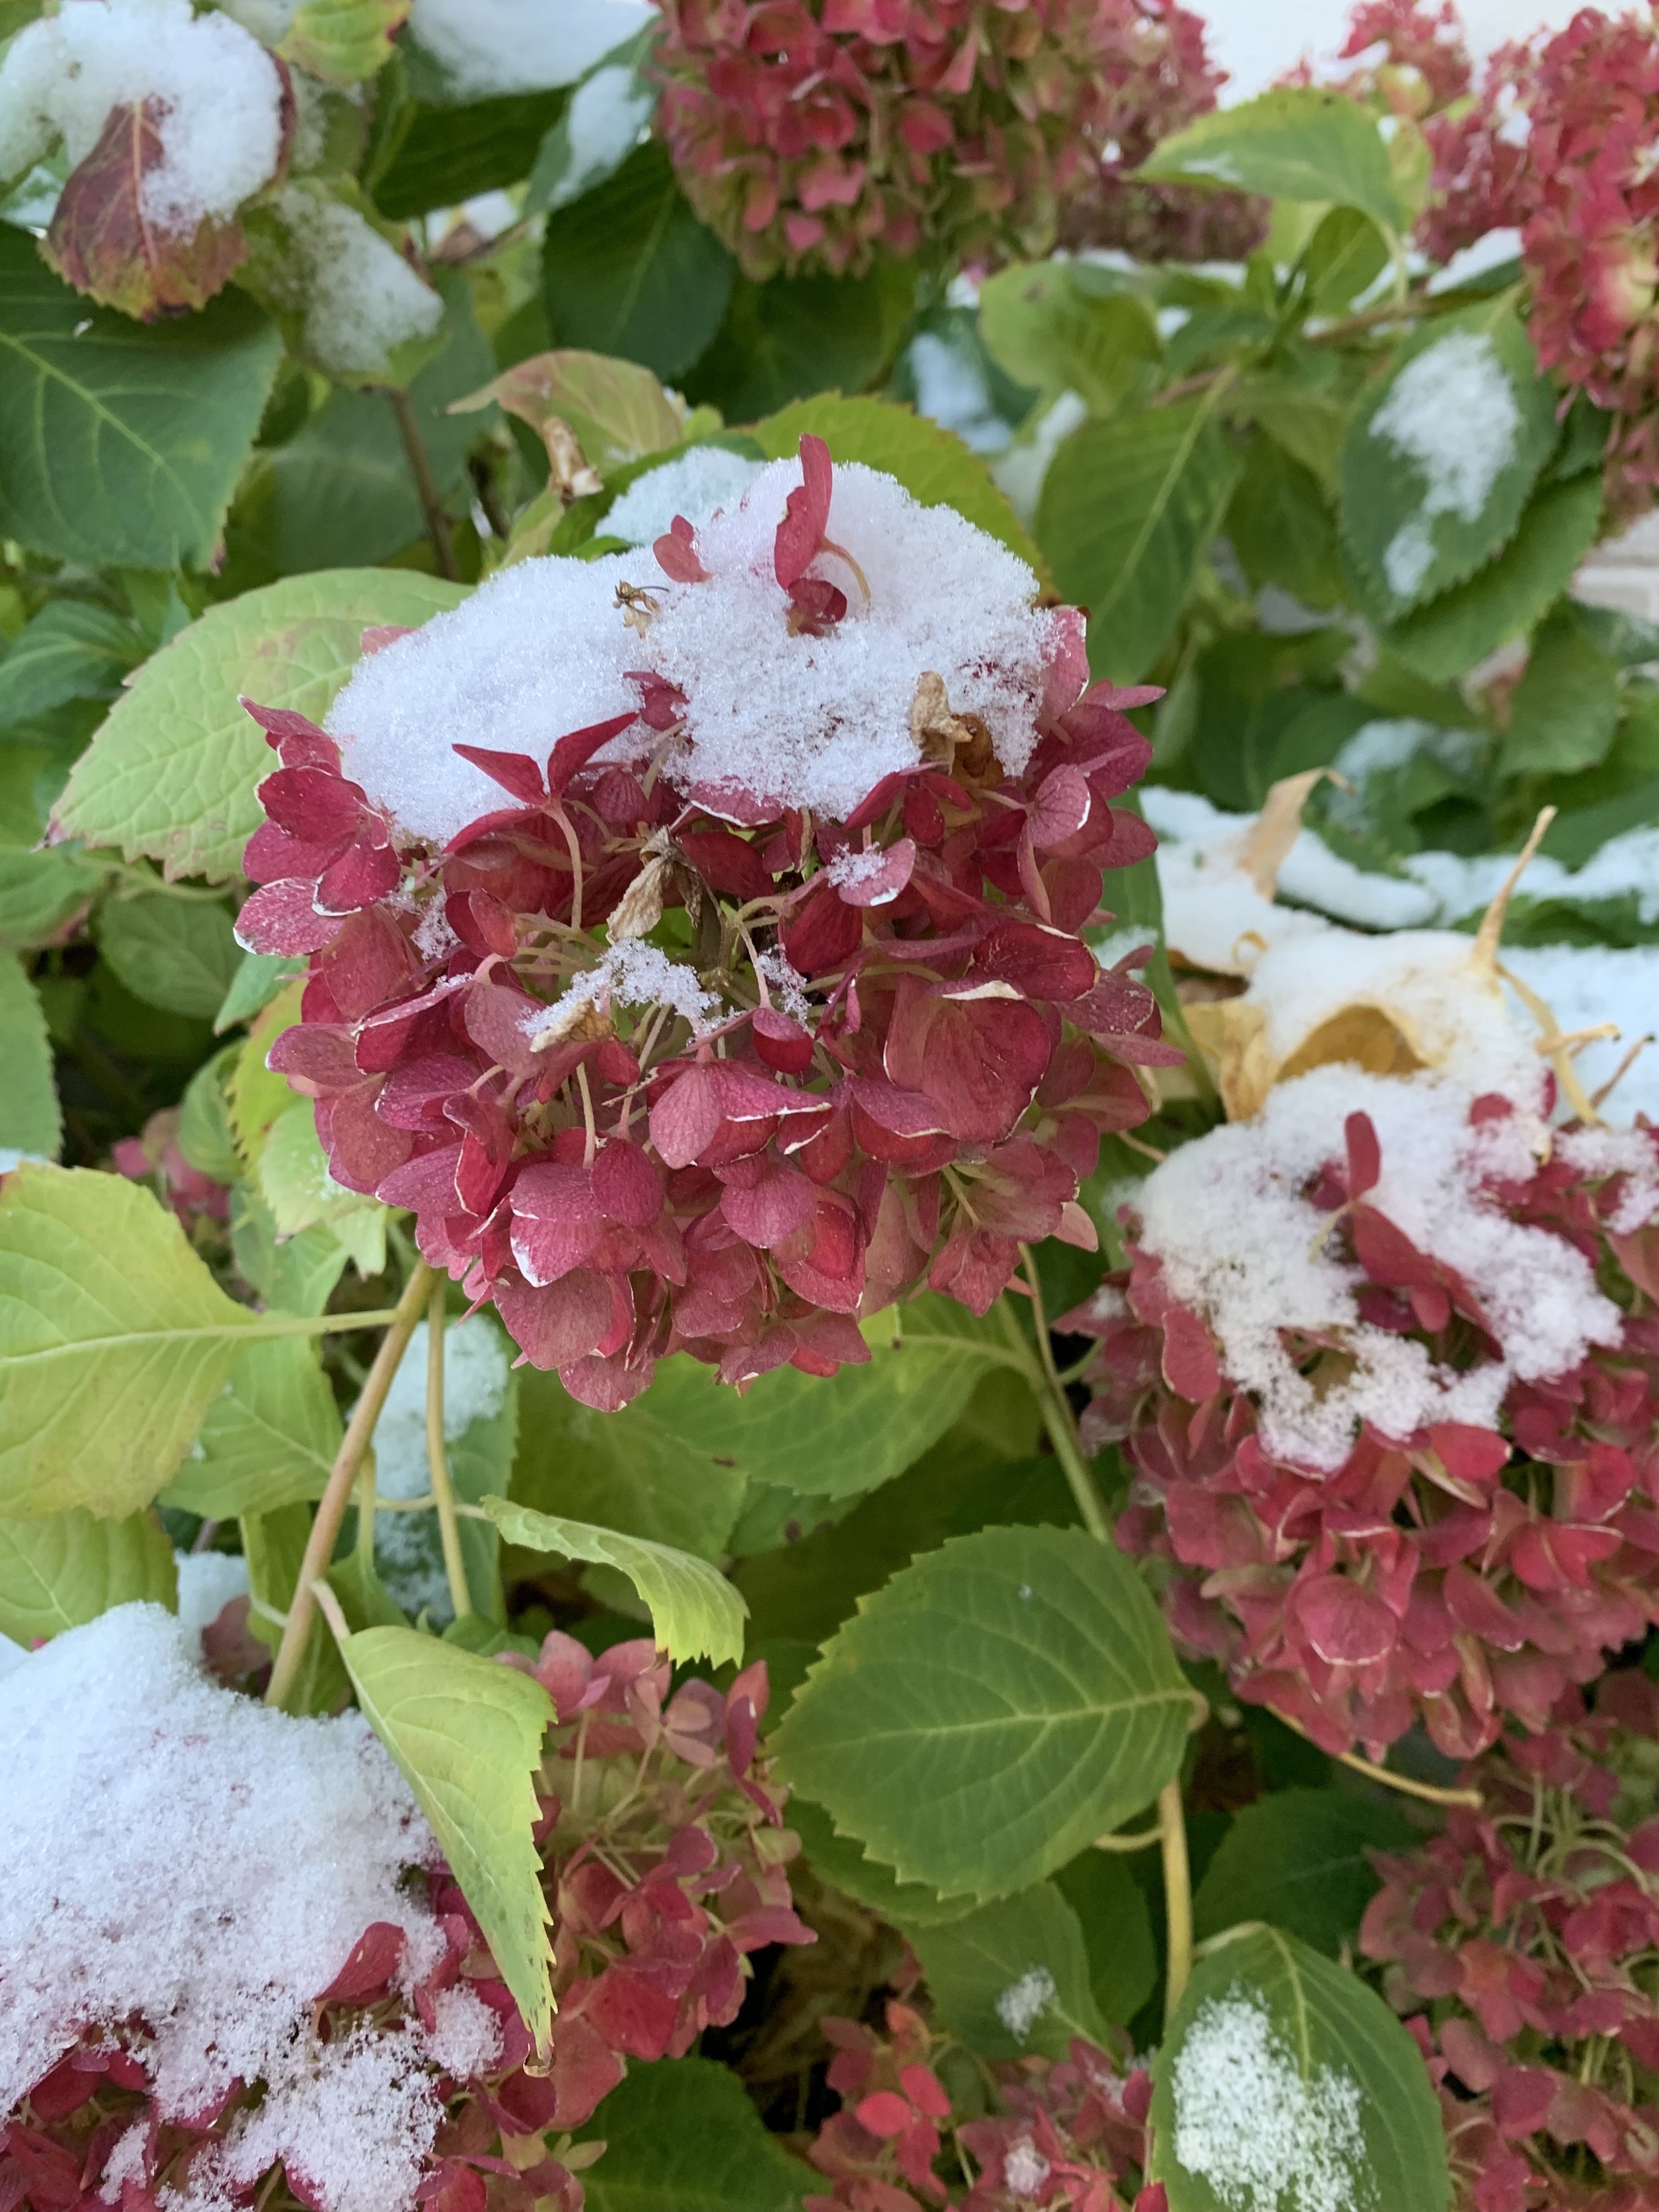
Make it a part of your routine from now until spring to check soil moisture and rainfall amounts at least once a week. A great source is the Oklahoma Mesonet. The Oklahoma Mesonet is a world-class network of environmental monitoring stations that consists of 120 stations throughout Oklahoma.
Use this link to check current soil moisture: https://www.mesonet.org/index.php/weather/map/2-inch_fractional_water_index/soil_moisture
Use this link to see the amount of rainfall in the last week: https://www.mesonet.org/index.php/weather/map/7_day_rainfall_accumulation/rainfall
Throughout the off season take advantage of nice, warm, light wind days
and give your lawn and landscape a good soaking.


Evergreens and fescue require more water attention during the winter.

Japanese maples have shallow roots that are susceptible to drying out during the winter.

Fescue and rye lawns will retain more color over the winter if the soil is moist went temperatures below 30 degrees.
Newly sodded lawns, due to a shallow root system, can experience freeze damage if the roots are dry during a winter cold spell.
Finally, all newer landscapes, those installed in the last two years require a little more watering attention over the winter.
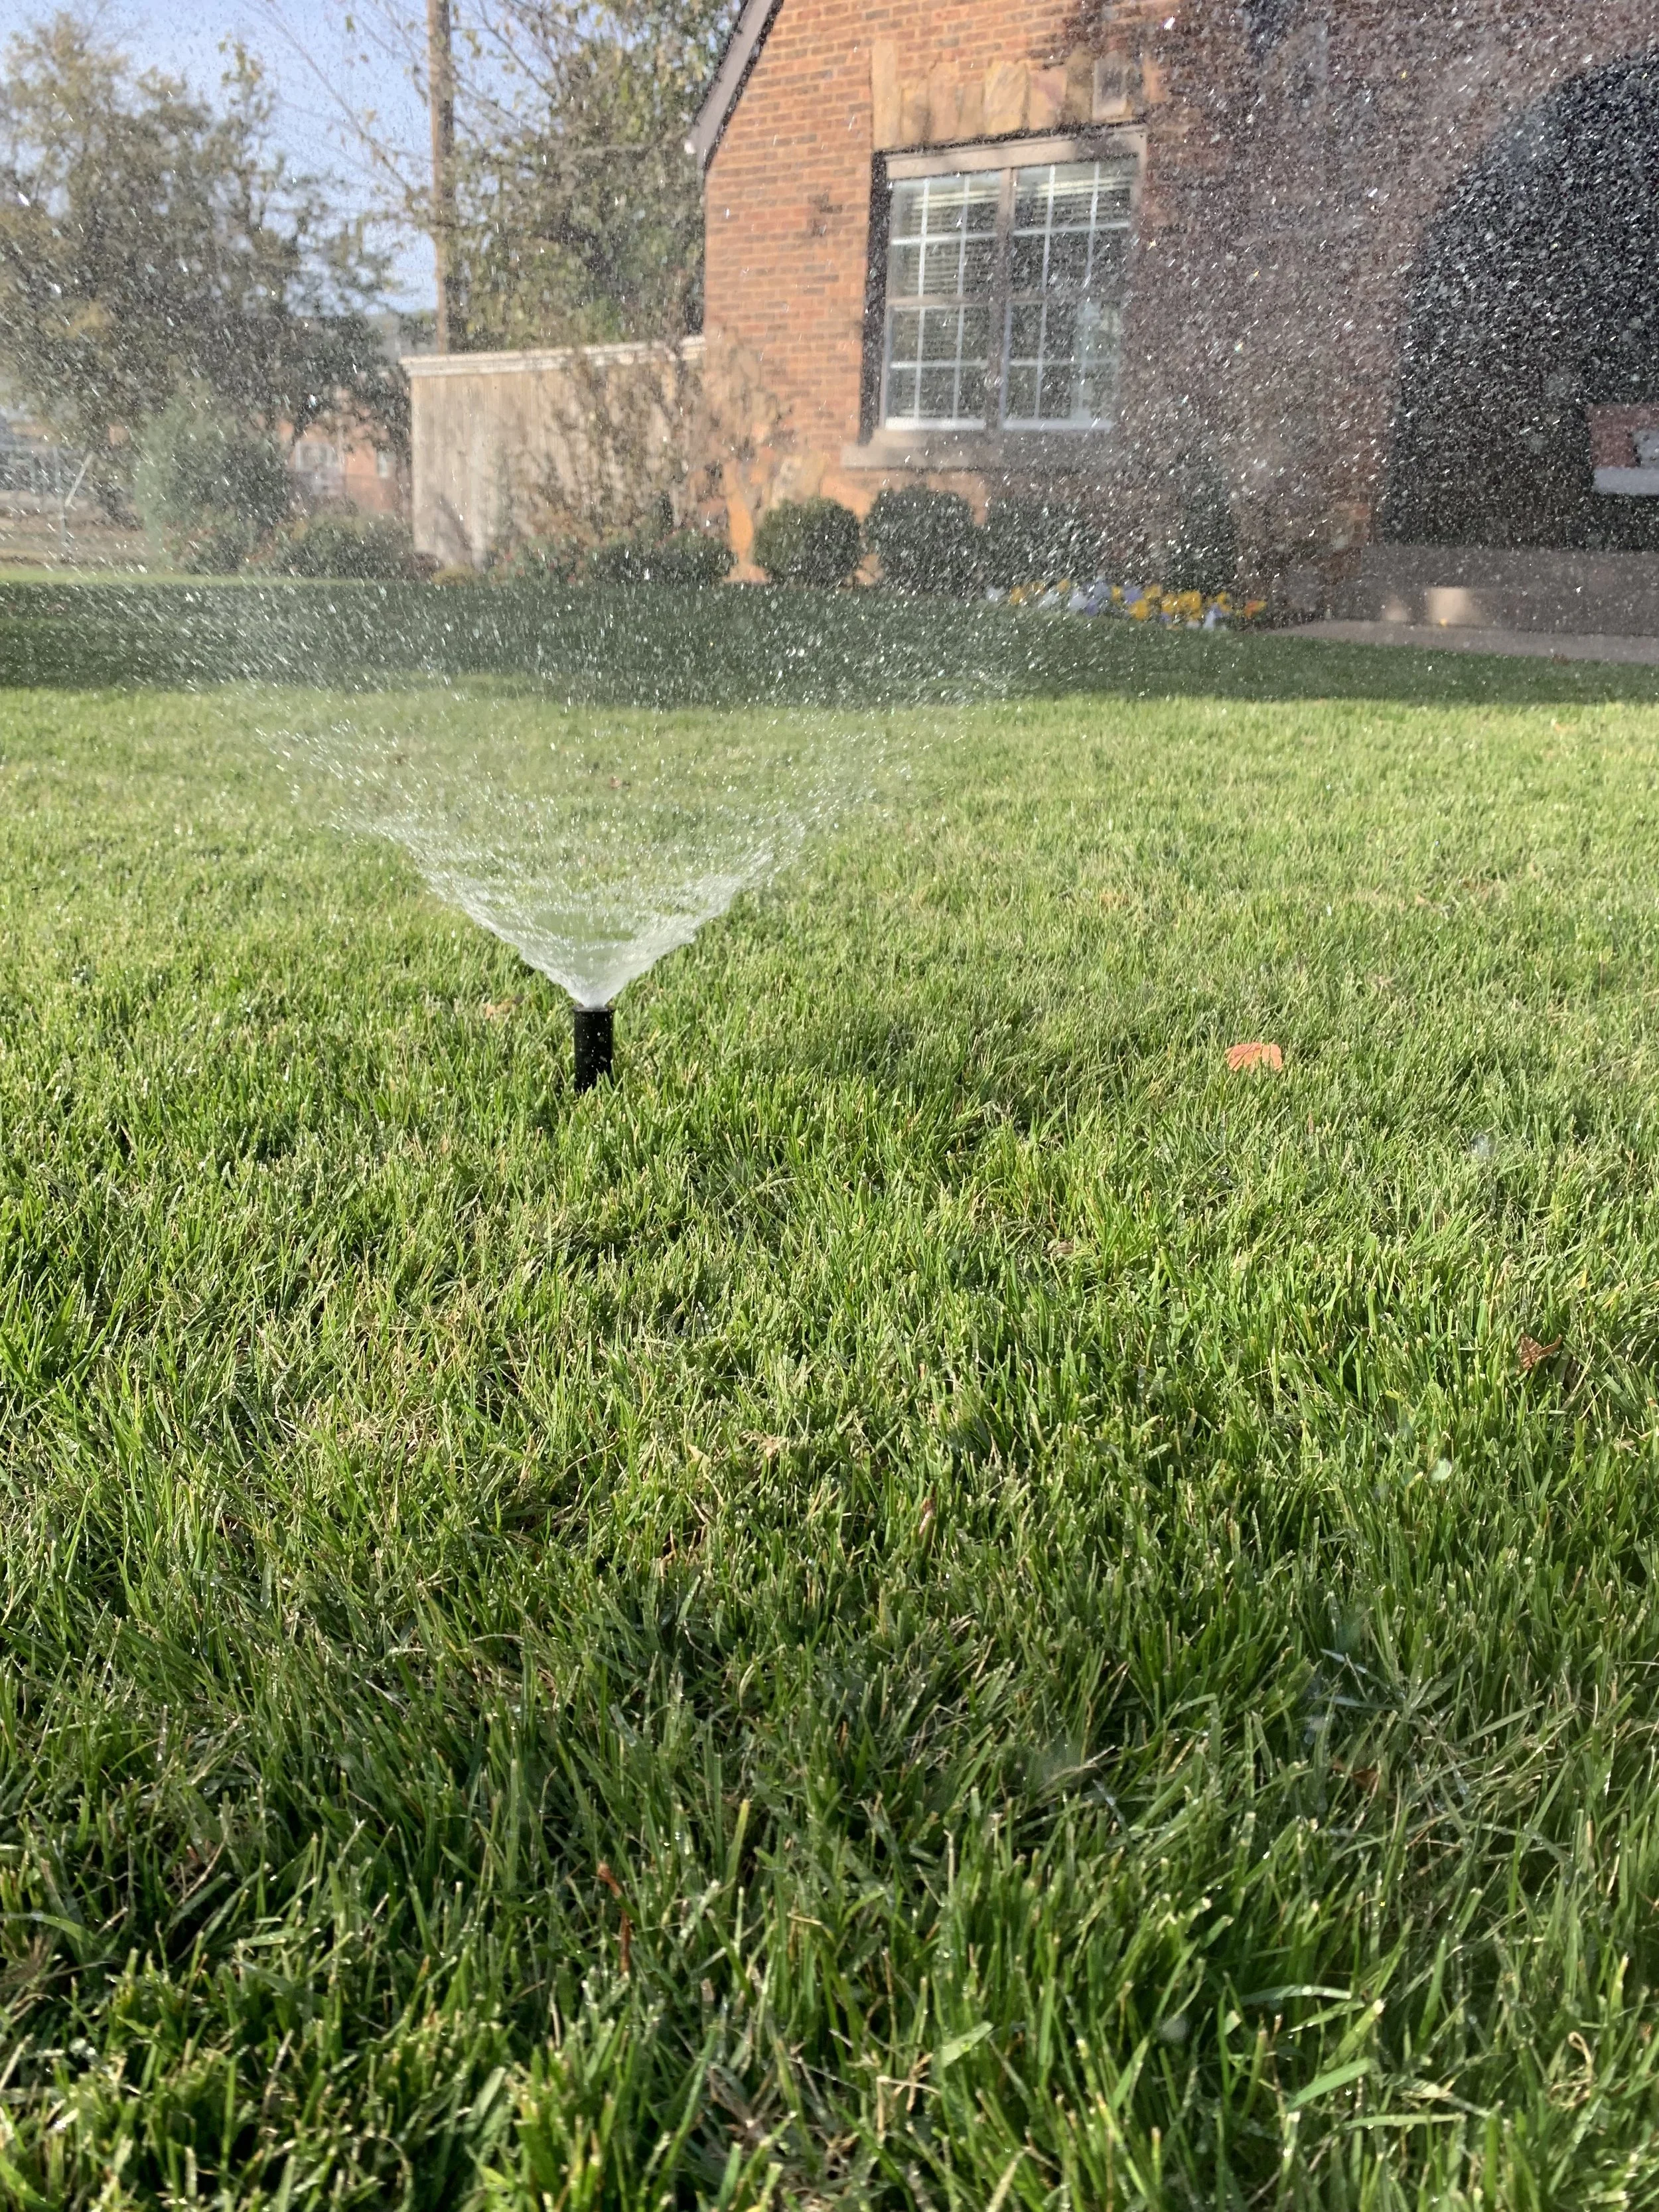
Watering Through the Off Season - Monitor the weather. Pay attention to the amount of rainfall we are receiving. Anytime we go a week without a good rain or snow cover, pick a warm day and run your system through a cycle. If you don’t have an irrigation system, pick an enjoyable day, stretch out the hoses and make sure all plant material receives a good soaking.

Pansies are a great winter annual as long as they aren’t bone dry when a cold front arrives.


A dry, windy and cold winter is hard on needle evergreens. Through a dry winter a good deep soaking every other week will help them survive.
Winter watering is particularly critical for evergreen shrubs and trees. Windy days zap the moisture stored in their leaves making them sensitive to winter injury when we receive a harsh cold snap when they are dry.
Shallow rooted plants, such as: azalea and Japanese maple are also prone to winter injury when they do not receive regular moisture during dormancy.
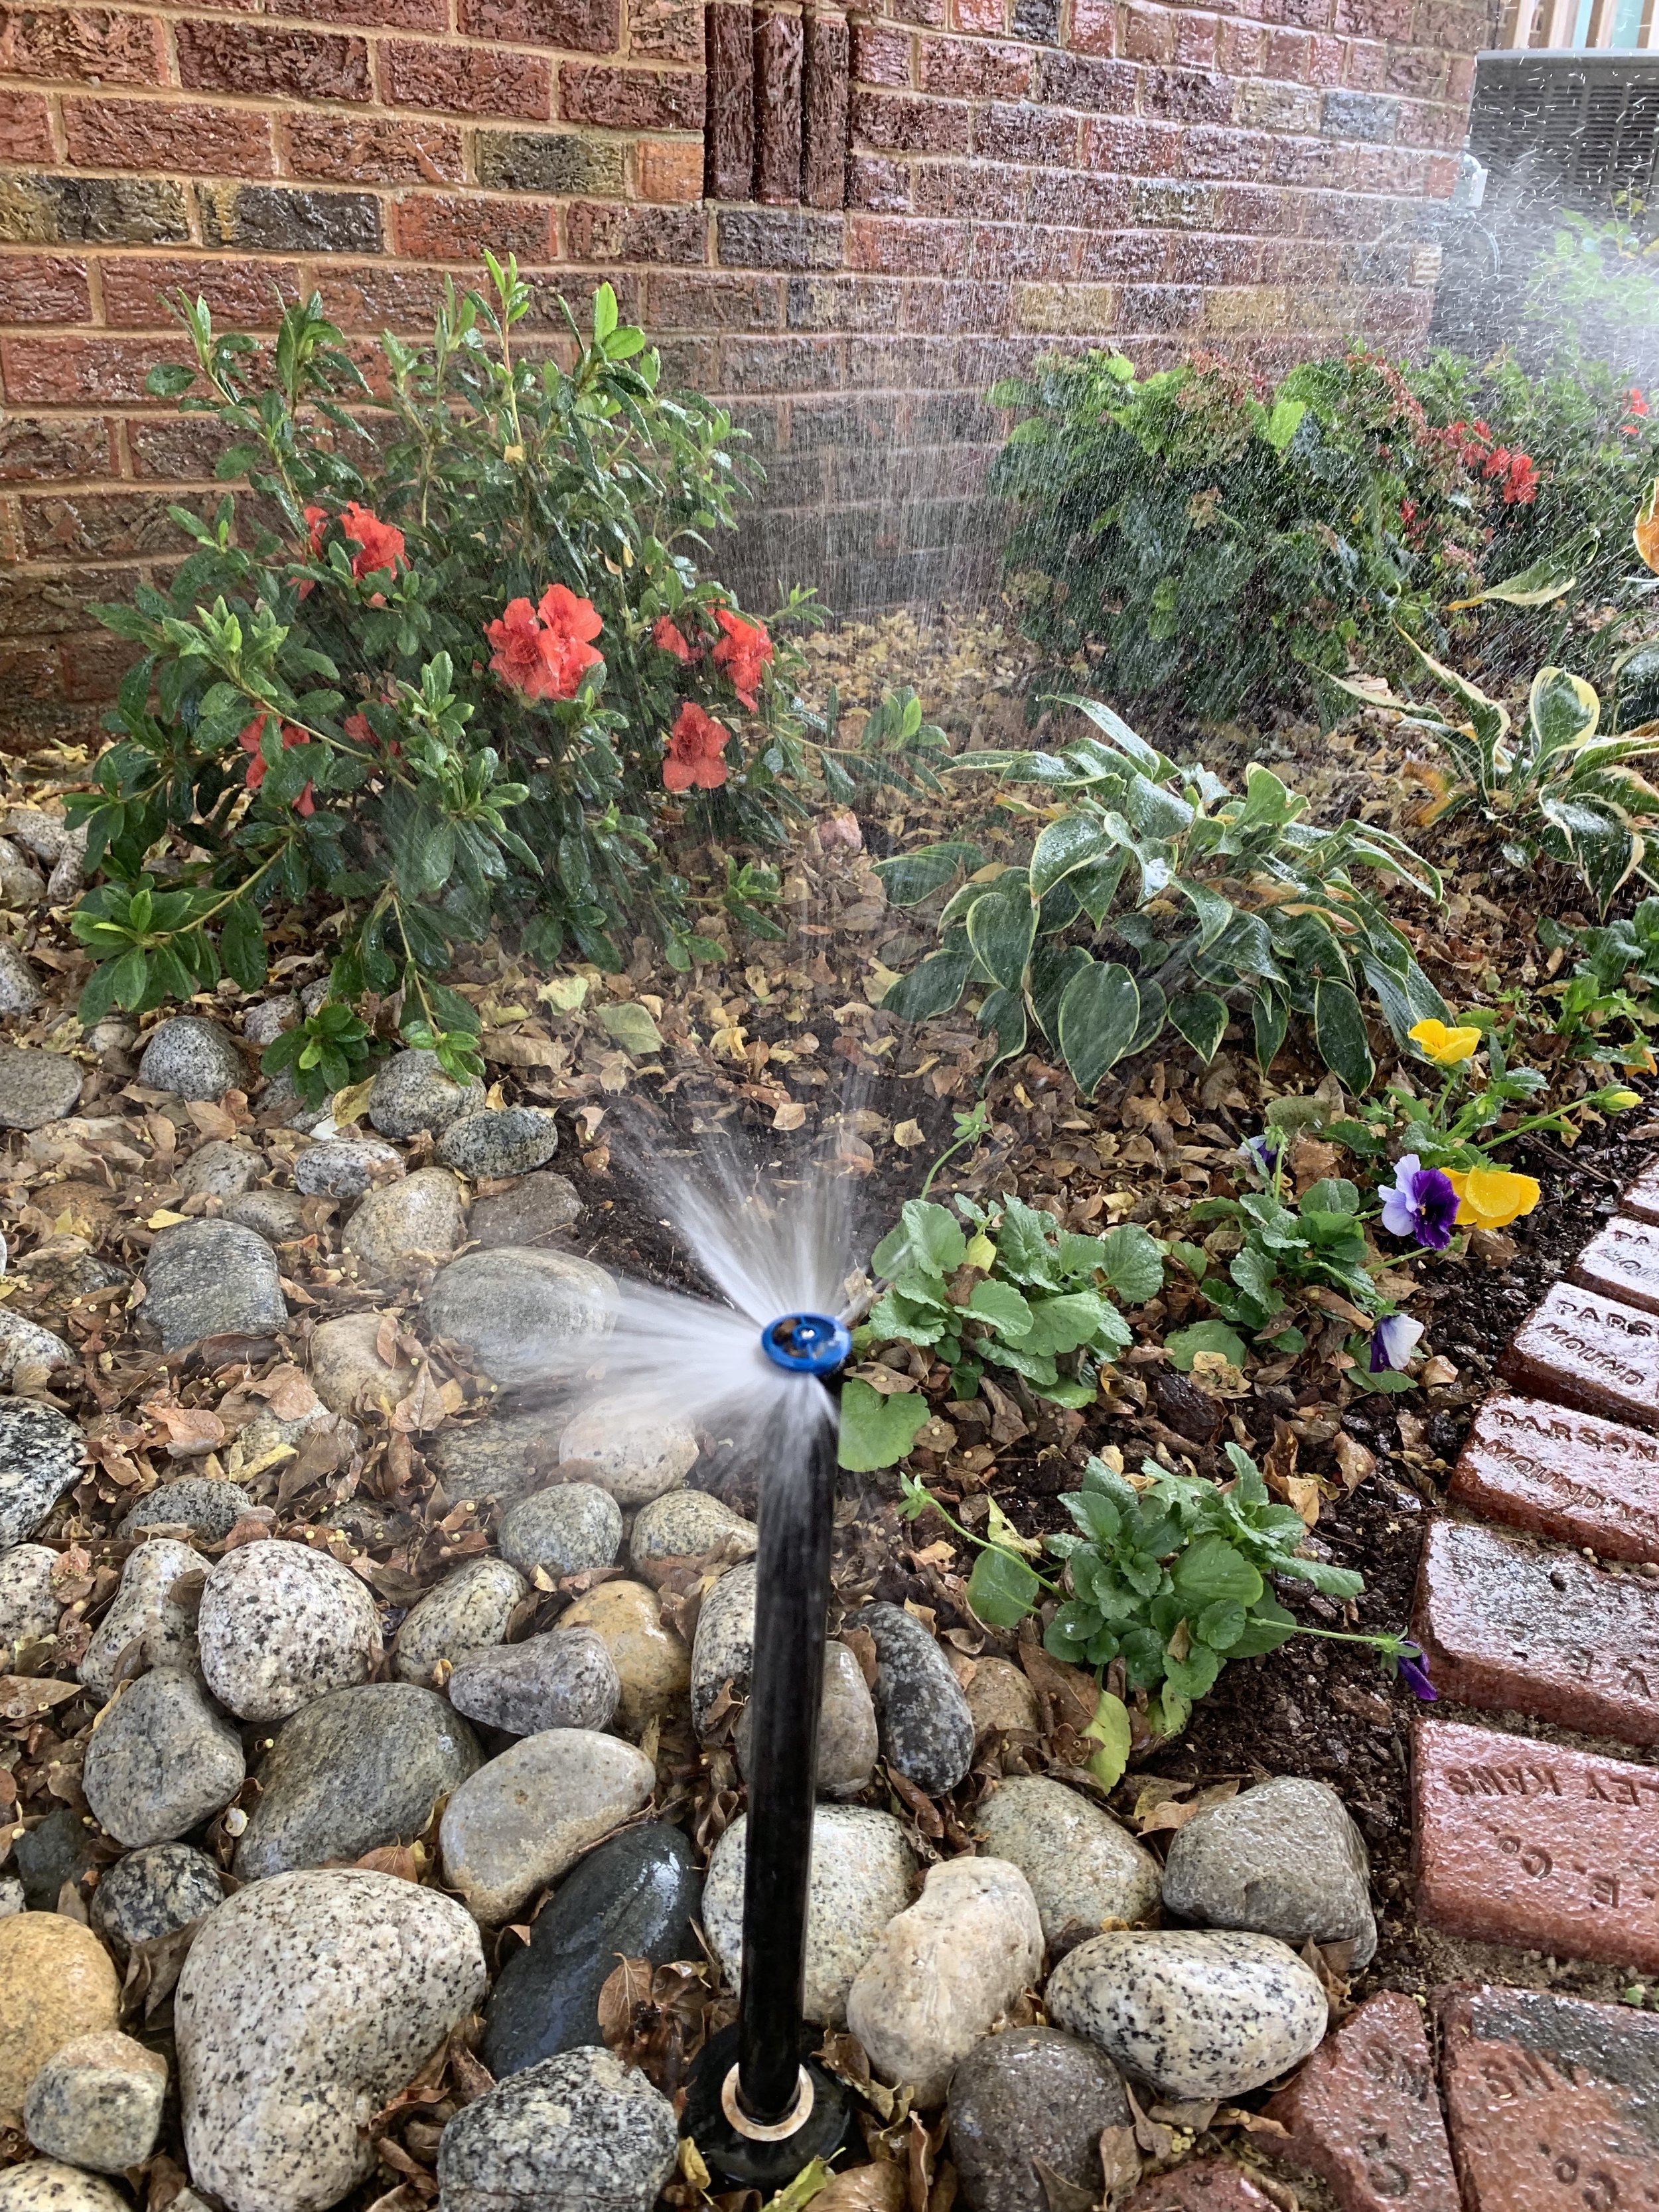
Plants with shallow root systems, such as Japanese Maples and Azaleas, respond best if they receive at least 1/2” of moisture every 7-10 days throughout the winter.
If you have perennials or winter annuals such as pansies or kale, winter moisture is critical to their performance going into the spring.
Fescue lawns will retain more color in the winter and rebound quicker in the spring if they are not allowed to become bone dry during the winter.

Evergreens need moisture during to winter to keep their foliage healthy.

Set your azaleas up for a successful spring by making sure they have enough moisture this winter.

Snow cover has two benefits: 1. It provides insulation from very cold temperatures by trapping warm soil temperatures. 2. As the snow melts it acts as a good deep soaking for your lawn and landscape.
Consider Upgrading Your System – If your system doesn’t have a rain/freeze sensor, add one. A rain/freeze sensor allows you the ability to set the controller to run once per week and leave it. If the temperature is below freezing, or if there has been a recent rain, the sensor will interrupt the scheduled cycle. The benefit is you won’t have to remember to turn your system off when it is too cold, or it has rained.

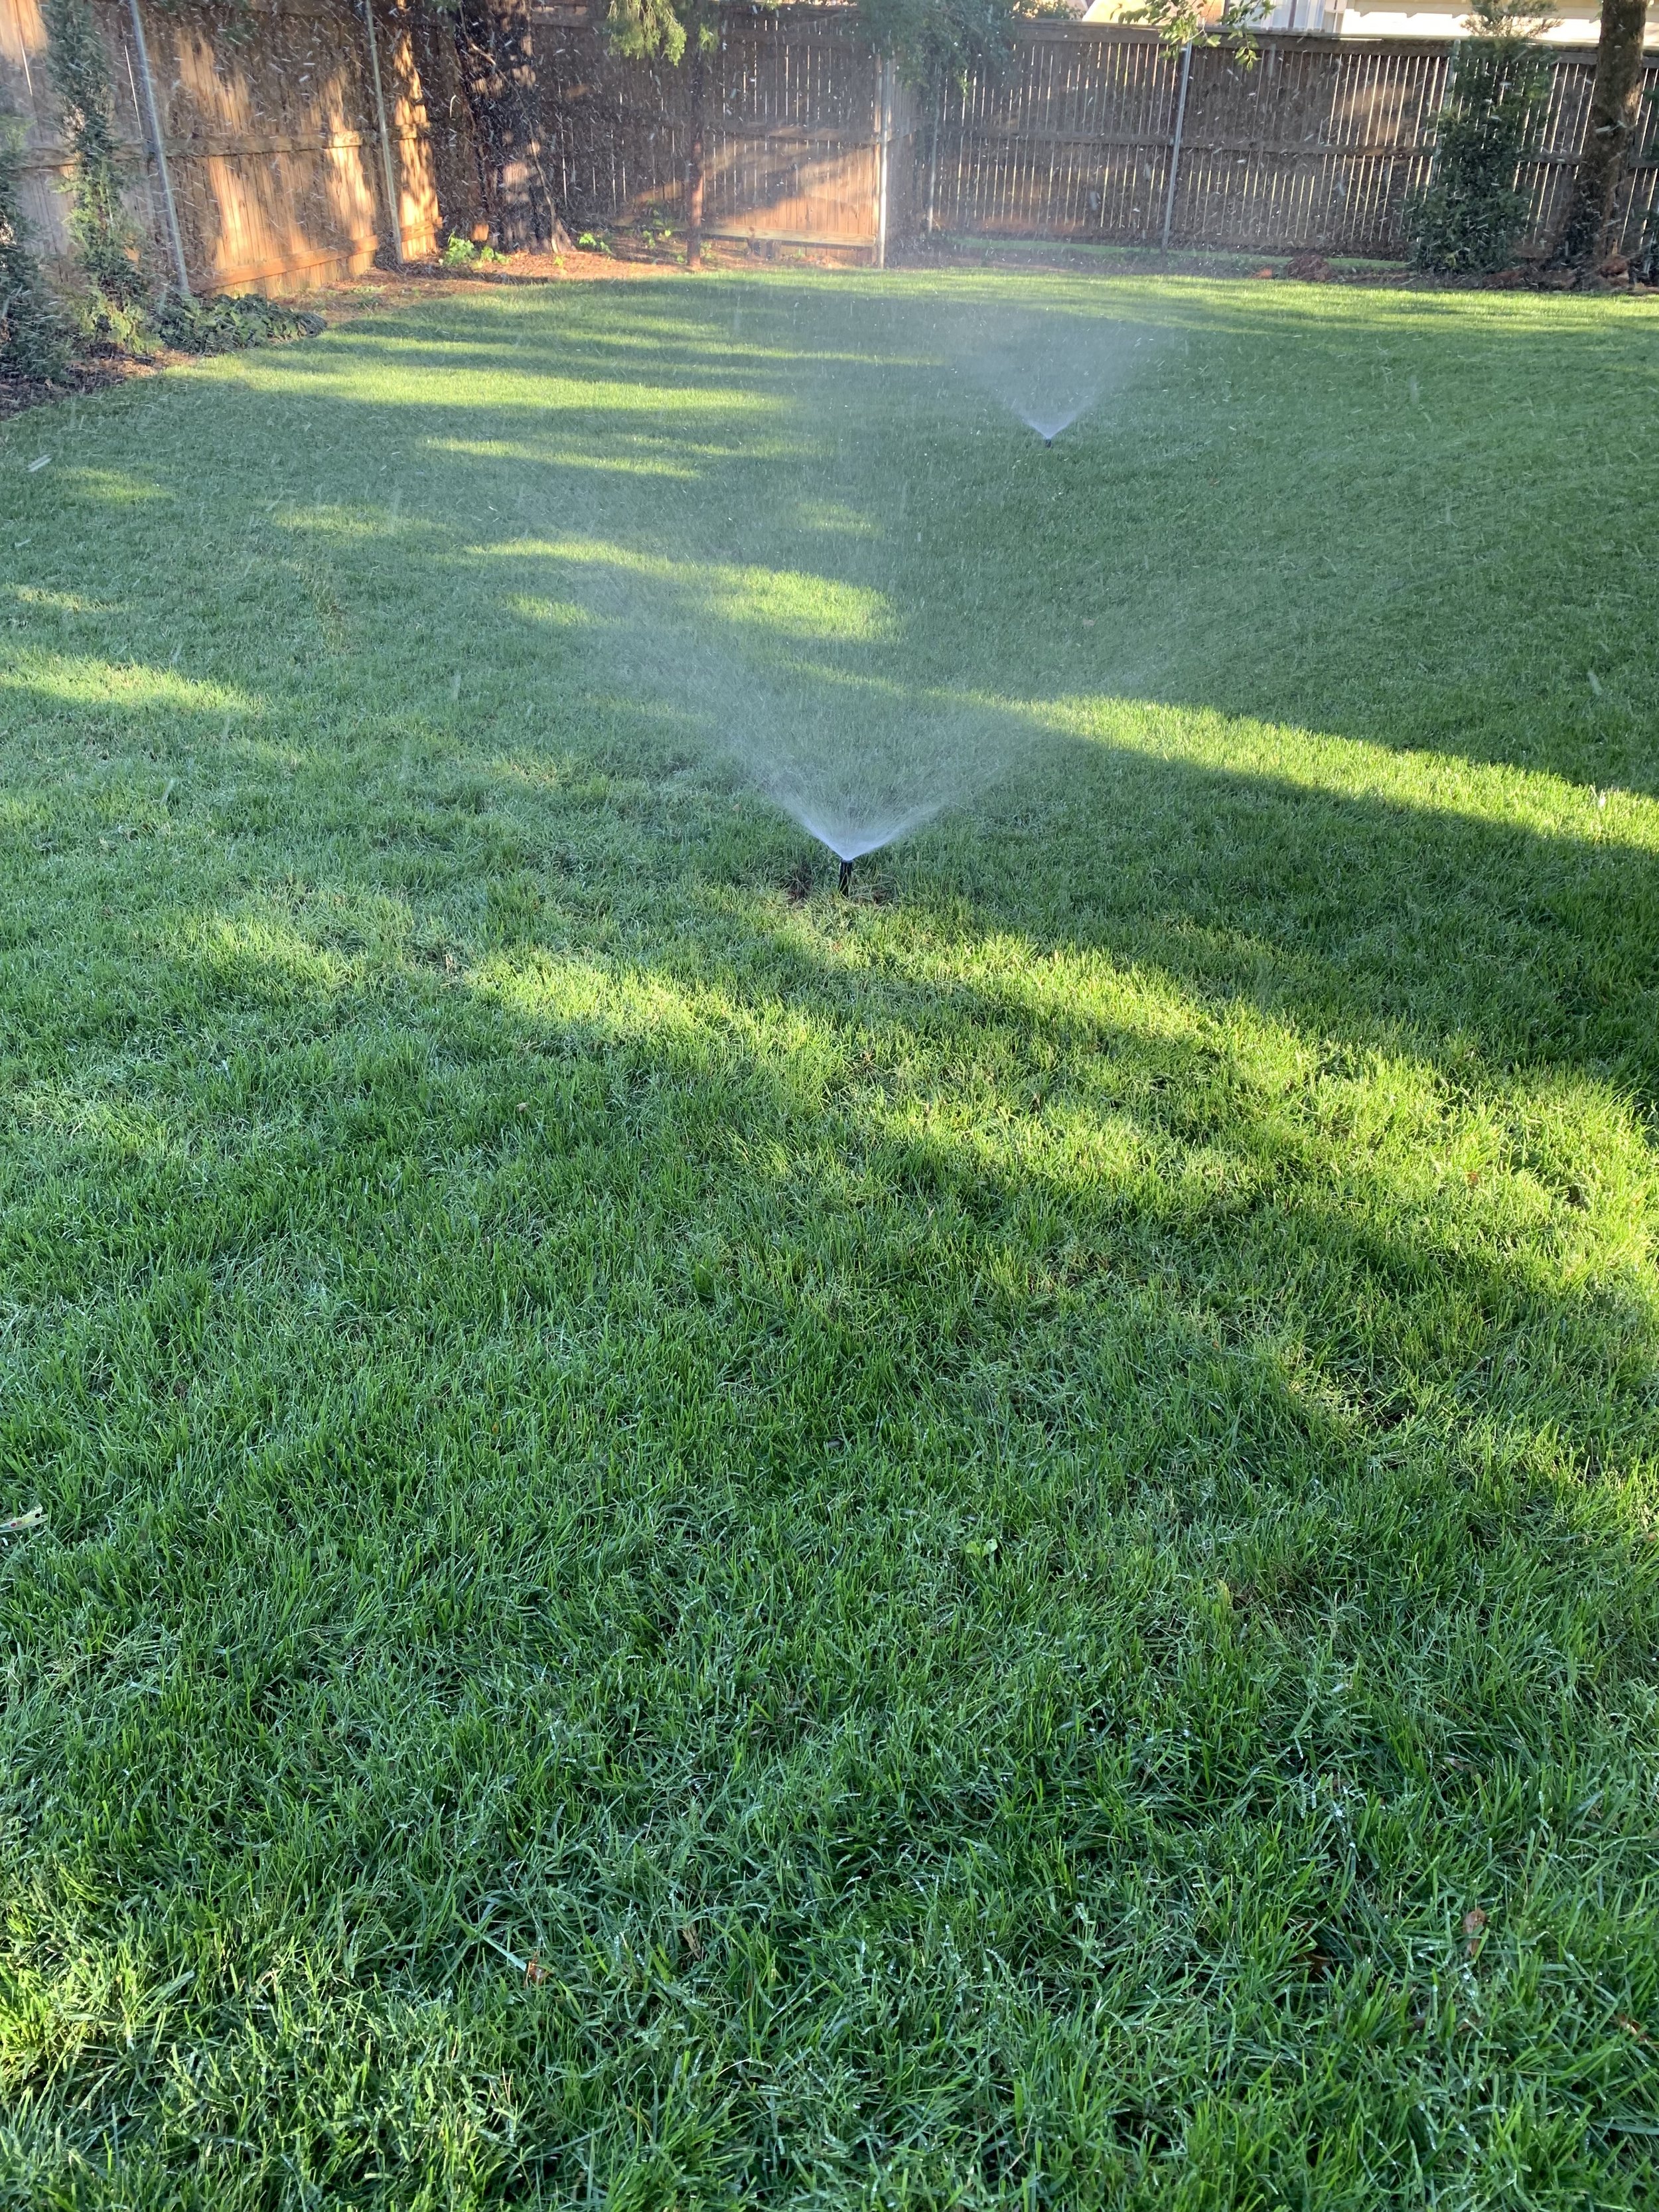
Another Upgrade to Consider – Install a Rainbird WiFi Link controller and let us control your system for you. We will monitor the weather and adjust the system through the winter based on the amount of moisture the area has received.
Remember – Most winter plant injuries occur when we receive a harsh cold spell while plant root systems are dry.
Give us a call, or respond to this email, if we can help you with irrigation solutions.
Lorne Hall
Hall | Stewart Lawn + Landscape
(405)367-3873
Fall Fertilizer Needs: Bermuda vs Fescue

One of the great things about Oklahoma is that we live in the transition zone.
What is the transition zone?
The transition zone is an area from northern Kansas to the Oklahoma-Texas border where you can grow both cool-season and warm-season turfgrasses. The transition zone can experience both hot summers and cold winters, often making it hard to decide between a warm-season lawn (Bermuda or Zoysia) or a cool-season lawn (fescue).
Why is that a good thing? Because we can successfully grow both warm season and cool season turfgrasses.
The most common turf in Oklahoma is Bermuda.
But, fescue, commonly thought of as only a shade grass, continues to increase in popularity as both a turfgrass suitable for shade and for full sun areas as well. It is now very common to find Bermuda lawns with at least some fescue.
Also, more and more lawn owners are realizing that fescue is more than a shade grass, it is a cool-season grass that can grow in full sun.
But, that can be a problem. You have to think very differently about how you care for a fescue lawn versus a Bermuda lawn.
Problem - Fescue won’t thrive, it will actually struggle to survive if it is fertilized like Bermuda. And, the same is true for Bermuda. Fertilize Bermuda like fescue and the result will be a thin, weak lawn.
Fertilizing cool-season lawns versus warm-season lawns requires a paradigm shift.
While Bermuda is approaching the end of its season, fescue is starting its season.
Let’s look at the differences.

Bermuda lawns are ending a season and need a low nitrogen, high potassium fertilizer to strengthen roots for the winter.

Spring Dead Spot is a disease that impacts bermuda lawns in the spring as the lawn is coming out of dormancy. One of the catalyst is heavy nitrogen applications in October applied in an effort to keep a warm season lawn green and active late into the fall.
Fall Fertilizer Applications:
Bermuda and Zoysia (Warm Season) –
Warm-season grasses are at the end of their growing season. In October and November, warm-season lawns don’t require nitrogen. With shorter days, cooler days, and nights, and the decrease in soil temperature, growth slows, and turf color fades.
Heavy nitrogen fertilizer during October in an effort to maintain color longer into the fall is harmful for Bermuda and a catalyst for Spring Dead Spot Disease.
The chances of having Spring Dead Spot Disease next year increases when nitrogen fertilizer is applied to a Bermuda lawn in the last 4-5 weeks before the first freeze, which in central Oklahoma is typically the first week of November.
So, if you are thinking your Bermuda lawn needs one more shot of nitrogen before the end of the season, don’t do it. There is a good chance you are doing more harm than good.

Bermuda, a warm season turfgrass,, performs best when fertilized with higher nitrogen during the summer month and low nitrogen fertilizer in the fall.

With cooler night time temperatures and shorter days, Bermuda lawns are slowing down. Resist the urgent to try keep them green and growing with high nitrogen fertilizer this month.

Because bermuda starts to thin out when it receives less than 6 hours of direct sunlight it is common to see lawns with both bermuda and fescue. The problem is you try to fertilize them the same, one will flourish and the other will struggle.
Fescue –
Fall is the beginning of a new season for fescue.
As temperatures begin to cool in September, fescue lawns start regaining color, thicken, and actively growing.
For fescue, fall is the same as spring is for Bermuda.
In April and May, as soil temperatures warm and Bermuda starts to grow, a higher nitrogen fertilizer is important. Again, fall for fescue is just like spring for Bermuda. Nitrogen, the first number on the fertilizer bag, helps thicken fescue, encourages new growth, and adds a deep rich color to the lawn.
Fall fertilizer applications on fescue will result in a healthier, thicker lawn. And don’t forget, a dense healthy lawn is the best defense against weeds.
A fertilizer application with at least 25% nitrogen to start the fescue growing season is important.
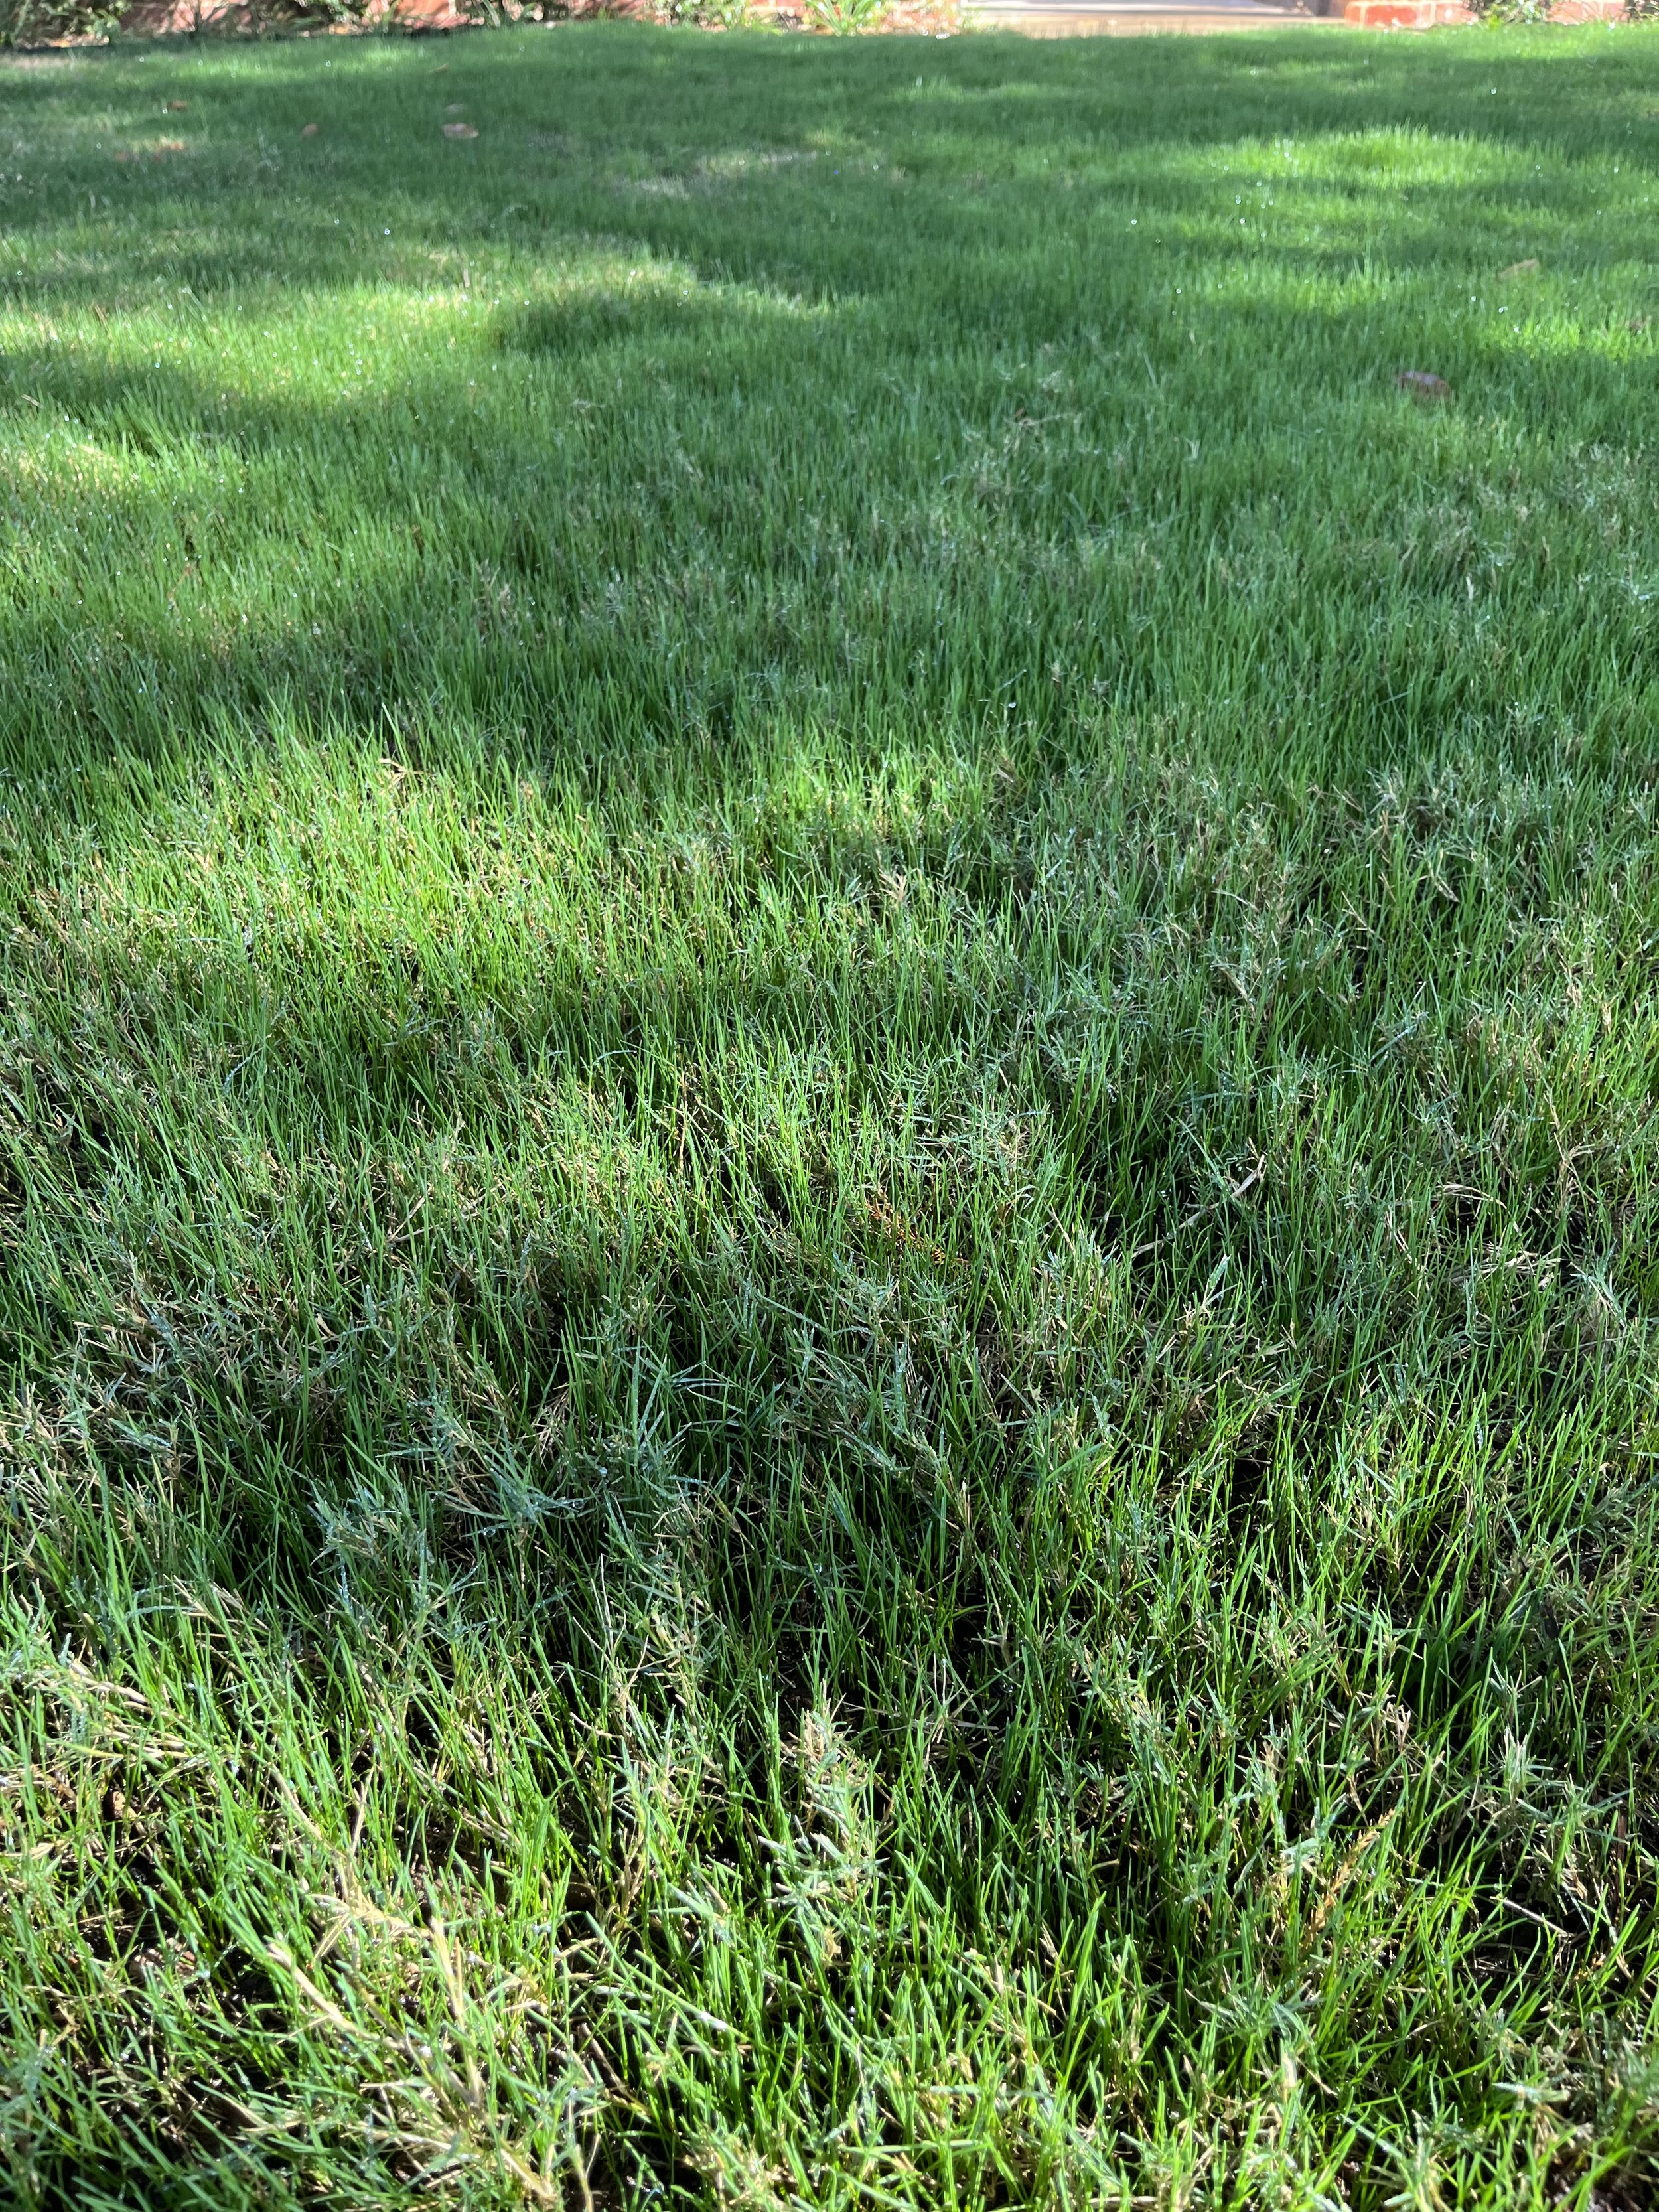
Newly seeded fescue lawns benefit from a fertilizer application anytime within the first 4 weeks after seeding.
The fertilizer differences continue throughout the year. Between now and next May, fescue performs best if it receives 4 pounds of nitrogen per 1,000 square feet.
Bermuda lawns are at their best when they receive their nitrogen between spring green-up in April and the end of September.
In early summer, while Bermuda needs high nitrogen fertilizer the only fertilizer needed for fescue is a low nitrogen, high potassium fertilizer to strengthen roots headed into the summer heat, similar to only fertilizer needs of Bermuda heading into the winter cold.

Fescue lawns are start a new season every fall. A high nitrogen fertilizer application now will increase color and turf density.

Fescue can be grown in full sun but it requires a very different fertilizer schedule compared to bermuda.
For a successful, fescue lawn, you have to think backward from a Bermuda lawn.
For a successful Bermuda lawn, you must think backward from a fescue lawn.
You can’t fertilize them both the same way and expect them both to respond the same way.
The Good News –
If you subscribe to Hall | Stewart’s 7-Step Lawn Care Program, whether you have Bermuda, Zoysia, fescue, or a combination of turfgrasses, we will make sure each type is receiving the correct fertilizer based on the current season and growing conditions. Our program recognizes that warm-season grasses and cool-season grasses have very different fertilization timing and needs.
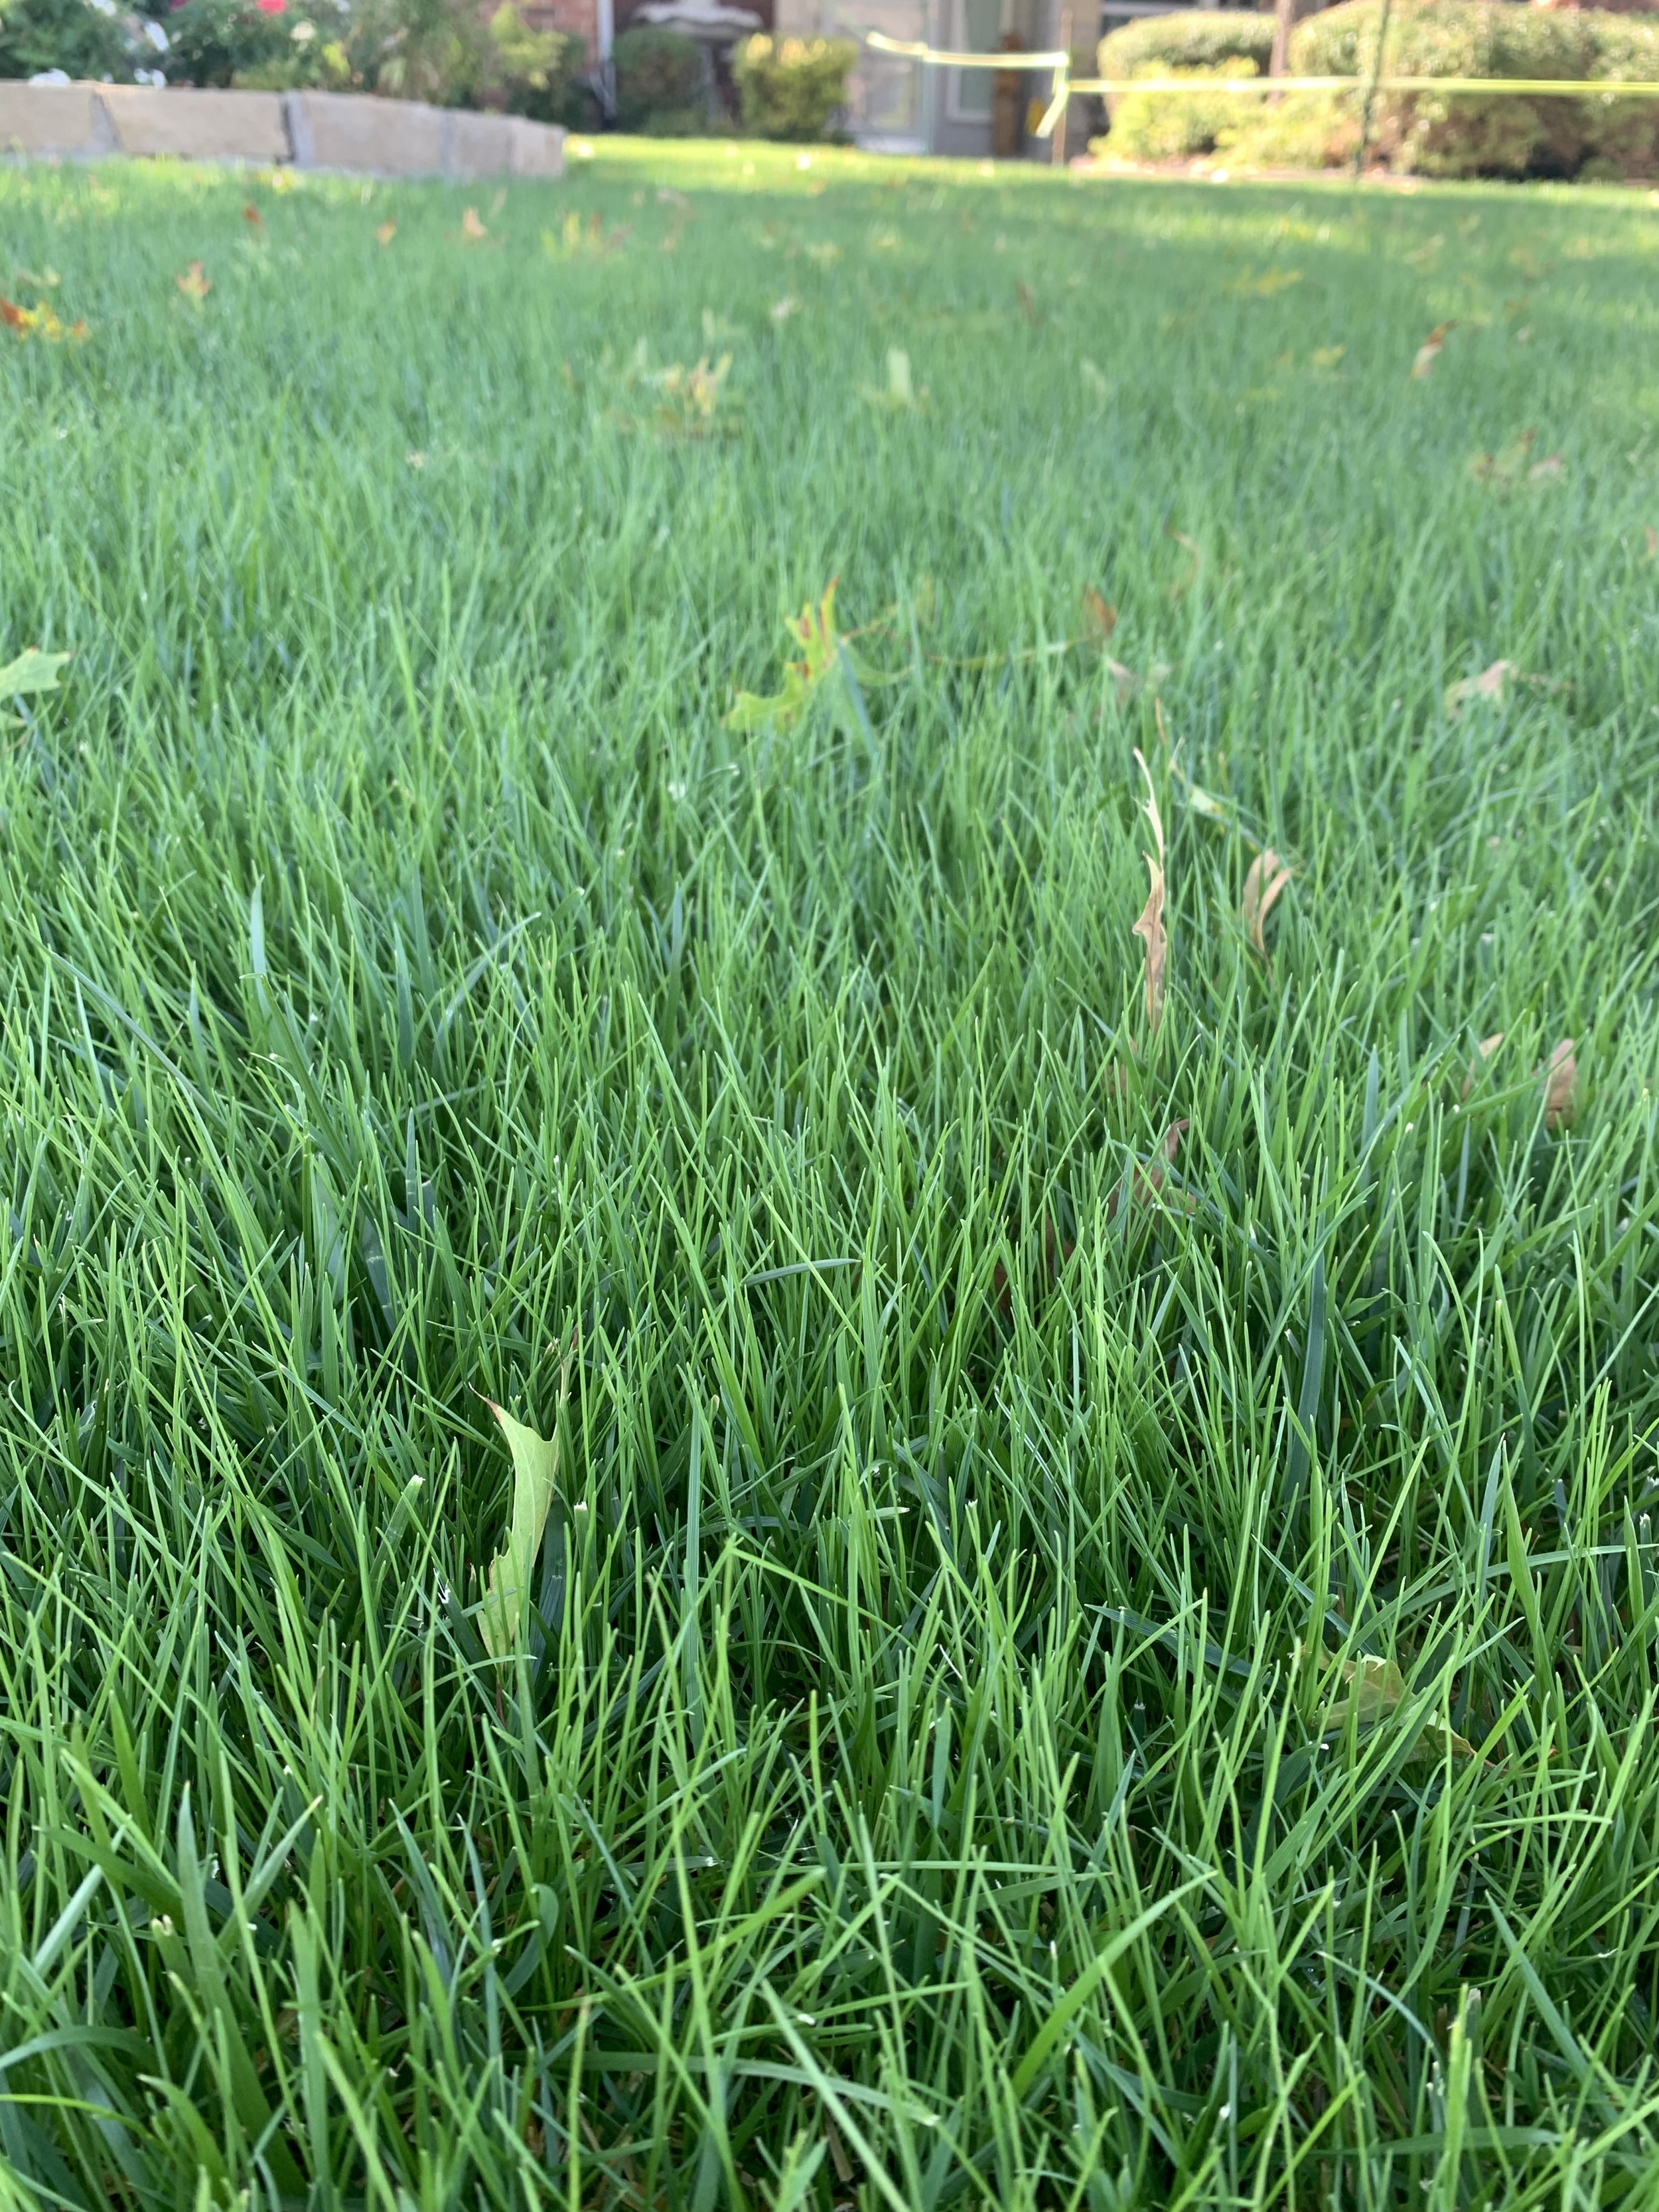
If you have a overseeded fescue or are planning to this fall, don’t skip a fertilizer application. New seed grows rapidly and needs plenty of nutrition.

A healthy, thick and deep green fescue lawn next spring is easier to achieve with when a lawn receives the correct fall fertilizer applications.
Let’s cover one more misconception about fescue in the fall:
Myth - If you are seeding fescue in the fall, it should not receive any lawn care applications.
Not true…
Fact - Fertilizer applications are not only very important for the existing fescue, but it also plays a critical role in the establishment of new seed.
Yes, if you are seeding you should not apply a pre-emergent herbicide until the seed has come up and the lawn has been mowed 2 or 3 times.
But, fertilizer anytime within the first 4 weeks of seeding will provide the seed the nourishment it needs as the new seedlings germinate and begin to grow rapidly.

The challenge for lawns with both warm season and cool season turf is they require the exact opposite timing of fertilizer applications for them both to thrive.
Summary:
Bermuda lawns benefit from receiving their last high-nitrogen fertilizer application before the end of September.
Fescue lawns are starting a new season and require a high-nitrogen fertilizer as they regain color, thicken, and grow.
Both are important.
For the best lawn, it is important to know your turf type and fertilize at the correct time of the year.
If you need have questions or need help understanding the fertilizer needs of your lawn, we would love to help.
Lorne Hall
Hall | Stewart Lawn + Landscape
(405)367-3873
Where Are the April Showers?

It is rare to be addressing watering practices in April. Who thinks about watering issues in April?
Regardless of the time of year, one of the best practices for your lawn and landscape is to pay attention to rainfall and supplement with good watering practices when needed.
Good watering practices start with being aware of current weather patterns and making adjustments to watering schedules.
Good watering practices are one of the biggest influences in the health and appearance of your landscape.
The west and north areas of the Oklahoma City metro are way behind on spring moisture. Lawns and landscapes that are not receiving supplemental moisture are showing signs of drought stress. Unfortunately, most people are not used to paying attention to their lawn & landscape’s moisture needs in April.
Best Watering Practices:
Your lawn and landscape need 1” of water per week during the spring.
A common question is “How long should I water?” Every irrigation system is different – different head types, different size nozzles, different head spacing, different areas, etc.
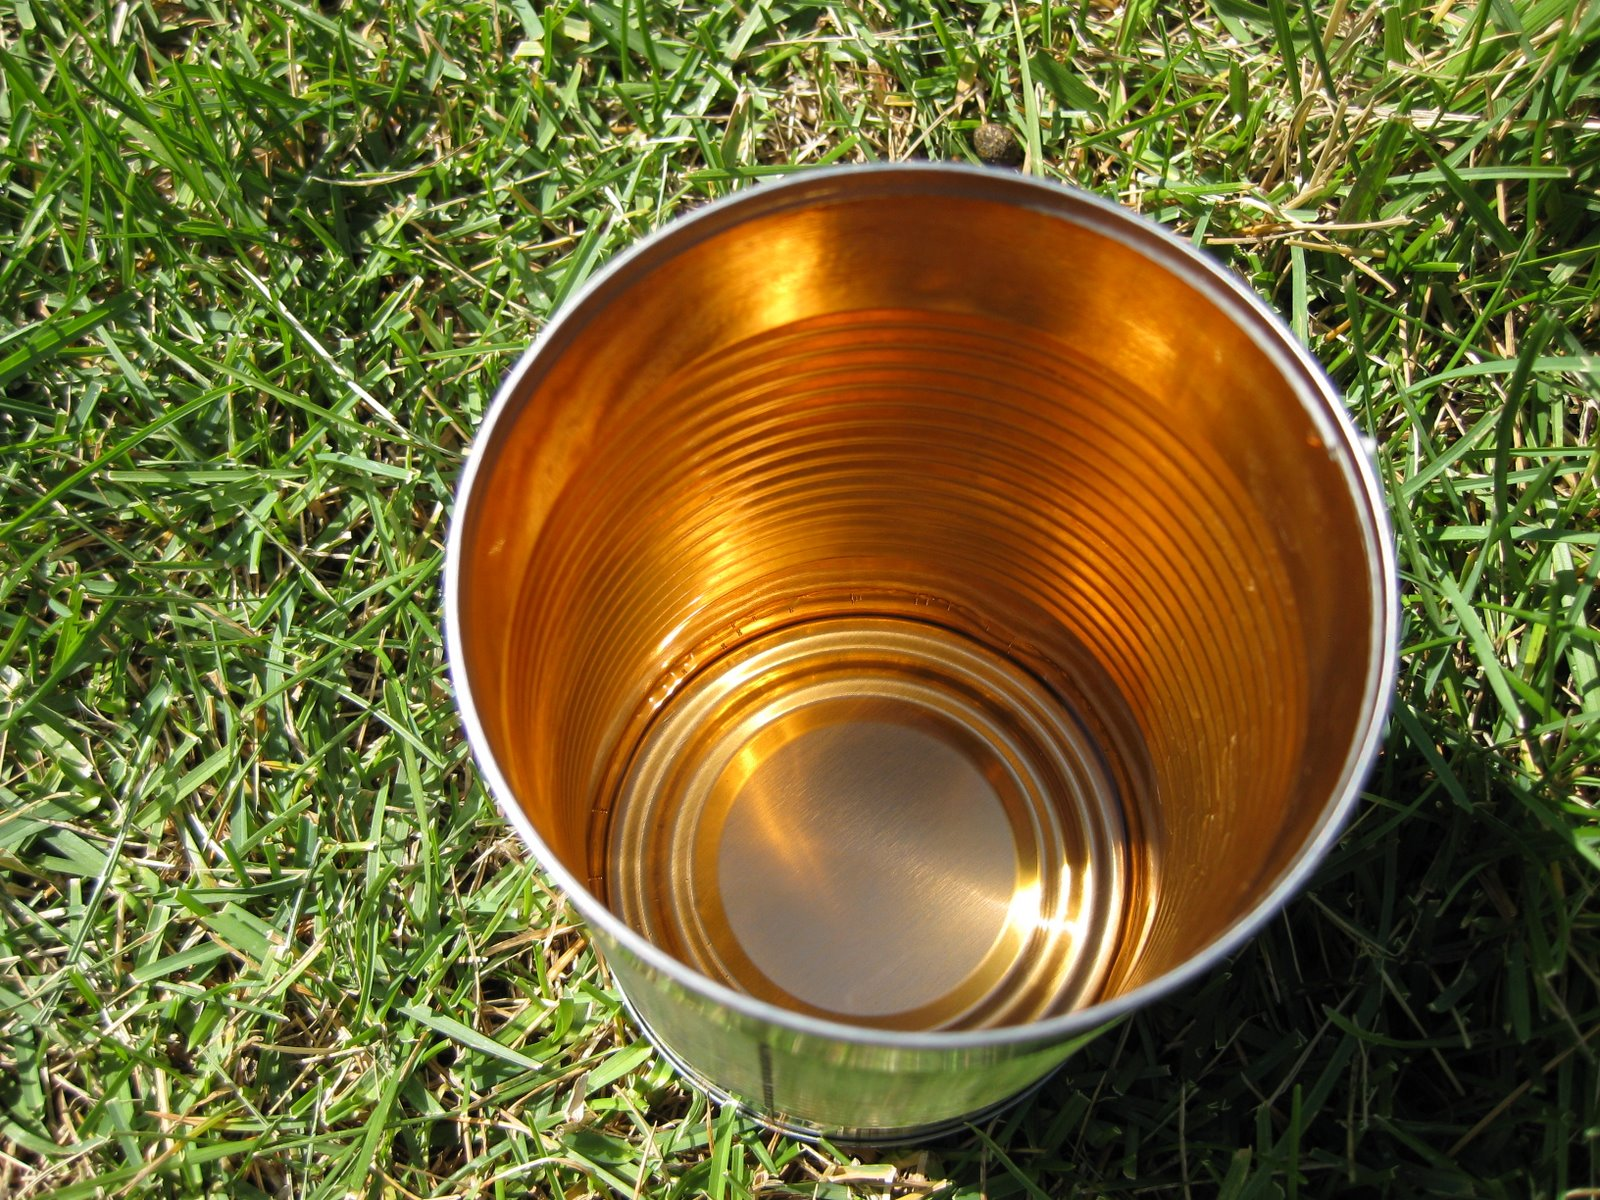
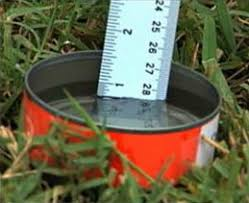
The best way to know how long you should water is to measure the amount of water your system puts out in each zone. Take a few cans and place them around your lawn in a random pattern. Run your sprinklers through a cycle and measure the amount of water in the cans. If the sprinklers ran for 15 minutes and you had .25” of water, you need 60 minutes per week.
Next, determine how long you can run your irrigation before there is excessive runoff. This will tell you how many times per week you need to water.
If you can get away with watering every 4th-day versus every other day, you will have a healthier, stronger lawn and landscape.
If you don’t have the time to audit the amount of water your system puts out, start with these settings, monitor, and adjust:
Fixed spray pattern heads with 10-15’ spacings – 15 mins per time.
Larger rotor type heads on 20-30’ spacings – 30 mins per time.

Set your controller to water with back-to-back run times.
For most of our landscapes, if we run our sprinklers long enough to get the recommended amount of water, we end up with a lot of water running down the street. Splitting zone run time in half and setting the controller to run through the zones back to back will improve the amount of water that soaks in and reduce the amount of water that runs off.
Example: Set the controller to run at 4:00 AM and 5:00 AM. When the 4:00 cycle completes, even if it is after 5:00, the controller will start the second cycle.
Moist soil will absorb more water than dry soil. Soil is just like the sponge in your sink. A dried sponge repels water before it starts absorbing water. Your landscape is the same. The first cycle moistens the soil and the second cycle soaks in.
Split, back-to-back, irrigation cycles are an old golf course trick.
I started using split, back-to-back, irrigation cycles a few years ago on lawns with slopes.
After seeing great results, I started incorporating the concept on all lawns.
It makes a difference in watering efficiency.

Water in the early morning.
Evaporation is at its lowest point in the pre-dawn hours. Also, the wind is usually at the lowest point of the day in the pre-dawn hours. I prefer to set most irrigation controllers to start at 4:00 AM with the goal of having the cycle completed by 8:00 AM.
Avoid watering in the heat of the day when much of the water will be lost to evaporation. Also, avoid watering in the evening. Watering in the evening promotes many turf diseases because the lawn stays wet too long.

IMPORTANT: Don’t water fescue in the evening during the summer. When water remains in the leaf for more than 6 hours, brown patch disease will develop.

Daily watering is not needed.
Unless you are trying to get newly planted seed to germinate or new sod to take root, there is not a good reason to water every day. Always water deep and infrequent. Daily, shallow watering creates a landscape that is shallow-rooted and more dependent on constant moisture for survival.
Fescue will benefit from a deep soaking just like Bermuda. A common myth I would love to dispel is that fescue requires a lot more water than Bermuda. Yes, it is when you are trying to get newly seeded fescue to germinate, but mature fescue doesn’t require more moisture than Bermuda.
I water my fescue the same way I water Bermuda – deep, infrequent cycles.

It’s April! Fescue should be at their best. If you have areas of fescue that are not rich green, check the soil moisture. If you can slip a large screwdriver several inches into the soil, you need to water.
Aeration improves moisture absorption.
You can’t beat aeration for improving your soil structure. A key benefit of improved soil structure is better water absorption. Lawns that receive annual aeration (or at least every other year) do not experience as much runoff.
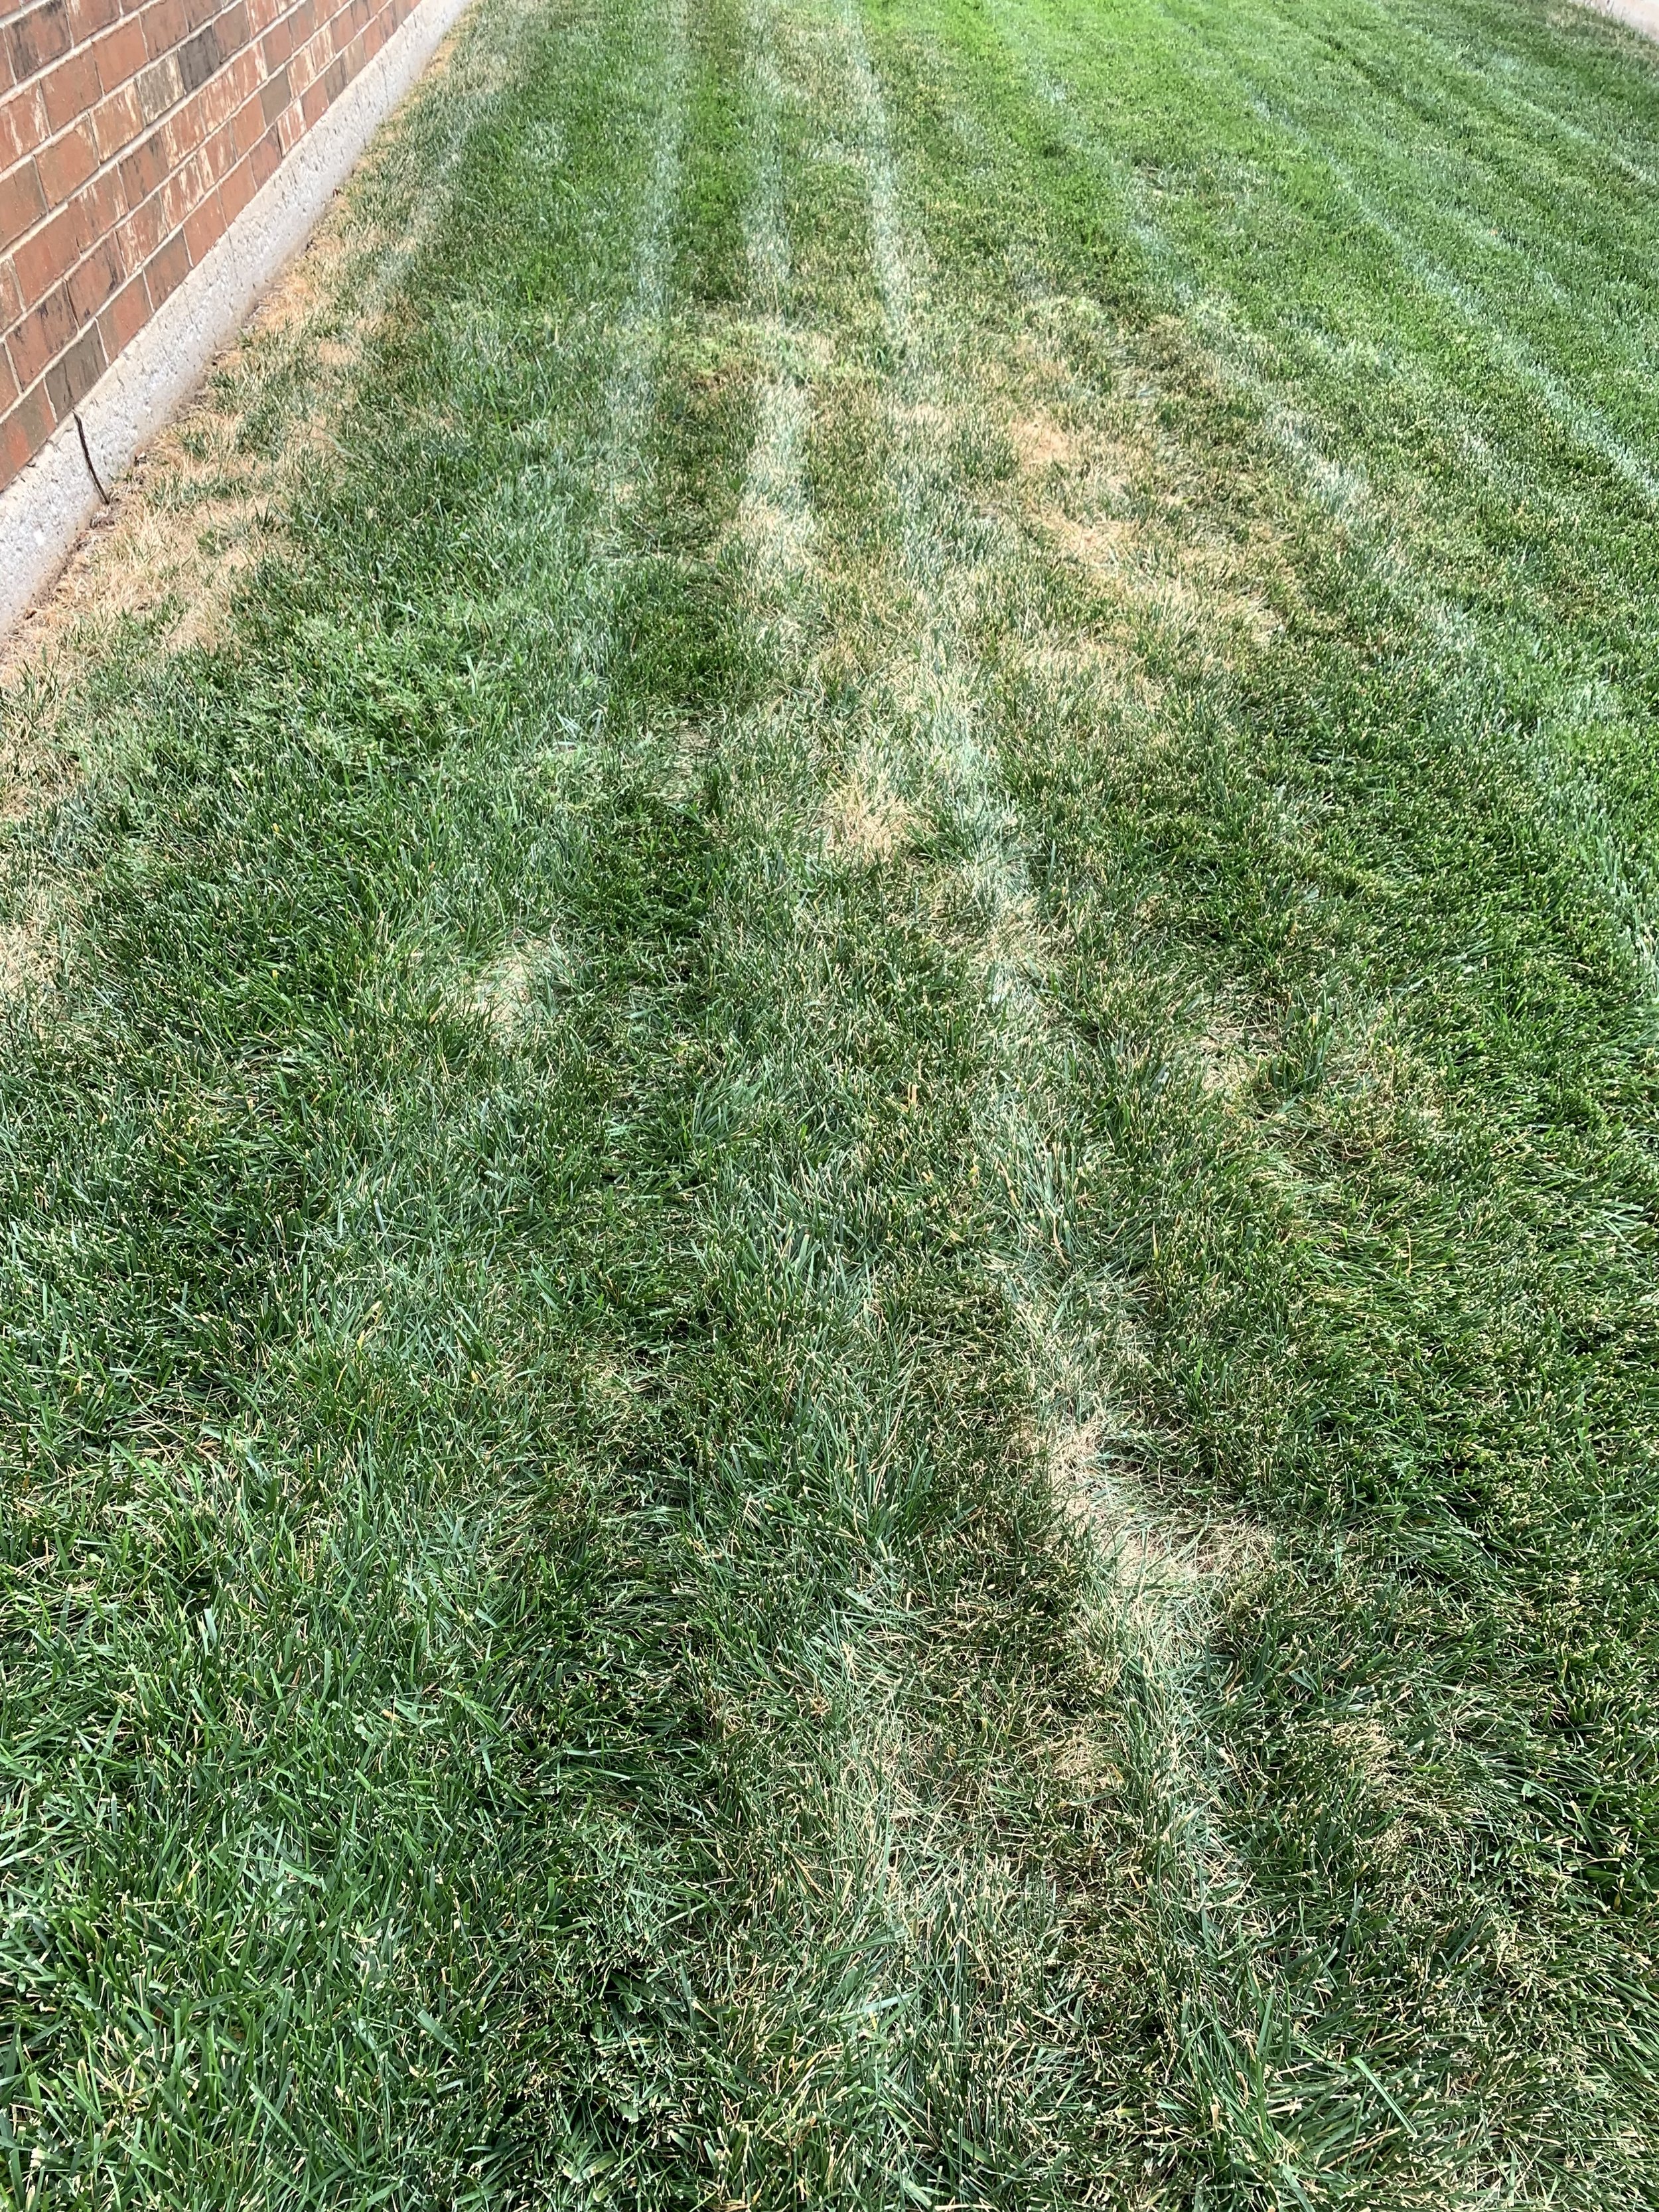
Always pay attention to water need.
If we receive .5” of rain or more, turn your controller off for a few days. Install a rain sensor if you are not good at remembering. A rain sensor will pay for itself easily in one season. Don’t assume you can leave your controller in automatic and forget it.
Don’t stress if your lawn and landscape gets a little dry, it will rebound quickly once water is applied.
A good indicator that your lawn is needing water is the footprint test. If the grass retains your footprints instead of quickly springing back, it is time to resume watering.

Fescue growing on the top of a sprinkler head.
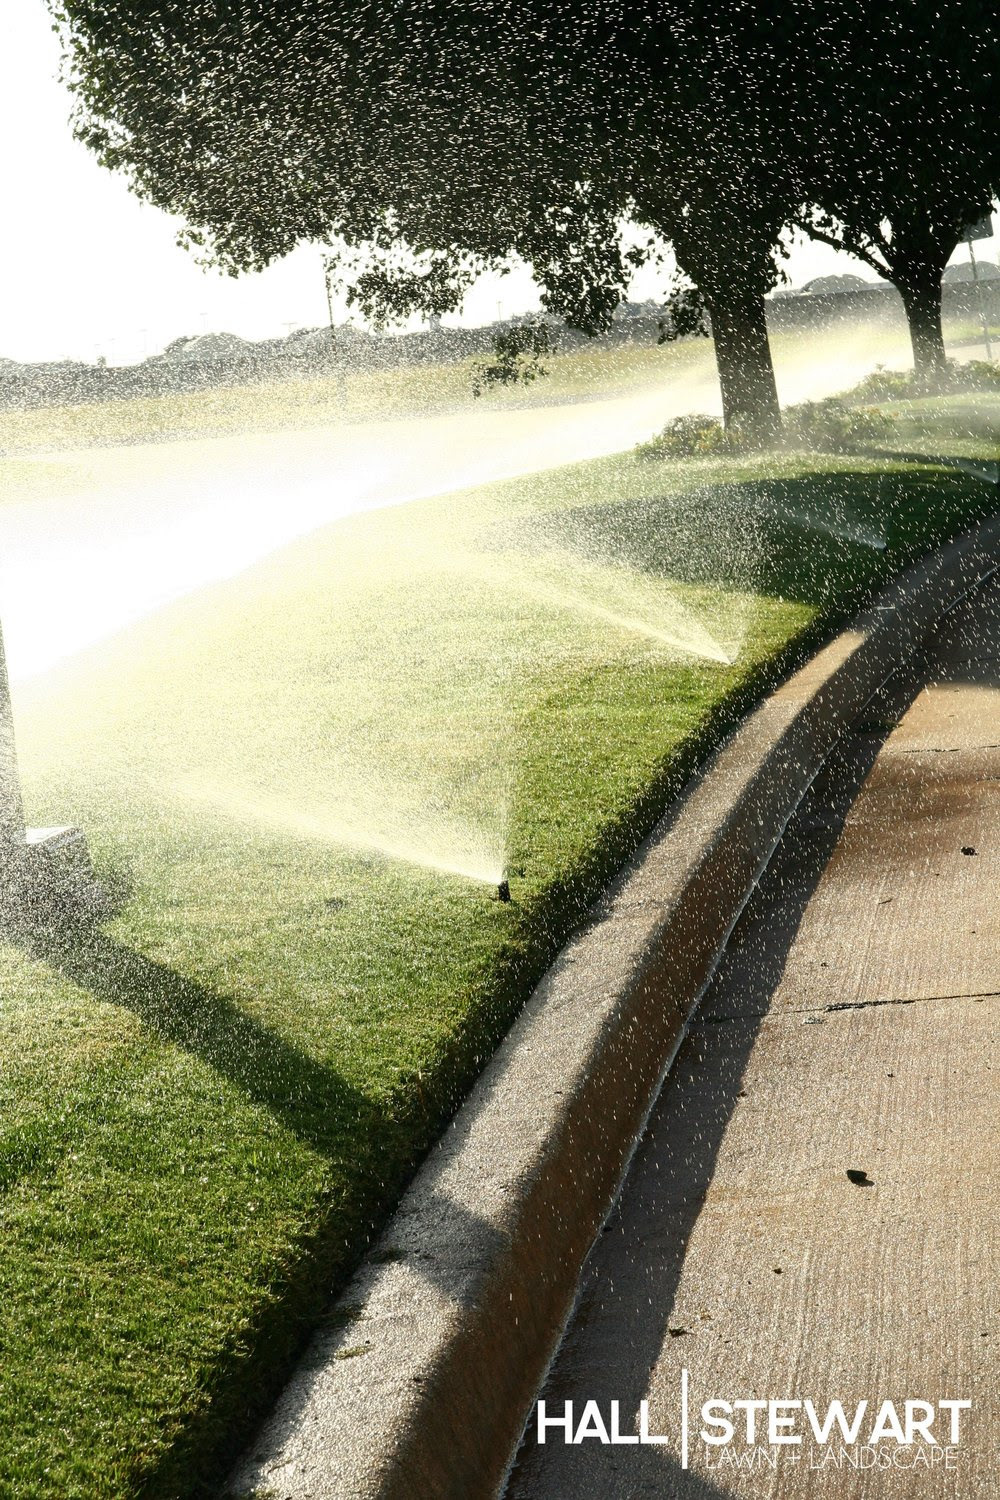
Watch for uneven water patterns.
If you notice areas where the lawn color is fading, you may have uneven moisture patterns. This could be the result of a broken head, a clogged nozzle, or a head that is out of adjustment.

Head to head coverage is when the water from one sprinkler head reaches all the way to the next head. Without head to head coverage, dry areas can develop around heads.

A clue to an uneven watering problem is an arc pattern matching the sweep of an irrigation head.

Even if you don’t have an irrigation system, the concepts of good watering still apply.
It is important to learn how long you need to water when you are using a hose-end sprinkler. Next time you water, set out a few cans. You will be surprised how long you need to water to get the proper amount of water on your lawn. Invest in a digital hose water timer, such as ones made by Orbit. It will make it easier for you to control the timing and frequency of watering.

A healthy landscape is an important part of our environment. A healthy turf helps clean the air, trap carbon dioxide, reduce erosion, improve groundwater quality, absorb noise, reduce temperatures, as well as, adds curb appeal and value to your home.
Let’s hope metro-wide spring moisture arrives soon.
Our environment needs it. Our lawns and landscapes need it.
But, if it doesn’t, be prepared to put the best watering practices in place.
Lorne Hall
Hall | Stewart Lawn + Landscape
(405)367-3873
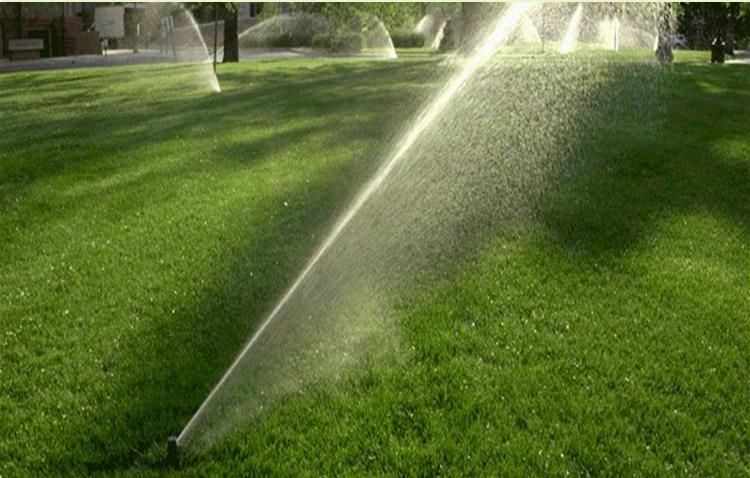

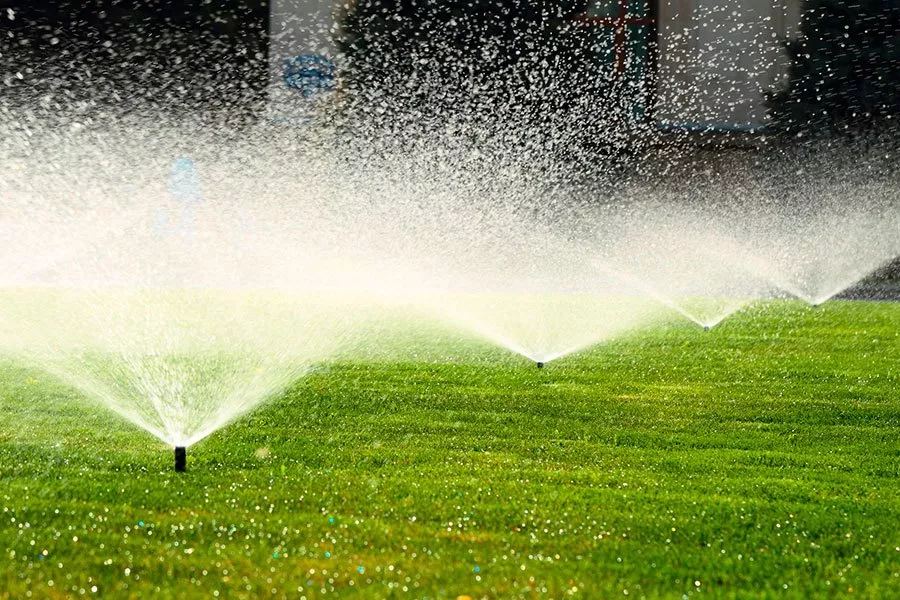
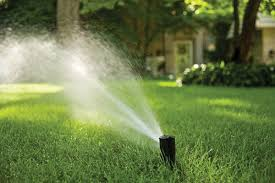
Two Important March Pruning Tips

If you have overgrown evergreens, this month is the best time for major pruning.
If you have crape myrtles, now is the best time for proper routine pruning.
Evergreen Pruning
As landscapes mature, it is typical for plant material to outgrow the intended space.
Some of the biggest offenders are hollies and boxwoods. It is common to find hollies growing into eves and boxwoods crowding sidewalks. The tendency is to plant shrubs in spaces they will not fit when they reach their mature size.
But, who reads a plant label?
And, if you did read the label you were thinking: “Surely this pretty little holly will never cover up the window.”
Then, a few short seasons later, you find yourself struggling to keep the shrub contained in the space you intended.
Or, possibly you have done a great job of keeping them sheared to fit the space, but they no longer have the natural shape you fell in love with.
What do you do? Tear them out and start over?

Dwarf Burford Holly is commonly used as a foundation planting. If your row of holly have become overgrown late winter through early spring is the best time to reduce their size with major pruning.

Nellie Stevens Holly often look best when they are allowed to retain their natural shape. If your Nellies have become overgrown, or have lost their natural beauty from repeated shearing, mid-February through March is the time to regain their natural shape with major pruning.
I have a better solution - March is your opportunity to do major pruning on most broadleaf evergreens.
The broadleaf evergreen, any plant with leaves year-round, the list includes aucuba, camellia, boxwood, cherry laurel, elaeagnus, holly, mahonia, photinia, just to name a few.
Heavy pruning in the spring before new growth starts allows you the opportunity to regain the shape you intended for the plant.
Twice over the 20 years, since it was planted, I have heavily pruned a large Nellie Stevens Holly on one corner of my house. And, as I do every time, I take a broadleaf evergreen back to no leaves and only major branches, I keep asking myself,
“What if this holly doesn’t re-leaf?”
“Am I ruining a 20-year-old Nellie?”
But, once again the shrub responded just like it should, and within in one growing season, it returned to its natural beauty.

Nellie Stevens Holly
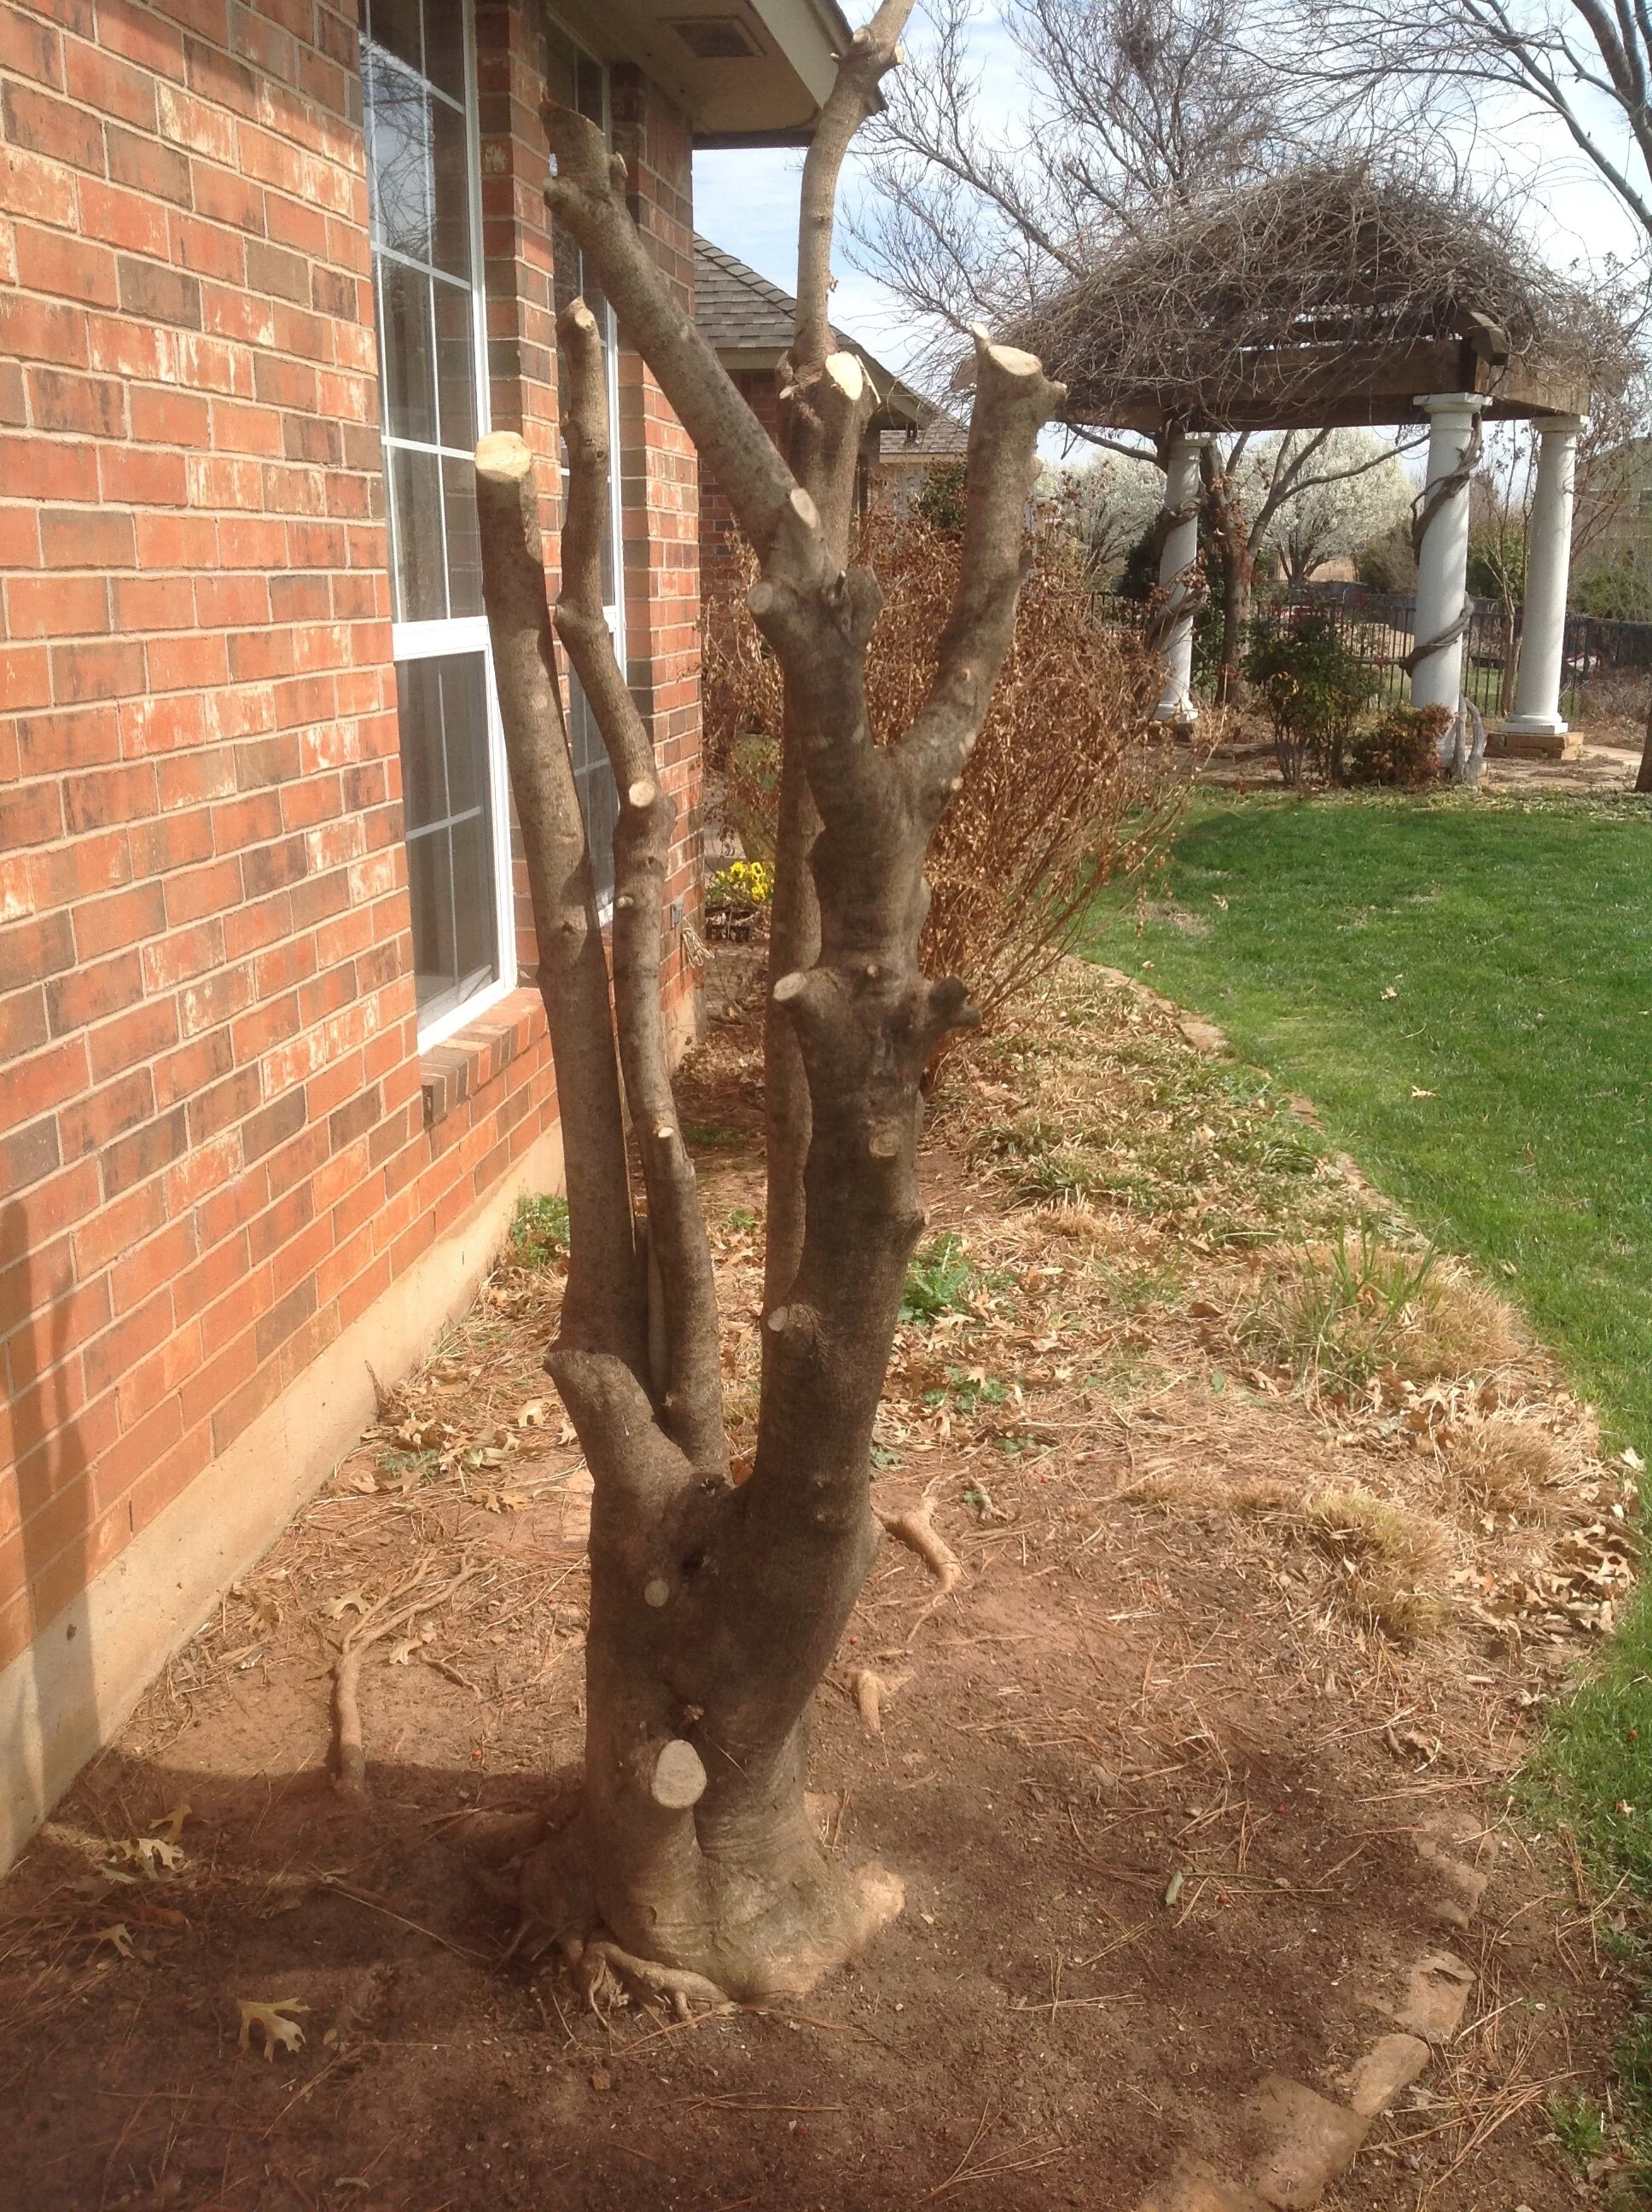

This is the same holly that was pruned back to only branches a couple of years ago.
Take time this week to evaluate your broadleaf evergreen shrubs.
Are they overgrown?
Or, do they have winter damage that needs to be removed?
Or, do they just need to be reshaped?
If so, now is the time to remove dead branches, reshape, and regain control of overgrown shrubs.
March is your best window of opportunity each year for the major pruning of broadleaf evergreens.

If you have boxwood taking over a sidewalk, mid-February through March is the best time to reclaim the sidewalk. You can trim them aggressively and they will recover during the growing season.

Nellie R Stevens Holly is a favorite foundation plant. With a mature size of 15’ tall and 10’ wide they quickly loose their natural beauty with regular sheering in an attempt to make them fit the landscape. Now is the best time to reduce the size and return them to their appearance.

BEFORE: If you have large hollies with damage from last winter, can they be saved or should they be replaced?

AFTER: As long as the evergreen has some green leaves you can remove the dead branches and reshape the plant. If the plant has a healthy root system, you will be surprised at how quickly it regains a good shape.

Why are so many crape myrtles cut back to 4-5’ every year?
Three Reasons for Bad Crape Myrtle Pruning
1. It is simply what everyone does to their crape myrtles in the spring. Have you ever wondered if it is the best practice? It pains me to see so many beautiful crapes cut back to ugly stubs every spring. This practice ruins the natural form of the plant. Southern Living termed the practice as “Crape Murder” decades ago, yet it continues as a common practice.
2. The wrong variety was selected for the location and pruning is needed to control the size. Varieties include large tree types that grow 20’ or larger, medium varieties 12-18’, 6-12’ small varieties, and dwarf varieties. When you select the right size for your planting area and are not forced to prune heavily to contain the plant, you will find you will have a healthier plant resulting in less disease and more blooms.
3. They believe the myth that crape myrtles bloom more if they are severely pruned every year. Flowers are produced on new growth every year even if they are not pruned. Without heavy pruning, you will have more branch area resulting in more summer blooms.

Crape Murder destroys the natural beauty of the plant. Mature crape myrtles have wonderful smooth and molten bark with graceful shapes. You will never experience this quality if you murder them every spring.
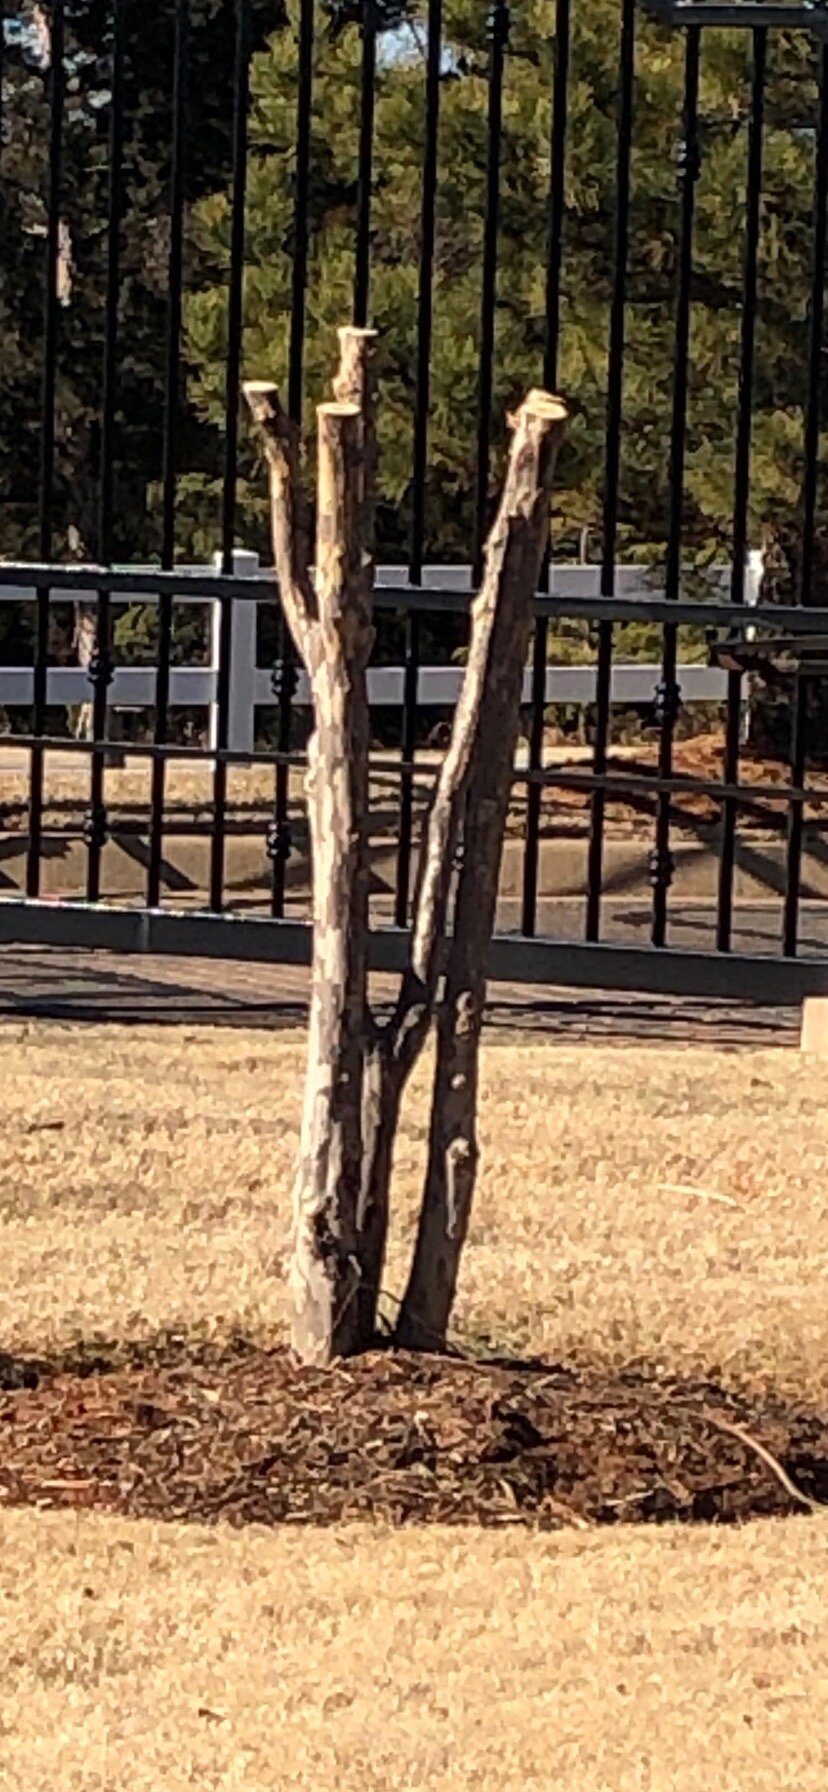
Crape myrtles in open areas should be allowed to grow to the natural shape as small trees and not pruned to 5’ every year.

When you allow crape myrtle to grow to their natural shape and size you gain the benefit of their attractive exfoliating bark.
Crape myrtles are one of the longest-blooming plants in our region, have attractive branching and bark, and provide great fall color.
Crape myrtles deserve a place in our landscape, planted in a location that allows them to grow into large shrubs or small trees they were intended to.
Lorne Hall
Hall | Stewart Lawn + Landscape
(405)367-3873
Crape Myrtle Pruning
Crape myrtle pruning is a regular topic for Hall | Stewart at this time of year. Sometimes we feel like we are a broken record on the subject and it’s time to move on, but we just can’t.
The over-pruning, the destruction of a wonderfully structured plant, never seems to stop. So, we will keep promoting the proper pruning and care of crape myrtles.
We understand that most crape myrtles require some pruning in late winter to early spring, but way too often crape myrtles are trimmed incorrectly and too severely.
There are cases where the crape myrtle variety is the wrong one for the location and the only choice is to dramatically prune. But, most crape myrtles are over-pruned for no reason.
Crape myrtles create a great allee along streets when grown to their natural size.

Great pruning… this Crape Myrtle didn’t fall victim to Crape Murder.
How should crape myrtles be pruned?
Best Pruning Tips
1. Know what your goal is before you start. You can always prune more, but once you have pruned, you can never prune less.
2. Remove last summer’s seed pods from the ends of the branches with hand pruners.
3. Remove all the smaller branches growing toward the center of the plant. This will allow more air and light to reach the center of the plant which will increase blooms and reduce disease.
4. Make cuts back at the main branch and don’t leave stubs.
5. Remove any unwanted branches from the base of large shrub or tree from varieties. Typically 5-7 trunks, free of any branches for the first quarter or third of the plant results in an attractive landscape plant.